Activities for 4 year olds to do by themselves
30+ Screen-Free Activities Your Kids Can Do ALONE While You Work at Home
Shannon Kelly and Marianne Wright Last updated: August 27, 2020 1 Comment
Listen, there’s no shame in occupying kids with screens sometimes—especially now since COVID-19 has us working at home, schooling at home, and basically up in each other’s business every single second of the day and night. If Frozen 2 provides 90 minutes of peace so you can get something accomplished, join a Zoom meeting without anyone interrupting, or regroup so you don’t lose your damn mind, then DO IT.
That said, with all of the regular day-to-day activities moving online—virtual school, virtual extracurricular classes, virtual camps, virtual birthday parties—kids are likely spending way more time on screens than they did pre-coronavirus.
To help keep your kids’ screen exposure down while also giving you time to do what you gotta do, here are some activities to keep your kids occupied (and let’s be honest: quiet) during the workweek, preferably without requiring parental help every two minutes!
Indoor Ideas
Maybe the weather isn’t on your side, or you just want to keep a closer eye on the kids—whatever the reason for keeping the kids indoors, these activities will keep your kids busy while they are inside.
LEGO Challenges
If your kids love LEGO, then setting them a new building challenge every day is a great way to keep them occupied. You can try this great printable 31-day LEGO challenge calendar and let the kids flex their creativity.
Marshmallow Toothpick Structures
Get the kids working on some STEM fun with marshmallow toothpick structures. All you need is some marshmallows and toothpicks and kids can have fun building all kinds of creations. If you want to instil a little more STEM into it, try one of these fun challenges.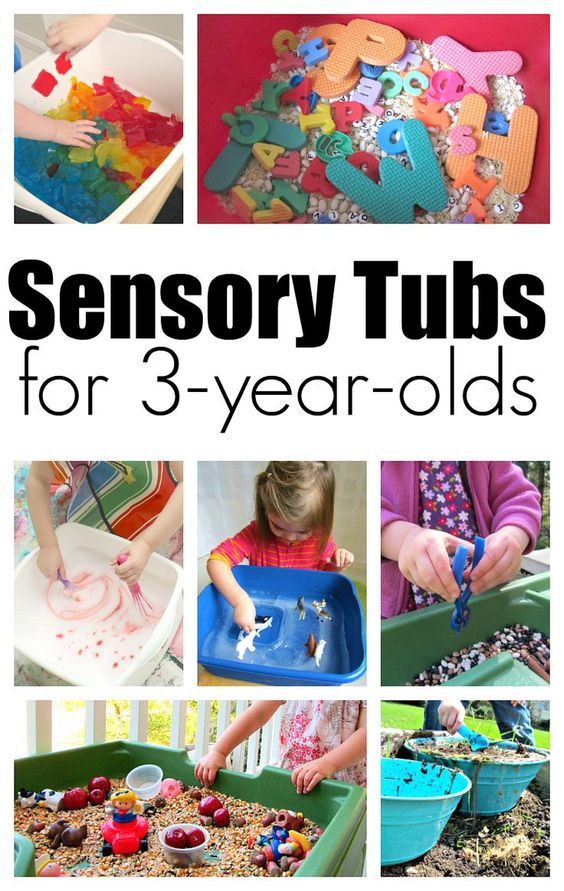
Indoor Obstacle Course
Check out this video for tons of ideas. Helpful tip: instead of siblings competing against each other (so much crying and shouting), put kids on the same “team” and have them take turns, then try to beat their collective time.
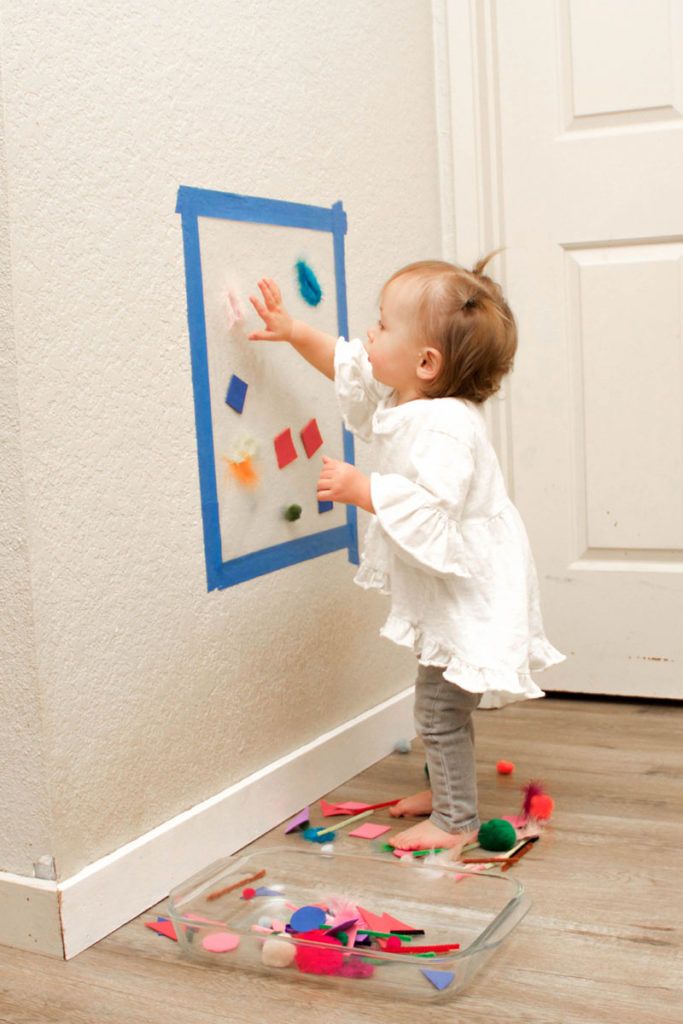
Window Marker Mosaic
Tape out shapes on the window and let kids colour them in with window chalk or markers. Then remove the tape for a cool effect. See an example here.
Board Games and Card Games
There are lots of board games for kids as young as age 4. Matching games are good for younger kids, along with cooperative games. There are many solo games out there for only children, too, and from about age 6, kids can grasp solitaire.
Printables
Looking to supplement your kids’ learning? There are approximately 1 billion printables for kids online, but Teachers Pay Teachers has some great options. Many are free and most are less than $5.
Puzzles
Puzzles have been flying off the shelves since mid-March, and it’s no wonder. It’s the perfect solo activity. Younger kids may ask you (i.e. beg you constantly) to help them at first. But if you can nudge them to figure it out alone and then lay on the praise, you might find them working more independently. Mix it up with some 3D puzzles.
Balloons
Do we need to elaborate? Kids love balloons and will develop a million games with them on their own. But the classic is “don’t let the balloon touch the ground”. Just prepare for whatever room they’re in to be destroyed!
Set Up A Fort
What kid doesn’t love setting up—and playing in—a fort? Grab all of the pillows, blankets, and cushions you can find and let the kids go crazy!
Frozen Toy Rescue
Place some small toys, beads, bouncy balls, etc, into ice cube trays, muffin tins, or plastic containers overnight, then let kids work to “rescue” them using droppers or pipettes of warm water. You can use cups of water, but the fun won’t last as long. Bonus: stay on theme and freeze Elsa and Anna.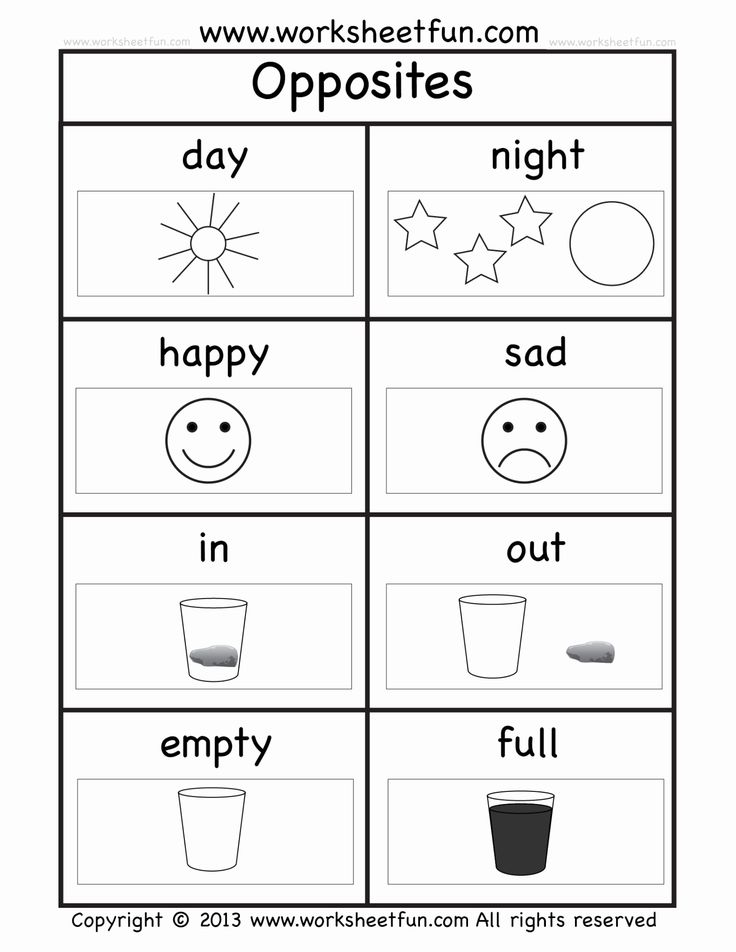
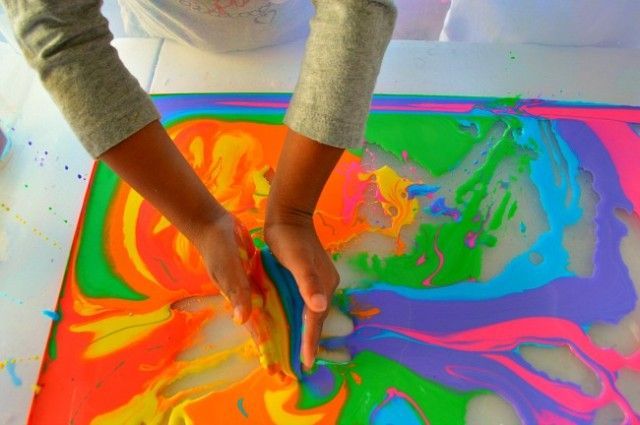
Fizzy Colour “Experiment”
Drop a different colour of food colouring into each cup of a muffin tin at intervals in a large container with sides, then cover with baking soda. Give kids vinegar, pipettes (baby medicine droppers work) or spray bottles with vinegar. Then let ’em loose to enjoy the “volcano” effect and uncovering and mixing colours.
Make A Mural
Choose a wall in your home that your kids can reach. Cover it completely with paper and let your kids draw to their hearts’ content. They’ll love getting the draw on the walls! Remember, you’ll still want to use washable markers for this one.
Hide And Seek
This one will take a little pre-planning on your part. Hide a bunch of your kids favourite toys around the house—think teddy bears, action figures and dolls. Let your kids know that their toys are playing hide and seek. They can spend the afternoon (or all day if you hide them well enough) searching for their friends!
Bead Necklaces or Friendship Bracelets
No time like the present to learn this essential solo kid skill! Make some for friends and family and then deliver them. Here’s a helpful friendship bracelet tutorial for beginners.
Mission Impossible-Style Obstacle Course
Grab some red yarn, head to a hallway, and create a “laser” maze a la Mission Impossible. Give your kids a timer and see who can get the fastest time through the maze.
Paper Dolls
Real talk: Whatever happened to paper dolls?! These days you can get the vinyl sticker and magnetic alternatives, which are fine, but if you want something more immediate and old-school, download free paper doll printables for kids to cut out (takes more time!) and play with. Check Etsy, too, for many options under $5.
Draw A Portrait
If you have more than one kid, you can have them draw portraits of each other. And if they are an only child, set them up with a mirror and have them draw a self-portrait.
Around-the-House Scavenger Hunt
Develop your own unique hunt or borrow from a few creative scavenger hunts we’ve found:
- Give kids a food scale and have them find things that weigh different amounts: something over 100 g, something under 100 g, something more than 300 mL, something around 1L, etc.
 (Props to my daughter’s Grade 2 teacher for this one!)
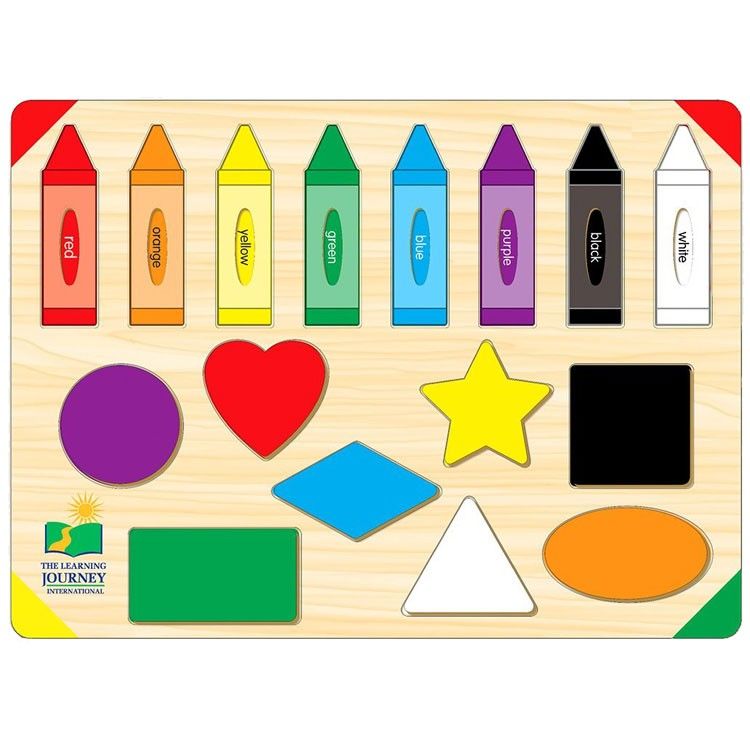
 - For younger kids, have them work on identifying shapes with a fun shape scavenger hunt—a ball for circle, a tortilla chip for triangle… you get the picture!
- This secret code scavenger hunt is great for older kids and comes with printables so you can easily share it with your kids.
Dress-up
If you already have a dress-up box or costume truck, pull it out and let the kids go crazy! If you don’t have a dress-up truck yet, it’s easy to throw one together. Grab hats, socks, coats, purses, shoes, boots, kid glasses, costume jewellery, old dresses, Halloween costumes, jackets, and anything else you think your kids would love.
Dominos
Do you have any idea how long it takes to set up a domino knock-down? Sure the payoff is short and sweet, but creating the moment takes a lot of time and patience… time that you could be answering emails or joining a Zoom call.
Outdoor Ideas
As the sun starts to shine more and more, it’s only natural that kids will want to get outside.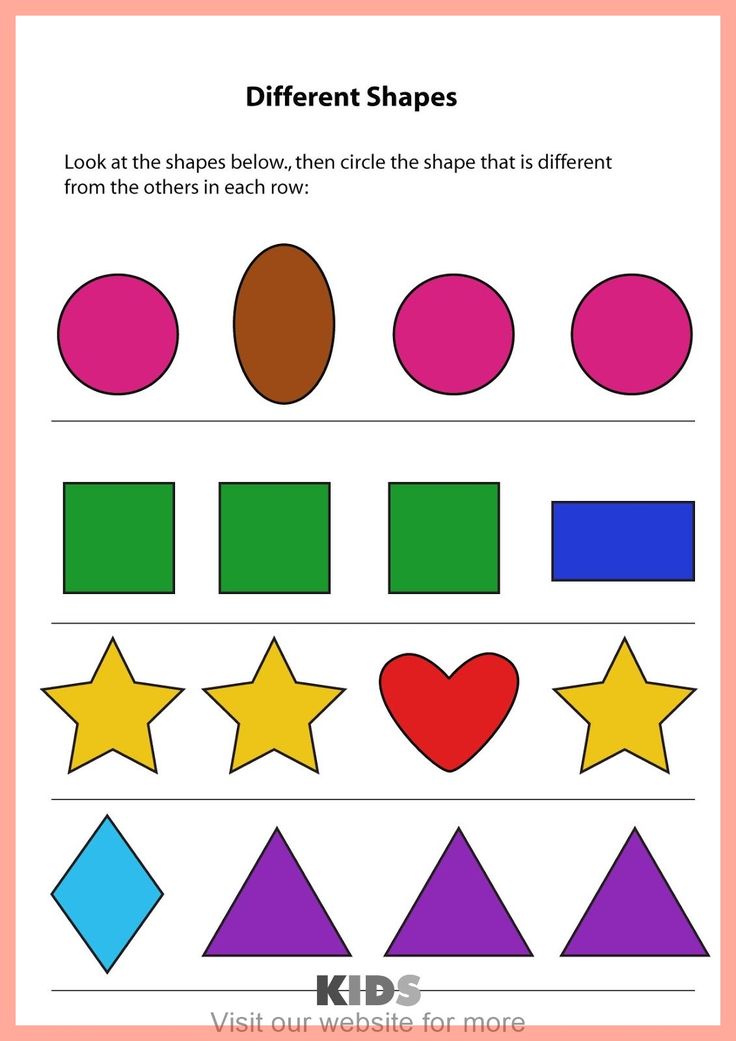 If they are old enough to safely hang in the back or front yard on their own, these ideas are sure to keep them busy while you work.
Sidewalk Chalk Obstacle Course
Find many amazing examples online. Mix and match “stations” like walking a tightrope, jumping over logs, spinning, dancing, and hopscotch. You can even incorporate math and spelling challenges. Kids can invent and add more stations.
Car Wash / Toy Wash
Choose a favourite toy—vehicles, PAW Patrol figures, Barbies…anything that can get wet will work—and set out one bin with bubble bath, one with clean water, plus some brushes and dish rags.
Outdoor Scavenger Hunt
What’s more fun than an outdoor scavenger hunt? Set the kids up with a list of things to find outside and remember the harder the things are to find, the longer the hunt will take to finish!
- We love this colour scavenger hunt that gets kids to match outdoor items to a colour wheel.
- Get kids to use all their senses with this sensory scavenger hunt.
- This nature scavenger hunt lets kids explore the outdoors and learn about the world around them.
Fun In The Sand
If you have a sandbox, let the kids work on building sandcastles and playing with their sand toys. If you don’t have a sandbox, grab a bag of sand from your local garden centre, pick out a few sand-friendly toys, throw it all into a large storage bin, and let the kids have their own beach day.
Bubbles
Because what kid doesn’t love to chase, blow, pop, and play with bubbles? If you don’t have any bubble mixture at home, you can make your own with 4 cups of warm water, ½ cup dish soap, and ½ cup sugar. And if you don’t have a bubble wand, try cookie cutters or make your own with pipe cleaners!
“Paint” The Fence
All you need for this activity is a few paintbrushes and a couple of buckets of water—kids can paint the fence of the side of your house and see the colour change. And because it will dry quickly, this activity can keep kids busy for a long time.
Water The Plants
If your kids are old enough, you can ask them to water the gardens. You can also bring your indoor plants outside and let them water those as well. It may seem like a chore, but adding water to any activity instantly makes it more fun for kids.
Dance Party
Set up an outdoor speaker, tell your kids to put on their shiniest outfits, and let them pick out their favourite tunes to dance to. Not only will this buy you some time, but it will also wear the kids out!
Draw A Nature Scene
Print off some examples of great Canadian landscape artists—the Group of 7, anyone?—and then set your kids up in the backyard with their own easel and paint set. Have them work on a landscape painting that either uses one of the styles they’ve seen or have them make up their own style.
Magnifying Magic
What is cooler than seeing a bug up close and personal? Give your kid a magnifying glass and let them explore the world! This one is great when paired with any of the outdoor scavenger hunts.
17 Independent Play Ideas for Preschoolers
By Alissa Marquess Zorn on October 18, 2013 (updated September 15, 2020)
Independent play is a great way for your little ones to keep themselves occupied at any time of the day. Solitary play is a great way to keep kids occupied, but also to build valuable skills surrounding independence and creativity.
These independent play ideas are great to have ready to go so you can pull one out when you need your preschooler (or older toddler….or kindergartener…) to be happily occupied for 10 minutes or so – maybe longer if you’re lucky! After we run through these ideas, we’ll cover all the ways that this type of play can be beneficial for your young child.
17 Independent Preschooler Activities:
1. Play dough filled balloons– I love the idea of the sensory experience of play dough without the accompanying crumbles of play dough all over. At The Chaos and the Clutter I found tips for filling balloons with play dough and recommendations for other sensory balloon fillings.
2. Forts and other Cozy Spots – suggest a new space to make a fort and grab a pile of blankets or pillows for construction. The other day we had a very snug house happening under the dining room table.
3. Write and wipe books– We have this Crayola Dry Erase ABC Activity Book (Amazon affiliate) which is nice because it contains enough pages with space for drawing as well as the letter pages.
4. New magnets for the Magnadoodle (Amazon affiliate) – If you save those thin flat magnets that come stuck on phone books and junk mail you can cut custom shapes from them for your board. My daughter also enjoys trying to trace items like an upside down cup on her Magnadoodle.
5. Rubberbands and a Geoboard(Amazon affiliate) – Preschoolers love the fine motor challenge of creating pictures with rubberbands on these boards and they continue to be entertaining for years.
6. Audio Books– The library is a great source for picture books along with a recording. Some kids find wearing headphones a novel and fun experience too.
7. Looking through toy catalogs– nope, you’re not saying you’ll buy anything, just giving them a happy time imagining playing with all of the different toys. I tell my kids, “Circle what you like to put it on your wishlist!”
8. Pipe cleaners and beads – sometimes we add a collander into the mix too. Adding different sized beads can add another level of
9. Rubber Stamps– I highly recommend Washable Ink (Amazon link)! Stamp ideas:
- Get out a large sheet of paper and a few stamps and have your preschooler go to town.
- Draw a shape, number or letter and ask them to fill it with stamps
- Give them stamps and markers to decorate a cardboard box.
- Ask them to stamp on a card to send to a loved one far away.
10. Pattern Blocks– Pattern blocksare fun with or without a pattern card. If you have a light table you can get translucent blocks which look great lit up from underneath.
11. Sorting treasures – Gather a collection of small empty boxes and a handful of your unwanted jewelry, glass stones, old keys…you know treasures and let your child look through and sort as they like.
12. Poker Chips– the clay filled chips have a satisfying heft and kids enjoy fitting them into the slot of an empty wipes container or sorting them into piles – similarly, putting coins in a piggy bank can be very engrossing.
13. Matching Nuts and bolts – At the hardware store choose five or six different sized bolts with matching nuts. Let your child sort which goes with which.
14. Quiet reading- Or perhaps I should say “quiet picture book looking” This may take time to develop as a habit, but it’s one worth working on. Seek and find books, textured books, and books with lush detailed illustrations are a big hit.
15. File Folder Games– Many of these printables are free and can be done independently by a preschooler. Find a huge directory of all sorts of file filder games at Ideas for Preschoolersand find puzzles, matching and sorting games at Montessori Printshop.
16. Sensory Bin: We’ve talked about a bunch of sensory play ideas in this article. There are numerous toys to provide all types of sensory experiences. So why not give your kid the choice? Make a play bin and fill it with sensory experiences. Your child can have fun picking their favorite toys, and it can add some variety to your child’s play time as well!
17. Blocks:Why not go with the classics blocks? These are such simple toys for toddlers. They can have fun stacking, building, and playing. They’re big and easy to stack, and your toddler can exercise their imagination.
Want more preschool activity ideas?
- Here are our favorite preschool games.
- Our picks for preschool outdoor toys
- And a bunch of sensory activities that are simple to set up.
Now that we’ve covered our favorite independent activities, let’s check out some reasons why independent play is so great for early childhood development. There are numerous reasons why solo play will benefit kids, and why they might enjoy it so much:
Imagination
The first benefit to independent play is it encourages imagination! Your kids have the freedom to define play time exactly by their own rules! The only limit to what they can do is their imagination, and you’d be surprised what they come up with. Imaginative play is great for developing minds, and showing young kids that all they need to have a fun playtime is a little creativity. These independent play ideas help to spur this creativity.
Fun
Independent play is just plain fun! Sometimes, kids are perfectly content occupying themselves for a while. Just give them the tools to do it, like any of our ideas above. Kids love independent play because they make the rules, which allows them to have fun in exactly the way they want.
Builds Self-Sufficiency
Independent play builds self-sufficiency as well. Whether they realize it or not, kids will begin to understand that they don’t have to rely on anyone to create their fun. They are capable of completing tasks all on their own, and they can do it all while having a great time! Play time is underlooked for all of the benefits it provides to a young child, and this extends to solitary play as well.
Builds PhysicalSkills
Independent play builds valuable physical skills for a child’s development. Playing with precise objects and building things will allow children to develop their fine motor skills and dexterity. They learn how to be precise, and how to build something in accordance with a plan. So while it may just seem like simple play-time, independent play can help significantly with a child’s development.
Remember: Mix It Up
Remember, independent play is great, but it’s just one part of a well-balanced routine for any toddler. Make sure that they engage in social play as well. Independent play is excellent for building independence, but your child needs to learn to play with others so that they can form friendships and learn about cooperation (amongst other skills). Incorporate independent play whenever you can, but be sure to mix it up, and be sure that your child engages in all kinds of play!
Thanks so much for reading our guide to independent play! We know that it’s not always easy to keep a toddler occupied and entertained. But we hope that, by using our list, you can find some go-to activities that your little one will love!
More ideas for Simple play for preschoolers can be found in my collaborative ebook: Three to Five: Playful Preschool
Like It? Share it!
You may also enjoy these related posts:
Reader Interactions
Educational games for 3-4 year olds with parents at home
For a 3-4 year old child, play is the main way to interact with the world. In the game process, the child develops logic and thinking, trains memory, expands communication skills, and strengthens physically. We have collected games that will appeal to both the baby and his parents, because they will be not only fun and interesting, but also useful.
Article content:
- Outdoor games
- Educational games
- Educational games
- Tips for parents
- Terminals
Outdoor games
Active games are aimed primarily at physical development. The kid improves coordination, attention, endurance. Regular activity strengthens the immune system and is the best prevention of diseases. Find out what you can play with your child at home or on the street.
-
Keeping balance. The parent lays out a rope or a long rope (such as a linen rope) on the floor. The child should walk along it, spreading his arms to the sides. The game can be made more difficult.
 For example, a child can carry a glass of water in his hands (of course, plastic) or hold a small book on his head.
 -
Collecting flowers. For this game, you will need several squares of colored paper, as well as a path, which can also be made from paper or, for example, a long scarf. The track is placed on the floor, pieces of multi-colored paper are scattered around it. We imagine that we are walking along a path, on both sides of which flowers grow. The facilitator (parent) periodically says how many and what flowers need to be collected. For example, 3 yellow or 5 red. The child stops and collects the right flowers. This game not only teaches coordination, but also distinguishes colors and recognizes numbers.
-
Sly fox. A mobile game that children love very much. It is more interesting to play it when there are many participants, but you can also play it together. The participants stand in a line, and the leader moves a few meters away and turns his back.
 The task of the player is to reach the leader. But you can only go when he is not looking! And when the leader turned, the participant must freeze, or they will have to go to the start.
 -
Traffic light. For this game, you need to prepare red, yellow and green circles that can be made from colored paper. Each color represents a specific action. For example, the host shows a green circle - the child is running, yellow - jumping on 1 leg, red - crouching, etc. The game can be started with three signals, but when the baby remembers them, complicate and add new ones.
Educational games
All games are educational for a child. But adults by developing games usually mean those that are aimed at studying any objects, phenomena. Such games develop intelligence, broaden horizons, improve memory, attention and speech.
On the development of motor skills
The development of fine motor skills directly affects the formation of speech, self-service skills, thinking, memory. At home, you can use various household items for games: buttons, clothespins, colored pasta, pencils, etc. On the street you can take cones, chestnuts, sticks. Consider several options for games for the development of motor skills.
- Piggy bank. Let's take 2 cans. Pour beans into one of them, and leave the other empty. A cover with a small slot is put on the second. The task of the child is to shift the beans from one jar to another. Alternatively, you can use the steam container from the multicooker (with small round holes). You can put pasta in them.
- Groats drawing. PVA glue is applied to a sheet of paper, cereals are poured on top in a certain order. You can use semolina, wheat groats, buckwheat to create multi-colored patterns.
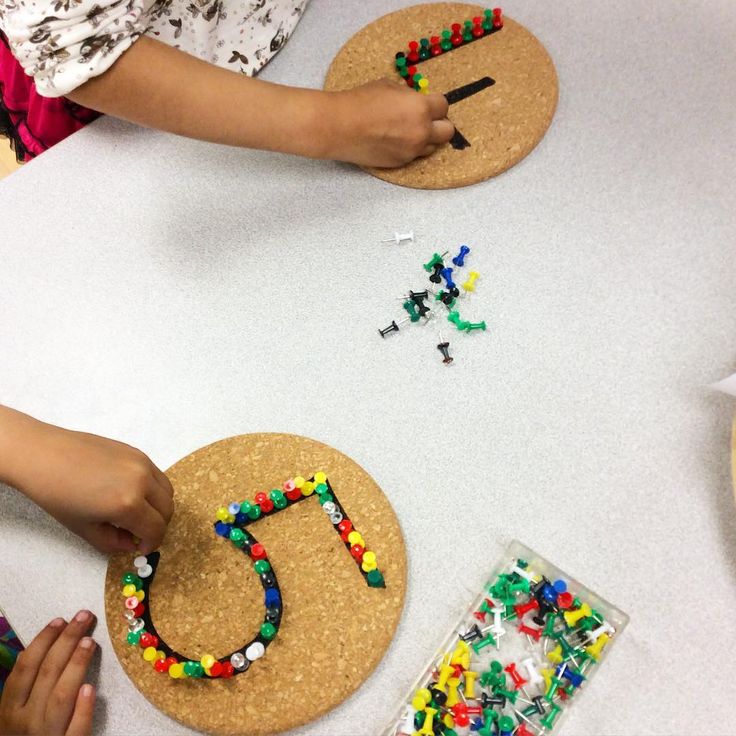
- Beads. The child is given a fishing line on which objects must be strung. It can be beads, buttons and even drying. Objects should not be too small, otherwise it will be difficult for the child to cope with them.
- Flower. Cut out a circle from paper - this will be the base of the flower. We will give the child colorful clothespins. He should attach them in a circle as if they were flower petals. In parallel, you can memorize colors and lay them out in a certain sequence.
For the development of logic
Logical connections are a very important part in the development of a child's thinking. To understand why and why, simple and exciting tasks will help.
- Find the extra. For this educational game, you will need special cards or sheets that can be found on the Internet and printed. The task for this age usually contains four simple subjects, one of which does not fit into the group for a certain reason. These can be color, shape, skills (for example, flies - does not fly), the purpose of the object (clothes, dishes, etc.) and other signs. It is important to allow the child to think independently.
- Divide into groups.
 A similar task, but here you need to select from the abundance of objects those that belong to a certain group. For example, vegetables, fruits, pets, toys, etc.
 - Say the opposite. A child at 4 years old already understands what antonyms are, that is, words with the opposite meaning. The parent says "hot" - the child answers "cold", etc. Use understandable words: quiet-loud, white-black, sad-cheerful, deep-shallow, wet-dry.
- Who needs what. This game requires a ball. The facilitator says the profession, for example, "doctor", and throws the ball to the child. He must answer what the doctor may need (thermometer, syringe, white coat) and throw the ball back.
For the development of speech
It is important to develop speech from birth. Talking even with a baby who is still silent seems strange, but in fact it is an investment in his future. Often, already studying at school, children cannot connect several sentences into a logical text, retell what they read, or talk about some event. To prevent this from happening, at 3-4 years old you can offer such home games with children.
- Describe the item. For this game, you need to collect several toys and put them in a box. The child takes out a toy and describes it. For example, the girl took out a doll. She can tell what size the doll is, what color her eyes and hair are, what clothes she is wearing, and come up with a name for the doll.
- Tell me from the picture. For this game, you will need an illustration of some popular fairy tale (again, you can find it on the Internet and print it out, or just show it on the screen). The child must tell what he sees in the picture, what happened first and what happened later, how the story ended.
- Everything is messed up. For this game, you can take the plot of a fairy tale that the child knows well. In telling it, you need to make mistakes. For example, the animals did not let the fox into Teremok, or Little Red Riding Hood went not to her grandmother, but to her friend.
 The kid must understand what is wrong in the fairy tale. You can dream up and compose your own fairy tale, in which the end will be different.
Educational games
At the age of 3, you can introduce your child to letters and numbers. The number is average, sometimes more developed children show interest in letters even at 2 years old. But there is no need to rush and force the baby to study - this will only discourage the desire to learn new things.
For learning to read and write
A popular technique for learning letters is to hang cards in different places in the apartment/room. And you can do this without even waiting for the age of three. Cards with letters should be bright, arouse the interest of the child. If the baby does not ask what kind of letter it is, you should sometimes pronounce them on your own. You can hang a card with a letter on an object that begins with it. For example, hang the letter L on a chandelier, and the letter T on a TV.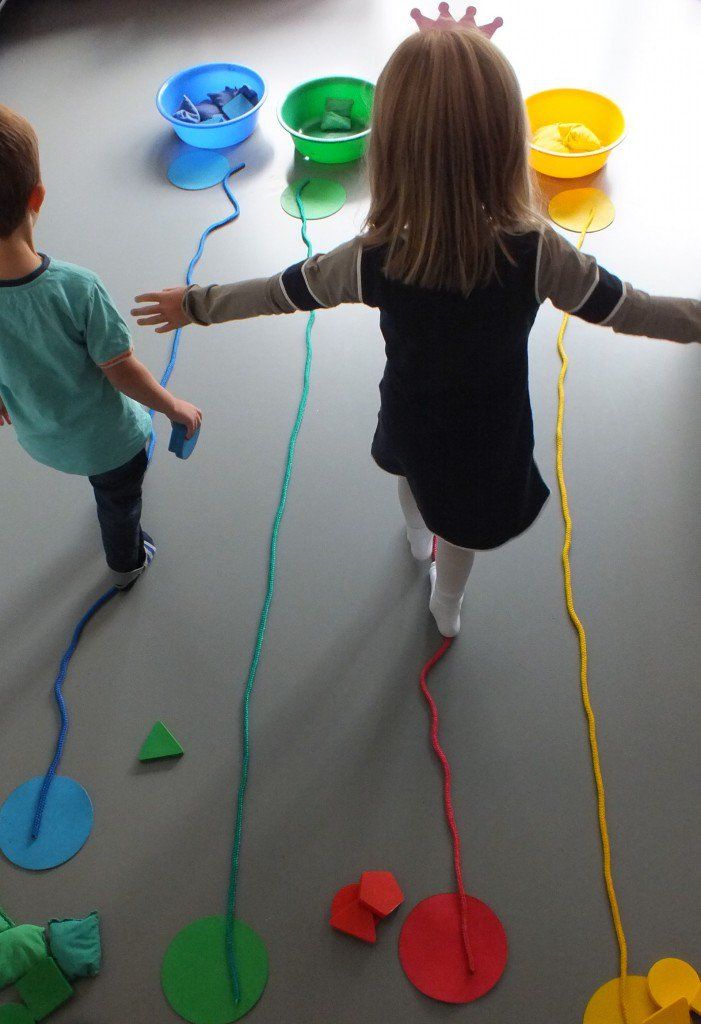 Periodically, cards need to be changed, outweighed in other places.
The following ideas are useful for learning about letters.
- Application. Cut out large letters from paper. For decoration, you can use cereals (motor development!), Cotton wool, fabric, beads, sparkles - whatever you like. When decorating a letter, be sure to pronounce it many times so that the baby remembers what it is called.
- Find the letter. Print the letter in several copies. Keep one for yourself, hide the rest in the children's room. Show the child a picture with a letter: "This is the letter O. Find 3 more such letters." At the same time, the letters should be hidden so that they are not difficult to find, you can give the baby hints.
- What's in common? Place items (or images of items) that begin with the same letter in a bag. The child must take them out and pronounce the names aloud, and then guess which letter was guessed.

When the child knows all the letters of the alphabet, you can move on to the study of syllables and words. To do this, write syllables or simple words of 3 letters on cardboard squares. These will be houses. Then take small toys, for example, from kinder surprises, and find a house for each toy. At the same time, pronounce: the horse lives in the “MA” house, the squirrel lives in the “CO” house, the bunny’s house is called “KY”, etc.
For teaching math
Educational games with numbers are the basis for learning mathematics for a child of 3-4 years old. They teach not only to memorize numbers, but also to compare, solve simple problems.
- Construction site. This game is suitable for both boys and girls. Build a brick house with your child. In this case, you need to determine how many floors there will be in the house, and how many apartments (cubes) on each floor. For example, on the 1st floor - 4 cubes, on the second - 3. To complicate it, you can take cubes of different colors and give tasks not only with numbers, but also with color (2 yellow cubes for the third floor).
- Train. Make cards with numbers from 1 to 10 and invite your child to make a train out of them. Only for this you need to arrange all the cards in order, from 1 to 10. If everything is done correctly, the train will go on a journey.
- Count the candies. Take two dolls (bears) and put them at the table to drink tea with sweets. Give one doll 2 candies, and the other 3. You can ask: "who has more candies", "how many candies do two dolls have in total." Then more dolls can come to visit, while the hostess will have to share the sweets equally among everyone. This game teaches not only to count, but also to think logically.
- One-many. Play a mindfulness game. You can ask the child: “What items are many in the room? And what subject is one? For example, in the kitchen there are many plates, but there is only one table.
Tips for parents
In conclusion of the article, we will give some important recommendations.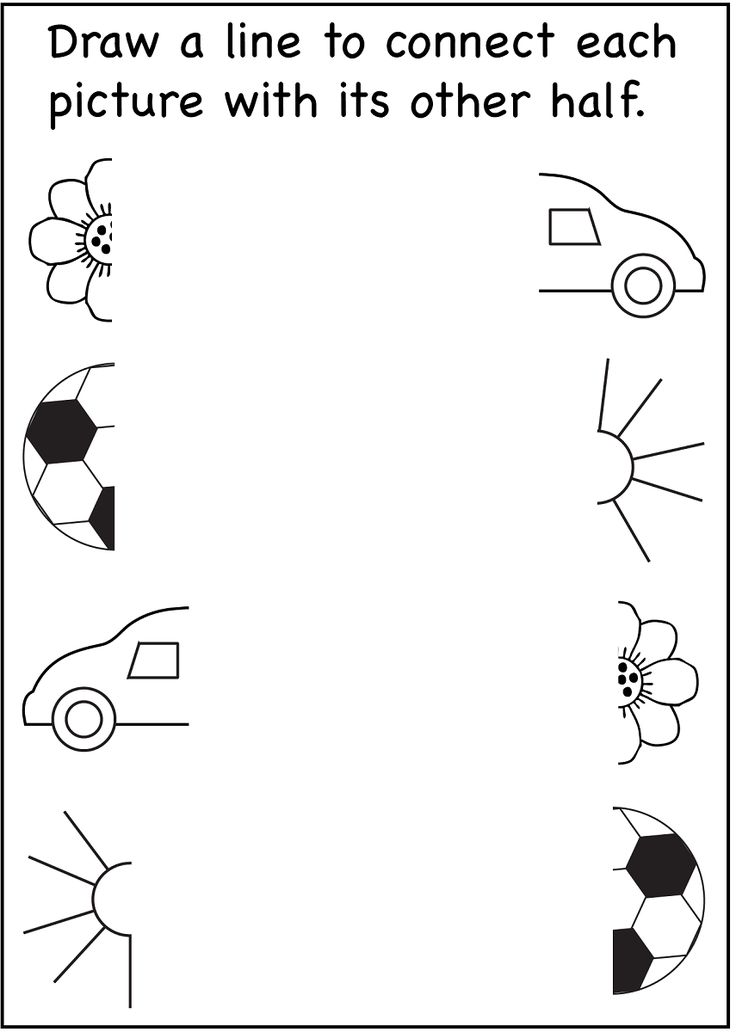
- For a baby, the game process itself, the action, and not the final result, is important. You should not be upset and even more so scold the child if the elephant you made looks more like a snowman.
- The rules of the game must be simple and clear. At the same time, it is necessary to leave room for creative improvisation. It develops imagination and initiative.
- Not all games may appeal to a child. You need to feel the mood of the crumbs and, if necessary, stop the game.
- Exercise regularly with your child. Try to set aside at least 15 minutes a day for joint activities.
Conclusions
Games at home with children are interesting and cool, but there is not always time and ideas for this. In order not to deprive the child of the opportunity to fully develop, you can take him to a specialized children's center or kindergarten "Baby Club", where the child will receive the necessary skills in a playful way and will develop all types of intelligence.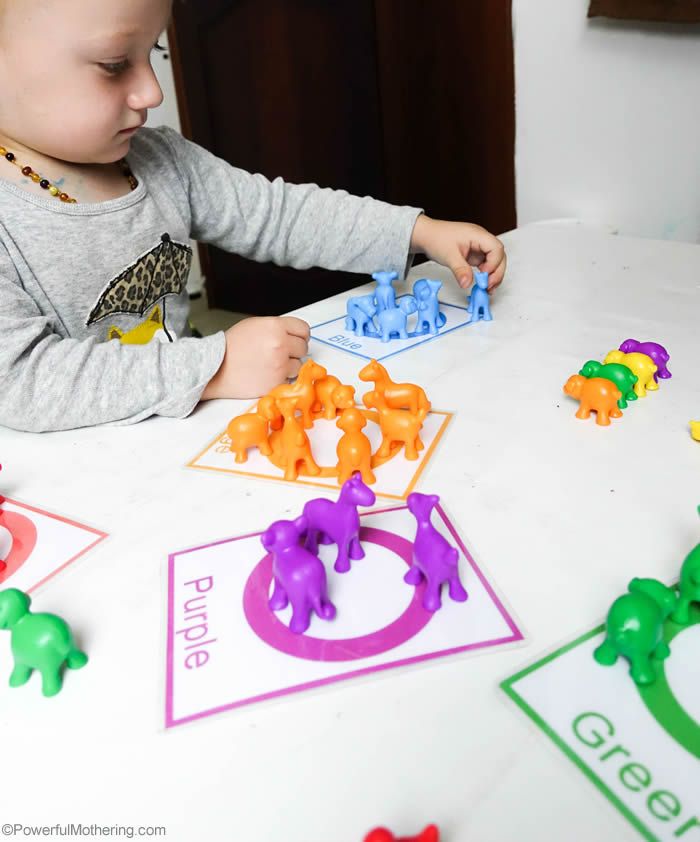 Specially equipped and safe rooms for classes are suitable for children of different ages: from 8 months to 7 years. Professional educators support the natural curiosity of children, directing it in the right direction.
Crafts for 4 year olds (55 kindergarten ideas).
Good afternoon, today we will make crafts for almost toddlers - for children 4 years old . A child at 4 years old already confidently holds a brush, knows how to distribute glue over the entire detail of the application. And most importantly, at the age of 4, he already understands HOW EXACTLY to put the part of the craft - that is, not upside down, not awry. At 4 years old, a child's hand is already aiming, correlating the detail of the craft with the right place for it. Therefore, children at 4 years old can independently make an application successively step by step, repeating the demonstration of an adult That is, it is understood that you yourself first made a craft in front of the child with your own hands, and then offered the child the same details to perform the same task - to create a masterpiece with your own hands .
In this article, I picked up simple and beautiful crafts, which can be made by a kindergarten teacher or a parent with children 4 years old. I will tell you how to prepare parts for this craft. And I will give methodological recommendations for the lesson itself on this craft. Before you is a whole CARD FILE OF CRAFTS for 4 years. So let's get started.
Craft for 4 years
Application horse.
All children love this craft. She's cool. A horse that was given a carrot. There is work for both the teacher and the child. The teacher himself prepares all the details of the craft - it's just cut out of colored paper. And separately, the teacher himself prepares striped harness for the horse. It is done simply: cover a sheet of white paper with strips of colored paper, alternating colors. Then we cut this sheet across our color banding , into short and not very wide segments. It turns out a lot of such striped segments - just for the entire kindergarten group.
The child's task is not to confuse the order of stickers. First we glue the carrot , and only then we glue the silhouette of the horse's muzzle on it from the TOP. Children make a mistake: first put a horse on, and then it’s not clear how to stick a carrot under it. Therefore, in a demonstration of crafts before class, show the children the wrong option and laugh at it together. And already during the lesson, again remind you of such a stupid and funny mistake.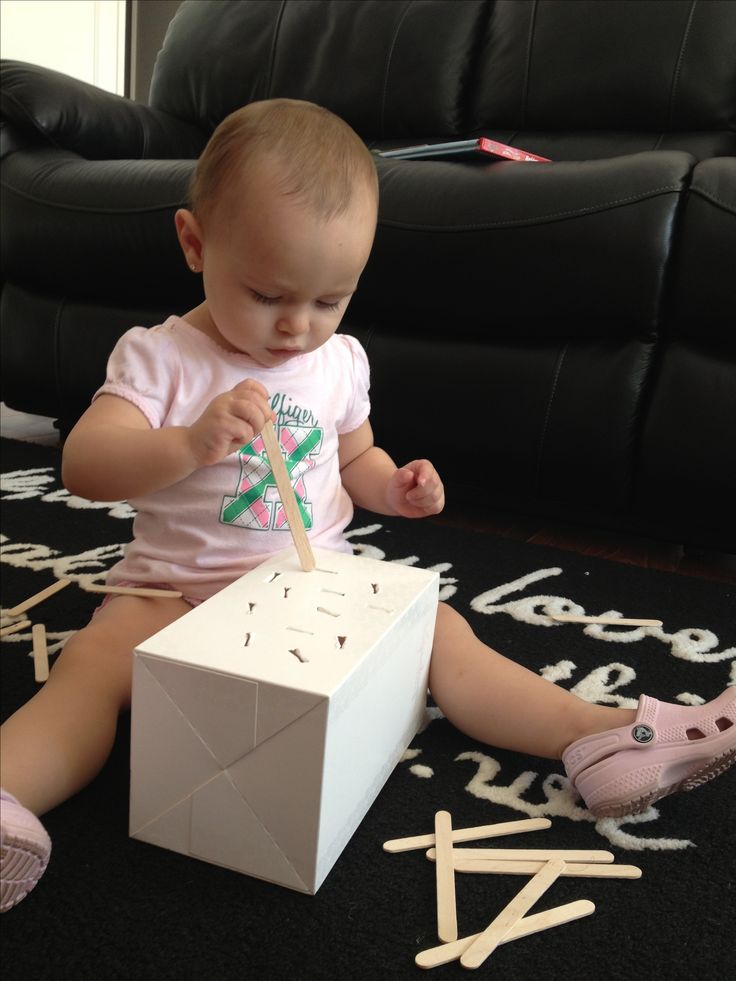
Also, some children glue the horse's bangs first, and only then the striped harness on top. Please note that the bangs should be on top.
This horse craft can be done with children 4 years old, when they have already moved to the middle group , it is at this age that they begin their first “chik-chik exercises” with scissors . We complicate the lesson for such children, we invite them to cut the green paper square into strips for carrots.
Craft for 4 years old
Appliqué LH.
This is a very beautiful application. It becomes quite beautiful if you use not only standard colored paper for the mane, but also paper with a pattern for gift wrapping. The technique for performing this application is as follows. We prepare sheets of paper on which a circle has already been drawn (just a circle with a pencil - it is 1 cm smaller than a lion's head).
And then we show the children how to make the application step by step - we do everything before their eyes, before class (as a preliminary work), this does not contradict the preschool education program.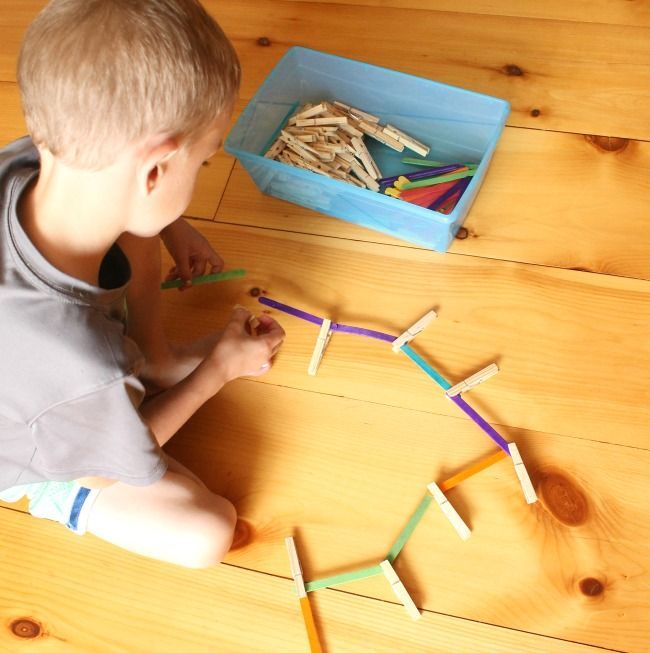 I don't like the show in the classroom, because it eats up 60% of the time, and there is very little left for the lesson itself, and the children do not have time.
So we have a sheet of paper in our hands - there is a circle on it. We take the detail of the BEAUTY of our lion and glue it UNDER THE CIRCLE. Next, we tell the children that the circle is like the sun, and now we need to make “rays” around it - for this we use a lot of colored stripes. We glue them in different directions from the circle.
And now all that remains is to stick the silhouette of the muzzle, ears, eyes and nose on top. Simple and fast.
Craft for 4 years old
HIPPO application.
This application is also loved by all children. They like that it is so rough to the touch, and the water is like real water, and the body of the hippopotamus can be seen through the water column.
Everything is simple here. First, we prepare the background - we tint a sheet of white paper with light blue.
FAST TINTING METHOD. I bought a powder brush especially for quick tinting - thick and soft. Pour 2 fingers of water into a glass and dilute a little blue gouache in it so that the water also turns blue. Wet a brush in such water and quickly cover a sheet of paper. Sometimes the sheets, when soaked, roll into a tube - do not worry, unfold and brush again, it will stick to the table from dampness and dry in such a straightened form. In such a quick way, 27 sheets can be tinted in 5 minutes - just for the entire kindergarten group.
While the background sheets are drying, we prepare the appliqué details. We cut out the silhouette of the abdomen with a tubercle of the head, the silhouette of the nose, nostrils. And we find a roll of blue toilet paper, or we cut blue table napkins into strips.
The most important thing is to explain to the child that the toilet paper itself SHOULD NOT be smeared with glue. She will crumble and break. We apply glue only to the SHEET CAM and then quickly apply a dry piece of toilet paper to this glue spot.
Kindergarten applications
for 4 year olds.
Here are more beautiful large crafts for children 4 years old. I love when the craft is large, when it occupies the entire sheet, and not small goats in the middle of the leaf. Very bright crafts giraffe and kangaroo. That's what they want to do.
A kangaroo craft with a baby can even be timed to coincide with Mother's Day. Because this marsupial couple is just a symbol of motherhood.
But crafts where you need to FOLD some details along the fold line - the frog's mouth, the dog's ears. This is just right for a 4 year old. Show the children how to fold the part - how to hold the main part with the palm of your hand, how to wrap the edge of the sheet with your other hand - away from you, or towards you, or from the side (think how it is more convenient in this particular case).
The craft of a bird looks very nice. Very easy craft for 4 year olds. First we glue the poles, then the grass. Then a thread and on a thread we plant birds from colored paper.
FISH craft is also simple for 4 years. The teacher cuts out an aquarium from a white sheet. Cut out white bubbles from scraps of white paper. The blue background of water does not have to be made of paper = you can paint it with paints. The child glues fish, algae, bubbles.
Here is an interesting application for 4 year old boys. We glue the segments of the tube from the cocktail onto a sheet of cardboard. From above we glue the bottom of the boat, sails. Add portholes, flags, clouds and sun. You can also draw waves with your finger and gouache.
Craft for 4 years old
Simple applications FROM NEWSPAPER.
And now let's look at this kind of creativity. He deserves your attention. I don't know why, but color paper sets almost always lack gray. Probably the manufacturers believe that there is no place for gray in a child's life. And so a lot of crafts remain unrealized. For example, a koala bear cub is gray and the application is simple - and what do you have to do to pick up a bag of waste paper and look for long strips of articles without pictures to cut the details of the application. And such crafts are always very joyful - both for children and other parents. “Mom, read what is written on my teddy bear.”
In homes with children, you don't often find colored paper - you're more likely to find a bottle of beer than plasticine and glue. But let's not deprive children of creativity - because now everything you want can be made from ordinary newsprint.
If there is no black paper for the bear's nose and ears in the house, it's not a problem. You can cut out these details using the dark spots on printed newspaper photos. Or paint over pieces of newspaper with black gouache and cut out the details.
You can manage and cut out the part SO THAT there is an interesting heading in the right place. Imagine a bear with a large headline “You Can’t Blow Russia With Sanctions” on its chest.
Years later, leafing through your children's crafts, your adult son will read with interest fragments of quotes from political analysts or watch the dollar exchange rate in his distant childhood.
You can draw colored areas on the newspaper - pink bunny ears. And replace the missing parts with household items - a button, a rope, a bottle cap, a piece of candy wrapper.
If individual sheets of a newspaper are covered with gouache paint, then we will get almost colored paper. So at home you can make bright color applications from ordinary newspapers.
Pieces of wet newspaper roll up perfectly into flagella (they just curl up like a twisted rope). Such flagella can be painted with gouache in different colors - and you will get blanks for the UNICORN's mane - a great craft for girls 4 years old.
Craft for 4 year olds
Light appliqués
made of pressed paper.
In the store you can see paper filters for coffee machines, paper molds for cupcakes. They are sold in packs of 100 pieces. This suggests the idea that there are a lot of them, which means that there will be enough for the whole group and not even for one craft. Unable to resist, I bought such paper things - and now the whole group has already made one craft from this elegant material and will do it more than once.
By the way, such craft ideas for 4 years can be glued AND FROM REGULAR COLOR PAPER, simply by cutting round parts.
Walrus craft - quick and easy for 4 year olds - you can add snow from cotton wool to it, since walruses live in snowy places. You can add a paper fish applique with glued foil.
Sand can be added to the CRAB craft (sift some sand from the sandbox) - after the whole craft is done, we apply a layer of glue on the brown background at the bottom of the sheet and sprinkle it with fine sand until the glue is dry. We wait for some time and shake off the sand on the table (but not on the floor).
Corrugated molds make a gorgeous parrot. With a cascading tail, a bright tuft on the head. A beautiful craft for the younger group
And here is a craft that all children of 4 years old and not only love. Toothy shark. The difficulties of the educator are to make blanks for the mouth - on each blank you will need to draw teeth with a pencil, and then paint the shark's mouth with a marker. Children of 4 years old will not draw teeth themselves - this task is too tough for them.
Smaller fish can be made from the same material. In the aquarium, pour real sand, or semolina or buckwheat, on the bottom. It's simple - we spread glue on the bottom of the craft - more glue, pour grits on top, wait a few minutes, without touching the grains with our hands, so as not to interfere with the glue to set. Then we pour the excess on the table.
Also on sale there are paper lace napkins for confectionery. Of these, it is good to make appliqué princesses in lace dresses, Christmas angels in patterned wings or fins for sea fish. A simple and beautiful craft for kindergarten.
Craft for children 4 years old
MONSTERS.
All kids love monsters. At 4 years old, monsters are not scary, but friendly and funny. Here is a great and very simple craft for kids. We take PVA glue and gouache - we dilute half the glue and half the gouache in a jar. We stir this glue gouache and give the child a brush.
On a sheet of paper, children slap puddles of this glue paint in any way they like. And while the puddle has not dried up on it, we put ready-made eyes and black silhouettes of the mouth. Eyes can also be drawn on paper - make several blanks of different sizes. We draw the teeth of mostrs with white paint, just fingerprints or brush marks.
In the same way, you can make monsters from cardboard and colored paper (photo below) . This craft is JUST FOR 4 YEARS. Because it is at the age of 4 that the preschool education program sets the task for the child - will learn to make a circle from a square of colored paper.
That is, the teacher gives the children squares of paper. And the child cuts the corners of the square with scissors, trying to round it off. And then he sticks these round uneven spots on his monster. Do not forget that the process of turning a square into a circle is first shown by the educator himself, several times - always on large samples, in the form of a sheet of cardboard measuring 20 by 20 cm.
The first experiments on turning a square into a circle will be unsuccessful, crooked - and this craft is just good because the shape and accuracy of the circle are NOT IMPORTANT here. Practice, make mistakes - there will still be a super-monster, even with crooked spots. The crooked, the scarier.
Here's another monster-themed craft - SCARY BITES. This craft will open a mouth full of teeth. It is done simply.
Cut out two circles from colored paper. On one circle, draw a line that divides this circle exactly in HALF. Now we explain to the child - that you need to glue ONLY ONE HALF of the circle with glue (any right or left - most importantly, only one !!!). And on the circle with the glue half smeared, we put the second circle on top - exactly, exactly on top of each other, exactly like a pancake on a pancake.
And it turns out that where there is no glue, this half opens and closes calmly - like a mouth. It remains to stick a red tongue and teeth in this mouth. And then cover the top pancake with spots and stick on the eyes. The mostr may or may not have arms and legs, as desired.
Children's crafts for 4 years
INSECTS.
And now we have another interesting topic - various bugs and insects. A variety of insects are made simply and understandably for children 4 years old.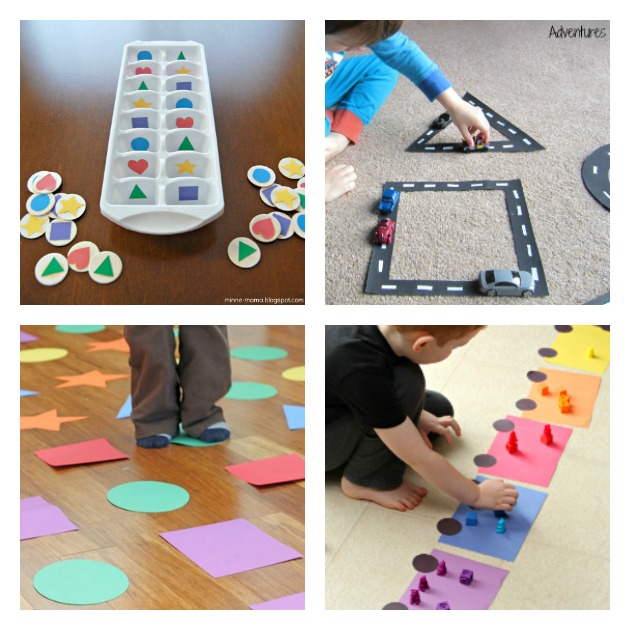
SNAIL CRAFTS. Here you can combine different techniques. For example, below we see a snail made of cardboard, which is decorated with a spiral of fluffy wire. But the WIRE IS NOT NEEDED - it can be mined with a plasticine sausage spiral. We get an excellent job just for 4 years.
LADYBUG CRAFTS. Here we teach the child to fold a flat paper circle in half - evenly. This is a difficult but useful task - let the child practice, do it himself. Pride from the result achieved will give him faith in his own strength.
And here is another snail craft. Here is a very important lesson - children learn to highlight the largest circle available - we paste it first, then again we look for the largest circle of the remaining ones, and paste it. And so we continue to the smallest circle.
Here's a FUNNY BEE craft. Two rounds made of yellow cardboard and two wings made of blue. Draw stripes on the tummy with paint. We glue the elements. Cut holes for fingers. We now have a tabletop theater character. You can make a few more friends for him, also with holes for fingers.
Here is another beautiful bee craft. She is very interesting with her voluminous wings. Children are simply delighted - they are interested in the task: first glue one end of the strip, wait until it dries and then wrap the other end of the strip and stick it in the same place.
Here is a great SPIDER craft, just right for 4 year old boys. A spider is your baby's handprints on a piece of paper, then dried, cut out. Made paper eyes.
We cover the plastic plate with paint of any color. Punch holes along the edge of the plate. If there is no hole punch, you can simply STICK THE INSECTIONS with scissors;
Here is a BUTTERFLY craft with double wings. The body of a butterfly can be made from plasticine balls. At the age of 4, children had already learned how to roll balls in kindergarten (according to the preschool education program).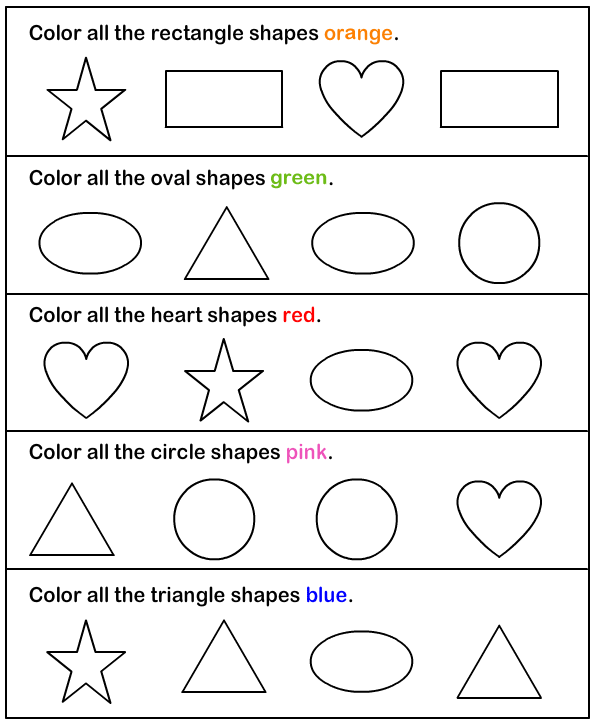
Paint half of the plate green, half blue. We glue paper flowers, glue butterfly wings, glue plasticine lumps.
Crafts FLOWERS
For a child of 4 years.
I really like this kind of craft. Where we get a whole long bed of flowers. The child can form the flower himself - paint the finished outline, or crumple the crepe paper into balls and stick these balls on the paper backing, forming the center and petals of the flower.
And then we plant all the children's flowers in a common flowerbed. We cut out a strip from the packaging cardboard, fold it with an accordion and put it on edge - like a screen. Now we glue green stalks on it and plant each flower of the child in a common flower bed.
The image of a flower can be created using various visual means. It could be anything. For 4 years old, we choose simpler and more understandable techniques for the child. The handprint is a finished tulip. A cotton pad folded in a triangle is a calla flower.
Here is a camomile craft made from cotton swabs. From yellow plasticine we make two round pancakes. We put rays of cotton buds (cut in half) on the bottom pancake and close it with the second pancake on top. We make stems and leaves from colored paper or plasticine.
From pasta in the form of bows, you can make a beautiful hand-made lilies of the valley - just a gift for mom on March 8, which a 4-year-old child can do. We glue pasta on plasticine (you can’t do it with simple glue).
Coloring crafts
For children 4 years old.
All children love to play with paints. But children of 4 years old are still learning to draw shapes with a pencil (squares, ovals, circles) - and in order to draw these shapes with a brush, it’s too early to dream about it. So what? Do not give the child a brush, or what?
Give. And how. But with paints we will DECORATE ready-made forms.
CAT CRAFTS. From corrugated cardboard (packaging gray cardboard), we cut out a semi-oval (cat's body), an oval with ears (cat's head), a curl (tail) and a small semi-oval (support-support at the bottom).
We cover all these details with paint. We make the head, tail and support simply in one color (orange or any to your taste). But we paint over the largest detail (the body of a cat) in the form of different stripes. Here is just a complete delight for children 4 years old. To draw stripes with a brush - how cool and beautiful it turns out, like an adult.
After the muzzle and tail have dried, the teacher himself draws the cat's muzzle . At 4 years old, only a few of the children (5 out of 20 people) can draw the normal eyes, nose and mouth of a cat according to the model. Yes, those children with whom parents draw at home will be developed in drawing, and for those parents who believe that “when they go to the garden, they will learn there”, a child at 4 years old cannot draw proportionate circles of eyes, nose, mouth.
“If we give a child a pencil, he will paint the furniture.” Of course it will draw. Because it's not enough to give a pencil - you have to sit down and draw scribbles with it for 10 minutes . And in our time, finding 10 minutes in a busy schedule is difficult. Finding 2 hours for gel nails is not a problem, because this is the right thing to do. And kalyaki is a stupid occupation, all the same, the child still does not know how to draw anything. But how will he learn? If he cannot pass the stage of kalyak-malak , which must be passed in 2 years. So it turns out that he, like a repeater, goes through this stage at the age of 4 - in kindergarten, and it's a pity to look at such a child.
Here is another cute cat that can be painted in stripes and then spots.
As we can see, the principle of assembling such a cat is simple. The following details are needed.
- 2 cardboard rectangles.
- 1 long narrow strip of cardboard (backbone).
- 2 head silhouettes
- 4 sticks for feet (you can use the same cardboard, you can use pencils, you can use wooden skewers)
- 8 cardboard triangles (for feet, 2 for each foot).
We put together 2 rectangles (body), put a backbone (a long strip of cardboard) on top between them. The spine must be inserted between the halves of the body SO THAT it sticks out behind (like a tail) and in front (like a neck on which we will attach the head).
It is to this ridge that we will glue the halves of the body. It holds perfectly on double-sided tape, less on glue (it’s not worth it on PVA, it only soaks the cardboard and the gluing is not strong).
Now glue the head on. We smear two silhouettes of the head with glue - and connect them together (pancake on pancake) - clamping between these layers the cervical process of the ridge sticking out of the cat's body.
Next, we make the legs, glue the sticks from the inside onto adhesive tape or plaster. We supplement the ends of the sticks with paws - we clamp the shelf between two cardboard triangles smeared with glue or double-sided tape.
CRAFTS WITH THREADS.
Such coloring crafts can be completed with one more decorative feature.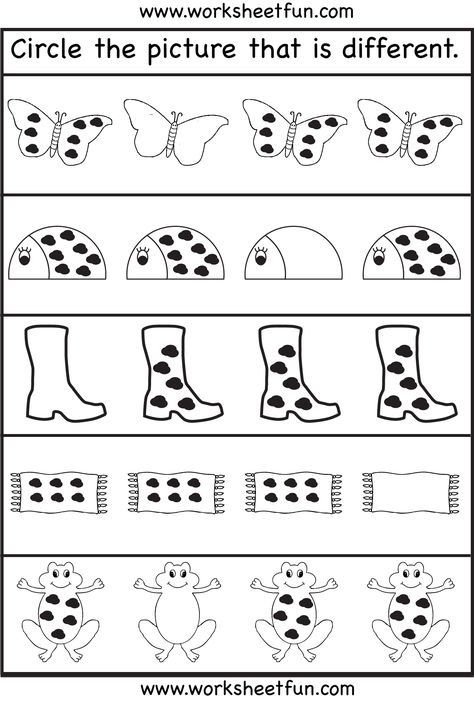 We take and wrap our craft with threads. So that the threads do not jump off or slip, we make cuts with scissors along the edge of the area that we plan to wrap.
Threads can be wound evenly, row by row. Then, with the help of multi-colored threads, you can make funny colored stripes.
Below is a piece of rough packaging cardboard - cats. They are complemented by the ability to stand upright and not fall. Because the middle of the cat is cut (two cuts) and this part is folded back - like a stand for photo frames.
You can color these cats simply with stripes. And you can wrap it with thread. If you wrap, make sure that the THREAD WALKS UNDER THE STAND-BREAKER, so as not to swaddle the stand.
CATS.
If you have an extra shoe or juice box, or even a small one for tea (size doesn't matter), you can make a great 3D craft with your 4 year old. And you will become the most beloved mother in the world.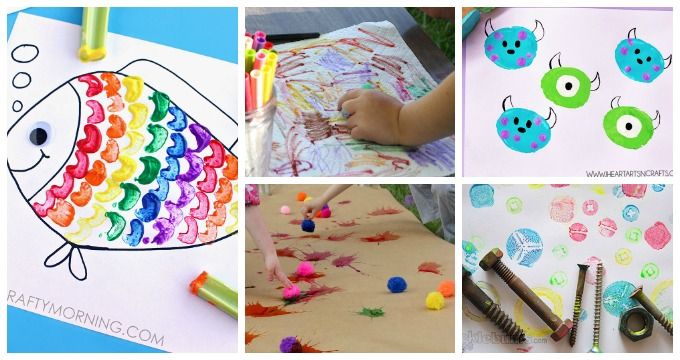 And this cat will be the pride of your child.
Here we just take the box. We cut off part of the lower part of it - leaving only processes at 4 corners. From cardboard (from anything, even from pizza). Cut out the silhouette of the muzzle with the breast and the silhouette of the tail. We glue these silhouettes on the box in front and behind - on double-sided tape. We cover it all with paint.
Speaking of paint. Large crafts require a lot of gouache. Especially if we cover a multi-colored box - we need to apply several layers so that the pattern of the box does not shine through. You can do it easier. A hardware store sells acrylic facade paint (which the walls are painted with) - do not buy a bucket, buy a small can (liter) - it will not be expensive. Facade paint closes the pattern on the box with one layer. And then gouache on acrylic will be easy and simple to lay down, and you don’t need a lot of gouache, enough for the whole cat. And this liter of white acrylic will come in handy for you in other crafts - it is stored for a long time, if it thickens a little, it can be diluted with tap water, and everything is like new again.
Here is another DOG FRIEND craft.
The principle is the same - we can take a box from milk, from juice, from anything. The dog's legs are toilet paper rolls. In order for the roll to stick with its edge to the bottom of the box, you can do this ... crumple a lump of newspaper (just the size of the hole in the roll). We smear the lump with glue, put it in a roll so that the surface of the lump is flush with the edge of the roll. And now it is convenient to stick this roll to the bottom of the box (at least on the same glue, at least dry it on tape).
Speaking of boxes, I can't help but show you one more cute craft that can keep your child entertained for a long time with a fun game.
Cut an arch hole in a regular box. We decorate the box in the form of a hare. Glue the red track of the tongue at the bottom.
By this principle, you can create any character with an open mouth - a shark, a bear, a dog, an elephant, a hippopotamus.
Folding crafts
For 4 year olds.
Here is an original craft that can yelp and bark with its mouth wide open. Cute paper dog.
Everything is simple. No complex origami. Just fold a sheet of A4 paper lengthwise three times. And then the resulting strip is also folded in half. And fold each half back in half too.
It remains to decorate the fold in the form of a dog - stick on the ears, tongue, spots, eyes and nose.
PLATE Crafts.
For children from 4 years old.
Normally, disposable plates should not be thrown away. They can become the basis for good children's crafts. For example, here is a monkey. The belly is a whole plate. The head is a plate that has been cut off in a circle, leaving only the appendages of the ears.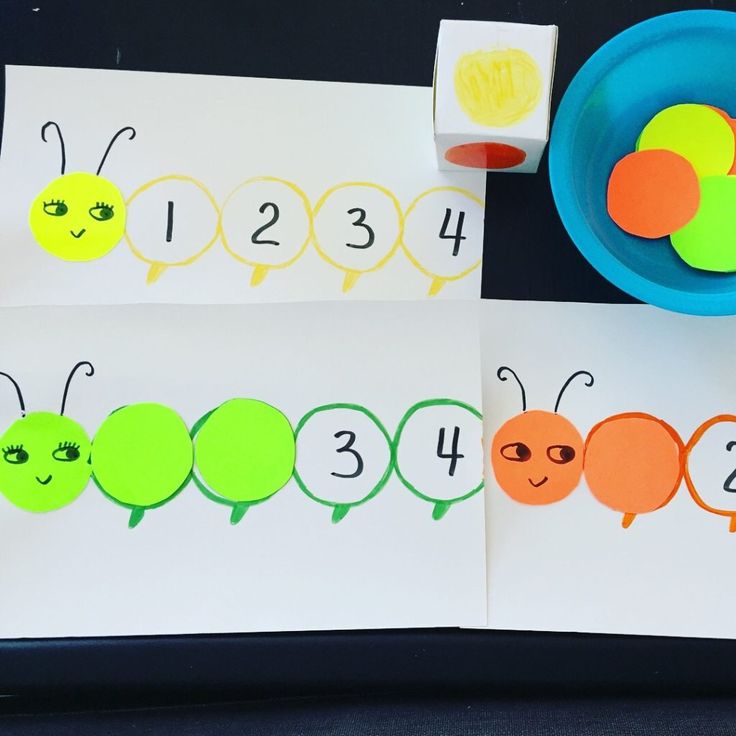 The rest of the details are cut out of colored paper.
Round plate can be turned into any muzzle. It can be painted with paints.
Half of a plate can become the basis for a beautiful solar craft. Strips of colored paper like a rainbow are glued to the cut line, we cut out elephant rays from colored paper. Color the plate yellow.
And from the other half of the plate you can make a WATERMELON craft, just paint it with paints and stick black plasticine grains. We roll plasticine into a thin sausage, cut the sausage into pieces with a stack. Here are the finished seed buds.
And here is a butterfly craft made from two sectors of a plastic plate. Here we work with paints and at the same time we follow the symmetry. That is, both halves must be painted the same way. If there is a red stripe along the edge on the left, then the same stripe on the right, if the next stripe on the left is green, then the second stripe on the right is also green. This is a logical task just for attentiveness. Children 4 years old forget the rules, but you continue to mumble the whole lesson: “I drew on the right, without immediately changing the paint, draw on the left” or “We don’t change the paint - we repeat on the left.”
You can not paint over the plate, but simply glue the bottom of the plate with a round piece of colored paper. This is how this daisy craft with a ladybug was made in the photo below.
And here is another great PIZZA craft based on a plastic plate. First, we paint the plate in the color of mayonnaise and ketchup - with yellow and red gouache. If you add PVA glue to the paint - less gouache glue (proportion by eye), then you can immediately throw all the paper elements of the application into such paint, until it dries on a plate - yellow stripes of cheese, pink pieces of sausage, brown silhouettes of mushrooms and black circles of olives.
Here are some interesting crafts you found today for children 4 years old.