Food color mixing
Food Coloring 101: 9 Tips for Working with Food Color
If working with food coloring confuses you, we’re here to help! Our quick tips and advice for working with all kinds of food coloring will take your cakes to a whole new level of color.
9 quick tips for working with food coloring
1. Always start small
Always begin mixing your food coloring in small amounts, building the color up over time. It’s oh so much easier to add color in than to remove it in case you go too bright or too dark. It takes more time, but it’ll be a heck of a lot quicker and easier than starting all over again.
2. Color develops over time
Food color develops and gets darker over time. This is essential to know, especially when tinting fondant red or black. Instead of adding in more and more coloring, let your fondant (or buttercream or royal icing) sit for 10 to 15 minutes and check to see how much it has darkened.
For matching food-colored items to specific palettes, it helps to stop a shade or two before you need to. Leave your work to sit for a few minutes and then check the color.
3. There’s a difference between powdered, natural, liquid and gel colors
There are different types of food color on the market, so it helps to know which works best for you and for your project. Check out our quick guide below:
Powdered coloring
Powdered colorings can be slightly hard to find — they’re not going to be in the baking aisle of your local grocery store or even craft shop. You’ll have more luck online — Craftsy has a good selection.
The list of colors available as powder can be limiting, which means you’ll need to adjust and mix them up yourself. Also, adding too much powder into your mix (be it batter, cookie dough or fondant) can dry out your consistency.
Natural coloring
These plant-based colorings are great for anyone who wants to avoid synthetic colorants. They do, however, yield some pretty dull results. If your aim is to create a rainbow layer cake, don’t use natural coloring — you’re just not going to get the vibrant, fun results you want.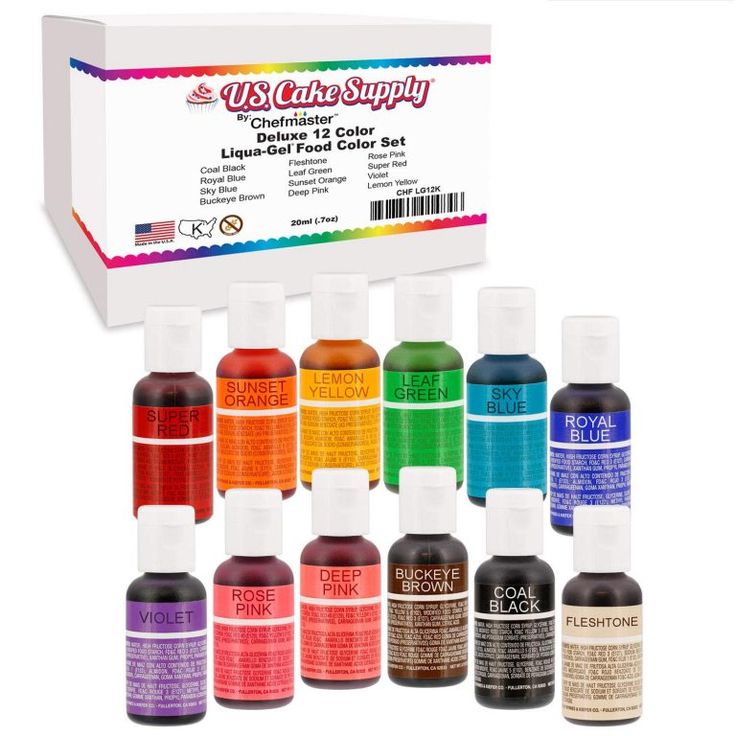 Natural colors can also be harder to find. Try an online search or a specialty health food shop.
Gel or paste coloring
These colorings contain glycerine and/or corn syrup, which gives them a thicker, gel-like consistency. For us, gel colorings are a great option when adding color to batters. They’re vibrant, readily available and they don’t affect the consistency of your mixture. They’re also pretty concentrated, so they’re perfect for vibrant creations.
Liquid coloring
Liquid food dyes come in miniature bottles. They can be very watery in consistency, which can really thin out your batter, dough or icing. We generally advise that cake decorators stay away from these, as they can compromise your batter and result in a sinking cake or even in a mix that doesn’t rise.
Liquid gel coloring
Liquid gel colorants are similar in consistency to runny honey. They’re a bit like a cross between liquid food dyes and gel/paste coloring. You’ll usually find them packaged in a squeeze tube or flip-cap bottle. We use food coloring in this form the most!
4. You can add color without food coloring
If you want to add color to your homemade bakes without using any food coloring at all (even store-bought natural colors) there are a few ways you can do this.
Pomegranate juiceFresh pomegranate juice, straight from the fruit, can create a vibrant to pastel pink. It’s perfect in sugary glazes for loaf cakes or doughnuts (just like our carrot, pomegranate and pistachio loaf above).
BeetsIt’s possible to add the red in red velvet cakes using grated beets (or beetroot in the U.K.).
Edible petalsBright, edible petals are great for adding pops of color on top of frosted cupcakes and cakes.
5. Use natural light
Always color by natural lighting to get an accurate view of the colors you’re creating. A lot of artificial lighting gives off a dull, yellowish glow that can make colors look totally off.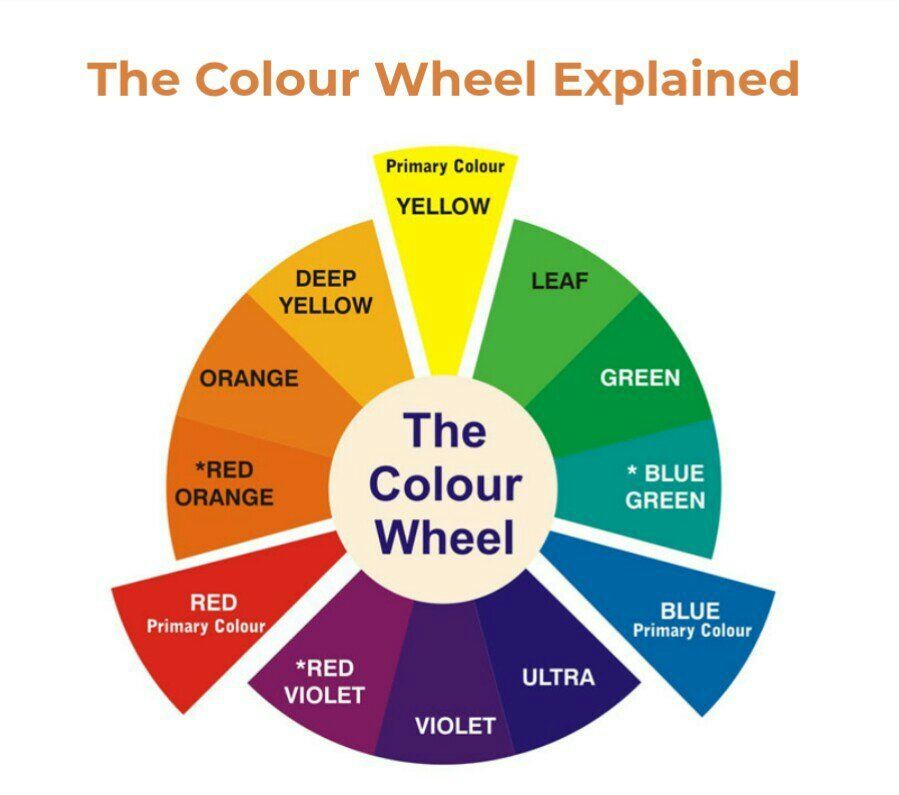 Imagine coloring green for a specific order and in daylight it’s actually a more blue toned color — not good!
6. Learn simple formulas for quick color mixes
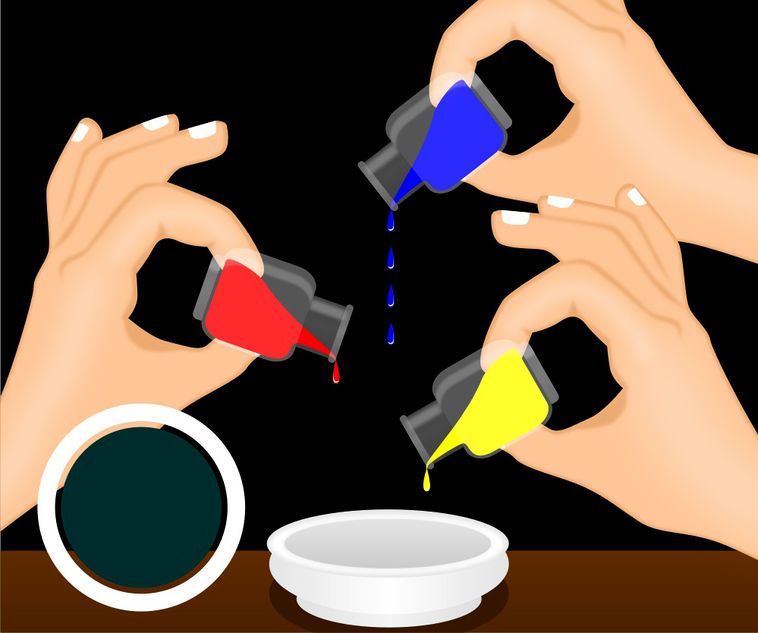
When it comes to decorating cakes, you’ll regularly need to create custom tints for fondants or buttercreams. If you don’t have every color on hand, it’s helpful to know what colors to mix together to form another color. Here’s a quick color-mixing guide to help!
- Purple – Add equal amounts of red and blue together.
- Brown – Mix equal amounts of red, blue and yellow (purple and yellow).
- Green – Add equal amounts of blue and yellow.
- Pink – If you don’t have pink food coloring, use a small amount of red.
- Orange – Mix red and yellow together.
- Mint – First create a soft green, then add a tiny amount of sky or baby blue.
- Sepia – Always begin with a soft, cream color and then add the color you need.
7. Make it metallic!
Making a good metallic finish isn’t as simple as tinting fondant, buttercream or royal icing. You’ll have to paint or dust your work. We like to color whatever medium we’re working with to a close matte-like match (caramel for gold, gray for silver) and then carefully hand-paint with edible dusts and paints. Read more about this technique in this blog post.
8. Master the mixing technique
Mixing in food coloring doesn’t necessarily mean just stirring it in your batter. The technique you use depends on how you like to work and what material you’re using.
Fondant or gum paste
We like to fold color into fondant or gum paste by making a well in the material, adding the color and repeatedly folding the fondant over and over on itself until incorporated.
Buttercream
One of the best methods for tinting buttercream is adding a little of your food color along with any extracts, essences or flavorings you need. This limits the amount of air bubbles you mix in.
Royal icing
We prefer to mix up big batches of plain or white royal icing, then tint whatever colors we need before adjusting consistencies and adding to piping bags.
9. Consider your materials and ingredients
A lot of people ask why their batter or buttercream has gone more turquoise instead of blue or peach instead of pastel pink. One of the most important things to remember is the base color of the material you’re working with.
For example, buttercream and batters usually have a natural yellow color due to the butter in buttercream and the butter + eggs in the batter. So, if you add some blue, it will mix with the yellow and result in a slight green color. You can avoid this by creating a white cream cheese– or Crisco-based frosting for fillings or coverings. For cakes and cupcakes, experiment with egg white batter to eliminate the orange egg yolks.
Do you have any essential advice or must-know food coloring facts?
How to Mix Food Coloring to Make Different Colors
Written by Eric Jonas • Updated August 24, 2022
Jupiterimages/Photos.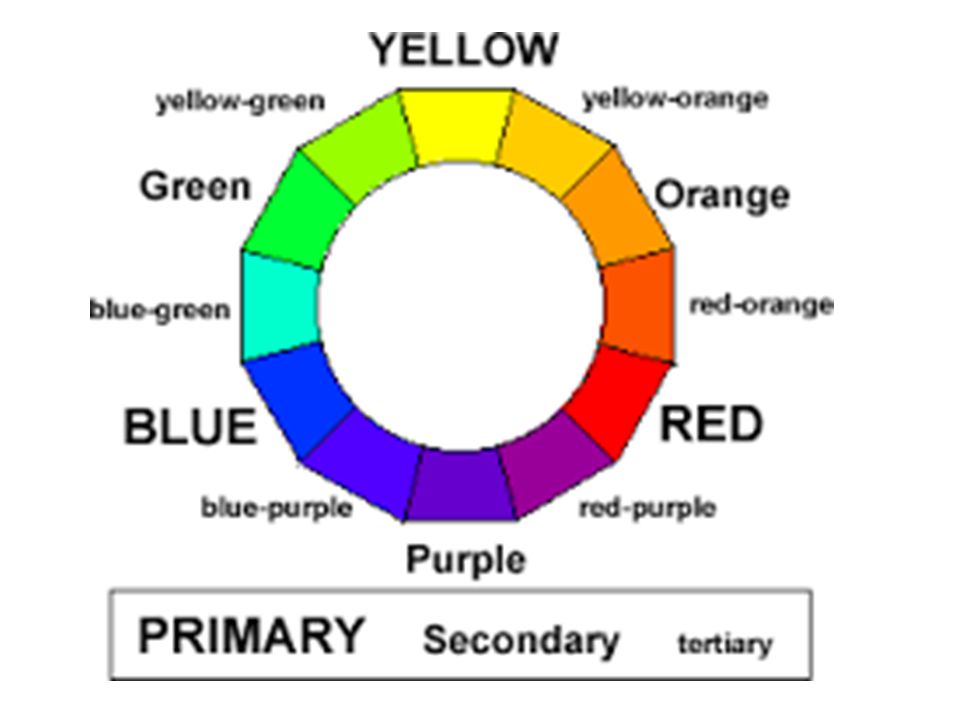 com/Getty Images
A brightly decorated cake can make a beautiful party centerpiece, and you do not need to purchase food coloring in every color of the rainbow to create your dessert masterpiece. You can create the exact color you want by mixing together a few basic colors. Start off with the primary colors and experiment with different combinations to get the perfect colors to coordinate with your next party or other special event.
Creating Secondary Colors
Add to your repertoire of cake decorating colors by mixing primary colors together to make secondary colors. These colors are made by mixing together equal parts of different primary colors. Mix two drops of blue food coloring together with two drops of red to make purple food coloring. Combine two drops of red food coloring with two drops of yellow food coloring to make orange. Make green food coloring by mixing two drops of yellow food coloring with two drops of blue. Remember to mix all colors in a white dish so you can watch how the true color develops as you mix it, allowing you to make adjustments as necessary before adding the coloring to the frosting.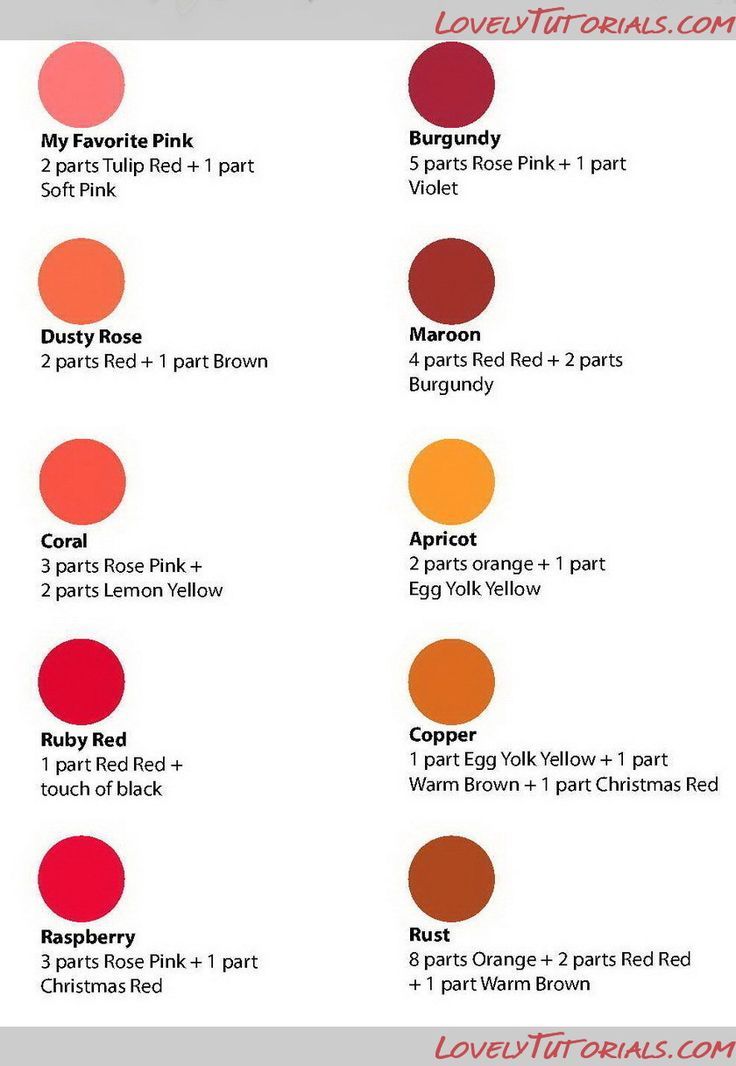
Mix Secondary Colors to Make Tertiary Colors
To make a cake that coordinates with any color scheme, continue to blend your newly created colors for even more. Make lime green food coloring by mixing three drops of yellow with one drop of the green food coloring. Mix two drops of green food coloring with four drops of blue to make aquamarine. Combine three drops of purple food coloring with two drops of blue to make a blue-violet food coloring. When you combine three drops of purple food coloring with two drops of red you now have a red-violet food coloring. Create chartreuse food coloring with nine drops of yellow and one drop of green food coloring.
Brown and Black
While chocolate icing sometimes serves as an adequate brown color for cake decorating, sometimes a deeper or lighter brown is required. Mix together two drops of red and two drops of green food coloring to make a dark brown. Lighten the brown food coloring to a tan color by adding two drops of yellow at a time. Mix and then add more yellow until the coloring reaches the shade of brown you want. Make black food coloring with three drops of blue, three drops of red and two drops of green food coloring.
Light, Dark and Better Black
When you have created a great color, but it is just a little too dark for your decorating needs, you can lighten the food coloring by mixing in a little bit of white icing. This is a great way to make pastel color icings as well. To darken the food coloring for a deeper, richer color, add a little bit of black food coloring.
When making black icing, sometimes regular liquid coloring will not deepen in color as much as necessary. Instead, start with chocolate icing and add a little black powder or gel food coloring. If starting with vanilla icing, keep in mind dark food coloring will give the icing a bitter taste from the amount of black coloring necessary to darken the icing. Chocolate icing is a great choice as a starting point for making dark frosting colors without compromising the taste.
References
- Color Matters: Basic Color Theory
- MyBluPrint: Food Coloring 101
Writer Bio
Eric Jonas has been writing in small-business advertising and local community newsletters since 1998. Prior to his writing career, he became a licensed level II gas technician and continues to work in the field, also authoring educational newsletters for others in the business. Jonas is currently a graduate student with a Bachelor of Arts in English and rhetoric from McMaster University.
YOU MAY ALSO LIKE
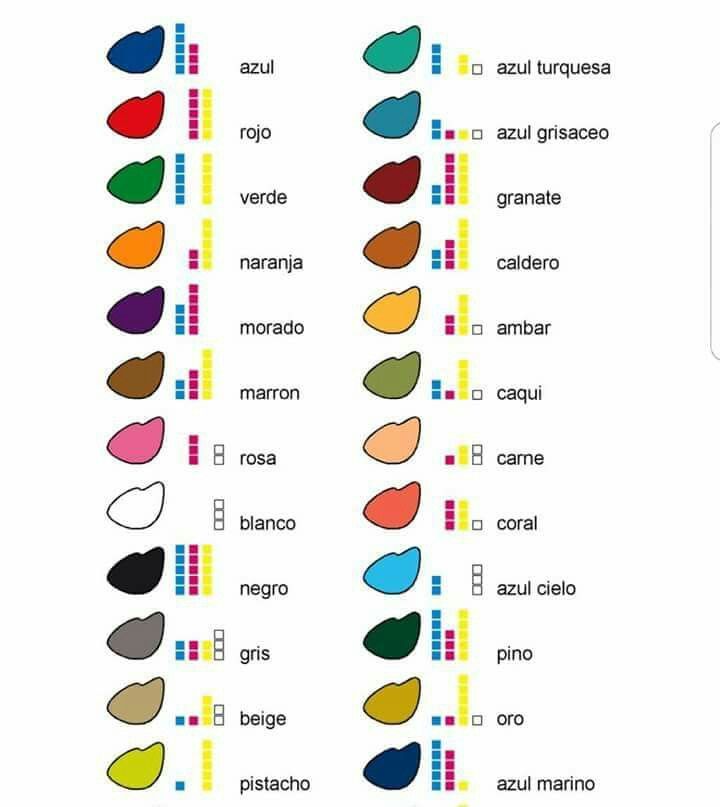
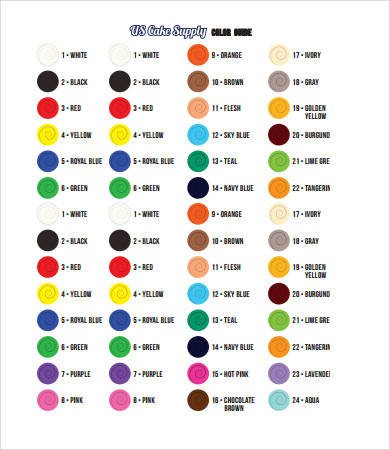
Food Color Mixing Chart
100ing | Blog
Select a sectionTo help the confectionerHow to useGood to knowRecipes and technologiesRecipesPastry recipes
This blog is not intended to provide a diagnosis, treatment, or medical advice. The content provided on this blog is for informational purposes only. Please consult a physician or other healthcare professional regarding any medical or health-related diagnoses or treatment options.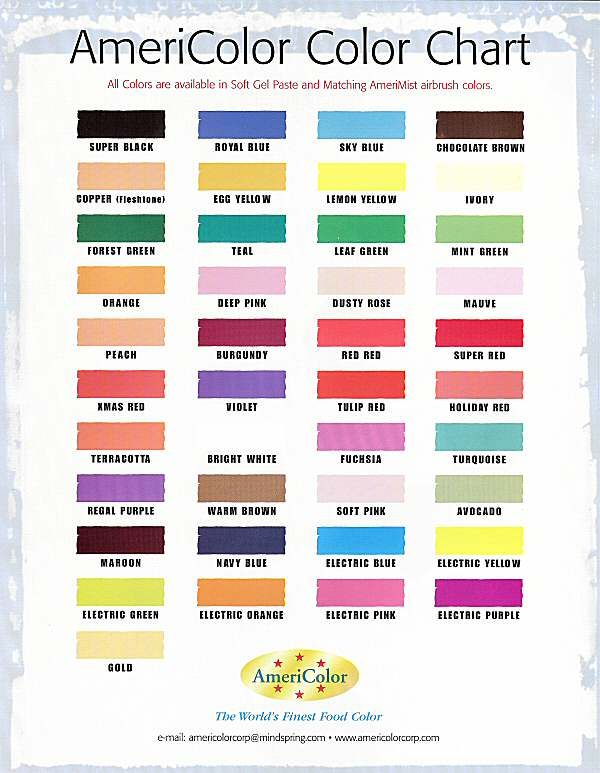 The information in this blog should not be considered a substitute for consultation with a healthcare professional. Statements made about specific products in this blog are not endorsed for the diagnosis, treatment, treatment, or prevention of disease.
Food coloring will make your culinary creations bright, original and memorable. To decorate dishes in all the colors of the rainbow, it is not necessary to purchase the entire palette of food colors. It is enough to buy the primary colors, and get the rest of the shades by mixing.
The main colors are red, blue, yellow, white and black. With these paints available, you can get almost any shade.
Color mixing chart for food coloring
| Example | Required color | Basic color + Mixing instructions |
|---|---|---|
| | Turquoise | blue + green |
| | White-Blue | white + blue |
| | Wedgwood Blue | white + blue and a drop of black |
| | Royal Blue | blue + black and green drop |
| | Violet | red + blue |
| | Gray | white + black |
| | Cool gray | gray + blue or green |
| | Pearl Gray | white + black, slightly blue |
| | Warm gray | gray + ocher or umber |
| | Medium Brown | yellow + red and blue, white for lightening, black for dark. |
| | Red-brown | red + brown |
| | Golden brown | yellow + red, blue, white; more yellow for contrast |
| | Tobacco | yellow + green + white + red |
| | Mustard | yellow + red, black and some green |
| Beige | gradually add white to brown until a beige color is obtained; yellow for brightness. | |
| | Rose Gray | white + drop of red or black |
| | Grey-blue | white + light gray plus blue drop |
| | Green-Grey | white + light gray plus green drop |
| | Khaki | brown + green |
| | Charcoal gray | white + black |
| | Avocado | yellow + brown and black |
| | Orange | yellow + red |
| | Yellow | yellow + white to lighten, red or brown to darken |
| | Lemon yellow | yellow + white, slightly green |
| | Light brown | yellow + white, black, brown |
| | Pale green | yellow + blue/black for depth |
| | Grass green | yellow + blue and green |
| | Olive | green + yellow |
| | Light green | green + white/yellow |
| | Turquoise green | green + blue |
| | Bottle green | yellow + blue |
| | Coniferous | green + yellow and black |
| | Green | yellow + blue or blue |
| | Olive Green | green + yellow |
| | Fern green | white + green, black |
| | Forest green | green + black |
| | Pine Green | green + yellow + black |
| | Emerald green | yellow + green and white |
| | Light green | yellow + white and green |
| | Aqua | white + green and black |
| | Pink | white + some red |
| | Apricot | red + ocher + white |
| | Chestnut | red + black or brown |
| | Royal Red | red + blue |
| | Royal purple | red + blue and yellow |
| | Magenta | red + blue + yellow |
| | Dark purple | red + blue and black |
| | Tomato Red | red + yellow and brown |
| | Mandarin Orange | yellow + red and brown |
| | Orange | red + yellow |
| | Gold | yellow + red or brown |
| | Reddish chestnut | red + brown and black |
| | Burgundy Red | red + brown, black and yellow |
| | Raspberry | blue + white, red and brown |
| | Plum | red + white, blue and black |
| | Dark brown | yellow + red, black and white |
| | Copper Gray | black + white and red |
| | Ocher | yellow + brown |
Basic rules for mixing food coloring
When mixing food coloring, it is important to follow a few rules and then the result will surely please you.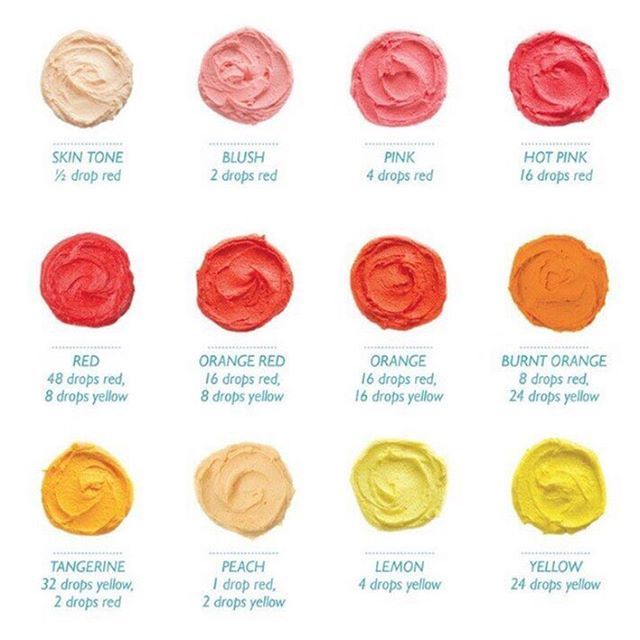
Food pigments are divided into water-soluble and fat-soluble, which is usually indicated on the packaging. Fat-soluble paints are used for coloring chocolate, buttercream, cocoa butter. For cream, caramel, dough products, icing, mastic, water-soluble dyes should be chosen.
An incorrectly selected type of dye will not give you the desired result, or even spoil the dish. It is impossible to mix dyes of two types with each other.
Also, dyes can be divided according to the form of release: dry, liquid and gel.
- Dry food colorings are usually diluted in water or vodka before they are added to the dish. Can also be used as a dry pigment for coloring mastic or wafer sheets. When using dry paints, mix them diluted. That is, first dilute the main color, then gradually introduce additional colors into it. As soon as the mixture acquires the desired shade, it can be introduced into the dish.
- Gel dyes are the most convenient to use, since they do not need to be diluted like dry paints, and they do not provide excess moisture like liquid paints.
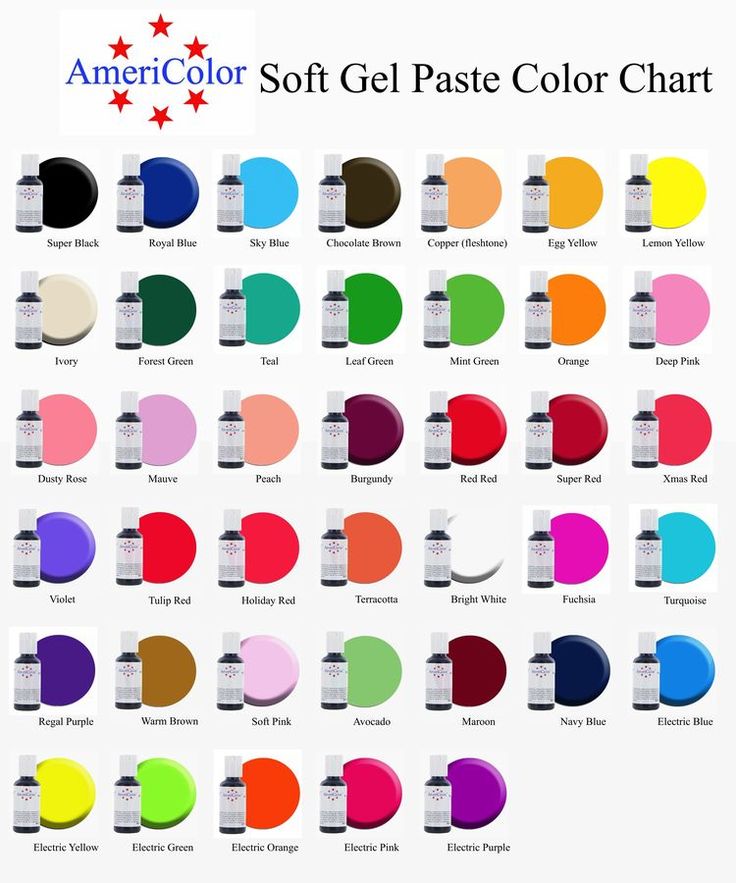 To color cream, dough or caramel, you can mix colors directly in the dish.
 - Liquid dyes have a lower density than gel dyes, mix well with each other and give beautiful watercolor shades. They are well suited for painting on confectionery surfaces and for coloring biscuits. You can mix this type of paint directly in the dish.
Always test the resulting color on a small part of the dish before coloring the entire dish.
Can dry and liquid food colors be mixed together? Experienced chefs do not advise doing this, as the result can be unpredictable. In order for the color to turn out beautiful, and the dish to be colored evenly and not change the consistency, it is recommended to mix dyes of the same type, release form and manufacturer.
You can buy high quality food colorings at 100ing.ru. The catalog contains dry, liquid, gel dyes, kandurin, as well as food markers. If you want to cook a bright beautiful dish or product, but do not accept synthetic pigments, pay attention to natural and safe, but no less bright, Luxomix dyes.
Food coloring is a fun activity that sometimes brings unexpected results. Experiment, try new things and create unique culinary masterpieces!
For our beloved readers 10% discount on promo code BLOG for all products weighing up to 15 kg in the online food ingredients store 100ing.ru! Delivery and pickup throughout Russia.
Airbrush Food Color Mixing Chart
Often you don't have the necessary rare colors or combinations on hand, which in fact can be obtained by mixing certain base colors.
In the culinary business, mixing food colors has its own specifics and can sometimes give unexpected results. This food color mixing chart for airbrushing will help you get started and will be useful for both beginners and experienced painters.
| black | = brown+blue+red=1:1:1 = red+green+blue=1:1:1
|
| grey-black
| = blue+green+red+yellow=1:1:1:1 |
| nude | = red and yellow paint. |

