Teaching students to follow directions
10 Ways to Teach Students to Follow Directions
2.7K shares
Getting your students to follow directions can be a challenge sometimes. It’s even more frustrating when it takes up your limited teaching time. So what can you do, besides have the patience of a saint?
Even a teacher with excellent classroom management will, from time to time, have a student or two who manages to miss the directions provided, or simply doesn’t follow them for whatever reason. Without fail these cute little ones are always quick to say, “What are we doing?” or “I don’t know what to do.” While the first time you hear it you are likely to not have a problem helping out, but after a few times, you’ll be tired of repeating yourself. That’s where these ten ideas come in.
1.) When providing directions, always make sure you are using an appropriate voice and message. Use the appropriate voice volume, tone, and even the speed, so your students listen well. If you talk too quietly or quickly, they aren’t going to be able to follow directions. Some schools provide portable microphones that teachers can wear. If you scream or shout at them, they are more likely to resist you and your instructions.
2.) Start each activity off with an anticipatory set or an attention getter. To start any activity with instructions, catch their attention first. Establish a moment of silence to grab their attention, stand in front, write a word on the board, or use hand gestures.
Once you have their focused eyes, start with an introduction of what you are about to do. Then, one by one, give instructions while checking their reaction. Their faces will let you know if they are confused or if they get it.
3.) Use actions with keywords. When you give instructions, try to create keywords that are equivalent to actions. This is a good strategy for giving verbal instructions. It is like having a “go” signal.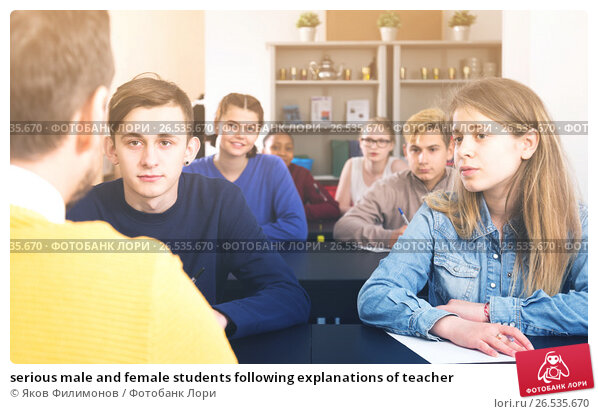 When you say the “magic word,” they should be able to do the correct action. You may also use hand gestures or sound signals. For example, tell them to start writing when you put your hand down.
4.) You repeat, they repeat. Repeat only once and ask them to repeat the directions. Have one, a few, or all of them say the instructions aloud. Give printed out instructions to take home projects or have them copy the instructions in their notes. Repetition is still a key to remembering and this is important in making your students follow directions effectively.
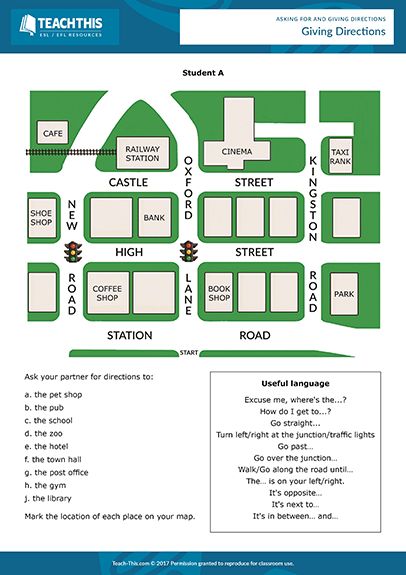
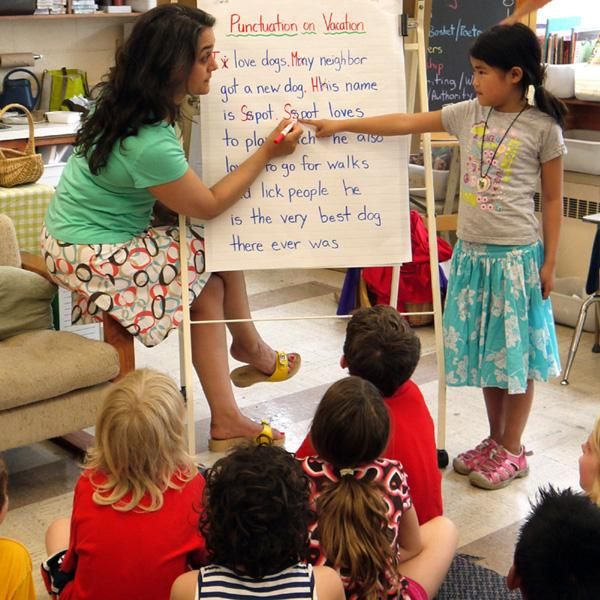
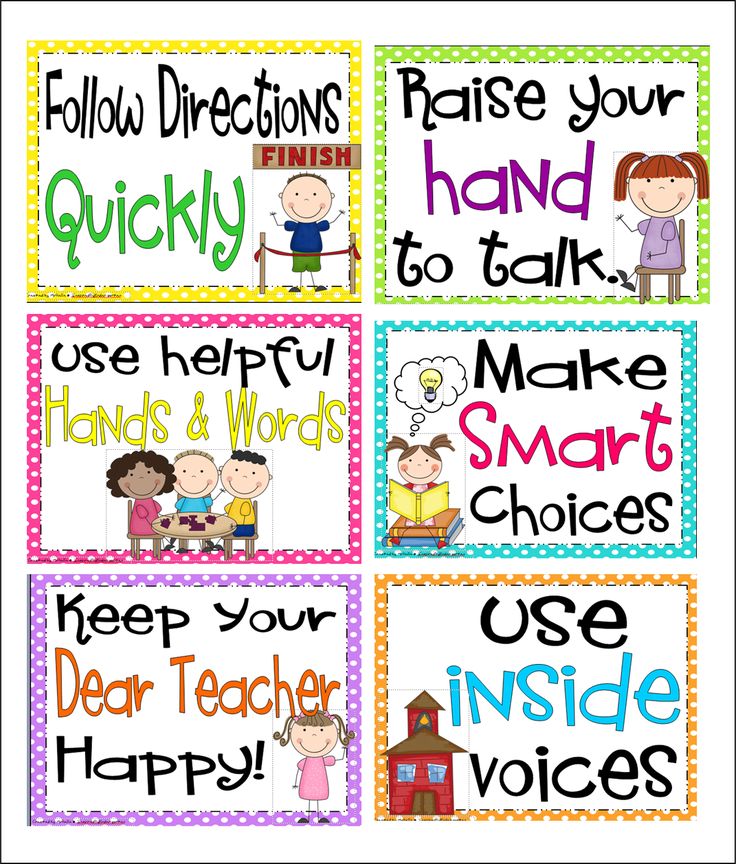
5.) Use visuals to help students follow directions. Say your instructions with visual aids: PowerPoint presentations, flipcharts, flashcards, or just simply writing the numbered instructions on the board. When they have the instructions right in front of them, it’s easy to point at them.
6.) Break it down! Support your instructions with examples or simplify them by breaking them down in detail. You may also consider modeling the instructions or role-playing them if needed. Actions speak louder than words, right?
7.) Direct with a Reason. Some students have a lot of questions, and these questions are usually a “why” question. When providing your instructions include the “why” for doing it. For example, “turn your books to page 4 and find the most difficult word you encounter. After that, be prepared to know what this means and be able to use it in a sentence.”
8.) Check with a question. Ask your students questions to check to see if they are following directions correctly. Yes, you can still ask the usual “any questions?” but most likely no one will say anything, and as soon as you have them get started, the questions will begin! So instead, ask specific questions, like “which page should we turn to?” or “what should we do after dividing?” Consider asking these other questions too:
- What are you doing now?
- Where are you right now?
- Which one are you doing?
- What should you be doing right now?
9. ) Check with others. When they first come to you, ask if they have reached out to any of their other classmates. If not yet, remind them of the “3 Before Me” Rule. I always write it on my board – “C3B4 Me” to remind students. I have my students quietly ask a neighbor what the directions were AND then ask two more – even if the first person told them. That way they are confirming the directions are the same from all three people. If all three people don’t know the directions, then the student should come to see me. At that point, I know I need to try another option on this list.
10.) Countdown. Give your students a time frame to do something. A simple counting to five while clapping your hands to take out their books or to use a timer on the board to show how long they have left to finish cleaning up. And once they are done, teach them a signal to give if they are finished, like one clap or putting their hands above their book.
The most important tip of all when it comes to getting students to follow directions is to use consistency. The more routine you are with your procedures and directions, the more they will be able to follow them on autopilot.
2.7K shares
Lessons For Teaching Students To Follow Directions
As teachers, sometimes we give our students directions but then are surprised (or disappointed) that they don't follow them.
No names on papers? No titles on compositions? No answers rounded to the nearest tenth? We all face these problems in our students but we can correct some of these behaviors by teaching the skills required for students to be able to follow directions.
If you find yourself confronting such problems while grading papers, your students may not be paying attention to directions. Although most successful students recognize the importance of reading instructions thoroughly and following them, some students may master the skill slowly.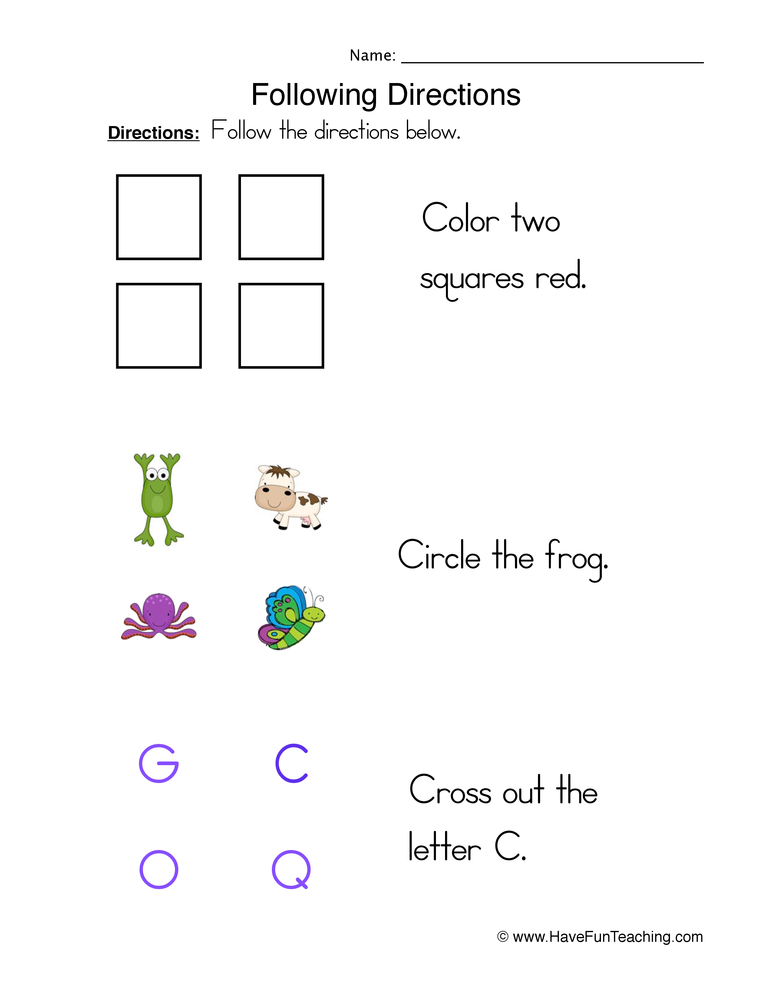 Education World provides five intriguing lessons to help your students read, write, follow, and even evaluate directions. Included: Lessons that make following directions fruitful and fun!
Surprised to see a number of students suddenly leave the room only halfway through an exam, the professor followed them into the corridor. He discovered the students completing the balance of the questions while leaning against the walls. When he asked for an explanation, one student pointed to the third question, which asked "Describe Hemingway's The Old Man and the Sea. You may supply a drawing but please leave room to answer."
Sadly, this joke may not ring very true for many teachers today. Unfortunately, in the rush to complete assignments, students often race past directions to get to the "meat" of their work. In desperation, some teachers have hidden the answer to a simple question, or a hint to a tougher one, within the directions of an exam, just to encourage students to read the directions!
There are ways to help students recognize the value of reading instructions before beginning an assignment and following them throughout. Elementary teachers may hold a "bear hunt." Students bring in teddy bears, hide them within the classroom or school, and then create lists of directions for others to follow to locate the bears. Teachers of older students may craft a page of instructions that students must read in their entirety before beginning to work and include as the last one, "Ignore all of the directions above and turn in your paper." The Internet provides even more opportunities to emphasize directions with lesson plans, how-to's, and recipes!
LESSONS FOR TEACHING STUDENTS TO FOLLOW DIRECTIONS
This week, Education World provides lessons about following directions. Click on each of the lesson headlines below for a complete teaching resource. Approximate grade levels are in parentheses.
How Well Do You Follow Directions?
This easy-to-use activity teaches valuable lessons about the importance of listening and following directions. (Grades K-12)
Phil's Fish Shop
Taking on the roles of new employees in a pet shop, students offer advice to customers, answer questions, and create a handbook of instructions for new fish owners. (Grades 3-8)
Critics of Cuisine
As food critics, students follow directions to create culinary delights and then critique the recipes and the flavor of their products. (Grades 3-12)
The Magician's Apprentice
Teaching the skill of following directions requires a little hocus-pocus in this lesson. Students re-create magic tricks, evaluate the clarity of the instructions, and teach an apprentice how to perform a trick. (Grades 3-8)
George Washington Teaches Map Directions
If students follow "directions," they'll have a picture of George Washington. (Grades 3-8)
Parachute Drop
Students experiment with gravity as they follow directions to create parachutes that will carry paperclip passengers safely to the ground. (Grades 1-3)
ADDITIONAL RESOURCES
30 Classroom Procedures to Head Off Behavior Problems
To keep your days running smoothly, establish consistency using these general procedures, daily tasks, and activities.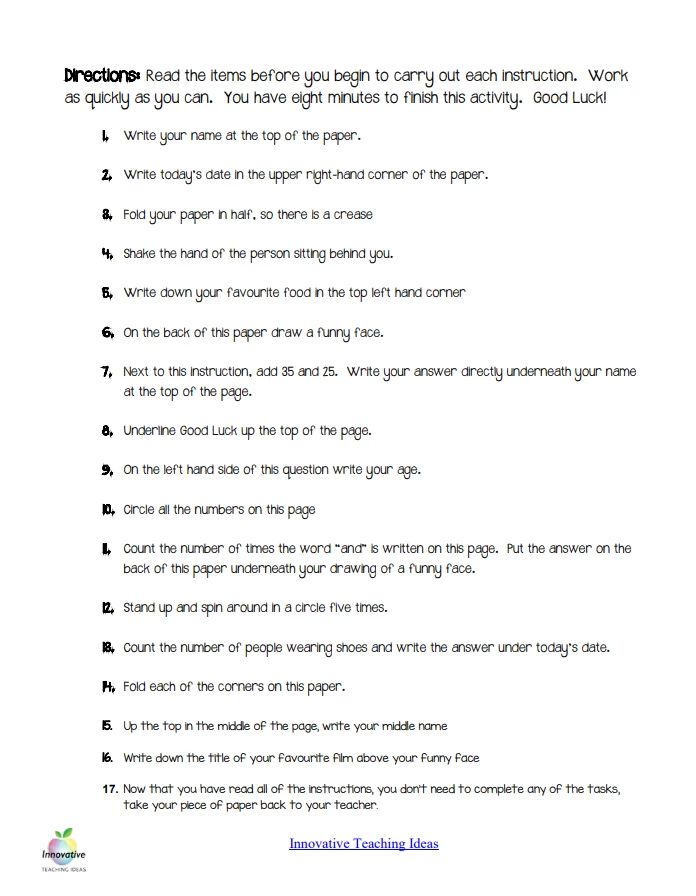
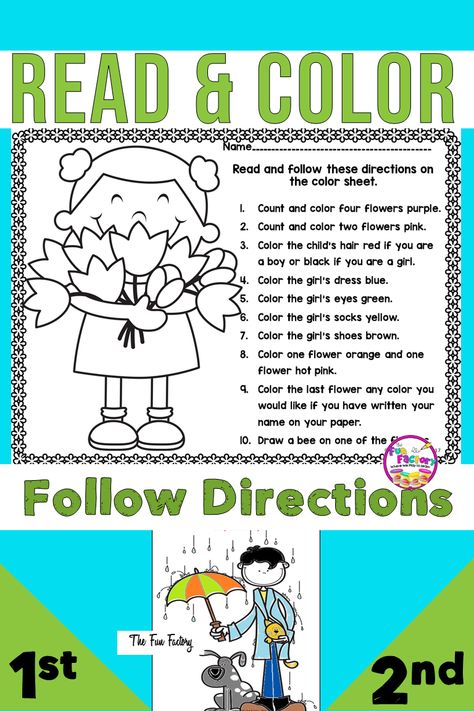
Free Following Directions Worksheets
Teach-nology provides several adorable coloring sheets with simple instructions to follow.
Last updated: 11/22/19
“Teaching the technique of reception and transferring the ball from below with two hands in volleyball”
9000 9000 9000 9000 9000
222
"Training technique reception and transfer
ball bottom double hands
in volleyball ”
9000 Nina Grigoryevna
Physical Culture teacher MBOU “Secondary School No. 61” Kemerovo
9000 9000 98
Having worked as a teacher for many years physical education, considering in detail the difficulties and mistakes that arise in schoolchildren when learning volleyball, I recommend exercises with which You can correct these errors or avoid them altogether.
Features Methods
9000s. students to systematic physical exercises. To organize and conduct volleyball classes
, the school must have the appropriate material base: a playground, as well as the necessary equipment: volleyballs, a volleyball net, which can be installed at different heights.
The planning of volleyball lessons should be based on the objectives of the subject being studied and taking into account the individual characteristics of the students. Tasks must be set for each lesson and even for its individual parts. At the same time, the teacher should be ready to solve more distant problems that will be implemented in the next lessons. It should be remembered that during the learning process, 3-4 tasks are usually solved in one lesson. At the same time, it is very important to distinguish between the main and secondary tasks, realizing them in accordance with the age and level of physical fitness of those involved. To create the most favorable conditions when studying game techniques, you must adhere to the following sequence:
General introduction to playing techniques.
Performing a game technique under simplified conditions.
The study of technique in conditions close to the game.
Improving the playing technique in group exercises and games.
When choosing an exercise, one should avoid monotony, and when performing a large number of repetitions. Recommended tasks should be constantly modified, supplemented by others. Interest in the lessons will be higher if you use the competitive form of the lesson: “Who will make more passes?”, “Which group will keep the ball in the air longer?” - etc.
Thus, only a properly organized educational process, the systematic implementation of a set of measures aimed at preventing injuries, will preserve and strengthen the health of students and achieve their sports improvement.
1. Technique for receiving the ball from below with two hands
Reception serving is most often done from below with two hands. This is the most reliable way and volleyball players around the world usually take the serve this way. On fig. 1 position shown the player receiving the ball from the serve in this way. Starting leg position bent, one leg slightly forward, hands ready to receive the ball. big hand position matters. The hands are closed and laid down. arms straight, turned outward and as close as possible. It is very important to take timely shown starting position.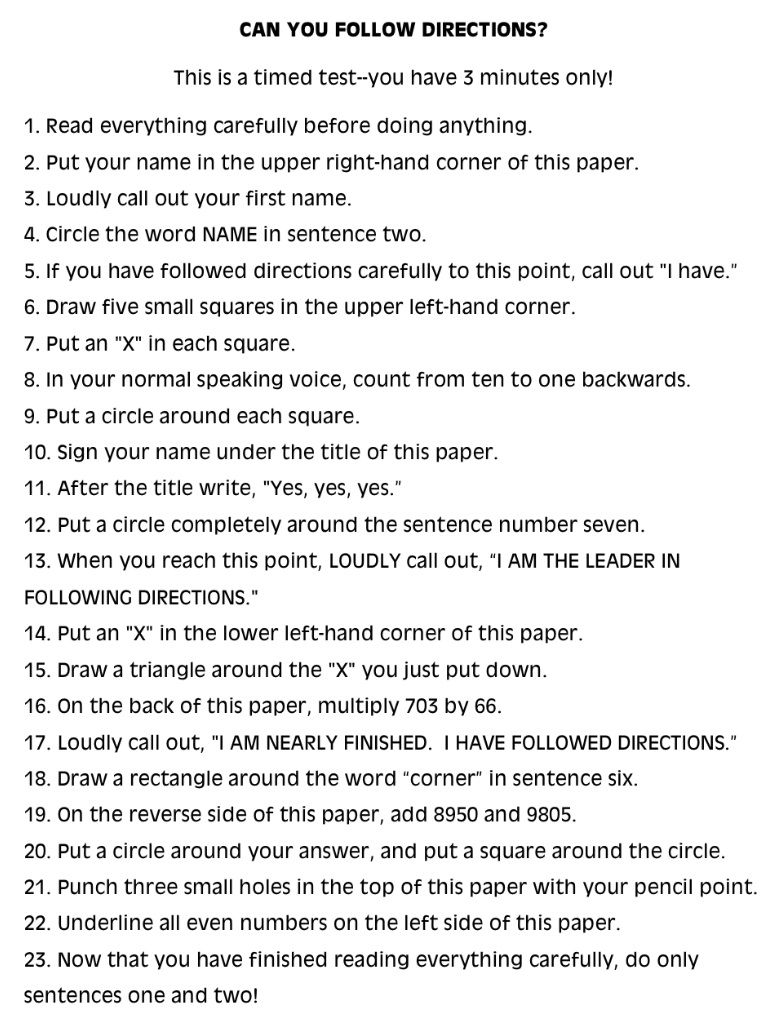 To do this, the player must be able to move possible feed direction and timely move to a convenient position for reception.
1. Reception the ball is carried on the lower part of the forearms, sometimes they say "on the cuffs." Hands at the moment of receiving the ball are straightened, a gross mistake would be to bend them in elbow joints. There should not be a strong oncoming movement of the hands, they approach the meeting point with the ball due to some extension of the legs, arms substitute under the ball, adjusting the trajectory of the first pass, but do not “beat off” his. There is even an expression "the reception of the serve is carried out with the feet", thus emphasizing the role of the timely choice of the starting position. degree of flexion feet depends on the trajectory of the serve, with a very low one - the player receives the ball from subsequent fall and roll to the side on the thigh and back.
2. Preparatory exercises
physical qualities, the development of which constitutes the initial stage of training. The group of these exercises (preparatory) includes the following:
Flexion and extension of the arms in the wrist joints, circular movements with the hands. The same, but the hands are closed (fingers are interlocked)
· From the stop, standing against the wall, simultaneous alternate bending of the arms in the wrist joints: the palms are placed on the wall with the fingers up, to the sides, down, the fingers are closed or apart.
From the stop, standing against the wall, pushing away with the palms and fingers from the wall with both hands simultaneously and alternately with the right and left hands.
In an emphasis lying on the hands in a circle, the toes of the feet are in place.
Movement in an emphasis lying down, legs are held by a partner (for boys).
Crouching from the stop, unbending forward and upward, go to the lying position.
Throws a stuffed ball (weight 1 kg) from below with two hands into the wall, after reflection from the wall, substitute hands (receiving position from below).
Same in pairs, distance - 3-4 m.
Run with acceleration from a static position in response to a signal (usually visual) and stop after running a distance of 1 to 5 m.
The same, but acceleration to the right, to the left, backwards.
The same, but with side steps - face, right, left side, back forward.
Exercises with catching a stuffed ball weighing 1 kg with both hands at knee level, arms straight.
Throwing a stuffed ball (1 kg) at a distance of up to 10 m and catching with hands from below. Throwing various balls at a distance of 15-20 m and catching.
In these exercises, the ability to measure one's actions taking into account the direction of the ball's flight is developed and the speed of reaction to a moving object is developed, which is very important when receiving a serve.
The listed exercises are used systematically in the lessons, even when young athletes have already learned how to play volleyball. After a certain period of using these exercises, they begin to exercise with a volleyball. Initially, lead-up exercises are used.
3. Lead-up exercises
position of hands, hands. The most common hand position is when the right palm overlaps the left, the thumb of the left hand pressed against the fingers of the right and is located parallel to the thumb of the right arms. Both hands are bent at the bottom and do not participate in receiving the ball. On fig. 2 ways of connecting the hands are shown. Each athlete chooses for himself method
rebound volleyball hanging from a string. The movement of the hands is mainly for due to extension of the legs - in the shoulder joints slightly, in the elbow missing. The main task is to feel the position of the hands at the time of reception.
That same after moving right, left and stopping.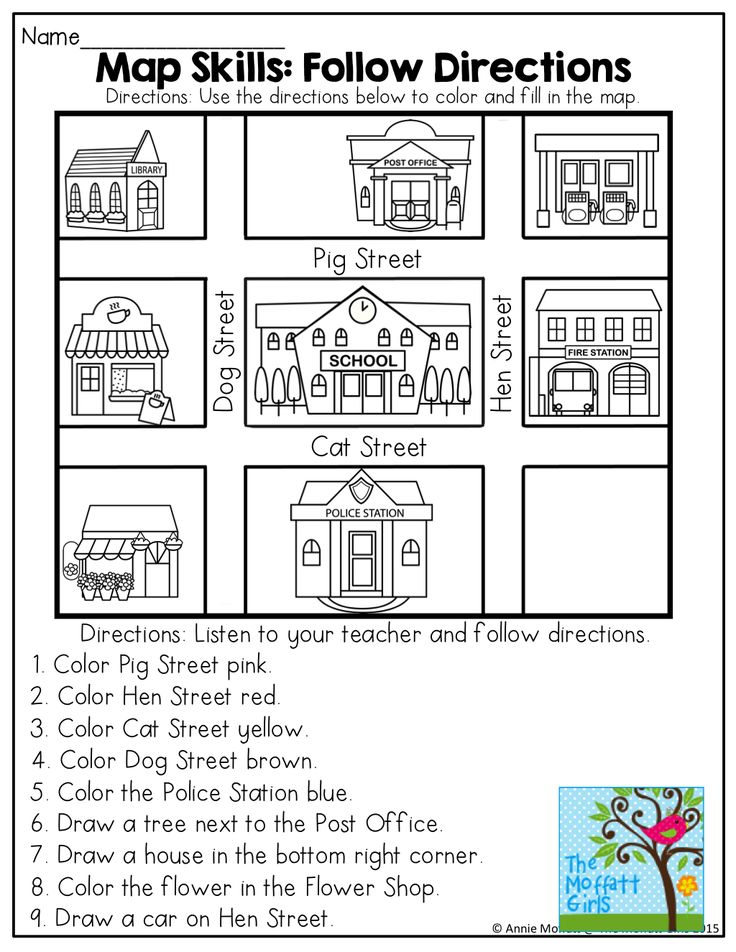
Reception ball from below, the partner throws the ball (distance - 2-3 m, which then gradually increases to 10-15 m).
At walls: hitting the ball from below repeatedly, the oncoming movement of the hands is insignificant and is produced primarily by leg extension.
That the same, but send the ball into the wall with a pass from above with both hands. Distance gradually increases. perform in place and after moving forward, right, left, back.
a, b, c - correct, d, e, f - with errors
fig. 2
That the same, but send the ball into the wall with a blow with one hand.
Transfers above yourself from below repeatedly (juggling).
· throws the ball up and forward, catch up and perform a reception from below after its rebound.
Reception ball into zone 6, the partner throws the ball over the net.
Systematic use of preparatory exercises (for the development of special qualities) and the development of leading exercises create a solid foundation for mastering the skills of receiving the serve to perfection. The main ones here will be technical exercises. They are very diverse.
Player stands
There are high, medium and low stances, which differ in the position of the legs, arms, torso, the angle between the thigh and lower leg. A high stance is used for running, attacking and blocking; medium - for making passes; low - for playing defense.
Possible errors
legs straight or excessively bent at the knees;
hands down;
excessive forward tilt.
Recommended exercises
alternate execution of racks on the spot;
taking one or another stance on a teacher's signal;
assuming various stances after completing some tasks;
outdoor game "Sparrows and Crows", where the starting positions are the volleyball player's stances;
moving around the court in the stance of a volleyball player;
imitation of various mirror stands.
Reception
When the ball approaches, the oncoming movement is started with the feet, the hands are included in the work a little later. The ball is received on the lower part of the forearm. You can not bend your arms at the elbow joints at the time of receiving the ball. There should not be a large oncoming movement of the hands forward up.
Exercises for Learning Reception 9000 9000 9000 9000 005 ball
bottom .
Imitation of receiving from below by two in place and after moving.
Lunge with the right (left) foot forward, take a stuffed ball (weight 1 kg.) with straight arms and without bending the arms, throw the ball up.
Same as ex. 2, but execute after running forward and stopping.
In pairs. Throws a medicine ball from below with two. Make sure that your arms are straight and do not rise above shoulder level.
Receiving from below a suspended volleyball while standing still and after moving.
"Juggling" the ball - continuously hitting the ball up from below with both hands.
Underpass
Used when receiving serves, when playing defense, when hitting balls over the net.
Possible errors
untimely access to the ball;
incorrect position and movement of the hands;
discrepancy between the speed of movement of arms and legs and the speed of the ball;
lack of coordination in the movement of arms, torso and legs.
Recommended exercises
imitative movements to clarify the position of the arms, their simultaneous movement in the shoulder and elbow joints in combination with the work of the legs;
in pairs: one player throws the ball to the other in a position convenient for receiving, and he returns it with a low pass;
hitting the floor with the ball, then moving and lower passing to a partner;
passing above oneself from below with two hands - in place, in motion;
receiving and passing the ball with two hands from below against a wall or net.
outdoor games: "Ball in the air", "Ball to the captain".
Passing the ball with two hands from below
Passing the ball with two hands from below - an element of technique, the most frequently used in the game. It is used when receiving the ball after a serve, when play in defense, when belaying and when interrupting through the net of balls, far flying off the site. This element of the game technique is the most reliable on the initial stage of education, when students do not yet have a sufficiently high mobility.
The technique of its implementation is as follows. Being in stand ready, the volleyball player takes the starting position - feet wide shoulders, bent at the knee joints, one in front of the other, arms straight and directed forward - down, the elbows are close to each other, the hands are connected, the body is slightly tilted forward. When performing a reception and transmission, the player positioned so that the ball was in front of him.
Ball taken on the forearms, closer to the hands. Straight arm movements forward-up are made only in the shoulder joints. The trunk straightens legs are actively extended. The movement accompanying the ball is performed by further extension of the legs and torso, as well as smooth displacement of the arms up and down after the ball.
The choice of how to pass the ball with two hands from below depends on the speed of the ball and the height of its trajectory in relation to the player. When you receive the ball with two hands from below, flying above the level of the belt with little speed, a stable position of the player in the middle stance, a smooth oncoming movement of straightened arms forward and upward, straightening the torso and final active leg extension.
If the ball flies at waist level, the player's torso slightly pronounced forward. In the phase of depreciation and rebound of the ball from the hands the player's torso moves back and up; hand movement speed is low helps soften the impact and reduce the speed of the ball after touching it with your hands.
speed (18-20 m / s) below the level of the belt, the student bends his legs more in knee joints in the starting position; BCT decreases due to an increase flexion of the legs at the knee joints; arms, shock absorbing, move back and down
include receiving the ball with two hands from below in each lesson in the form of relay races walls, oncoming gears to constantly reinforce the skill in this exercise.
Teaching how to pass the ball with two hands from below is carried out in parallel with the improvement of the transfer of the ball with two hands from above. Students must learn to apply passes from below and from above, depending on environment.
Transmission ball in place
1. Passing the ball to a partner. The distance between the students is about 4 m. The partner throws the ball to the passing player so that it is convenient for him to receive it with both hands from below. The sender, having received the ball, passes it to the partner from the starting position. Pay attention to the technique of performing the reception.
2. Passing the ball to a partner with a lunge to the sides, forward, backward. partner throws the ball is 0.5 m to the left, to the right of the sender, closer to him or behind his head. The sender, having made a lunge, seeks to take the ball to the lower part in parallel located forearms and coordinated movement of the legs, torso and arms passes the ball. Draw students' attention to the need for timely completion lunge for a falling ball.
3. Reception and transmission of balls flying along various trajectories. Players in pairs are located at a distance of 3-5 m from each other, alternately pass the ball along low, medium and high trajectory. Pay attention to the change in angle inclination of the hands when receiving and passing, depending on the trajectory of the ball: than the lower the trajectory, the greater the angle of inclination of the arms, followed by an active counter moving them up and down.
4. Reception and transmission of balls flying at different speeds. Students in pairs are located at a distance of 3-5 m from each other, alternately pass the ball flying at different speeds. Draw the attention of those involved in the need for a quick counter movement of the hands to the ball flying with a slight speed, and a relatively slow movement of the hands forward and upward with an increase ball flight speed. In the case when the ball flies at high speed, i.e. after impact, you should reduce the speed of the ball due to depreciation, when in the moment the ball is received, the torso rises slightly, and the arms slightly move up and back.
5. Players stand 1.5-2m from the wall, pass the ball with both hands from below with a hit against the wall (maximum number of once).
6. Receiving and passing the ball with a change in direction at an angle 45°. Three students are located at the vertices of an imaginary triangle on distance of 3 m from each other. Passing the ball from left to right, in the middle stance.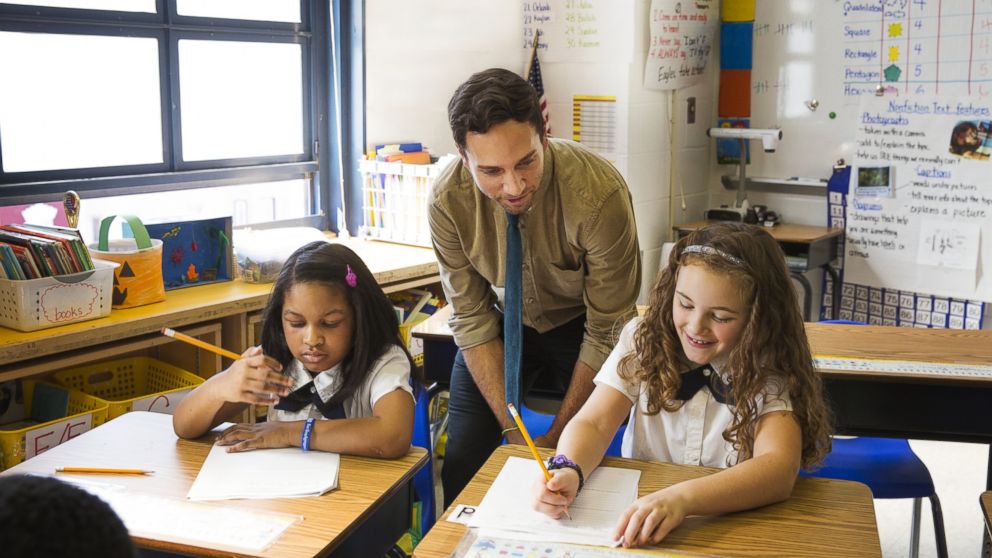 Draw students' attention to the need to move their hands in the direction forward-up-right after contact with the ball; left leg extended actively; the weight of the body is transferred to the right leg. The same, but on the other side. Hands after contact with the ball move in the direction forward-up-left, the right leg unbends actively, the weight of the body is transferred to the left leg.
7. Students one by one are located in zones 4 and 3, a column of players - in zone 5. Transfer ball from zone 4 to zone 5, from there alternately to zone 3 with the return of the ball to zone 4.
8. Transfer ball from zone 2 to zone 1, from there to zone 3 with the return of the ball to zone 2. attention is paid to passing the ball from zone 1 to zone 3.
9. Passing the ball with a 90° change of direction
Students one by one are located in zones 4 and 2, a column of players in zone 6. Alternately from zone 6 sends the ball to zone 2, then to zone 4.
Receiving and passing the ball over the net. students in columns located on opposite sides of the grid 2 m from it. The ball is passed along a low trajectory - 0.5-1 m above the net.
Players in columns are located in zones 4, driving - in zones 3.
Transmission ball from zone 3 to zone 4, from there through the net to zone 6.
Students in columns are located in zones 2 with their right side to net driving in zones 6. Passing the ball from zone 6 to zone 2, from there to zone 6 .
Receiving the ball from the net. Engaged in columns located in zones 4 1.5 m from the net facing it. The driver with the ball stands in zone 6 3-4 m from the net and throws the ball into the net; ball alternately after going out the players standing in the column take it forward and pass it to the driver in zone 3. Students should explain that the ball bounces off the net in different ways. depending on where in the grid it hits and at what speed sent to the grid.
Transmission ball after movements
1. Passing the ball after moving forward, sideways, back. AT steam. One does not throw the ball to the partner by 1-2 m, throws to the left, to the right or behind the head. The other tries to move towards the flying ball so that so that before touching it with your hands, it is already in its original position.
2. Students are located in pairs at a distance of 4 m. One with a slight blow sends the ball to the other 1 m closer, to the left or to the right of it.
Same as in exercise 2, but the distance between the players is 6 m. By hitting or passing the ball, the ball is sent to the partner 1.5-2 m from him.
Students in the column are located in zone 6,. teacher with the ball in zone 3. The teacher is weak kicks the ball to zone 5 or 1. Students take turns after moving to they take the ball to the side and pass it to zone 3. The teacher with the ball stands on a chair in zone 3 on one side of the grid, students are built in a column in zone 6 on the other.
Training transmission
3. Exercise in pairs. One student throws the ball to the partner on the forearms of straight arms extended forward and downward, he hits it in the opposite direction with a blow from below.
4. Same as ex. 3, but the partner does not throw the ball, throws it to the left or to the right 0.5 m from the student, who must first lunge or side step to the side, and then knock the ball. The arms do not bend at the moment of impact in the elbow joints.
5. Passing the ball with two hands from below in pairs. Distance between 4m.
6. Passing the ball in a triangle from left to right and right to left. Before passing, the student must take the starting position, turn to face in the direction of the pass and position himself so that the ball can be taken in front of him.
7. Same as ex. 6, but four students pass the ball to the side at an angle of 90 °.
8. Exercise in pairs. Throwing the ball over the head. Before the throw, the student makes a lunge forward and, bending over, sends the ball behind the head to the partner with straight arms.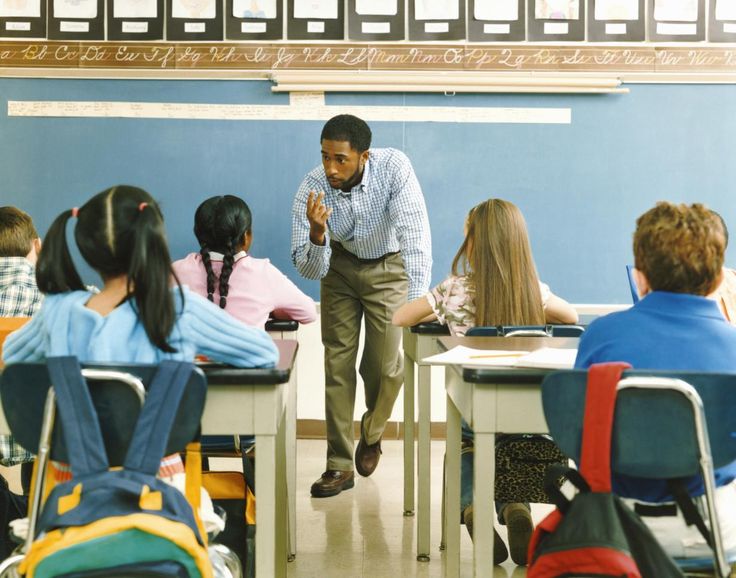
9. Passing the ball behind the head. Three students are arranged in a column one at a time. The last one throws the ball to the middle one, and he, with a blow from below with two hands, sends the ball behind the head to the partner.
10. Exercise in pairs. Passing the ball with two hands from below through the net.
Training 005
Parties and 9000 9000
1. Exercise in pairs. One student does not throw the ball to a partner, throws to the left, to the right, behind the head; the other one runs under the ball, takes a starting position and catches the ball, and then imitates the pass. The arms are straightened. The legs and torso are unbent simultaneously with the movement of the arms.
2. Same as ex. 1, but the student, going under the ball, knocks it out with both hands from below, directing it to a partner. At the moment of impact, the arms should not bend at the elbow joints.
3. Individuals practicing in a column. The coach does not throw the ball 1-1.5 m, the trainee runs forward and, with a blow from below with both hands, returns the ball to him along the middle trajectory.
4. Three players with balls are located in the attack zone with an interval of 2.5 m. The rest are built in a column one at a time in zone 5, from where they alternately run forward and knock the ball thrown by them, and then move to the right and knock the ball thrown by others, etc.
5. Same as ex. 4, but built in zone 1 and moving to the left.
6. Competitors line up on the offensive line facing the net. The coach from zone 3 throws the ball over the head of the first student, who, after moving back, knocks the ball with both hands from below, directing it to the coach. Students need to quickly move back so that before hitting the ball to be in a stable position
7. Hammarry of the ball through the net in the columns.
8. Same as ex. 4, but the ball is not thrown and goes over the net.
9. Passing the ball with two hands from below to zone 2 after moving from zone 6 to zone 1.
Learning to receive the ball after serving
1. Exercise in pairs. One practicing from a distance of 7-8 m directs the ball along the middle trajectory with a gentle blow to a partner who receives it. If the ball flies above the waist, then the student takes it with two hands from above, if below, with two hands from below.
2. Same as ex. 1, but the distance between the trainees is 10-11 m.
3. Exercise in triplets. Two students from a distance of 9-10 m alternately serve the ball to the third. When the ball is served from below by the partner, the receiver passes it with two hands from above, with the top serve, the receiver passes the ball with two hands from below.
4. Same as ex. 3, but the balls are served through the net from a distance of 6-7 m from it.
Teaching how to receive the ball after serving
1. Trainees are located on one half of the court (dispersed, regardless of the zone), the coach with the ball is on the opposite side - behind the end line. The trainer imitates various methods of delivery, the trainees carefully follow his actions and, depending on the method of delivery (according to a predetermined task), perform a step forward, backward, to the sides.
2. Three students are located in zones 1, 6 and 5, the rest take turns serving the ball. After receiving the ball is sent to zone 3.
3. Same as exercise. 2, but after receiving the ball is sent to zone 2.
4. Same as ex. 2, but after receiving the ball is sent to zone 4.
Furmanov Volleyball on the lawn, in the park, in the yard. - M: 1982 pp. 43-79
2. Volleyball "At the origins of mastery" Yu.D. Zheleznyak, V.A. Kunyansky
Moscow 1998
3. Volleyball "The Way to Victory" Y. Matsudaira, N. Ikeda, M Saito
M "FiS" 1999
4. Volleyball "Extracurricular students' activities” G.A. Kolodnitsky V.S. Kuznetsov I.V. Maslov Moscow 2011
5. Nazarenko L.D. In the classroom with high school volleyball players /L.D. Nazarenko // Physical culture at school.2005. - No. 2. p. 43-46
6. Goncharova E.D. Volleyball lesson according to the method of circular training / E.D. Goncharova // Physical culture at school. 2004. - No. 6. p. 23-26
7. Zheleznyak Yu.D. Volleyball serve technique training
Physical culture at school.2004. - No. 7. p. 29-34
Instructions for the performance of test No. 6 Problem-based learning at MCC lessons Practical part
Using the proposed information about the essence of problem-based learning, make a lesson plan using such methods.
DEFINITION PROBLEM LEARNING
PROBLEM TASKS TRAINING
-
Learn think logically, scientifically, creatively.
-
Make educational material more evidence-based and persuasive for students, to form not just knowledge, but knowledge-beliefs, which is the basis for the formation scientific
-
Promote building solid knowledge information obtained independently students, are firmly remembered, and if they are forgotten, then they are easy to restore, repeating the course of reasoning, evidence, argumentation.
-
on the emotional sphere of schoolchildren, building feelings like confidence in their power, satisfaction from intense mental activity.
-
basic search and research activities.
-
and develop a positive attitude interest in the subject, as well as teaching in general.
PROBLEM METHODS TRAINING
STAGES, LEVELS AND METHODS OF PROBLEM LEARNING
1. Preparation to the perception of the problem.
2. Creation of a problem situation.
3. Formulation of the problem.
4. Problem solving process.
5. Proof of the correctness of the chosen one solutions.
METHODOLOGICAL TECHNIQUES FOR CREATING PROBLEM SITUATIONS
-
schoolchildren to the contradiction and suggest them themselves to find a way to solve it
-
Push contradictions in practice
-
Set out different points of view on the same same question
-
Suggest class to consider the problem from different items
-
Encourage students to make comparisons, generalizations, conclusions from situations, compare facts
-
Set specific questions for generalization, substantiation, concretization, reasoning logic.
-
Suggest problematic theoretical and practical tasks.
-
Supply problematic tasks (eg. insufficient, excessive or deliberately erroneous data, with uncertainty in the formulation of the question, with limited solution time).
3 Educational technology
Active teaching methods -
Research learning approach - a set of methods and techniques that require from students of independent search truths that reproduce in teaching scientific methods of knowledge.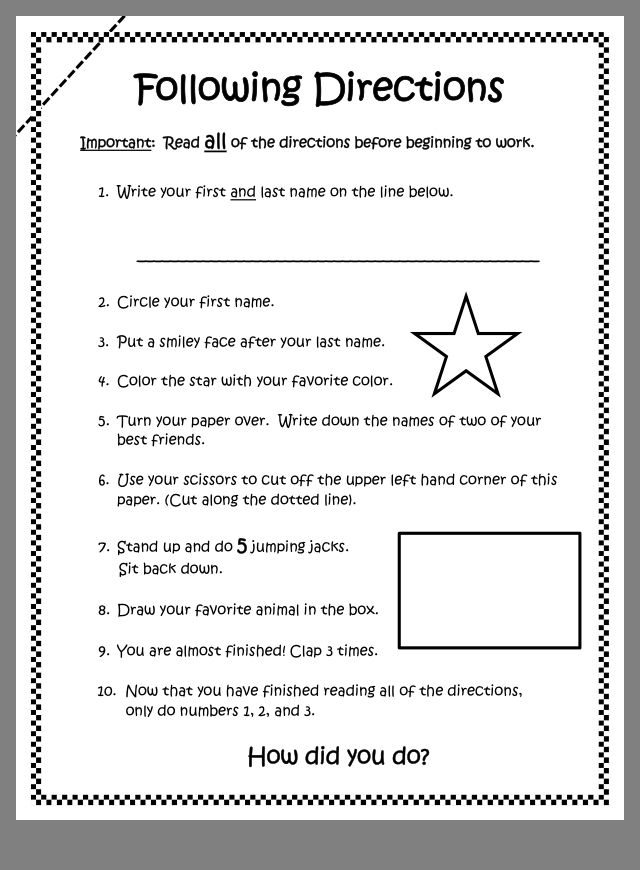
Problematic training – training based on nomination, finding a solution problems and the tasks arising from them, activating interest and thinking students, contributing to the development abilities.
_________________
4 Teaching and methodological support for students' independent work. Evaluation tools for ongoing monitoring of progress, intermediate certification based on the results of mastering the discipline
Species independent work : analysis of textbooks, programs, educational manuals, creating presentations and other visual forms of learning. Development lesson plans of various types.
Current control independent work is carried out in the form of execution and verification of control works.
Methodical instructions to the student :
Implementation of training programs in terms of practical activities, in-depth study additional materials on the lists literature to prepare for seminars classes.