Yarn hand game
Kid's guide to easy string figures, games, and tricks with video clips
Kid's Guide to Easy String Figures
Games and Tricks with Video Clips!
Maybe you already know how to do Cat's Cradle and a few other string figures? If not, then you can learn to make some string figures now. If you can already do some, then why not learn a few more and teach your friends how to do them?
Did you know that in some parts of the world kids know how to make dozens and dozens of amazing string figures? Making string figures is a pastime that kids and adults throughout the world have enjoyed for thousands of years.
String figures are really fun to make! Long before TV, or even books, people were using string figures to illustrate the stories they told around the campfire.
Video clips have been added for most figures. If you have difficulty following a description of how to make a string figure, look at the end of the description and click on Slow dial-up, Dial-up, or Broadband. To view the clips you will need Window's Media Player. For best viewing enlarge the view. If you want to view better quality clips, Right Click on the Dial-up or Broadband link (even if you don't have DSL or other high speed connection) and select "Save as" to download the clip to your computer for fast, high quality viewing anytime you want. Be sure to go to the main menu and look on other pages for more video clips.
The following figures give some idea of the great variety of string figures you can learn to do. First, you will need to learn Position 1 and Opening A, as these are commonly used to begin figures.
Position 1
Pick up one short section of the string loop on both thumbs without twisting it. Extend hands apart. The string now goes from one thumb to the next without any twists in it. The string closest to you is called the near thumb string, and the farthest one is called the far thumb string.
Now, using your little fingers, pick up the far thumb string on the fingernail side of the little fingers.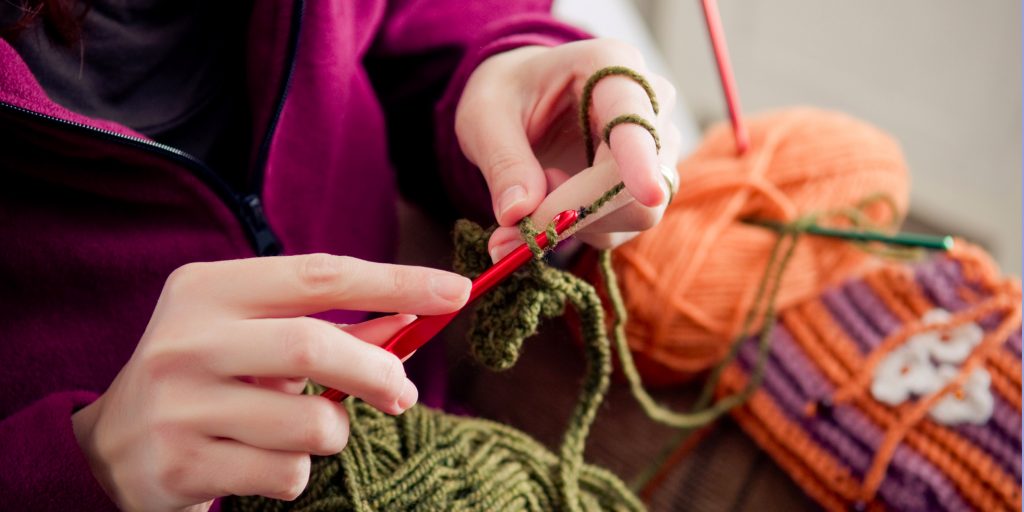 (If told to grab a string, you would curl your finger around it and either hold it with the fingerprint side or, if instructed to, twist it 180 degrees towards or away from you as directed to take the string up on the finger or thumb.) Now just
spread your hands and fingers apart to tighten the string and you have Position 1. View video: Slow dial-up, Dial-up, Broadband
(If told to grab a string, you would curl your finger around it and either hold it with the fingerprint side or, if instructed to, twist it 180 degrees towards or away from you as directed to take the string up on the finger or thumb.) Now just
spread your hands and fingers apart to tighten the string and you have Position 1. View video: Slow dial-up, Dial-up, Broadband
Opening A
Do Position 1. Use your right forefinger to move left and pick up the left palm string on the back of the forefinger.
Tighten the strings. The left forefinger then moves right, goes through the right forefinger noose, and picks up the right palm string. Unless told otherwise, tighten the strings after each step with palms facing each other, and fingers pointing up and spread apart.
View video: Slow dial-up, Dial-up, Broadband
(Opening B is the same except you start with the left forefinger picking up the right palm string.)
Here's what the strings in Opening A are called.
A Hand Catch
Do Opening A. Hold your hands out towards someone. Have them put one hand through the center of the figure. Now release the strings on both little fingers and forefingers, but keep the strings on the thumbs. You have now caught the other kid's hand.
Do Opening A again with the far string still around the other kid's wrist. Tell them to put their hand back up, from below, into the center of the figure. Let go of the strings on your little fingers and forefingers again, and pull your thumbs apart. The string will go right through their arm!
View video: Slow dial-up, Dial-up, Broadband
Cup & Saucer
Europe
Do Opening A. Move both your thumbs over the near forefinger strings and pick up both far forefinger strings (pulling the hands apart to make the strings tight is something you should do after each step unless told not to).
Now remove the lower of the two strings
, the original thumb nooses, from both thumbs.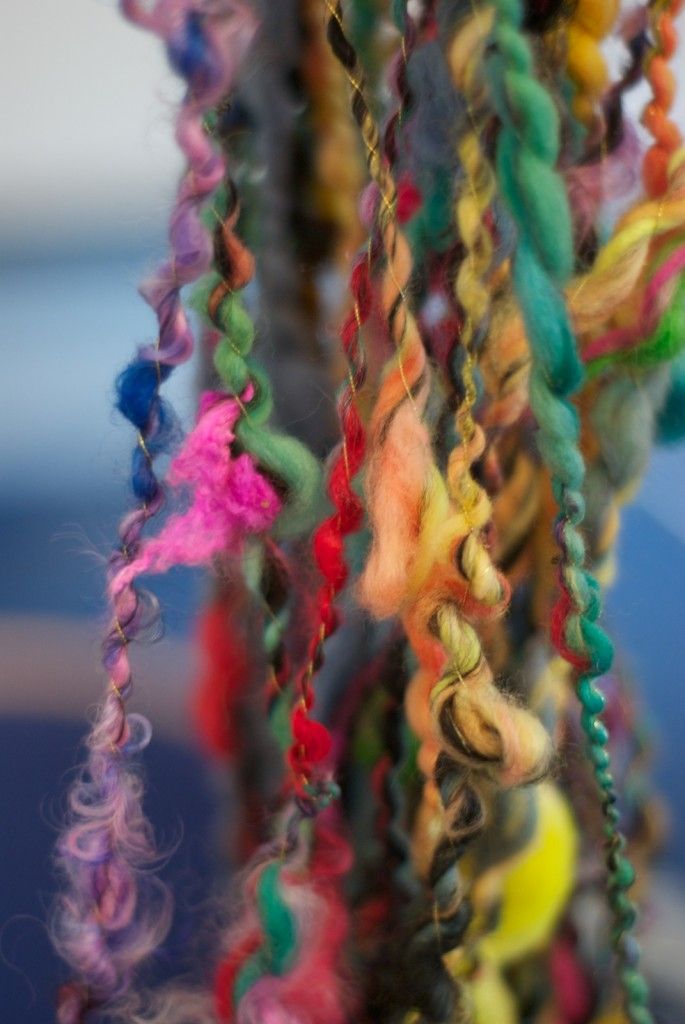 You can remove each bottom string with the opposite hand, or you can use your middle fingers to remove the bottom near thumb string up and over the thumbs (at the same time) while leaving the upper string nooses in place (or use your mouth to remove the bottom near thumb string from the thumbs). Release both little fingers and extend thumbs up.
View 27 second video: Slow dial-up, Dial-up, Broadband
View 2:36 minute video with audio: Slow dial-up, Dial-up, Broadband
Several other very simple figures can be made from Cup and Saucer. Stretched out by bringing thumbs and forefingers closer together, the Cup can pass for A Boat on water. The Witch's Hat is made by taking the middle of the near thumb string (the top of the cup) in your mouth and pulling it out, without releasing the thumbs, until a large triangle is formed. The small forefinger nooses are the brims of the hat. The Eiffel Tower is made in the same way, but thumbs are removed so the forefinger nooses are larger and resemble the base of the Eiffel Tower.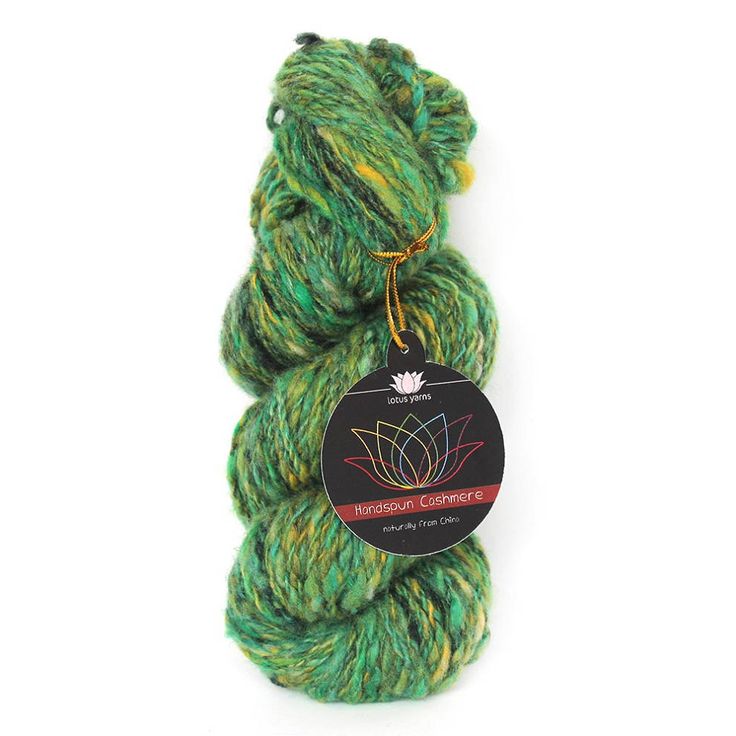
View video: Slow dial-up, Dial-up, Broadband
From the Cup, thumbs can also be rotated away from you, down, and in front of the forefinger nooses so the thumbs are pointing down with palms out to create The Outrigger Canoe.
Laurel Sharp likes to do two more variations: Start with The Eiffel Tower and work your hands back and forth to collapse the figure into an upside down Y. Now put the nooses held in each hand on your ears and release the noose in your mouth so it hangs down in front of you. This is the The Stethoscope. Put your thumb in the hanging noose, tighten it, and put it against someone's chest (or your own), then rhythmically stroke the two strings. If one is a little tighter than the other, a very good "lub-dub, lub-dub" of a heart can be heard. Take the center of the "Y" and put it on your nose leaving the two nooses on your ears so that the remaining noose hangs from your nose. You have now made The Elephant's Nose.
The Star
Alaska
Do Cup and Saucer using a short string loop or a regular size loop that has been doubled. (2) Hold your hands with fingers pointing up. Look at the center of the figure where the bottom of the cup sits on the saucer. This part is made up of three strings. Two are crossed and go to the near side of the forefingers; the other is on top and loops around the far forefinger/far thumb strings. Use your little fingers to pick up this top straight string as shown. Now release the strings on your thumbs. (3) With your thumbs move over the forefinger nooses and pick up the near little finger strings. Now release just the string noose on your right little finger. If the star doesn't look right, try using a shorter string.
This figure was collected by David Titus (March, 2001) while visiting with Yupik children from the village of Akiuk, Alaska. This figure appears to be a new invention. Most of the children in the village knew it (and many others). Even some of the Kindergarten kids could make much harder figures than The Star. View video: Slow dial-up, Dial-up, Broadband
Fishing Spear
South Pacific
Do Position 1, then use the right forefinger to pick up the left palm string, but do not pull on this string yet.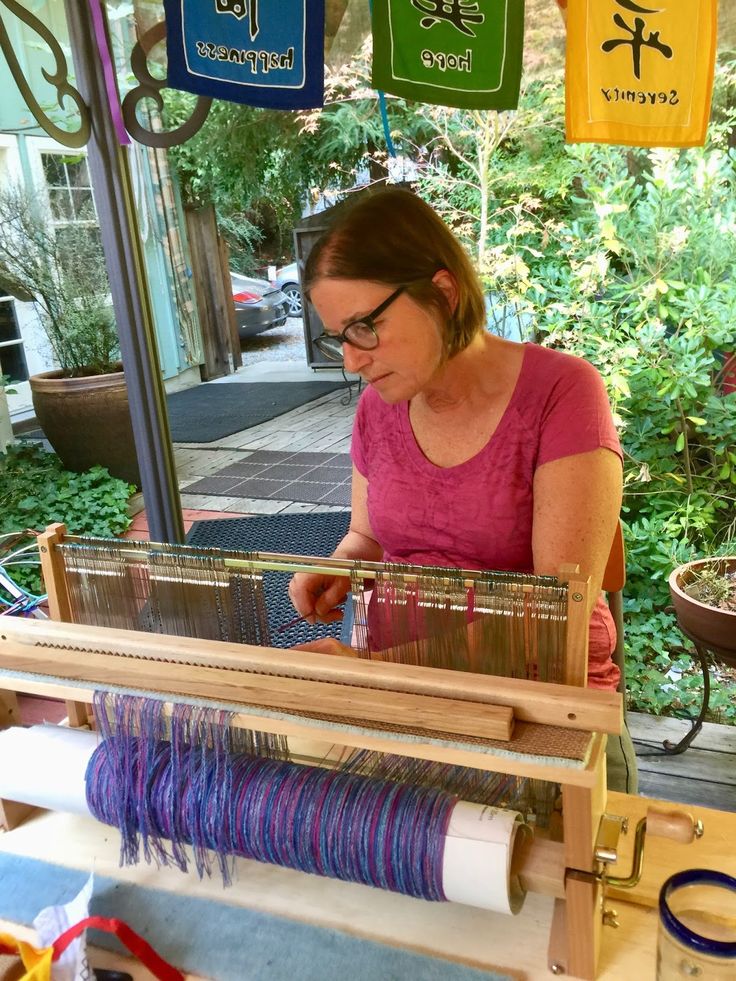 As your right hand returns to it starting position, the forefinger moves away from your body twisting the right forefinger noose 360 degrees. (2) The left forefinger then moves right, through the right forefinger noose, and picks up the right palm string just like in Opening A. (3) Release the right thumb and right little finger nooses at the same time. This figure is also called The Witch's Broom, or Turkey's Foot.
View video: Slow dial-up, Dial-up, Broadband
Dressing a Pelt
American Indian
Do Opening A. Use your thumbs to hold the near forefinger strings tight against the forefingers. Release the little fingers, but keep the hanging string loose—do not extend. Flip the hanging string out away from you so that it goes up and over all the strings, comes back towards you, and hangs over the near thumb string. Now move the thumbs down and away from you so that they go through the thumb nooses and grab the far forefinger strings that are hanging over the thumb nooses.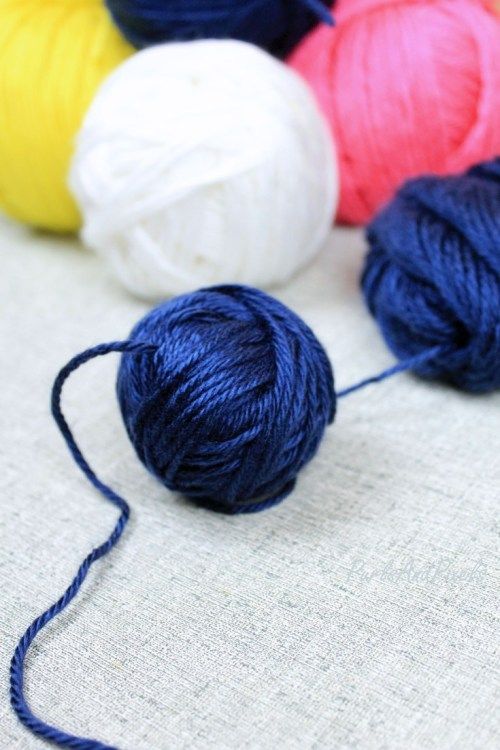 The original thumb strings will slip off. Extend the figure quickly.
The pulling through of the string reminded American Indians of pulling off the skin of a hanging animal and reversing it as it was being dressed or skinned. The figure is difficult to do quickly in one smooth motion, so competing to see who can do it the fastest is a fun game to play. Note that this figure is an upside down Cup and Saucer and can be made the same way by reversing references to thumb and little finger in the instructions for making Cup and Saucer.
View video: Slow dial-up, Dial-up, Broadband
A Moth
Zulu
Do Opening A using a short #5 or #6 string. Release thumb strings. (2) Thumbs then move over the forefinger strings and pick up the near little finger strings. Release the strings on the little fingers. (3) Thumbs next pick up the near forefinger strings. Now remove (navaho) the lower thumb strings (which is easiest to do using the middle fingers to lift them off and over the thumbs while leaving the upper thumb strings in place).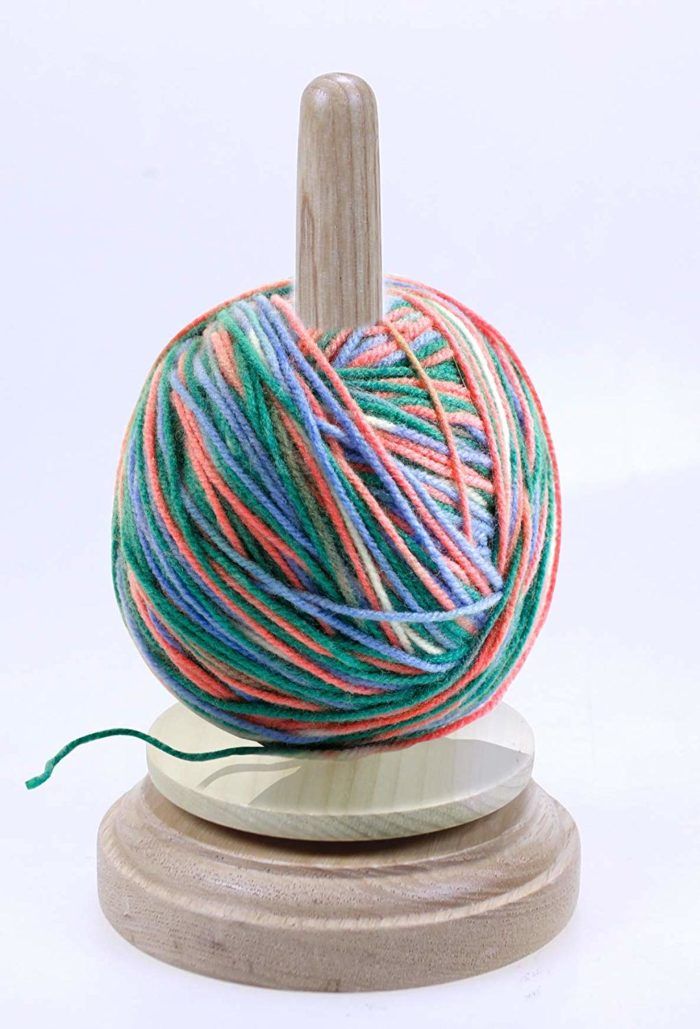 (4) Forefingers move down and grab the top string that goes around the middle of the thumb/forefinger noose, then, moving away from you, extend the forefingers up and palms out.
View video: Slow dial-up, Dial-up, Broadband
The Mouth
Pacific
Double up a normal #8 string or use a short #4 or #5 string, and do Position 1. (2) Forefingers pick up the far little finger string. (3) Thumbs then move over the near forefinger strings and pick up the far little finger strings (which could also be called the far forefinger strings) and remove the lower thumb strings (or simply let the original thumb string slip off as you pull the far little finger string through). (4) Open and close your thumbs and forefingers to make the mouth talk. Cover your mouth with your forearm and give the mouth a voice.
This figure is also called Crab's Mouth, but the Hawaiians think it looks more like the twitching posterior of a pig. View video: Slow dial-up, Dial-up, Broadband
You can also release your little fingers and turn thumbs and forefingers pointing away from you to create The Bone.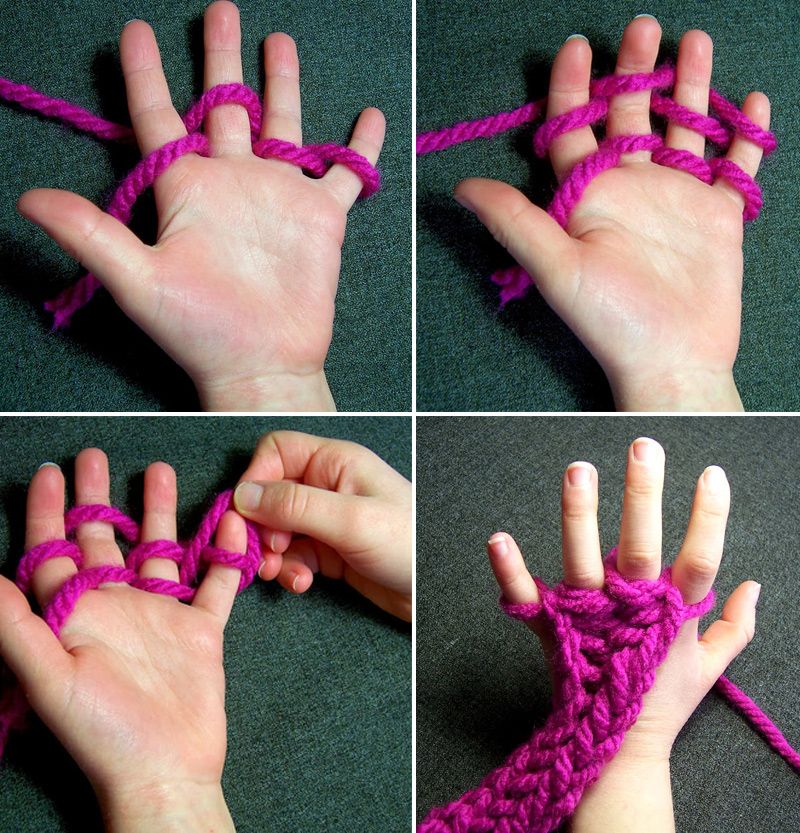
Man Climbing a Tree
Australia
Do Opening A. Little fingers then move over all strings and pick up the near thumb strings on the tips of the little fingers to keep it separate from the original string. (2) Grab and hold tight the palm strings with the forefingers, then remove the bottom little fingers noose (holding the top string with your middle fingers while letting the lower string slip off). (3) Release the thumb nooses while letting the bottom forefinger noose slip over the forefinger. (4) Depress the far little finger string using your foot, a book, etc. (5) Extend hands upward while letting the forefingers alternately slip to see the man climbing a tree.
View video: Slow dial-up, Dial-up, Broadband
Sawing Wood
U.K.
Use all four fingers to pick up the string noose—the near hand string goes between the thumb and forefinger. Grab the near hand string close to the thumb with the opposite hand and twist it around the hand, then do the same for the other hand. (You could also grab the near hand string with all fingers and twist the string up onto the hands in one motion.) There is now a palm string and two dorsal strings across the back of your hands. (2) Use the forefingers to pick up the palm strings as you would in doing Opening A. Use your mouth or teeth to hold on to the center of the near hand string that goes straight across from hand to hand. (3) Have a second person grab the straight string on the far side of your hand. (4) Turn your forefingers away from you, bend them down and grab the noose that goes around the forefingers while letting the strings going around your hand slip off. Pull both hands apart, then let the other person pull their string, then you pull your strings, and so on, to saw wood.
View video: Slow dial-up, Dial-up, Broadband
Variation 1: You, as person A, makes Opening A. Person B then picks up your near thumb string on their right thumb and little fingers as in Position 1, and likewise they take up your far little finger string with their left thumb and little finger. Person B then does Opening A over your strings. Both of you then release your thumb and little finger strings while holding on to your forefinger strings. Now you can saw wood vigorously without pulling any teeth out.
Variation 2: Two people take up the string loop as in Position 1 with your palms facing theirs. You will share far little finger strings in common. Now each of you, using only your right hands, do Opening A. Next use your left hands to do Opening A over top of your right hand strings. Both of you then release your thumb and little fingers and saw wood by alternately pulling right then left hands.
Framework for a Hut
Africa
Take up Position 1 on the left hand only. With the right hand, move left and through the hanging string noose, then reach around to the back of the left hand. With your right thumb and forefinger grasp the string going across the back of the left thumb. (2) Now pull this string down and through the hanging string noose just far enough to transfer it to the left forefinger without twisting it. (3) With your right thumb and forefinger hold tight to the left palm string near the left little finger and transfer it to the left thumb. (4) Again, using your right thumb and forefinger, move over top of the left hand, reach around to the back of the left hand and grab the string going around the back of the left hand. Pull this string out and over the left hand to remove it, and then slowly extend your right hand up while letting the strings on the left hand slip to raise the framework for a hut (or teepee?)
View video: Slow dial-up, Dial-up, Broadband
You can turn this figure upside down so that the left hand becomes The Parachute with its cords holding up the parachutist.
The Mouse
World Wide
With the left hand held with the palm down, hang the string noose over the left thumb and fingers.
(2) With your right forefinger, move away from you and pick up the left near hanging thumb string, then move left, going between the thumb and forefinger, and grab the string going across the back of the left thumb and forefinger.
Pull this string a short distance out, then twist your right forefinger towards you to bring it to the normal upright position, but do not extend hands apart.
Instead touch your right forefinger to the left forefinger and transfer the noose from the right forefinger to the left forefinger.
(3) Now take your right forefinger and, moving away from you, pick up the left hanging palm string. As before, move left, going between the forefinger and middle finger, and grab the string going across the back of the left hand.
Pull this string a short distance out, then twist your right forefinger towards you to bring it to the normal upright position without extending hands apart. Transfer this noose to the left middle finger by touching the tip of it with your right forefinger and letting the noose slip onto it. Repeat this pattern for the left ring and little fingers.
4) Release the left thumb. This noose is the mouse. Attack the mouse with your left thumb while pretending it is a snake. With your right thumb and forefinger grab the left near little finger string that hangs down just below the left little finger and pull the string so the mouse can make its escape by running away through the trees.
View video: Slow dial-up, Dial-up, Broadband
This figure is also known as The Yam Thief and many stories can be told about what is going on. One story is about a row of birds sitting on a fence and suddenly taking flight. Another is about a cat and a mouse. Another is about a strong but stupid man trying to pull up a root by pulling before the thumb is released. The clever village weakling then releases the thumb and easily pulls up the root to the amazement of all. So make up your own story.
Thumb Catch
Pacific
Start with Position 1 using the left hand only. The right little finger then moves left, through the hanging string noose, and picks up the left near thumb string. Extend hands apart. (2) The right thumb then picks up the right near little finger string. This is a twisted Position 1. Now do Opening A. The thumbs then move over, through the forefinger noose, down, toward you, then up. (3) Release the forefinger nooses, then release the little fingers and extend to catch the thumbs in a snare.
View video: Slow dial-up, Dial-up, Broadband
If, before you release your little fingers, you put all fingers from below into the thumb nooses and transfer them to the wrists, then release your little fingers, you will have made The Handcuffs. Alternatively, transfer only one thumb noose to your wrist and hold the other open with your fingers, then ask an innocent bystander to put their hand through it. Release little fingers to cuff and arrest them.
Batoka Gorge
Africa on Zambesi River
Drape the string loop over your right wrist keeping the two strings separated without any twists. (2) The left hand then moves to the right and through the two hanging string nooses. Extend hands apart. There should be two crossed strings, and a near and far wrist string. (3) The little fingers pick up first the far then the near crossed strings. (4) Now flip the near wrist string that goes straight across up and over the hands. The near little finger strings run diagonally down to the far wrist string. (5) Pick up these near little finger strings on the thumbs, and then remove the wrist nooses.
View video: Slow dial-up, Dial-up, Broadband
This is a nice African figure, but for most of us who have never been to Batoka Gorge on the Zambesi River below Victoria Falls, it doesn't quite look like a gorge. The figure is said to look like the river as it zigzags back and forth through Batoka Gorge below the falls. If you want to invent new names for figures, that's okay.
Casting a Spear
Africa, Pacific
Do Opening A. (2) Left forefinger picks up the right forefinger noose from above on the tip of the finger removing it from the right forefinger, then the right forefinger moves over the back of the left forefinger and picks up the original, bottom left forefinger string removing it from the left forefinger. The left forefinger noose now goes through and around the right forefinger noose. (3) Release the right forefinger to cast the spear while holding the right far thumb string and right near little finger string close together to form the shaft of the spear which has three points on the other side (making it a fishing spear). (4) Now with your right forefinger go from below up into the left forefinger noose and pick up the original right forefinger string. (5) Release the left forefinger this time to cast the spear the other way. Again pick up the released noose and cast again and again.
View video: Slow dial-up, Dial-up, Broadband
The Wink
Pacific
Pick up the string loop with your right forefinger and middle finger only, with palms down and the string hanging down. (2) With your left thumb and forfinger take hold of the right far middle finger string just below the middle finger and twist it around the middle of the right forefinger/middle finger one time, then transfer it to the right thumb. (3) Now pick up the top forefinger/middle finger string with your right thumb, and remove the original string that was on the right thumb. (4) With your left thumb and forefinger grab from below the string that hangs down from the right forefinger over the right palm and transfer it to the right thumb. Now grasp the two hanging strings with your left hand and pull to make the eye wink.
View video: Slow dial-up, Dial-up, Broadband
And a special thanks to Jim Brennan for the animation to the right.
Checkout his collection of tricks at Diabolo Tricks
- Visit our Zazzle store:
- Fine Poster Art
Fine poetry and art go together. Support this site: Visit our Zazzle store featuring ultra hi-res images of artworks, Hubble/ESA/NASA space images, Mandelbrot fractals, maps and more. Images up to 525 megapixels allow for fine printing at the largest sizes. Give a fine print as a gift that could hang around for a hundred years or more.
5 String Games for Kids
- View Larger Image
Share This Story, Choose Your Platform!
If the sight of your children staring zombie-like at a screen sends shivers down your spine, why not try introducing them to an old-fashioned hands-on activity like string games.
Remember string games like cat’s whiskers? Jacob’s Ladder? Witch’s broom? If it’s ringing a vague bell but you can’t remember how it’s done, Kidspot has devised a string figure refresher course on your behalf.
In this article you’ll find five fool-proof how-to videos that will get you started on some basic string games.
Spending ‘quality time’ with our kids is something we angst about in Western culture and we do all sorts of crazy, elaborate things to try to be a good parent. But a core essence of parenting is simply the passing down of stories and ideas to the following generation.
If you spend some time learning a few string figure, then sit down to teach them to your children, you’ll be engaging in some solid quality time with your kids. You’ll also be keeping the ancient art of string tricks alive through the digital age.
String games: a history
The origin of string games dates right back to the Greeks in the 4th century AD. Since then, many cultures have taken up the practice of string figures, largely to illustrate stories. The cultural presence of string figures is far-reaching: from our very own indigenous Australians to the Inuit in the Arctic to the Zulu in southern Africa.
It’s no accident that string figures are so prevalent in so many cultures across the world.
- They’re a great development tool for a few key cognitive areas that are crucial for your child’s intelligence quotient: patterns and relations, geometry, spatial awareness and problem solving.
- They’re a classic parent-to-child cultural hand-me-down.
If you’re still thinking it’s too old-fashioned and hokey, think about this: string figures are just an ancient form of Tweet; a little idea passed on from one person to the next, eventually connecting a whole lot of us across the planet with common knowledge.
So get to it and learn some string tricks to pass on to your kids.
Check out our easy string game videos
We’ve collated five simple figures in this article, but there are so many more, and a lot of them lead to others. For example, once you know the Cup and saucer you can also do the Eiffel Tower, Stethoscope, and Star string figure, while Jacob’s Ladder leads to the Witch’s hat.
Cat’s whiskers
Cat’s whiskers is probably the string figure you will remember from the schoolyard. It’s handy because once you can do cat’s whiskers, you’re halfway to Jacob’s Ladder.
- How to make the Cat’s whiskers string figure
Jacob’s Ladder
Jacob’s Ladder: We used to call it the Harbour Bridge down here. It looks complex, but once you get the hang of the “Navaho” move it’s easy as.
- How to make the Jacob’s Ladder string figure
Butterfly (or moth)
The Butterfly string figure is an old tribal classic that originates from Native American and Zulu cultures. They call it “the moth”. But we thought “the butterfly”’ was a more enticing name.
- How to make the Butterfly string figure
Cup and saucer
Like cat’s whiskers, cup and saucer leads to a number of further figures. Keep watching the video to see the Eiffel Tower as well.
- How to make the Cup and saucer string figure
Witch’s broom
Witch’s broom is a simple but effective one, also known in tribal cultures as “the spear”. Watch closely for the double twisted loop at the beginning of the figure.
- How to make the Witch’s broom string game
Your string game glossary
If you’re going to go searching for more figures, here’s some terms you may come across. We’ve referred to fingers as thumb, pointer finger (or forefinger), middle, ring and pinkie. Some instructions refer to the: thumb, index, middle finger, ring finger and little finger.
- Position 1 – the most common starting position with the string running across the palms and behind the thumb and pinkie on each hand.
- Palm or palmar string – the string that runs across the palm in position 1.
- Transverse or frame strings – the strings that run straight across from one hand to the other.
- Opening A – (see videos) the beginning to most string figures – hooking the forefinger through each palmar string and pulling the hands apart so that there is a loop on each thumb, forefinger and pinkie.
- To Navaho, or pass over – to lift the lower loop on a finger (or thumb) up and off.
Thanks to Kidspot Australia for creating the instructional videos.
Threads for carpet embroidery - how to choose? ⦉tatdot.com⦊
The most frequently asked question from beginners that I hear is what kind of thread is needed for carpet embroidery?
I agree, it is very difficult to understand what exactly to buy without knowing the intricacies of the matter.
But the carpet technique is very loyal to the master, and allows you to embroider almost anything.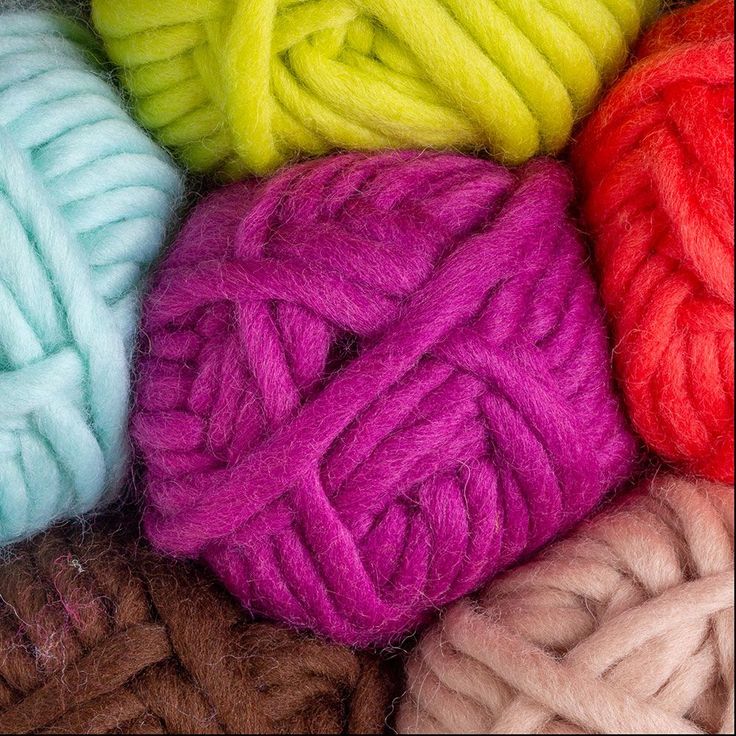
Yarn - the most popular yarn for carpet technology
Yarn can be of any brand, any color and with any composition. All this matters only for the specific product that you are going to embroider. Do you want a wool pillow or an acrylic one? Soft thread or harder?
For the technique itself, only one thing is important - the thickness of the thread. The main thing to know is that the thread must move freely in the needle. When you insert the thread into the needle, move it back and forth. If it moves freely and you don’t have to pull it, it fits.
However, if you use a thread that is too thin for your needle, it will fall out of the fabric. This happens because the needle makes a hole in the fabric, approximately the size of the diameter of the needle. And if the thread does not fit the needle and is too thin, it simply cannot close this hole and create a loop.
You will immediately understand that the thread is wrong. If the thread is too tight in the needle, the loops will not stay on the back of the fabric. The needle seems to "hold" the thread, and when you pull the needle out of the fabric, the thread trails behind it. If the thread is too loose, then it will fall out of the fabric.
I came up with a system for choosing yarn for needle , depending on the recommended needle size.
Needle size is an indicator of the thickness of the yarn, which is important when knitting. But it is also useful to us. The needle size icon looks about the same for many manufacturers and is always written on the packages. This icon is most often like this.
So how do you choose yarn for carpet embroidery?
- for a Lavor needle with a diameter of 1-3 mm and other needles with a similar diameter, yarn with needle sizes from 3 to 4 is suitable. 2 (e.g. YarnArt Jeans, YarnArt Ideal, YarnArt Elite, Alize Cotton Gold Hobby, Kartopu Hola, YarnArt Begonia, YarnArt Style, YarnArt Cotton Soft).
- For a Lavor needle 4 mm in diameter and other needles with this diameter, yarn with a needle size of 4 to 5 is suitable (for example, Alize Alpaca Tweed, Alize Real 40 Plus).
- For Oxford needle No. 10 regular, Lavor needle with a diameter of 5 mm, new Lavor needle with a diameter of 5.5 mm and similar needles, threads with needle sizes from 6 to 7 are suitable (for example, YarnArt Merino Bulky, Nako Sport Wool, Alize Superlana Midi , Vizell Baby Smile).
In practice, you will quickly learn to understand "by eye" which threads for carpet embroidery will suit you.
My work, embroidered with threads YarnArt Jeans and fine needle LavorFloss for carpet embroidery
Mouline thread is also suitable. Fold the thread 4-6 times and use with the thinnest Lavor nozzle or similar needles with a diameter of about 1 mm.
The pattern looks very nice if you make contours using floss. Subtle and jewelry.
Yes, you will embroider a little longer than with thick yarn, but you will get a very neat pattern.
Fine thread drawing by master jay_works_ukraineOther materials that can be embroidered
Western craftsmen often use unusual but interesting materials for embroidery. For example, raffia, cord, strips of fabric.
If you have a T-shirt at home that you are definitely not going to wear, you can give it a second life. Just cut it into thin strips of fabric and thread it into the needle. The drawing will definitely turn out to be very unusual and textured!
Embroidery with stripes of fabric by Arounna Khounnoraj Raffia embroidered bag by Rose PearlmanTypes of yarn for hand knitting
Content
- Animal yarn
- Vegetable yarn
- Synthetic yarn
- Fancy yarns
Various types of yarn are used to create knitted products. It all depends on the model, the season, the desired characteristics of the finished item. In the assortment of shops today you can find a huge number of different yarns for every taste. And all of it can be conditionally divided into several groups. Firstly, it is a natural and non-natural yarn. Accordingly, one is made of fibers of natural origin (wool, linen), the other is made of artificial ones. Also often there are balls of combined threads, this technology allows you to combine the beneficial properties of natural and synthetic materials. Secondly, the yarn can consist of one or two threads, the knitting density and the heat capacity of the finished product depend on this. Also, the threads in the ball can be twisted tightly or loosely, this affects the volume of knitting. Well, in general, yarn is conditionally divided into summer and winter: linen, cotton and viscose are suitable for the warm season, wool is useful for cold weather.
Animal yarn
Natural yarn is made from the wool of sheep and goats, which is obtained by combing animals. She has her undoubted advantages: she perfectly retains heat, does not produce static electricity during friction, woolen things are light and comfortable to wear. But at the same time, wool products can “sit down” after washing in very hot water, pellets form on them faster, and when worn for a long time, they lose their shape and stretch. This yarn is good for winter things with both smooth and voluminous patterns.
Yarn of animal origin is divided into the following types:
1. Cashmere. This material is obtained by combing wild mountain goats found in the Indian state of Kashmir. A pound of wool produces only 150 g of down, so pure cashmere is very expensive and is often added to other types of yarn. With proper care, things made from this yarn will last a long time, while remaining light and pleasant to wear.
2. Alpaca. This yarn is made from the wool of the South American llama species of the same name, and is highly valued for its variety of shades - from white to brown and black. In addition, it is resistant to the appearance of pellets and is much lighter than sheep.
3. Mohair. High sheen yarn from young angora goats. The threads in it are like silk - delicate and smooth, so other fibers are added to fasten them together, that is, there is no pure mohair. Its highest quality varieties are kid mohair and super kid mohair from the wool of half-year-old kids.
4. Angora. Very soft and light, but at the same time impractical yarn. It is made from Angora rabbit hair, which is very short and difficult to twist into long threads, so when worn, the hairs can come out and stay on outerwear.
5. Merino wool. This yarn is recommended for knitting children's garments as it does not irritate the skin, is durable and lightweight. It is obtained from the wool of fine-fleeced sheep. According to the thickness, it is divided into two types: extra fine and super fine (extra thin and super thin).
6. Camel wool. Like alpaca, this yarn has many natural colors and is therefore not dyed. For its production, two-humped camels of the Bactrian breed are used. The fluff from the chest of small camels has the greatest value.
7. Plain wool yarn. Perhaps the most controversial of the entire list. On the one hand, it is warm and durable, even, according to some, it has healing properties, on the other hand, things made from such wool are prickly and can provoke allergic reactions.
Vegetable yarn
The fibers of some plants are well suited for making light summer yarn from them, which is well breathable and absorbs moisture.
Types of vegetable yarn:
1. Len. Linen yarn is a great option for hot weather. It is difficult to paint it in other colors, so gray-beige products are often decorated with decorative elements. Linen dries quickly after washing and does not stretch.
2. Silk. The yarn is in a sense of animal origin, since it is made from silkworm cocoons. It is usually not used in its pure form, but is added to cotton or linen to give shine and elasticity, and silk things are less wrinkled.
3. Cotton. Not as durable as silk and linen, but does not fade in the sun and is machine washable. After drying, things made of cotton may shrink, which must be taken into account when determining the size of a future product.
4. Bamboo fiber. Has natural antiseptic properties, deodorizes the skin well and is much more breathable than cotton yarn. It is easy to dye and retains the acquired color for a long time. Many consider bamboo thread to be the best yarn of our time.
5. Hemp yarn. Quite unpleasant to the touch due to strong stiffness, which makes this yarn ideal for making bags, rugs, napkins for hot dishes on the table.
Synthetic yarn
It is made either from waste from the production of other types of yarn of natural origin or other industrial products, or completely from chemically synthesized fibers.
Main types:
1. Viscose. This yarn is based on wood (spruce, pine, etc.), crushed, boiled in an alkali solution, bleached and turned into threads. In its pure form, it is very fragile, it can tear even when squeezing the product during washing. Therefore, such fibers are most often added to other types of yarn.
2. Acetate fiber (silk). Made from cotton waste or wood. Positive qualities include its ability not to let moisture through, to retain color for a long time, not to wrinkle and to be absolutely hypoallergenic. However, such yarn is not resistant to high temperatures (the thing can be easily burned with an iron), it is highly electrified and immediately deteriorates when some solvent enters.
3. Synthetic yarn. This group includes a great variety of items: capron, lycra, nylon, polyester, etc. Fibers with characteristics such as strength and elasticity are used for the manufacture of sports items (socks, golfs, etc. ). And more often, synthetic yarn is added to natural yarn in a ratio of one to three in order to improve the properties of the latter.
Fancy yarns
A variety of natural and synthetic yarns allows you to create interesting combinations of threads from which unique things are obtained.
Types of combined yarn:
1. Boucle. A fabric made from this yarn acquires an interesting embossed texture due to the fact that the thread has spherical thickenings. Great for simple knitting, but complex patterns will not look good.
2. Tweed. It is interesting in that there are bright color blotches in the plain fiber. This yarn is made from natural wool with the addition of cotton or synthetic fibers. It has the characteristic features of wool yarn, but is more durable and allows you to create products with unusual color schemes.
3. Chenille. A yarn that feels like velvet. Produced by combining cotton and acrylic fibers. Products from it are not subject to the formation of spools, but if worn under outerwear, they can be rubbed and covered with “bald spots”.
4. Plaid (or twisted) yarn. Consists of fibers that are twisted threads of various shades and textures. Products made from such yarn are original in terms of color, and are also distinguished by strength and low thermal conductivity.
5. Knitted tape. Yarn with a flat thread, quite expensive due to the complexity of production. Choosing it to create a product, you can play around with the geometry a lot, laying the loops at different angles and even making a relief if you put the thread sideways.
6. Pile yarn. It is created on the principle of twisting, but using threads with a long pile, which makes the finished product look like fur.