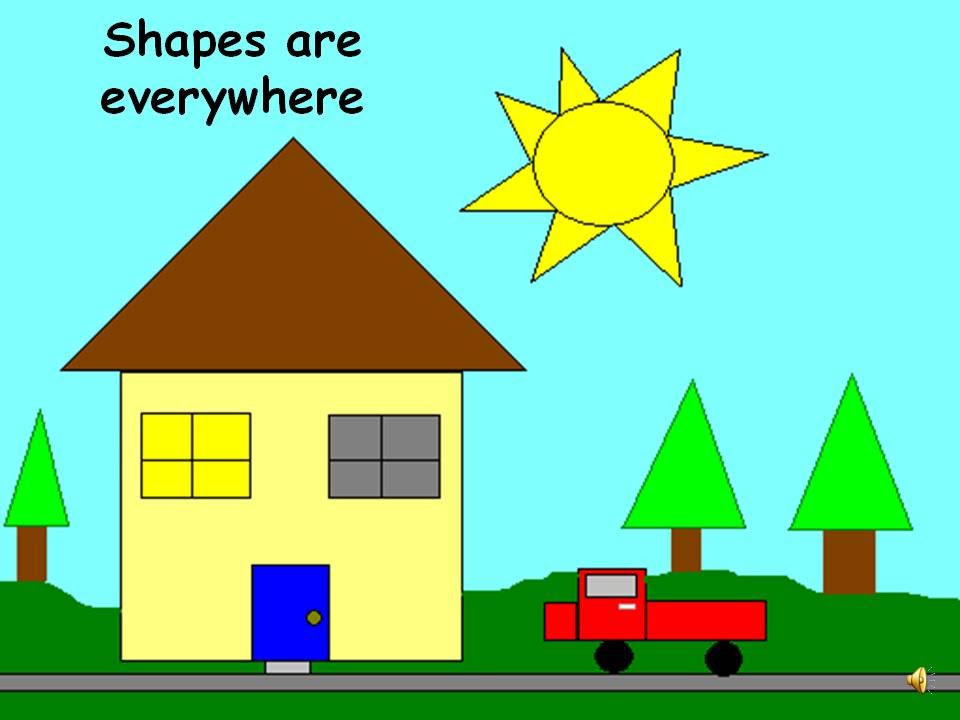
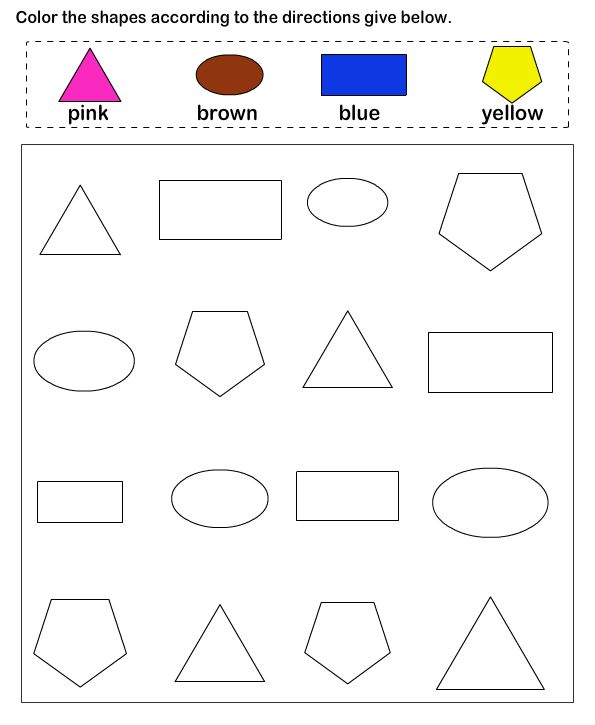
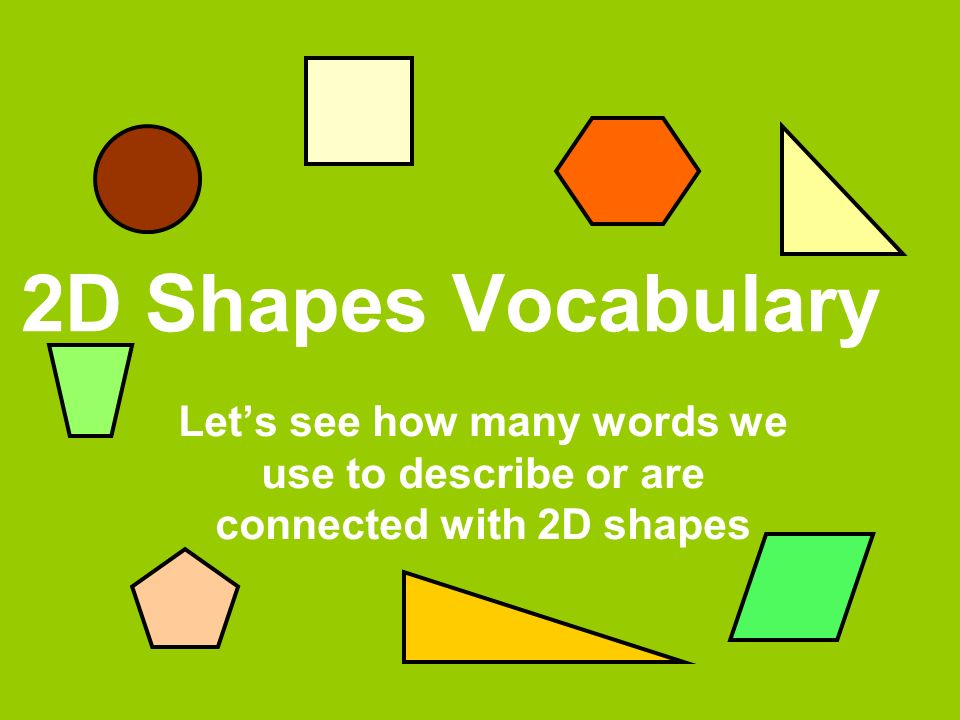
2D shapes around house
What are Examples of Geometric Shapes in Real Life?
Geometric shapes are everywhere. No matter where you look, almost everything is made up of both two-dimensional (2D) and three-dimensional (3D) geometric shapes. Keep reading for real-life geometric shape examples that make up the world around us.
geometric shapes examples in street signs
Advertisement
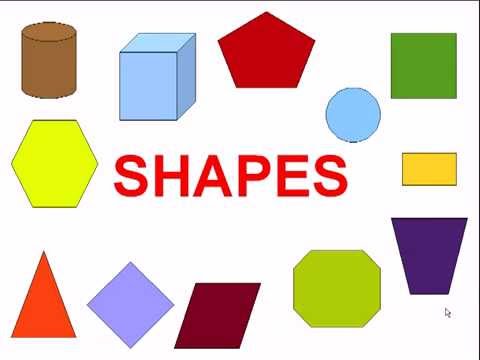
Examples of 2D Geometric Shapes
Two-dimensional shapes are flat figures that have width and height, but no depth. Circles, squares, triangles, and rectangles are all types of 2D geometric shapes. Check out a list of different 2D geometric shapes, along with a description and examples of where you can spot them in everyday life.
Keep in mind that these shapes are all flat figures without depth. That means you can take a picture of these items and you can still determine their shape. The same isn't true for three-dimensional shapes.
Circle Examples
A circle is a round shape with the same radius from a fixed point in the center. Examples of circles in real life include:
- pizza pies
- cookies
- wheels of a bike
- clock faces
- dinner plates
Advertisement
Square Examples
Four equal straight sides with four right angles make a square. Some real-life examples of squares are:
- square rubber stamps
- square tiles on the floor
- square paper napkins
- chess boards
- virtual keyboard keys
Triangle Examples
Triangles are three-sided figures with straight sides. There are lots of different types of triangles, depending on their angles. Examples of triangles in real life are:
- slices of pizza
- a sandwich cut diagonally
- some tortilla chips
- sails on a boat
- yield traffic signs
Rectangle Examples
Like a square, a rectangle has four straight sides with four right angles. However, two sides are shorter than the other two sides. Check out these examples of real-life rectangles:
- chapter book covers
- cell phones
- some picture frames
- dollar bills
- some ice cream sandwiches
Pentagon Examples
Pentagons are shapes with five sides of equal length. They are less common than quadrilaterals, which have four sides, but can still be found in real life. Some examples of pentagons are:
- The Pentagon building
- black sections on soccer balls
- home plate in baseball
- traffic crossing signs
Hexagon Examples
When you add one side to a pentagon, you get a hexagon. A hexagon has six straight sides of equal length. Check out these examples of real-life hexagons:
- ice crystals
- snowflakes
- beehive cells
- outline of a metal nut
- white sections on soccer balls
Octagon Examples
Eight straight sides, typically of equal length, make an octagon. They are more common in real life than you may think. Some examples of octagons are:
- stop signs
- open umbrellas
- UFC ring
- poker tables
Advertisement
Trapezoid Examples
A trapezoid is a four-sided figure with just one pair of parallel sides.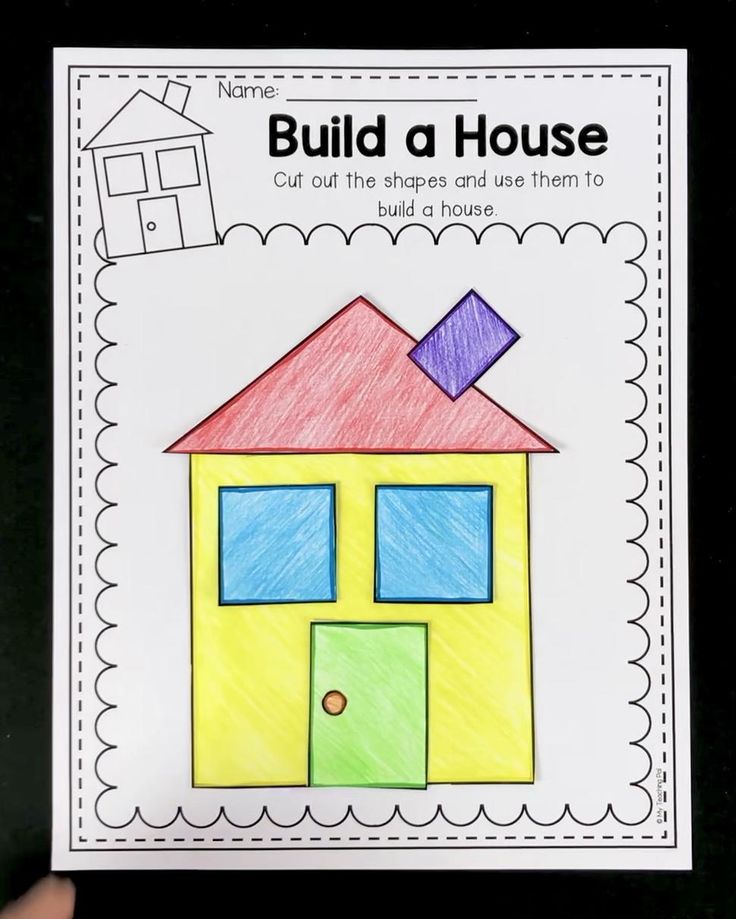 You can find trapezoids in the following examples:
- the trusses on bridges
- some handbag sides
- a half-eaten piece of pizza
- musical dulcimer
Advertisement
Examples of 3D Geometric Shapes
Unlike two-dimensional shapes, three-dimensional shapes have width, height and depth. Examples of 3D shapes include pyramids, spheres and cubes. Take a look at these everyday 3D geometric shape examples.
Some of these shapes are interchangeable, of course. For example, a bag might not always be a parallelogram, as there are certainly circular bags and other types possible. This list is also not exhaustive either, as there are many other two-dimensional and three-dimensional geometric shapes.
Advertisement
Sphere Examples
Spheres are round solid figures. Like circles, they have a radius in the center that is equidistant to every point on the sphere. However, unlike circles, they have volume and depth. Examples of real-life spheres are:
- basketballs
- planets
- oranges
- marbles
- tennis balls
Cube Examples
Each of the six faces of a cube is a square. When they are put together in a 3D cube shape, also known as a square prism, they create depth. Some examples of cubes include:
- six-sided dice
- sugar cubes
- square building blocks
- Rubix cubes
- square packing boxes
Cone Examples
A cone has a circular base that tapers to one point. Cones are very common in everyday items, including:
- traffic cones
- waffle ice cream cones
- party hats
- Christmas trees
- funnels
Cylinder Examples
Cylinders are three-dimensional figures with parallel sides and a circular cross-section. Some real-life examples of cylinders are:
- cardboard paper towel tube
- straight pipes
- drinking glasses
- chapstick tubes
- cans
Ellipsoid Examples
An ellipsoid is a sphere that is not perfectly round because it has been flattened at two sides. Also known as a spheroid, an ellipsoid creates a 3D oval effect. Some examples of ellipsoids are:
- footballs
- eggs
- some of Saturn's satellite moons (Mimas, Enceladus, Tethys)
Rectangular Prism Examples
A rectangular prism is a 3D figure where one pair of opposite sides are the same shape, connected by straight, parallel sides. They have four rectangular faces and two square faces. You can find rectangular prisms in these examples:
- sticks of butter
- bricks
- cameras
- cereal boxes
- rectangular packing boxes
Advertisement
Triangular Prism
Triangular prisms are just like rectangular prisms, except that their square faces are triangles, making them three-sided prisms. Examples of real-life triangular prisms include:
- tents
- wedges of watermelon
- wedges of cheese
- slices of cake
Pyramid Examples
A three-dimensional figure with one flat side and edges emerging to come together at a point is a pyramid. They can have any shape with three or more sides as their base, including a triangle (triangular pyramid), square (square pyramid) and pentagon (pentagonal pyramid). Examples include:
- the Great Pyramid of Giza
- the roof of a house
- some free-standing cheese graters
- glass Lourve Pyramid
Advertisement
Shapes That Build Our World
The world around us is built out of 2D and 3D shapes. Having a basic understanding of geometric shapes and where they can be found in everyday life is a great start to a mathematical education. For more mathematical practice, check out these basic math terms to get you started. You can also take a look at some examples of monomials and polynomials if you're ready to move on to algebraic concepts.
Staff Writer
Shapes – Definition with Examples
What are Shapes?
In geometry, a shape can be defined as the form of an object or its outline, outer boundary or outer surface.
Everything we see in the world around us has a shape. We can find different basic shapes such as the two-dimensional square, rectangle, and oval or the three-dimensional rectangular prism, cylinder, and sphere in the objects we see around us. These geometric shapes appear in objects we see as credit cards, bills and coins, finger rings, photo frames, dart boards, huts, windows, magician’s wands, tall buildings, flower pots, toy trains, and balloons.
Different Types of Shapes
Shapes can be classified into open and closed shapes.
| In geometry, an open shape can be defined as a shape or figure whose line segments and/or curves do not meet. They do not start and end at the same point. | In geometry, a closed shape can be defined as an enclosed shape or figure whose line segments and/or curves are connected or meet. They start and end at the same point. |
Closed geometric shapes can further be put into two broad categories, namely two-dimensional and three-dimensional shapes.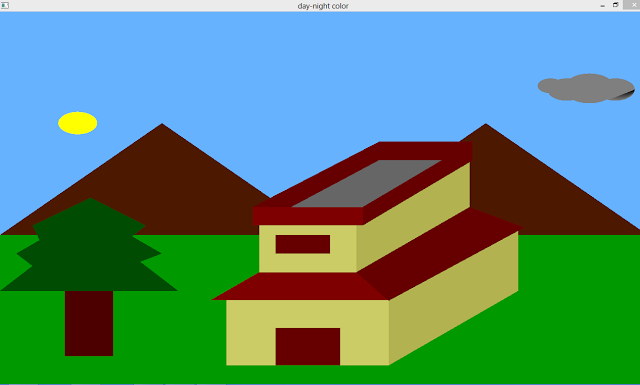
| The 2-Dimensional shape is flat. | A 3-Dimensional Shape is a solid shape. |
| It has two dimensions, that is, length and width. | It has two dimensions, that is, length, width, and depth. |
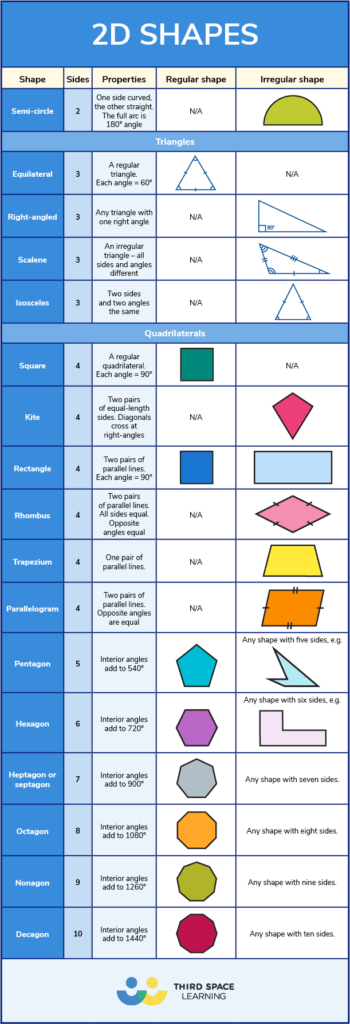
Here’s a list of 2-D or two-dimensional shapes with their names and pictures:
| Two-Dimensional Geometric Shapes |
Here’s a list of 3-D or three-dimensional shapes with their names and pictures:
| Three-Dimensional Geometric Shapes |
The color, overall size, and orientation called the non-defining attributes of a two-dimensional or three-dimensional shape do not define or affect the shape in any way. These attributes can change without any effect on the shape.
On the other hand, defining attributes such as the number of sides (parallel or non-parallel, straight or curved), vertices, edges, and faces of a shape, whether the shape is open or closed, and the angle measures determine the shape of a two-dimensional or three-dimensional object. Any change in these defining attributes will change the shape.
Solved Examples on Shapes
Example 1: Name the shapes.
- A polygon with 6 sides.
- Outline of a door.
- When you fold square corner to corner.
- A square and a triangle on top of it.
Solution:
- Hexagon
- Rectangle or quadrilateral
- Triangle
- Pentagon
Example 2: Classify the given letters as open shape or closed shape.
C, D, L, M, O, S, U, V, Z
Solution:
Open shape: C, L, M, S, U, V, Z
Closed shape: D, O
Example 3: Identify the solid shape of given objects.
- Globe
- Book
- Cold drink can
- Dice
Solution:
- Sphere
- Cuboid
- Cylinder
- Cube
Example 4: Why is the crescent-shaped moon not a polygon?
Solution:
Crescent shape moon is not a polygon as it has curved lines.
Practice Problems
1
What is 8-sided polygon known as?
hexagon
heptagon
octagon
quadrilateral
Correct answer is: octagon
A polygon with 8 sides is known as octagon.
2
How many dimensions does a solid shape have?
1
2
3
depends on the shape
Correct answer is: 3
All solid shapes are 3-dimensional shapes.
3
Which of the following statements is incorrect?
closed shapes can have only straight sides.
closed shapes have definite area.
start and end point of a closed shape are the same.
start and end point of a open shape are the different.
Correct answer is: closed shapes can have only straight sides.
Closed shapes are shapes whose start and end points are the same. It is not necessary that it is formed by only straight sides.
Basic geometric shapes
Each of us, both adults and children, noticed how many geometric shapes exist around us. We meet them everywhere, in all the objects around us. Where are geometric shapes found in our lives?
Where are geometric shapes found in our lives?
Each of us - both an adult and a child - noticed how many geometric shapes exist around us. We meet them everywhere, in all the objects around us.
People have long been interested in the variety of geometric shapes. Even for primitive people, the shape of the objects surrounding them played an important role. Mastering the world, people got acquainted with the simplest geometric shapes. At first they made tools of relatively regular shape, then they learned how to improve them. At that time, of course, there were no special names for geometric shapes. They were invented much later. When people began to build houses, they had to understand even more deeply the features of different figures in order to understand what shape walls and roofs should be given, what shape logs or stone blocks should be. Without knowing it, a person was constantly studying figures: women, making clothes, hunters - spearheads or boomerangs of complex shape, fishermen, making such bone hooks so that the fish would not fall off them.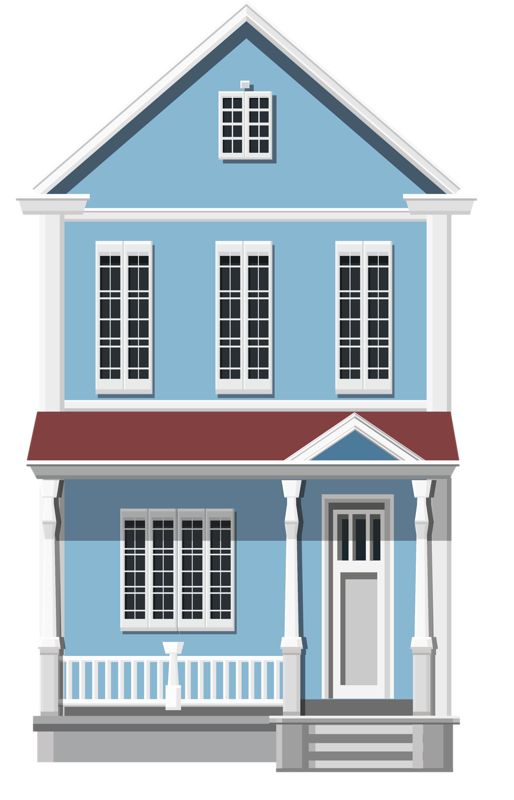
One cannot live without this knowledge in the modern world.
Where are geometric shapes found in our lives?
Perhaps someone thinks that the various lines of the figure are "found" only in the books of learned mathematicians. However, if you look around, it becomes clear that many objects have a shape similar to the main geometric shapes. We just don't always notice it. Many wonderful geometric shapes are found in the nature around us. The field has the shape of a rectangle, the river has a curved line, the lake has a circle, a salt crystal has the shape of a cube, an ordinary pea, a dew drop has the shape of a ball. Beautiful and varied polyhedrons - crystals of rock crystal. But in everyday life, the basic geometric shapes are also everywhere. These are buildings, structures, transport, apartment interiors, even dishes and clothing. For example, a woman's skirt is a trapeze, a plate is a circle, a house is a square and a triangle, and a cylinder is in a pipe.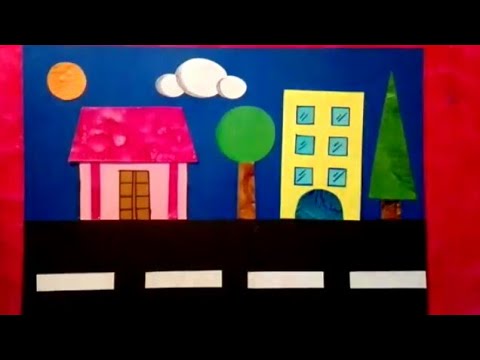
Knowing all the figures, their types, names and properties is very important. Systematizes knowledge about geometric shapes and studies their properties of mathematical science - geometry. This science is very important, its application is simply priceless at all times and regardless of profession. Neither a worker, nor an engineer, nor an architect, nor an artist can do without knowledge of geometry. And it is very important to start mastering this science at an early age.
The iSmart educational platform will be a great help to your child. The main types of geometric shapes, their properties, tasks for finding the area of figures and much more are on the platform in the "Mathematics" section. Here are collected several thousand tasks for the development of these topics, which are not repeated during repeated development. Being engaged in, primary school students will thoroughly understand the basics of geometry. This will give them a good base in the subject for their middle and high school studies. In addition, interactive tasks are colorful, interesting, and exciting.
So,
The simplest types of shapes
The two basic shapes are a point and a line. The accumulation of points and lines forms various geometric shapes. Each of them is individual, differs in its parameters, their forms are very diverse. Figures are simple and complex, flat and voluminous.
Point
Point is the smallest, but at the same time the most important object in geometry. This is the smallest geometric figure, but it is it that is necessary for constructing other figures on the plane and is the basis for all other figures. It does not contain such properties as length, height, volume, area, does not have measuring features and characteristics. It only matters where it is located. The point is indicated by a capital letter of the Latin alphabet or a number. For example, A, B, C or 1, 2, 3.
Any more complex geometric figure is a set of points , which have a certain property that is characteristic only for this figure.
The simplest figures are a ray and a segment.
- A ray is a part of a line that has a starting point but no end. This is a one way extension.
- Segment is a component of a straight line bounded by two points. It has a beginning and an end, so it is measured. The length of a line can be determined by measuring the distance between its ends.
Line
A line is formed from a set of dots arranged one after another and connected to each other. Lines are closed and open, straight and curved, as well as broken.
- Closed - when the start and end parts of the direction are located at the same point. An inverse version is obtained from an open line.
- Open - when the beginning and end of the line are not connected.
- Straight continuous line unchanged.
- Curve is not a straight line.
- Polyline - when segments are not connected at an angle of 180 degrees.
An infinite number of lines can be drawn through one point, but only one straight line and many curves can be drawn through two points.
Basic geometric shapes
Connected points form lines, and interconnected lines form basic geometric shapes on a plane.
Geometric figures are flat or two-dimensional (2D) and three-dimensional or three-dimensional (3D). They are bounded by the closed surface of their outer boundary.
If all points of a figure are in the same plane, then it is flat. Flat figures that everyone knows: point, square, rectangle, triangle, circle, semicircle, circle, oval, rhombus, trapezoid.
And if all the points of a geometric figure are not in the same plane, then it is voluminous. These include a ball, cone, cylinder, sphere, pyramid, etc.
Let's analyze flat figures.
Triangle
Triangle is a figure that is formed when three line segments connect three points that do not lie on the same line. These three points are called vertices, and the segments are called sides.
There are three kinds of triangles:
- Rectangular - when one angle is right, the other two are less than 90 degrees.
- Acute - when the degree of its angles is greater than 0 but less than 90 degrees.
- Obtuse - when one angle is obtuse, that is, more than 90 degrees, and the other two are acute.
Triangles have the following properties:
- in a triangle opposite the larger angle lies the larger side and vice versa;
- the sum of the angles of a triangle is always 180 degrees;
- all angles of an equilateral triangle are 60 degrees;
- in a right triangle, the square of the hypotenuse is equal to the sum of the squares of the legs (but this is already studied in high school).
The vertices of triangles are indicated by capital letters of the Latin alphabet: A, B, C, etc.
Examples of triangles:
from center distance.
Circle
The part of the plane inside the circle is called circle . That is, the circle is the boundary of the circle. And the distance from the center of the circle to any point on it is called the radius. The diameter of a circle is a line segment that connects two points on a circle and passes through its center. The diameter of a circle is equal to two of its radii.
Rectangle
Rectangle is a figure consisting of four sides and four right angles, which has:
- opposite sides are equal;
- the diagonals are equal and bisect at the point of intersection;
- around a rectangle it is possible to circumscribe a circle centered at the point of intersection of its diagonals and with a radius equal to half of the diagonals.

Square
Square is the same rectangle with:
- all sides are equal;
- all angles are equal and equal to 90 degrees;
- the diagonals are equal and perpendicular;
- the centers of the inscribed and circumscribed circles coincide and are located at the point of intersection of its diagonals.
Trapezium
A quadrilateral in which two sides are parallel and two are not is called a trapezoid . If the sum of the lengths of the bases of a trapezoid is equal to the sum of the lengths of the sides, then a circle can be inscribed in it.
Parallelogram and rhombus
Parallelogram is a quadrilateral whose opposite sides are pairwise parallel.
Rhombus is a parallelogram with equal sides.
A parallelogram has the following properties:
- opposite sides and angles are equal;
- the sum of any two adjacent angles is equal to 180 degrees;
- the diagonals intersect and the intersection point is bisected;
- each diagonal divides the figure into two equal triangles.
Basic quantities and their formulas
All geometric figures have their own characteristics and their own value. The most common are such quantities as area and perimeter. They are used in everyday life, in construction and in other areas. For example, during renovation or new construction, the amount of materials needed and the scope of work cannot be determined without calculating the area and perimeter in advance.
Perimeter
The perimeter is the closed boundary of a flat geometric figure, which separates its inner area from the outer one. Any closed geometric figure has a perimeter:
In the figure, the perimeters are marked with a red line. The perimeter of a circle is often called the length.
The perimeter is measured in units of length: mm, cm, dm, m, km.
Designated by capital Latin P .
Area
Area is the part of the plane occupied by a closed flat geometric figure, that is, that part of the plane that is inside the perimeter. It is she who gives us basic information about its size. Any flat closed geometric figure has a certain area.
In the figure, the areas of the figures are colored in different colors.
To measure the area of a figure means to find how many times another figure is placed in a given figure, taken as a unit of measurement. Area is measured in square units of length. Area units include: mm 2 , cm 2 , m 2 , km 2 , etc. S (square) - a sign of the area.
Perimeter and area calculation
Perimeter is the length of the closed contour of the geometric figure. You can, of course, measure the length of all sides with a ruler and add them. But it is better to use special formulas for calculating the perimeter, this will greatly simplify the task.
- Square: perimeter = 4 * side.
- Triangle: perimeter = side 1 + side 2 + side 3.
- Irregular polygon: perimeter = sum of all polygon sides.
- Circle: circumference = 2 * π * radius = π * diameter (where π is pi (a constant approximately equal to 3.14), radius is the length of the line connecting the center of the circle and any point lying on this circle, Diameter is the length of a line segment passing through the center of a circle and connecting any two points on the circle.
To calculate the area of the figure, you will also need the corresponding formula. Different formulas apply to different shapes. To calculate the area of standard geometric shapes, you can use the following formulas:
- Parallelogram: area = base * height
- Square: area = side 1 * side 2
- Triangle: area = ½ * base * height radius is the length of the line segment connecting the center of the circle and any point lying on this circle.The square of the radius is the value of the radius multiplied by itself).
So, we have listed the main and most common geometric shapes and their properties. The iSmart educational platform will help your child learn basic geometric shapes, their types, names and properties through fun activities. Benefits of exercising on iSmart smart trainers:
- interactive tasks are more like a game;
- they can be practiced many times and will not be repeated;
- the platform will form an individual learning path based on knowledge diagnostics;
- just 20 minutes of lessons a day is enough to see progress in learning in a short time.
In addition, classes will help you free up your time, because the child will be able to study independently, and the parent will receive reports and monitor the dynamics of learning. The iSmart learning method is based on the latest scientific practices: microlearning and behavioral analysis.
The iSmart educational platform offers preparation for tests, tests, VPR, olympiads, as well as the study of additional subjects that are not included in the school curriculum.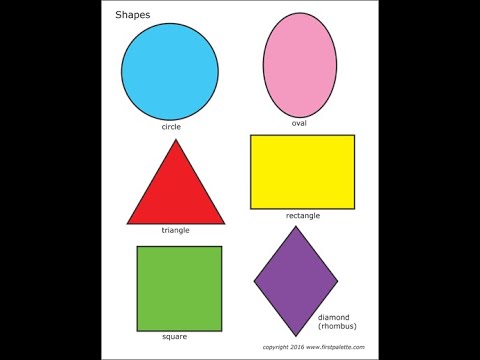
Creating 3D Objects and Animations in Photoshop
User's Guide Cancel
Search
Last update Oct 26, 2021 08:00:00 AM GMT
- Photoshop User Guide
- Introduction to Photoshop
- Dream about it. Do it.
- What's New in Photoshop
- Editing the first photo
- Create documents
- Photoshop | Frequently Asked Questions
- Photoshop System Requirements
- Transfer of presets, operations and settings
- Introduction to Photoshop
- Photoshop and other Adobe products and services
- Working with Illustrator artwork in Photoshop
- Working with Photoshop files in InDesign
- Substance 3D Materials for Photoshop
- Photoshop and Adobe Stock
- Working with the built-in Capture extension in Photoshop
- Creative Cloud Libraries
- Creative Cloud Libraries in Photoshop
- Working in Photoshop using the Touch Bar
- Net and guides
- Create transactions
- Cancellation and transaction history
- Photoshop on iPad
- Photoshop on iPad | General questions
- Introduction to the working environment
- System requirements | Photoshop on iPad
- Creating, opening and exporting documents
- Adding photos
- Working with layers
- Drawing and painting with brushes
- Selecting areas and adding masks
- Retouch compositions
- Working with Adjustment Layers
- Adjusting the key of a composition using the Curves layer
- Applying transform operations
- Trim and rotate compositions
- Rotate, pan, zoom and restore canvas
- Working with text layers
- Working with Photoshop and Lightroom
- Getting missing fonts in Photoshop on iPad
- Japanese text in Photoshop on iPad
- Application parameter management
- Touch shortcuts and gestures
- Key combinations
- Image resizing
- Live stream your creative process in Photoshop on iPad
- Correcting imperfections with the Healing Brush
- Creating brushes in Capture and using them in Photoshop
- Working with Camera Raw files
- Creating and using smart objects
- Adjusting the exposure of images with the Dodge and Burn tools
- Photoshop 9 web beta0394
- Frequently asked questions | Photoshop Web App Beta
- Working environment overview
- System requirements | Photoshop Web App Beta
- Keyboard shortcuts | Photoshop Web App Beta
- Supported file formats | Photoshop Web Application Beta
- Opening and working with cloud documents
- Collaboration with stakeholders
- Limited editing options for cloud documents
- Cloud Documents Photoshop | Frequently Asked Questions
- Photoshop Cloud Documents | Workflow Questions
- Work with and manage cloud documents in Photoshop
- Cloud storage update for Photoshop
- Unable to create or save cloud document
- Troubleshooting Photoshop cloud documents
- Collect cloud document sync logs
- Sharing and editing cloud documents
- File sharing and commenting in the application
- Basic information about the working environment
- Learn faster with the What's New panel in Photoshop
- Create documents
- Working in Photoshop using the Touch Bar
- Tool gallery
- Performance settings
- Using tools
- Touch gestures
- Touch gesture capabilities and customizable workspaces
- Overview versions of technology
- Metadata and comments
- Default key combinations
- Touch gesture capabilities and customizable workspaces
- Putting Photoshop images in other applications
- Installations
- Default key combinations
- Rulers
- Show or hide non-printing auxiliaries
- Specifying columns for the image
- Cancellation and transaction history
- Panels and menus
- File placement
- Positioning of elements with referencing
- Positioning with the ruler tool
- Setting sets
- Customizing keyboard shortcuts
- Net and guides
- Photoshop for design
- Artboards
- View on device
- Copy CSS from layers
- Dividing web pages into fragments
- HTML options for snippets
- Changing the arrangement of fragments
- Working with web graphics
- Create web photo galleries
- Resizing images
- Working with raster and vector images
- Image size and resolution
- Importing images from cameras and scanners
- Creating, opening and importing images
- Image viewer
- "Invalid JPEG marker" error | Opening images
- Viewing multiple images
- Customizing color palettes and color swatches
- HDR images
- Image color matching
- Converting between color modes
- Color modes
- Erase sub-images
- Blend Modes
- Choice of colors
- Making changes to indexed color tables
- Image information
- Distortion filters not available
- Color details
- Color and monochrome corrections with channels
- Selecting colors in the Color and Swatches panels
- Sample
- Color mode (or picture mode)
- Shade
- Adding color mode change to operation
- Add swatches from HTML CSS and SVG files
- Bit depth and settings
- Understanding Layers
- Reversible editing
- Create and manage layers and groups
- Selecting, grouping and linking layers
- Putting images into frames
- Opacity and layering
- Layer masks
- Applying Smart Filters
- Layer compositions
- Move, arrange and lock layers
- Masking layers with vector masks
- Manage layers and groups
- Effects and Layer Styles
- Editing layer masks
- Extract resources
- Display layers with clipping masks
- Generation of graphic resources from layers
- Working with Smart Objects
- Blend Modes
- Combining several fragments into one image
- Combining images with Auto Layer
- Alignment and distribution of layers
- Copy CSS from layers
- Load selections based on layer boundaries or layer masks
- See-through to show the contents of other layers
- Layer
- Mixing
- Composite images
- Background
- Select and Mask workspace
- Quick area selection
- Getting Started with Selections
- Selecting with the Marquee toolbox
- Selecting with the Lasso tools
- Selecting a color range in an image
- Pixel highlight setting
- Convert between contours and selection boundaries
- Channel Basics
- Moving, copying and deleting selected pixels
- Creating a temporary quick mask
- Saving selections and alpha channel masks
- Selecting focus areas in an image
- Duplication, splitting and merging of channels
- Channel calculation
- Extraction
- Bounding box
- Perspective distortion
- Reducing blur due to camera movement
- Healing Brush Tool Examples
- Export color lookup tables
- Image sharpness and blur correction
- Understanding color grading
- Applying the Brightness/Contrast setting
- Shadow and Highlight Detail Correction
- "Levels" correction
- Hue and saturation correction
- Juiciness correction
- Adjusting the color saturation in image areas
- Quick tone correction
- Applying special color effects to images
- Image enhancement with color balance correction
- HDR images
- View histograms and pixel values
- Image color matching
- Crop and straighten photographs
- Converting a color image to black and white
- Adjustment and fill layers
- Curves adjustment
- Blend Modes
- Target Imaging for Press
- Color and tone correction with Levels and Curves eyedroppers
- HDR Exposure and Toning Compensation
- Filter
- Blur
- Lighten or darken image areas
- Selective color correction
- Replacing object colors
- Camera Raw 9 system requirements0046
- What's New in Camera Raw
- Introduction to Camera Raw
- Creation of panoramas
- Supported lenses
- Camera Raw Vignetting, Grain, and Haze Removal
- Default key combinations
- Automatic perspective correction in Camera Raw
- Reversible editing in Camera Raw
- Camera Raw Radial Filter Tool
- Manage Camera Raw settings
- Processing, saving and opening images in Camera Raw
- Image enhancements with Camera Raw's improved Spot Remover
- Rotating, cropping and modifying images
- Camera Raw color correction
- Function overview | Adobe Camera Raw | Issues for 2018
- Overview of new features
- Processing versions in Camera Raw
- Making local adjustments in Camera Raw
- Removing objects from photos using Content-Aware Fill
- Content-aware patching and relocation
- Retouching and fixing photos
- Image Distortion and Noise Correction
- Basic troubleshooting steps to solve most problems
- Object transformation
- Crop, rotate and canvas settings
- Crop and straighten photos
- Creating and editing panoramic images
- Deforming images, shapes and contours
- Perspective
- Using the Plastic filter
- Content-aware scale
- Transforming images, shapes and paths
- Deformation
- Transformation
- Panorama
- Drawing symmetrical ornaments
- Options for drawing a rectangle and changing the stroke
- Drawing details
- Drawing and editing shapes
- Paint tools
- Creating and modifying brushes
- Blend Modes
- Adding color to contours
- Edit contours
- Painting with mix brush
- Brush Presets
- Gradients
- Gradient interpolation
- Fill and stroke selections, layers, and paths
- Drawing with the pen tool group
- Creating patterns
- Creating a pattern with the Pattern Builder filter
- Circuit control
- Managing pattern libraries and presets
- Drawing with pen tablet
- Creating textured brushes
- Adding dynamic elements to brushes
- Gradient
- Draw stylized strokes with the Archive Art Brush
- Drawing with pattern
- Synchronizing presets across multiple devices
- Adding and editing text
- Universal text editor
- Working with OpenType SVG fonts
- Character formatting
- Paragraph formatting
- Creating text effects
- Text editing
- Leading and letter spacing
- Font for Arabic and Hebrew
- Fonts
- Troubleshooting Fonts
- Asian text
- Creating text
- Text Engine error when using the Type tool in Photoshop | Windows 8
- Video editing in Photoshop
- Edit video and animation layers
- Introduction to video and animation
- Video and animation preview
- Drawing frames in video layers
- Import video files and image sequences
- Creating frame animations
- Creative Cloud 3D Animation (Preview)
- Creating timeline animations
- Creating images for videos
- Using the Liquify filter
- Using Blur Gallery group effects
- Filter basics
- Filter effects reference
- Adding lighting effects
- Using the Adaptive Wide Angle filter
- Oil Paint Filter
- Effects and Layer Styles
- Application of specific filters
- Image area feathering
- Saving files in Photoshop
- Export files to Photoshop
- Supported file formats
- Saving files in other graphic formats
- Move projects between Photoshop and Illustrator
- Saving and exporting video and animation
- Saving PDF files
- Digimarc copyright protection
- Printing 3D objects
- Printing with Photoshop
- Printing and color management
- Checklists and PDF presentations
- Print photos in a new image layout
- Spot color printing
- Duplexes
- Printing images on a printing press
- Photoshop Color Enhancement
- Printing troubleshooting | Photoshop
- Create activities
- Creation of data-driven images
- Scenarios
- File batch processing
- Operation playback and management
- Adding conditional operations
- About actions and the Actions panel
- Recording tools in operations
- Adding color mode change to operation
- Photoshop UI Development Kit for plug-ins and scripts
- Understanding Color Management
- Accurate color assurance
- Color settings
- Working with color profiles
- Color management of documents for viewing on the web
- Color management for printing documents
- Color management of imported images
- Perform proofing
- Learn more about content credentials
- Identity and origin of NFT 9 tokens0046
- Connecting accounts for creative attribution
- 3D in Photoshop | Common questions about deprecated 3D features
- Creative Cloud 3D Animation (Preview)
- Printing 3D objects
- 3D drawing
- 3D Panel Enhancement | Photoshop
- 3D Concepts and Tools
- Rendering and saving 3D objects
- Creating 3D objects and animations
- Image stacks
- 3D graphics workflow
- Measurements
- DICOM files
- Photoshop and MATLAB
- Counting objects in an image
- Combining and transforming 3D objects
- Editing 3D textures
- HDR Exposure and Toning Compensation
- 3D panel settings
Photoshop lets you create a wide variety of basic 3D objects using 2D layers as a base. After creating a 3D object, you can place it in 3D space, change rendering settings, add lights, or include it in other 3D layers.
-
Convert 2D layers to 3D postcards (planes with 3D properties). If the initial layer is a text layer, all transparency settings are preserved.
-
Wrap a 2D layer around a 3D object such as a cone, cube, or cylinder.
-
Create a 3D mesh from grayscale content stored in a 2D image.
-
Model the metalworking technique called minting by extruding a two-dimensional object into three-dimensional space. See Creating 3D Embossing.
-
Build 3D volumes from a multiframe file such as a DICOM image file. Photoshop will process the individual images from the file and create a 3D object based on them, which can be placed in 3D space, where it can be manipulated and viewed from different angles. Various 3D volume rendering effects can be used to optimize the image of different materials during scanning, such as bone or soft tissue.
 See Creating a 3D Solid.
Create a 3D Postcard
3D Postcards can be added to an existing 3D scene to create a surface that will capture shadows from other objects in that scene.
-
Open a 2D image and select the layer you want to convert to a postcard.
-
Choose 3D > New 3D Card From Layer.
-
The 2D layer is converted to a 3D layer in the Layers panel. The content of the 2D layer is applied as a material to both sides of the postcard.
-
The original 2D layer appears in the Layers panel as the Diffusion texture map of the 3D Postcard object. (See 3D panel overview.)
-
The created 3D layer retains all dimensions of the original 2D image.
-
-
(Optional) To add a 3D postcard to a 3D scene as a surface plane, merge the new 3D layer with an existing 3D layer containing other 3D objects, then align if necessary. (See Merging 3D Objects.
 )
) -
To access 3D content, export the 3D layer to a 3D file or save it as a PSD file. (See Exporting 3D Layers.)
Creating 3D Shapes
Depending on the selected object type, the resulting 3D model may contain one or more meshes. The Spherical Panorama option overlays the image on the inside surface of a 3D sphere.
-
Open a 2D image and select the layer you want to convert to a 3D shape.
-
Choose 3D > New Shape From Layer, then choose a shape shape from the menu. Shapes can contain objects with a single mesh, such as a donut, sphere, or hat, or objects with multiple meshes, such as a cone, top hat, lemonade can, or bottle of wine.
Arbitrary shapes can be added to the shapes menu. Shapes are Collada model files and have a ".dae" extension. To add a shape, place the Collada model file in the Presets\Meshes folder with Photoshop installed.
-
The 2D layer is converted to a 3D layer in the Layers panel.

-
The original 2D layer appears in the Layers panel as a Diffusion texture map. It can be used to overlay new 3D objects on surfaces. Other surfaces can be overlaid with Diffusion texture maps by default with appropriate color settings. See 3D Panel Overview.
-
-
(Optional) Use the Spherical Panorama option when using a panoramic image as a 2D input. This option performs a complete transformation (360 x 180 degrees) of a spherical panorama into a 3D layer. Once converted to a 3D object, you can apply paint to areas of the panorama that are often hard to reach, such as poles or areas with straight lines. For more information on creating a 2D panorama, see Creating 360-degree panoramas.
-
Export the 3D layer as a 3D file or PSD to preserve the resulting 3D content. See Exporting 3D Layers.
Create a 3D Mesh
The New Grayscale Mesh command converts a grayscale image into a depth map, where lightness values are treated as depth values.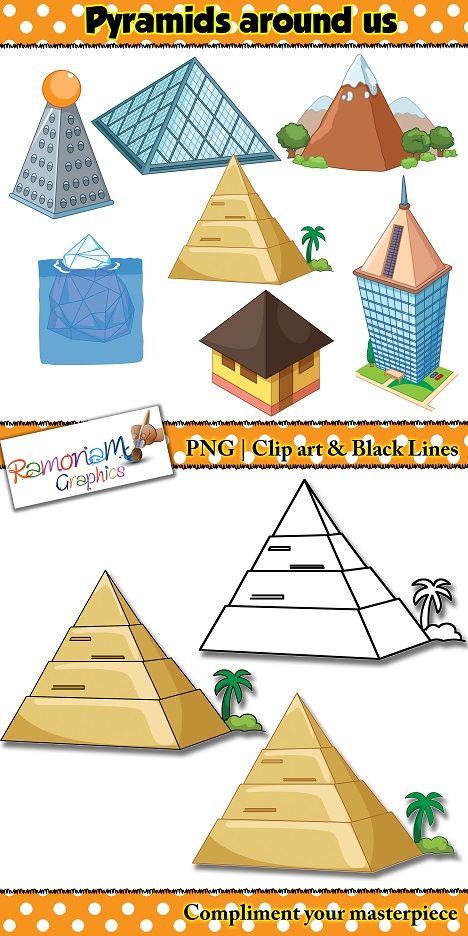 Lighter areas are converted to high areas, and darker areas are converted to depressions. Photoshop then overlays a depth map on one of four possible geometric shapes to create a 3D model.
-
Open a 2D image and select one or more layers that you want to convert to a 3D mesh.
-
(Optional) Convert the image to a grayscale image. (Choose Image > Mode > Grayscale or Image > Adjustments > Black & White for a more accurate conversion process.)
If an RGB image is used as the input image when creating the mesh, the green channel values are used to create the depth map.
-
(Optional) Edit the grayscale image if you want to limit the range of brightness values.
-
Choose 3D > New Grayscale Mesh, then choose a mesh type.
Plane
Places a depth map on a flat surface.
Double sided plane
Creates two mirror planes on either side of the central axis; the height map is superimposed on both planes.
Cylinder
Overlays the depth map on the outer surface, relative to the center of the vertical axis.
Sphere
Superimposes a radial depth map on the outer surface from the center point.
Photoshop will create a 3D layer containing the new mesh. The Diffusion, Transparency, and Plane Depth texture maps are also generated for the 3D object, with data taken from the original color or grayscale layer.
You can open the heightmap as a smart object at any time and edit it. When the map is saved, a grid is generated.
The Transparency texture map is not displayed in the Layers panel because the map uses the same background file as the Diffusion map (original 2D layer). If two texture maps refer to the same file, that file is displayed in the Layers panel in a single instance.
Using the Photoshop Animation timeline, you can create 3D animations where a 3D model moves in space while changing display settings.