Learn phonics for toddlers
How To Teach Phonics To Preschoolers in 3 Simple Steps
10 shares
- Share
- Tweet
If you have a preschooler in your life, you’ve probably found yourself googling, “How can I teach my preschooler to read?” more than once.
Maybe you’ve even seen terms like “phonics” or “decoding” show up in the search results. Or maybe you’ve caught yourself scrolling Pinterest for hours looking for tips to teach your preschooler letters and sounds.
Teaching kids to read is a common concern for both parents and teachers, and rightfully so! Raising a strong reader is one of the most important things we can do for our little ones.
Although we want a fast, easy answer, teaching a child how to read is very complex. It takes years of systematic, explicit instruction before our kids become fluent readers who comprehend what they’re reading.
The good news is that we can lay the foundation while they’re still young to give them the best possible chance to be strong readers in the future!
In order to do that, let’s start with some basic literacy definitions that are important to understand. Then you’ll be on the right track for learning how to teach phonics to your preschooler.
Phonics and decoding are both essential parts of teaching a child to read. If you’re not too familiar with these common terms of early literacy, here is a brief review:
Phonics is a method of teaching reading by correlating sounds with letters or groups of letters in an alphabetic writing system. So, hearing a sound and knowing what letter made it.
Decoding is the ability to apply knowledge of letter-sound relationships to correctly pronounce written words. So, seeing a letter and knowing what sound it makes.
Phonics and decoding go hand-in-hand.
Let’s take the word BUS as an example.
When we teach our preschooler there’s a /b/ sound at the beginning of “bus,” and then we help them connect the /b/ sound with the letter b, we are teaching them phonics.
When they can look at the letters “b” “u” “s” and blend the sounds together /b/ /u/ /s/ to read the word “bus,” they are decoding.
Our preschoolers need to master the sounds of printed letters so that they can use that knowledge to decode words. Letter sounds are the building blocks of reading.
Related Post: 14 Simple Activities to Teach Preschoolers the Alphabet
How to Teach Phonics to a Preschooler
If your preschooler is ready to begin the process of learning to read, here are 3 steps you can follow to help set them up for success with phonics and decoding:
STEP 1: Start with Sounds (Phonemic Awareness)Let’s take one step back…
Before we ever introduce printed letters to our kids, we want them to know that English is a language of speech sounds. There are 44 speech sounds (phonemes) in the English language that are represented by 26 letters.
If you’re not sure what the 44 sounds are, click here for an easy-to-read chart.
When we speak, we put those speech sounds together to make words. To represent those words on paper, we pair them with letters.
When it comes to reading, we want our kids to first understand speech sounds before they ever get to the printed letters that represent those sounds.
Tuning into the sounds of English (phonemes) helps our preschoolers develop phonemic awareness.
Phonemic Awareness refers to the specific ability to identify and manipulate the 44 phonemes in spoken words.
Phonemic awareness is one of the best predictors of how well our kids will learn to read during the first two years of school.
Ideas to practice phonemic awareness (you don’t need any supplies for these games):
- Slow-Fast: Say a word slowly, and then have your preschooler say it fast.
- You say /c/ /a/ /t/ slowly and they say “cat.”
- You say /s/ /i/ /p/ slowly and they say “sip.
 ”
”
- Isolate the Sound: Have them tell you the beginning, ending, or middle sound of a word (not the letters, just the sounds).
- “What’s the first sound in the word caterpillar?” /k/
- “What’s the last sound in the word cheese?” /z/
- “What’s the middle sound in the word pop?” /o/
- Change the Beginning Sound: Say a word but change the beginning sound to make it silly.
- “Would you like a baffle?” (instead of waffle)
- See if they can guess the word it was supposed to be.
- Count the Sounds: Give them a word, and have them count the sounds (not the letters, just the sounds).
- “How many sounds in the word apple?” /a/ /p/ /l/ = 3 sounds
- “How many sounds in the word wish?” /w/ /i/ /sh/ = 3 sounds
- Same or Different: Determine if words have the same beginning sound or not.
- “Do “duck” and “dog” start with the same sound?” Yes
- “Do “fish” and “box” start with the same sound?” No
If you want to get the most bang for your buck when it comes to teaching your preschooler to read, THIS is the area to spend the majority of your time!
Related Post: Letter T Printables
STEP 2: Introduce Printed Letters (Phonics)Now it’s time to teach your preschooler phonics. You’ll want to start by introducing your little one to the 26 letters of the alphabet.
Since you started with Step 1 and focused on sounds, Step 2 will be a lot easier because they’ll be linking something new (printed letters on paper) with something they already know (speech sounds).
If we try to link something new (printed letters on paper) with something they don’t know (speech sounds), they’re going to be lost and struggle to remember these concepts.
A few DOs and DON’Ts when introducing printed letters to your preschooler:
- DO teach the uppercase and lowercase letters at the same time.
- Uppercase letters will be easier for them to write.
- Lowercase letters will be what they see most often in books.
- They need to know both.
Related Post: Fishing for Letters Sensory Activity
- DON’T do Letter of the Week.
- This is an outdated practice that doesn’t help with retention of the alphabet.
- Stick with 3-5 letters at a time to work on as a group. See the reasons in this book here.
- This is an outdated practice that doesn’t help with retention of the alphabet.
- DO Stick with the most common sound of each letter. A few to look out for when choosing alphabet cards and books:
- C is for the beginning sound in caterpillar, not city
- G is for the beginning sound in gorilla, not giraffe
- X is for the last sound in fox, not the beginning sound in xylophone or x-ray
- Don’t choose words with digraphs
- S is NOT the first sound in shell
- C is NOT the first sound in chat
- DON’T teach letters in ABC order.
- There are many different orders you can teach letters in. Here’s one example that’s very effective as these are grouped by common letters used most often in the English language. I like to group letters together and work on one group at a time:
- s, a, t, i, p, n
- c, k, e, h, r
- m, d, g, o
- l, f, b, q, u
- j, z, w
- v, y, x
- Then I introduce the digraphs sh, ch, th, and wh.
- There are many different orders you can teach letters in. Here’s one example that’s very effective as these are grouped by common letters used most often in the English language. I like to group letters together and work on one group at a time:
Related Post: Letter O Printables
- DO Stick with short vowels.
- Vowels make both long and short sounds, but when teaching preschoolers, it’s important to stick with the short vowel sounds.
- A = apple (not acorn)
- E = Ed (not eat)
- I = itch (not ice cream)
- O = octopus (not open)
- U = umbrella (not unicorn)
- You’ll also want to look out for any vowels that have the letter R after them, as this will change the sound.
- Don’t use “orange” for short vowel o. The letters “o” and “r” at the beginning of the word say “or” together.
- Vowels make both long and short sounds, but when teaching preschoolers, it’s important to stick with the short vowel sounds.
- DON’T teach all of the letters before going to Step 3.
- If you follow the order I suggested, you can actually go to Step 3 sooner!
- DO use LOTS of multisensory techniques when working with letters.
- Make sure to incorporate LOTS of hands-on play and movement.
- Use sensory bins that engage multiple senses.
- Incorporate different themes or topics that interest your preschooler to keep them excited.
- Use fun, multi-sensory activities like erasing letters on a dry erase board or using stickers to fill in a letter.
- Make sure to incorporate LOTS of hands-on play and movement.
Now here’s where you can see Step 1 and Step 2 paying off.
If you played with sounds in Step 1, your little one will be more comfortable blending sounds together.
If you introduced the letters in a specific order in Step 2, you can make LOTS of words without having to go through the entire alphabet.
- Just from the first 6 letters (SATIPN), you can make words like:
- sat, sit, pin, nip, nat, tan, tap, pan, tip, nap, and MORE!
Learning to read is complex and takes many years of instruction. English is a complicated code, and we want to give our little ones the tools to break that code so they are confident, successful readers.
Now that you know how to teach phonics to preschoolers, you can start laying the foundation NOW. By following these 3 steps, you’re sure to watch your preschoolers bloom into strong readers in the future.
Related Post: Free Flower Letter Tracing Printables
AUTHOR BIO:Erin from Littles Love Learning
Erin is a wife, mom, and preschool teacher with a master’s degree in Early Childhood Education & an endorsement in Reading. She is the founder of Littles Love Learning, where she shares hands-on learning activities that are based on early learning standards and rooted in PLAY! Her passion is equipping preschool parents & teachers with the tools to teach foundational skills so their little ones have success in kindergarten and beyond. Connect with Erin on social media:
- Instagram: @littleslovelearningblog
- Facebook: Littles Love Learning Blog
- Pinterest: Littles Love Learning Blog
Related posts:
How To Teach Phonics At Home with Montessori
3-5 years old learning to read with phonics montessori reading program pre-reading activities
How can I teach phonics at home with my preschooler?Although phonics is the evidence-based approach to teaching reading, there’s still a gap between reading instruction in schools and the science of reading.
This is why you need to think twice about HOW your child will learn to read, especially if your local school is teaching the outdated “whole language” approach that’s based on a theory of reading that’s been debunked by cognitive scientists.
With just a few minutes a day, you can set up your preschooler for success with learning to read by teaching phonics at home.
My gentle, child-led approach focuses on indirect preparation.
Even though I talk about "teaching your child to read", it's really about providing opportunities for children to teach themselves. I don't believe in putting pressure on 3 or 4 year old children to start reading before they are developmentally ready!
Keep reading to learn the 4 steps in the learning sequence to teaching phonics at home using hands-on Montessori activities.
It’s important to understand the steps from pre-reading to early reading. That way you you’ll be able decide quickly whether or not your child is ready for a specific activity that you find on Pinterest.
Before we get into HOW to teach phonics, let’s start with a definition of phonics. You may have heard the term “phonics” before without really knowing what it is.
So, what exactly does “phonics” mean?
Phonics is the method of teaching reading and writing through explicit instruction of the code between speech sounds and written symbols.
The alphabet letters in English are written symbols that represent speech sounds. We can communicate through writing because we’ve all agreed that a certain letter or combination of letters represents a single sound in our spoken language.
Individual speech sounds are called phonemes and the written symbols that represent those sounds are called phonograms.
A phonogram can be a single letter or a combination of letters. For example, when we say the word “cat” and then write it on paper, the speech sound /c/ is represented by the letter “c”, the speech sound /a/ is represented by the letter “a” and the speech sound /t/ is represented by the letter “t”. It’s easy to read the word “cat” when you know the sound that each letter represents!
Learning to read and write in English is a bit more complicated than other languages because there are more than just the phonemes that correspond to the 26 alphabet letters.
There are about 44 unique speech sounds in the English language, and some of them have multiple spellings! For example, the long a vowel sound can be spelled as a (acorn) and also ai (train), a_e (cake), ay (play), ei (vein), eigh (eight) and ea (break).
To have a solid foundation for reading, your child needs to learn about 70 phonograms. Of course, we don’t overwhelm children by teaching all 70 phonograms at the same time!
We want to first start with basic phonics. This means that you’ll first focus your sound-letter association activities on teaching the alphabet letters that represent the short vowel sounds and hard consonant sounds.
Then you’ll layer on the other common phonograms such as ai, sh, ee, ch, ou, etc to cover advanced phonics. Over time, you’ll draw attention to the various spellings of the 44 unique speech sounds.
It’s important for your preschooler or kindergartener to learn phonics for two main reasons.
- Your child will know which letters to use when writing words.
- Your child will be able to decode words never seen before.
In fact, a good way to assess your child’s knowledge of phonics is to invite him or her to write or read nonsense words such as gax, baj, steck, vaith and strone.
A huge advantage of teaching phonics is that your child won’t need to memorize long lists of words!
This is because most words you’ll find on high-frequency word lists or sight words lists can actually be sounded out easily by children who have knowledge of the phonetic code.
Children who learn phonics also don’t need to guess at words by looking at the picture or the first sound of the word, and they don't need to skip any words in a sentence. These are the strategies of struggling readers who don’t have a solid foundation in phonics.
Here’s the step-by-step overview of the learning sequence for teaching phonics at home with your preschooler that I teach inside The Playful Path to Reading™.
You can sign up to watch my FREE CLASS that walks you through this 4-step method to teach reading at home. You'll learn the 3 biggest mistakes to avoid and you'll pinpoint where your child is at in the learning sequence.
The first three steps develop pre-reading skills. These activities offer indirect preparation for reading. We’ll use language objects, sandpaper letters and a moveable alphabet to develop all the skills needed to learn phonics — without any worksheets or crafts!
STEP 1: Develop Phonemic Awareness
The first step to teaching phonics is to play "sound games" when your child is around 3 years old to help your preschooler develop phonemic awareness.
Phonemic awareness activities involve NO letter symbols!
The focus is just on drawing attention to the individual speech sounds (phonemes) in spoken words. That will prepare your child to understand that letters are symbols that represent speech sounds.
It's important not to skip this step because phonemic awareness is the best predictor of how well children learn to read.
"Without phonemic awareness, phonics is harder to learn.In other words, phonemic awareness is something that should be taught before phonics — or at least early in the phonics sequence — so children receive maximum benefit from their phonics instruction.” (2005 National Reading Panel Report)
STEP 2: Associate Speech Sounds and Letter Symbols
The second step to teaching phonics is to help your child connect the speech sounds in spoken words with the letter symbols of our written language.
At this point, your preschooler will already be able to identify at least the beginning sounds of spoken words.
Having already developed some phonemic awareness, the letter symbols will have meaning for your child. Your preschooler will be able to draw on that knowledge to make sense of letter symbols.
Sound-letter association games using Montessori sandpaper letters develop visual, muscular and auditory memory to learn basic and advanced phonics.
STEP 3: Use Phonics Knowledge to Build Words
The third step to teaching phonics is to show your child how to put speech sounds (represented by letter symbols) in a row to make words using a Montessori moveable alphabet.
This "writing before reading" step allows children to use their existing phonics knowledge to communicate ideas through print without any pressure to read what they have written.
Often children are ready to build words before the pencil grip has developed, so we’ll use a Montessori moveable alphabet instead of pencil and paper.
Your child can just focus on finding the Montessori moveable alphabet letters needed without worrying about having to write any letters with a pencil. This takes the pressure off!
STEP 4: Use Phonics Knowledge to Decode Words
Most children will discover their ability to read through the process of building words! Your child is now ready to develop decoding skills through practice reading words, phrases and then sentences.
Once your child has begun reading words using phonics knowledge, you can encourage your child to memorize some sight words to boost reading fluency and then introduce decodable readers that require knowledge of basic and advanced phonics.
Quick Summary: How to Teach Phonics at HomePhonics is the method of teaching reading and writing through explicit instruction of the code between speech sounds and written symbols. Research supports using phonics over the whole language approach.
There are 4 steps in the learning sequence from pre-reading to early reading using hands-on Montessori activities.
- Develop phonemic awareness.
- Associate speech sounds and letter symbols using Montessori sandpaper letters to learn the phonetic code.
- Use existing phonics knowledge to build words using a Montessori moveable alphabet.
- Practice reading words, phrases and then sentences.
It’s important to understand the big picture so that you’ll be able to decide very quickly whether or not your child is ready for an activity that you find on Pinterest. That way you can be reassured that you're not putting any pressure on your child to learn to read before he or she is developmentally ready.
Learning English phonetics with children
How to teach children to read in English
So we taught our child to speak simple English with the help of fun lessons (games, cards, videos, cartoons, songs). He is already 6-7 years old, he can read and write in Russian and knows Russian letters well. At the very time to start learning to read in English and mastering the first rules. Of course, the abilities of children are different: for some, the optimal age for learning may be 8 years old, and for some, even 5. Parents themselves should identify the abilities of their children and in no case try to forcibly sculpt geeks out of them just because the neighboring the child is already a polyglot at the age of three.
Basic reading rules for children
Teaching children to read in English should begin in two stages.
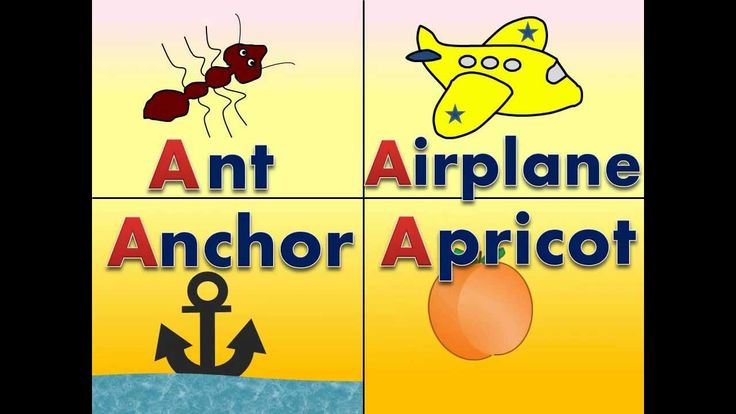
First: we learn the English alphabet, and it is possible not in alphabetical order, but starting with the letters used in words that the child has already learned and learned to pronounce well. For example, words:
- table, dog, cat, apple, water, tiger, lion, car, house, etc.
It is very important to start learning with understandable and familiar words: knowing the pronunciation and seeing the word itself, the brain learns to draw analogies, and the child's brain works intuitively and twice as fast as an adult.
How to teach the English alphabet
It is easier to learn the alphabet using a card that additionally contains a transcription of the sound of each letter.
How to memorize the alphabet:
- Learn a few letters a day and use them in words
- Note that the phonetic sound of a letter in the alphabet and a word can be completely different
- Reinforce learned letters with fun lessons:
kids can learn with this fun pig family.
I think the lesson below will give them pleasure:
Children learning the rules of English phonetics
The second stage begins at the very beginning of learning to read and runs parallel to it all the way. Children learn the following rules:
- the same letters and letter combinations in words can be pronounced differently
- some letters are written but not readable
- one letter can be read with two sounds, and vice versa: in a letter combination there can be 2-3 letters read with one sound
All this is called phonetics, and in order to learn it, you need to know the rules of transcription and know:
- What are short vowels sounds:
are pronounced briefly, sometimes their sound corresponds to a Russian sound, and sometimes a special, so-called neutral, intermediate between two adjacent (-o and -a, -a and -e) sounds
- What are diphthongs and triphthongs:
these are sounds consisting of two or three elements
- What are voiced and voiceless consonants?
Reinforcing techniques for teaching reading
To explain phonetic rules, it is desirable to have cards with transcription of sounds in these categories.
Demonstrating the card, we memorize the rules for pronunciation of each sound, in accordance with Russian sounds. If there is no Russian analogue, then the pronunciation of the sound is written in detail, indicating the location of the language or finding a similar sound
For example, such a rule for pronouncing the sound [θ]:
- When pronouncing the sound [θ], you need to position your tongue as if you are going to pronounce the sound “s”, only place its tip between the teeth.
Or the following rule for pronouncing the sound [ə]:
- The sound [ə] is pronounced as the middle between -o and -a, or unstressed -o and -a in the words "water" and "room".
In the process of learning phonetics, we fix the rules of reading on examples of words.
Such not very interesting lessons can be diversified with visual videos:
I can't help but recall the wonderful technology of color reading, which greatly simplifies the intuitive memorization of phonetics rules for children in practice.
See also a very informative and useful lesson on English reading lessons:
English phonetics for children
According to modern psychological and pedagogical research, every person from birth is endowed with the function of perceiving and reproducing speech. It is this innate speech function, and not mechanical memory at all, that is the fundamental basis in our childhood for mastering native and foreign speech, since it synthesizes the necessary mental features for processing and perceiving the sound stream. But innate abilities, as you know, must invariably be backed up by a well-formed set of honed skills and abilities.
Thus, English phonetics for children involves work on the formation of the child's articulatory apparatus and the development of phonetic hearing, which covers the learning of sounds, which are divided into three small conditional subgroups:
- Sounds almost identical to native ones;
- Similar, but with specific articulation;
- Sounds that do not have analogues.
As a result of this division, it is necessary to teach children English phonetics, guided by the following basic provisions:
1. Imitation.
It is well known that children have a very developed sense of imitation, therefore, it is necessary to use this ability. Young children are certainly capable of memorizing a large number of thematically related words or situational emotional expressions. At the same time, the lexical units selected for them should contain the sounds of the first subgroup and be easy to pronounce, not long, but this is only at the initial stage of learning.
2. Features of the speech apparatus.
A child's speech apparatus is characterized by a high degree of plasticity, and, of course, a child, due to personal abilities, is able to more or less clearly pronounce those English sounds and intonation groups that are presented to them. Therefore, it should be remembered that English phonetics for children should not initially be adapted. Such simplification can cause a useless habit of pronouncing sounds not quite accurately, and then, at an older age, one may encounter the problem of relearning.
3. Opposition.
In order for there to be an element of comprehension of phonetic material, it is necessary to place accents and explain the main difference between native, that is, familiar to children, and English shades of intonation and sounds. Constantly analyzing and contrasting the intonation and sounds of the second subgroup, they learn not to confuse them in speech.
4. Differences in sound systems.
The child, listening to foreign speech, pays, first of all, the sounds of the third subgroup, unusual for the native language, and their combinations. Therefore, it will not be superfluous to acquaint children with the pronunciation of sounds characteristic only for the English language, highlighting a separate lesson for them.
5. Development of phonemic hearing.
In order for children to master the sound system well, it is recommended to conduct didactic games, the basis of which would be the generalization and comparison of the sounds of three subgroups and their combinations.
6. Formation of skills.
The development of phonetic skills is based mainly on sound imitation during the so-called phonetic exercise, which is necessarily organized in the form of an exciting game or performance.
7. Recommended number of sounds.
It is inappropriate to plan the study of a whole subgroup of sounds at the same time. Two or three sounds assigned to one lesson are enough, which may belong to different subgroups.
Therefore, English phonetics for children, as a separate section, should include purely phonetic moments, as well as individual organizational problems, and correspond to the characteristics of age. And most importantly, learning should resemble a game and a performance, the participants of which are both children and adults themselves.
Skype English school blog for kids
Did you know that the English alphabet consists of 26 letters and 46 different sounds? The same letter can convey several sounds at the same time. Just don't panic! We will tell you how easy it is to remember English sounds without boring tables and cramming.
As a rule, in English lessons a child keeps a separate dictionary, in which the pages are divided into three columns: “word”, “transcription”, “translation”. New words are written there, which then need to be learned. And if everything is clear with the columns "word" and "translation", then with "transcription" there are often difficulties.
What is transcription? This is a kind of instruction on how to read a word. Usually it is written in square brackets. For example: [pen]. The characters that are inside square brackets are the sounds of the English language. One character = one sound. Only these characters are not always similar to the letters of the alphabet . Let's look at the English sounds that are most difficult for a child and how to learn them:
Do you want your child to keep up in English at school?
Selecting associations
It's no secret that complex things are easier to remember using associations. This rule works especially well for children.
ʊ - short [y] - very similar to the badge "horseshoe"
æ - wide [e] - open your mouth wide and say "e". We call this symbol "bug badge" 🐞
ŋ - [n] - a funny sound that is similar to how the Baby Elephant spoke in the cartoon "38 Parrots" 🐘. Need to say "n", but a little "on the nose", like you have a runny nose . Try pinching your nose with your fingers, open your mouth and say "n". Happened?
ð - interdental [z]
θ - interdental [s]
To memorize this pair of sounds, a child can be told a whole fairy tale: “There was a little bunny (our tongue). But he was very shy, so he sat in a mink (in his mouth) all the time. But one day he dared to stick the very tip of his nose out of the mink (we put the tip of the tongue between the teeth). At first he said softly [θ], and then loudly [ð].
s, d, n, t - [s], [d], [n], [t] - remember the Jumble series about English pronunciation? “You need to talk like you have a hot potato in your mouth,” is the best explanation for the baby. When you pronounce these sounds, the tongue touches the hard palate and alveoli , a little further than in Russian.
r - [r] - the English "r" is not like ours. In Russian, the tongue seems to tremble in the mouth. In English, the tongue "rolls" with its tip back towards the soft palate.
w - [y] / [v] - there is no such sound in Russian either. First, we stretch our lips, trying to say “y”, but then the lips should “spring” , as it were, , without closing and returning to a smile.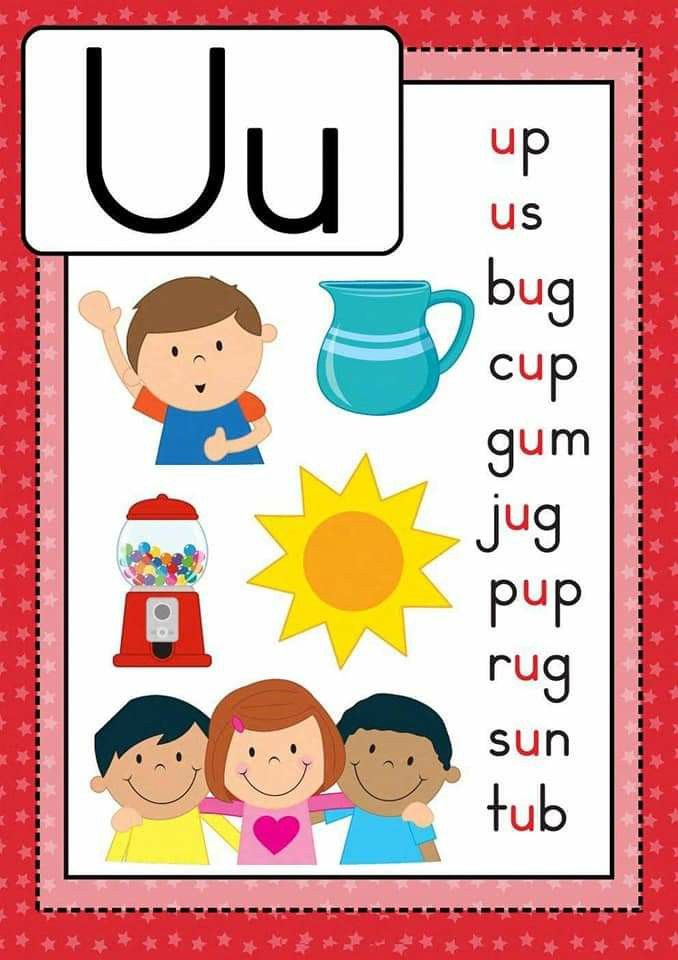 Remember how you say "Wow!".
e - narrow [e] - similar to the Russian "e" without the "y". When pronunciation, open your mouth quite a bit.
ə - deaf [e] - a deaf, slightly "stifled" sound, very short and almost indistinguishable. When you say the word "m o loco", then you pronounce this sound in place of the first "o". The symbol is called funny - "seam".
ɜ - middle [e] - reads like the letter ё in the word "ice".
j - [th] - very important not to confuse with the letter Jj ("jay")! In transcription, this symbol does not mean at all what the letter means.
To make things even easier, we have drawn the main characters of the English transcription with the appropriate sounds of the Russian language.
Sources: http://englishfull.ru/deti/chteniya.html, http://www.comenglish.ru/anglijskaya-fonetika-dlya-detej/, http://allright. io/blog/2017/09 /18/anglijskie-zvuki-dlya-detej-chitaem-transkriptsiyu-pravil-no/
Phonetics of the Russian language for foreigners | Russian alphabet pronunciation Letters Sounds
Russian alphabet for foreigners: often not only foreigners who begin to learn Russian, but also advanced level foreigners cannot correctly pronounce some Russian sounds. We'll talk about which letters of the Russian alphabet cause difficulties for foreigners , we will give recommendations for teachers on how to teach phonetics of the Russian language sounds , which cause the greatest difficulties for foreigners.
Russian as a foreign language
How to teach Russian pronunciation: letters and sounds
Lessons for teachers of Russian as a foreign language (RFL)
For beginners to learn Russian, foreigners The difficulty in learning the Russian alphabet and Russian phonetics lies in the fact that almost all letters of the Russian alphabet can represent several different sounds, for example: the letter E can denote the sounds [E], [YE], [I], and sometimes even the letter E can denote the sound [Y] (after the consonants Zh, Sh, C without stress: price, wife).
Pronunciation is another difficulty for teachers of Russian as a foreign language in teaching Russian to both beginners and foreigners continuing to study Russian. Below we give recommendations, how to put the pronunciation of Russian sounds in the lessons of Russian as a foreign language.
Rules for staging Russian sounds. Teaching the phonetics of the Russian language
Phonetics of the Russian language for foreigners: work on staging any sound of the Russian language , one must begin with the formulation of phonemic hearing , i.e. first you need to ensure that the foreigner distinguishes sounds by ear. This is important because many Russian sounds sound the same to foreigners. For example, if your student says “grandfather” instead of “girl”, and when you correct him, he answers that he said so, then this means that your student does not distinguish sounds [D] and [V] by ear, they are for it sound the same.
In order for foreigners to learn to distinguish sounds by ear, we recommend doing the following exercises :
Exercise "Playing with cards" :
1. Take two sheets of paper, write on them the sounds you will practice. For example, on one sheet we write D, and on the other - V. Let's give these cards to a foreigner. The teacher pronounces the sounds [D] and [V] in random order, and the foreigner must raise the corresponding card. Of course, the teacher must tell the foreigner if he makes a mistake.
2. Then the teacher pronounces syllables, for example: wa - yes, du - wu, ava - hell, etc., and the foreigner must raise the “D” card or the “B” card.
Phonetic dictation exercise :
The teacher dictates sounds, syllables, words to the student, and the foreigner writes down what he hears.
! Please note that in the exercise “Playing with Cards” and “Phonetic Dictation”, when practicing consonants, you do not need to dictate words that end in voiced paired consonants (B, C, D, D, F, Z), because. when pronouncing at the end of a word, voiced paired consonants are stunned. For example, if you dictate to a foreigner “bow”, “meadow”, then the foreigner will write down “bow”, “bow”, because “meadow” is pronounced like “lu[K]”, while your foreign student will not make a mistake, because this is a phonetic, not a spelling dictation.
When a foreigner began to distinguish Russian sounds by ear, the teacher can already change places with the foreigner, i.e. the teacher shows the card, and the foreigner says what is written. At this stage, another problem arises: a foreigner hears and understands how a Russian sound should sound, but cannot pronounce it correctly. The greatest difficulties for foreigners arise when pronouncing the following sounds: [S], [Y], [R], [F], [C], [W], [Sh] . Below we will consider the rules for setting these sounds and give recommendations on how to explain Russian phonetics to foreigners, how to conduct phonetic exercises for foreigners.
Russian alphabet - Letters I, Y
Pronunciation of sounds [I], [Y]. Phonetic exercises for foreigners
The pronunciation of the Russian vowel sound [Ы] causes difficulties for almost all foreigners. For example, foreigners pronounce "mi" instead of "we" and "beat" instead of "be".
The pronunciation of the vowel sound [I] causes much less difficulty for foreigners. The Russian sound [I] is similar to the English sound [i:]. To pronounce the sound [I] you need to point the tongue forward and touch the tip of the tongue to the lower teeth. When pronouncing [I], your students need to smile a little :).
Let's return to the formulation of the problematic Russian sound [Ы] . When pronouncing it, the entire tongue must be pushed back and strain the back of the tongue . Now the tip of the tongue no longer touches the lower teeth, but is pushed back. When we pronounce [ы], we no longer smile (of course, such a complicated sound!) and [G].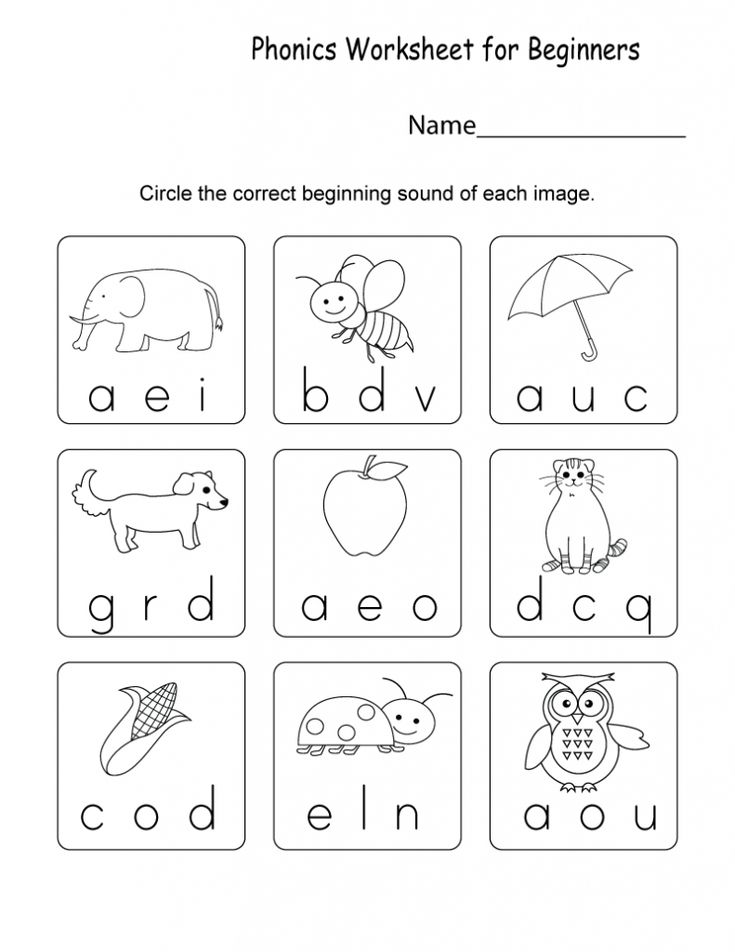 The pronunciation of the sounds themselves [K] and [G] usually does not cause difficulty for foreigners, but when they are pronounced, the back of the tongue automatically tenses, and this is what we use in our phonetic exercise for foreigners:
yk - yg - yk - yg - yk - yg - yk - yg
ky - gy - ky - gy - ky - gy - ky - gy - s - s - s - s - s - s - s
ky - km - we - washed
gy - hmy - we - washed
ky - kvy - you - howl
gy - gvy - you - howl
ky - kby - would - was
gy - gby - would - was
soap, was, exit, exhibition, was, son, cheese, letters, smart
Russian alphabet - Letter Y
Pronunciation of the Russian sound [Y]. How to explain the sound [Y] to foreigners?
You should pay attention to foreigners beginning to study the phonetics of the Russian language to the letter of the Russian alphabet J. The sound [Y] is found in Russian speech much more often than the letter Y , because the vowels E, E, Yu, I are at the beginning of the word, after vowels and after the letters b and b denote two sounds: [YE], [YO], [YU], [YA], for example: [YO] lka, with [YE] hat, kal [YA] n.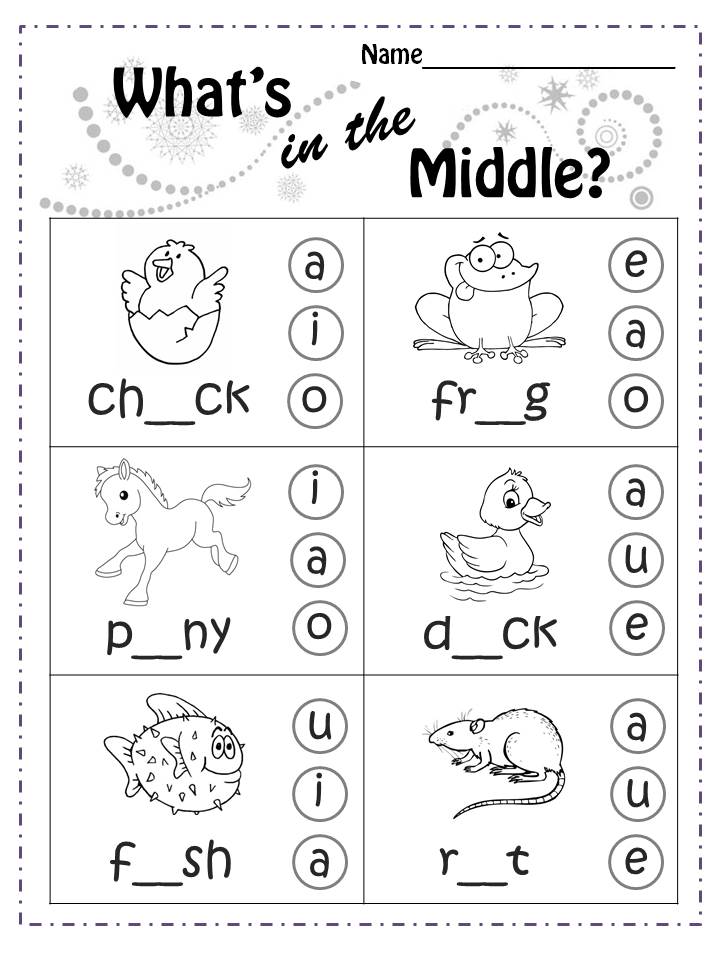
Difficulty in pronouncing the sound [Y] (often this sound in transcription is denoted as [j]) usually occurs in foreigners if the letter Y is at the end of the word, for example: foreigners pronounce "sanatoriums" instead of "sanatorium" or "my" instead of "my". Very often, foreigners do not distinguish by ear the sounds [Y] and [I], then it is advisable to do the exercise “Playing with cards” with foreigners.
How to explain to a foreigner the difference between the sounds [Y], [I] and how to teach a foreigner to pronounce the sound [Y]?
It is necessary to explain to a foreigner that the sound [Y] is pronounced VERY briefly. The sound [And] can be sung: and-and-and-and-and-and-and-and-and-and ..., and the sound [Y] must be pronounced very briefly , as if someone pricked with a pin: OH! The sound [Y] is pronounced with much more tension than the sound [I], when the sound [Y] is pronounced, the middle part of the tongue rises more, so a narrower gap is created between the palate and the tongue and the air stream breaks out with more pressure, more powerfully.
Pay attention of foreigners to the spelling of the letter of the Russian alphabet Y :
Often foreigners confuse not only the sounds [Y] and [I], but also the letters Y, I. Foreigners can write the letter Y as the letter I (without a check mark above the letter Y), they do this by analogy with writing the letters Yo and E, because. it is not necessary to put a dot over the letter Y in writing.
The teacher should draw the foreigner's attention to the fact that when writing the letter Y, you should always put a tick over the letter, because the absence of a check mark above the letter Y is a spelling and grammatical error. Compare: "my favorite cowboy" and "my favorite cowboys."
Russian alphabet - Letter Р
Pronunciation of the Russian sound [Р]. Phonetic exercises for foreigners
When pronouncing the Russian consonant sound [Р], the tense tip of the tongue vibrates near the alveoli (these are tubercles above the upper teeth) under the action of the air jet.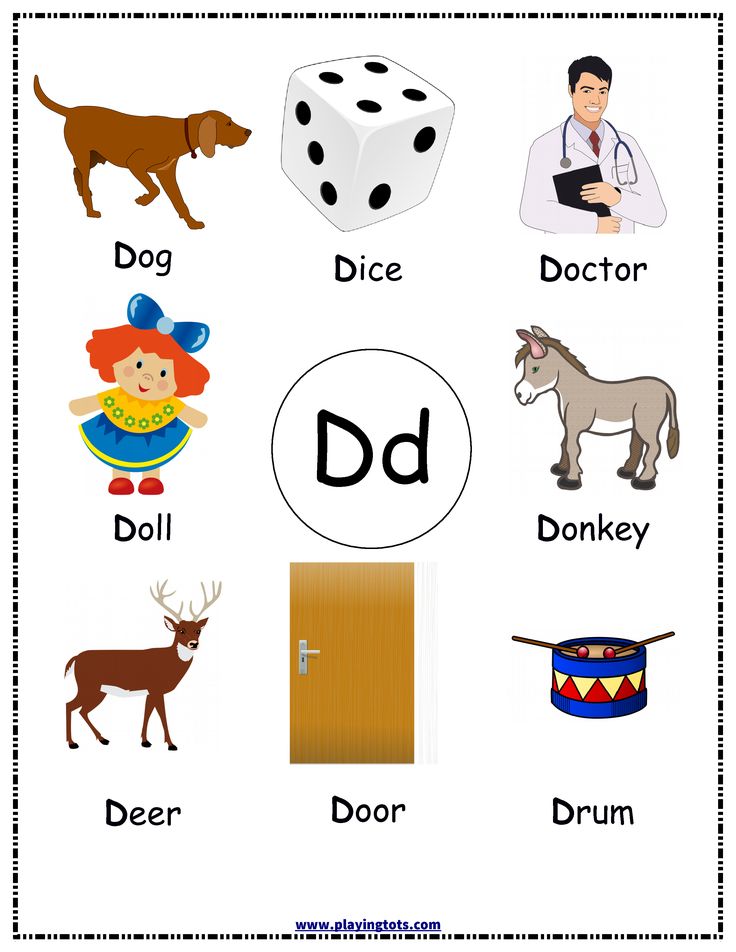
So, when pronouncing the sound [P], the tip of the tongue is slightly bent upwards, touches the tubercles above the teeth and is tense. But it is quite difficult for a foreigner to make the tip of the tongue vibrate. To help a foreigner, we turn to the helper sounds [T] and [D], during the pronunciation of which the tongue automatically takes the desired position at the alveoli.
Let's start our phonetic exercises.
Let's start the motorcycle!
dr – dr – dr – dr – dr – dr – dr – dr – dr – dr – dr – dr – dr – dr – dr – dr – dr…
Whose motorcycle started up?
Let's do some more exercises (pronunciation of the sound [P]):
dra - dra - dra - dra - dra - dra - dra - fight
dro - dro - dro - dro - dro - dro - dro - fraction dru - dru - dru - dru - dru - friend
tra - tra - tra - tra - tra - tra - tra - trauma
tro - tro - tro - tro - tro - tro - tro - rope
tru – tru – tru – tru – tru – tru – tru – coward
| dra - dra – dra – ra – cancer draw - draw – draw – ro – rock dru - dru – dru – ru – pen dry - dry – dry – ry – fish | tra - tra – tra – ra – frame tro-tro – tro – ro – robot true - true – true – ru – Russian tra - tra – try – ry – market |
To practice the pronunciation of the soft sound [P'], in phonetic exercises after the letter P, you need to use vowels that soften the previous consonant (E, Yo, I, Yu, Ya).
Russian alphabet - Letter Zh
Pronunciation of the Russian sound [Ж]. Phonetic exercises for foreigners
Another letter of the Russian alphabet, the letter Zh, is unusual for foreigners both in its spelling (some foreigners call it a butterfly) and in its pronunciation.
When pronouncing the sound [Ж], the tip of the tongue is raised to the alveoli (to the tubercles behind the upper teeth) and the tongue is pulled back.
To produce the zhu zhzh sound [Ж], we again turn to helper sounds: the consonant [Г] and the vowels [О], [У]. The sound [G] will help to pull the tongue back, and the sounds [O] and [U] will help to stretch forward and round the lips.
Phonetic exercises for foreigners:
gzhu - gzhu - gzhu - zhu - magazine, beetle, buzz, tell you
gzho - gzho - gzho - zho - yellow, alien, knife, circle
[Ж], but the difference lies in the fact that the sound [Ш] is pronounced without the participation of the vocal cords (no voice, only noise). Below we will talk separately about the letters of the Russian alphabet Sh and Shch. How to explain the Russian sound [Ts] to foreigners?
The Russian sound [Ts] is a single and indivisible sound, although it is similar to a combination of sounds [T + S], which is why some foreigners pronounce two sounds [TS] instead of the letter Ts. In this case, the foreigner must be explained that the sound [T] must be pronounced as briefly as possible !
It is better to work out the pronunciation of the sound [Ts] in words where the letter T is after the letters T or D, for example: fathers, to the father, with the father, thirteen, thirty, twenty, twelve, well done ...
Russian alphabet - Letters Ш and SC
Pronunciation of Russian sounds [Ш] and [Ш]. Phonetic exercises for foreigners
Foreigners often confuse the sounds [Ш] and [Ш] and do not even distinguish these sounds by ear. In this case You already know what to do! Of course, do the exercise "Game with cards. "
"
Compare how the tongue and lips are positioned when pronouncing the sound [Ш] and the sound [Ш]:
|
| Solid sound [W] | Soft sound [S] |
| Language | Moved back, the back of the tongue is tense. | Promoted forward, has a convex shape, which is raised to the palate, the tongue is tense.
|
| Tongue tip | Raised to alveoli (to the tubercles above the upper teeth).
| more moved forward to the teeth.
|
| Lips | Stretched and rounded. | Stretched into a smile.
|
When pronouncing the sound [Щ], the entire tongue moves forward, the middle part of the tongue is raised to the palate, the tongue is tense. When pronouncing the sound [Ш], the lips are less extended forward than when pronouncing the sound [Ш]. When pronouncing the sound [Ш], the corners of the lips are slightly stretched, and when pronouncing [Ш], we do not smile.
! The sound [Щ] is pronounced LONGER than the sound [Ш].
The sound [Щ] causes much more difficulties for foreigners. It is necessary to ensure that foreigners pronounce the sound [Щ] softly. Therefore, in the phonetic exercise, we use the vowel sound [I]:
Search - search - schi - shield
Search - search - sche - cheek
Search - search - esche - brush
Search - search - shu - feel
How to perform phonetic exercises correctly when teaching phonetics of the Russian language to foreigners
When you do any phonetic exercise , you must adhere to the following scheme:
1) When teaching the phonetics of the Russian language, the teacher first reads the letters, syllables, words, and the foreigner listens to the teacher and follows the text.
2) Then the teacher reads and the foreigner repeats.
3) And only now the foreigner reads on his own.
If you need to explain to a foreigner the position of the tongue when pronouncing a sound, you can show it with your hands. For example, the right hand is rounded, fingers pointing to the floor. Now your right hand is the palate, alveoli and teeth. And from the left hand we will make a tongue. Now you can show foreigners the position of the tongue in the mouth.
Thanks to this, we will be able to do without an intermediary language when explaining almost , which, of course, is a big plus.
We always recommend using as little intermediary language as possible in the lessons of Russian as a foreign language. such lessons are much more useful for foreigners studying Russian.
When creating materials for foreigners and teachers of Russian as a foreign language, we are always focused on making Russian language lessons not only as effective as possible, but also easy.