Matching uppercase and lowercase letters activities
Matching Uppercase and LowerCase Letters
This interactive and hands on game to teach matching uppercase and lowercase letters is a fun gross motor game for preschool and kindergarten. Use this interactive letter activity along as an alphabet matching with objects and a sensory-motor learning activity!
Matching uppercase letters to lowercase letters is a literacy task that supports reading skills, but also challenges visual discrimination skills, form constancy, and visual scanning, all of which are visual processing skills needed for handwriting and reading comprehension. What’s fun about this activity is that it builds these skills in a fun way!
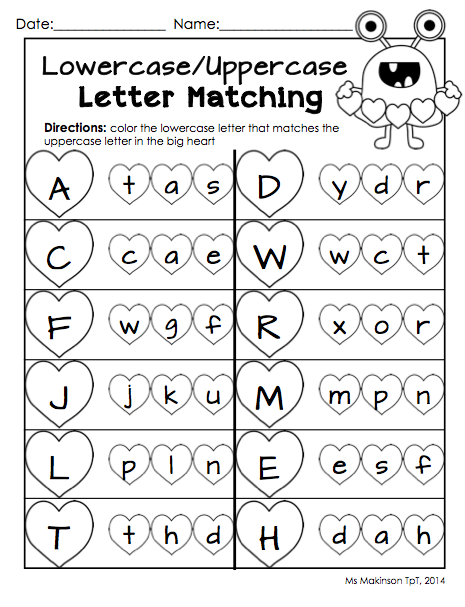
Be sure to grab our color by letter worksheet to work on letter matching, visual discrimination skills.
Matching Uppercase and Lowercase Letters
Learning letters and matching upper and lower case letters is a Kindergarten skill that can be tricky for some kids. We made this easy prep letter identification activity using items you probably already have in the house. If you’ve seen our blog posts over the last few days, you’ve noticed we’re on a learning theme using free (or mostly free) items you probably already have.
We’re sharing 31 days of learning at home with free materials this month along with 25 other bloggers in the 31 days of homeschooling tips series.
Today’s easy letter learning activity can use any letters you have around the house or magnetic letters and coffee filters.
While this activity is almost free if you’ve got the items at home already, we’re sharing the affiliate links for the items in this post.
How to play this interactive letter matching activity
You’ll need just a few items for this letter matching activity:
- Magnetic letters
- marker
- coffee filters (but paper towels or recycled paper would work as well.
To set up the activity, there are just a few steps:
- Grab the magnetic letters from the fridge and 26 coffee filters.
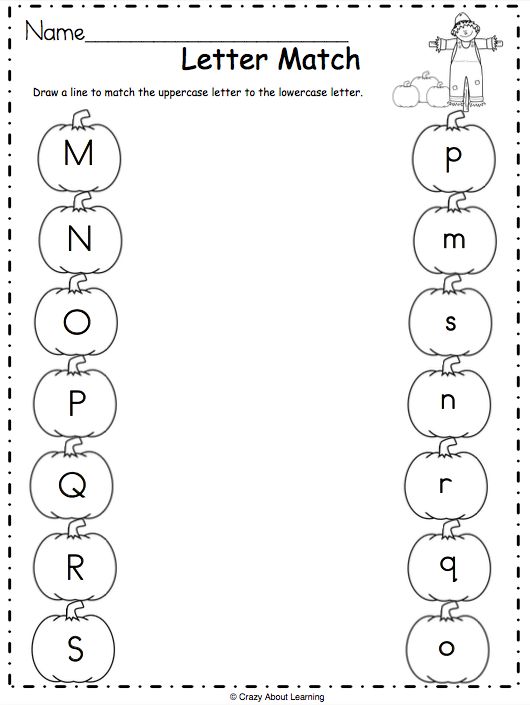
- Use a permanent marker to write one lower case letter of the alphabet on each coffee filter.
- With your child, match the magnetic letters to the lowercase letters on the coffee filters.
- Ask the child to help you crumble each letter inside the coffee filter that has its matching lowercase letter.
- Continue the play!
More ways to match uppercase and lowercase letters
By matching the magnetic uppercase letter to the lowercase letter on the coffee filter, kids get a chance to incorporate whole body movements and gross motor activity while looking for matching letters.
With your child, first match up each lower case coffee filter letter to the upper case magnetic letter.
You can spread the filters out to encourage visual scanning and involve movement in the activity, OR you can stack the coffee filters in a pile and one by one match up the letters. This technique requires the child to visually scan for the upper case magnet letters.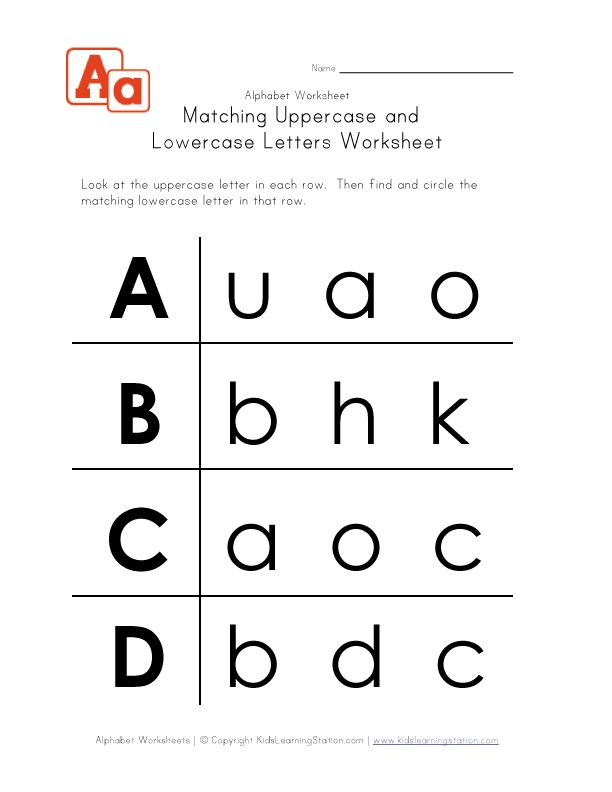
Try both ways for more upper/lower case letter practice!
We then wrapped the coffee filters around the magnets in a little bundle. There are so many games you can play with these upper and lower case letters:
- Match the same letter– match uppercase letters to uppercase letters and lowercase letters to lowercase letters.
- Alphabet matching with objects– Match an object that starts with the letter of the alphabet. Use small objects inside the coffee filter and match it to lowercase letters written in the coffee filter with uppercase magnet letters.
- Match the picture with the letter– Print off pictures of words that start with each letter of the alphabet. Then match the picture with letters of the alphabet using lowercase letters written on the filter and uppercase letters in magnetic letter form.
- Play a letter memory game– Hide letters around the room and challenge kids to find the letters in order to match the uppercase letter to the lowercase letters.
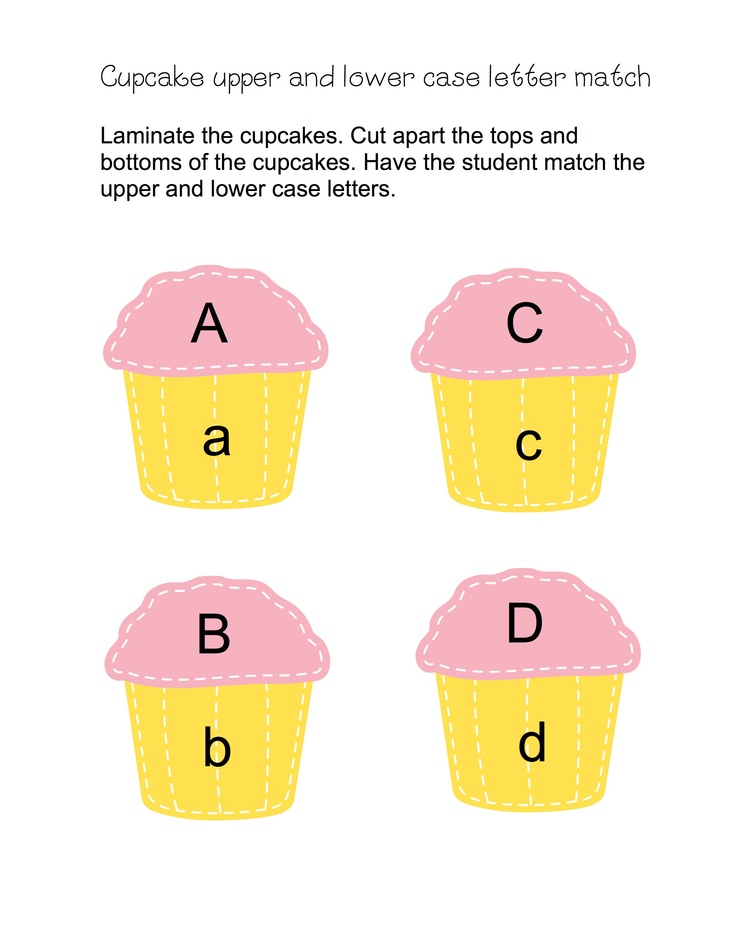
- Letter sound matching– Make a letter sound and challenge kids to find the letter that makes that sound.
- Letter Hide and Seek- Hide the bundled up letters around the room while your child hides his eyes. Send him off to find the letters and ask him to open the bundle and identify the letter.
- Letter Toss Activity- Toss the coffee filter bundles into a bucket or bin. Any letters that make it into the bin are winners!
- Name the letters- Unwrap the bundles and name the letters. Spread the coffee filters out around the room. Toss magnetic letters onto the matching lower case letter.
- Letter toss game- Toss a bean bag onto the coffee filters. The child can identify the lower case letter, then go to the pile of magnetic letters and find the matching upper case letter.
Can you think of any more ways to work on upper and lower case letter matching with coffee filters and magnetic letters?
Matching Big and Small Letters
The nice thing about this activity is that you can teach the concepts of big and small letters.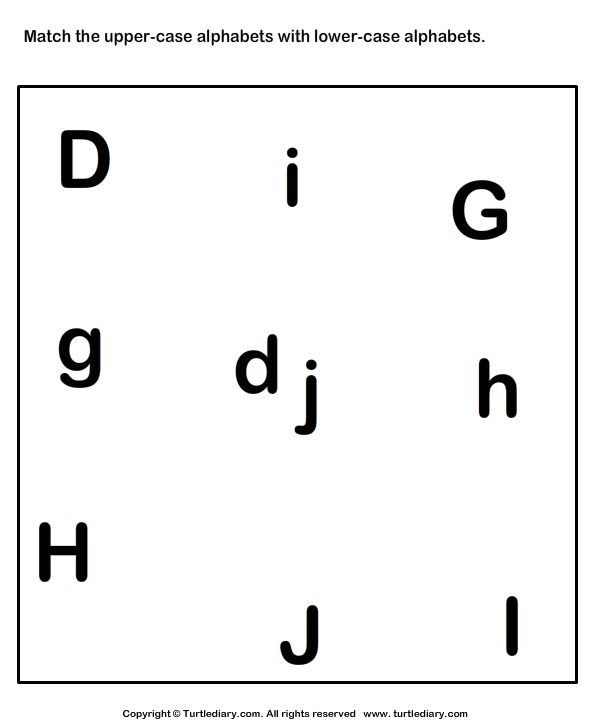 When we say “big letters” and “small letters”, we are showing the concept of letters that touch the top and bottom lines, or the upper case letters.
And teaching children the difference between those big letters and the small letters which touch just the middle point are part of the visual discrimination process that is needed for handwriting on the lines, or line awareness skills.
You will enjoy more alphabet posts from our archives:
- Hand-eye coordination letter match
- Building letters with baked cotton swabs
Looking for more interactive letter activities to match uppercase and lowercase letters? The Letters! Fine Motor Kit is for you!
Letter Kit for fine motor, visual motor, and sensory motor play.This 100 page printable packet includes everything you need for hands-on letter learning and multisensory handwriting!
This digital and printable packet includes these multisensory handwriting and letter formation materials:
- A-Z Multisensory Writing Pages
- Alphabet Fine Motor Clip Cards
- Cut and place Fine Motor Mazes
- A-Z Cotton Swab Cards
- A-Z Pattern Block Cards
- Fine Motor Letter Geo-Cards
- A-Z Color and Cut Letter Memory Cards
- Color By Size Sheets
- A-Z Building Block Cards
- A-Z Play Dough Letter Formation Cards
- Graded Lines Box Writing Sheets
- Alphabet Roll and Write Sheets
- Pencil Control Letter Scan
- Color and Cut Puzzles
Uppercase & Lowercase Letter Recognition Matching Hole Punch Activity
Skip to content
Letters
This post contains affiliate links for your convenience. View our full disclosure policy here.
What is it about school supplies that is so exciting? I loved when school supply shopping time came around and as an adult, shopping to stock my work desk makes me giddy. My daughter has learned (or maybe she was born with it) to love office and school supplies, too. Even as a toddler she loved using markers instead of crayons or tried to use adult scissors instead of kid scissors. So I knew that when I set up this free Uppercase & Lowercase Letter Matching Hole Punch Activity, we would have fun!
*Pair with our Clothespin Clip Cards BUNDLE for Kindergarten!
Uppercase & Lowercase Letter Matching Hole Punch Activity
I created this activity because my daughter has a few letters, both uppercase and lowercase, that she gets stuck on. Practice makes perfect and adding a hole punch in the mix makes practicing letter recognition super fun!
Each printable page in this activity has four letter matching strips on it.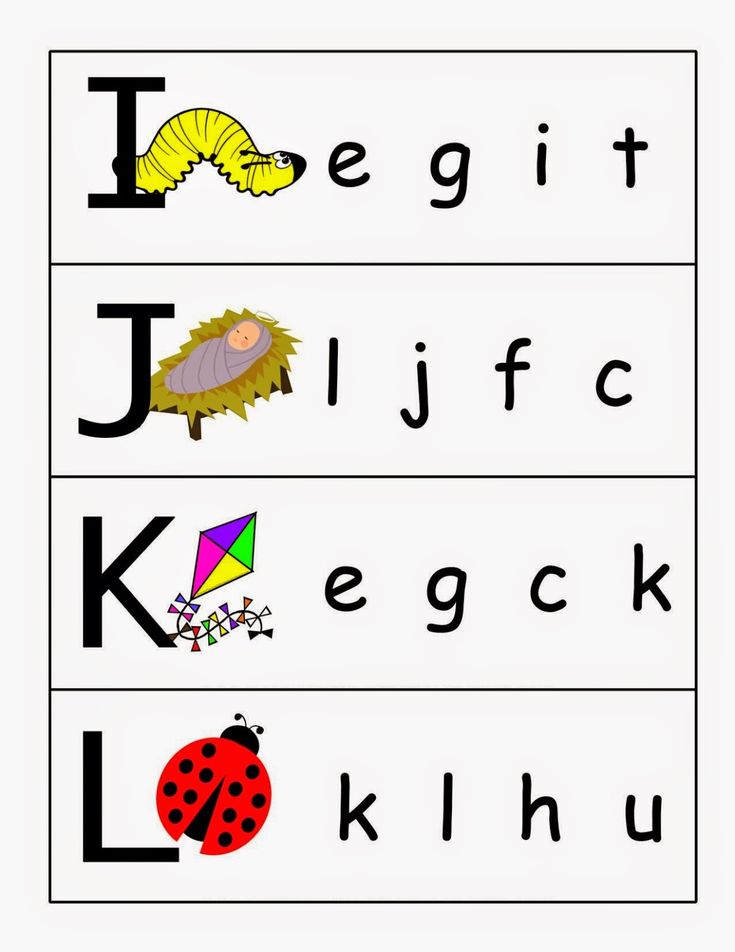 There is one strip for each letter included. I’ve also included both color and black and white versions for an ink-saving option!
To get started, first gather the supplies:
- Letter recognition printables (download below)
- Single hole punch
- Scissors
- Manipulatives (erasers, reusable stickers, etc.) – optional
- Dry erase markers – optional
Ways to Use the Letter Recognition Printables
For Single Use: For single use I like to use the black and white printable version of this letter matching activity. Print it out and cut along the outer dotted lines to make the strips ready for the kids to hole punch.
The letter bank has two lines to allow for more of a variety of letters.
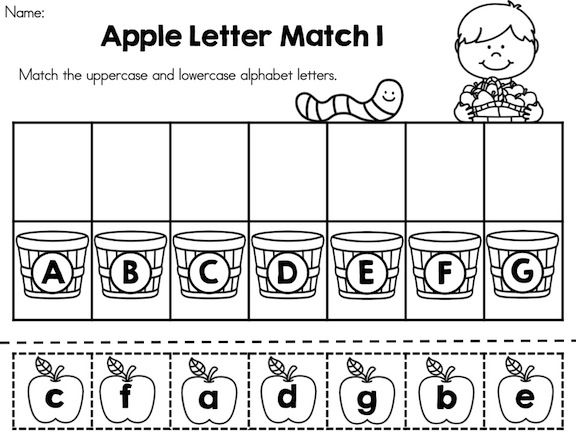
Kids find the lowercase letters in the letter bank, that match the uppercase letter. Once they have found the matches they can hole punch them. When that strip is complete, they can move on to the next.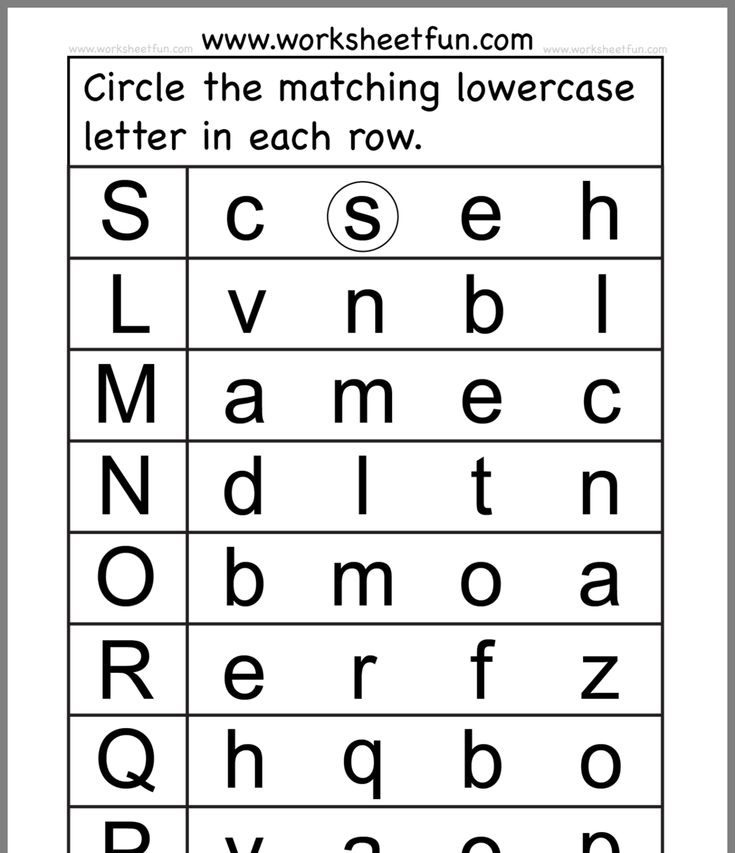 Using stickers to cover the matching letters is also a great option for strengthening fine motor muscles.
For Center/Reusable Use: This activity also includes a fun color version that is great for a reusable activity or for your literacy centers. Print the pages, laminate, and then cut them into strips. The kids can use manipulatives such as erasers or counters to cover the matching letters.
Sometimes we like to use dry erase markers to mark the matching letters on the laminated strips. This is always a hit!
At home this turned out to be a great letter matching activity that I could give my daughter while making dinner or folding laundry. When she needed assistance on letters that she wasn’t quite confident with, she could ask but I did not need to be 100% involved. It’s wonderful to see how well she reacted to this activity and how one simple office supply motivated her to practice her letters!
Grab Your FREE CopyReady to practice letter recognition and fine motor skills? Grab your free copy of the hole punch letter matching printables by clicking the large, yellow download button at the end of the post!
Want unlimited access to even MORE of our activities and resources?Then be sure you request your invite so that you can be the first to hear when the doors open again for our Print and Play Club!
With instant access to hundreds of printables by topic and skill (no more scouring the internet!), every TKC resource, video lessons, a digital games vault, “Super” Sunday Surprises, and much more – your planning time just got easier.
- Author
- Recent Posts
The Kindergarten Connection
Alex and the TKC team work together to bring you the best resources and activities for Pre-K and Kindergarten. It is our hope that this content helps you stress less and gain confidence in your classroom. Visit Alex on Instagram @thekindergartenconnection for more content and behind the scenes.
Latest posts by The Kindergarten Connection (see all)
Character Formatting in InDesign
- InDesign User Guide
- InDesign Basics
- Introduction to InDesign
- What's New in InDesign
- System requirements
- General
- Using Creative Cloud Libraries
- What's New in InDesign
- Work environment
- Basic information about the work environment
- Toolbox
- Parameter setting
- Operating environment "Touch control"
- Default key combinations
- Document recovery and cancellation
- Capture Extension
- Basic information about the work environment
- Introduction to InDesign
- Creating Documents and Layouts
- Documents and Pages
- Creating Documents
- Working with master pages
- Working with multiple documents
- Set the page size, margin, or release area
- Working with files and templates
- Creating book files
- Adding basic pagination
- Numbering of pages, chapters and sections
- Converting QuarkXPress and PageMaker documents
- Sharing content
- Basic Workflows with Managed Files
- Saving documents
- Nets
- Nets
- Grid formatting
nine0003 Layout Tools - Rulers
- Documents and Pages
- Text
- Add text to frames
- Text block linking
- Arabic and Hebrew options in InDesign
- Creating text along a path
- Markers and numbering
- Glyphs and special characters
- Text layout
- Text variables
- Creation of QR codes
- Text editing
- Text alignment
- Wrap text around objects
- Linked objects
- Related content
- Paragraph formatting
- Character formatting
- Find/Replace
- Spell checker and language dictionaries
- Typography
- Using fonts in InDesign
- Kerning and tracking
- Text formatting
- Text formatting
- Working with style packs
- Tabs and indents
- Review text
- Track and review changes
- Add editorial notes in InDesign
- Import PDF file comments
- Adding links
- Creating a table of contents
- Footnotes
- Creating an index
- Endnotes
- Signatures nine0024
- Styles
- Paragraph and character styles
- Mapping, exporting, and organizing styles
- Object styles
- Drop caps and nested styles
- Working with styles
- Leading
- Tables
- Formatting tables
- Creating tables
- Table and cell styles
- Selecting and editing tables
- Stroke and fill tables
- Interactive functions
- Hyperlinks
- Dynamic PDF documents
- Bookmarks
- Buttons
- Forms
- Animation
- Cross references
- Structuring PDF documents
- Page transitions
- Audio and video
- Forms
- Graphic objects
- Introduction to paths and shapes
- Drawing with the Pencil Tool
- Drawing with the pen tool
- Apply line parameters (dash)
- Compound paths and shapes
- Edit contours
- Clipping paths
- Changing angle parameters
- Alignment and distribution of objects
- Related and embedded graphics
- AEM Resource Integration
- Color and transparency
- Color application
- Using colors from imported graphics nine0003 Working with color swatches
- Mixing colors
- Shades
- Introduction to spot and process colors
- Overlay colors
- Gradients
- Flattening a transparent graphic
- Add transparency effects
- Working with InDesign cloud documents
- Cloud documents in InDesign | Frequently Asked Questions
- Sharing and collaboration
- Send for editing
- Checking a published InDesign document
- Feedback management
- Hosting, exporting and publishing
- Internet publishing
- Copying and pasting graphic objects
- Exporting content to EPUB format
- Adobe PDF Options
- Export content to HTML format
- Export to Adobe PDF
- Export to JPEG
- Export to HTML
- Overview of DPS and AEM Mobile
- Supported file formats
- Printing
- Booklet printing
- Marks and bleed
- Printing documents
- Inks, color plates and screen lines
- Overlay
- Creating PostScript and EPS files
- Preflight files before sending
- Printing thumbnails or large documents nine0003 Preparing PDF files for service providers
- Preparation for printing plates
- Automation
- Data Merge
- Plug-ins
- Capture extension in InDesign
- Scenario development
- Corrected errors
- Crash on startup
nine0003 Settings folder error: read-only
Apply baseline offset
Use the Baseline Offset option to move the selected character up or down from the baseline of the surrounding text. This option is especially useful when you need to manually enter fractional values, as well as when positioning graphics in a row. nine0397 Baseline offset values applied to text
-
Select text.
-
In the Character panel or Control panel, enter a numeric value for Baseline Offset. Positive values move the character's baseline higher, and negative values move the character's baseline below the rest of the string.
To increase or decrease this value, click the Baseline Offset field, then use the Up Arrow and Down Arrow keys to adjust the value. If you hold down the "Shift" key at the same time, the value will change in large increments. nine0397
A different value increment for the default baseline offset is set using the Baseline Offset option in the Units section of the Preferences dialog box.
Create superscript and subscript characters in non-OpenType fonts
-
Select text.
-
Choose Superscript or Subscript from the Character panel menu or Control panel menu.
nine0024 -
Select text.
-
Choose the Underline or Strikethrough option from the Character panel menu or Control panel menu. nine0397
-
Choose Underline Options or Strikethrough Options from the Character panel menu or Control panel menu. nine0397
-
Do one of the following and click OK:
-
To set the current text to be underlined or strikethrough, select Underline On or Strikethrough On.
-
Select the thickness of the underline or strikethrough from the Thickness option, or enter a value.
-
From the Text menu, choose one of the underline or strikethrough options.
-
Set the Offset to the vertical position of the line.
 The offset is measured from the baseline. A negative value moves the underline above the baseline and the strikeline below.
 -
Select Stroke Overlay if you don't want the stroke to mask the underlying ink on the press.
-
Choose a color and shade. If the line type is set to something other than solid, select a color or shade for the gap to change the display of the area between dashes, dots, or lines. nine0397
-
Select Stroke Overlay or Space Overlay if you want to print underlines or strikethroughs over another color and avoid errors that can result from deregistration.
-
-
Select text.
-
Select Ligatures from the pop-up menu. You can also choose Ligatures from the Character panel menu or Control panel menu. nine0397
-
Do one of the following:
-
Use the Type tool to select the frame before changing the colors of the text inside the frame.
-
To apply the color change to the entire frame, use the Selection tool to select the frame. If the color is applied to the text and not to the container, be sure to click the Formatting Changes Text icon in the Tools or Swatches palette. nine0397
-
-
In the Tools or Swatches palette, choose whether to apply the color to a fill or a stroke. If Stroke is selected, the color will only be applied to character outlines.
-
Do one of the following:
-
In the Swatches panel, click a color or gradient swatch.
-
In the Stroke panel, specify a line thickness or other line option (see Stroke panel options).
 nine0397
-
-
Use the Selection tool to select the text frame.
-
Select Object menu > Effects > [effect name] .
-
From the Settings for... menu, select Text.
When Object is selected, the effects you select apply to both the text in the text frame and the stroke and fill of the frame itself.
-
Set the effect attributes and click OK.
If you want to change the blend mode and opacity of the text, you can do so in the Effects palette.
-
Do one of the following:
-
To apply language settings to selected text only, select the desired text.
-
To change the default dictionary for InDesign, change the language while no document is open. nine0397
-
To change the default dictionary for a particular document, choose Edit > Deselect, then choose the language you want.
-
-
Select the appropriate dictionary from the Language menu in the Character palette.
-
Select text.
-
Choose All Caps or Small Caps from the Character panel menu or Control panel. If the text was originally entered in small caps, selecting the Small Caps option will not change it.
-
Choose Edit > Preferences > Advanced Text Options (Windows) or InDesign > Preferences > Advanced Text Options (Mac OS). nine0397
-
In the Small Caps field, enter a percentage of the original font size for text formatted in small caps. Then click the "OK" button.
-
Select text.
-
Select one of the following options from the Text > Change Case submenu:
-
To make all characters lowercase, select All Lowercase.
-
To capitalize the first letter of each word, select Capitalize At The Beginning Of Each Word.
-
To capitalize all characters, select All Caps.
-
To capitalize the first letter of each sentence, select Capitalize at the beginning of a sentence.
-
-
Select text to scale.
-
In the Character panel or Control panel, enter a numeric value for either Vertical Scale or Horizontal Scale. nine0397
-
Do one of the following:
-
Use the Selection tool to resize a text frame by dragging its corner while holding down the Ctrl (Windows) or Command (Mac OS) key.
-
Use the Scale tool to resize the frame.

See Scaling Objects. nine0397
-
-
By default, when Apply to Content is selected, the Size fields in the Control panel and Character palette are set to the new text sizes (40pt in our example). If you select the "Set up scaling in percentage" mode, then both the original size and the size after scaling ("20 pt (40)") will be reflected in the "Size" fields.
-
The scaling values in the Transform panel reflect the frame's horizontal and vertical scaling as a percentage.
 By default, if Apply to Content is selected, the scale values are reset to 100% after text is scaled. If the "Adjust Percentage Scaling" mode is selected, these values reflect the change in the scale of the frame, that is, if it is doubled, the frame scale "200%" will be shown. nine0397
 -
Choose Edit > Preferences > General (Windows) or InDesign > Preferences > General (Mac OS).
-
Select the Adjust Percentage Scaling option, and then click OK.
-
The "Adjust Percentage Scaling" setting option applies only to frames that are scaled after setting this option, and all existing frames remain unchanged.
-
The value of the settings parameter "Adjust scaling in percent" is saved with the text.
 The size after scaling is displayed in brackets even after turning off the settings option "Adjust scaling in percentage" and then changing the scale of the frame. nine0397
 -
To turn it off, choose Redefine Scale as 100% in the Transform panel. In this case, the view of the frame that has undergone scaling will not change.
-
When editing text or changing the scale of linked frames, with the "Adjust Percentage Scale" preference selected, the text scale changes even as it wraps to the next frame. However, if Apply to Content is selected, text that is edited into the next frame loses its scaling. nine0397
-
Select text.
-
In the Character panel, enter a numeric value for Skew. Positive values slant the text to the right, while negative values slant the text to the left.
- Applying OpenType font attributes
- OpenType 9 fonts0005
- Applying color
- Adding paragraph rulers above and below
- Applying gradients to text
- Transparency effects
- Hyphenation and spelling dictionaries
- Alignment of hierarchical or multipart structures before routing an event record to the output of an add or update object.
- Perform required changes to attribute field names and/or capitalization. For example, casting the TrackID name to track_id.
- Selectively match fields of interest with new fields to simplify event recording.
- Add new attribute fields to the event writer schema to allow other processors such as Field Calculator or Field Enrichment (Feature Service) / Field Enrichment (File) to write to existing fields rather than new ones. nine0005
- To perform individual data type conversions such as string to long integer or vice versa.
- Processor Field Mapping can be used to perform the required changes to attribute field names and/or capitalization. For example, data received with attribute field names such as ReportedDateTime can be remapped to pass data values to an attribute field named reported_dt. This is often necessary when the attribute field names in the resulting schema do not conform to the internal RDBMS's requirement that the field names be either all uppercase or all lowercase.
 nine0005
 - The processor can be used to selectively match fields of interest with new fields so that the target event structure has fewer attribute fields than the source. For example, if you are configuring the input to build geometry from the received coordinate values, the field mapping processor can be used to remove the coordinate values from the event record structure before routing the data to the output. It can also be used to anonymize event data by removing the customer's name and address while retaining city, state, or other general information. nine0005
- The processor can be used to add additional fields to the event structure. This applies when using a Field Calculator Processor or a Field Enrichment Processor (feature service) and you need to allow those processors to write to existing fields rather than create new fields. Using a processor before these other processors allows fields to be added to the event structure so that processors downstream can write data to the new fields.
- The processor can be used to perform individual data type conversions such as string to long (eg "3201" to 3201) and long to string (eg 3201 to "3201"). Because GeoEvent Server processes long integer date values measured in epoch milliseconds, you can cast a date to a long format, but you cannot use a field mapping processor to convert date to string or string to date. Instead, use the toString( ) function in the Field Calculator processor to convert data from date to string format. nine0005
- The processor can be used to flatten a multicomponent or hierarchical event structure. This is typically done before routing event records to the output of add or update objects; feature records in the geodatabase do not support hierarchical groups or multipart lists of data values. For example, the following is a scenario in which three data values (pressure, temperature, and humidity) are grouped under a parent element named data. The processor can be used to flatten the hierarchy of event records by matching the data attributes grouped below with peer data, along with the id, status, and calibrated attributes.
 nine0394
 - When mapping values organized within a group in a hierarchical structure, use a dot (.) when writing to access nested fields. For example, to display the pressure field nested below the data grouping field, map data.pressure to the field named pressure.
- When matching values organized in an array or list or multicomponent structure, use the index notation common to programming languages such as C# and Java. For example, if you have a list of values named observations, to map the third value in the list to the new third attribute, you map observations[2] to the third field. Arrays in programming are almost always zero-based, meaning the index of the first element in the array is zero. nine0005
- For more information, see Accessing data values in JSON Data Structures - Working with Hierarchy and Multi-cardinality on the GeoNet blog for examples of hierarchical and multi-cardinality data.
- When configuring the Field Mapping processor, select a source GeoEvent definition and a target GeoEvent definition.
 Fields from the target GeoEvent definition appear on the right, with drop-down lists available from the source GeoEvent definition, allowing you to select which fields to match. For each field, the data type is displayed to help identify the appropriate mappings for each field. nine0005
 - GeoEvent definition for event records in one real-time processing step may not be consistent with the published feature service schema. The event record must be processed by the Field Mapping processor to match the schema of each event record with the schema of the target features before the GeoEvent Service updates the features in the feature service. For example, many real-time data feeds (especially those that provide generic JSON) often provide data structures with data organized as groups or lists with multiple values. Such data structures are not the same as object service schemas, whose data structures are flat and expect discrete data types (date, string, long, and so on). The processor can be used to map data from hierarchical and/or multipart data structures to create a simpler, flatter data structure such as a GeoEvent definition imported from a feature service.
 nine0005
 - If you update features in a published feature service and do not want one or more fields of existing features to be changed, and leave those fields unmapped in the processor, this will write null values to the unmapped attributes of the feature records. Instead of leaving unmatched fields in the processor, just remove the fields that shouldn't be updated. For more information, see the Using a partial GeoEvent Definition to update feature records blog on GeoNet. nine0005
- If the Field Mapping processor is unable to complete the data type conversion, the mapped field will be set to null. An example would be to map an attribute with a string data type to an attribute field whose data type is double. The processor cannot convert the literal string value twelve to a numeric value, so it writes the value zero to the target field.
 nine0005
 - The processor is selective about the event data it receives. For example, suppose the processor is configured to map the event records associated with a GeoEvent definition Car to the structure described by a GeoEvent Vehicle definition. If a processor receives an event record with vessel attribute data, it will assume that another processor is waiting for an event record whose data structure matches the GeoEvent Vessel definition and will allow the event record to pass through the processor unchanged. nine0005
- The processor will not skip or flush event records if the field mapping between source and target GeoEvent definitions is incorrect. Event records will continue to be processed using the original GeoEvent definition schema and the target GeoEvent definition will be ignored. For example, if you are going to map a field from the source schema named TrackID to a field in the target schema named track_id and you make a typo so that the source field is specified as TrackIDs, the processor will not map either field.

When Superscript or Subscript is selected, predefined baseline offset and font size values are applied to the selected text.
Values are calculated as a percentage of the current size and leading, and are based on the settings in the Text Preferences dialog box. When text is selected, these values do not appear in the Baseline Offset and Size boxes in the Character panel.
The default size and position for superscripts and subscripts can be changed in the Advanced Text Options preferences. nine0397
Applying an underline or strikethrough
The default underline and strikethrough line thickness depends on the font size.
Jeff Witchel provides a video tutorial on using an underline font: Adjusting Underline in InDesign.
Applying an underline or strikethrough
Changing the underline or strikethrough settings
The underline setting is especially useful when you want uniform underlining across characters of different sizes, or when creating special effects such as highlighting a background.
Type of text before and after underliningYou can change the underline or strikethrough options in a paragraph or character style in the Underline Options and Strikethrough Options sections of the dialog box that appears when you create or edit a style. nine0397
Applying ligatures to character pairs
InDesign automatically inserts ligatures, which are typographic characters that replace certain character pairs (such as "fi" and "fl") if they are available for the font. Characters that InDesign uses when the Ligature option is selected display and print as ligatures, but are fully editable and do not generate false spelling errors.
When using an OpenType font, when Ligatures is selected from the Character panel menu, Control panel menu, or shortcut menu, InDesign generates all the standard ligatures specified by the font designer. However, some fonts contain more decorative, complementary ligatures that are created when the Complementary Ligatures option is selected.
Change the color, gradient, or stroke of text
You can apply colors, gradients, and strokes to characters and then continue editing text. Use the Swatches panel and the Stroke panel to apply colors, gradients, and strokes to text, or change character color options when creating or editing a style.
A. Effect of swatches on fills and strokes B. Effect of patterns on container and text C. Hue percentage
You can also apply a gradient to text by dragging the mouse over selected text when the Gradient Swatch or Gradient: Feather tool is selected.
To invert text, you can set the text fill color to white (or "[Paper]") and the frame fill color to dark. The same effect can be achieved by creating a paragraph line behind the text, but if it is black, the text color will have to be changed to white.
Adding transparency effects to text
Use the Effects palette to add transparency effects to text, such as shadows.
Mike Rankin gives examples of how to use transparency effects: Pretty InDesign Effects, Part I.
Language setting for text
The language setting for text determines which dictionary will be used for spell checking and hyphenation. The choice of language does not affect the text itself.
InDesign uses Proximity (and Winsoft for some languages) dictionaries when checking spelling and hyphenation. These dictionaries allow you to define a different language even for a single character of text. Each dictionary contains hundreds of thousands of words with a standard syllable breakdown. Changing the default language will not affect existing text frames or documents. nine0397
Dictionaries are customizable to ensure that any unique dictionary is correctly recognized and processed.
Influence of dictionaries on hyphenationA. The word "Glockenspiel" in English B. The word "Glockenspiel" in traditional German C. The word "Glockenspiel" in reformed German
Changing the case of characters
The All Caps or Small Caps commands change the display of text, but not the text itself. The "Change case" command, on the other hand, changes the case of the selected text. This distinction plays an important role when searching or checking the spelling of text. Suppose the word "arachnids" is entered into a document, then the "All caps" command is applied to it. When searching for the word "ARCHID" using the Find and Replace command (with the "Case Sensitive" option selected), the word "Arachnids" with the All Caps command applied will not be found. For better results when searching and checking spelling, use Change Case instead of All Caps. nine0397
Anne-Marie Concepcion provides an article on small caps: Regular and OpenType small caps.
Change text characters to all caps or small caps
InDesign supports automatic case change of characters for selected text. If the text is formatted as small caps, the small caps characters are automatically used if they are available in the font. If there are no small caps in the font, then InDesign produces them is a synthesis of , using reduced-size variants of regular uppercase characters. The size of synthesized small caps is set in the Text Settings dialog box.
Before (top) and after (bottom) small caps for legacy time periods (BC and AD) and surrounding text For OpenType fonts, selecting All Caps or Small Caps creates a more elegant style. When using OpenType fonts, you can also select the All Caps option from the Character panel menu or Control panel menu. See Applying OpenType Font Attributes. nine0397
Set cap size
Change capitalization
This command expects a period ("."), exclamation mark ("!"), or question mark ("?") at the end of sentences. It may result in unexpected case changes if the listed characters are used for other purposes such as abbreviations, filenames, URLs, and so on. In addition, proper nouns can begin with a lowercase letter, although they must begin with an uppercase letter. nine0397
Scaling type
You can set the proportion between the text height and width relative to the original character width and height. For unscaled symbols, this value is 100%. Some typefaces include the true wide font, whose characters are specially designed to be wider than the regular font. Scaling causes text characters to become visually distorted, so it is usually preferable to use fonts specifically designed to be narrow or wide, if available. nine0510
A. Text without scaling B. Text without scaling in condensed font C. Text in condensed font after scaling
Vertical or horizontal scaling setting
Scaling text by resizing a text frame
Specifying the appearance of scalable text values
When you change the scale of a frame, the scale of the text inside it also changes. For example, if the text frame is doubled, then the text size increases from 20 to 40 points.
David Blatner provides an article on scaling text frames: Creating a magnifying glass for a text frame in InDesign.
The display of scalable text on palettes is controlled by the preferences parameters.
Tracking scale changes can be useful in cases where you might want to return the original scale of a frame and its text, or find out how much the size of a frame has changed. To track changes in the scale of frames and the text they contain:
Pay attention to the following points.
Text slope
Remember that applying slant is different from italic.
Related content
Processor Field Mapping—GeoEvent Server | Documentation for ArcGIS Enterprise
Summary
The Field Mapping processor can be used to translate (or map) data from one event recorder schema to another event recorder schema or structure. The Field Mapping Processor has five main uses:
All event data entering GeoEvent Server must have an appropriate GeoEvent definition that describes attribute field names, data types, and the overall data structure. The Field Mapping processor can be used to map one GeoEvent definition to another.
Examples
Usage notes
Parameters
| Parameter | Description |
|---|---|
| Name | |
| Processor | Name of the selected processor. |
| GeoEvent source definition | The name of the GeoEvent definition from which the attribute values will be taken. When matching values organized within a group or hierarchical structure, use a dot (.) when writing to access nested fields. Use the array index notation common to programming languages such as C# and Java when matching values organized as a list or multicomponent structure. |
| Target GeoEvent definition | Name of the GeoEvent definition whose attribute fields will receive values from the source data structure. |

