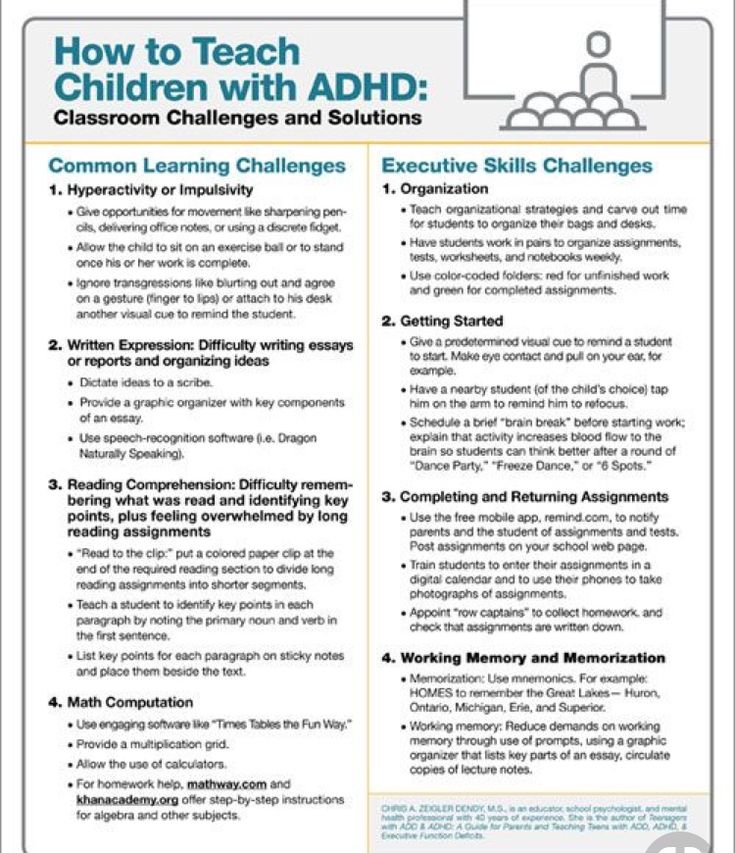
Organizing a teacher's desk
Calm the Clutter with Teacher Desk Organization Tips
Teacher desks often become chaos by the end of the week—or sometimes even by the end of the school day! These teacher desk organization tips are easy to implement and will help you control the clutter! With a range of solutions, you’re sure to find one that will help keep you sane.
(Note: WeAreTeachers may collect a small portion of the profit from links within this article. We only showcase items we love!)
1. Start a teacher toolbox
Not enough drawer space? Keep all of the essentials at your fingers tips with a multiple drawer toolbox kit like this! The best part is you can customize it however you like (even include a drawer for chocolate pick-me-ups).
Source: @teachingprimarywithkatelyn
2. Add a cart for extra storage
Extend your desk with a storage cart for more organization space. The mobility of the cart also allows you to bring it around the classroom if you store items you may want to grab as you teach a lesson.
Source: @thepinspiredteacher
3. Utilize the wall space
Here’s a great solution to the cluttered desk. Using the wall space near your desk is a game changer! If you have a filing cabinet or magnetic surface nearby, add magnetic clips for papers, magnetic baskets for pens, or magnetic round tins for paper clips and tacks. If you don’t have a magnetic area, try command strips.
Source: @teacherinthejungle
4. Lazy Susan to the rescue
Lazy Susans aren’t just for spices in the kitchen! Try one out on your desk and give it spin to pick up exactly what you need.
Source: @marleymegb
5. Pick up a makeup organizer
Acrylic makeup organizers have the perfect little compartments that will fit all of your teacher accessories, too! Not to mention how aesthetically pleasing this one is.
Source: @primary_positivity
6. Add a sticky note tower
Who doesn’t want a sticky note tower? This fun desk addition will keep all of your note papers in one place.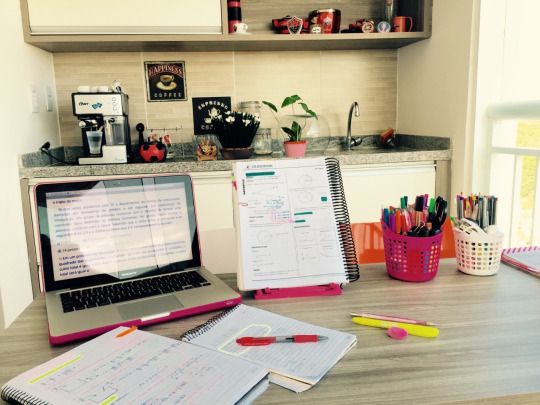
Source: @teachingwithmrgammon
7. Add a pegboard
If your desk is up against or alongside a wall, attach a pegboard. Customize your storage with different hooks or pegboard baskets to fit your organization needs.
Source: @mrs.misjunskindergarten
8. Wall shelving clears desk space
Shelving can be so helpful to remove items that don’t need to be sitting on your desk. Give yourself more space by easily mounting a shelf.
Source: @prayandteach
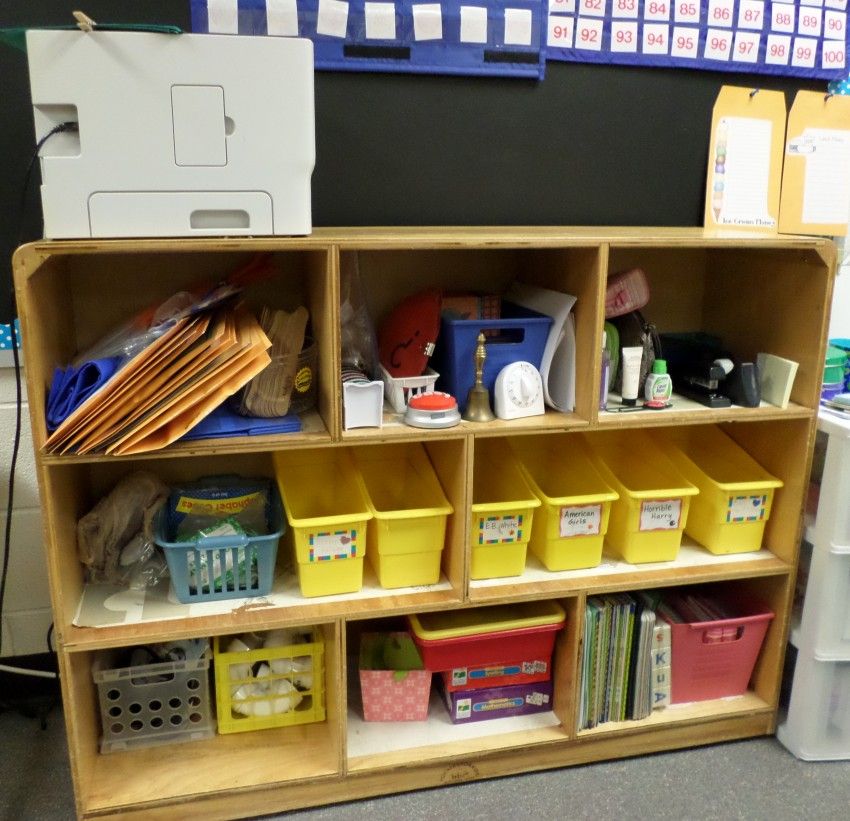
9. Ditch the file drawer
If you have a desk drawer filled with files, consider moving them to a file storage container to free up space. You’ll now have so much room for more things you need on a daily basis!
Source: @coffeeteachandinspire
10. Put items in pouches
Pouches are so easy to throw in your drawers without having to worry about things being a mess. Grab an array of pouches that you can fill with personal items, pens, notepads to attend meetings, and more.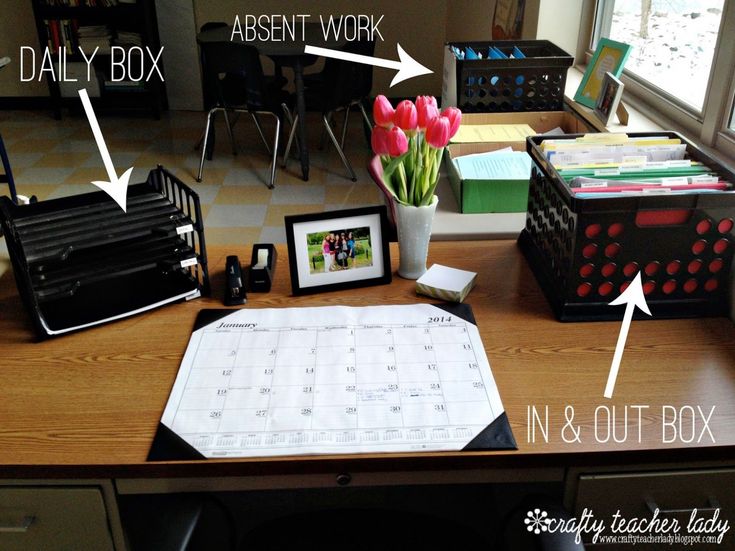 Plus, clear pouches make it easy to see what’s inside.
Source: @teachinghistoryinthemiddle
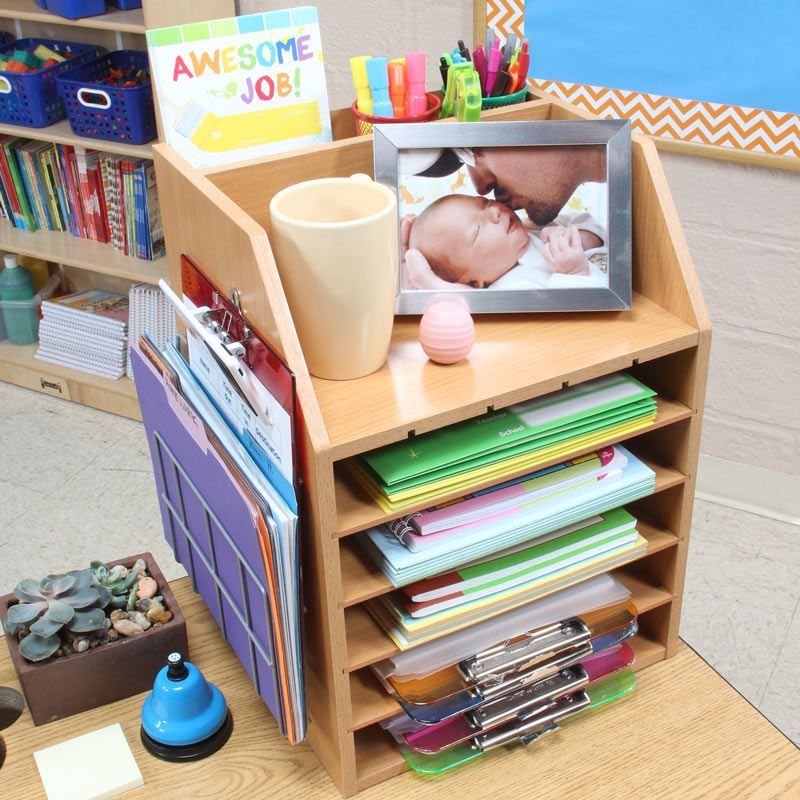
11. Add a desk shelf
A desk shelf adds another layer of storage to your space. You can store smaller items underneath, with easy-to-grab essentials on top.
Source: @coloringincardigans
12. Label everything
If you have files or other paper folders in a desk drawer, be sure to label them for easy access. We’re sure you’re already on the label train, but if not, a label maker is worth the investment.
Source: @mrsjonescreationstation
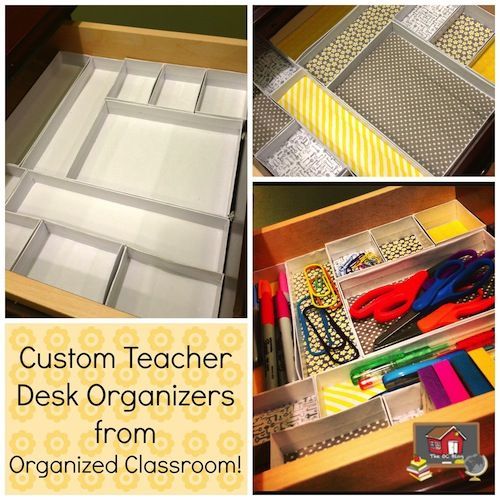
13. Take time to organize drawers
Tired of wasting time shuffling through drawers? Take the time to organize items for easy access. Pick up a set of desk drawer organizers, set aside an hour, and thank us later for having taken the next step of teacher desk organization.
Source: @mrs.craftandteach
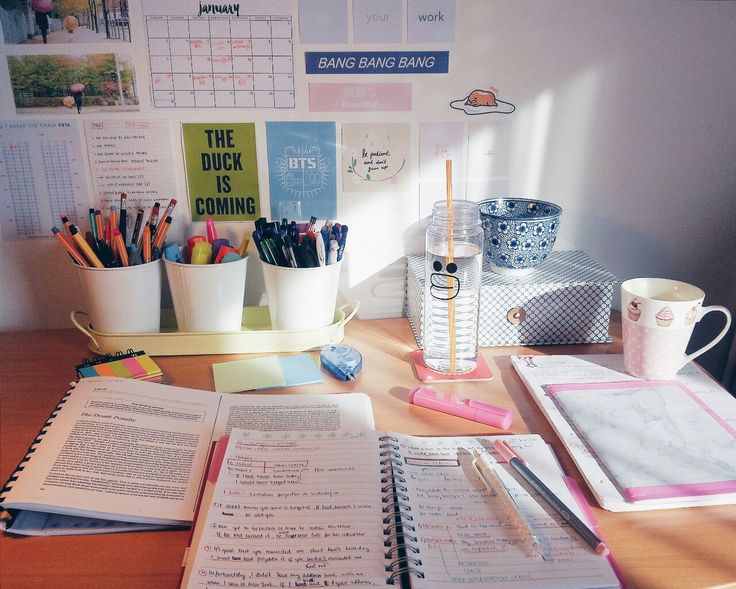
14. Downsize what you don’t need
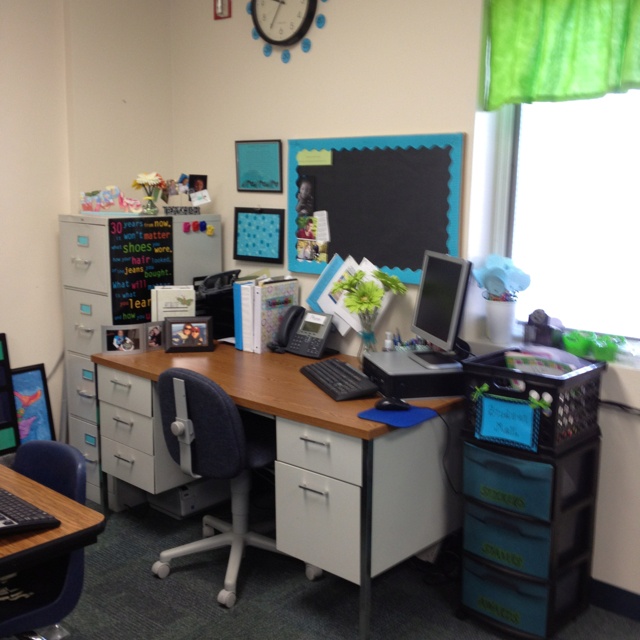
We know you love that teacher mug from the holidays, but does it need to sit on your desk? Cutting down on the number of items you have will make you feel more organized as a whole. We know teacher desks can often get chaotic like pictured above during busy days, and getting rid of items that aren’t in use is a helpful tip to combat this.
Source: @missgirlingsclassroom
15. Organize your cords
There’s nothing more frustrating than a mess of tangled cords. These cord clips are so helpful and can attach anywhere on your desk to keep pesky cords from running about.
Source: @ispeakorganized
16. Use the sides of your desk
With some command hooks and binder clips, you now have a new area to store student handouts or display a sign
Source: @beccasmusicroom
17. Create a space you love
You should work, grade, and make lesson plans in a space you love. Do yourself a favor and make your teacher desk functional, yet inviting. Add pops of your favorite colors, patterns, or pictures of family and pets. Having an area you appreciate will only make you more willing to keep your teacher desk organized.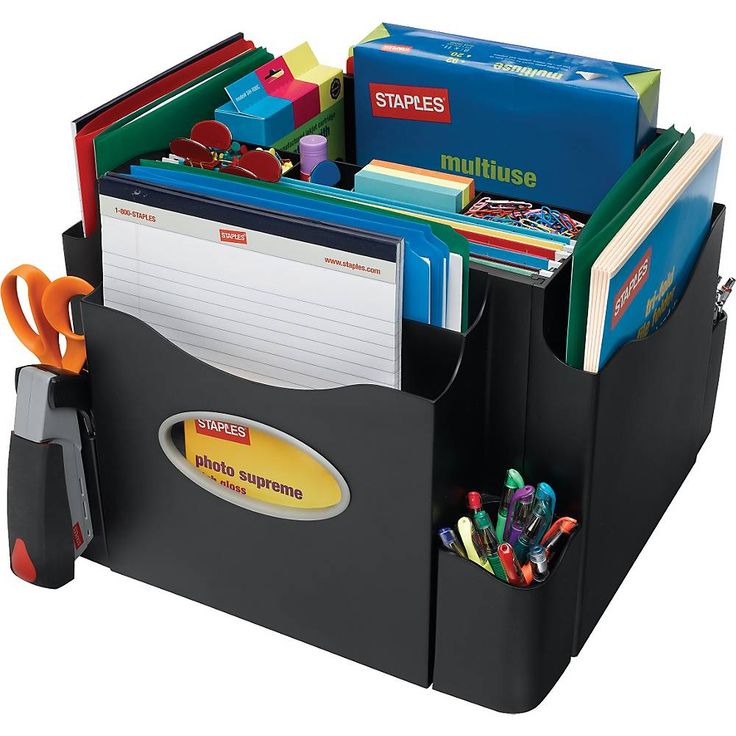
Source: @justateacherfromakron
Looking for more teacher content? Subscribe to our newsletters for more send directly to your inbox.
Loving these teacher desk organization tips? Also check out other classroom organization inspiration.
Teacher Desk Organization Ideas: How to Declutter and Organize Your Workspace in 2022 - Clutter-Free Classroom
If you are looking for teacher desk organization ideas, then you’ve found the right place! This post shares 5 steps for transforming your desk from a hot mess to a systematized, tidy workspace. The first step is to reflect on why it’s important for you to have a tidy workspace. This will give you the motivation to complete the project. Whenever you feel like you are losing steam, think back to why you are taking on this task. The second step is to determine if you actually need a teacher desk in your classroom. This post will talk you through the process of making that decision with reflection questions. The third step is to take action and declutter your desk.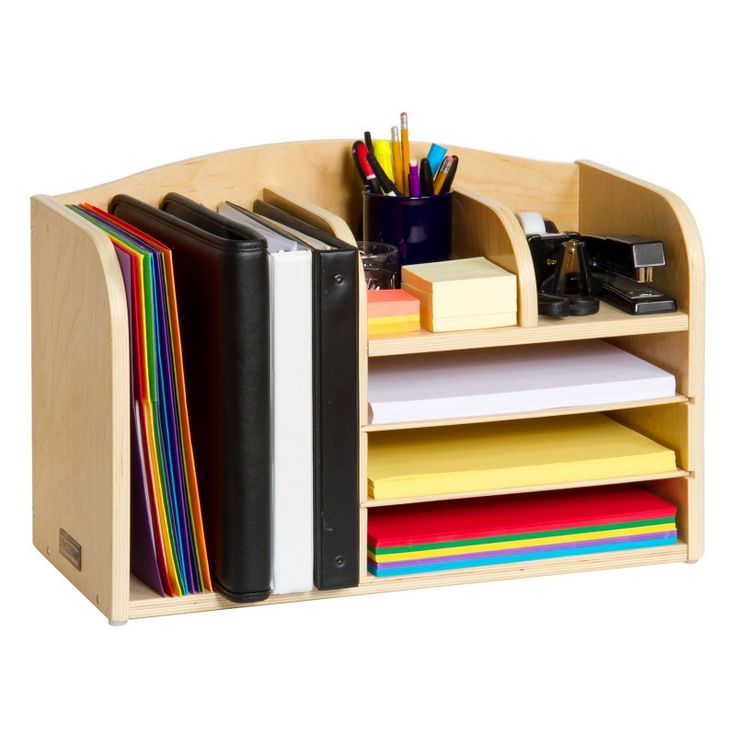 This post will walk you step-by-step through how to do that. The fourth step is the organization phase. The final step is to maintain your newly organized space. There are 20 tips to support you in doing so down below.
This post will equip you with the information you need to declutter and organize your teacher desk and establish systems and routines for maintaining an organized work space. Get all of the teacher desk organization ideas below!
Below are 5 steps for organizing your teacher desk. There are tons of great teacher desk organization ideas imbedded in them as well.
1. Reflect on why it’s important for you to have a clean workspace.
Before we get into anything related to teacher desk organization, think about why you want a tidy workspace and the benefits of keeping a clean desk. Below are some examples to help you start the brainstorm process.
- A clean workspace will improve efficiency.
- It will present an organized, professional image.
- Having systems to maintain your space daily helps protect confidential data and student information.
- It will make you more relaxed and less stressed.
2. Determine if you need your teacher desk.
Again, before we get into any teacher desk organization tips, think about if you even need a desk. Teacher “desks” often become teacher “offices,” which take up a good chunk of the classroom. If you are short on space, you may want to consider doing away with the desk completely. Ask yourself the reflection questions below to help you determine if you actually need your desk.
What do I use my desk for?
If the answer is storage, then think about other places that you could store those same materials (or better yet, declutter the space and get rid of some of them). If you use your desk for planning, grading, etc. then consider alternative spaces that would work better.
Am I the only one benefitting from the space?
Teacher desks frequently monopolize a large fraction of the classroom, yet only one person is getting use out of it.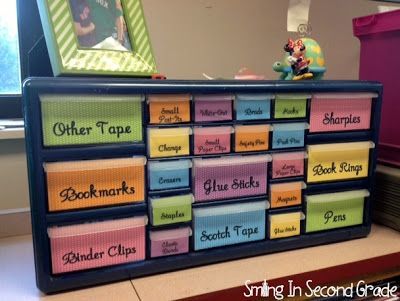 Consider how you could use the space to maximize student learning.
How does this piece of furniture affect my teaching?
Most teachers report that they don’t spend much time at their desk. When children are present, they are working with them and not sitting alone at a desk. When they are out of the room, there are tables available to work at.
How does my desk area usually look and how does that make me feel?
If whenever you look at your desk you feel overwhelmed and stressed, then that’s a good sign that this is a problem area for you. Another thing to consider is the feeling you get whenever an administrator, colleague, or parent walks in your classroom. You know your desk is a direct reflection of you. If it is cluttered and messy, then that sends a message to anyone who sees it.
Is getting rid of the desk an option? If not, how could it be repurposed?
I currently have a teacher desk in my classroom. I doubt it could be removed because I don’t think there would be anywhere to store it.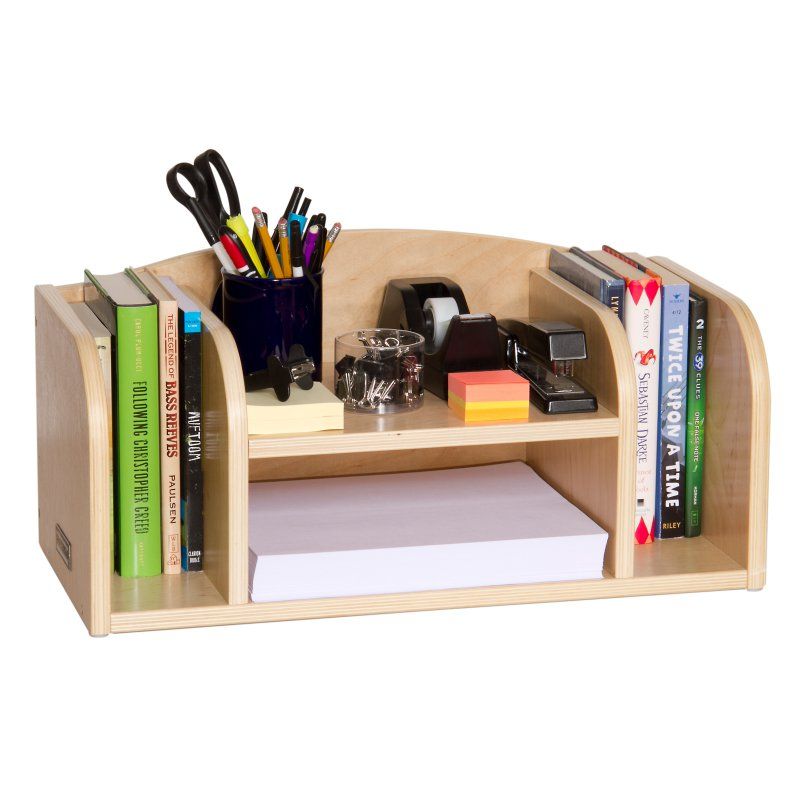 However, I am planning to repurpose it as an area that kids can work at. It’s higher than the tables so it’ll be a good option for those friends that like to stand and work.
If you have determined you need a teacher desk, then let’s focus on how to make it organized and more efficient! Read below for the next steps!
3. Declutter your desk.
It’s very easy to accumulate a lot of unnecessary “stuff” in and around a desk. Start by determining what you really need and what you can remove from the classroom.
And remember, the more you get rid of the less you’ll need to organize.
- Gather 2 small sorting containers (labeled keep and donate), a recycling bin, and a trash can. Place the sorting containers on top of your desk. Open one drawer at a time, remove the items and place them into the appropriate container.
- Now go through the container of items you plan to keep, sort and reconsider the items. Place like items together (pens/pencils, stickers/stamps, paperclips/binder clips, etc).
 Get rid of anything that is considered excess. You don’t need three scissors or four bottles of whiteout.
 - If you have a teacher supply closet at your school simply place the excess staples, paperclips, and other items there. It’ll be there when you need it. If you can’t stand to part with it then consider getting a small storage box and placing all of the duplicate and overstocked items inside so that your actual workspace is simplified.
- After you have removed everything from your desk, give it a deep cleaning. Add in organizational systems for sorting objects with labels before returning items to it.
- Designate a space for things that come and go with you each day so they are not left out on your desktop (i.e. cell phone, camera, keys).
- Try putting everything you need into a box next to your desk for a week or two. When you take an item out to use place it inside your desk. Reevaluate the items that are still in the box and weren’t used at the end of the designated time period.
 Do you really need them?
4. Organize your desk.
The next step is to organize your desk. Below are 12 teacher desk organization ideas that may be helpful!
Avoid the big desk calendar.
The first teacher desk organization idea on the list is to avoid the big desk calendar you often see on teachers’ desks. Those giant calendars that cover the surface of a desk look like a good idea, but can be problematic for several reasons. Desk calendars are large and awkward. The items placed on top need to be removed or shuffled to access it, and those items don’t always find their way back to the correct home.
A much better solution is a small planner that is portable and easy to use. If you prefer to view the year or month at a glance, consider creating a display next to your desk that you can see, but not bury.
Only put items you actually need in the desk.
Most likely you will never find yourself in a situation that requires you to immediately put your hands onto 24 pens, 13 boxes of paperclips, and 43 elastics.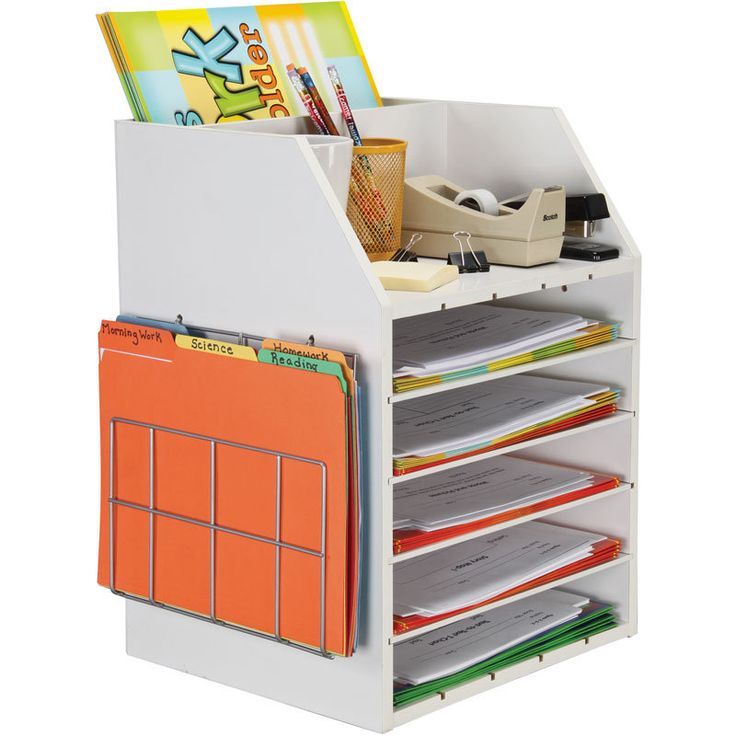 Use smaller, marked containers to house the surplus of these items and keep only a few handy in your desk.
Create smaller compartments.
The third teacher desk organization idea on the list is to use small boxes or drawer organizers to contain small items in your desk. This will keep your desk not only looking tidy, but will make it easy to find and put away objects that would otherwise be tossed loosely inside.
Label the areas within your desk.
A label greatly improves your chances of returning items to the correct location. It also prevents you from placing items into spots where they do not belong.
Create a bulletin board next to your desk.
You can either invest in a cork board or simply cover the existing wall with paper and border. Use it to display important items like schedules, lunch menus, procedures, etc. If an item is confidential (for example: student addresses and phone numbers), create a “pocket” to hide the information, but still keep it at your fingertips. A file folder works well for this.
Organize your tasks.
The next teacher desk organization idea on the list is to use stacking trays or a vertical wall system for separating items. Some great categories include: to do (things that need to be addressed, filled out or copied), to file (papers that need filing), and to read (items that need your full attention). Also consider that trash can to be your fourth and most important filing category.
Create a home for your plan book.
Always keep it in the same place when you are not writing in it. Inform a close colleague about where you keep your plan book and teacher manuals, so that in the event of an unplanned absence everything will be accessible.
Store small items into your desk.
This includes paperclips, pens, erasers, and such. Desktop organizers seem like a good idea, but add visual clutter and take up valuable space. They also make it too easy for children to access them.
Clean off your desktop often.
Get in the habit of always cleaning off your desktop before lunch and before you go home. This will ensure that you don’t reach the point of being overwhelmed by the task.
Relocate items on your desk.
Take the items that are typically found on a teacher’s desktop and relocate them to a drawer. They’ll still be easy to access, but won’t be cluttering the area. This includes things like post-its, a stapler, tape, etc.
Use small containers within the drawer to keep things organized.
One of my favorite teacher desk organization ideas on the list is to use small containers within drawers. Labeling the baskets is helpful too. There are some great desk organizer products available, but I prefer to keep everything out of sight.
Always be ready for a substitute.
Strive to leave a clean workspace with emergency sub plans out and visible when you leave each day. Not only will you feel more productive coming into a clean spot, but you will never need to worry about sub plans again.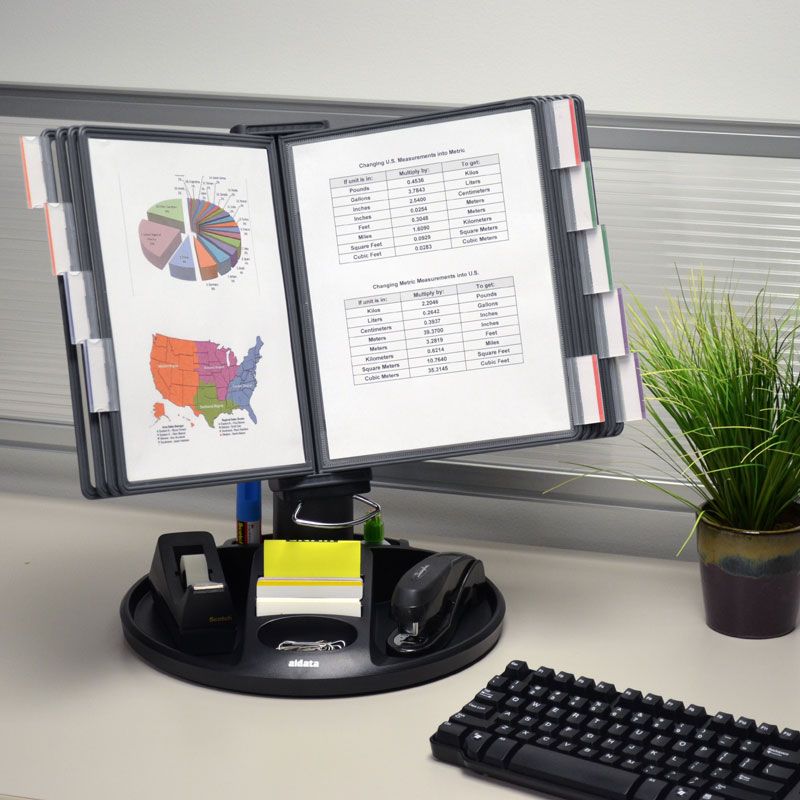
5. Establish systems and routines.
Once your desk is organized, develop routines to make it easy to stay that way. Get into the habit of always clearing off your desktop at the end of prep, before lunch and before you leave for the day. This will prevent you from feeling overwhelmed or having to spend a ton of time at it at once.
Stop using sticky notes for reminders.
Instead of using sticky notes, keep one notebook designated for reminders and to do lists. I love me a Post-It too, but they make your work area look cluttered.
Limit the family photos and kid art.
It’s nice to have pictures of your family available so that your students can connect with you and know you are human. It’s also great to be able to look at the smiling faces or your loved ones while you are away from them. However, your classroom should not be a shrine to your family. Consider creating a personalized binder cover insert or a page protector with your personal photos. You could also go digital and simply look at your phone when you want to see those adorable little smiles.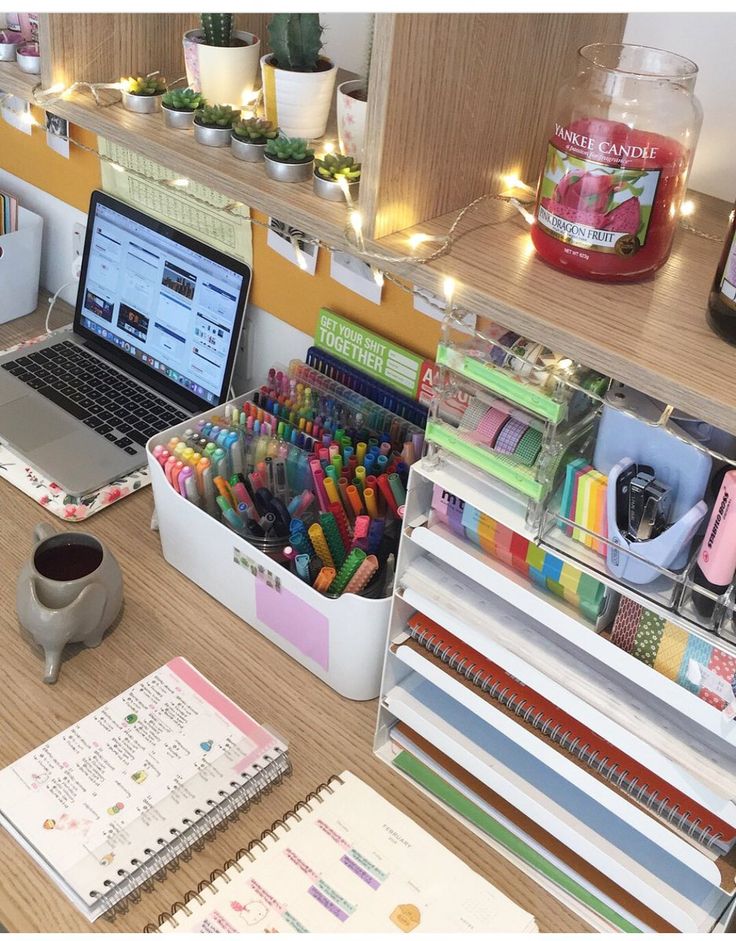
Say no to knick-knacks.
Limit the personal items on your desk. They take up valuable real estate, are another thing to manage, and could get damaged accidentally. We want everything on our desk to serve a purpose.
Schedule times to clean your desk.
Make this a routine. My class takes a few minutes to wash their hands and gather their recess things just before lunch. They also take about five minutes to pack up to go home at dismissal. I use both of those times to “manage” my desk. I quickly recycle anything I don’t need, address things in my action file, and relocate anything that has been placed onto the surface. Because it never gets to the “out of control” stage, I am able to tend to it during these two short periods of time. After the kids leave for the day I wipe the desk down and place my emergency sub binder in the center of the desk.
Stick to one type of pen.
Pick a brand and color that you like and use it exclusively. Only keep 2-3 on hand at a time.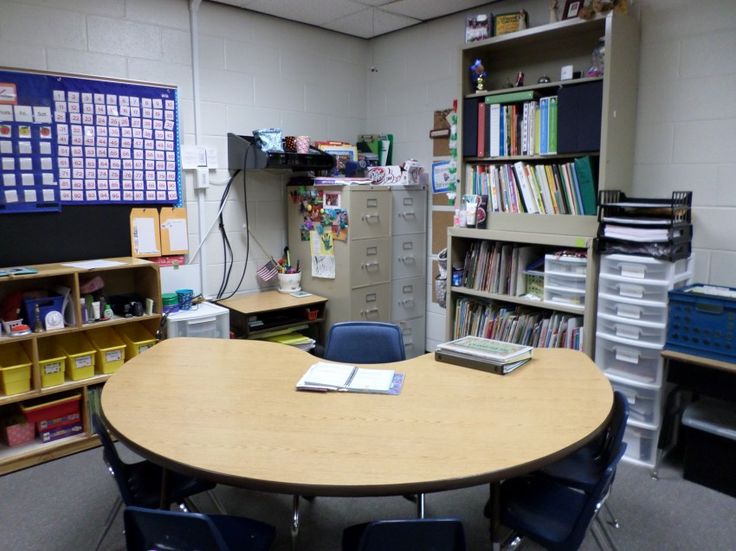
Don’t print emails or resources unless you absolutely need to.
Reducing the amount of paper you have also reduces the amount you’ll need to manage. Avoid having unnecessary papers as much as possible.
Keep a clear desktop.
You’ll be amazed at how this makes you feel psychologically. To achieve this goal store things in the drawers, attach photos to the desk or on a nearby wall.
Consider creating a “traveling office.”
Create a traveling office by placing a pair of scissors, a stapler, a roll of tape, a couple pens and some paperclips into a portable tote or caddy that can be stored on a shelf, under a table or in a cupboard when not in use. This gives you so much flexibility!
Have a plan for all those student drawings that are presented to you.
Perhaps you could designate a small bulletin board and rotate the gifted artwork or simply say, “this will look beautiful on my fridge at home.”
Create smaller containers and spaces.
Small containers are a great way to store items within drawers. Use small boxes, plastic containers, muffin tins or draw sorters to keep things organized. Go the extra step by labeling each section. It greatly increases the odds that you’ll put things back into their proper place. As I mentioned earlier, this is definitely one of my favorite teacher desk organization ideas!
Find a method of managing cords that works well for you.
You can use zip ties to tighten them and/or a basket to corral them. You could also cut holes in a box to keep the cords together while in use. Attach a label near the power source to identify the purpose of the cord.
Do not use your workspace as a closet.
Designate a closet or drawer to house your purse, coat, and lunch bag during the workday. Try to refrain from hanging your coat on the back of your chair.
Establish routines for maintaining a clutter-free, clean workspace.
Keep a container of baby wipes in your newly decluttered drawer.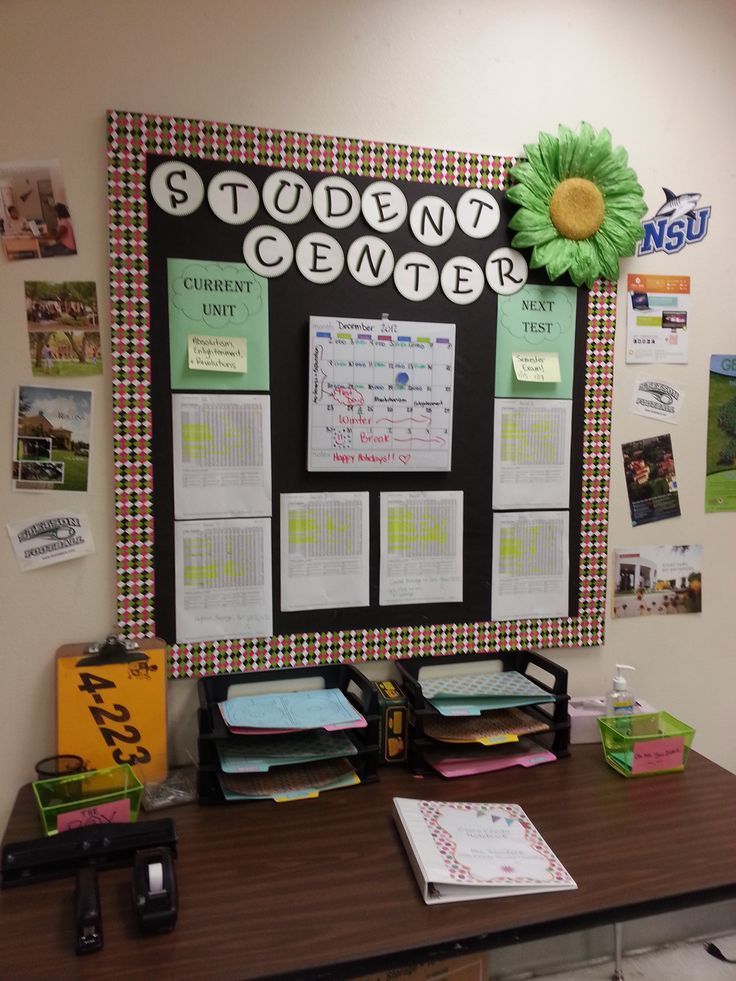 Get in the habit of clearing the surface throughout the day and wiping it down before you go home.
Keep your keyboard clean.
Use the sticky end of a Post-It note to clean between the keys on your keyboard.
Avoid eating at your desk.
It will invite mess. Plus, you need a real break during the day.
Have a designated space for notes.
Having a spot for notes and a method for organizing your Post-Its will help you avoid little scraps of paper here, there and everywhere.
Avoid a generic “inbox tray.”
Raise your hand if you are guilty of this! Instead of using a generic inbox tray, invest in a filing system. Create sections for managing papers (i.e. need response, to be copied, to be corrected, to be filled out, etc). This will keep things current and allow you to have less piles to shuffle.
Go paperless.
Do this as much as possible. Use your iPhone for notes, calendar, etc. to reduce the amount of paper you need to manage.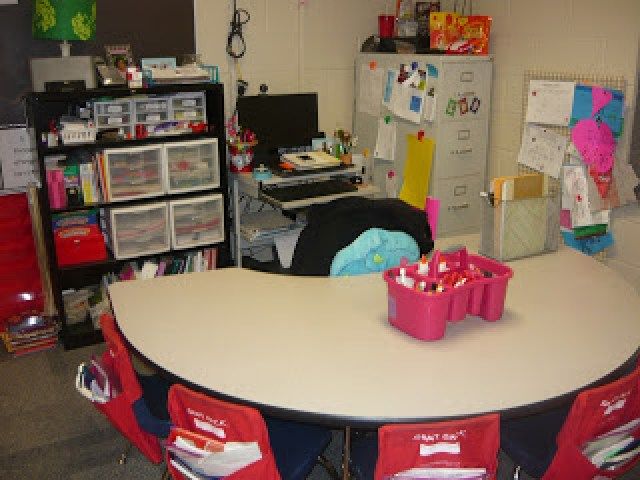
Keep a paper shredder and a trash can within close proximity.
This will make it easier to purge items in your work area as needed. This is a highly underrated teacher desk organization idea, but it makes life so much easier.
Designate one day a month for a deep desk cleaning.
This is a great routine to get into. Get rid of anything you’ve acquired recently that you don’t need along with items you may have initially saved.
In closing, we hope you found these teacher desk organization ideas helpful. If you did, then you may also be interested in my classroom organization workshop, as well as these posts:
- How to (Finally) Declutter Your Classroom this Year
- 5 Time Savers for Elementary Teachers
- How Teachers can Save Money on Groceries Each Week
Organize your desk: a tip for a teacher
Published inPartnership MaterialsRM
Photo: firestock.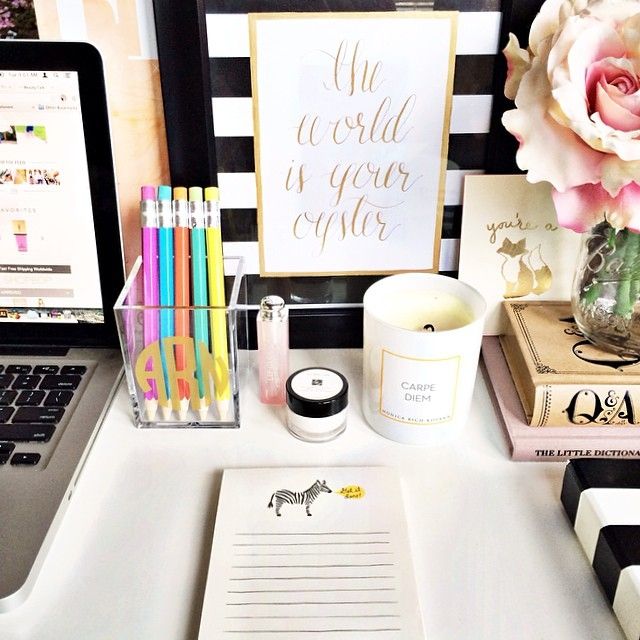 ru
ru A well-disciplined teacher is the key to the success of the educational process. In order for the training to be comfortable for the teacher and children, it is necessary that he be in a good mood and be able to freely plan his own time, as well as cope with all the tasks assigned to him. This requires a well-organized workplace. The article will discuss useful tips for the teacher, which will ensure complete order and focus on useful things.
What should be the workplace
The organization of the workplace plays an important role in the learning process of children. After all, an impressive number of factors depend on how competently it is carried out:
- the effectiveness and efficiency of training;
- the nature of the relationship between teacher and students;
- the desire of students to learn something new;
- order in the classroom.
In order for everything to be organized at the highest level, it is worth being guided by some simple principles.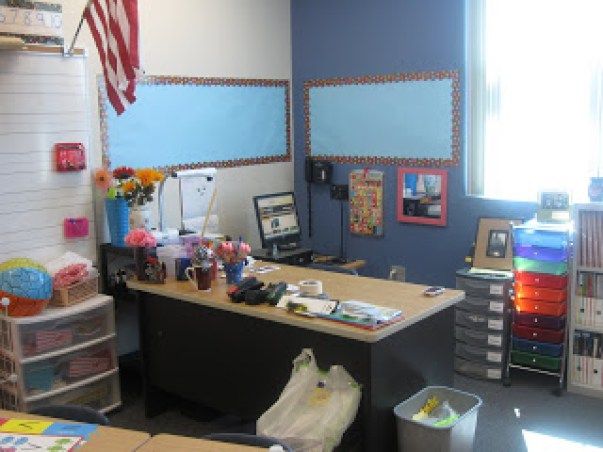
- Office supplies must be stored separately. To this end, it is worth allocating additional space on the table in one of the upper corners. It is advisable to use stands for pens and pencils, and put rarely used items in bedside tables if they are provided for in the design of the furniture.
- Freeing up desk space is also very important. After all, it should be enough for the teacher to put textbooks and notebooks, fill out a class journal, and work out a topic with the student. An important role is played by the presence of additional space.
- The light on the desk must also be present. It is best that it fall on the left side if the teacher is right-handed. This will allow you not to obscure it with your hand while writing, as well as maintain good vision and ensure perfect visibility.
- Particular attention should be paid to such a factor as the influence of colors on the human psyche. There are tones that soothe and lead to a state of harmony.
 And there are, on the contrary, shades that negatively affect mood and lead to depression. To design a school class, you should use light warm colors - beige, coffee, coral, pistachio. They will contribute to the maximum concentration of children, as well as improve the general mood in the classroom.
Based on the described rules, we can conclude that the workplace of the teacher and each student must be illuminated and equipped with everything necessary for the educational process. It should be in order, and there should not be randomly scattered things.
How to choose the right table and chair
Children are constantly growing and they need a well-organized space like no other. But due to the complexity of the profession, teachers also have to deal with physical inconveniences. Therefore, they also need a competent selection of a table and chair. How to make a rational choice will be discussed later.
- The type of work chair must be such that all seating rules are observed.
 The angle at the knees should be on average 90 degrees, and the posture should be even, for which the back is responsible. The seat can be upholstered. That is, the chair for the teacher should have the same design as the chairs for children, but it must be additionally provided with soft areas in the seat and upper back.
 - Choosing a teacher's desk is quite difficult, but guided by certain rules, it is quite possible to do this. There are few criteria for choosing a desk, but each of them must be taken into account. Firstly, the product must be spacious, i.e. the size of the countertop plays an important role. Secondly, pedestals and compartments should be provided inside the structure in order to put teaching aids and other items of educational equipment in them. Thirdly, the table must be safe, that is, it must not contain toxic elements and protruding parts.
Thus, maintaining a complete order on the desktop is quite a simple and solvable task. To achieve this, the teacher must follow a list of certain rules.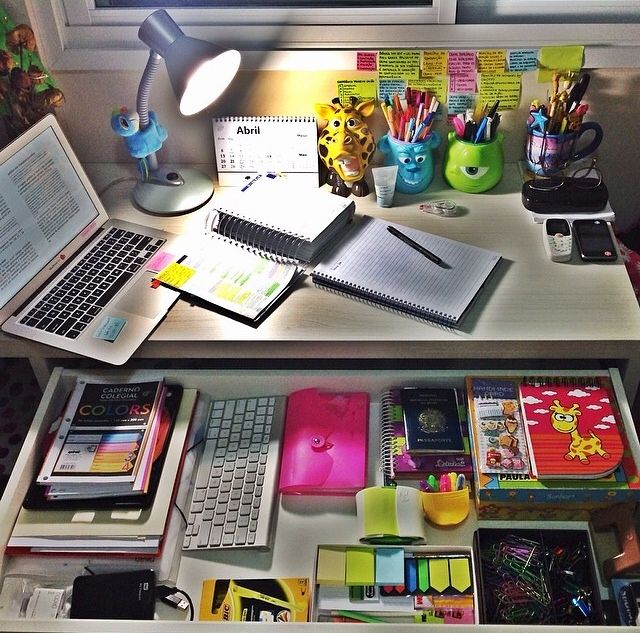
You can choose a teacher's table that meets all the characteristics on the website of the ODELEX factory.
Subscribe to Russian Monitor on Google News
Tags: education10 original ways to organize your workplace at home - INMYROOM
Workplace place at home - the necessary space in almost every apartment. But, unfortunately, not everyone has a separate office. That's why the question arises where to find and how to equip a workspace in a residential apartment so that it:
1. was convenient;
2. contained everything you need;
3. organically fit into the overall interior of the apartment.
To answer the question: how to organize a working place at home, you need to know a few rules for creating a comfortable space.
Regulations organizations
No. 1. First you need to decide how much you need places and what will be included in this zone. If you are sitting at a computer, then it will suit you small computer table.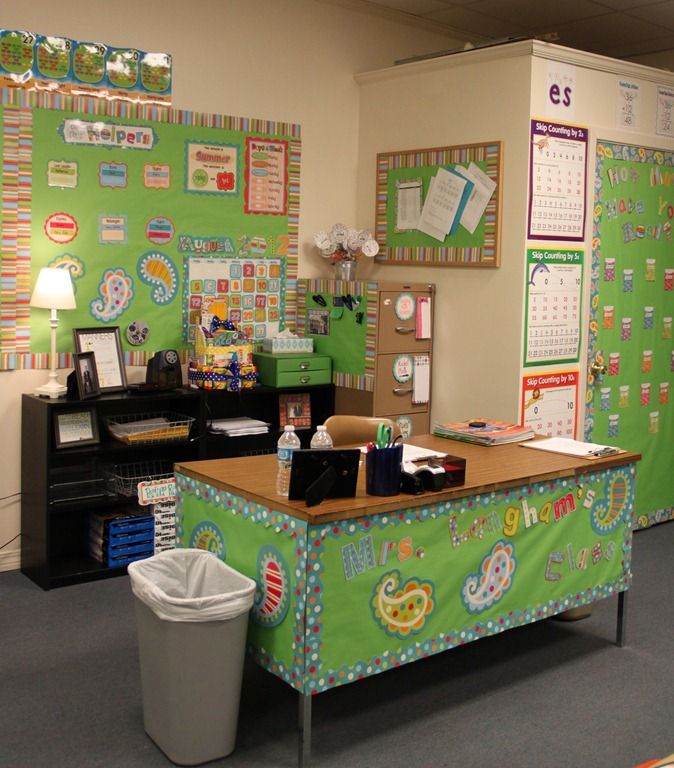 If it deals with papers or books, then you need to think in advance where you put these accessories so that they always were at hand.
#2. Look at your apartment and see if there is space suitable for the working area. If there is, then you will only have select the desired desktop design places in the apartment. If there is no such zone, try to make a permutation.
#3. Be sure to consider how the light on your table: from a window, from lighting fixtures, etc. Think you can whether you install and connect the lamp in such a way that you do not suffer then from lack of light.
#4 . If you decide to organize a workplace at home, then its design should not go against the overall interior of your apartment or room.
Individual room
The best option would be a separate room. Then you can decorate the room the way you want. Install the required number of racks, use the table of the dimensions you need, arrange an additional seating area by placing a small sofa or easy chair.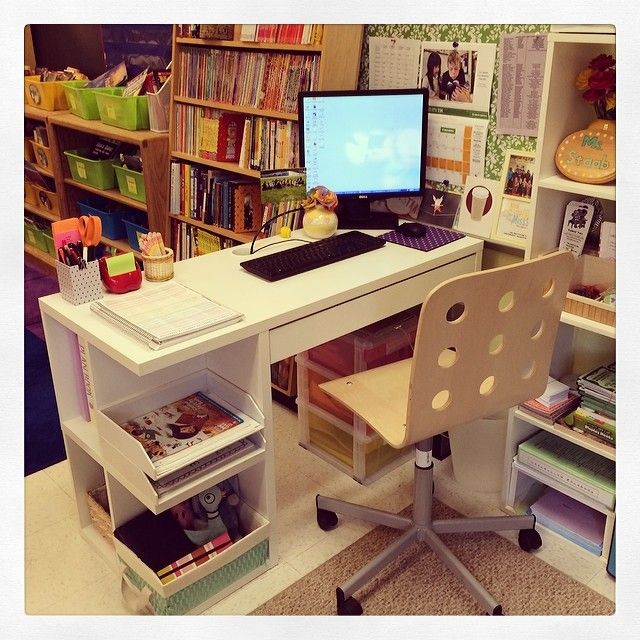
V living room
In today's world, not everyone has the opportunity organize your workspace in a separate room. As a rule, for these goals have to be done in one of the living rooms, for example, in the living room. For so that the working area is organically inscribed in the total area of \u200b\u200bthe living room, you need to think about the design of the desktop, racks and shelves that you will need. You can separate the space with the help of partitions or large floor racks that will become and partition, and a place to store the necessary things.
B bedroom
If your family members can interfere with you in the living room, then the bedroom is a more secluded place. Here it is necessary to fence off the area for sleeping. To do this, just hang a curtain between the bed and the table, put partition or install a canopy.
In the kitchen
proximity to a stove or sink will become dangerous for equipment or documents. Therefore, you can zone the kitchen with floor racks or use double table: on one side - written, on the other - kitchen.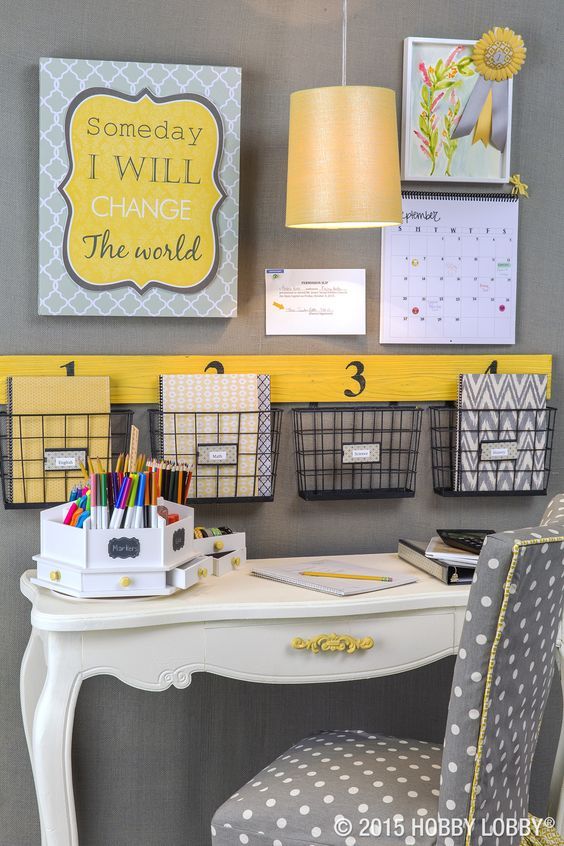
On the balcony
As a rule, in each the apartment has balconies, but often they are used as storage space unnecessary things. You can use the balcony in a more useful way and make him in his office. But before that, it is necessary to insulate and glaze it in order to use It was possible not only in summer, but also in winter.
Underfloor heating and quality windows will make a balcony comfortable place to work. The dimensions of the table and shelves must be selected based on the size of the balcony, try to use all the free space in order to to put things in there. A huge plus of this room is that there is a lot of light and fresh air, and working in such an environment is much nicer.
In the pantry
Organize work the space in the pantry is lighter than on the balcony, because there is no need to insulate and to carry out additional heating devices, but it is necessary to show more creativity. Pantry rooms are usually smaller than balconies, but they are usually have doors that allow you to separate this area from the rest of the residential space.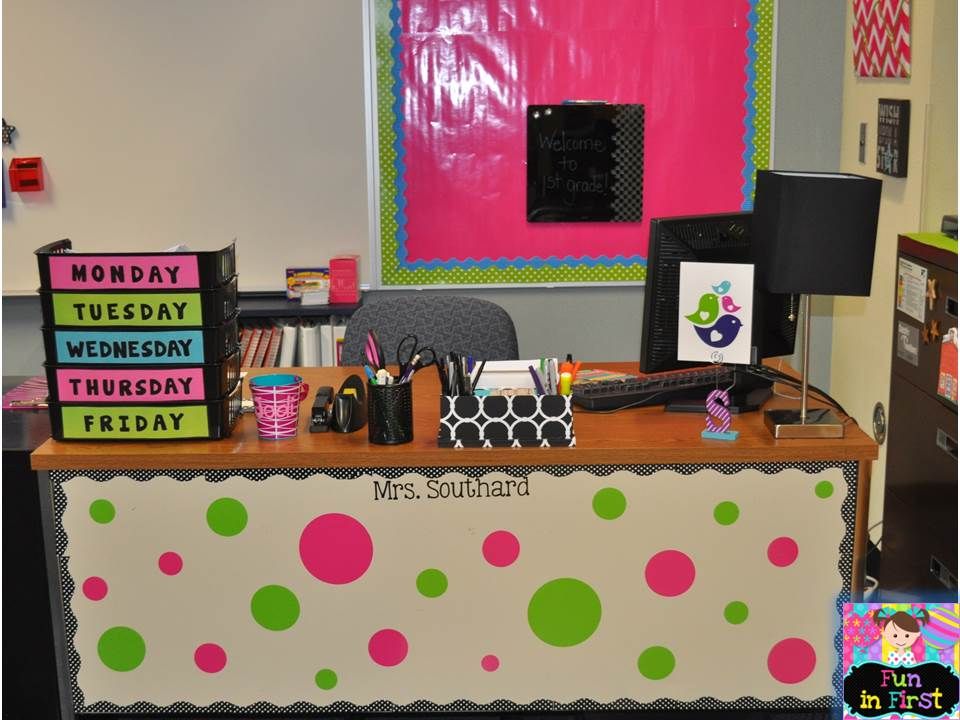
You can set up a small table in the pantry, and leave the rest of the place under the shelves and additional storage organizers. For finishing in the pantry, choose light colors and think about the lighting system. Unlike the balcony, here you will not be able to use natural light, so install some lighting appliances.
Options accommodation
We offer your Here are some original ideas for desktop, which will help to competently organize the zone, while not taking up a lot of space.
In a niche
In many apartments there are wall niches, they are usually taken away for decorative elements, but you can use it more practically: place there is a small desk and set a few shelves.
In the cabinet
Placing the table in the cabinet is a good option for those who do not have a closet. You can not only save space in your apartment, placing a table in the closet, but also hide your work area at the moment when you becomes necessary: simply by closing the cabinet doors.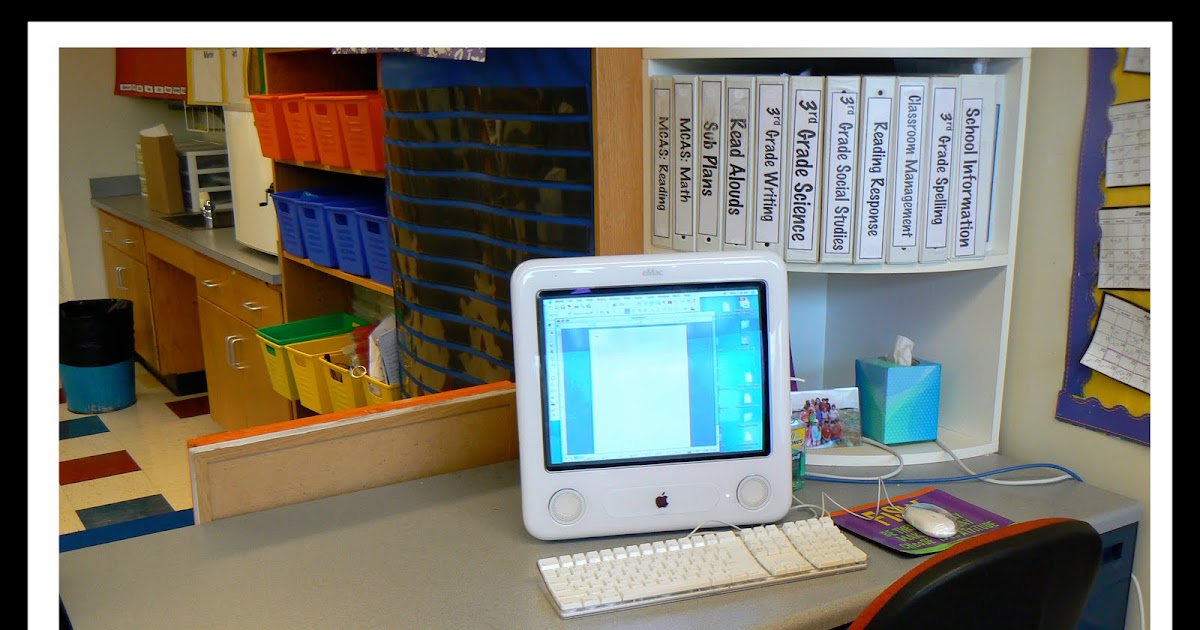 This placement idea is quite also successful because there will be enough space in the closet to clean necessary accessories.
Folding table
If you have a small apartment and need to save money space, then you can not buy a massive desk, but use a small folding. They are usually installed against walls and "recline" when necessary.
Window sill
Window space, usually does not perform any functions, but you can organize a working zone. The workplace by the window is continuation of the window sill, its increase. In this case, you will not lose square meters, but you will get excellent lighting and a comfortable place to work. Flowers that will organically fit into this space will help brighten it up. A workplace by the window can give you also a great view.
For two persons
If there are several people in the apartment who need workspace, you can organize a workplace for two. For this use, as a rule, long tables along one of the walls of the room.