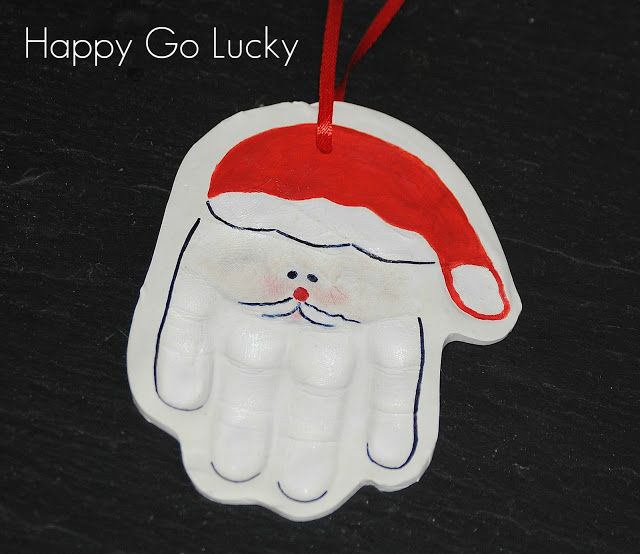
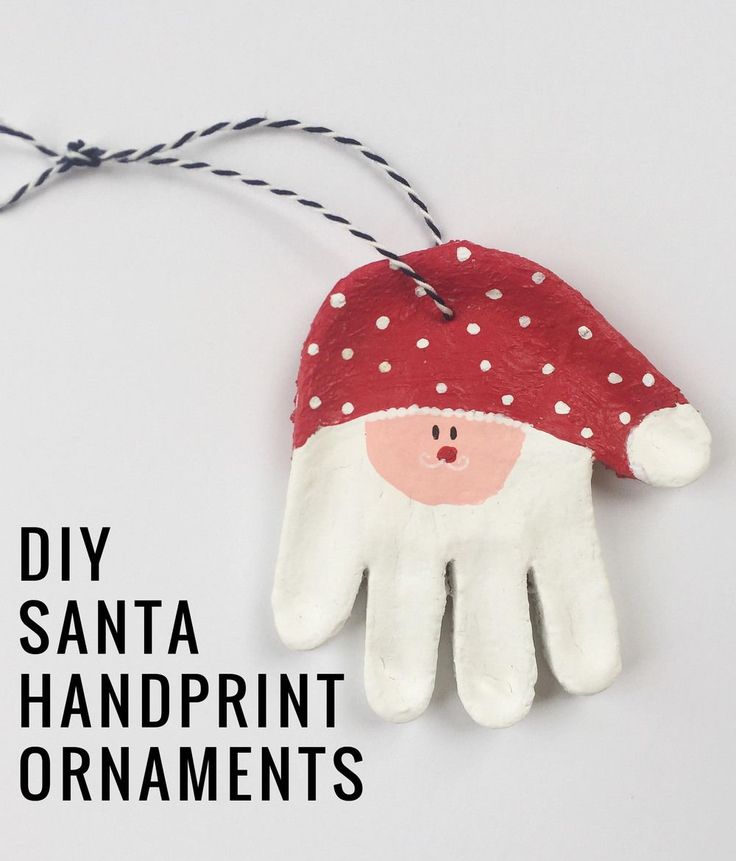
Salt dough hand ornament
The Best Salt Dough (for Ornaments and Crafting!) to Make with the Kids
Learn how to make classic salt dough with the kids, with baking, painting, and storage info. This method is straight forward, easy, and thorough—and they a perfect kids holiday gift for grandparents, teachers, and loved ones!
Salt Dough
This salt dough is a staple of childhood and I love doing this Christmas activity with my kids each year—and throughout the rest of the year too! We love to make salt dough handprints, ornaments, and sometimes, just any old shape they want to. It’s an easy project that we can do together—and then share as kid-made holiday gifts, keepsakes, or house decorations.
Salt Dough Recipe
Making salt dough at home is as easy as combining three pantry staples together into a dough. It’s fairly fool proof (as long as you follow the measurements!) and is a recipe that even little kids can help make.
Ingredients in Salt Dough
To make this recipe, you’ll need:
- table salt
- all-purpose flour
- water
TIP: That’s it! (I buy store brand, cheap flour for this since project to keep it very budget-friendly. )
How to Make Salt Dough Ornaments Step-by-Step
Here’s a look at how to make the dough for this salt dough. Scroll down to the bottom of the post for the full information.
- Measure out the flour and water. (photo 1)
- Add the water. (photo 2)
- Stir with a wooden spoon. (photo 3)
- Keep stirring until the dough is mostly together and is hard to stir any longer. (photo 4)
- Knead a few times with hands to bring the dough together. (photo 5)
- Place dough between two pieces of parchment paper and roll out. (photo 6)
TIP: You can divide the dough in sections so multiple kids can have their own dough to work with.
How to Cut Out, Bake and Decorate Salt Dough Ornaments
Once you start rolling, here’s a look at what will follow if you want to make these into ornaments. (Skip the hole poking if you want to just make these as shapes for the kids to paint. )
)
- Roll out, changing directions occasionally, until about 1/4-inch thick. (This may not get precise if you’re working with kids and that’s okay!) (photo 1)
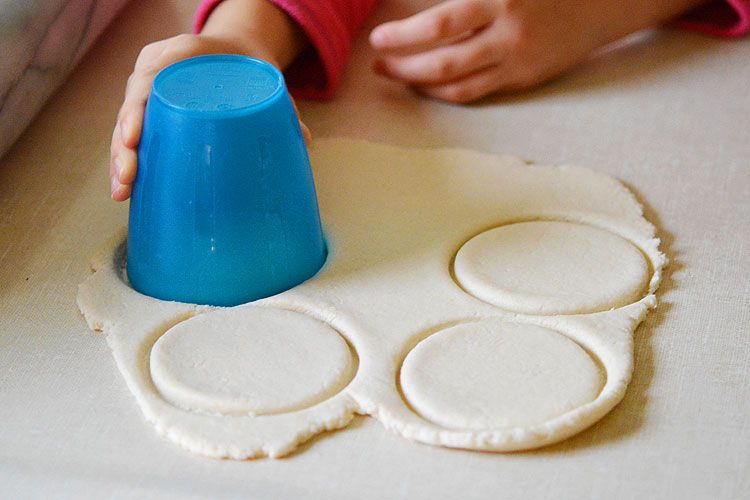
- Stamp cookie cutters. (photo 2)
- Remove the dough around the shapes, then either transfer the whole piece of parchment paper to a cookie sheet OR transfer just the shapes to a parchment-lined cookie sheet. (photo 3)
- Poke holes so you have a place for a string to hang as ornaments. (photo 4)
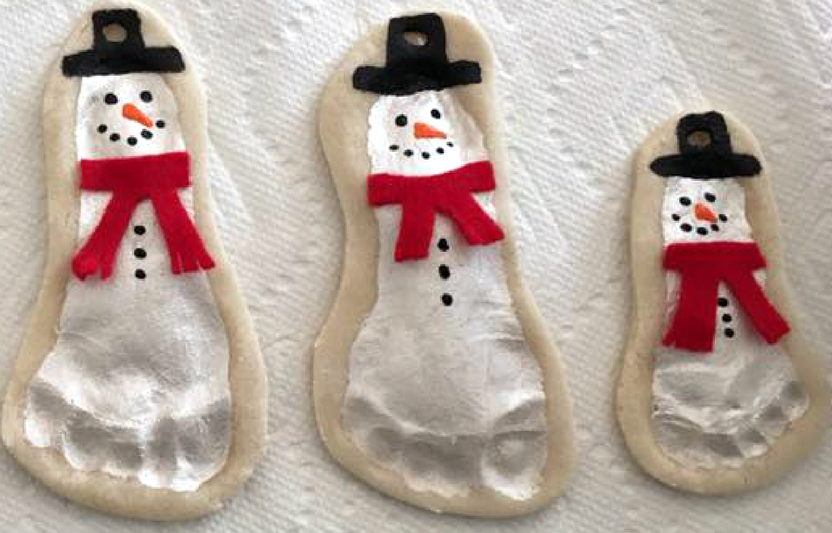
- Press in a hand to make a handprint, if desired. (photo 5)
- Bake, let cool and decorate! (photo 6)
TIP: Re-roll any remaining dough after Step 3 here to make additional ornaments.
Salt Dough Handprint Ornament
Capturing a handprint in salt dough is a perfect grandparent gift, or a keepsake ornament to make for your own tree. I love pulling out our little collection year after year. Know that getting a good print may take a few tries if doing a baby’s hand!
TIP: Check the size of your round cookie cutter against your child’s hand to make sure that it’s big enough.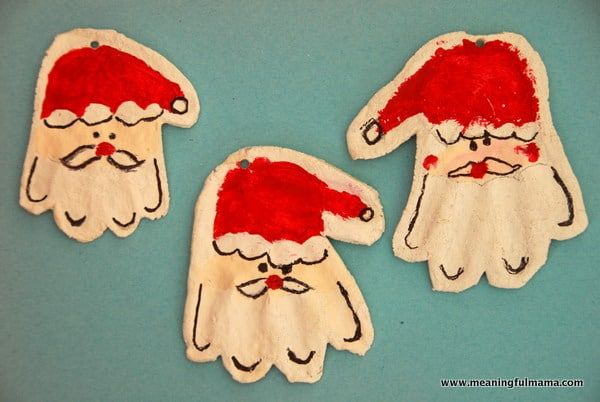 You may need one that’s 4-5 inches in diameter.
Best Paint for Salt Dough Ornaments
If the kids are wearing smocks, the table is protected, and you are reasonably sure they won’t paint all over their hands and faces, I like using regular acrylic craft paint since it holds up best on crafts. With younger kids who may wind up wearing more of the paint, I’d recommend tempura washable paints.
TIP: We put our paint into the base of old egg cartons since we always have those on hand. You can also use paper plates.
How to Preserve Salt Dough Ornaments
To help preserve your finished dried ornaments, you can coat with a layer or two of Mod Podge or spray with a sealer. Either work well. I’d recommend coating or sealing both sides, so do one side and let it dry, and then do the second side. If using the sealer, do it in a well ventilated area without the kids too close by.
TIP: To store these ornaments from year to year, you’ll want to wrap in bubble wrap.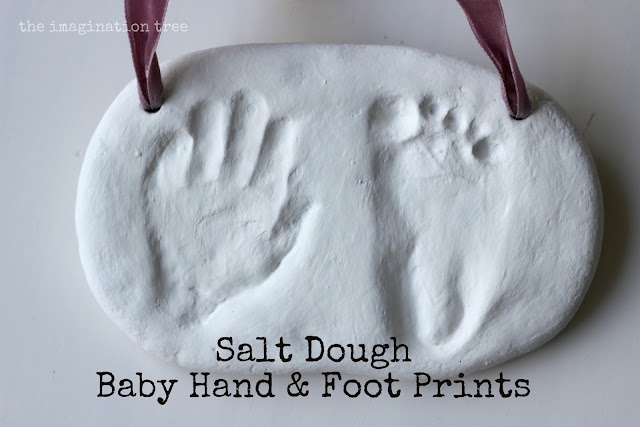 Store in a container that won’t be banged around, dropped or exposed to excess moisture.
Why is my salt dough puffing up?
If you mistakenly use self-rising flour, they may puff. And sometimes it happens randomly. Keep the oven temperature low and if it happens consistently, you can try baking at an even lower temperature for a slightly longer amount of time.
Tips for Making the Best Salt Dough Ornaments
- If the dough is too wet and sticky, knead in a little more flour. If it’s too stiff, add a little more water. There is a big range in the way different flours absorb liquid, so there is a normal range of variation in liquid needs. It should be easy to work with—soft and not too stiff and not excessively sticky.
- Use paper lollipop sticks or a skewer to make your holes.
- Use a 4-5 inch round cookie cutter to make handprint ornaments.
- Tie on baker’s twine or thin ribbon to hang as ornaments.
- Try to get the dough to an even thickness before baking so the ornaments bake evenly.

- Bake for the time indicated and then longer if your ornaments still feel soft. They should be firm to the touch without much give.
- Let cool fully before painting.
- If you want to paint the background of a handprint ornament, do that before you paint the inside of the hand. Let dry before adding a second color. Some people like to paint the whole thing white or cream to give it a more finished look.
- Use acrylic craft paint for older kids who can be trusted with paint and tempura washable paints with younger toddlers.since it holds up best on crafts. With younger kids who may wind up wearing more of the paint, I’d recommend.
- To help preserve your finished dried ornaments, you can coat with a layer or two of Mod Podge or spray with a sealer.
I’d love to hear your feedback on this project and what your kids thought of it, so please comment below to share!
Prep Time 30 minutes
Cook Time 2 hours
Total Time 2 hours 30 minutes
Author Amy Palanjian
Cuisine American
Course Holiday
Calories 1kcal
Servings 2 dozen ornaments
- ▢ 4 cups flour
- ▢ 1 cup table salt
- ▢ 1.
 5 cups water
Mix the ingredients together in a large bowl using a wooden spoon. When it becomes too stiff to stir, use clean hands to bring the dough together.
NOTE: If the dough is too wet and sticky, knead in a little more flour, about 1 tablespoon at a time. If it's too stiff, add a little more water, about 1 tablespoon at a time. There is a big range in the way different flours absorb liquid, so there is a normal range of variation here. It should be easy to work with—soft and not too stiff and not excessively sticky.
Knead a few times until the dough is uniform and soft, about 3-5 minutes.
Divide dough into 2 or 4 sections and roll out to about 1/4-½ inch thick between two sheets of parchment paper. This will help prevent sticking.
Cut out with cookie cutters. Transfer shapes to a parchment-lined baking sheet.
Repeat rolling and cutting out shapes to use up the dough.
Preheat oven to 250 degrees F.
Do a 4-5-inch circle and press in a child's handprint if desired.
Use a paper lollipop stick or a skewer to make a hole to hang as an ornament.
If making ornaments, bake for 90 minutes to 2 hours; if baking handprints, bake for 2-3 hours. Continue baking both ornaments and handprints as needed until they are until just firm to the touch, checking every 20 minutes. (It's not a problem if yours take longer than the initial baking time—it varies based on thickness and size...which will likely vary if you are baking these with kids!) They do not need to be rock hard, but should not feel squishy. Handprints will likely take longer than smaller ornaments and may take closer to 4 hours.
Remove from oven, let cool, and paint if desired with acrylic or washable tempera paint.
Once paint is completely dry, seal with Mod Podge if desired.
Mixing Bowl
parchment paper
Mini Cookie Cutters
- Divide the recipe in half to make a smaller portion of dough if desired.
- Use paper lollipop sticks or a skewer to make your holes.
- Use a 4-5 inch round cookie cutter to make handprint ornaments.
- Tie on baker's twine or thin ribbon to hang as ornaments.
- Try to get the dough to an even thickness before baking so the ornaments bake evenly.
- Bake for the time indicated and then longer if your ornaments still feel soft. They should be firm to the touch without much give but do not need to be rock hard. It is not a sign of a problem if yours take longer than mine did to bake—flours and ovens vary!
- Let cool fully before painting.
- If you want to paint the background of a handprint ornament, do that before you paint the inside of the hand. Let dry before adding a second color.
- Use regular acrylic paint for older kids who can be trusted with paint and washable tempera paint with younger toddlers.
- To help preserve your finished dried ornaments, you can coat with a layer or two of Mod Podge or spray with a sealer.

Calories: 1kcal, Fat: 1g, Saturated Fat: 1g, Polyunsaturated Fat: 1g, Monounsaturated Fat: 1g, Fiber: 3g, Sugar: 1g, Calcium: 31mg, Iron: 6mg
Tried this recipe?Rate in the comments and tag @yummytoddlerfood on IG!
Salt Dough Recipe - The Easiest Way to Make Salt Dough!
Kim148 Comments
All activities should be supervised by an adult. As an Amazon Associate, I earn from qualifying purchases. This post may contain affiliate links.
Learn how to make your own salt dough ornament with this easy Salt Dough Recipe. You only need a few ingredients from your kitchen to make this salt dough! We cover all of our tips and tricks to make sure your salt dough ornaments will last for years!
RELATED: Salt Dough Ornament Recipe
Table of Contents
- Salt Dough Recipe – for Handprints & Ornaments
- Salt Dough Ingredients
- How to Make Salt Dough – an Easy Salt Dough Recipe!
- Why Is My Salt Dough Puffing Up?
- How Do I Seal Salt Dough Ornaments?
- What Kind of Paint Should I Use?
- How to Decorate Salt Dough Handprints
- How Many Ornaments Does this Make?
- Tips for Making Perfect Salt Dough
- Salt Dough Handprint & Ornament Recipe
- Get the Recipe
- More Salt Dough Ornament Ideas
Salt Dough Recipe – for Handprints & Ornaments
One of our favorite things to do with salt dough is to make handprint ornaments. But you can also use this same recipe and use cookie cutters and paint shapes instead!
For the handprint ornaments – you can make a new one every year and have a nice memento for the Christmas tree!
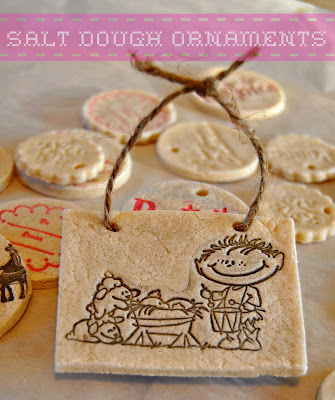
Don’t forget to add the year on the back of the salt dough ornament to keep track of the different years.
Salt Dough Ingredients
- 4 cups all purpose flour (Note: you want regular all purpose flour, not self-rising)
- 1 cup salt
- 1.5 cups warm water
How to Make Salt Dough – an Easy Salt Dough Recipe!
1. Combine all of your ingredients (flour, salt, warm water) and mix well until it starts to form a dough.
2. Take the dough out of the bowl and knead for at least 10 minutes.
If your dough is too dry, add a little bit more water in and continue to knead.
The dough should be smooth and roll out with not too many bumps. It should also be easy to press a handprint into it.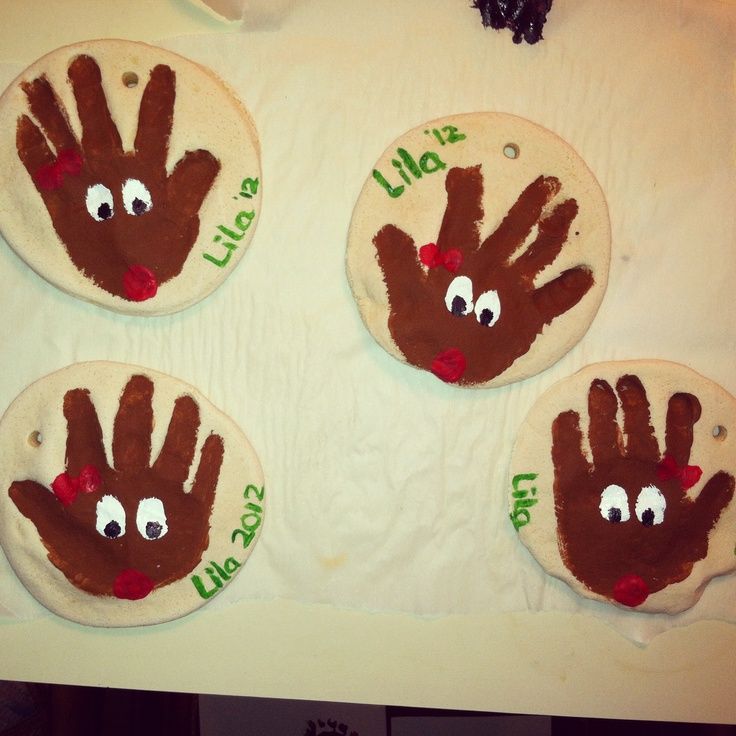 If you’re finding it’s too hard or not smooth enough, continue to knead some more. If it’s still too dry, add a little bit more water (but not too much or it may get too wet).
Roll out the dough to between 1/4 to 1/2 inch thickness. If the dough is too thick it will take too long to dry.
Press the hand into the dough.
3. Use a circle shaped bowl to trace around your handprint.
Cut out the handprint with a knife (adults to do this part).
You can also print off a circle shape or heart shape to trace around with a knife (adults to do this part).
If you have a smaller handprint you can use a circle or large heart cookie cutter.
TIP: It’s easier to press the handprint first, and then trace around it. If you have dough left over you can roll it out again and do another handprint.
4. Using a straw, make a hole in the top of the ornament.
5. Let the ornaments air dry for a day.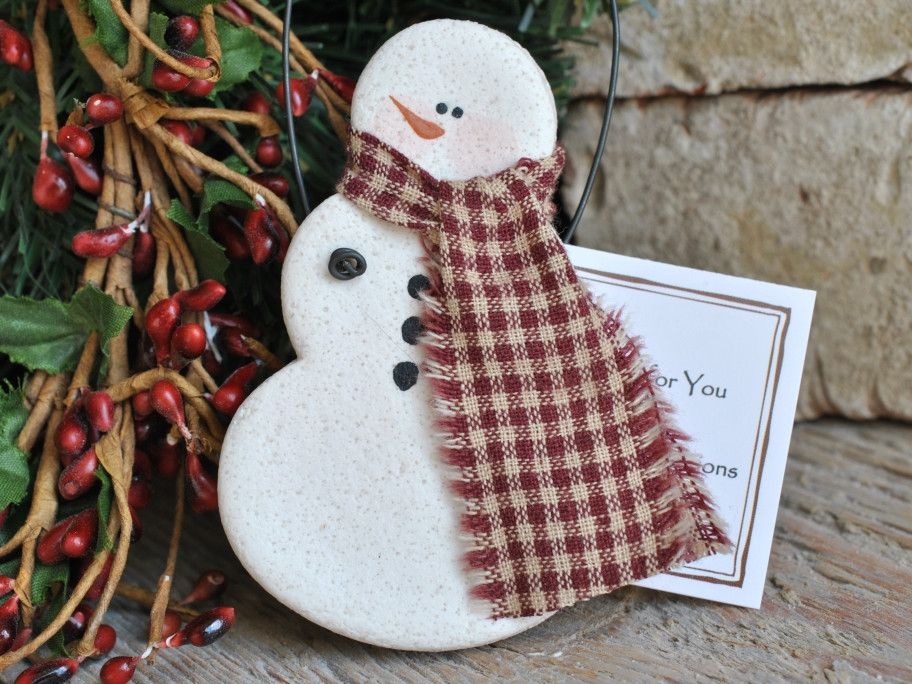
If you have time, let the ornaments air dry for a day. This will cut down on the baking time required and help to prevent puffing. If you do not have time, you can bake right away instead.
Bake at 250 degrees Fahrenheit for 1-2 hours. Once the top of the ornaments look dry and solid, flip over and bake on the other side.
NOTE: It’s important that you check that your oven temperature is set to Fahrenheit. One of the most common reasons the ornaments burn and puff up is that the oven temperature is Celsius. If you have a Celsius setting then you’ll want to use the lowest oven temperature, closer to 120 degrees Celsius.
If your ornaments are still doughy, put them back in for another hour. It will depend on your thickness how long you need to bake for. The thinner ornaments will take less time but thicker may take more. If it’s taking too long in the oven, let them finish drying by air drying them for a few more days. Make sure to flip them over so the bottoms also get exposed to air.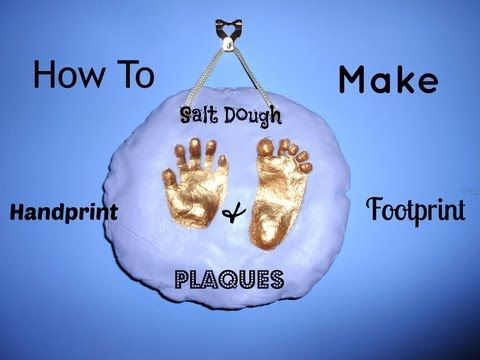
6. Once your ornaments are fully dry you can paint them.
Paint the handprint and leave the remaining ornament plain. Or you can paint the whole ornament white and then paint the center handprint once the base coat has dried.
If you want to add glitter into the handprint, decorate the whole ornament with paint first, then fill the handprint with glue. Shake glitter onto the glue.
After the paint has dried, make sure to seal with with either mod podge or a clear glaze spray. Seal the ornaments after you paint them and the paint has fully dried.
7. Tie ribbon or twine through the hole for hanging on the Christmas tree.
Why Is My Salt Dough Puffing Up?
The number one reason salt dough is puffing is due to the oven temperature. If the temperature is too high the salt dough will puff up. It is better to let your ornaments air dry for a day and then bake them. This will prevent the puffing. If you need to bake right away, bake at the lowest temperature (200-250 degrees Fahrenheit).
Note: Make sure to check your oven temperature is Fahrenheit and not Celsius.
You also want to make sure you are using regular, all purpose flour and not self-rising flour.
How Do I Seal Salt Dough Ornaments?
Once you are done, don’t forget to seal with either mod podge or a clear glaze spray. We like this spray for a durable finish. Adults should do the spraying and always follow directions of the product chosen.
Sealing the final ornaments will help stop them from cracking in a few years and prevent moisture from getting in.
What Kind of Paint Should I Use?
I like to use non-toxic acrylic paint for salt dough ornaments. The color will go on much thicker and more vibrant than kids paint. We like this brand of acrylic paint.
How to Decorate Salt Dough Handprints
You can use a heart for the shape around the handprints or you can use a circle.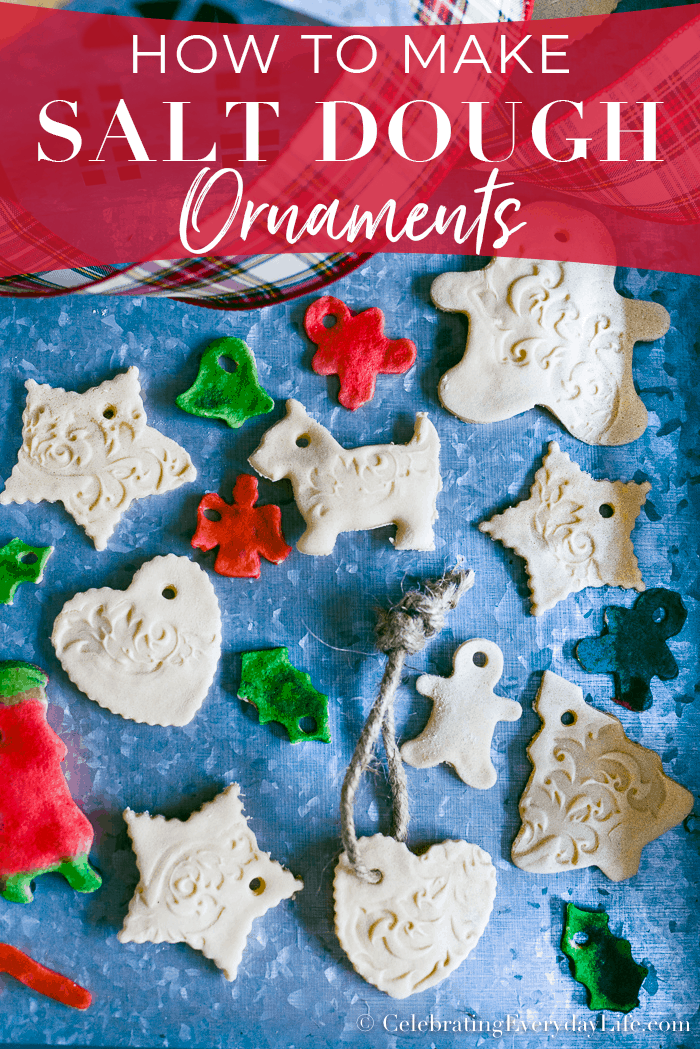
For this one, we used a large heart cookie cutter as the handprints were small (baby handprints):
If you have larger handprints, you can trace around a heart print-out or use a knife (adults only) to draw a heart shape around the handprint.
We painted this one with acrylic red paint but you could choose green or even silver or gold. Then you can leave the handprint portion of the salt dough ornament either natural or use glue and add glitter to it like we did.
How Many Ornaments Does this Make?
Depending on the handprint size and thickness of the salt dough – you can get approximately 8 handprints. If you’re using the dough to make small cookie cutter ornaments you’ll get approximately 15.
If you’re hoping to make this for a classroom or with a larger group of kids, I would recommend bringing an extra batch just in case. The quantity can vary depending on size of cookie cutters, handprints and thickness of the dough. I like to roll out the dough and continue to knead together the scraps to use as much as I can.
Tips for Making Perfect Salt Dough
- Knead well to make the dough smooth – I like to knead at least 10 minutes.
- Let the ornaments air dry for a day first, if possible. This cuts back on the oven baking time and helps to prevent puffing.
- Don’t forget to flip the ornaments when baking or air drying so that the bottoms will be exposed to air.
- Seal with our recommended sealers mentioned above so that the ornaments will last for many years.
- Store the ornaments in a cool, dry place and keep away from moisture. Sealing the ornaments also prevents moisture from getting in.
Prep Time15 mins
Active Time2 hrs
- ▢ 4 cups all purpose flour
- ▢ 1 cup salt
- ▢ 1.5 cups warm water
- ▢ Clear Glaze Finish or Mod Podge
Combine all of your ingredients and knead for 10 minutes.
 If your dough is too dry add a little bit more water in and continue to knead.
Roll out the dough to a thickness that you'd like your salt dough ornament to be. We like between 1/4 to 1/2 inch thickness.
Using a large cookie cutter, cut out different shapes for your salt dough ornaments. If making handprints, place the handprints first and then trace around them.
Have your child place their hand into the salt dough ornament. If the dough is too hard to get an imprint it may be too dry. Continue to knead until smooth. You can also add in a little bit more water.
Using a straw, make a hole in the top for where you want to hang your salt dough ornament.
If possible, let the ornaments air dry for a day.
Preheat your oven to 250 degrees Fahrenheit. Bake for 1-2 hours. If your ornaments are still doughy, put back in for another hour. (It will depend on your thickness how long you need to bake for. The thinner ornaments will take less time but thicker may take more).

If you encounter too much puffing, roll out thinner ornaments and this will help reduce the puffing. If the ornament is still a bit doughy, bake for longer or let sit out a few days to harden before decorating. The thickness of the dough will determine how long you have to bake them for. We prefer to bake them at 250 degrees Fahreneheit for longer and let them air dry for a few days to prevent puffing.
Once cool, you can decorate by painting with non-toxic acrylic paint.
Spray with a clear glaze finish or finish with mod podge. Do this before adding the glitter.
To make the hand glittery, fill the handprint with glue then sprinkle glitter on top of the glue, shake off the excess and let it dry.
Kids will love helping to make this salt dough recipe. They will also have fun decorating the salt dough ornaments by painting them.
Finally, just a friendly reminder to keep these out of reach of pets (they can be toxic to dogs due to the salt content).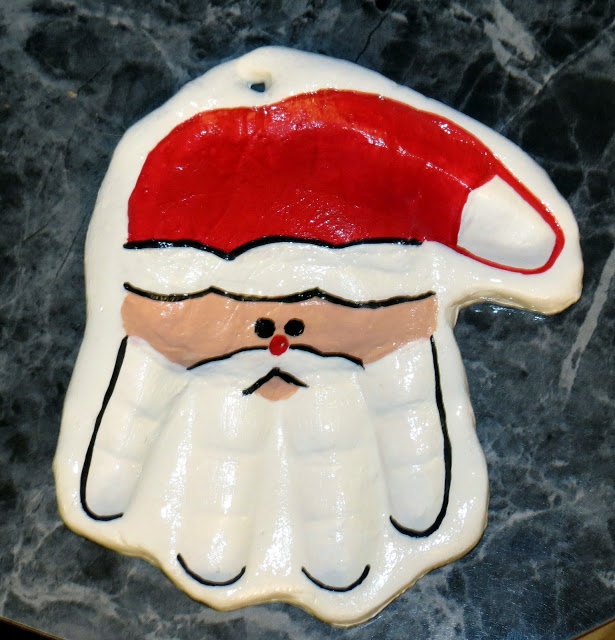
See over 25+ of the best Salt Dough Ornaments here for more great ideas!
These salt dough ornaments are also fun to make – and you can make these for any season or holiday too!
How to make DIY salt dough decorations
- November 12, 2018
- Miscellaneous
- Svetlana Funtova
Salt dough modeling is a very exciting activity for both adults and children. The material is easy to make on your own, it is absolutely safe for children, plastic, and crafts are very durable and original. In the article, we will consider how to make decorations from salt dough.
How to prepare material for crafts, the nuances of the process
The creative process itself is no different from working with any other materials - plasticine, polymer clay, and so on.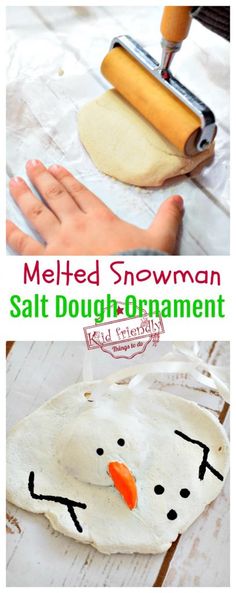 The advantages of the test are that it has high plasticity, does not stain hands and surrounding objects, and allows more complex work to be carried out. Subject to all the rules of drying, it becomes durable and stored for a long time. The most interesting thing is that the material can be used not only for making toys, salt dough is perfect for decorating a loaf, for example.
So that the mass does not stick to hands and tools, does not dry out and does not crack, it is necessary to follow the manufacturing technology and take into account some nuances:
Salt Dough Decoration Dough Recipe:
- Mix dry ingredients - 1.5 cups flour, 1 cup salt and 2 tbsp. l. any water-soluble wallpaper adhesive.
- Pour in 0.
 5 cups of water and knead the dough thoroughly.
For a more plastic salty dough to decorate the loaf, the recipe would look like this:
- Mix 1 cup each of salt and flour.
- Add 0.5 cup water and 2 tbsp. l sunflower oil.
Tools for work
Salt dough decoration requires the use of certain tools and materials.
Each of them can be found among kitchen utensils, stationery, home crafts:
- Dough rolling pin, if it is not available or it is too massive, you can replace it with a glass bottle.
- Plain or shaped knife for cutting dough. To protect the child, he can be given a plastic knife from a plasticine set.
- Modeling board.
- Paints for coloring finished products, here you can use watercolor, gouache or acrylic.
- Water based top coat. Best used in aerosol cans. In addition to the standard varnish, it is recommended to use sprays with sparkles, mother-of-pearl, and so on as a supplement.
- A glass of water and a set of brushes for decorating crafts.
- Biscuit molds.
- A variety of needlework accessories (knitting needles, brushes, hooks, buttons, lace), with which products are given texture and volume.
It is advisable to prepare an apron and sleeves so as not to get dirty during decoration. They wipe their hands with napkins and rags during work and soak the brushes, they should always be at hand.
How to dry clothes correctly?
Not only do you need to know how to make salt dough crafts, but also how to process them afterwards.
Proper drying of the dough is the key to long-term storage of the finished product. You can do it in several ways:
- Drying in a heated oven. Depending on the thickness of the product, the temperature is set from 50°C to 80°C. The molded craft is placed on a baking sheet covered with parchment paper and placed in a heated oven for one hour. If the item is large, it may take longer.
 Then the oven is turned off and the crafts are left in it until completely cooled.
 - Drying in a cold oven. It takes place according to the same scheme as in the method described above, only the product is placed in a cold oven, and then the heating is turned on.
- The best and longest drying time is outdoors. Crafts dried in this way become very durable due to uniform and gradual weathering. However, it is suitable mainly for small and flat products.
Do not dry the figurines on a radiator or with electrical appliances. Products treated in this way often crack or remain raw inside, which leads to damage to the jewelry.
Coloring and varnishing crafts
Color pigments can be added to the dough during preparation. Coloring the finished craft combines two types of creativity at once: modeling and drawing.
Water-soluble paints are best. Acrylic dyes deserve special attention. From the first time they paint with a dense uniform layer, have a wide range of colors, dry quickly and are easy to use.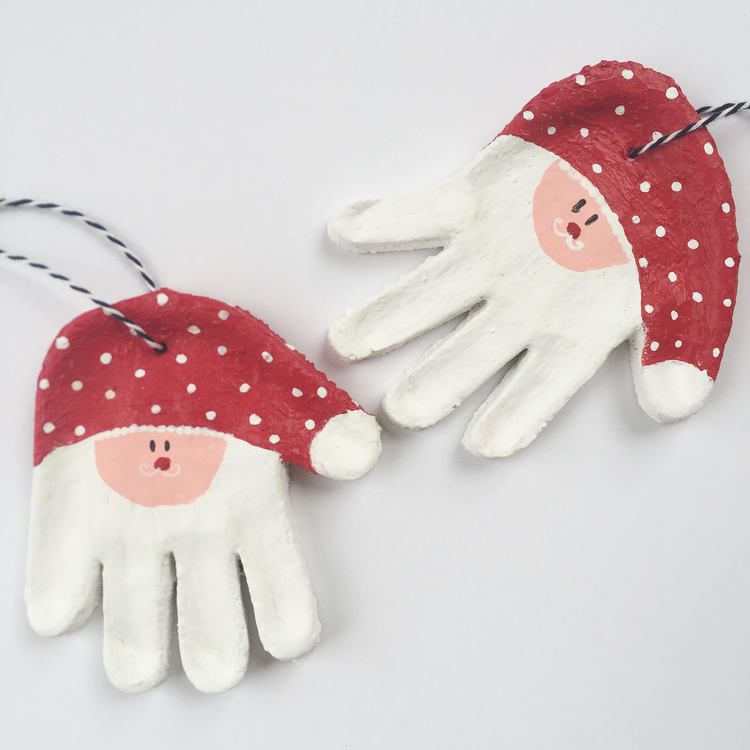 Familiar watercolor covers with a translucent tone, which makes it possible to layer the palette and create a three-dimensional pattern. The product, lubricated with a layer of PVA glue, allows you to get a base layer for opaque, durable staining.
Salt dough embellishments have good pigment retention properties without a protective coating. If the finished item is planned to be used in everyday life, for example, a vase, a box, dolls, chess pieces, then frequent touches can wear out the paint. In this case, varnishing is mandatory. In addition, glossy sheen often makes the product especially beautiful.
Best applied with an aerosol can in the air or in a ventilated area. If necessary, you can apply several layers, drying each well.
Dough pendant
This decoration is quite easy to make. The dough is rolled out into a layer, a base is cut out of it using a cookie cutter. A hole is cut with a pen or knife for threading the lace. You can decorate the future pendant with any items at hand: cut along the edges, stick geometric figures, attach lace, which will leave a beautiful pattern, etc. Then the product is sent to dry.
After drying, start decorating and coloring the product. The effect of antiquity is given by light touches with a sponge with fresh paint. Then the pendant is varnished, dried again and the cord is threaded. A beautiful handmade product is ready.
Beads and bracelets
Beads and bracelets are made using the same technique. First of all, you need to make beads. You can make them in a standard round shape by rolling a ball and stringing it on a toothpick. Or get creative and make square, triangular, flat and voluminous parts. Each bead is pierced with a skewer, stuck into a soft base and dried in this form.
To make the decorations more original, you can sculpt animal figurines, symbols or zodiac signs. In addition, the same pendants on the beads and bracelet will combine them into one set. Then each detail is carefully painted over inside and out, dried and varnished. If these are evening decorations, you can use glitter and mother-of-pearl.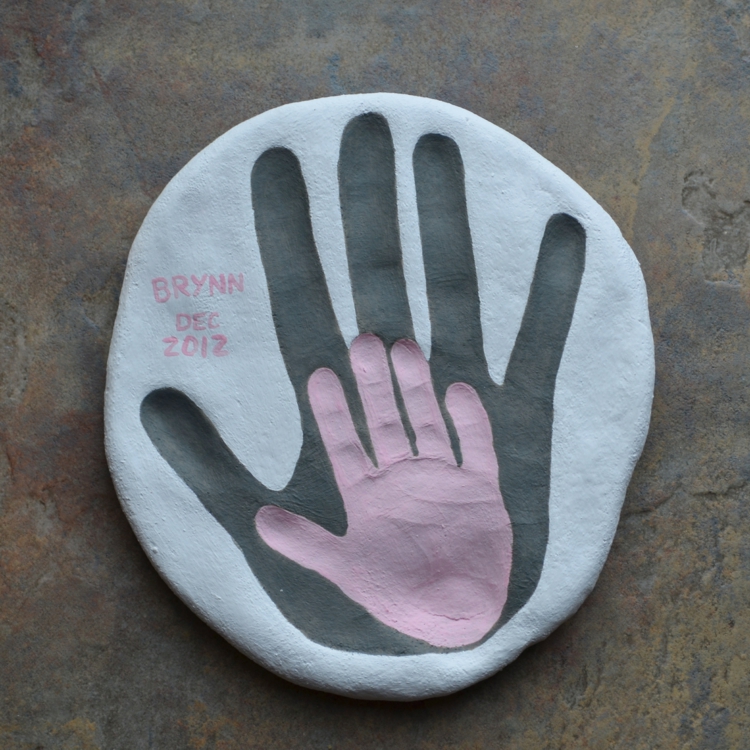
The final step is threading. The beads are strung on a bunch, following a certain sequence, and the clasp is fastened. Decorations are ready.
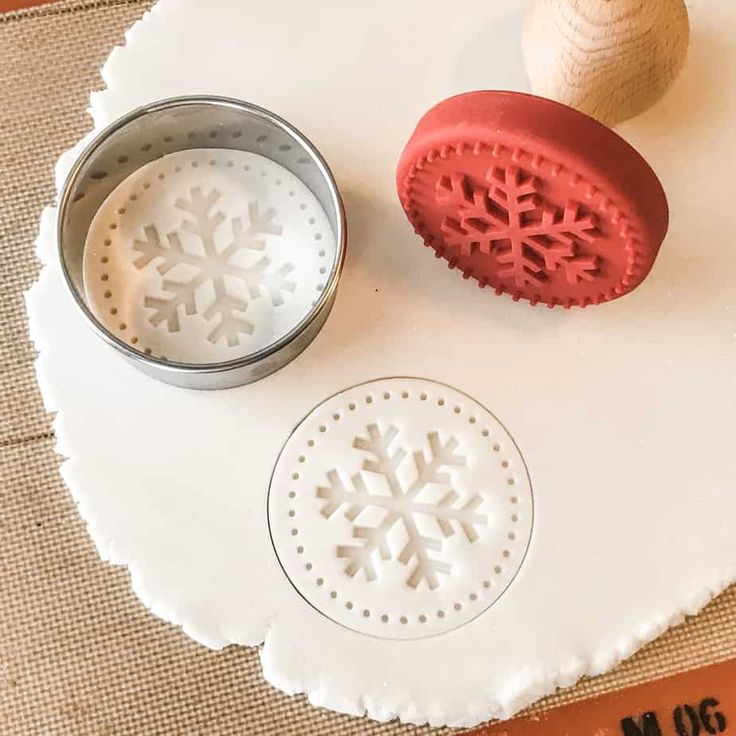
Christmas decorations from dough
Even a child can make Christmas decorations from salt dough. The dough is rolled out and figures are cut out of it (herringbone, mitten, heart, etc.), a hole is made for the tape and dried. Then they paint it and send it back to air. New Year's toys, covered with a spray with the effect of snow, small confetti and sparkles, look especially festive.
Animal figurines or dolls
Small animals or dolls can be made as homemade decorations from salt dough. Children will especially like this process.
Making three-dimensional figures is a little more difficult, so you can create a joint craft with your parents. If a child wants to make an object on his own, it is better to start with the simplest, for example, a hedgehog or a caterpillar:
- To fashion a hedgehog, roll up a ball and pull out one half a little - this is the future muzzle, a small ball is molded on the tip - a nose.
 Needles are made with the help of frequent cuts with scissors or halves of toothpicks are stuck thickly.
 - To make a caterpillar, you will need several balls connected to each other. To make the craft look more realistic, you can put the parts on the wire and give the insect a bend. The finished product needs to be painted in different colors.
- There are many ways to fashion a doll. The simplest is a bell-type doll. The rolled out square of dough is folded into a bag, the excess is cut off so that the form stands on the resulting wide part. A ball is attached to an acute angle - this is the head. Then hair is molded - strips of dough cut out in a chaotic manner, and hands are fastened. The doll is ready. You can complement the craft by decorating your head with a wreath or a bow, a dress with flowers or a strap.
Panel pictures
The basis for the panel can be a piece of plywood or thick cardboard, this will solve the problem of what to stick the salt dough decoration on.
The mass is rolled out in a thin layer and glued to the base. Then the details of the future picture are cut out or molded and attached to the resulting layer. The finished picture is carefully dried and painted, then varnished.
Using foil-covered plywood as a basis, the finished and painted product can be easily removed and can be transferred to another material. Suitable, for example, a frame tied with a cloth, a box, glass or plastic.
Loaf
Decorating dishes, such as loaves, will bring special pleasure. The production of salt dough to decorate this product is carried out according to the recipe described above. The classic way is to wind the bundles from the finished material and braid them. You can also fashion flowers and leaves from the dough. The decor is laid out on the top of the loaf and dried in the oven.
This handicraft, accessible to everyone, allows you to please relatives and friends with an original little thing, develops imagination and perseverance.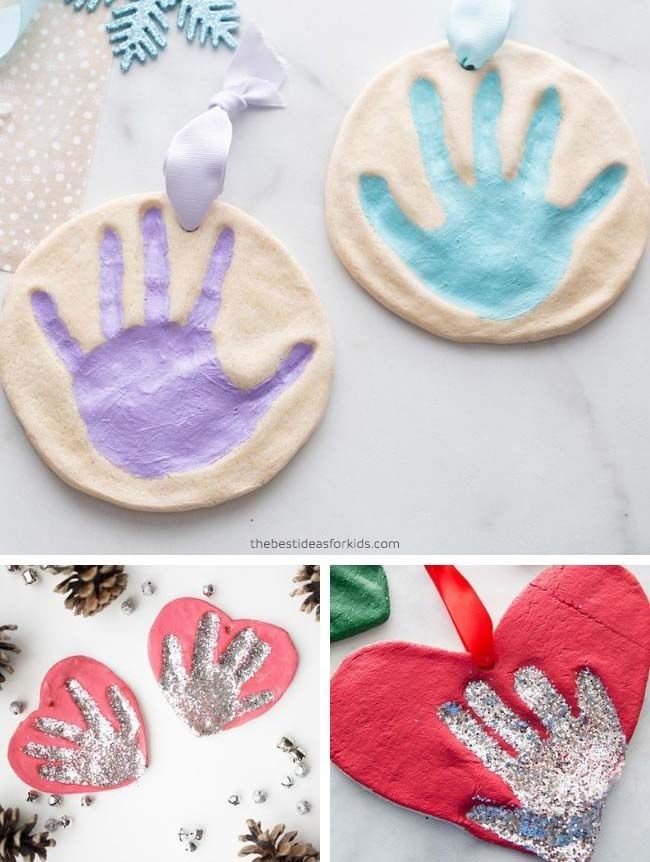 In addition, the lesson makes it possible to complement any image with beautiful jewelry.
Similar items
Miscellaneous
Do-it-yourself sliding gates on rollers: design, installation instructions
Miscellaneous
About the most popular toy: how are Barbie dolls made?
Miscellaneous
How to disassemble the motor from the refrigerator: expert advice
Miscellaneous
How to draw a giraffe step by step
Miscellaneous
How to weave food from rubber bands on a slingshot: master class
Miscellaneous
How to make liquid wallpaper yourself at home: instructions, proportions and application technology
How to make DIY salt dough jewelry
Tools:
* Toothpicks, embossed buttons.
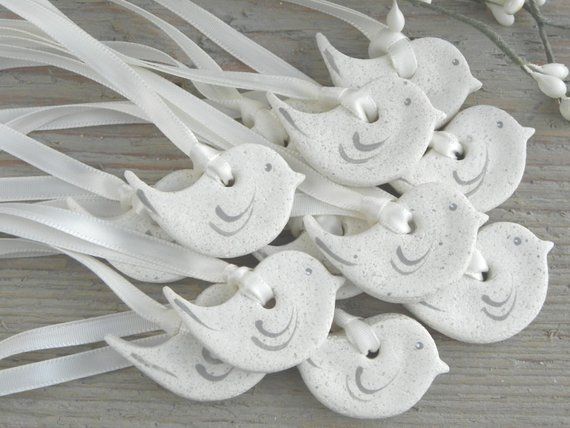
Prepare the salt dough: mix flour and salt in a 1:1 ratio, add some water and mix thoroughly. Only fine salt is suitable, otherwise the structure of the dough will be grainy. Knead the dough well and divide it into small balls of different diameters. Fashion a small figurine of a bird from one such ball. Pass a toothpick soaked in water in a helical motion through the bird figurine in order to make it easier to work with a small detail. With another toothpick, apply a relief pattern. It is necessary to make 3 pairs of bird figurines of various sizes.
For the other part, take a ball of dough, thread it onto a toothpick and flatten it. Then, on both sides of the workpiece, make prints with embossed buttons, after sprinkling the “stamp” with flour. Additionally, make 10-14 small balls from the dough, stringing each on a toothpick.
To make the "accordion" piece from a ball of salt dough, it is necessary to mold a "sausage", then give it a flattened shape and fold it, as shown in the photo.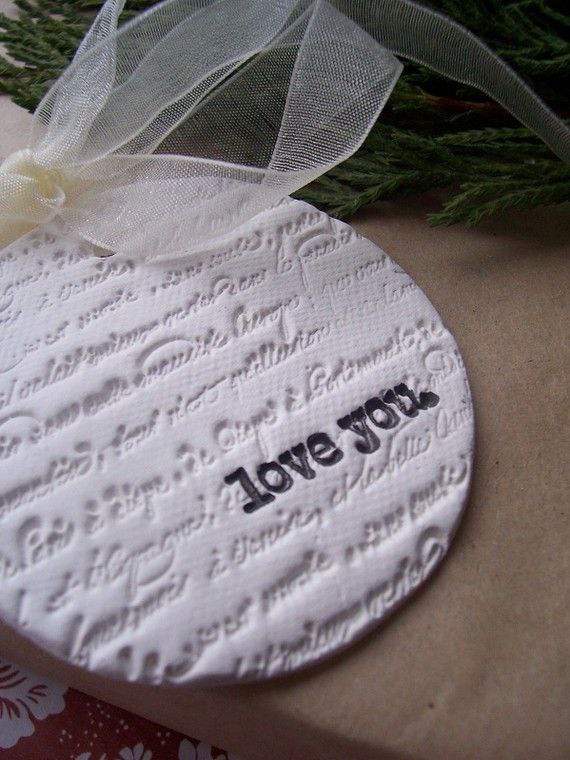 Pierce the workpiece with a toothpick. Do 9similar details. Also, from the “sausage” of salt dough, twisting it in a spiral, fashion 12 parts in the shape of a “snail”.
To make a spacer bead, take a larger bead and shape it into a flat "brick". Pass 3 toothpicks successively through the parts at a short distance from each other. Then, with embossed buttons, create a pattern on one side of the part. Make the required number of pairs of beads.
Insert all prepared parts on the toothpicks into the foam and leave to dry for a day, periodically shifting the parts so that they do not dry out on the toothpicks. Then place the parts in the oven, leave them with the door loosely closed at a low temperature until completely dry (so that the dough does not rise). Remove toothpicks.
Cover the already completely dry beads (they make a characteristic crumbling sound) with a mixture of egg yolk, milk and salt. Next, place the pieces back in the oven at a high temperature and bake them to the desired color. The color for each piece can vary from light yellow to brown. After cooling, coat the parts with varnish or gold paint using a semi-dry brush. String the beads on a double folded nylon thread, as shown in the photo.
Make three of these elements. Pass the threads of each row through the holes of the separator bead and gather the ends of the threads together, forming two main ones. String the remaining beads on them. Attach a jewelry lock.
Tip
The more flour you put in, the more plastic the mass will turn out, this rule is especially important when making small parts for beads. To make it easier to work with salt dough and it does not stick, periodically moisten your hands with water.
In fact, I often make jewelry from the so-called. "non-traditional" materials, and sometimes it turns out something worthwhile.
All other solutions were made specifically for the magazine, but most of them were never included in the issue, so I want to show you all of them))) Maybe these ideas will push you to something ;-)
For example, these the beads were not included in the magazine.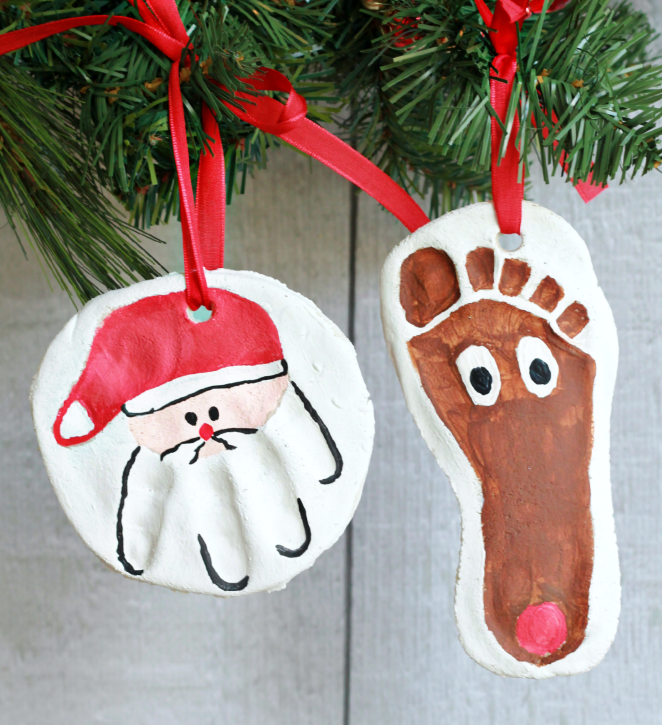
Drawing on them - imprints of embossed buttons, beads, etc. They also made a bracelet and earrings. Not lacquered, without gold paint, typed on a waxed brown cord.
The very ones that started it all - multi-row beads made of lacquered beads strung on a nylon thread.
Waxed cord bracelets
Bird earrings.
It should be noted that these are the birds - one might say, my topic))) I.e. it is in this form that they are one of the motives of my work, periodically manifested in different materials and products.
Earrings, pendant
Align the edges of the future brooch with a craft knife. Make notches with a knife, imitating the structure of the basket. From small balls, fashion an apple, pear and plum, giving relief to the fruit with a toothpick.
Attach 6 small dough balls to the base of the brooch, arranging them in the shape of a flower. Work on the flower petals with a toothpick. Make another such flower. Complete the composition with small dough balls. Then the brooch should be dried and baked as described above. Cover the brooch with varnish or gold acrylic paint. Glue a special pin on the reverse side.
The funniest and most "Russian" brooches made based on wedding cakes.
By the way, they are no more than 40mm in size (honestly!)
By the way
Wrap the ends of the bundle with waxed cord, secure with glue. Attach metal “bells” for jewelry and a few beads to the ends of the workpiece. Complete the beads with a brooch made using the technology of "imprinted" beads. And collect simple bracelets from birds or “chocolate” balls with your children.
I like these very much - they are made with bast. Beads on ribbons became very popular a few years ago, so here are the same ribbons, but made of natural material))) Some are dyed with gold.
I wanted to take pictures of these jewelry in this honey light, because.