Shapes for second graders
How to Teach 2D and 3D Shapes
This blog post is all about 2nd grade 2D and 3D shapes activities. These activities build on 1st grade common core geometry standards and prepare students for 3rd grade standards. This blog post will focus on how to use these activities in your study of the 2nd grade standard 2.G.1. Your students will learn a variety of strategies for reasoning with shapes and their attributes.
Standards for geometry:
2nd Grade 2.G.1: Recognize and draw shapes having specified attributes, such as a given number of angles or a given number of equal faces. Identify triangles, quadrilaterals, pentagons, hexagons, and cubes.
Introduce Terminology
Introducing your geometry unit with an anchor chart that reviews key terminology and provides visuals is highly effective. This serves as a spiral review of previous 2D and 3D shapes skills they have learned as well as a strong visual for this unit. In 1st grade, students learn how to distinguish defining shape attributes.
Reviewing these attributes is a great warm-up for students. This anchor chart provides a visual for students as they study 2D and 3D shapes and their attributes. This is a strong foundation for them to build knowledge on in 2nd grade.
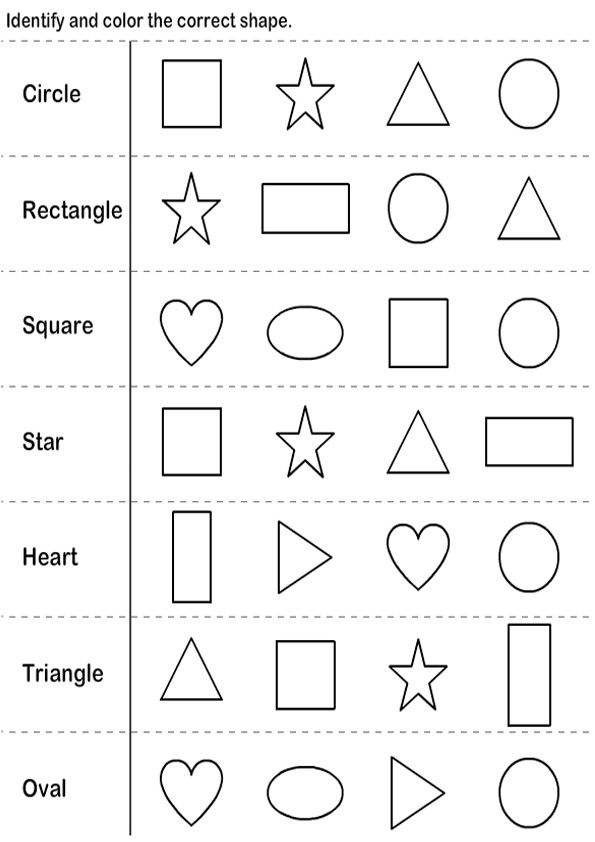
An essential 2D shapes activity used is this anchor chart which describes 2D shape attributes. It is essential that students connect the defining attributes to the name and suffix of the shape word. This will help them understand the number of sides, vertices, and angles more concretely. Showing examples of different ways to make that shape is also important. This allows the students to think beyond the basic version of each 2D shape.
Much like the 2D shapes activity above, this 3D shape attributes anchor chart serves a similar purpose. This chart breaks down each 3D shape figure and shows the number of faces, edges, and vertices. The examples of each shape help students connect the term “solid” to the defining attributes. They are also able to see the differences between 2D polygons and 3D solids.
These interactive videos from BrainPop Jr are a fun way for students to practice recognizing and defining 2D and 3D shapes.
- BrainPop Jr- 2D Shapes
- BrainPop Jr- 3D Shapes
Identifying Shapes
When focusing on 2D and 3D shapes, it is helpful to start by focusing on one type of shape at a time. This gives the students time to understand each type of shape separately before comparing them. One day of the unit will solely be about 2D shapes. After the whole group lesson, students will work in partners, small groups, and individually to study these shapes and their attributes. Hands-on activities, interactive notebook prompts, and leveled 2D shapes activities are included for this lesson.
Once the students are showing mastery of the 2D shapes, the next step is to study the 3D shapes and their attributes. Similarly, students will have a whole group lesson featuring an anchor chart and posters. Then, they will work in partners, small groups, and individually to show what they know about 3D shapes and their attributes.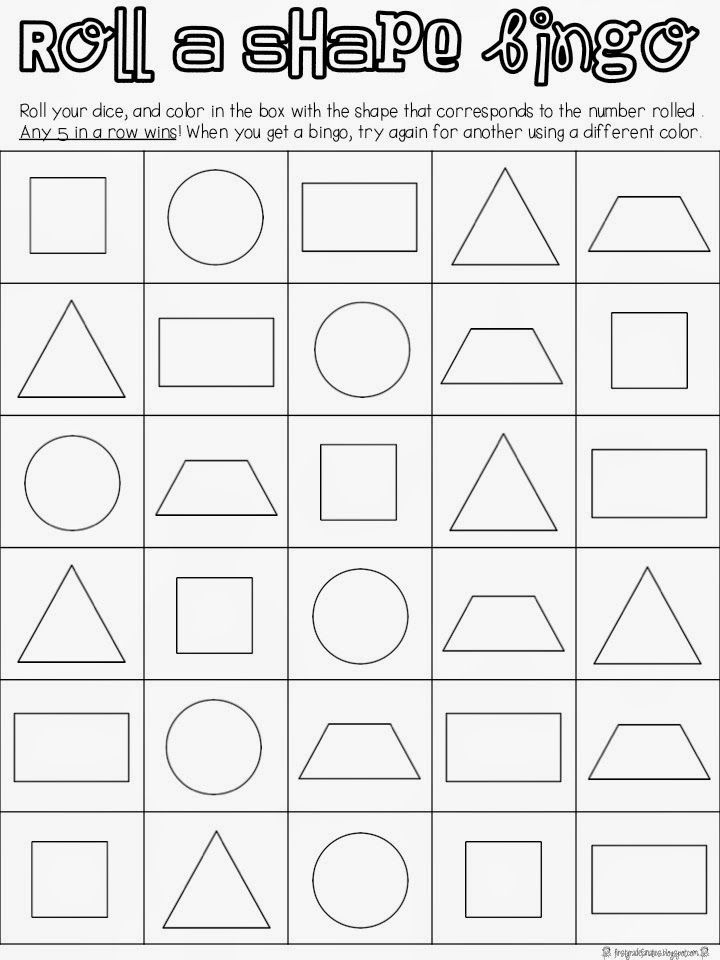 This 3D shapes book is one of my favorite activities in this unit as it serves as a great “go-to guide” for the students as they move through this study.
Describing Attributes
Now that the students have studied both 2D and 3D shapes in depth, it is time to start describing them. These 2D and 3D shapes activities will help students describe the attributes of different shapes. The 2D and 3D shape cards can be mixed up for an added challenge or separated into 2D and 3D shapes. Having the students describe the attributes and then sort them independently encourages critical thinking skills.
Drawing Shapes
As they continue to build on the prior 2D and 3D shapes activities, the students are now ready to draw shapes. Using their knowledge of the shapes and their attributes, the students get to show what they know by drawing 2D and 3D shapes. I love how the cards in this activity have the students trace the shape first. This allows them to think about all of the attributes and get a feel for what that shape looks like and feels like to draw. This is great for our kinesthetic learners. After that, the students draw their own shape beside it. This helps our visual learners as well by allowing them to see how close their drawing is to the original.
Differentiating Small Group Activities
Just like with any concept, not all students will learn at the same pace or in the same way. I have included 3 levels of 2D and 3D shapes activities in this unit. Students in the remediation group will benefit from a simple review activity and matching practice. On-level students may work more on defining the attributes of the shapes while the students in the enrichment group are ready for drawing shapes activities and more challenging games. As always, it is crucial for the teacher to meet the students where they are at and progress from there. Building those foundational skills before moving on is key.
Give Lots of Time for Mixed Review and Hands-On Practice
Like anything, practice makes perfect! Giving the students multiple opportunities to work with these 2D and 3D shapes activities is essential.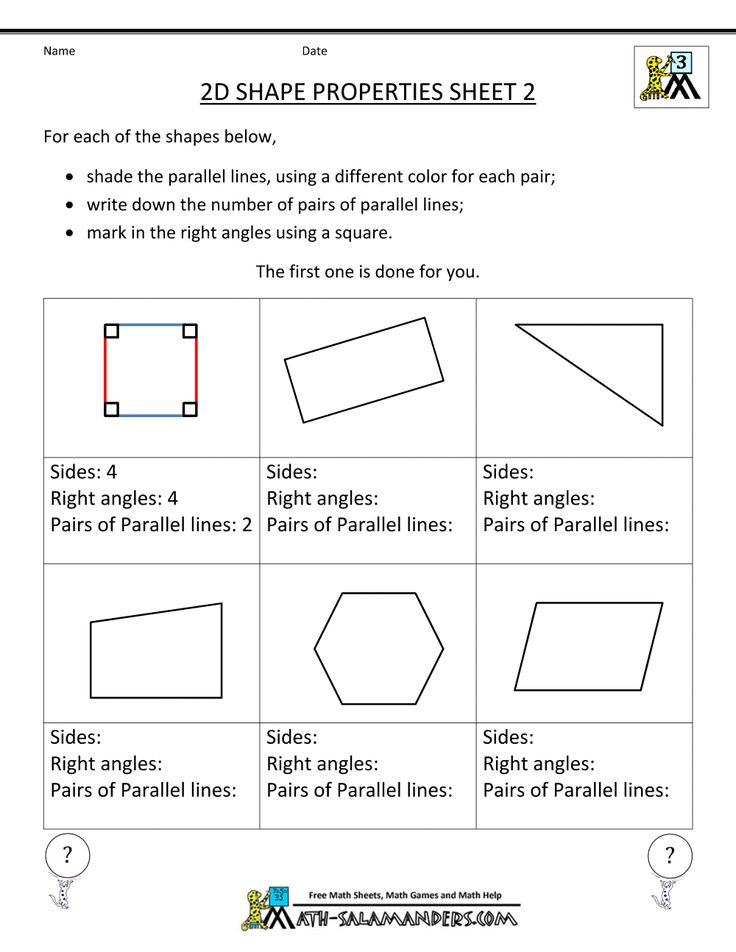 Using a variety of hands-on and mixed review activities included in this unit allows the students to practice these concepts and become more fluent. They will begin to define, draw, and recognize the different shapes and their attributes with more precision as they work towards mastery. This unit makes differentiation a breeze, giving your students the support they need.
2nd Grade Teaching Suggestions…
This unit breaks down the 2nd grade standard, 2.G.1, teaching students how to recognize and draw 2D and 3D shapes having specified attributes, such as a given number of angles or a given number of equal faces. Students will also learn how to identify triangles, quadrilaterals, pentagons, hexagons, and cubes. All of the images you see throughout this blog post come from the 2D and 3D Shape Attributes unit.
Click the buttons for the link you need.
Looking for more math blog posts?
- Keeping Your Math Block Organized
- Writing About Math
- How to Teach Number Lines
Making Fluency Functional in Your Reading Block
Are you struggling to find ways to make fluency functional in your reading block? Teaching fluency can often feel tedious for both educators and students,
Read More »
3 Anchor Charts for your Point of View Lessons
Do you ever struggle to get through the “point of view” lesson plan with your students? Teaching an unfamiliar concept can be tricky, so it’s
Read More »
Win 6 Valentine’s Day Read Alouds HERE!
Hello teachers! I’m giving away books for your classroom library. These will be delivered directly to your house or school, depending on where you tell
Read More »
Geometry and Shapes for Kids: Activities that Captivate –
Learn and build with the geometry and shapes for kids. Tons of fun math activities included and a FREE pattern block symmetry activity!
Were you searching Pinterest or googling to find engaging, hands-on geometry and shapes for kids? Are you looking for lessons and activity ideas that are fun and build a strong understanding of shapes and geometry? Then you have come to the right place!
Geometry and Shapes for Kids
The math tips and strategies you need to teach geometry in primary grades are right here. You will have everything you need to quickly implement and bring a wealth of geometry activities, games, and centers into your classroom or home.
The activities, books, math unit, and other resource suggestions (including a FREE one) cover a ton of geometry concepts and are perfect for Kindergarten, first grade, and second grade. Plus, find valuable geometry materials and manipulative suggestions, as well as freebies you can access today! This post is filled with a ton of value for you as you teach.
Why is it Important to Teach Geometry and Shapes for Kids?
Children need many opportunities to learn about shapes. Learning to identify and understand what the different shapes are, as well as their parts are important concepts. Each day children are exposed to shapes in their environment. They see and interact with them everywhere daily. They need to be able to recognize shapes, verbalize what they see, and understand why they are there.
We want children to see a shape and make a connection. When they look at the wheel of a car, we want them to process that image as a circle, a shape they have learned to label. Eventually, we want children to decipher between shapes and understand formal definitions of shapes. When they look at a cracker, we want them to process that image as a square, since it has four equal sides.
As children learn each geometric concept, they will move onto the next stage of understanding. A strong knowledge of shapes is vital for learning more complex geometry concepts later.
The activities below are ones that will help develop an understanding of shapes. Use them as they are described or adapt them to your own needs. Have conversations about shapes and encourage questions. When a child notices shapes in their environment, let them share with the class! Make time for fun and engaging geometry activities daily in your math center and free play areas.
Geometry and Shapes for Kids Activities
Two Dimensional Shapes
The first stage in learning about geometry is being able to identify, name, and describe 2-dimensional shapes. Talking about shapes whenever you see them and having shape posters on the wall are helpful to kids! Have plenty of shape manipulatives available to explore and “play” with.
Activities
- Create a detailed anchor chart for each 2D shape you are teaching.
 Draw the shape and label and describe how many sides and corners each has.
 - Teach a shape with a catchy song or poem to help them remember what it is called and its parts.
- Use colored popsicle sticks to form the 2D shapes with straight sides. Leave them in a center for kids to put together independently.
- Play and get creative with tangrams. See what pictures kids can make.
- Pattern blocks are also fun, hands-on manipulatives that encourage kids to create. They are the perfect addition to any math tub!
- Bring out the geoboards and practice forming shapes using elastic bands.
- Let kids form shapes in a hands-on way with Playdough.
- Reinforce learning about shapes with engaging printable activities perfect for the primary classroom!
- Practice forming shapes using different tools, such as do-a-dot markers or stickers.
- Make simple crafts using shape pieces cut out of construction paper. Let them invent a shape by combining shape pieces to make new ones.
- Check for understanding with small, focused tasks. Review the recognition of shapes quickly with flashcards.
- Draw shapes for practice using a Boogie Board or other draw and erase tool. Being able to draw basic shapes is essential for bringing other more complicated things later.
Three Dimensional Shapes
Just like 2D shapes, being able to identify, name, and describe 3-dimensional shapes is important! Our world is made up of 3D shapes, and we need to recognize them to make sense of things. Make sure to have geometric solids available to hold and interact with, as well as posters to refer to.
Activities
- Create a detailed anchor chart for each 3D shape you are teaching. Draw the shape and label and describe how many edges, vertices, and faces each has.
- Teach a 3D shape with a catchy song or poem to help them remember what it is called and its parts.
- Form 3D shapes in a hands-on way with small balls of rolled up clay and toothpicks to hold everything together.
- Let kids form geometric solids using Playdough.
- Play games to reinforce understanding and recognition of geometric solids: shape Bump and Scoot are two engaging choices.
- Get creative with foam blocks and build a tower or other structure.
- Kids love magnetic pieces that can be joined to form 3D objects. Have a bin of these available during free play or STEM time.
- Teach kids how to draw a geometric solid shape in steps. They will be surprised at how simple it is!
- Look through old magazines for pictures of the different 3D shapes. Add the pictures to a class anchor chart.
- Puzzles, clip cards, and matching activities are great for shape recall and building fluency.

Shapes in the Environment
The main goal of teaching children about shapes is for them to be able to see shapes in the environment and to interact with the environment because of that understanding. Get kids to talk about what they see continuously and encourage them to share.
Activities
- Create an anchor chart with examples of each shape in their world. Let kids give and draw the suggestions of what each shape “looks like…”.
- Look around the classroom and point out different shapes.
- Play games where kids must recognize what object is what shape. Give this Bingo game a try!
- Go on a scavenger hunt outside and take note of what is seen.
- Take photos of real-world examples of shapes. Add the photos to a class pocket chart.
- Read books about shapes in the real world. The Shape of Things is a good book with lots of picture examples.
Compare & Sort Shapes
Provide opportunities for kids to compare different shapes with each other. Once an understanding is developed with the parts of shapes, teach children to sort shapes based on one or two attributes.
Activities
- Provide small groups of either 2D or 3D shapes per pair of students. Ask them to take turns sorting shapes and let the other person try to guess their sorting rule.
- Place shapes in a pile in front of the class. Ask them to sort the shapes into their type or by following a particular rule.
- Sort 2D or 3D picture cards by a given attribute as a class or in a center
Symmetry
Teach kids at a young age about reflectional symmetry, which is a mirror image. Show kids that if you draw a line down the center of an image, both sides will match up. This is called the line of symmetry. Some shapes have one line of symmetry, and others have more. Expose them also to symmetry found in nature and their environment.
Activities
- Ask kids to find symmetrical things in the classroom and share them with the class.
- Go outside on a nature walk and look for symmetrical things.
- Use pattern blocks to create symmetrical pictures. Given half a pattern block picture, create the mirror image. Grab these FREE pattern block symmetry cards below!
- Create a Lego structure with a friend by placing the same pieces down together on both sides.
- Build something symmetrical using small objects, such as blocks.
- Create a piece of art using the concept of symmetry. Fold a piece of paper and paint only on one side. Fold the paper together to create symmetrical paint blotches.
Geometry and Shapes Resources for K-2
The activities seen in this post can be found in the following resources.
Kindergarten Geometry & Shapes Unit
First Grade Geometry Math Unit
Second Grade Geometry & Fractions Unit
Free Pattern Block Symmetry Pictures
Print off a set of these to go with your pattern blocks to create an easy math center. Kids will enjoy creating symmetrical designs!
Grab FREE pattern block symmetry pictures for your math center by clicking the image below.
Geometry & Shapes Books
Up, Down, and Around by Katherine Ayes
Go, Shapes, Go by Denise Fleming
When a Line Bends…a Shape Begins by Rhonda Greene
Shapes, Shapes, Shapes by Tana Hoban
The Shape of Things by Dayle Ann Dodds
Seeing Symmetry by Loreen Leedy
Jump, Kangaroo, Jump by Stuart J. Murphy
If You Were a Polygon by Marcie Aboff
If You Were a Quadrilateral by Marcie Aboff
Greedy Triangle by Marilyn Burns
Shape Up! by David Adler
Three Pigs, One Wolf, Seven Magic Shapes by Grace Maccarone
Shape by Henry Pluckrose
Mouse Shapes by Ellen Walsh
Shape by Shape by Suse MacDonald
Shapes! by National Geographic Kids
Captain Invisible and the Space Shapes by Stuart J. Murphy
Geometry Materials
Try the Mindful Math Comprehensive Program
Read about the Mindful Math program and how it can change your math block in positive ways! This comprehensive math curriculum is available for Kindergarten, first grade, and second grade.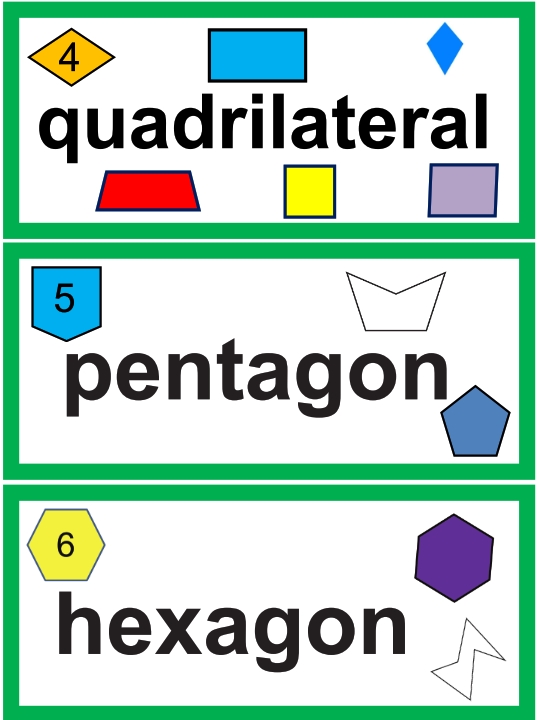
More Math Activities for Kids
Number of the Day Activities
Addition and Subtraction to 20 Activities for the Classroom
Number Sense Activities to 20
Learning Fractions
PIN
FREE Number Sense Email Series
Sign up for the building number sense email series filled with effective strategies, must try activities, and FREE resources to build routines in your classroom. Everything you need to help kids grow their number sense and have fun at the same time!
First Name
Personal Email Address
We use this field to detect spam bots. If you fill this in, you will be marked as a spammer.
I'd like to receive the free email course.
This form collects information I will use to send weekly emails with strategies, promotions, and resources. Unsubscribe at any time. Powered by ConvertKitColors and shapes for children
The first years of a child's life are undoubtedly important. After all, the baby is changing rapidly. It just seems that yesterday I learned to smile, babbled, took the first step. This explorer makes so many discoveries in one day! But development depends on the environment. Any of us can create a developing environment, stimulate the proper development of the child if desired. Learning new things about the world around us also means remembering the color and shape of objects with a crumb. When is the best time to start exercising? It is believed that by the age of three, the baby should know at least all the basic colors and the simplest shapes. So how do you learn shapes and colors with kids?
I myself became interested in this topic when my daughter was about one year old. Almost everything caused her indescribable delight and surprise: animals and plants, people and things. For her, everything was new, interesting and unknown. To broaden her worldview, I decided to include lessons in colors and shapes in our small home games. It turned out that there are many teaching methods for determining the colors and shapes in the game. I learned about them from the Internet, books, television programs, but I focused more on simple “home” exercises.
For my convenience, I divided the classes into groups:
- at home and on the street;
- toys and games;
- coloring books and books.
Everything can be turned into a game at home. For example, during regular bathing or joint games, giving toys to my daughter, I clearly pronounce the name, color, shape (for example: “Daughter, please take the ball, look how red, round and rubber it is”). You can also use cups, pyramids, a multi-colored constructor: each part has its own shape and color. If your toddler likes tossing toys around, try arranging them according to certain colors or shapes.
Don't forget about colors and shapes while walking. So many objects around: trees, buildings, cars. Each item has its own shape and color. And with a baby, you can beat everything. Together with my daughter, we came up with colorful stories, made up fairy tales about any subject.
I have become more purposeful in choosing all kinds of toys. The color of toys should be close to natural in order to accurately name it and not confuse the baby. Children quickly get tired and can concentrate, unfortunately, not for long. I believe, therefore, it is more effective to conduct a lot of mini-classes, thought out in advance by parents. For example, you can cut out cards from colored cardboard and show them to your baby, pronouncing not only all the names of the colors, but also their shades. It is interesting and effective enough to remember.
Sorters in the form of a house, a bear, a cube with slots of various shapes and sizes are magnificent in this regard. Figures of the corresponding form are embedded in them: a square in a square. You should not only give it as a gift, but also start playing together, explain the conditions of the game, since the child may not immediately understand how to play it. Circle each hole together with your index finger and examine the liners, say the name of the shapes and colors. Try putting each mold together in the correct hole. Do not be discouraged if the child does not succeed, everything will come with time. While playing, the baby begins to understand and distinguish not only colors, but also shapes and sizes.
When my daughter was 1.5 years old, my little girl and I really liked to play the following game: we had to find objects in the room that looked like, for example, a red apple or a yellow lemon.
The little girl really liked to collect mosaics or large buttons according to color in separate jars. To better remember the names of shapes and colors, we used a pendant with multi-colored pockets for storing toys. Together we laid out toys there: in yellow - a lemon, a sunflower, a chicken, in green - a frog, a crocodile. The child will remember colors and expand his vocabulary.
In my opinion, invaluable for the development of a three-year-old daughter was the cognitive game-lotto by Burdina S. V. These are 72 cards with an image in the form of a locomotive with wagons. You can play in different ways. For example, for a drawing on a train, to select objects on trailers that are suitable in color and shape, you get a long composition. Either the child collects only drawings similar to, say, a circle, a square, or only objects of a certain color: yellow, blue. You can train memory and attention: lay out several different pictures, offer your child to remember them. After he turned away, remove 2 and add new ones, and then ask the baby what has changed. All this is interesting, convenient and effective. Daughter still loves this game.
You can download the game about shapes and colors here for free - click on the picture below to download.
Books are undoubtedly our first helpers.
Pay attention to the whole series of books "School of early development", designed for children aged 2 years and older. They will help in revealing the individual abilities of the child. For example, "Color and Form" by Galina Shalaeva. Attract simplicity, bright drawings, accessible tasks of this book. In addition to color, there are contour black and white drawings designed for coloring and working on the cells when creating a similar drawing.
Or Olga Zemtsova's educational series "Smart Books" for children of all ages. Her book "Colors and Shapes" for children from 2 years old with stickers. It will help to understand the various properties of objects, comparing them in size and color. The book has a spread of stickers and bright large illustrations on thick, good quality paper. A varied list of tasks: what the object looks like, name the colors, larger or smaller, round or square. At first, I helped my daughter look for the right sticker and stick it on the page, after a while, my daughter already coped with the tasks herself. How much we enjoyed this book.
A series of books "School of 7 Gnomes" is also instructive and interesting, in some ways even unique: seven sets for a child from one to seven years old. For example, our favorite fairy tale “Ryaba the Hen” in the book “Form. Color" for children from 1 year old is accompanied by extraordinary illustrations: fairy-tale characters are depicted in the form of various figures. The book contains colored stickers - circles and triangles, which my daughter pasted herself, often without my help. I quickly remembered them, and for a long time later we retold the tale from the pictures. Again and again repeated colors and shapes.
Coloring pages are a must for learning colors and shapes. It seems to be simple, but how exciting. The main thing is not to delay the lesson: 10 minutes at first is enough. Any knowledge should bring joy and positive emotions. Do not forget to praise the child who has coped with something. This will be an incentive for further progress. The love of parents is what should be the basis of all joint activities. Good luck!
The history of school uniforms in Russia
Home | Useful information | The history of school uniforms in Russia
Nowadays, school uniforms are the subject of fierce debate among schoolchildren, their parents and teachers. The arguments of both sides equally have the right to exist. But there were times when such disputes would have seemed at least strange, and the form was an indispensable part of the life of every student.
In 1834 the school uniform was officially introduced in Russia. Nicholas I, who reigned then, ordered the wearing of uniforms for all civil servants, he could not ignore the students. The appearance of the form in the 19th century changed several times, but it remained until the revolution of 1917 years old.
Uniform for high school students resembled military uniforms and bureaucratic overcoats at the same time. With a certain similarity of all types of uniforms, there were some differences in it, the main purpose of which was to determine which gymnasium or real school the student belongs to. The production of school uniforms was not put on stream, and therefore they were bought at the expense of parents or trustees. That is, wearing a gymnasium uniform meant origin from the privileged strata of society, because sewing a complete set, consisting of a cap, tunic and overcoat, was not at all cheap. City schools also had their own uniform, but most often the children of poor and poor parents who studied in them were limited only to uniform caps.
The Smolny Institute for Noble Maidens became the first educational institution in Russia, whose pupils wore a single uniform. Even under Catherine II, students were divided into four groups by age (6 - 8, 9 - 11, 12 - 14 and 15 - 18 years old), while each group wore simple dresses of a certain color - coffee, blue, gray and white, respectively. . Dresses were complemented by aprons, armlets and a cape. In the future, the form was changed several times, but the general principle was preserved. Gymnasiums and boarding schools for girls, which arose at a later time, also basically used the same colors for uniform dresses: blue, green and brown.
The Tsarskoye Selo Lyceum stands out among the establishments for boys. From the very moment of its foundation, there was a special uniform, a lyceum uniform. Lyceum students wore a dark blue caftan with a red stand-up collar. The uniform was complemented by a white camisole and white linen. In 1825, when the issue of uniforms for students of St. Petersburg gymnasiums was being decided, it was the uniform of the Lyceum that was taken as the basis.
But all these were only special cases, but since 1834, the whole of Russia has already dressed in uniform. Nicholas I, who most of all valued order and discipline, in his "Regulations on Civil Uniforms" did not deprive students and gymnasium students of their attention. Before the next emperor, Alexander II, ascended the throne, gymnasium students were required to wear blue jackets and uniforms with red collars, created in the likeness of the uniform of the guards.
In 1855, the uniform changed, instead of the Nikolaev uniform, it was now prescribed to wear a dark green semi-caftan. The color of the trim, buttons, caps, as well as the emblems of educational institutions have not changed. In the future, the form continued to change, sometimes partially, sometimes dramatically. So, for example, in 1864, the cut and some elements of the gymnasium uniform became different, but the color - dark green - remained the same. But after four years, uniforms again become dark blue, as in Nikolaev times. It is in this form that it will be preserved in the memory of generations and will "survive" until the revolution.
In the 70s In the 19th century, high school students living in boarding houses and shared apartments also began to wear special home clothes - gray half-caftans made of cloth and trousers of a darker shade. Separately, it is worth noting that wearing a uniform in those years was mandatory not only during classes and official events, but also in public places and on the street outside school hours. The inspector could at any time check to what extent the appearance of the gymnasium corresponded to the charter.
In the early 1880s, caps were replaced by uniform caps. The cap was both a matter of pride and the subject of a wide variety of manipulations, that is, an extremely useful and multifunctional thing. It was polished and bent in a special way, decorated with straps, shoes were wiped with it, water was drunk from it, various small objects were hidden in it. Only the students of the lower grades had their caps in their original form; for everyone else, this would have been truly indecent.
The same can be said about the manner of wearing the uniform in general. Junior students, as a rule, were forced to put on all the elements of the uniform as it was supposed to according to the protocol. Another thing is high school students, who were unofficially allowed to deviate somewhat from the norms. According to the rules adopted by the gymnasium students themselves, the gymnasium number was broken off from the cap while they were on the street, and the comrades watched each other even more vigilantly than their teachers - for the observance of decorum within the walls of the gymnasium. The reason is quite obvious - it was much easier for a high school student who committed a public offense to remain unidentified in this way.
School uniforms appeared in women's gymnasiums in 1886, when women's education began to develop especially actively. A brown dress and a black apron are the classic uniform of all state women's gymnasiums. Private gymnasiums had a free choice of uniform colors, and could also introduce color grading for different ages. Dress and everyday uniforms differed in small details - a white lace collar and an apron. In addition, according to the charter, any additional dress could be sewn.
Neatness was the main requirement for the hairstyles of schoolboys and girls. Primary school students, for example, were shaved almost completely before the start of the school year. Girls were supposed to braid their hair in braids with bows of black and white silk. However, in the era of the birth of the women's movement and later, until 1917, some female students - "emancipe" - wore short haircuts to demonstrate their beliefs. Of course, it was impossible for younger girls to do this without the risk of disciplinary action, or even exclusion.
At the beginning of its existence, the Soviet government resolutely rejected the old form for students in a number of other "remnants of the past". The school uniform is recognized as one of the attributes of the enslavement and dependence of the student. Of course, there were also purely economic reasons - neither the impoverished state nor the no less impoverished parents had the means to sew uniforms. The mass elimination of illiteracy and the availability of school and higher education to all sections of society made the school uniform insignificant, if not harmful, and its abolition in those realities made life easier for many. However, at 1948 uniforms will be returned to secondary schools. Even earlier, in some educational institutions, for example, in vocational and technical schools or pioneer camps, uniforms were introduced. In secondary schools, the uniform was almost completely copied from the gymnasium and was acquired at the expense of the family.
The designed school uniform for girls remained practically unchanged until its abolition: a brown dress, white collar and cuffs, a black apron, which was replaced by white on holidays. At the same time, the style and some details could differ depending on personal preferences and fashion trends. However, this can be said about the schoolgirls of the 60s. and later - up to this point, the length of the skirt, for example, was strictly regulated. Along with the uniform, it was supposed to wear knee-highs or tights and strict closed shoes. Hair must be cut short and modest, or braided with black, brown, or white bows. The wearing of jewelry and the use of cosmetics was strictly forbidden. Teachers strictly monitored the observance of these rules and most often did not allow students who violated them to attend classes.
The most radical changes took place in the 1980s. XX century. A new uniform for high school girls has appeared: an A-line skirt, a vest and jacket, and in some parts of the country also trousers for cold weather, all of which are blue. This form made it possible to combine different options and wear a variety of blouses.
Boys in Soviet times "changed clothes" more often. The first option consisted of gray or dark gray military-type tunics and long trousers. The uniform was complemented by a cap with a visor, a belt with a buckle and dark boots or low shoes, always cleaned to a shine. Hairstyles for boys should be short and neat. Then the tunics gave way to gray woolen suits, which in the 70s. were replaced by all blue suits (jackets with patch pockets and trousers). In the 80s. The high school students were dressed in blue trouser suits.
Another obligatory element of the uniform for both sexes was the October or Komsomol badge and a red pioneer tie, depending on age.
In 1992, after a series of relaxations, the school uniform was finally abolished, which marked the victory of democracy, as in 1917 - the victory of the revolution. Today, as then, we come to the idea of the return of form.