Sight word if
Sight Word IF {2 Worksheets, 2 Books, and 4 Activities!}
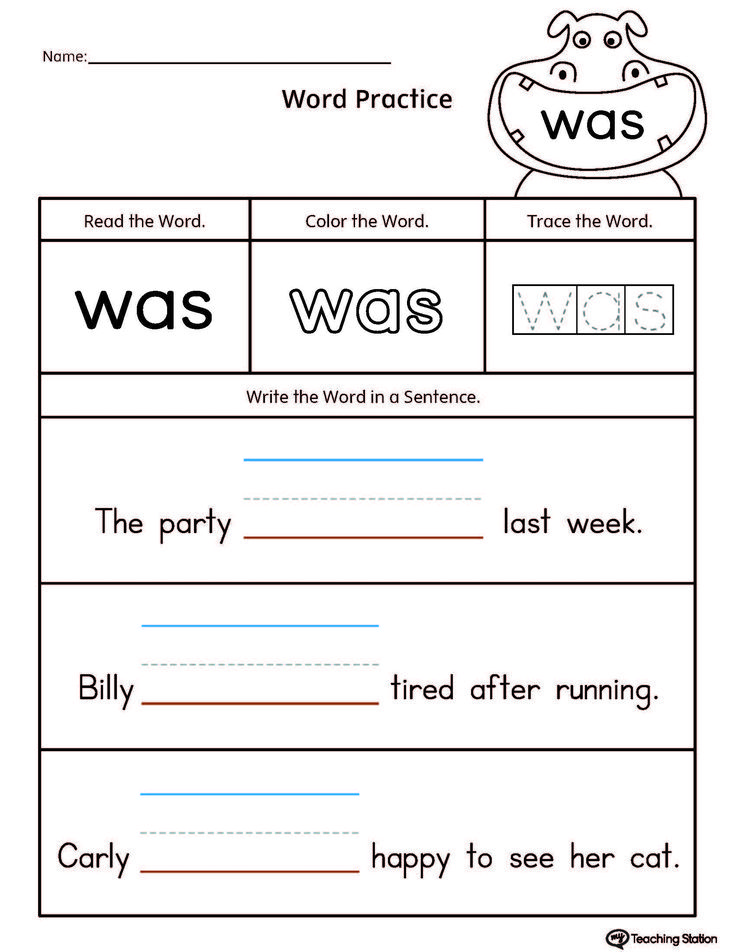
Do your students need practice with the sight word ‘if’? Then this is the bundle for you! This download includes 8 products to help reinforce the sight word ‘if.’ Your students will be able to read and write this important sight word in no time! :)
1. Worksheet 1 (pulled from these Practice Pages)
Students will trace, write, and color the sight word ‘if’. Next, students find like sight word among other sight words. Finally, students cut out pictures and match them to a letter in the sight word ‘if’ with the same beginning sound.
2. Worksheet 2 (pulled from these Practice Pages)
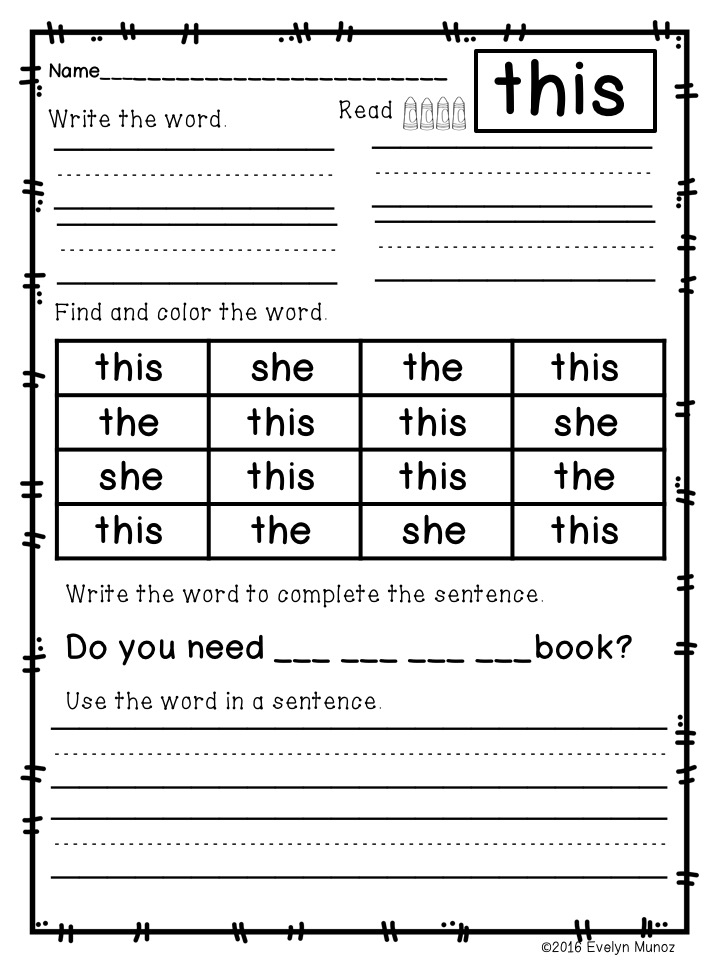
Students will first read the word and write the sight word ‘if’. Then, students will trace the word and rainbow write it. Next, students will fill in the missing letters for the word. Students will then circle the letters inside the word, using the alphabet chart as a reference.
Finally, students will find the word ‘if’ 2 times inside a randomized, 8x8 word search.
3. Sight Word Emergent Reader (pulled from these Sight Word Books)
This Sight Word book ‘if’ has a cover and 4 pages. The sentence on each page contains the sight word within a sentence of predictive, emergent level text to help your student learn the sight word and practice reading. The pictures on each page match the text to help with decoding. The pages are formatted for easy copying and stapling.
4. Sight Word Advanced Reader (pulled from these Sight Word Books)
This sight word book 'if' has a cover and 4 pages. The first sentence on each page contains the sight word within a sentence of predictive, emergent level text. The next sentence is not predictive, which will challenge your students to decode and not rely on repetitiveness. The pictures on each page match the text to help with decoding. The pages are formatted for easy copying and stapling.
5. Sight Word Coloring Page (pulled from these
Sight Word Coloring Pages.)
Your students will first color in the parts on the page that contain the sight word ‘if’ black. Next, students will color in the rest of the parts any other color. Finally, students will write the sight word on the dashed lines on the bottom of the page.
6. Sight Words with Pattern Blocks (pulled from these Pages.)
Students will make the sight word ‘if’ with pattern blocks. The outlines on the page will match up with your classroom pattern blocks perfectly. When finished, students will trace the word at the bottom of the page.
7. Sight Words with Snap Cubes (pulled from these Pages.)
Students will make the sight word ‘if’ with snap cubes. They will then trace the word at the bottom of the page. Your classroom snap cubes will fit the outlines on the page exactly. When finished, students will trace the word at the bottom of the page.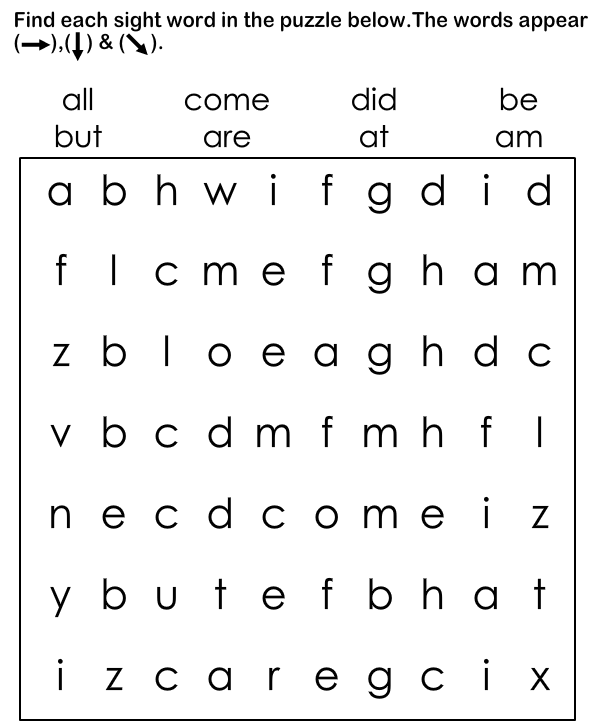
8. Sight Words with Bingo Daubers (pulled from these Pages.)
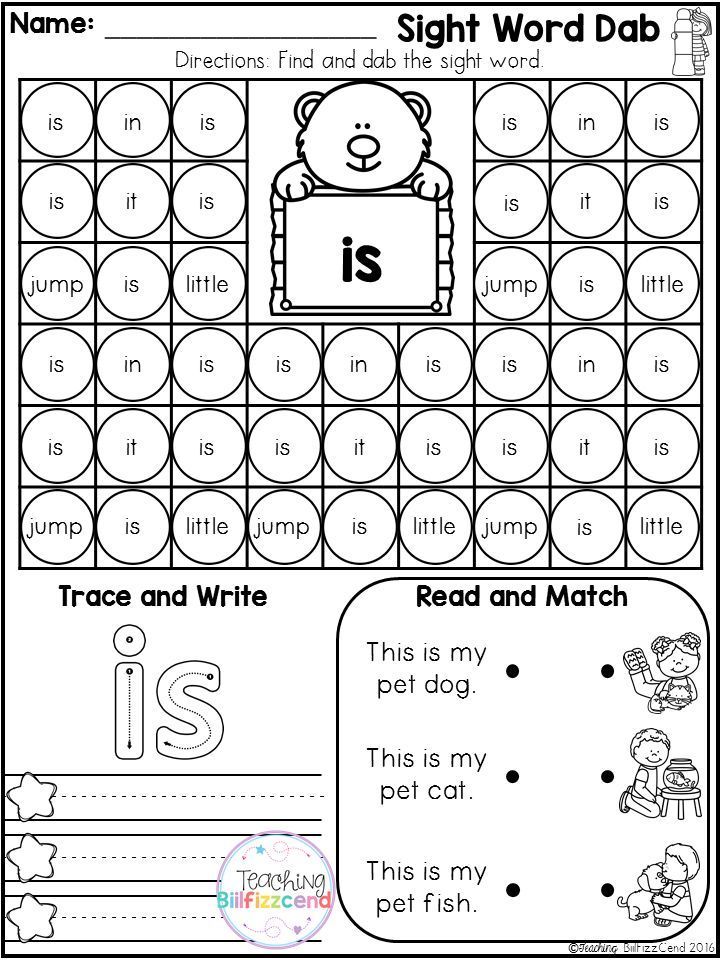
Students will create the sight word ‘if’ with bingo daubers. They will also dab the sight word when they find the word in the circles that surround the word. Finally, they will practice writing the sight word on the dashed lines at the bottom of the page.
**********************************************************************************************************
Do you need more sight word mini bundles? Check out the list below!
NOTE: please reference this list often as TPT doesn't show all of these mini bundles in the search engine.
About
All
Am
An
And
Are
As
Be
But
By
Can
Come
Could
Did
Do
Down
For
From
Go
Had
Has
Have
He
Her
Here
Him
His
How
In
Is
It
Like
Little
Look
Love
Many
Me
My
No
Not
Now
Of
On
One
Out
Or
Said
See
She
Some
So
That
The
Their
Then
Them
There
These
They
This
Up
Want
Was
We
Went
Were
What
When
Where
Which
Who
Will
With
Would
You
Your
Sound of the Sight Word: if Game - ELA Games
Sound of the Sight Word: if Game - ELA Games - SplashLearnHome > Games > ELA Games > Sound of the Sight Word: if Game
Ignite a love for language in your child by learning the sound of the sight word: if.
Play game
Assign to class
SUBJECTS & TOPICS
Know more about Sound of the Sight Word: if Game
Spotting sight words such as if with their sound is as important as recognizing them with sight. This game will help your child learn the skill of identifying sight words using just their sound.
Explore Amazing Games on All Sight Words
View all 975 Games
-
Reading
Learn the Sight Word: I Game
Help your child practice english by learning the sight word: I.
Pre-K
K
VIEW DETAILS
-
Reading
Sound of the Sight Word: I Game
Practice the sound of the sight word: I.
Pre-K
K
VIEW DETAILS
-
Reading
Practice the Sight Word: I Game
Polish your language skills by practicing the sight word: I.
Pre-K
K
VIEW DETAILS
-
Reading
Learn the Sight Word: a Game
Help your child practice english by learning the sight word: a.
Pre-K
K
VIEW DETAILS
-
Reading
Sound of the Sight Word: a Game
Practice the sound of the sight word: a.
Pre-K
K
VIEW DETAILS
-
Reading
Practice the Sight Word: a Game
Polish your language skills by practicing the sight word: a.
Pre-K
K
VIEW DETAILS
-
Reading
Learn the Sight Word: the Game
Help your child practice english by learning the sight word: the.
Pre-K
K
VIEW DETAILS
-
Reading
Sound of the Sight Word: the Game
Introduce your child to the sound of the sight word: the.
Pre-K
K
VIEW DETAILS
-
Reading
Practice the Sight Word: the Game
Polish your language skills by practicing the sight word: the.
Pre-K
K
VIEW DETAILS
-
Reading
Learn the Sight Word: and Game
Help your child practice english by learning the sight word: and.
Pre-K
K
VIEW DETAILS
-
Reading
Sound of the Sight Word: and Game
Introduce your child to the sound of the sight word: and.
Pre-K
K
VIEW DETAILS
-
Reading
Practice the Sight Word: and Game
Polish your language skills by practicing the sight word: and.
Pre-K
K
VIEW DETAILS
-
Reading
Learn the Sight Word: it Game
Help your child practice english by learning the sight word: it.
Pre-K
K
VIEW DETAILS
-
Reading
Sound of the Sight Word: it Game
Introduce your child to the sound of the sight word: it.
Pre-K
K
VIEW DETAILS
-
Reading
Practice the Sight Word: it Game
Polish your language skills by practicing the sight word: it.
Pre-K
K
VIEW DETAILS
Discover Fun Games on Sight Words
View all 975 Games
-
Reading
Can You Find the Uppercase Letter A? Game
To play this game, find the uppercase letter A.
Pre-K
K
VIEW DETAILS
-
Reading
Can You Find the Lowercase Letter a? Game
To play this game, find the lowercase letter a.
Pre-K
K
VIEW DETAILS
-
Reading
Learn the Letters: Big A Game
Put your language skills to the test by learning the letter: Big A.
VIEW DETAILS
-
Reading
Practice the Letters: Big A Game
Kids must practice the letter: Big A.
VIEW DETAILS
-
Reading
Learn the Letters: Small a Game
Put your language skills to the test by learning the letter: Small a.
VIEW DETAILS
-
Reading
Practice the Letters: Small a Game
Put your language skills to the test by practicing the letter: Small a.
VIEW DETAILS
-
Reading
Match Big and Small A Game
Put your language skills to the test by learning to match big and small A.
Pre-K
K
VIEW DETAILS
-
Reading
Find the Letters A, B, C & D Game
Put your language skills to the test by finding the letters A, B, C & D.
Pre-K
K
VIEW DETAILS
-
Reading
Can You Find the Uppercase Letter B? Game
To play this game, find the uppercase letter B.
Pre-K
K
VIEW DETAILS
-
Reading
Can You Find the Lowercase Letter b? Game
To play this game, find the lowercase letter b.
Pre-K
K
VIEW DETAILS
-
Reading
Learn the Letters: Big B Game
Put your language skills to the test by learning the letter: Big B.
VIEW DETAILS
-
Reading
Practice the Letters: Big B Game
Kids must practice the letter: Big B.
VIEW DETAILS
-
Reading
Learn the Letters: Small b Game
Put your language skills to the test by learning the letter: Small b.
VIEW DETAILS
-
Reading
Practice the Letters: Small b Game
Put your language skills to the test by practicing the letter: Small b.
VIEW DETAILS
-
Reading
Match Big and Small B Game
Put your language skills to the test by learning to match big and small B.
Pre-K
K
VIEW DETAILS
Find Engaging Games on Reading
View all 2,209 Games
-
Reading
Can You Find the Uppercase Letter C? Game
To play this game, find the uppercase letter C.
Pre-K
K
VIEW DETAILS
-
Reading
Can You Find the Lowercase Letter c? Game
To play this game, find the lowercase letter c.
Pre-K
K
VIEW DETAILS
-
Reading
Learn the Letters: Big C Game
Put your language skills to the test by learning the letter: Big C.
VIEW DETAILS
-
Reading
Practice the Letters: Big C Game
Kids must practice the letter: Big C.
VIEW DETAILS
-
Reading
Learn the Letters: Small c Game
Put your language skills to the test by learning the letter: Small c.
VIEW DETAILS
-
Reading
Practice the Letters: Small c Game
Put your language skills to the test by practicing the letter: Small c.
VIEW DETAILS
-
Reading
Match Big and Small C Game
Put your language skills to the test by learning to match big and small C.
Pre-K
K
VIEW DETAILS
-
Reading
Can You Find the Uppercase Letter D? Game
To play this game, find the uppercase letter D.
Pre-K
K
VIEW DETAILS
-
Reading
Can You Find the Lowercase Letter d? Game
To play this game, find the lowercase letter d.
Pre-K
K
VIEW DETAILS
-
Reading
Learn the Letters: Big D Game
Put your language skills to the test by learning the letter: Big D.
VIEW DETAILS
-
Reading
Practice the Letters: Big D Game
Kids must practice the letter: Big D.
VIEW DETAILS
-
Reading
Learn the Letters: Small d Game
Put your language skills to the test by learning the letter: Small d.
VIEW DETAILS
-
Reading
Practice the Letters: Small d Game
Put your language skills to the test by practicing the letter: Small d.
VIEW DETAILS
-
Reading
Match Big and Small D Game
Put your language skills to the test by learning to match big and small D.
Pre-K
K
VIEW DETAILS
-
Reading
Can You Find the Uppercase Letter E? Game
To play this game, find the uppercase letter E.
Pre-K
K
VIEW DETAILS
Related Worksheets
View all 1,063 Worksheets
-
Reading
Find Letter A Worksheet
Enhance your linguistic skills by finding the letter 'A' with this worksheet.
VIEW DETAILS
-
Reading
Spot Letter a Worksheet
This ELA worksheet will fill your child with zest as they spot the letter 'a'.
VIEW DETAILS
-
Reading
Where's Letter B Worksheet
Enhance your linguistic skills by finding the letter 'B' in this worksheet.
VIEW DETAILS
-
Reading
Learn About Letter b Worksheet
In this worksheet, learners will get to learn about the letter 'b'.
VIEW DETAILS
-
Reading
Look for Letter C Worksheet
Add elements of fun to your ELA practice by looking for Letter C.
VIEW DETAILS
-
Reading
Color Letter c Worksheet
Enhance your linguistic skills by coloring the letter 'c' with this worksheet.
VIEW DETAILS
-
Reading
Color Letter D Worksheet
Enhance your linguistic skills by coloring the letter 'D' with this worksheet.
VIEW DETAILS
-
Reading
Look for Letter d Worksheet
Become more versatile in English by looking for letter 'd'.
VIEW DETAILS
-
Reading
Circle Letter E Worksheet
Learners must circle the letter 'E' to improve their ELA skills.
VIEW DETAILS
-
Reading
Where's Letter e Worksheet
Enhance your linguistic skills by finding the letter 'E' in this worksheet.
VIEW DETAILS
-
Reading
Look for Letter F Worksheet
Learners must look for the letter 'F' to improve their ELA skills.
VIEW DETAILS
-
Reading
Circle Letter f Worksheet
Learners must circle the letter 'f' to improve their ELA skills.
VIEW DETAILS
-
Reading
Where's Letter G Worksheet
Enhance your linguistic skills by finding the letter 'G' in this worksheet.
VIEW DETAILS
-
Reading
Find Letter g Worksheet
Enhance your linguistic skills by finding the letter 'g' with this worksheet.
VIEW DETAILS
-
Reading
Learn About Letter H Worksheet
Reinforce ELA concepts by learning about the letter 'H'.
VIEW DETAILS
Your one stop solution for all grade learning needs.
Give your child the passion and confidence to learn anything on their own fearlessly
Parents, Sign Up for Free
Teachers, Use for Free
4,413+
4,567+
RELATED TOPICSMechanical sights. Types and features
Recently, people have often been arguing about the types of sights - which is better - a slot or an aperture, a large hole or a small one. And in the course of the dispute, it becomes clear that the opponents know the subject of discussion only by hearsay, or, at best, after a cursory acquaintance. The desire to clarify and systematically understand the issue was the motive for writing this text.
So, as a basis, I took the sights that are put on military weapons and its derivatives, I do not consider hunting models consciously. nine0004
Mechanical sights
Mechanical sights on weapons are structural elements, the combination of which forms a line of sight. These can be flat bars, slots and holes of various shapes as a rear sight (sight), as well as holes, threads, rods, needles, barrels as a front sight (front sight).
Two main types of sights for hand-held long-barreled small arms - open and closed (aperture or ring). nine0003 According to GOST 28653-2018 they should be called open and diopter, respectively.
An open sight is a rear sight with a rectangular/square/U-shaped slot, etc. (for example, a classic AK rear sight).
Diopter sight - rear sight with a round, square or diamond-shaped hole (sight M4 or AK12).
The results of shooting depend on the correct choice of type and the correct configuration of sighting devices.
I will try to state the advantages and disadvantages of these types of sights, based on my personal experience and, in part, compiled materials from the network, also passed through the filter of my experience. The experience at the moment is approximately the same - more than 60 thousand shots from weapons with an open sight and more than 85 thousand with a closed one. nine0003 In order not to make permanent references to terms and definitions further in the text, I will list them in advance and describe them.
Terms and definitions
Focus of an optical system is the point at which initially parallel beams intersect ("focus") after passing through the collecting system. In our case, if we see an object sharply, then it is at the distance at which our eye is focused, or "the object is in focus" . nine0003
Aperture diaphragm is a barrier or frame of one of the lenses, which restricts the beams of rays emerging from the points of the object located on the optical axis and passing through the optical system. In our case, this is a frame or an object with a hole, which is a closed rear sight.
Aperture is a value that characterizes the light transmission of an optical system. In our context, how much darker is the image when viewed through the scope and without it. Low aperture leads to a darkening of the field of view in the sight. Applies to closed sights only. nine0004
Parallax - change in the apparent position of the object relative to the distant background, depending on the position of the observer. For us, this will sound like the influence of the position of the front sight in the sight on the accuracy of the hit. The higher the parallax, the more the hits will shift with a slight movement of the front sight in the rear sight.
Diffraction - the phenomenon of light deflection from the rectilinear direction of propagation when passing near obstacles. This means that when diffraction occurs, the target pattern or part of it begins to blur. nine0003
Aberration - an error in the optical system, a violation of the focusing of light beams on the spherical surfaces of the lenses, caused by different degrees of refraction. In our case, blurring of observed objects, especially those that are out of focus. The less aberration, the clearer the picture.
Light irradiation - an apparent increase in the size of light figures on a black background. This means that a light figure on a black background seems more dark, with the same actual size. This effect is especially noticeable when there is a light background on one side of the front sight and the target, and a dark background on the other. nine0004
Depth of Field or Depth of Field (DOF) - the distance along the optical axis in space, within which objects are displayed subjectively sharp.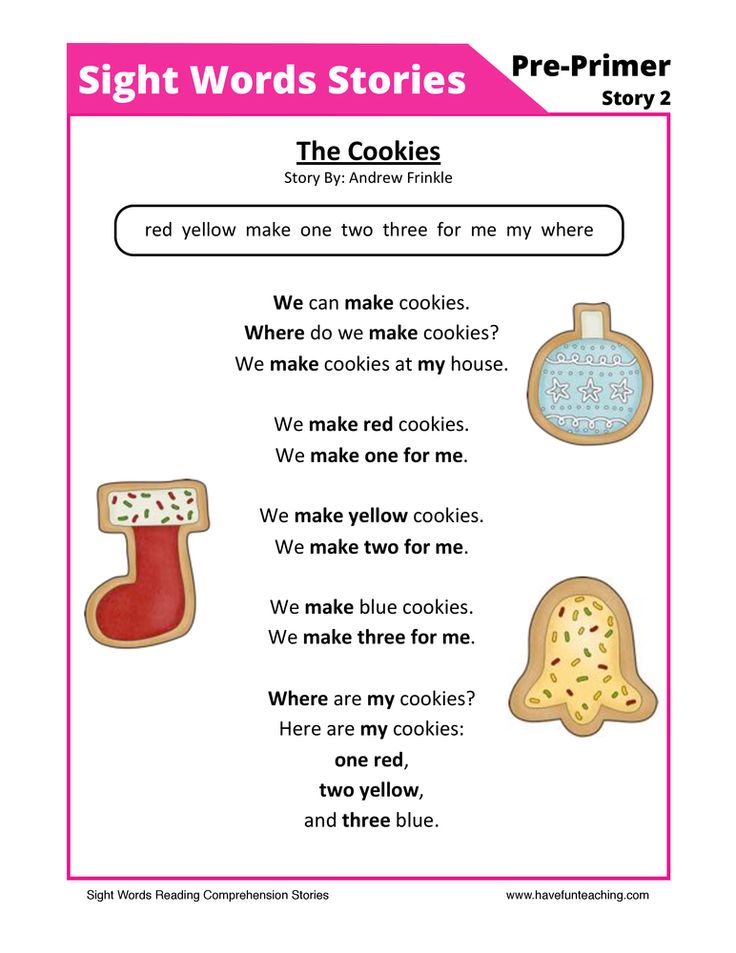 The more depth of field - the more space is in focus, that is, it is seen sharply by us. You can increase the depth of field by aperture (reducing the aperture diameter) of the optical system, this will suppress the effect of aberration and make objects sharper. The simplest example. Extend your hand in front of you with your finger extended - this will be about half a meter from the eye. Focus on your finger. Everything that is further than it - one meter from the eye and beyond, will be blurry. But if you look at your finger through a 2mm aperture (for example, the aperture of a ring sight), objects behind it become much sharper. This effect works when the diaphragm diameter is smaller than the pupil diameter. The farther away the object in focus is, the greater the depth of field. nine0004
Accommodation - the ability of the eye to change the focal length due to muscle contraction and relaxation. That is, the ability to transfer focus to objects located at different distances.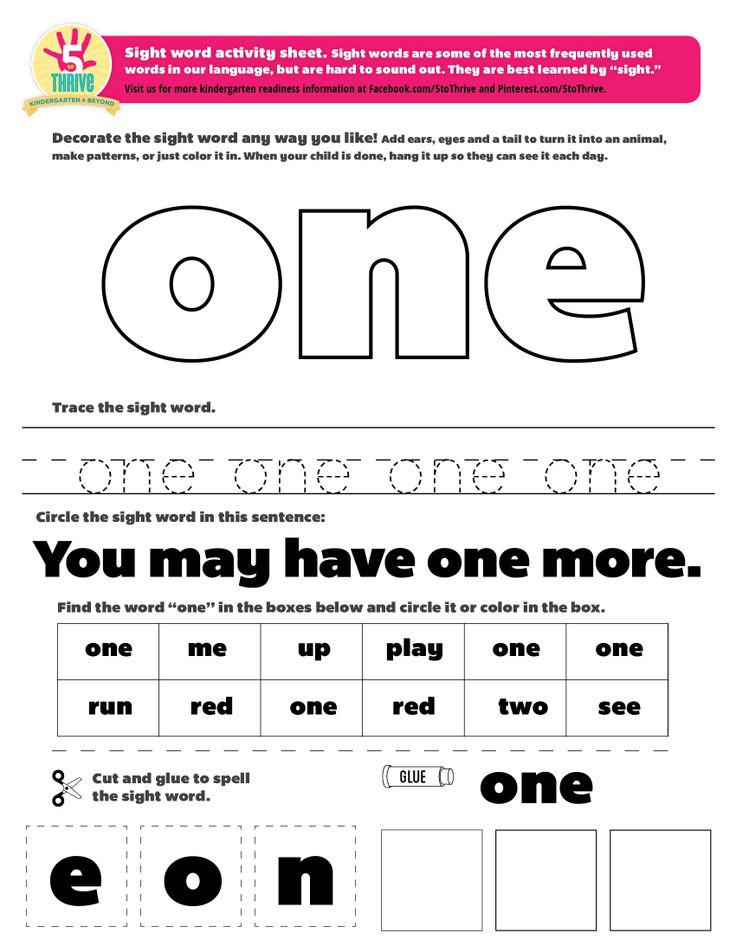
Types of sights and their features
Open
The rear sight is at some distance from the eye so that the shape of the slot and the upper edge are as clear as possible, provided that the focus is NOT on the rear sight. On this type of sight, the correct sighting line is the alignment of the top plane of the front sight with the plane of the rear sight, and the location of the front sight in the slot so that the gaps between the front sight and the sides of the slot are the same. At this point, one of the worst enemies of correct aiming is light irradiation. Uneven illumination of parts of the target, as well as background elements that differ in brightness and color behind the target, negatively affect the correct perception of gaps on the sides of the front sight. nine0004
This type of rear sight is not closed, therefore it does not have the properties to cut off part of the rays, and therefore does not affect the brightness of the perceived image or depth of field. The width of the rear sight slot affects the size between the side wall of the slot and the side of the front sight, allowing for more accurate positioning or faster catching of the fly in the slot. The wider the slot, the easier it is to find the fly faster, but the higher the error in its positioning. Already a slot - it is more difficult to quickly find the fly, but positioning is more accurate. By the way, the AK103 front sight, pressed close to one of the walls of the rear sight, leads the group to the side by 12-15 centimeters at 50 meters, and the front sight, pressed to the “bottom” of the slot, lowers the group by more than 50 centimeters at the same distance. Plus, diffraction comes into play, which, with an excessively narrow slot, begins to make it poorly distinguishable, since the slot merges. The minimum size of the slot, when it is still clearly visible, is called optimal. It depends on many factors, the main of which in our case is the individual characteristics of the shooter's vision.
 nine0004
The next nuance of working with this type of sight, arising from the peculiarities or, rather, shortcomings of the structure of the optical system of the human eye, is the inability to simultaneously sharply observe objects at different distances. We simultaneously see clearly either the rear sight, or the front sight, or the target. Let me remind you that in classic bullet shooting, the focus is on the front sight, and the rear sight and the target are blurry. Everything is clear with everything, but what to do with the target if these are not ideal shooting range conditions, when the lighting is the same, the target is static and contrasting? Suddenly it merges with the background, moves, or is unevenly lit? Here you have to constantly shift focus (accommodate) from the front sight to the target, or sacrifice the sharpness of the front sight too. nine0004
The advantage of this type of sight is that there are no objects above the front sight that block the view. But there is also a drawback - the rear sight with the front sight hides everything that is under the target below the level of the top of the front sight. When transferring a weapon from target to target, the view is the same for both eyes, in the case of transfer to the side of the driven eye, the new target first enters its field of view.
The correct position of the weapon - the absence of a blockage - is subjectively assessed by the horizon of the upper face of the rear sight.
Closed ring (with small ring diameter - less than 3 mm)
The rear sight is at a minimum distance from the eye so that the width of the space observed through the hole is maximum, and the inherent capabilities of such an optical system are realized - increasing the depth of field. On this type of sight, the correct sighting line is the alignment of the upper plane of the front sight with the center of the rear sight ring, and the location of the front sight in the ring so that the gaps between the front sight and the walls of the ring are the same. Thanks to the intuitive sense of symmetry of the eye, the front sight is placed in the center of the visible zone without any additional effort. Different illumination of the target parts, different brightness and background colors have little effect on the correct perception of the aiming image, since the visible area is quite large compared to an open sight. nine0003
This type of rear sight is closed, therefore it has the properties to cut off part of the rays of transmitted light, which means it affects the brightness of the perceived image. Thus, a small diameter aperture does not allow the use of this type of sight at dusk and at night. Rear sight aperture diameter affects speed and accuracy. Larger aperture diameter - faster target image formation, but lower accuracy. Smaller diameter - slower formation of the sighting image, but the accuracy is higher. Due to the effect of parallax suppression on this type of sight, the error when aiming is negligible. What does this mean in practice? As long as the diaphragm diameter is smaller than the pupil diameter, even the imperfect location of the front sight in the center of the ring almost does not lead to the STP - the parallax effect is almost completely suppressed. It begins to be observed only when the axis of the eye is shifted further than the edge of the diaphragm - but even in this case, the withdrawal of the STP is not catastrophic. nine0004
For comparison, the AK12 front sight, pressed close to the wall of the standard ring, leads the group in the corresponding direction by 6-8 centimeters at 50 meters, regardless of direction. I note that increasing the pupil diameter while maintaining the aperture diameter of the sight increases parallax suppression even more. That is, on an enlarged pupil, you can shift the sight even more, but this will not lead to additional withdrawal of the STP. It is this effect that is used on rifles for biathlon and bullet shooting - a large “pancake” is installed on the rear sight, which reduces the illumination of the eye, due to which the pupil expands. By the way, in terms of parallax suppression, diopter sights are better than some collimator and holographic sights. nine0004
To put it simply, in a small diameter ring sight, there is no need to focus on the ideal location of the front sight in the ring. It is better to spend this time on the exact location of the front sight on the target.
The next feature is aperture. The smaller the ring, the darker the image. The difference in the brightness of the picture through the sight and without it becomes indistinguishable when the pupil diameter is equal to or less than the diameter of the aperture of the sight.
The third is diffraction, which, with a very small ring diameter, begins to “blur” the picture. The periphery is especially “blurred” due to the phenomenon of aberration. The size of the diaphragm, when the phenomenon of diffraction is not yet so obvious, is called optimal. It depends on many factors, the main of which in our case is the individual characteristics of the shooter's vision. nine0004
Then there are the advantages of working with this type of sight, arising from the features of optical systems. When diaphragming (that is, reducing the diameter of the ring), the depth of field increases, which means that it becomes possible to simultaneously subjectively sharply observe objects at different distances.
For instance. With a diaphragm diameter of 2.0 mm, taking into account my far from ideal vision, observing a target at a distance of 200 meters, I quite clearly see the space at + -100 meters along the depth of the aiming line. With this type of sight, it is easier to deviate from the basic principles of aiming bullet fire if the shooting is not carried out in ideal shooting range conditions. I focus at a distance a little further than the front sight, about 0.5-1.5 meters. And the space visible in the sight has increased sharpness. By cutting off part of the beams, aberration in the eye is suppressed, and the image observed in the sight becomes sharper than outside the sight. This quality is especially valuable when it is necessary to control several targets, or work with non-contrasting targets. An increase in depth of field reduces the amount of accommodation, which less tires the muscles of the eyes. nine0004
At the same time, it is necessary to understand exactly that an increase in the length of the aiming line, which occurs when using a closed sight, with a constant position of the front sight, is a necessary condition for increasing the depth of field. The shorter the aiming line, the less depth of field. The farther the sight ring is from the eye, the less depth of field. The optimal distance is 4-8 cm - a common mistake is to put the ring rear sight at a distance from the eye. This, by the way, is one of the reasons why I always prefer to shoot with the shortest stock length possible for the situation. nine0003
A slight disadvantage of this type of sight is that above the front sight there is a part of the rear sight ring that obscures the view. But, given the size of the zone visible in the ring, this problem is rather far-fetched. But there is an advantage, in contrast to the open one - there is a visible space below the top of the front sight.
One of the main drawbacks and a trap for inexperienced shooters is that on sights with a small aperture diameter, when the weapon is quickly transferred from target to target at close range, the view for the leading and driven eyes is different. At the same time, the brain unconsciously begins to switch visual channels from which it receives information. And the leading eye becomes the driven one, which leads to an incorrect assessment of the aiming picture and incorrect aiming of the weapon. But I repeat, this effect is typical only for small diaphragm diameters - 2.2 mm or less, in conditions of high-speed transfer at close range up to 50 meters, only for small targets, and the lack of proper skill. nine0004
And another typical mistake for beginners is an attempt to aim not with a fly, but with protective "horns", i.e. the shooter starts aligning the ring or "forks" of the front sight guard in the ring of the rear sight - this is an incorrect technique. This method can be used in ghost-ring scopes and when shooting at very close ranges. Getting used to it is quite easy - you need to remember that the protection of the front sight is just the protection of the front sight, and not part of the aiming system.
The correct position of the weapon - the absence of a blockage - is evaluated by the vertical front sight. nine0004
Closed annular Ghost-ring (with large ring diameter - 3-5 mm)
The rear sight is at a minimum distance from the eye in order to realize the effect of the Ghost-ring (Ghost-ring) - a thin circle shadow in front of the leading eye, on which the front sight is centered. On this type of sight, the correct aiming picture is focus on the target and a defocused front sight, which is intuitively centered in the ring. Thanks to the sense of symmetry of the eye, the front sight is placed in the center of the visible zone without any additional effort. Uneven illumination of parts of the target, as well as elements of the background behind the target that differ in brightness and color, have little effect on correct perception, since the visible zone is very large compared to an open sight. nine0099
The advantages of working with this type of sight include the speed of forming an aiming image, the speed of transfer and the convenience of working on moving targets. Given the short range operation, there is no need to keep focus on or close to the front sight - you can fully control and keep the target in focus.
This type of rear sight is closed, but due to the size of the hole it does not affect the brightness of the perceived image during daylight hours - the pupil of the eye will be exactly smaller than the aperture diameter. But, this also reduces the effect of parallax suppression - and the errors will become larger, and there is no effect of increasing the depth of field. For comparison, a front sight pressed close to the wall of a ring with a diameter of 4.5 mm leads the group in the corresponding direction by 20 centimeters at 50 meters, regardless of direction. Thus, it becomes extremely problematic to conduct guaranteed accurate fire at a target the size of a target 4 further than 100 meters. But the size of the hole allows the use of this type of sight at dusk and even on a moonlit night, and it is in such conditions that the pupil of the eye expands to 8 mm, which means it becomes larger than the aperture diameter - and the depth of field increases again and parallax is suppressed. Of course, provided that the target is visible. nine0004
Another disadvantage of this type of sight is that it is difficult to use it on brightly lit targets with a front sight of standard thickness, it begins to get lost due to illumination - if this type of sight is the main one, it is definitely worth trying to put a thicker front sight.
The correctness of the position of the weapon - the absence of blockage - is evaluated by the vertical of the front sight, but at short distances this does not have any significant effect on accuracy.
nine0006 Fire process
If we simplify the process of producing an aimed shot with the help of mechanical sights as much as possible, then we can describe it in the following steps:
1. Bringing the weapon to the aiming line
2. Alignment of the aiming line with the visual axis of the eye
3. Aligning the aiming image with the required aiming point (TA)
4. Processing the descent with the control of maintaining the correctness of the aiming image and its alignment with the dot on the target before the shot is fired. nine0004
5. Hit control / aiming image alignment for re-shot / weapon transfer with target search.
Now let's go through the types of sights with a description of the process of working with them in this sequence of actions.
Open
Since the rear sight is at some distance from the eye, especially if lateral corrections are introduced by moving the rear sight, after step 1 it may take some time to find the correct position of the head for the front sight to fall into the slot (step 2 ). After that, the weapon is aimed at the target by aligning the aiming image with the required aiming point on the target (step 3 ). At this stage, the correct aiming is greatly influenced by the glare and illumination of the sides of the front sight and the upper edge of the rear sight and front sight, as well as the background, its uniformity and the contrast of the target against the background - light irradiation works against us. During the 4 stage, it is necessary to constantly monitor not only the position of the front sight on the target, but also the position of the front sight in the rear sight slot. Further, if it is necessary to control the hit of stage 5 you need to focus on the target, control the hit, and decide on the transfer of fire, or again focus on the front sight and finish off.
Closed - both types
Since the rear sight is as close as possible to the eye, at the stage 1 the eye, with proper skill, instantly finds the rear sight hole itself. And during the second stage, he also intuitively positions the fly in the center of the ring. At the same time, it makes little sense to control its position in order to ideally position itself in the ring, if we are not talking about sniper shooting. During stage 3 The focus is on aiming the front sight at the target, there is no need to additionally control the position of the rear sight. During step 4 all control over the position of the front sight in the right place on the target, and not the rear sight and the target. If after step 4 it becomes necessary to control the hit (step 5 ), then the target is usually in the focus zone due to the increase in depth of field - and there is no need for additional accommodation.
It is logical that a high level of aiming skill allows minimizing the difference in time between the formation of an aiming image and the search for a target, as well as the transfer of fire. But the skill cannot compensate for the increase in depth of field, just as it cannot allow you to see the front sight in an open rear sight in deep twilight. nine0004
Output
Open sight
Advantages:
-
simplicity of design and manufacturing technology
-
the ability to install on almost any weapon in the center of the structure
-
no master-slave eye switching effect
-
no effect on the illumination of the aiming image
Flaws: nine0004
-
parallax
-
the need for constant emphasis on front sight control in the rear sight
-
phenomenon of light irradiation
-
the need to refocus from the front sight to the target to control the hit
Closed sight
Advantages:
-
parallax suppression
-
no need for perfect alignment of the front sight in the rear sight ring nine0004
-
increase in depth of field
-
almost complete absence of the phenomenon of light irradiation
-
the ability to detect small details (reconnaissance) in the sighting image by increasing sharpness and depth of field
Flaws:
-
complexity of design and manufacturing technology
-
installation as close to the eye as possible is not possible on every weapon
nine0265 -
master-slave eye switching effect at small ring diameters and short distances
-
influence on the illumination of the aiming image - small aperture at a small aperture
There are misconceptions that ring sights are more prone to failure due to dirt/snow/water ingress. Properly selected ring design and hole diameter have the same chance of clogging as the slot of an open rear sight. And here there are two options. Or this blockage is easy enough to remove by blowing the sight / shaking the weapon. Or the same clogging happened with a front sight located in a protective rim, which is much more difficult to clean without improvised means than any rear sight. nine0004
There is no single correct mechanical sight. All have their advantages and disadvantages. But we can definitely say that the best scope is the one that you know how to use.
Georgy Gubich aka Zhora Nefteskvazhinsky
Special thanks to D*** and R***** for edits
Kalashnikov Club | The basis of a precise shot: rules for aiming
Georgy Gubich, a Kalashnikov specialist in the field of civilian small arms, talks about the rules for using a closed mechanical diopter sight
More than a year ago, the article “Mechanical sights. Types and features ”, where I tried to give information for reflection on what are the fundamental differences between open and closed sights, as well as describe the differences in aiming methods. It turned out that the article, in addition to not convincing everyone, in some cases raised even more questions than it answered, and sometimes even led to outbursts of rage in an attempt to deny the obvious.
I think this happened due to the fact that, in fact, some readers perceived the analytical material as the rules for aiming with a diopter sight, and even superimposing on it the established aiming technique with an open mechanical sight. nine0004
Therefore, in this article I focus on the rules for using mechanical sights - open and diopter. But first, let's turn our attention to the ability to achieve shooting targets by taking the rules for using scopes out of context.
I would like to start with quotes from a book that can rightfully be considered the quintessence of Soviet methods of sports shooting - A. A. Yuryev, "Sport Shooting", Moscow, FIS, 1962 (Second Edition):
“An indispensable condition for correct aiming should be such an interposition of sighting devices (regardless of the types of sights) in which a “smooth front sight” is maintained.
When aiming with an open sight, a “flat front sight” will be such a visible arrangement of sighting devices in which the front sight falls in the middle of the sight slot, and the top of the front sight is flush with the upper edges of the slot.
“When aiming with a diopter sight with a “flat front sight”, the top of the rectangular front sight (or the center of the hole of the ring front sight) will be aligned with the center of the diopter hole.” nine0035
Thus, the “flat front sight” for an open sight is the top of the front sight at the same level as the top of the rear sight, the side gaps (if any) are the same size, and the “flat front sight” for a diopter sight is the top of the front sight in the center of the diopter hole.
For open sight:
1. Front sight in the middle of the slot
2. The top of the front sight is at the level of the mane of the rear sight
The figures presented in this article are schematic and not capable of conveying the full picture, but will help you visualize the main theses of the article. nine0035
For diopter sight:
1. The top of the front sight is in the center of the rear sight hole
Separately, it is worth focusing on the fact that in the case of a diopter sight, we are talking about the top of the front sight, and not its other part (middle, 2/3, etc.). Perhaps you yourself have encountered similar manifestations in your practice:
From the point of view of directly building the correct sighting line, you can aim not with the top of the front sight, but, for example, with its base or protection, and, subject to the condition of uniformity, such options will also work. But there is no need to talk about ease of use. We must not forget about the different types of flies, types of protection and the position of the flies relative to the protection (because the vertical displacement of the STP when bringing the weapon to normal combat is often carried out by screwing in or twisting the front sight), and getting used to centering relative to the diopter hole, for example, a round front sight , you can run into a problem when picking up a weapon that does not have a trigger. nine0004
Regardless of the conditions, the position of the top of the front sight in the center of the diopter is optimal.
Again we return to quotes from the book of A.A. Yuryev "Sport Shooting" (Second Edition, Moscow, FiS, 1962):
“Thus, the accuracy of aiming depends on the ability of the shooter to always keep the “smooth front sight” in the same way and combine its top with the lower edge of the “apple” of the target (with the aiming point).
At first glance, the aiming scheme outlined above seems simple and understandable. But when the shooter wants to put it into practice, he will face many difficulties during shooting.
The main practical difficulties that arise in front of the shooter during aiming are due to the peculiarities of the structure of the eye and its work as an optical apparatus in the process of aiming. nine0035
“... the eye cannot simultaneously clearly see objects that are at different distances from it, in this case, the slot of the sight, the front sight and the “apple” of the target. So, if you clearly see the front sight, then the target and the slot of the sight will be perceived by the eye as blurry; if you focus your vision on the target, the front sight and the slot of the sight will be blurry. Some shooters, while aiming when firing from a rifle, “run across” their gaze from the front sight to the slot, then to the third object - the target, doing this quickly and several times until they combine all three points on one straight line. This method of aiming causes rapid fatigue of the muscular apparatus of the eye and can be used in the initial form of learning to aim, and then only at first. With this method of aiming, it is very difficult for the shooter to conduct, for example, high-speed shooting when it is limited by time. The same applies to standing shooting, when the athlete does not have the opportunity to pay much attention to aligning and refining the position of the front sight in the slot. Therefore, while aiming when shooting from a rifle, the shooter must sacrifice something and strive to clearly, sharply see only one of three objects: either the front sight, or the slot, or the target. nine0035
Based on practice, the vast majority of shooters, when shooting from a rifle, try to see the front sight sharply, being forced to somewhat neglect the sharpness of the image and the cut of the sight and the “apple” of the target. At the same time, one should not be embarrassed by the fact that the sight slot is perceived as fuzzy and, as it were, doubled ... "
At first glance, everything is quite simple, obvious and has long been known. Almost the same thing can be seen in the manual on shooting (NSD), for example:
"119. To aim, you need to close your left eye, and look with your right eye through the slot of the sight at the front sight so that the front sight falls in the middle of the slot, and its top is on a par with the upper edges of the mane of the aiming bar, i.e., take an even front sight.
© Guide to the 5.45 mm Kalashnikov assault rifle (AK74, AKS74, AK74N, AKS74N) and 5.45 mm Kalashnikov light machine gun (RPK74, RPKS74, RPK74N, RPKS74N). Moscow: Military publishing house of the Ministry of Defense of the USSR, 1976.
We level the front sight vertically and horizontally - and "there will be happiness."
It is worth noting that the NSD does not say anything about what specifically needs to be focused on, therefore, the correct formation of the skill remains on the conscience of the leader at the training place.
This is what concerns working with an open sight. Further about the diopter. And again we return to A.A. Yuryev’s “Sport Shooting” (Second Edition, Moscow, FiS, 1962):
“A diopter sight greatly facilitates and simplifies aiming, since the shooter is relieved of the need to see one of the three objects during shooting (sight slot), which is closest to the eye, and therefore the most inconvenient for visual perception. nine0035
The role of the slot in the diopter sight is performed by a small round hole (diopter). When aiming, the shooter needs to look through it and see only two objects - the front sight and the target.
To aim with a diopter sight, the shooter, looking through the diopter hole with his right eye, brings the top of the rectangular front sight under the lower edge of the target "apple" or places the "apple" of the target in the center of the front sight ring.
nine0034 During aiming, the shooter should not particularly divert his attention to searching for the center of the diopter hole and aligning the top of the front sight with it; due to the sense of symmetry of the eyes, this work is able to perform automatically and involuntarily.
If the shooter makes an inaccuracy in determining the center of the hole and the location of the top of the front sight in it, and the line of sight turns out to be somewhat shifted to the side, there will be no big mistake in aiming, because the point of the diopter hole itself is relatively small. nine0035
Thus, in order to ensure accurate and uniform aiming with a diopter sight, the shooter must basically mobilize all his attention to correctly and uniformly position the top of the front sight relative to the aiming point, while carefully maintaining the same clearance.
Likewise, there are no secrets.
If we turn to foreign sources, for example, an analogue of our NSD - Field manual, we will find that it says about the same principles of a “smooth front sight”. nine0003
Figure 4-15. Correct sight alignment
RIFLE MARKSMANSHIP M16A1, M16A2/3, M16A4, AND M4 CARBINE (Change 4). Washington: US Army, 2006.
RIFLE MARKSMANSHIP M16-/M4-SERIES WEAPONS (Change 1). Washington, DC : HEADQUARTERS DEPARTMENT OF THE ARMY, 2011.
The referenced Field Manual FM3.22-9, although without much detail, mentions that the centering of the front sight in the rear sight hole ring, the eye is able to perform independently. nine0004
But in reality, many have doubts, bordering on distrust, regarding the possibility of automatically centering the front sight in the diopter ring. The fact is that here we are hindered by stereotypes formed by the experience of working with "open mechanics". If you are shooting for the first time using a diopter sight, then instinctively you want to center the geometric center of the visible part of the front sight. We have already seen that this is not true, although, as discussed in the first article, a small shift will not lead to catastrophic consequences. nine0004
It must be remembered that the top of the front sight is located in the center of the rear sight hole, and not its geometric center. With the development of the skill, this error disappears rather quickly, and the eye puts the top of the front sight in the center of the rear sight ring. Let's look at this through the prism of the real conditions for the use of weapons.
If you need to make an accurate shot, for example, at a distant small target, you can always take a fraction of a second to control the position of the top of the front sight in the diopter hole, while preparing a quality preparation for an accurate shot. And if you need to make a quick shot, your focus will be on the target, which you will automatically place in the center of the diopter, and small possible deviations of the front sight (which, by the way, is more clearly visible due to the effect of increasing the depth of field) from the center of the rear sight ring will not give a significant absolute deviation of the bullet from the aiming point, tk. if you needed to make a quick shot, then most likely the target is close and large-sized. nine0004
Let me draw your attention to one more nuance from our NSD, namely, to the part where it is written “you need to close your left eye”! As is often the case in manuals, there is no description and explanation of why it is necessary to squint your eyes, since such documents are made according to the “read-do” principle and are aimed (or contribute) to simplifying the procedures for further copying to students. It can be assumed that in this way an attempt is made to increase control over the sighting image and the "smooth front sight" by cutting off half of the visual field or, which may be even more priority, an attempt to forcibly get rid of the problem of determining the "leading" eye. nine0004
And again we return to quotes from A.A. Yuryev’s “Sport Shooting” (Second Edition, Moscow, FIS, 1962):
shooters. Another disadvantage is that closing one eye is almost always accompanied by more or less tension in the muscles of the eyelids and pressure of the eyelid of the aiming eye on the eyeball; the latter affects the light-refracting apparatus and thereby negatively affects visual acuity. The third point that adversely affects the accuracy of shooting is the involuntary expansion of the pupil of the open eye in response to covering or closing the other. Based on this, it is best to turn off the second eye from the work not by physical means - by closing, but by psychological suppression of the visual impressions of the open, not aiming, left eye. nine0003
It follows from the text that closing one's eyes has many negative aspects.
To consciously suppress the perception of the picture by the “guided” eye, the following training method can be used: at the initial stage of mastering the aiming technique, the shooter closes his left eye, then learns to aim with both eyes, first slightly squinting his left eye to produce an accurate shot, then gradually opening his eye more and more , proceeds to shoot with both eyes open. In case of lack of time for full-fledged training, it is possible to use a simple algorithm in training the shooter: close your eye - level the front sight.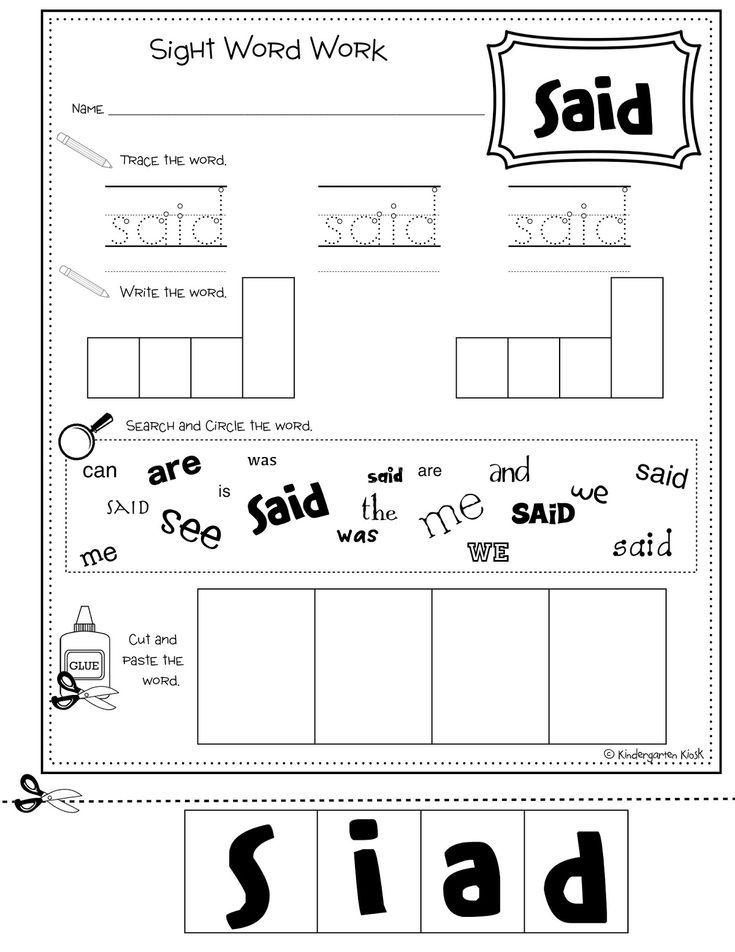 nine0004
The described training methodology allows achieving a high quality of aiming in classical bullet shooting and, for example, in applied military exercises AK-3 and AK-4, and if other skills necessary for firing a shot are available at a high level, a high level of shooting accuracy.
And now let's move a little away from the mentioned conditions, when:
- the target is static;
- target contrast;
- the target is well lit. nine0579
- skillfully fire at various targets in various combat conditions, both day and night, achieving the destruction of the target in the shortest possible time;
- observe the results of the fire and skillfully correct it. nine0265 "Continuously observe the battlefield"
If you close one eye while shooting, at least 30% of the field of view is cut off. Is it right to close your eyes in this case? The question is rhetorical.
"Skillfully shoot at all kinds of targets"
A properly trained shooter should be able to do this regardless of the type of sight on his weapon. Do not forget also about the ability to determine the distance to the target, as well as the removal of the aiming point in accordance with the excess of the trajectory, if necessary.
 nine0004
 “Observe the results of fire and skillfully correct it”
It is worth noting here that the manuals list specific methods of observation and evaluation: bursts of hits, bullet tracks and changes in enemy behavior. front sight, the top of a clearly visible front sight on the target blur. If the paths of tracer bullets are more or less visible at the same time, then observing the bursts will require a shift in the gaze to the target and the space surrounding it. And how long will it take to transfer focus from the front sight to the target, for example, at 200 meters, and back? A second and a half? Plus or minus. nine0004
So it turns out - either the correct aiming picture, or a timely and, with a greater degree of probability, an effective shot.
Let's imagine a more realistic situation. The enemy in camouflage disguises himself in thickets and moves at the same time. How can you generally fire at such a target, focusing on the front sight, while observing the results of the shooting and adjusting it if necessary, if the target is already barely distinguishable and changes its position?
nine0003
The answer is simple - when using an open sight, aiming in accordance with the canonical rules from the textbook is often impossible.
 They shoot, sacrificing accuracy - focusing on the target with blurry front and rear sights. And with the advantages of a diopter sight, expressed in an increase in the depth of field and the absence of the need for perfect focusing on the front sight, aimed fire at a complex target merging with the background is real: tracks are visible (when using tracer bullets), bursts of hits are visible and enemy behavior is visible - remains on place, took cover or fell stricken. nine0004
 Do not forget also that when looking through an open sight, the shooter, maintaining a "smooth front sight", does not see the space below the level of its top. When looking through the rear sight, there is an observable field below the top of the front sight.
Why do dissatisfaction and denial arise among those who, having extensive experience in shooting with an open mechanical sight, tried to shoot with a diopter sight?
As a rule, everything lies in the wrong use. Shooters complain about the narrow field of view in the sight, about the rear sight itself, which blocks part of the view, that the front sight is “impossible” to center in the diopter ring.
 nine0004
 But, if you follow simple rules, which, unfortunately, are little known, then everything becomes much simpler and clearer.
First, position the eye at a distance of 4-8 cm. At this distance from the eye to the diopter hole, a balance is maintained between the angle of the field of view through the diopter hole and the ease of intuitively positioning the top of the front sight in the center of the hole. In this case, the rear sight ring blurs into a ghostly shadow and becomes almost invisible. A shooter who does not close his eyes when shooting cannot lose part of his field of vision at all, because the brain will supplement the entire missing picture from the right pupil with information from the left. The required distance from the diopter to the eye can be maintained either by correcting the manufacture, or by changing the length of the adjustable stock. By the way, it is not possible to install a diopter sight on any type of small arms, precisely because of the requirements for the distance to the eye.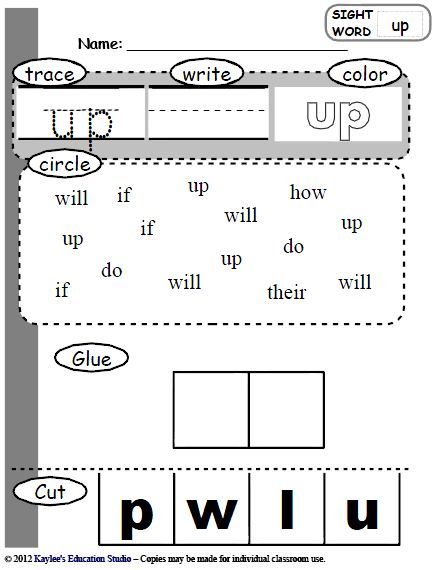 nine0004
 Secondly, If you have just started to master shooting using a diopter sight, you need to focus on the location of the upper cut of the front sight in the center of the diopter. In the future, to make any significant effort to center the top of the front sight in the rear sight ring, as already mentioned not only by me, but also quoted from, I’m not afraid of this word, the greatest work on teaching the technique of producing a well-aimed shot, there is practically no need - eye will do so involuntarily. The same thing was mentioned in the first article, when the ability of a diopter sight to reduce parallax was briefly described. You can read more about this effect in a recently published translation of a practical study on this topic. nine0004
Thirdly, the canonical rule "focus on the front sight." But, depending on the conditions, due to the increase in the depth of field of the depicted space, in order to achieve the goals of making a shot, it is possible to shift the focus of vision to the target without losing the quality of aiming.
And again, briefly about the rules of shooting using a diopter sight (after determining the range to the target, setting the sight and / or taking out the aiming point and forming the correct position, which will ensure the necessary removal of the eye from the sight): nine0004
- front sight focus;
- top of the front sight in the center of the diopter;
- the top of the front sight on the aiming point.
SUMMARY
ANY mechanical aiming device allows you to make an accurate shot, provided that the shooter is able to distinguish the target, it's only a matter of skill. But it is undeniable that different types of scopes have their own unique advantages and disadvantages.
The prevalence of the advantages of one type of sight over another in specific conditions of use determines our choice of sighting device. And it is precisely for the correct understanding and high-quality use of sighting devices that appropriate competencies are needed.
Learn more
And consider, for example, the conditions for performing exercises according to the rules of the international confederation of practical shooting from a carbine in the open air.
A beige cardboard target against a sand bank or a white target against a snowy shooting range will have low contrast and may be poorly lit, such as side or contrast light. Under such conditions, keeping a "smooth front sight" and combining its top with a faintly distinguishable target will become a non-trivial task. And in the case of using “focus on the front sight”, it will lead to the need for constant refocusing of the eye (accommodation) from the front sight to the target and back to clarify the correct aiming. nine0004
Or another situation: the bullet shooter knows for sure that it makes no sense to look at the target after the shot - black holes in the black "apple" of the target at 50/100/300 meters still cannot be seen. The practical shooter also knows not to look at cardboard targets. But, after shooting at a metal falling target - “popper”, even if the shooter is mentally able to make a good “mark” of the shot and the sound of a bullet hitting was heard, it is necessary to look at the target and make sure that the target has fallen. Otherwise, it will be considered unaffected. And here a diopter sight is more convenient than an open one - refocusing, if it is needed at all, is much easier and faster. nine0004
In these cases, the use of diopter sights makes it possible to significantly simplify these tasks: there is no need to level the front sight in the rear sight, as already mentioned in the quote from Sports Shooting - the eye performs this function involuntarily; increasing the depth of field makes aiming easier, there is no need for additional accommodation of the eye. In a diopter sight, when focusing on the front sight, the “blurring” of the target is much less than when looking through an open sight. nine0004
If you are guided by the contents of the manuals on shooting (NSD), then for the successful completion of tasks in combat, at least it is necessary:

