Teaching toddlers to write their name
How to Teach a Child to Write Their Name: Simple Steps
- Share
If you want to learn how to teach a child to write their name for the first time, it can be tempting to whip out a piece of paper and start tracing letters.
If your child is still in preschool, she needs to develop important pre-writing skills before moving onto pen and paper.
Read on to find out how you can go about preparing your child and eventually teaching her how to confidently and correctly write her name.
When Should a Child be Able to Write Their Name?
Firstly, you may be wondering if your 3 or 4-year-old should be able to write their name or why you are practising so often and your child is still not properly writing it.
It’s important to understand that children first start randomly forming and experimenting with letters as part of the developmental stages of drawing.
Scribbles and lines turn into loops and spirals and then shapes.
At some point, between 2 and 4, shapes that vaguely resemble letters start to emerge (like the capital letter T or V). These are not yet necessarily formed on purpose.
At around the age of 4, your child will probably start to “write” on his drawings, which means he is experimenting with forming letters he sees often – in his environment, his name written on his artwork, etc.
He may proudly announce that he is writing. Your child is probably more exposed to his name than any other word if it’s written on his belongings, his artwork and especially if a parent is trying to practise it often.
The simple answer is don’t worry about it. There is no age that your child must know how to write his name. It will probably start emerging around 4 years, maybe a little earlier or later.
If your child is too young developmentally to be expected to write, then the same applies to his name.
While it is inappropriate to start teaching and expecting your child to write, it is understandable that you may want to practise just his name.
There are ways to do this that are fun and developmentally appropriate and that will not cause stress or worse, boredom!
Should Children Write their Names with Capital Letters
It is easier for a young child to learn their name in capital letters first, as these are made up of simpler lines and curves.
Your child will also experience more success when actually being able to form the capital letters.
While many still believe in only capitalizing the first letter, this article on teaching capital letters first is an excellent explanation of why it’s best not to introduce a young child to lowercase letters.
The occupational therapist states:
“No matter how excellent the instruction, not all five-year-olds have the underlying spatial-temporal perceptions or visual motor skills to support learning lowercase.”
When a child learns to form the letters incorrectly, it becomes more difficult later on to form the letters properly.
Here is a common example of how children write a letter ‘a’ when they don’t have fine motor control yet, or they have not been taught the correct formation.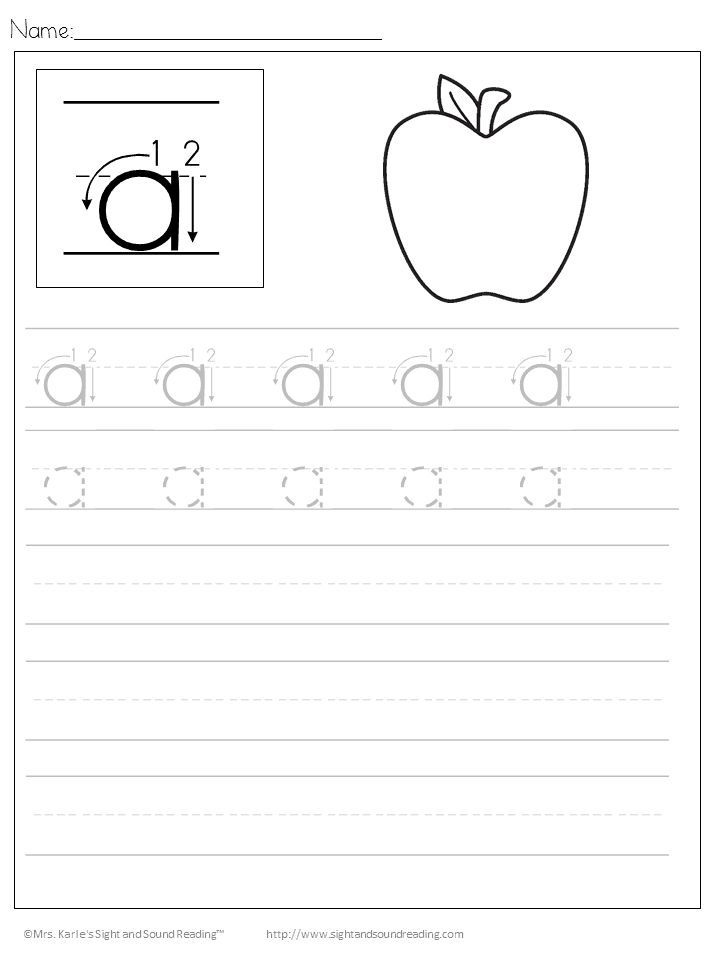
They tend to draw a circle and then attach a line or stroke onto the side. This will not be an easy habit to undo.
Here is an example of how to teach an older child the correct formation. Start at the top, go around to the left, all the way back up, then straight down.
This particular font has a flick at the bottom. Some schools use a font similar to this, or one where the ‘a’ has a straight line without a flick.
This does not matter too much. It is more important to focus on the correct direction and to not lift the pencil to form the line going down.
How Do You Teach a Child to Write Their Name?
Writing is a process of developing many skills, and the very last step in that process is writing letters on a piece of paper with a pencil or pen.
Children begin writing by the first grade because by then they have developed the necessary fine motor control to write correctly and control their pencil.
For preschool children, the first step in the puzzle is to develop their fine and gross motor skills, and later to start learning to write their names by being introduced to letters in many different informal ways.
Put away the worksheets, boring traceables, online apps and any other activity that isn’t play-based.
There’s a reason children are wired to play for the first few years of their life. It’s how they learn. Everything else is a waste of time.
Here is a quick breakdown of the steps involved in teaching your child to write their name.
1.
Develop General Fine and Gross Motor SkillsIn order for children to be able to write – a skill that requires fine motor control – they need to first develop their gross motor skills.
Think of this as starting large and going smaller over time.
Gross motor skills can be built through everyday movement and play activities.
Children should experience movements such as climbing, running, swinging, jumping, skipping and playing with balls.
They will naturally develop these muscles during free play and you can also play games with your children to specifically work on these skills.
Children develop their gross motor skills first and later their small muscles strengthen.
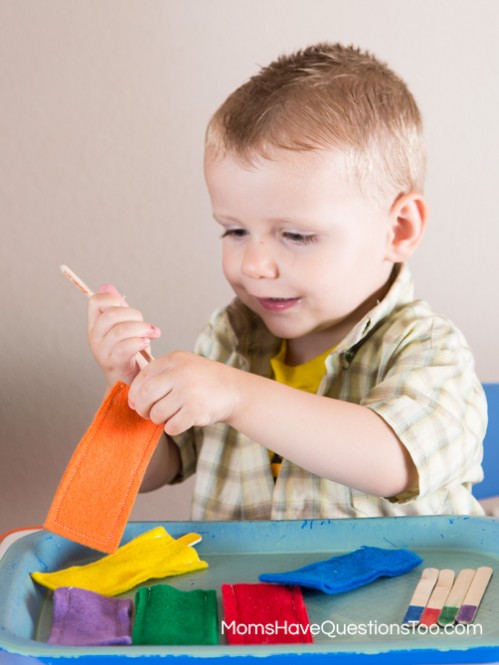
Fine motor activities include drawing, painting, playing with beads, using pegboards, threading, lacing, etc.
These are all vitally important as children must have good muscle control before they can hold a pencil and write.
Start with these fine motor skills toys you probably already have at home.
2. Let Your Child See Their Name Often
An important step in learning to write a name is name recognition.
A child who sees her name often will start to understand what it represents, imprint it in her memory, and have greater success when attempting to write it.
Write your child’s name on the top left-hand corner of her pictures. This also teaches how we write from left to right and top to bottom in English.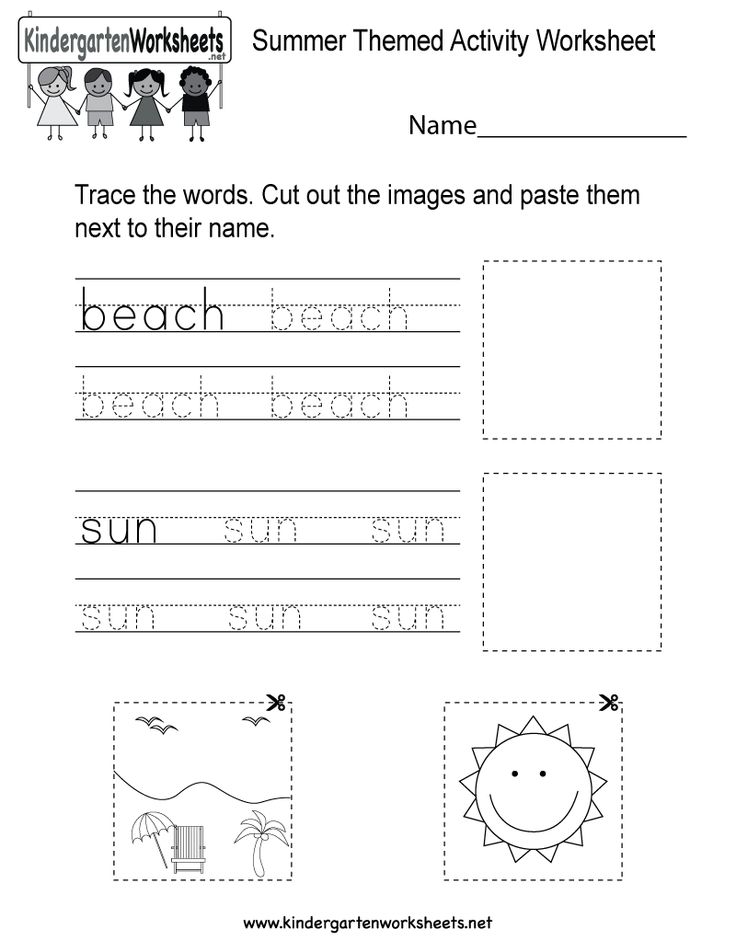
Label her belongings, her bedroom door if possible and any other places that are appropriate.
To help you teach the letters, print your child’s full name out in big on a piece of paper or banner and keep it visible during all the following activities.
3.
Walk the LettersUsing chalk, draw one letter at a time of your child’s name in huge letters on concrete or paving. The letters should be big enough for your child to walk around them.
Practise correct formation by starting in the correct place and moving along the letter in the correct sequence. Use language to explain the formation.
Let’s start here. Walk all the way up. Turn around and go down all the way to the bottom.
4.
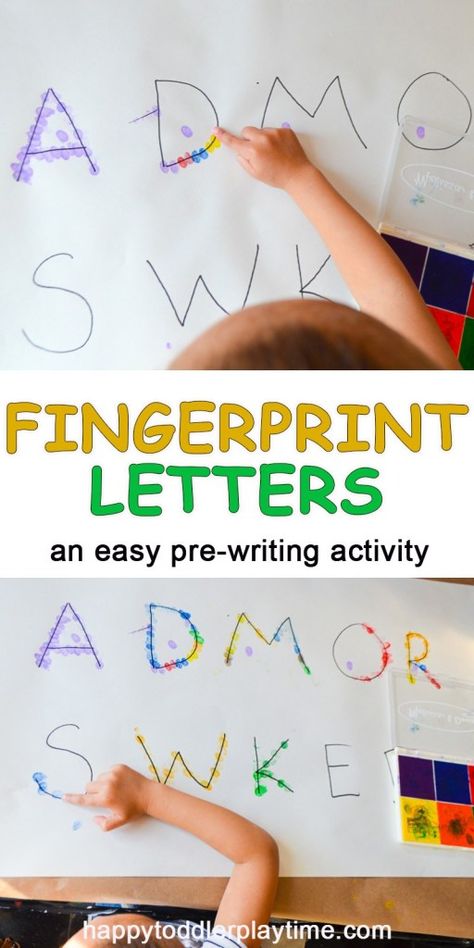
Use Messy PlayMessy play is the best way to teach name recognition and writing. Focus most of your attention on these kinds of activities.
Try to use all the senses if possible – touch, sound, smell, taste and sight. When more senses are incorporated, the concepts are learned quicker and associations are made.
This post contains affiliate links for educational products that I personally recommend. If you purchase through one of them, I earn a commission at no extra cost to you. Read the terms and conditions for more details.
The messier the activity is, the more likely your child will remember the letters they were playing with and their shapes.
- Use a large paintbrush dipped in water to trace over medium-sized letters drawn in chalk on the paving.
- Form letters in shaving cream.
- Form letters in a tray of sand or in the sandpit.
- Bake letter cookies.
- Say the letter sounds out loud as you form them (not the name ‘bee’ but the sound ‘b’).
- Write the letters on big pieces of sandpaper and get your child to trace them. Feeling the rough texture is an excellent way to imprint the formation in your child’s mind.

- Use finger paint to trace over letters on large paper.
- Using playdough, build each letter in the name. Try making something that starts with that sound.
5.
Play with LettersLet your child play with plastic, foam, rubber or wooden letters.
Feel the letters and trace them with your fingers. Build your name with the letters. Say the sound of each letter.
Fridge magnets are a great way to play with and feel letter shapes.
6. Do
Pre-Writing ExercisesMaking lines and patterns is a great way to introduce the shapes and formations found in letters. Try these pre-writing exercises too.
7.
Start Tracing LettersWhen your child is older (and ready) and you have practised letters in multiple ways, they can start tracing big letters on paper.
- Print each letter onto an A4 paper.
- Get your child to trace over each letter with their finger.
- Ask them to trace that letter onto your back.
- Then take coloured wax crayons and trace the letters a few times.
Over time, you can start to decrease the size of the letters. Print your child’s name in grey letters or dotted letters and ask them to trace the letters in pencil.
Later, write their name softly on their work and get them to trace over it, until they are writing it independently, using the correct formation.
If your child experiments with writing their name before the process is complete, don’t stop them. Allow them to experiment with writing freely.
Remember to have fun and let your child progress through the steps at her own pace.
Get FREE access to Printable Puzzles, Stories, Activity Packs and more!
Join Empowered Parents + and you’ll receive a downloadable set of printable puzzles, games and short stories, as well as the Learning Through Play Activity Pack which includes an entire year of activities for 3 to 6-year-olds.
Access is free forever.
Signing up for a free Grow account is fast and easy and will allow you to bookmark articles to read later, on this website as well as many websites worldwide that use Grow.
- Share
A simple way to practice name writing
PSPKK123June 21, 2016 • 16 Comments
This post contains affiliate links. As an Amazon Associate I earn from qualifying purchases.
Sharing is caring!
Is your child struggling to write his name independently? Try this simple strategy for kids who are close to entering kindergarten but still need some help writing their names.
(This post contains affiliate links.)
This Reading Mama and I have been sharing our top tips for getting little learners ready for kindergarten. So far we’ve talked about interactive read alouds and concepts of print. Today we’ll talk about teaching your child to write his or her name.
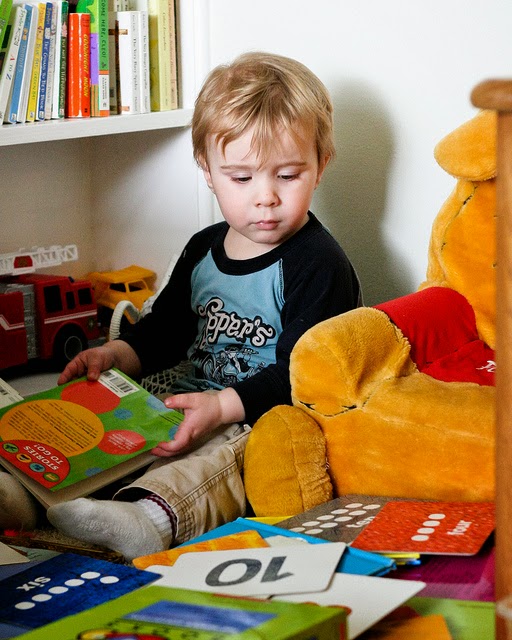
Try hands-on activities first!
Before you have your child practice name writing with a pencil, you’ll want to do a lot of hands-on activities to help him recognize and form the letters of his name. You’ll find some quick name activities in this post and even more of our favorite name activities here.
Your child needs to know two things to write his name on paper…
- how to hold a pencil correctly – (try these tips)
- how to spell his name
While it is helpful, it’s not absolutely necessary that your child knows how to form all the letters of the alphabet, or that he knows the distinction between upper and lowercase letters before he writes his name.
However, if your child is close to entering kindergarten, please know that most kindergarten teachers prefer that children enter school writing their names with a capital followed by lowercase letters.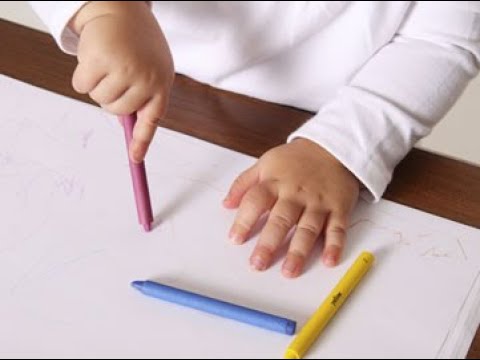 In the sample images below, you’ll see capital letters throughout the name… because my little guy has a while until he’s in kindergarten. 🙂
A fun song to help kids learn to spell their names
Before our kids are ready to write, we’ve taught them how to spell their names by singing their names to the tune of “There was a farmer who had a dog.” Most names – except very long ones – can work with this tune, if you modify it just a bit.
An example:
There was a girl who liked to play,
And Emily was her name-o!
E-M, I-L-Y,
E-M, I-L-Y,
E-M-I-L-Y,
And Emily was her name-o!
Try this simple strategy to practice name writing
What if kindergarten is on the horizon and you need a quick way to practice name writing? Your child can make a lot of progress in just a few weeks by trying this simple strategy.
You will need:
- a pad of blank paper or blank paper stapled together
- a pencil or skinny marker
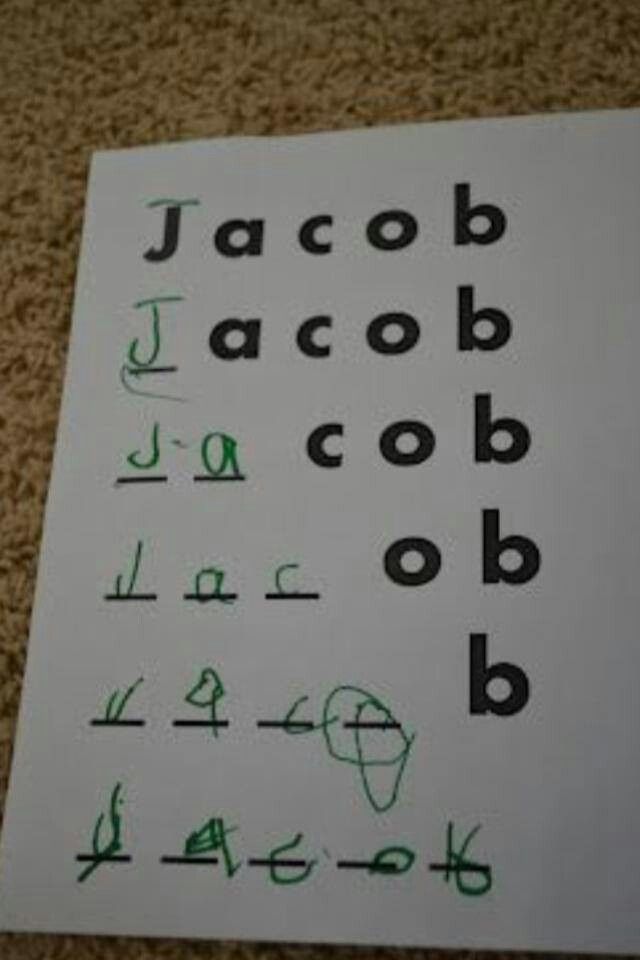
Turn to the first page in the pad of paper.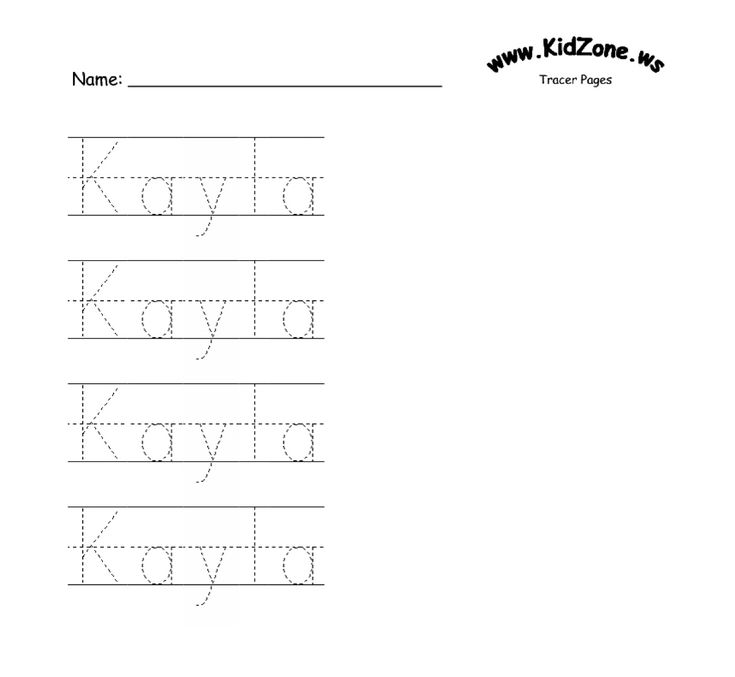 Have your child write his name the best he can, even if it takes up the whole page.
If your child is new at this, hold his hand as he writes, saying the names of the letters as you do so.
Have your child write his name on a new page each day. Provide as much support as necessary. You may need to hold your child’s hand for some letters and not for others.
After a month of this, your child may surprise you by writing his name just the right size! At this point, if you’d like, you may introduce writing on a plain line and then – if it doesn’t frustrate your child – basic handwriting lines.
If writing is a struggle for your child, using a marker is a good first step. But do be sure that your child can also write his name with a pencil before starting kindergarten.
Other ideas for name writing:
- Write your child’s name using a highlighter. Have him trace it using a pencil.
- Write your child’s name on a card.
 Have him copy it by using his finger to “write” his name in a sensory tray of shaving cream, salt, or sugar.
 - Play a name fishing game with this free printable.
- Have your child “sign in” to do an activity – whether that’s have to have a snack or enjoy some screen time.
Check out the rest of our kindergarten readiness tips!
CHECK OUT OUR POPULAR ALPHABET CURRICULUM!
Letter of the Week Curriculum
$29.00
Looking for a creative, hands-on letter of the week curriculum? Download this ebook and have countless hands-on, creative learning activities right at your fingertips.
Buy Now
MEMBERS GET MORE!
WATCH THE MEMBER WORKSHOP
In this 25-minute training, members will learn:
- How to teach preschoolers to make their own books
- How to determine each learner’s level of spelling development
- What skills to teach
- Exactly what to say when supporting preschool writers
Not a member yet? Learn more here.
CLICK TO WATCH THE MEMBER TRAINING
Free Spelling Games
Get this fun variety of sample spelling games from the membership site! The download includes resources for spelling CVCE words, long vowel teams, and multi-syllable words.
Sharing is caring!
Filed Under: Writing in Pre-K, Writing Tagged With: kindergarten, Pre-K
You May Also Enjoy These Posts:
Digraph say & cover
Teach fluency with scooping phrases
Trackbacks
🎖▷ How to teach a child to write his name
News
1 3 minutes read
Teaching a child to write his name should be done not just for fun, but to prepare him for school. By teaching your child to write their name, you develop their motor skills, prepare them for school, and even give them a specific personality in one fell swoop. It's also a fun activity for parents to teach their child to write their name before they start kindergarten.
Let's look at a few ways to teach 3 year olds how to spell their names:
Here's how you can teach your kids how to write their names in a fun way:
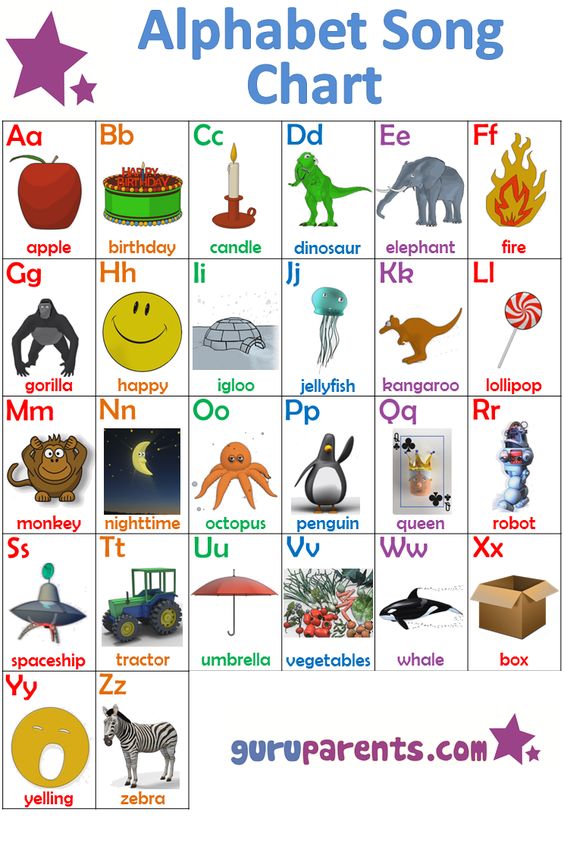
1. Use the Chart
it was easier for him to figure out how to write his name. In a Word document, select a large font and enter its name, select an outline option, and print it. Print out multiple copies of the same for your little one. Hold your child's hand and have them write on the outline with a pencil. With enough practice, your child will master the art of writing their own name.
2. Fingerprint
The movements involved in writing a name can be difficult for your child, and this is where finger painting becomes fun. You can use salt, shaving cream, or even pudding on a tray and have your child write their name on it using their finger or a writing instrument. The advantage of this is that it can be used as much as possible without worry.
3. Teach him on the street
You can always try to teach him in the middle of nature. Write their name on the driveway in large chalk, and then have your child write it in large print. In the end, you can reduce the size of the letters and make it fit the paper.
4. Follow marker
This is another cost effective and easy to use method. Trace your child's name on the paper using a thick marker. All your child has to do now is practice making pencil marks in the color of the marker, and little by little his motor skills will develop.
5. Slate and chalk
There is a reason why slates are still an age-old method of teaching children to write. Also using slate and chalk to teach a child is a cost effective method. Just give your child a chalk or slate pencil and sit next to him so you can tell him how to write his name on the slate.
6. Sign up and login
Once your child learns to write their name, don't stop there. Practice makes a person perfect, so make sure he gets enough practice. To make it fun, have your child sign up if they want something. For example, if he wants to have a snack, he should write his name; if he wants to play with his favorite electronic gadget, he will have to log in. This can be fun for a child.
7. Dry Erase Window Markers
Children love to draw on windows and walls, and whatever you do to prevent them from writing on your beautifully painted walls, they won't listen to you. So, why not make this doodle productive? Channel their energy into a positive experience by giving your child some dry erase markers and having them have fun practicing their name on a window or wall.
8. Cutouts
You may need to teach your children to recognize letters first. It can be fun looking through old magazines for the letters of his name and carving it specifically to make a collage of his name.
9. Spaghetti
This is the only time you encourage your child to play with food, but if it's good for your child, why not? You can give your child spaghetti or noodles and encourage him to say his name using strands. This can be a fun experience for your child.
10. Make a song
To get your child to learn the spelling of their name, you can make up a silly song that recites and sings. Your child will definitely sing it by himself and he will gradually learn the spelling of his name without much effort.
There are many ways to teach your preschoolers how to write their name, but try to make it as fun as possible for your child.
Also read: Childhood development of motor skills
Tags
name how to teach your child to write
Mom calls the nanny "stuck" because she wants money, not ice cream
Babies ruin marriage, and it's time to talk 9004 Related Articles
Back to top button
How to teach your child to write their own name: 15 steps
').insertBefore("#quiz_container"),$('
'). insertBefore("#newsletter_block_main"),ha(!0),b=document.getElementsByClassName("scrolltomarker"),a=0; a
In this article:
With the help of candy
Using markers
Additional articles
Learning how to write your name is the first step in a young child's literacy. This should be an enjoyable experience for you and your child.
Steps
-
1
Take a small piece of paper or a whiteboard, a pen or markers, and, if necessary, some candy.
-
2
Have the child sit at the table and sit next to him/her.
-
3
Tell your child that today you will teach him how to write his name. It's okay if the child can't write yet, it will give him a head start.
-
4
Place paper / board and pen / marker in front of the child.
-
5
First, write the child's name on paper and explain that this is how the child's name should be written.
-
6
Write his name in thin lines or dots so that the child can circle it. Ask him to circle the name several times until he gets it right.
-
7
Once you are sure, ask to write the name yourself.
-
8
This may take some time, but be patient.
- If the child's name is "Jack" or "Emma", it should be easy. But if the child's name is "Kimberly" or "Madison", it may take some time.
-
9
Check to make sure the child spelled each letter correctly. Even if you see a small mistake, for example, the letter "A" goes beyond the bottom line, correct the child. It's easier to fix now than later.
-
10
Praise the child when he spells the name correctly several times. Give him some candy. Tell him he deserves them. Let the child run and play.
-
11
Practice for several days in a row, praise the child and give him a little more candy every day.
 Soon he will be able to write his name quickly and beautifully!
 Advertising
Children love bright colors; markers can make learning a lot of fun.
-
1
Take different colored markers, blank or lined paper, and a pen or pencil.
-
2
Write the child's name with colored markers, changing colors each time. This will keep some interest.
-
3
Have your child circle your notes with a pen or pencil.
-
4
Always reward your child appropriately.
Advertising
Tips
- Help your child develop fine motor skills by stringing beads or rings, playing with clay or Lego, closing snaps or doing up buttons.
- Do not overload the child, otherwise he will no longer want to study.
- If your child has difficulty writing with a pencil, have them use thick crayons or markers.
 Your child can also practice writing the name using a board and marker or chalk.
 - To help your child write the letters of their name in the correct order, attach the letters of your child's name to the refrigerator using magnets and have your child line them up in the correct order.
- You can write with finger paints, on sand, rice or oatmeal.
- Ask your child what their favorite treat is beforehand so they will really try to write their name.
- In a couple of years, when the child is, for example, in the third grade, ask him to write his name for you. As soon as he does this, you will see that the name is written clearly and without errors. Praise him and give him a prize because he deserves it!
Advertising
Warnings
- Do not push the child too hard. Relax and let your child move at their own pace.
Advertisement
About this article
In other languages
Learning how to write your name is the first step in a young child's literacy.
.jpg)