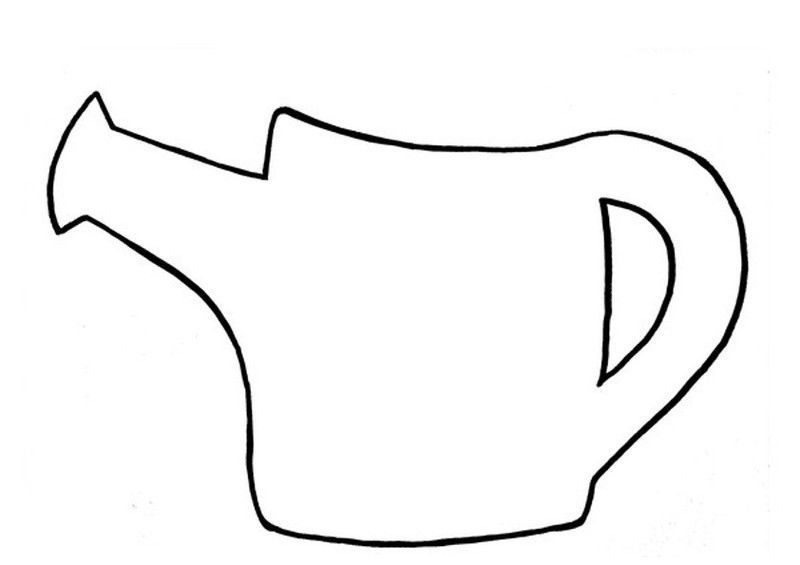
Watering can template printable
Free Printable Watering Pail Template
Sharing is caring!
20 shares
- Share
As the weather warms up, there are many fun things for children to do during spring and summer time.
Not only is it a wonderful opportunity to explore mother nature, but you can also have indoor fun activities by using this free printable watering pail template.
This simple printable watering pail template will encourage your kids to get their hands dirty in the garden and grow their own plants.
This exciting activity will keep your little ones occupied for hours even during the spring break.
Grab all the materials needed and print as many as you want of this easy free printable watering pail template for each family member.
*By the way, this post may contain affiliate links which means I may receive a small commission at no additional cost to you if an item is purchase through that link. For more information, click here.*
- Printer Paper
- Colored Pencils, Markers or Crayons
- Printable Watering Pail Template (FOUND AT THE BOTTOM)
Make your child’s finished watering pail template a forever memory by laminating it!
We use this laminator and cannot express how much we love it! It is not only inexpensive, it is SO easy to use!
Your kids will love seeing how much you adore their art work when you laminate and display it for years to come!
Looking for more spring and summer template ideas? Be sure to check this Flower Pot, Flower and Bird House template!Ideas for Watering Pail Template
Here are some of the great ideas that we came up on how to include this printable watering pail template in your daily life with the kids
1. Family Time
Spring is one of the perfect times of year to get outside and enjoy some family bonding activities that will strengthen your connection.
This free printable watering pail template is the best way to spend quality time with your children.
Once you and your kids are done making this printable watering pail template, it’s for some outdoor activities that are related to the watering pail like gardening or watering the plants.
You will notice your children will boost their confidence in having conversation. It will also help them to focus on the things they are doing.
2. Books Related to Gardening for KidsChildren are often curious on how plants grow and different kinds of flowers in your garden.
If you notice that your little ones are interested in exploring mother nature, here’s a few of our favorite books and we know your kids will love them too.
- Let’s Get Gardening
- If You Plant a Seed
- Grandma’s Gardens
 DIY Watering Pail Vase
This printable watering pail cartoon template will encourage you and your children to do some easy DIY crafts.
Gather all the materials needed because we’re going to make a DIY watering pail flower vase!
Let your kids decorate the watering pail using colorful paint.
Pick your favorite flower in the garden and you are ready to display this beautiful watering pail flower vase on the table of your living area or anywhere you want to put it.
4. Watering Pail Card and InvitationDid you know that this simple printable watering pail template has a lot of purpose? Yes!
You can also use this as a card and invitation to your upcoming events!
Simply cut out the watering pail template and write down your message.
You can also ask your preschooler to color it with pastels to make it more stylish. Super easy and very unique!
As you can see there are a lot of tremendous ways on how to use this simple printable watering pail template for toddlers and preschoolers.
Gardening is an exciting outdoor activity that can motivate your toddlers or preschoolers to prevent them from spending too much time on mobile games and get some fresh air.
This free printable watering pail template will allow your children to use their imagination in coloring or creating crafts once they are done with their outdoor activities.
Don’t forget to keep sharing all the things you and your kids have learned in using this simple watering pail template in the comment section.
When you have finished, be sure to share your creation on Simple Mom Project’s Facebook Page and follow me on Pinterest!
Kaitlen D.
More Fun Spring and Summer TemplateWatering Can Card - Etsy.de
Etsy is no longer supporting older versions of your web browser in order to ensure that user data remains secure.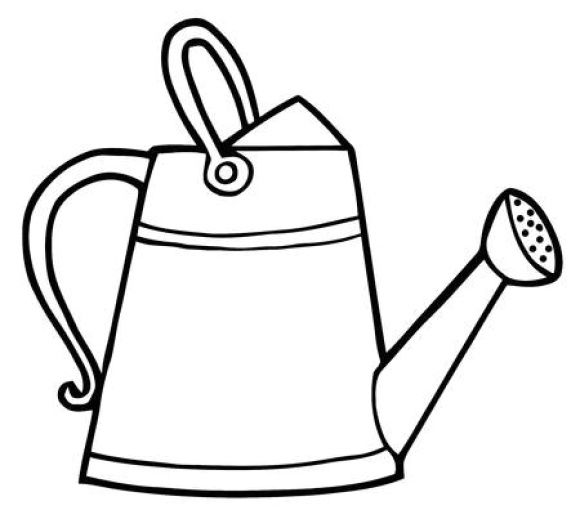 Please update to the latest version.
Take full advantage of our site features by enabling JavaScript.
Find something memorable, join a community doing good.
(1,000+ relevant results)
Free STL file shower head limestone remover・3D printing template to download・Cults
orizontal spool holder
free
shower glass hook
Free
shower hook S997
free
machine gun motor x
Free
Return of Guybrush Threepwood Monkey Island
5 €
Audrey 2 Little Shop of Horrors
2. 50 €
50 €
Alvaro and Camilla Fantazoo OX TALES
5 €
Mila Hazuki You are the striker! Mila and Shiro 2 Cuori in Pallavolo
6 €
Video girl Ai Amano
6 €
Hormonal Monster Mori
5 €
Gigi la trottola Dash Kappei stl
6 €
Mago Panchione Enti (Hakushon Daimau)
6 €
The best files for 3D printers in the Tools category
Canon lens hood
Free
RAW COLLECTION OFFICEHÄK
3,50 €
GoPro Hero 3 Lens Cap (NinjaFlex)
Free
Stamp discs for clay - geometric patterns
2. 96 €
96 €
instacliip
Free
Filament Holder and Scales
Free
Turbojet engine, 1st flight, 1939
14.47 €
Prusa Gears Knob
Free
Bestsellers in the Tools category
PRECISE DIAL INDICATOR 3D PRINT DIY
1.91 €
Case for Chill Buddy lighter
0,96 €
Spoon Holder Chunky Flavor More Nutrition
1,25 €
BOCA MATE SET - ERBERA AND SUGAR BOWL - BOMBONERA
1,81 €
UNIVERSAL BED LEVELING INDICATOR FOR VERY ALL PRINTERS
2. 89 €
89 €
Paint stand with scissors
5.33 €
PET-Machine, make your own plastic bottle filament at home!
50€ -70% 15 €
BMG E3D V6 direct drive for Creality Ender 3 (Pro/V2) & CR-10
€4.49
3D printed wave transmission (harmonic drive)
4.99 €
Ender 3 Briss fang Gen2, red lizard, spider, nf crazy, dragonfly, etc.
1.82 €
ENDER 3 S1/PRO SPRITE, V3 AIR DUCT 5015 OR 4020
€2.50 -fifteen% 2.12€
INDICATOR FOR BETTER BED LEVELING FOR ENDER 3 V2
2. 89 €
89 €
Filament shielding
2.80 €
Cut-Man - PET bottle cutter with handle!
€3.49
INDICATOR FOR BETTER BED LEVELING FOR ENDER 3 PRO
2.89 €
Ender 3, 3 V2, 3 pro, 3 max, dual 40mm axial fan hot end duct/fang. CR-10, Micro Swiss direct drive and bowden compatible. No support required for printing
1.64 €
Do you want to support Cults?
Do you like Cults and want to help us continue our journey on our own ? Please note that we are a small team of 3 people , so support us in keeping the activity going and making future designs is very easy. Here are 4 solutions available to everyone:
-
AD: Disable your AdBlock banner blocker and click on our banner ads.
-
AFFILIATION: Shop online with our affiliate links here Amazon.
-
DONATIONS: If you want, you can donate via PayPal here.
-
* INVITE FRIENDS: * Invite your friends, discover the platform and great 3D files shared by the community!
Examples of interesting unusual postcards. Tea bag teapot or gift scraper Cardboard teapot template
Draw something thin on the dotted lines, such as a non-writing pen, the paper will then fold better, more evenly.
Fold along lines like this:
Insert each other's parts - attach the wings to the body.
Secure the parts by gluing with a piece of paper.
Bend the glued part as shown. Apply glue to the antennae and part of the wings.
Glue the dragonfly to the inside of the card, lining up the middle.
You can make such not a postcard, but decorate the album page.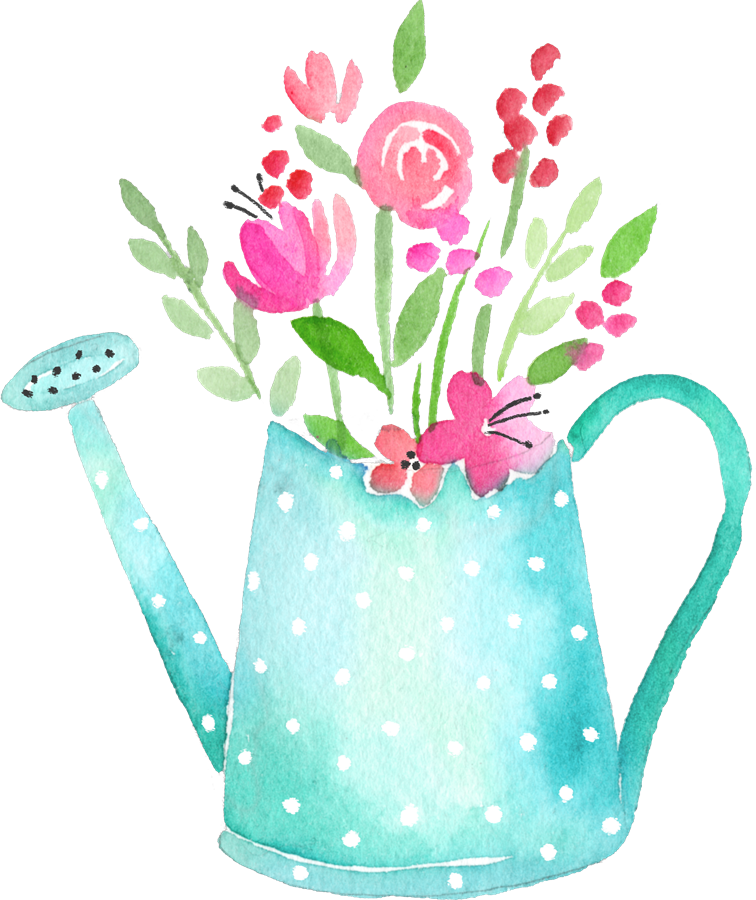
To make this card, you will need the following materials and tools:
White cardstock or watercolor paper (22 cm x 16 cm)
Beige blue cup paper (6.8 cm x 6 cm)
Beige polka dot embossed scrapbook paper ( size 8 cm by 6 cm)
- white office paper (size 3 cm by 5 cm)
- beige shabby ribbon (length 10 cm)
- crystal brads
- white liquid pearl
- ruler, scissors, pencil
- paper glue
- double-sided tape
First, let's prepare a blank for a future postcard. To do this, draw a cake template, cut it out. Then we take watercolor paper, bend it in half and transfer the drawing of the cake onto it using a simple pencil. Then cut out the card stock.
Now take scrap paper and embossed paper. We will also transfer the cake template to them and cut out the cup and the cake itself, but so that it turns out to be 2-3 mm smaller than the watercolor blank.
We begin to glue the postcard.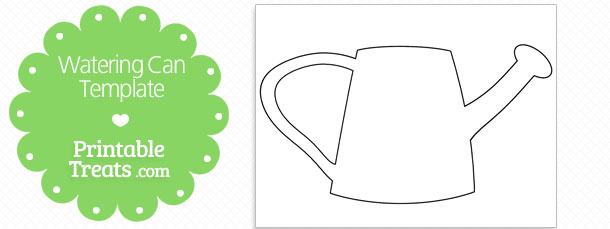 Glue the cup first, then the cake itself. We will apply liquid pearls to the junction of the cake, so we will imitate the cream. We also cut out a wavy “cloud” from white office paper and glue it on the cake. We will also decorate it with liquid pearls.
Leave for 10 minutes so that the liquid pearls dry well and that's it, the cake-card is ready!
Teapot card scrapbooking grandmother:
So, how to make a card for grandma :
The first postcard is in the form of a watering can. It can be a great gift for a grandmother or mother who loves to grow flowers at home or in the garden.
Christmas tree.
For the birth of a baby, you can present happy parents with a baby bottle card.
Card-basket for sweets will delight your kids for any occasion! It will also be a pleasant sweet surprise for your loved ones!
Clamshell postcard is an original solution for an unusual congratulation, while a photo placed on one of the walls of the postcard will also look quite organic.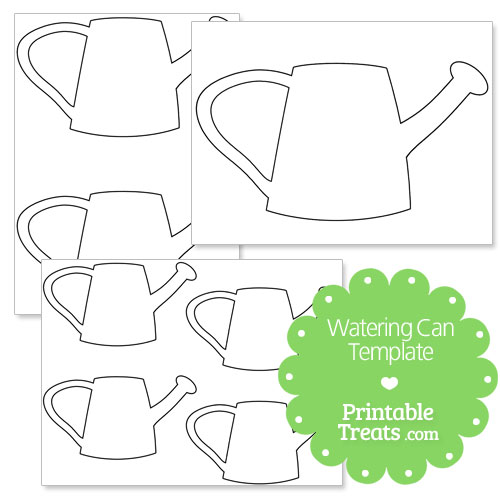
Postcard-boat will be a great addition to a gift for your beloved men.
Folding card-transformer.
Postcard - castle for romantic natures.
Postcard-cake - a great gift for a friend or loved one.
Postcards-boxes with a surprise.
What do you need?
- plain white template paper
- scrapbooking paper (we will use it to make a pot and flowers)
- ruler
- scissors
- ribbon
- buttons
How is it done?
This is how this glorious pot looks like when disassembled:
My dear needlewomen! I suggest you make a vase or a TEAPOT box for tea bags out of cardboard with your own hands. For work, you can use thick corrugated cardboard or drawing thinner. The vase template is below, the vase can be decorated to your taste: you can paste it over with patterned wrapping paper, you can do decoupage with napkins or print it out on a printer, you can lay it out with eggshell mosaics with paper art elements.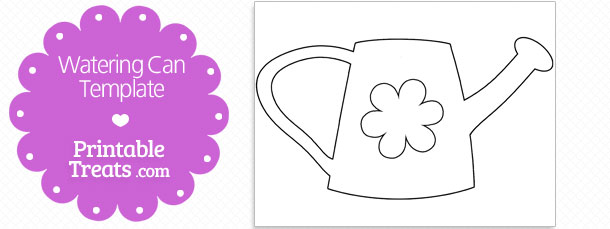 There are actually a lot of ideas, it all depends on your taste and the materials at hand. I wish you all success in your work and a delicious tea party after a hard working day under the roof of your beloved home!
By the way, about working days and the roof of the house) Many of you are now busy building or repairing your houses or dachas. The roof of any building requires special attention, namely the roofing material, which should not only be beautiful, durable, but also protect the house from bad weather and so on. If you have not yet decided on the choice of the most optimal roofing material for yourself, I suggest taking a look at the Tejas Borja website. Here you will learn about the advantages of ceramic tiles and be able to purchase them at a promotional price, very inexpensive.
Here is a cup template in the shape of a kettle, it needs to increase
Cross the cardboard and cut out parts
The same parts are cut out of the packaging paper
We glue the paper to cardboard blanks
Here we will assemble a vase from such ready-made parts
Immediately decorate.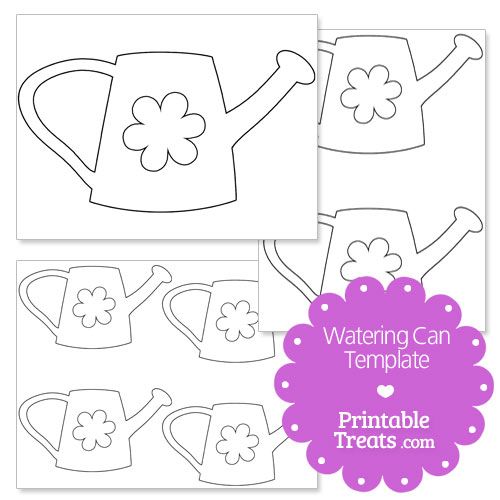 This version uses lace and jute
JUT CLEASE OF THE COMPLES OF cardboard, glue it
Cover the details of the box
Careful tags cut out of the burlap
We decorate with rhinestones, if you like this option) 9000
9000 9000 9000 9000 9000 9000 9000 9000 9000 9000 9000 9000 9000 tea bags. Master Class.
A wonderful decoration for any table and interior, used to store tea bags. A beautiful gift for every taste...Birthday, anniversary, celebration about a beautiful gift. Surprise your family and friends! All kinds of teapots.
Dear needlewomen! I suggest you make a vase or a TEAPOT box for tea bags out of cardboard with your own hands. For work, you can use thick corrugated cardboard or drawing thinner. The vase template is below, the vase can be decorated to your taste: you can glue it with burlap using coffee beans, jute and natural materials. eggshell with paper art elements. There are actually a lot of ideas, it all depends on your taste and the materials at hand. I wish you all success in your work and a delicious tea party after a hard working day.
We will need:
Cardboard, heavy box or scrapbooking paper,
scissors,
pencil,
sandpaper;
acrylic paint,
decor materials,
glue.
1. Print out and cut out a template (two of them to choose from) of a paper teapot. Now consider two manufacturing options. First: we put the paper template on thick scrapbooking paper (it is colored and double-sided), circle it, cut it out. The parts of the teapot are immediately ready for assembly. Do not forget that we need to make one piece for the bottom and two pieces for the sides.
The second option: cut out the details of the teapot according to a paper template on ordinary thick cardboard or from a box (then you need to paint over them with white acrylic paint after sanding), sand them with sandpaper.
2. If you are making a teapot according to the first option, all you have to do is glue the parts, tint the edges of the paper with acrylic paint to taste, and glue the decorative elements.
If you are making a teapot according to the second option, now you need to cut out the details from colored paper or thin scrapbooking paper again according to the template, glue them to cardboard blanks, dry them, sand the edges and tint them with acrylic paint to taste. Add decorative elements.
Toning is optional, but adds a special effect to the paper. You can decorate the edges in other ways, such as gluing ribbons.
3. A little trick: if you attach ribbons to the lid of the teapot and tie them, the tea bags will not be lost while the gift card is on its way to the recipient.
Enjoy your creativity.
New Year's gifts can be very different. But if in the process of making them with your own hands you manage to combine your own creative inspiration with the interests and desires of the recipient, the New Year's surprise turns out to be especially touching and memorable. The work of the next participant of the competition "Carnival in KARTONKINO" Olga Kiseleva is from this category.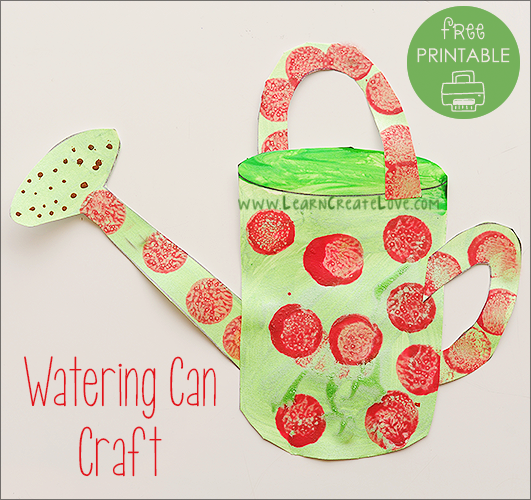 And the very idea of gift packaging for tea bags, made in the form of a teapot, is sure to be useful to many.
Cardboard teapot
My name is Olga Kiseleva. I live in a small Siberian town, which is located in the south of the Novosibirsk region. I have been doing various types of needlework since childhood. I knit, sew a little, make postcards, arrange photo albums. I make toys in different ways. In many of my works, paper and cardboard are the main or basic materials.
Now, like all craftswomen, I'm getting ready to celebrate the New Year and make gifts for relatives and friends. I have a friend Nadia. She loves to drink tea very much, and therefore I often give it to her. I pack tea in a box, and put the box in a beautiful paper bag. This year I decided to change the tradition and make my own tea bag packaging in the form of a teapot.
The following materials are needed to make it:
— box cardboard;
- colored paper or scrap paper;
- satin ribbon or braid;
twine or yarn;
- paper glue;
— Moment Crystal glue;
- scissors;
- decoration elements;
- Delicious tea bags.
Draw the outline of a teapot on a piece of paper. The base must be straight. Then we draw a rectangle, the length of which is equal to the length of the base of the teapot, and 2 rectangles on the sides with a length equal to the height of the tea bag minus 1 cm, 5 cm wide (the width can be changed).
Cut out the resulting templates and transfer them to the corrugated board. According to the template in the shape of a teapot, cut out 2 parts.
Rectangular piece cut out in one piece. We cut the top layer of cardboard along the fold lines with a blade (or a clerical knife) so that it can be easily bent and not broken.
Cover all cardboard parts with colored paper on both sides. We glue the end part of the teapot with twine or cord knitted from yarn.
We bend the rectangular part and glue the side parts of our teapot to it one by one using glue Moment. Before the glue dries, we squeeze the craft with our hands.
We glue the lower part of the craft with tape or braid (it will serve both for additional fastening of parts and for decorating the product).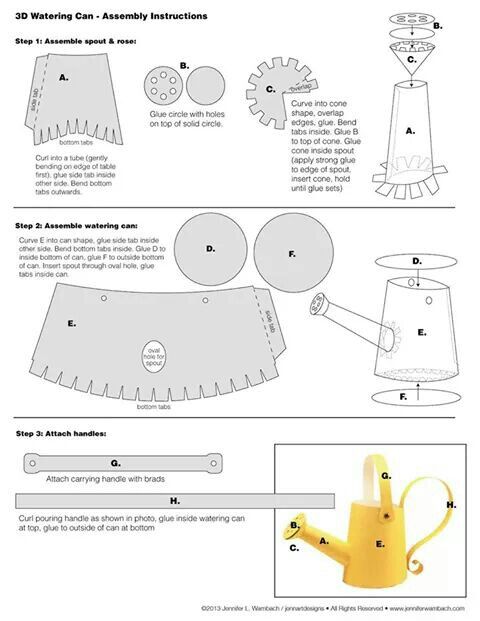
Here is a nest for tea bags.
Trying on. The bags come in freely and are easy to get.
We decorate the teapot. For this I used leaves, flowers and a berry cut out of felt. And on one leaf I glued a ladybug.
This is a cardboard teapot I will give to my friend for the New Year. And together with her we will drink tea with strawberry jam.
In Rus' - one vow,
Besides any food:
In the morning - tea, in the afternoon - seagulls,
In the evening - tea.
Well, already March is coming to an end, and I'm just posting what I promised a long time ago. I don’t even know what to call it - a bonbonniere is not a bonbonniere. Tea house, not a house. The box is not a box. And the note itself is definitely not a master class. Rather, a small alteration of the finished template.
On the eve of March 8, Lenochka found an interesting idea Paper gift teapot. Template for printing
Similar teapots have already met in the Internet. For example, Maryel (Maria) Teapot for tea bags or napkin holder
Come, let's put the samovar, and go away - have a cup of tea .
The idea itself is very good, but I was puzzled about what bags to fill? I am a strong opponent of this tea dust, which is sold in disposable bags. Good tea is my weakness. Therefore, my friends would not understand me if I gave them this disgusting tea leaves.
And here Lena's hint came in handy. It turns out that tea and coffee shops sell EMPTY disposable tea bags.
Drink it can be many and often,
Drink, and life will immediately become beautiful.
You can always quench your thirst,
Tea is power, it must be drunk.
Well, why not give gifts to your friends for the holidays? Moreover, you can give free rein to your imagination, make any tea collection, and personalized labels for each bag! Well, let's print the poems, and put them in a box - God himself ordered)))
From the heart I wish you
Paradise with your sweetheart on earth.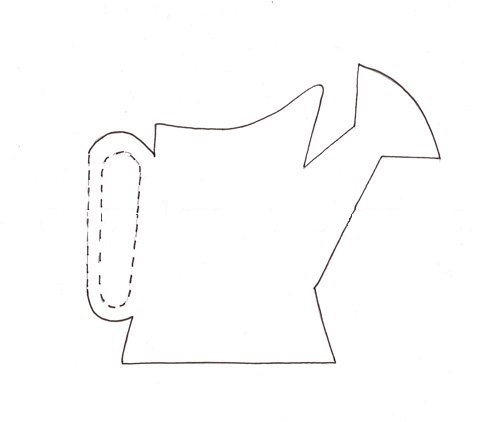
And with fragrant strong tea
Life is sweet even in a hut.
But I was not satisfied with the quality of the printout and the size of the teapot. And I didn’t want to give everyone the same teapots. So, I made a few pieces according to Lenochka's template. And then I made a few more different teapots, but more. Maybe it will be useful for someone too?
I made templates on an A4 sheet. Only the size is increased so that at least 100 grams of tea can be accommodated)))
Drink tea - enjoy.
So you have to glue. I will not explain HOW, everything seems to be clear.
I will come to you with a small gift,
We will drink it, it will become a little hot.
But he will also be able to cheer us up,
Delight us with a chic aroma.
I brought you green, black,
It may be sweet, but definitely not bitter.
You guessed it, I see it in the face.