What can you make with salt dough
30+ Salt Dough Crafts for Kids - Red Ted Art
We have a long standing “love affair” with salt dough, it is something that we come back to over and over again. Many of our salt dough crafts we don’t even “bother” sharing with you here, as they are variations on the same theme or the children simply modeling, exploring and having fun with salt dough.
But now, with Christmas approaching, I thought it would be great to pull together a set of salt dough craft ideas for kids – as for me, salt dough is kind of a “classic Christmas craft” – who hasn’t made salt dough ornaments using cookie cutters in the past? And if you haven’t, it is time you made some!!!
Other salt dough resources
Once again we share a crafty chat video (towards the end of this page!) – all about salt dough- but I also demo, how very quick and easy it is to whip up a batch of salt dough with our classic salt dough recipe.
We also discuss some OTHER salt dough craft ideas – though ornament making is still my very favourite, there are plenty of other things you can make from this super versatile craft material!
Salt dough is also great for the classroom, as it is inexpensive to make and you can air dry it over a few days.
Further Salt Dough Craft Ideas for Kids:
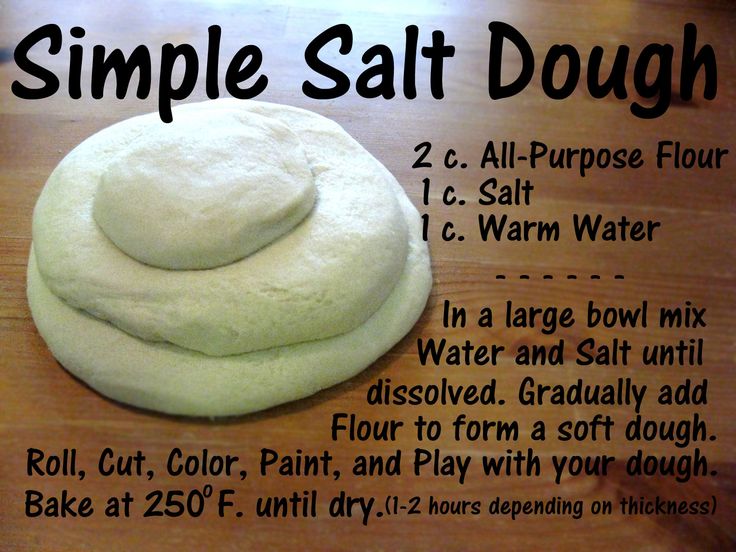
Super Simple Saltdough recipe
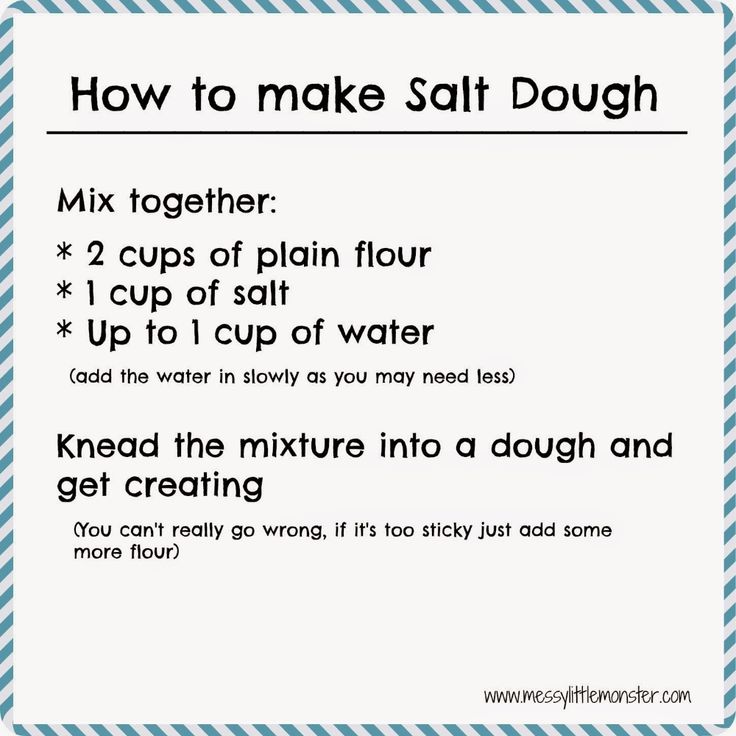
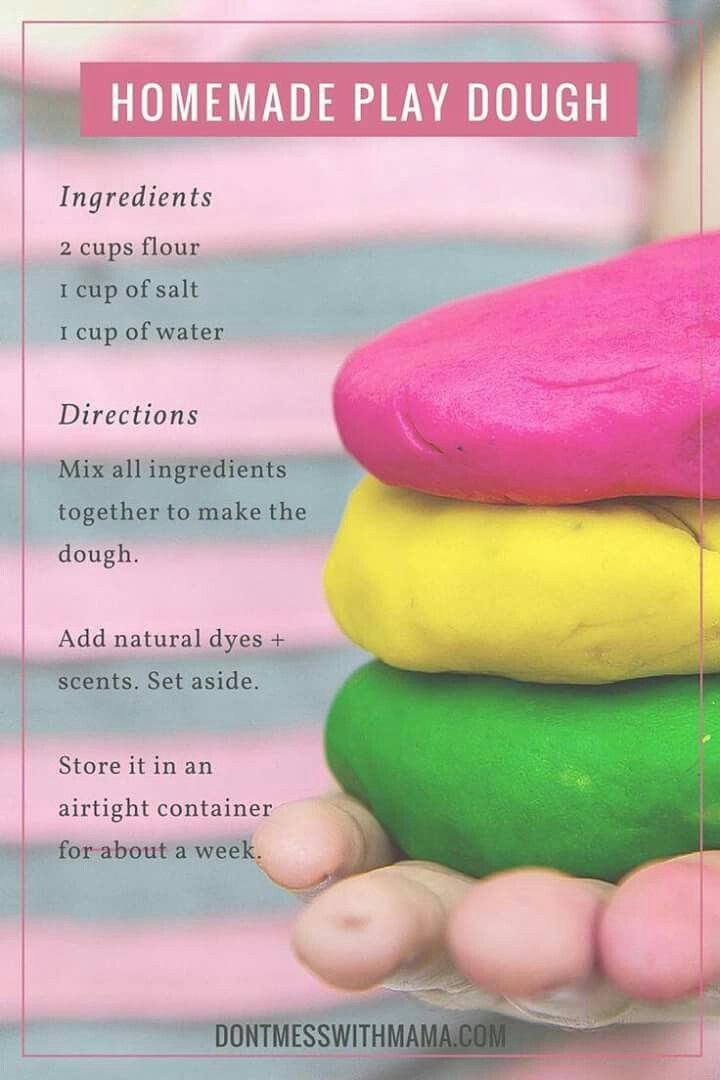
To make salt dough, all you need is
- 2 cups of flour,
- 1 cup of salt and
- UP to a cup of water.
- You can also add good quality food colouring to dye your saltdough before drying!
When we say “cup” .. any cup works, so long as you keep the proportions the same.
To dry you salt dough clay
If it is a hot summers day, dry your salt dough out in the sun, turning occassionally. If crafting in Winter, speed up the drying process by heating in the oven at 50C. Remember to turn regularly.
Also, if you are making anything for hanging – i.e. with holes, remember to “re-poke” the holes during drying, to avoid the holes closing up. Salt dough as tendency to “spread” like cookies and the holes can close.
Our favourite Salt Dough Crafts for Kids
Use coloured salt dough to make easy and bright shell pendants.
How cute is this Sea Glass Turtle? Such a great way to combine recycling with salt dough!
Don’t have access to sea glass. . fear not, shells and pebbles would look just as great! Check out these Salt Dough Turtles!
When the kids were little we also made these colourful Salt dough beads! They make a wonderful necklace for mum or could be used as counting beads too.
Older kids may enjot the challenge of these Salt Dough Pendants with these cute Kawaii Peas in a Pod Pendants!
Similarly, and even more challenging you can make some fabulous Salt Dough Emoji Beads! But we use the “coloured” salt dough recipe to make it easier!
Microwavable Salt Dough LOVE necklace
Though THESE Autumn leave bowls were made using clay, I have seen the SAME PROCESS used to make salt dough leaf bowls. Wonderful.
Adorable Pine Cone Hedgehogs!
Created wonderful Colour Leaf Impressions
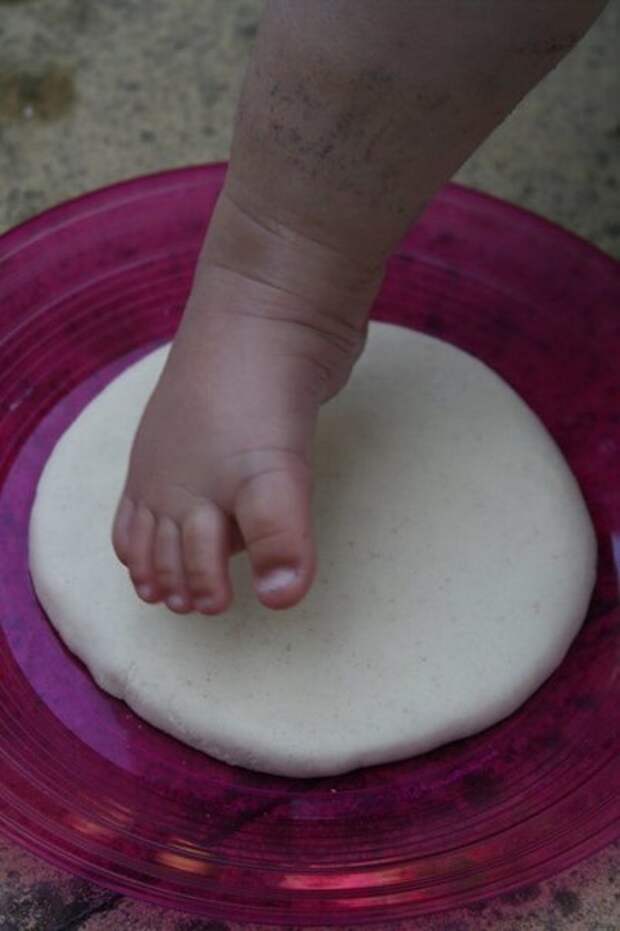
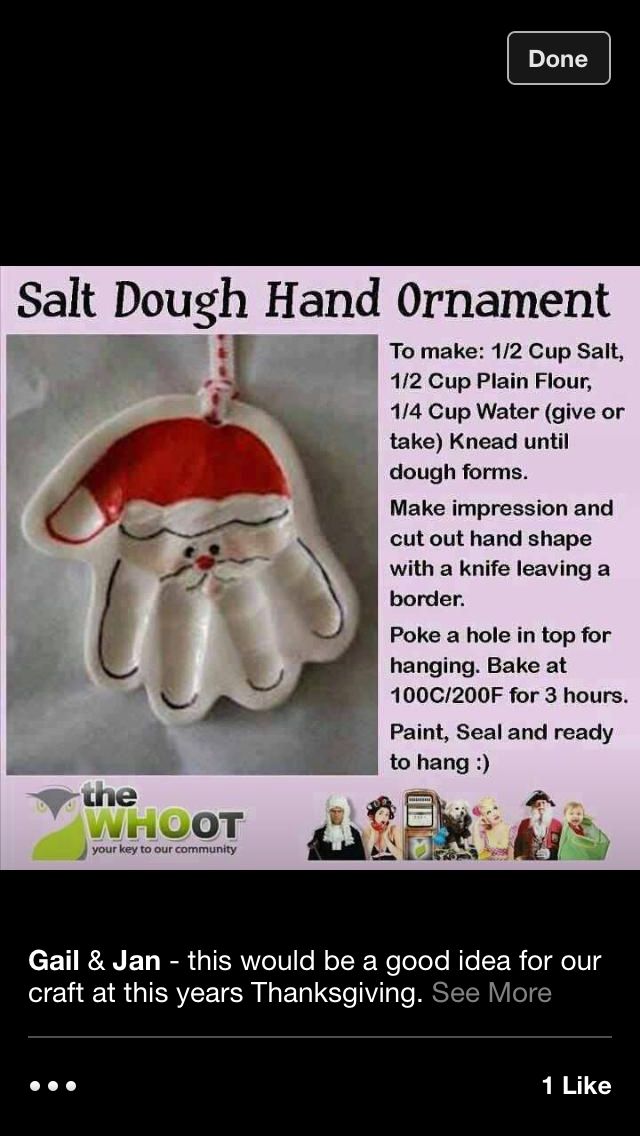
A wonderful “classic” Salt Dough Foot or Handprint keepsake – these can also easily be turned into Christmas Tree ornaments.
Similarly these Footprint Hearts are super popular!
Similarly these thumbprint hearts are adorable!
Simple Salt Dough Votives – these are SUPER easy for kids to make and are great as little Christmas Votives or for Diwali – watch the video for our “how to”, really SO EASY to make!
Salt dough Gift Tags by Pretty Wrapped (this site is now closed) – make them for any ocassion, these are little Wedding Gift Tags.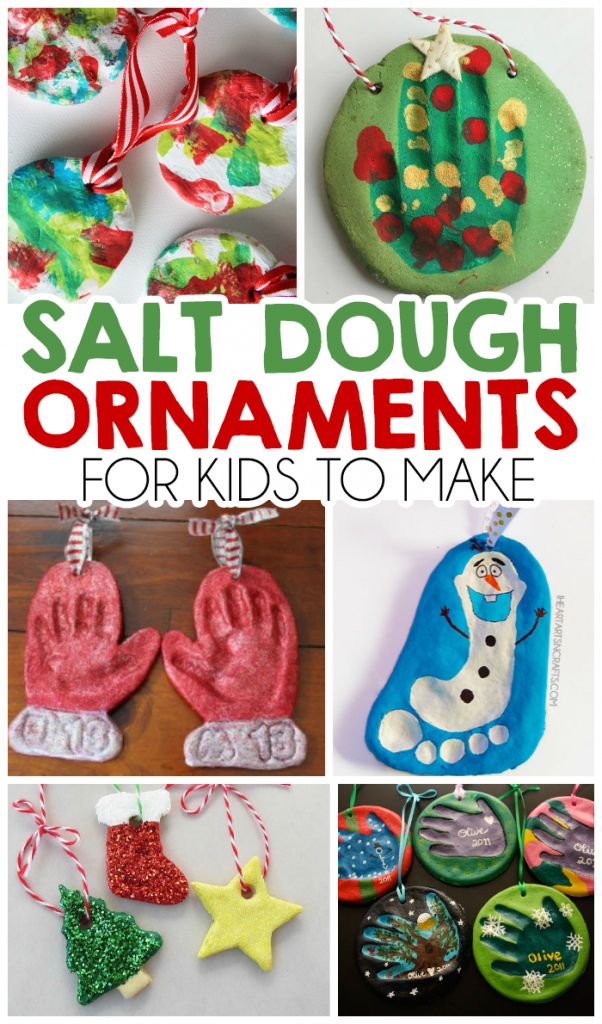 Awww.
Awww.
Thanks Giving Pendants
Salt dough Lady Birds by Damson Lane (this blog is no longer available)- they make for a great counting set.
Salt dough baskets
Salt dough bread for the toy kitchen
Lots more salt dough play food by the Cherry Farm (this blog is on longer available, sorry)!
Salt Dough Snowmen
Salt Dough Penguin
Salt Dough Pen Box
Salt Dough Egg Cups
Salt Dough Medals
Modelling your favourite Book Characters
Salt Dough Wreath by the Chicken N Coop (blog no longer available)
These double up as Valentine’s Decorations or for Christmas
Or combine your hearts with buttons! Such sweet Button Heart Decorations!
Conversation Heart Necklaces!
Dias de Los Muertos Ornaments (Pin only!) – though if you search “Dead of the Dead Cookie cutters” they should pop up online!
Salt Dough works great as Fridge Magnets:
Valentines’s or Mother’s Day Fridge Magnets
Give a Hug Fridge Magnets
Cute little Crab and Turtle Fridge magnets
And here the “classic” 10 Salt Dough Christmas Ornaments
For Christmas, you may want to give our Cinnamon Salt Dough a go.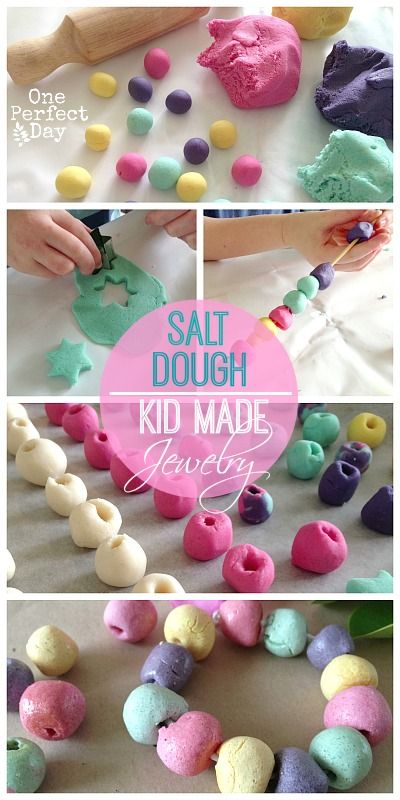 SOOO lovely!
Summarising the Salt Dough Ornaments shared below!
As mentioned Christmas is a great time to have a go at Salt Dough ornaments. Start off simple with the classic “cookie cutter ornaments” and then get a bit more adventurous and see what you can create?!
You can achieve a great amount of detail – e.g. look at these wonderful Salt Dough Santas from Carolina Farmhouse Kitchen – this blog is no longer available!
Similarly, get the felt tips out, make your basic Salt Dough Recipe and create some of these fabulous Santa Star Ornaments. Just so fun!
Salt Dough Stars – nice and simple! Kids LOVE this!
Sea Glass and Button Trees
Combine Salt Dough and Stamping
More Salt Dough Stamping
Salt Dough Owl (now an invite only blog, sorry!)
Salt dough ornaments with seeds (instruction no longer available, sorry)
Salt Dough Patterns by She Made That (no longer available)- use doilies or similar!
Love these quirky characters!
Salt dough sun catchers
More Beaded Ornaments
Star Wars Ornaments (I know someone who will love these!) You will need a set of these Star Wars Cutters just search online for them!
Finally – some Easter Salt Dough Crafts
Salt Dough Easter Ornaments… not just for Christmas!
Hope you love this Salt Dough Crafts round up as much as I did creating it! If you fancy some more crafty inspiration, why not take a look at our Cookie Cutter Crafts?
11 Incredible Salt Dough Ideas to make all year round
Salt Dough Crafts are not just for Christmas though of course Salt Dough ornaments are super fun to make and a great childhood classic.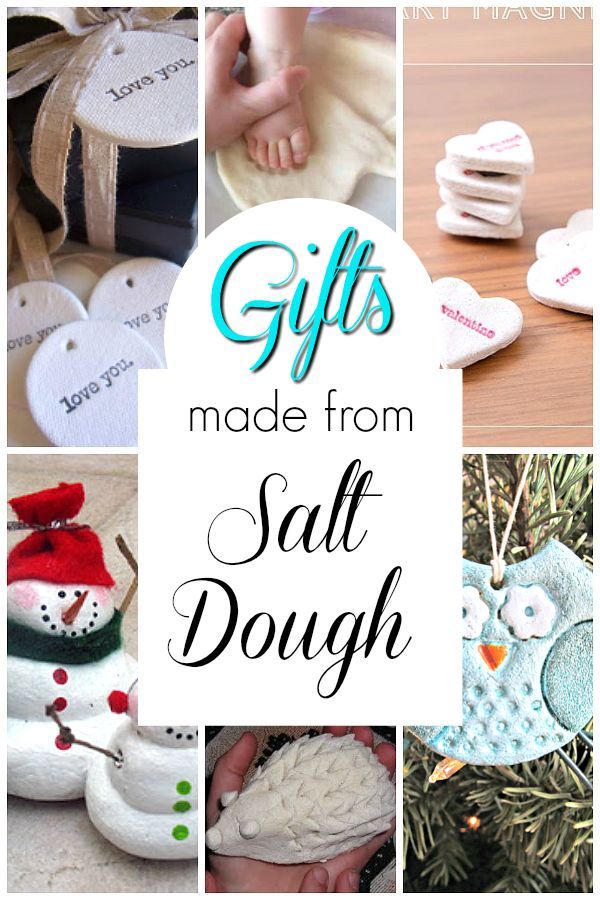 There are all sorts of projects you can make from salt dough and I have picked out my top Salt Dough Ideas for you to try throughout the year.
Making Salt Dough Crafts in the summer is particularly fun, as you can let the salt dough dry naturally in the sun, instead of baking it in the oven. Though of course both air drying salt dough and oven drying salt dough works! There are lots of lovely keepsakes you can make too (I especially love the salt dough shell necklaces!).
Note, we haven’t shared any salt dough handprint ornaments here today, as there are a whole set of fantastic Christmas Salt Dough DIYs you can make!
Top Tips for these Salt Dough Ideas:
Salt Dough Summer Crafting – if you are making these salt dough ideas in summer, get a damp art cloth or old tea towel and place over the salt dough you are currently not working with. This will prevent the salt dough from drying out whilst crafting and cracking.
Simple is Best – though salt dough is gorgeously versatile, it doesn’t always keep it’s “detailed” shape. It can spread a little during the baking process – and you often want to “repoke” holes, whilst it drying etc. You can add details later when painting and decorating your salt dough projects!
Some quick questions answered:
Does salt dough go Mouldy?
The short answer is: sadly, yes! As salt dough is made from flour and salt, which are natural materials that absorb water, they CAN go mouldy. Stored carefully in an air tight container or away from a humidity – this can be avoided.
Alternatively, especially with “play items”, you can seal the salt dough by using acrylic paints or a glaze/ spray. Though, none of our salt dough crafts have needed this.
Why does my salt dough have bubbles in it?
Usually, if your salt dough shows a bubble in it, it is because your oven is too hot and you have dried it too quickly. Or instead of using plain flour you have used self raising flour, which has a raising agent in it. The key to a smooth salt dough is drying it at a moderate temperature for a long time!
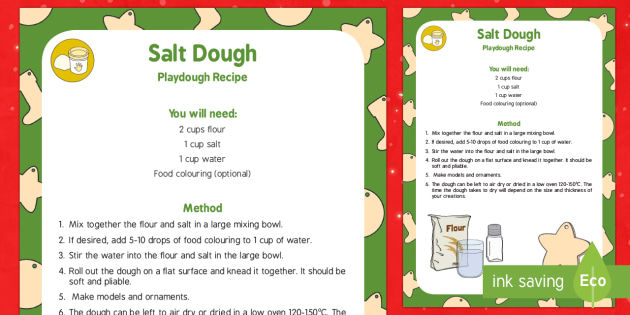
What is the best Salt Dough Recipe?
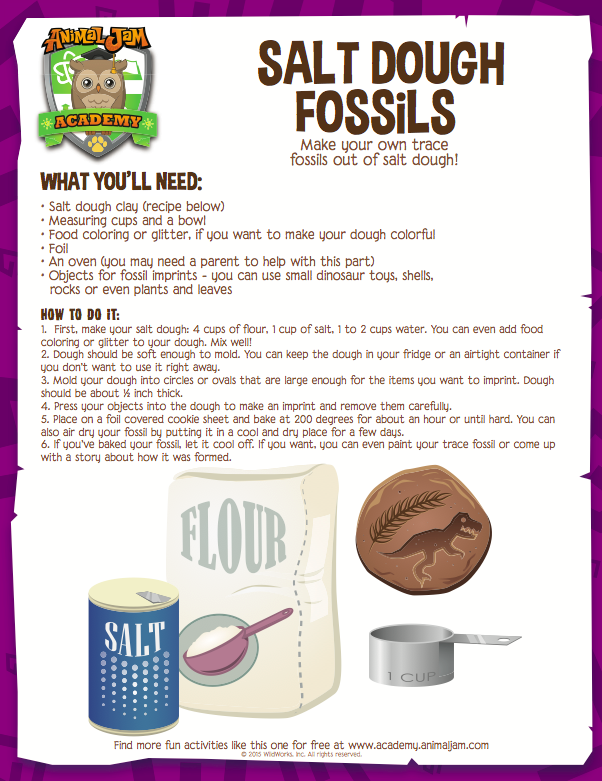
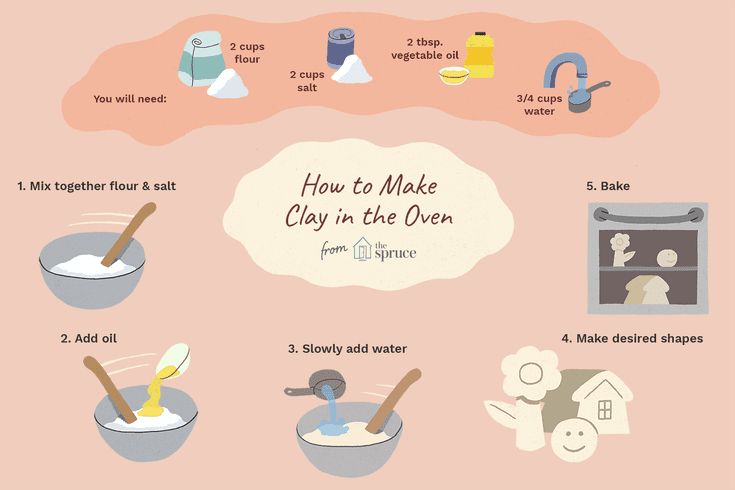
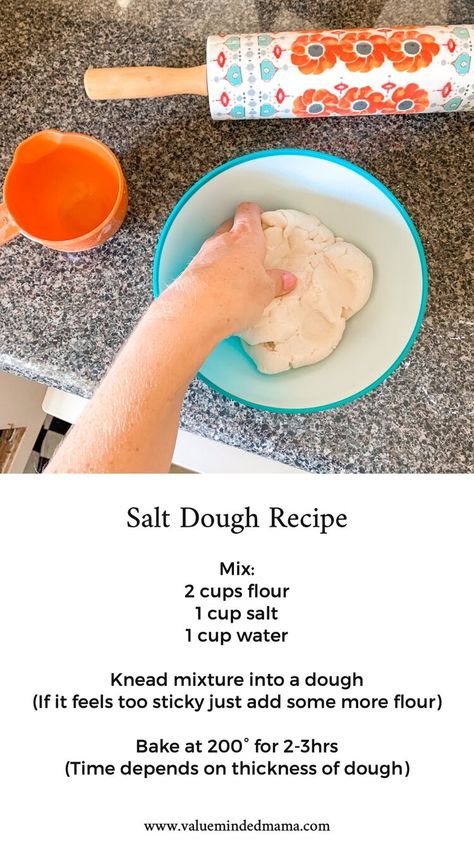
To make salt dough, all you need is
- 2 cups of all purpose flour,
- 1 cup of salt and
- UP to a cup of water (warm water is nice, as it combines a little more quickly)
- You can also add good quality food colouring to dye your saltdough before drying
- Baking sheet for the oven
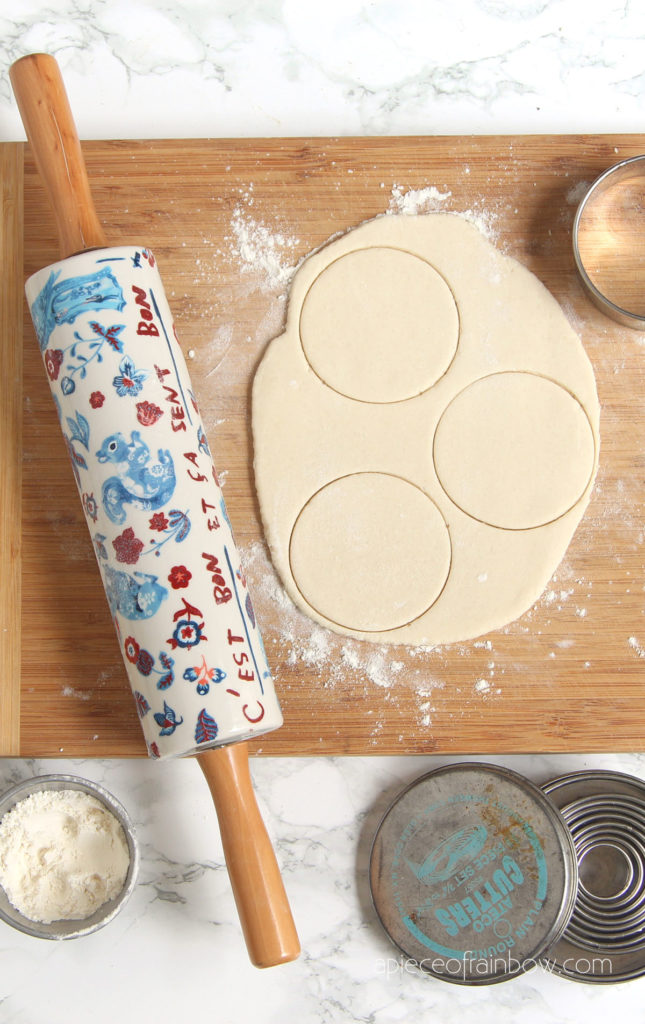
- A rolling pin is handy for many projects too
Baking in the oven for 3hrs at 50-80C
For an extra sensory experience you can even add a little cinnamon to your DIY dough, making it smell gorgeous! Though we do also have a special cinnamon salt dough for Christmas. You can also add a little glitter for that extra sparkle at the end (see the salt dough photo frames shared below). Some people also like to use a sealer to seal their salt dough crafts with some mod podge or PVA glue. Again, it isn’t strickly necessary!
Grab some bowls and your ingredients and you are ready to get started!
Can you make coloured Salt Dough?
Yes!!! It is super easy! Use the same recipe as for you regular Salt Dough Recipe and add GOOD quality food colouring.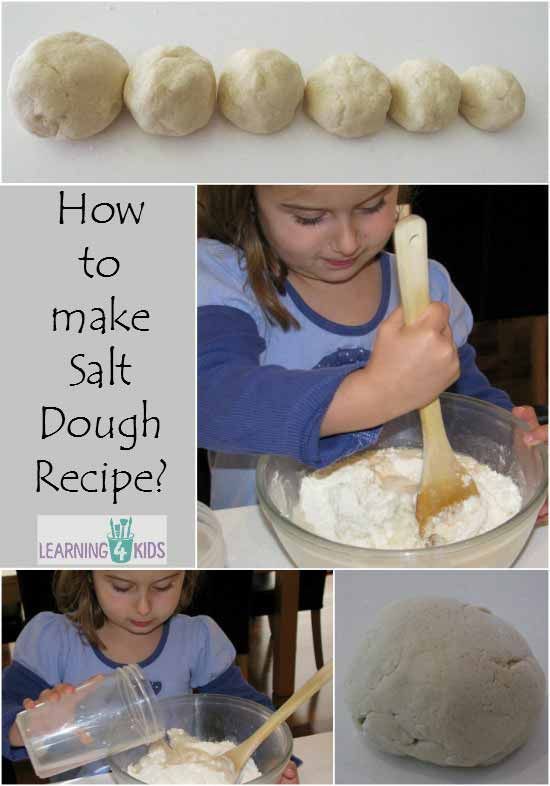 If you use cheap food colouring, it will pale significantly once dried. For vibrant colours, use great food colours! If you coloured salt dough comes out “dulled” once dry, you can varnish it to bring the colours out again. Follow our easy instructions to make this “coloured clay”!!
Incredible Salt Dough Ideas to make all year round:
Salt dough rainbow clouds – a summer salt dough ornament craft ideaAs part of our Sky Kids Series 1 – Best Makes Ever! – we made these gorgeous little rainbow cloud ornaments. A super lovely way to decorate your room with! Using our favourite Salt Dough Recipe, cookie cutters and acrylic paints, this is a great project for summer! You could even have a go at this using our coloured salt dough recipe – for that more natural feel.
Easy Salt Dough HedgehogsCombine salt dough and pine cones for this lovely eco friendly nature activity – Pinecone Hedgehogs. A simple modelling salt dough project for kids – and the best bit? It is fully bio degradable too!
Salt Dough Turtles Fridge MagnetsSImilarly, you can have fun with shells and salt dough.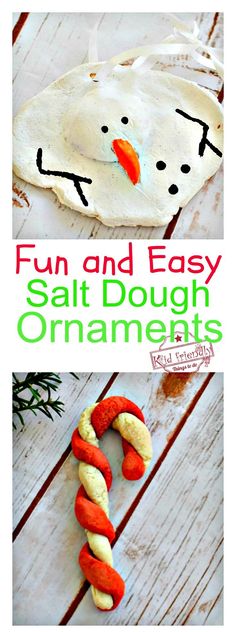 . combining the too to make these adorable Sea Shell Turtles. Why not also add a magnet and make them into keep sake Turtle Fridge Magnets?
Similarly make a set of salt dough turtles and salt dough crabs as fun fridge magnets for summer! So cute!
Salt Dough BeadsWhen the kids were very little we first had a go at making salt dough beads! Later we upskilled these to Emoji Beads and Peas in a Pod craft! You literally can make any kind of salt dough bead. We have seen some super cute Earth Day Necklaces by Natural Beach Living too..
Salt dough shell pendantsThough we love the saly dough beads.. these pendants are even easier to make. An easy way to turn any nature finds into a wearable craft – turn sea shells, snail shalls, mini pinecones or favourite rocks into pendants with these colourful Salt Dough Pendants. Again, these are fully biodegrable should you tire of wearing them! A tooth pick or straw is useful for making your pendant holes.
Salt Dough Hearts – baker’s twine is lovely for hanging your salt dough ornaments or pendantsIf you haven’t made Salt Dough Hearts at least ONCE in your life, now is the time to make some.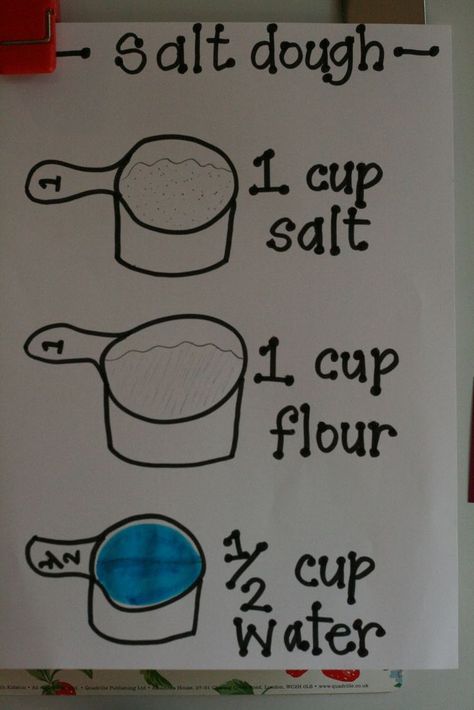 So easy and so pretty.. salt dough hearts are perfect for any time of year – from lovely room decor, to Mother’s Day gifts, to Valentine’s Day and of course Christmas Salt Dough ornament crafting too!
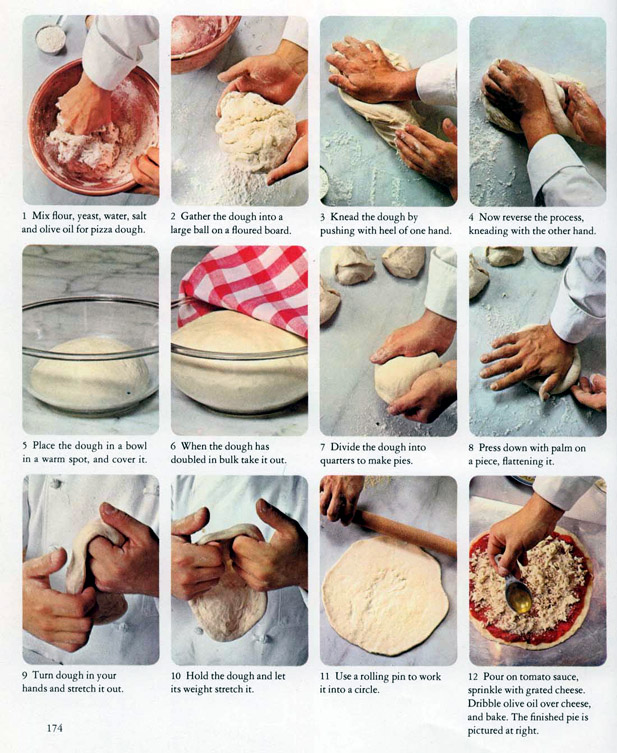
Salt dough is great for making your own toys! Especially, you own salt dough toy bakery – grab your salt dough clay, some parchment paper and “get baking”… I mean, it is a salt DOUGH, right? So what better related craft. Adore the salt dough pretzels and plaited loves. So cute!
Salt Dough HugsWith a year of “missing” hugs behind us, why not send a “Hug” through the post, with these lovely Salt dough HUG Fridge Magnets. What a lovely little gift idea!
Salt Dough VotiveSo.. what to make when you have a salt dough ball left over and the kids have run out of steam? You can wrap the salt dough in cling film and it will keep a few days in the fridge (you may need to just give it a good knead, when ready to work with it again). Alternatively, make this super quick and easy salt dough votive. Little ones will LOVE sticking beads into it. You can even go and use the coloured salt dough recipe for these too! Quick and easy Salt Dough idea for kids!
Check out these adorable Fridge Magnet Photo Frames from Best Ideas for Kids.
See out full list of Salt Dough Ideas, including wonderful Christmas Salt Dough Projects here:
Salt dough is great for Christmass tree ornaments!Lots of salt dough craft ideas!Do-it-yourself crafts from salt dough at home with children - Family Portal of the Omsk Region
From salt dough you can make a huge number of crafts, for example: flowers, animals, various figurines, inscriptions, numbers, toys, pictures and whatever you want! Modeling from salty test is called bioceramics. The advantage of salt dough is that it is convenient to work with it, this material is absolutely harmless and crafts from it will delight you for several years. In this article we will look at how to make crafts from salt dough with your own hands.
As make salt dough?
You will need: a glass of wheat flour, a glass of extra salt, half a glass of cold water, a bowl.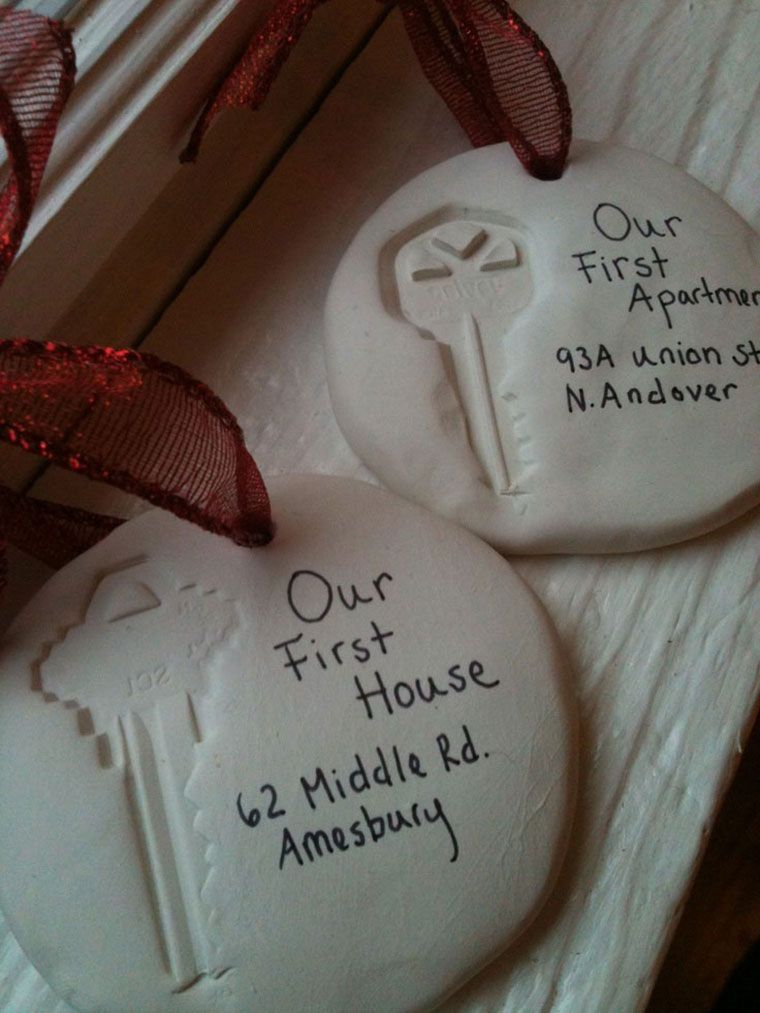
Recipe #1
- Take bowl.
- Pour out a glass of flour.
- Add a glass of extra salt.
- Fill with cold water.
- Knead the dough.
Recipe No. 2
- Flour - 1.5 glass;
- Salt - 1 cup;
- Water - 1 glass;
- Dry wallpaper glue - 1 - 2 tbsp. l.;
- Sunflower oil - 1 tbsp. l.
Pour into capacity flour and salt and gently add water little by little (be sure to first flour, then water, and not vice versa, otherwise lumps may form) and mix. If lumps form in the dough, knead them with your hands. So Knead all the dough until it becomes soft and homogeneous in composition.
Add to this mass of sunflower oil so that the dough does not stick to your hands, and wallpaper paste - so that the dough becomes like plasticine, bending and elastic. All this again mix thoroughly and knead the remaining lumps.
Now we take dough and place it on a cutting board.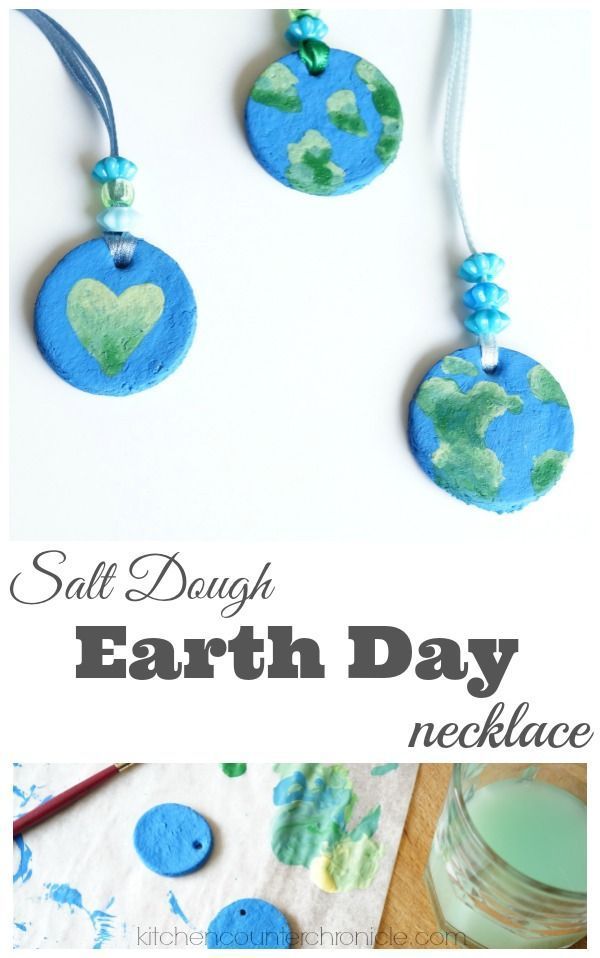 Rolling out the dough with a rolling pin several times in order to completely eliminate the possibility of the appearance lumps.
We place the dough in a plastic bag and put in the refrigerator for an hour. An hour later the dough ready to go.
During sculpting, you should not immediately take out all the dough from the bag - in the air it quickly will start to dry up. It is better to pinch off the necessary pieces, and close the rest package.
Important! Mandatory first flour, then water, and not vice versa, otherwise lumps may form.
The finished salt dough must not stick to hands or crumble. It should be cool and comfortable to sculpt.
How to dry salt dough?
There are two most common ways to dry items from salt dough. The first way: the finished craft will dry itself. The main thing that direct sunlight did not fall on it, otherwise it will crack. Under the tree you can put it on a flat surface and wait a few days.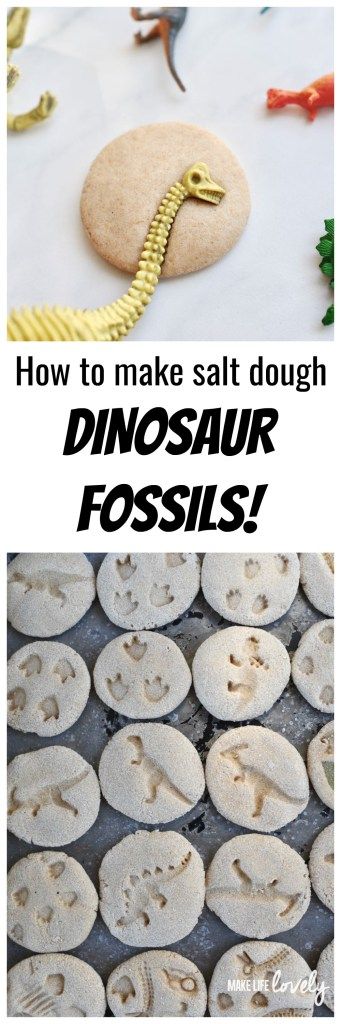 Second way: the finished craft dries in the oven from 3 to 6 hours (depending on the size crafts). Drying takes place intermittently. One set is 1-2 hours. For quick drying in one go, set 75-100 degrees in the oven closet, and then, the craft will dry in an hour. At a temperature of 120 degrees craft dries in 30 minutes, but it is better to dry naturally.
How to color salt dough?
There are two most common staining methods salt dough. The first way: after drying, the finished craft is painted acrylic paints or gouache, using a brush. Method two: food coloring diluted in water, then added during the preparation of the dough. When craft completely painted and dried, it must be covered with a transparent manicure or furniture varnish in 2-3 layers. Each layer before application the next one must dry. In this way, the craft will last for a long time.
Salt dough caterpillar
You will need: colored dough, knife, pva glue, toothpick, pendant, clear nail polish.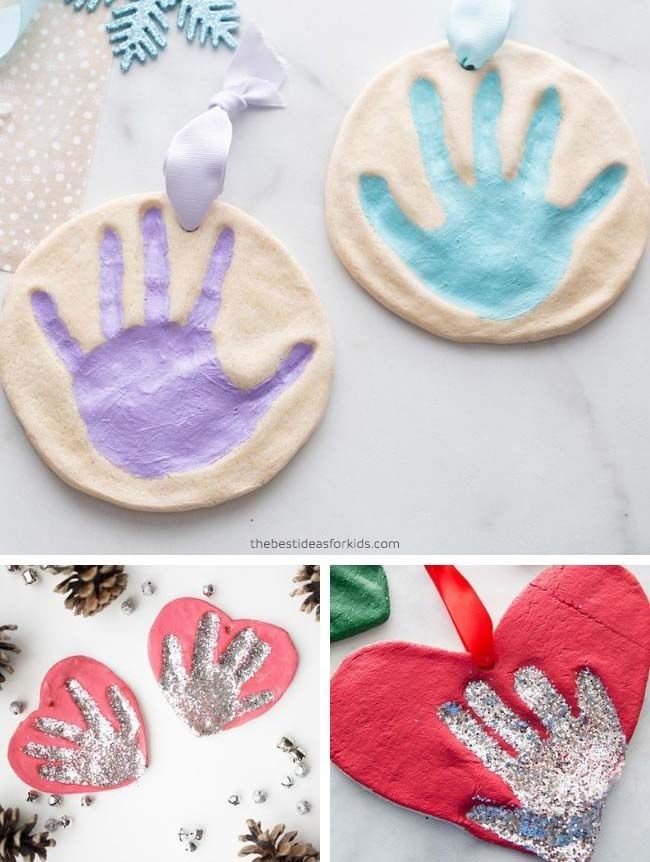
Master class
- Roll out sausage.
- cut it into 6 equal parts.
- Roll up balloons.
- Glue 5 balls in between.
- Glue head.
- Blind nose and eyes, then glue them.
- Pierce toothpick place for hanging.
- Dry under the tree.
- Cover varnish and wait until it dries completely.
- Attach suspension.
Salt dough caterpillar is ready!
Salt dough hedgehog
You will need: salt dough, nail scissors, pva glue, acrylic paints or gouache, brush manicure varnish.
Master class
- Blind the body of the hedgehog is oval.
- Make elongated tip.
- Blind 2 small balls and glue the eyes in place. Roll the ball a little more and glue it as a spout.
- Make needles, cutting the dough. The incisions should be made in rows, the needles should be placed in checkerboard pattern.
- Dry under the tree.
- Color and wait for it to dry completely.
- Cover varnish and wait until it dries completely.
Hedgehog salt dough ready!
Salt dough cat
to you you will need: salt dough, knife, rolling pin, simple pencil, sheet of paper, sandpaper, acrylic paint or gouache, brush, transparent nail polish, glue gun or pva, base for crafts for example: board with a frame, clear nail polish.
Master class
- Draw cat or print the template.
- Roll out the dough thinly.
- Attach the template and cut out the cat.
- Dry the craft.
- Sand the sandpaper craft paper, removing irregularities.
- With a simple pencil, transfer the desired drawing on the body of a cat.
- Color paint and wait until it dries completely.
- Varnish the craft and wait complete drying.

- Glue cat on a base with a frame.
Salt dough cat is ready!
DIY salt dough crafts, 10 ideas, workshops
You can make a huge number of crafts from salt dough, for example: flowers, animals, various figures, inscriptions, numbers, toys, paintings and anything you want! Modeling from salt dough is called bioceramics. The advantage of salt dough is that it is convenient to work with, this material is absolutely harmless and crafts made from it will delight you for several years. In this article, we will look at how to make crafts from salt dough with your own hands.
Contents
- 1 How do you make salt dough?
- 1.1 Recipe
- 2 How to dry salt dough?
- 3 How to color salt dough?
- 4 Salty test stalls
- 4.1 Master class
- 5 Caterpillar caterpillar salt dough
- 7.1 Master class
- 8 Salt dough roses
- 8.
 1 Master class
- 8.
- 9 Hedgehog from salty dough
- 9.1 Master class
- 10 owl (eagle owl) from salty dough
- 10.1 Master class
- 11 Basin with fruits of saline
- 11.1 Master class
- 12 Cat from salty dough
- 12.1 Master class
- 13 Pencil of salty dough
- 13.1 Class
- 14 TACE SAVED SELE0150
- 14.1 Master class
- 15.1 Master class
- 900.1 Master class
How to make salt dough?
You will need: a glass of wheat flour, a glass of extra salt, half a glass of cold water, a bowl.
Recipe
- Take a bowl.
- Pour out a glass of flour.
- Add a glass of extra salt.
- Fill with cold water.
- Knead the dough.
The finished salt dough should not stick to your hands or crumble. It should be cool and comfortable to sculpt. I recommend watching the video master class!
SALT DOUGH | How to make DIY salt dough | Easy salt dough recipe.
Watch this video on YouTube
How to dry salt dough?
There are two most common ways to dry salt dough. The first way: the finished craft will dry itself. The main thing is that direct sunlight does not fall on it, otherwise it will crack. The craft can be put on a flat surface and wait a few days. The second way: the finished craft is dried in the oven for 3 to 6 hours (depending on the size of the craft). Drying takes place intermittently. One approach is 1-2 hours. For quick drying in one go, set 75-100 degrees in the oven, and then the craft will dry in an hour. At a temperature of 120 degrees, the craft will dry in 30 minutes, but it is better to dry it naturally.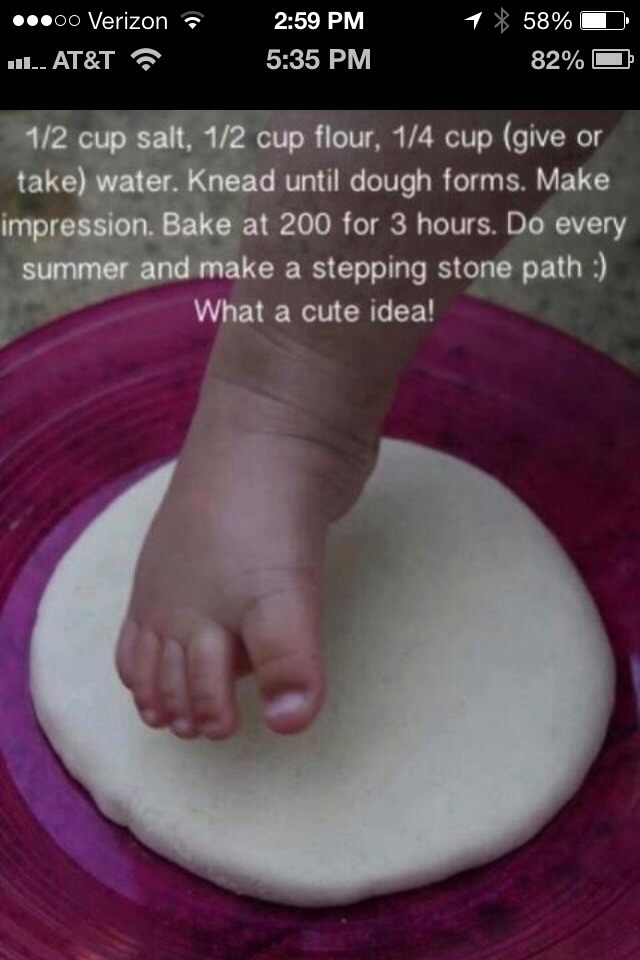
How to color salt dough?
There are two most common ways to color salt dough. The first way: after drying, the finished craft is painted with acrylic paints or gouache using a brush. The second way: food coloring is diluted in water, then added during the preparation of the dough. When the craft is completely painted and dried, it must be covered with a transparent manicure or furniture varnish in 2-3 layers. Each layer must dry before applying the next. In this way, the craft will last for a long time.
Salt dough star
You will need: colored salt dough, stack, clear nail polish, toothpick.
Workshop
- Roll into a ball.
- Make a cake out of it.
- Cut out the star with a stack.
- Lubricate the corners of the sprocket with a wet finger to make them smooth.
- Make points with a toothpick.
- Make your eyes smile with a stack.
- Attach small flat balls of a different color with water to decorate the star.
- Dry the craft.
- Lacquer over and allow to dry completely.
Salt dough star is ready!
Salt dough caterpillar
You will need: colored dough, knife, pva glue, toothpick, pendant, clear nail polish.
Workshop
- Roll out the sausage.
- Cut it into 6 equal pieces.
- Roll into balls.
- Glue 5 balloons together.
- Glue on the head.
- Blind the nose and eyes, then glue them on.
- Use a toothpick to pierce the hanger.
- Dry the craft.
- Lacquer over and allow to dry completely.
- Attach the hanger.
Salt dough caterpillar is ready!
Salt dough apple
You will need: colored salt dough, pva glue, clear nail polish.
Master class
- Blind half an apple, make the inner part flat, pressing it to a flat surface.
- Blind a thin flat center and glue to the main part.
- Roll up 6 seeds and a stick, then glue to the apple.
- Blind the leaves, then glue them.
- Dry the craft.
- Lacquer over and allow to dry completely.
Salt dough apple is ready!
Salt dough elephant
You will need: colored salt dough, pva glue, clear nail polish.
Master class
- Blind the body of an elephant by rolling an elongated ball.
- Shape 4 legs into plump sausages.
- Blind the proboscis.
- Blind the ears of an elephant in the following way: roll up 2 flat cakes, glue to them the cakes of the same shape of a smaller size in a different color.
- Make a small ponytail.
- Blind your eyes.
- Assemble the elephant in the following sequence: glue the legs to the body, then glue the proboscis, then the ears, eyes and tail.
- Dry the craft.
- Lacquer over and allow to dry completely.
Salt dough elephant is ready!
Salt dough roses
You will need: salt dough, foil, candy bowl or similar plastic container, gouache, brush, clear nail polish, modeling board, knife or glass.
Workshop
- Fill the vase with foil.
- Roll into balls. For one rose you will need 5 balls, for a leaf - 1 ball.
- Blind the leaves, draw stripes in a stack.
- Shape the balls into cakes and form a rose. Twist one cake into a tube, then attach the cakes on opposite sides, forming petals.
- Attach roses and leaves to foil.
- Dry the craft.
- Color the craft and let it dry completely.
- Varnish the craft and wait until it dries completely.
Salt dough roses are ready! I recommend watching a video tutorial on how to make a rose!
Workshop: Modeling a rose with thin petals from salt dough. Master class for modeling roses.
Watch this video on YouTube
Salt dough hedgehog
You will need: salt dough, nail scissors, pva glue, acrylic paints or gouache, nail polish brush.
Workshop
- Blind the body of an oval hedgehog.
- Make an elongated tip.
- Make 2 small balls and glue the eyes in place.
- Roll up the ball a little more and glue it as a spout.
- Make needles by cutting the dough. The cuts should be made in rows, the needles should be staggered.
- Dry the craft.
- Paint over and dry completely.
- Lacquer over and allow to dry completely.
Salt dough hedgehog is ready!
Owl (eagle owl) from salt dough
You will need: salt dough, PVA glue, nail file, nail scissors, acrylic paints or gouache, brush, wooden board with pendant, transparent nail polish.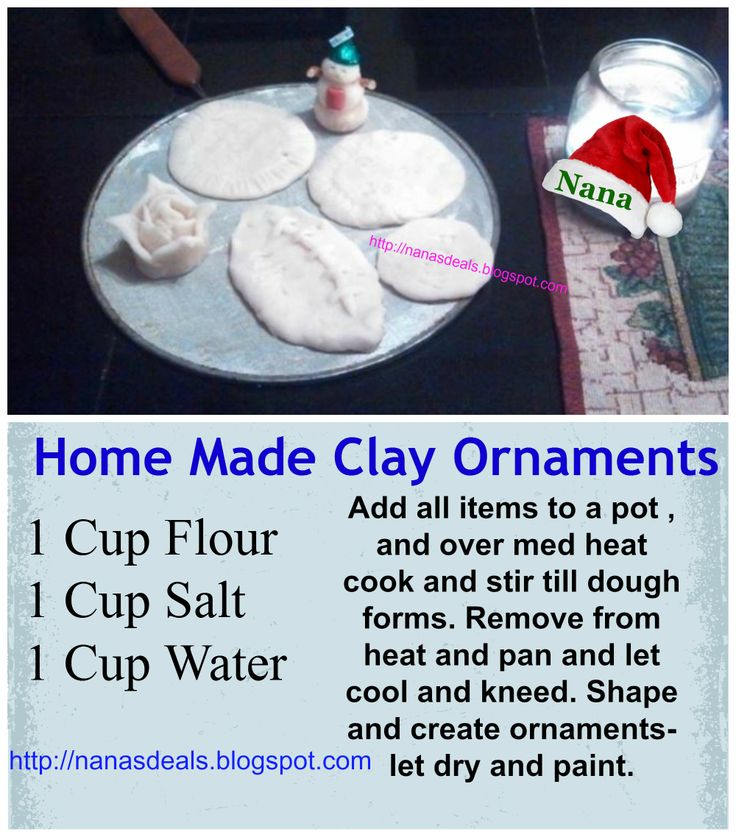
Workshop
- Blind the body of an owl in an oval shape.
- Blind the eye in this way: make a round cake and glue the pva, then take a piece of dough, form a small strip, wrap it into a tube and glue it as a pupil.
- Blind the other eye in the same way.
- Use a nail file to make small stripes from the pupil to the outer shell.
- Make rays around the eye by pressing on the dough with a nail file.
- Take your scissors and make cuts to form owl feathers. This process is painstaking, the main thing is not in a hurry.
- Arrange the cuts in rows. Feathers should be staggered.
- Glue the craft to the board.
- Shape the legs of the owl and glue them on.
- Shape the owl's wings, make feathers with scissors and glue them on.
- Attach the "hair" in the same way.
- Dry the craft.
- Color the owl and let it dry completely.
- Varnish the craft and wait until it dries completely.
Salt dough owl is ready!
Salt Dough Fruit Basket
You will need: Salt dough, the base on which the craft will be attached, for example, a plank or plate, a stack or a knife, a sheet of paper, a simple pencil, a garlic crusher, a rolling pin, PVA glue , acrylic paints or gouache, brush, transparent nail polish, carnation.
Workshop
- Draw a basket on paper or print out the template.
- Roll out the dough thinly.
- Glue the center of the sheet onto the plank.
- Attach paper template.
- Cut out the basket with the tip of a knife.
- Pass the dough through a garlic press to form strips, then twist the flagella.
- Lubricate the handle of the basket with glue and place the flagella on it.
- Glue the flagella to the headband.
- Draw a grid on the basket with the tip of a knife, making it look like a weave.
- Roll out the sheet and cut out 9 leaves with a knife.
- Draw stripes on the leaves with the tip of a knife.
- Glue 3 leaves on the sides and top center of the basket.
- Make 4 large circles and glue them like apples.
- Make a small indentation with a stack in the center of each apple and glue on a carnation.
- Make 3 small circles and glue them as plums.
- Make about 20 small balls and glue like a bunch of grapes.
- Dry the craft.
- Paint over and dry completely.
- Lacquer over and allow to dry completely.
Salt dough fruit basket is ready! I recommend watching the video tutorial!
#Salt dough/ Basket with vegetables.
Watch this video on YouTube
Salt Dough Cat
You will need: salt dough, knife, rolling pin, pencil, sheet of paper, sandpaper, acrylic paint or gouache, brush, clear nail polish, glue gun or pva, base for crafts e.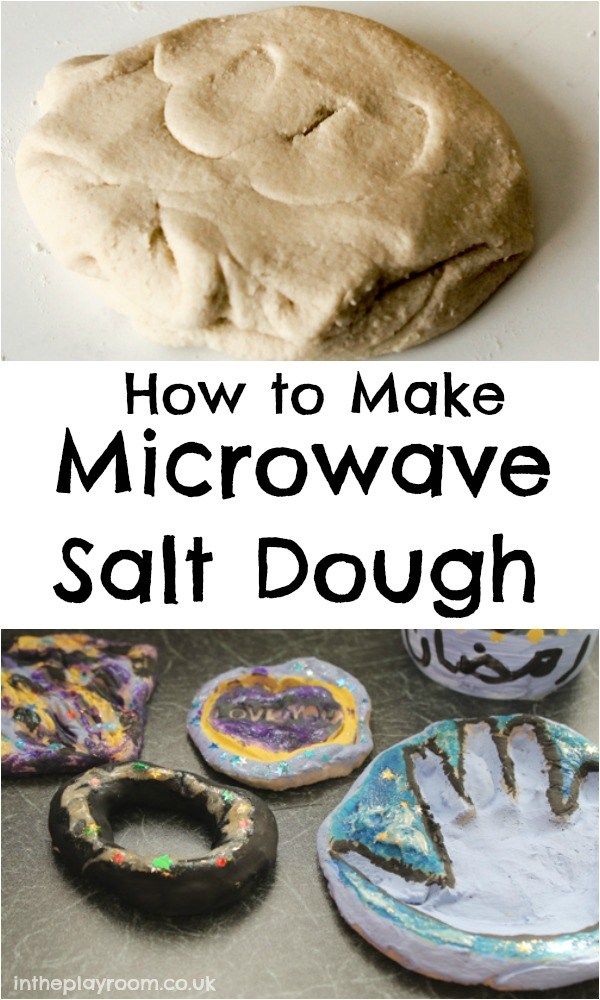 g. board with frame, clear nail polish .
Master class
- Draw a cat or print out a template.
- Roll out the dough thinly.
- Attach the template and cut out the cat.
- Dry the craft.
- Sand the craft with sandpaper, removing rough edges.
- With a simple pencil, transfer the desired pattern onto the cat's body.
- Paint with paints and allow to dry completely.
- Coat the craft with varnish and wait until it dries completely.
- Glue the cat onto the frame base.
Salt dough cat is ready! I recommend watching the video tutorial!
Cat souvenir (Laskutok) | Salt dough modeling 1 part
Watch this video on YouTube
Salt dough pencil
You will need: water, flour, extra salt, cardboard jar for the frame, PVA glue, scissors, a piece of decorative cord or crepe paper, a brush, gouache , button, stacks, acrylic varnish for crafts, toothbrush.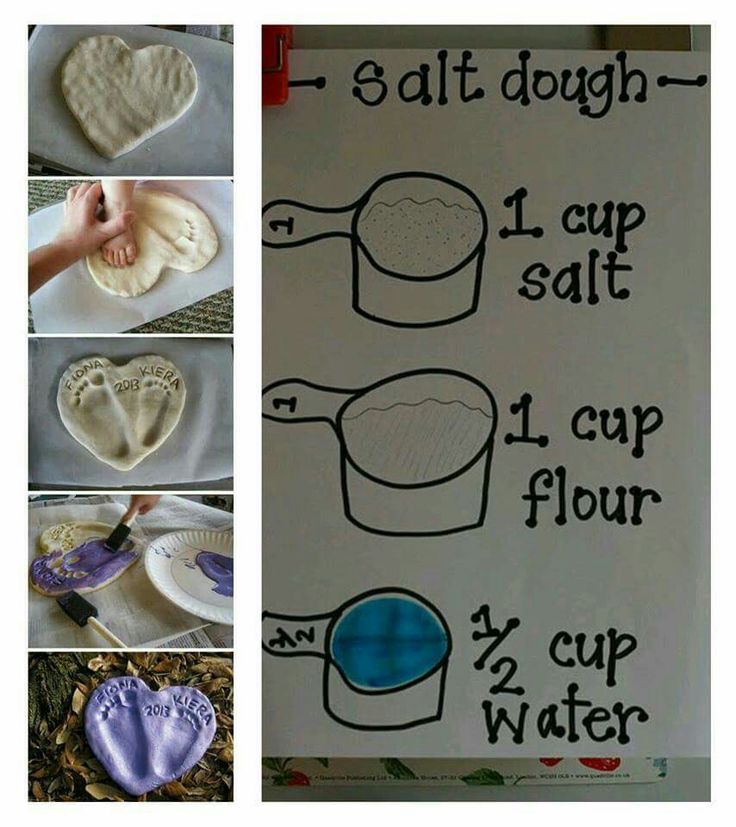
Master class
- Knead the salty dough in this way: add a glass of flour, a glass of salt, add water, then knead until the desired consistency of modeling. Separate part of the dough, add beige gouache, then knead.
- Roll out the cake to a thickness of 10-15 mm.
- Apply PVA glue to the outer rim of the jar and wrap with dough. Cut off the excess with a stack, and smooth the joints with a damp brush.
- Create a small dotted texture with a toothbrush on the surface of the dough.
- Knead the brown dough, roll it into a 10-15mm thick cake.
- Cut a 5 cm strip of brown pastry and glue it to the bottom of the jar.
- Make 2 large owl eye bases with white dough, then glue them on.
- Make a beak out of brown dough and glue it on.
- Make eyes out of turquoise dough and glue them on.
- Roll up 8 strips of pink dough, twist them into 4 ropes and make a bow, then leave it to dry for 2 hours.
- Shape owl wings into droplets from brown dough, then glue them on.
- Weave the beige dough and glue it to the neck of the jar.
- Roll up a sausage from white dough, draw the texture of lace with a stack and glue it as a collar under the beak.
- Leave the craft in a warm place for a day.
- Paint the underside and wings with brown gouache and decorate with white dots.
- Draw pupils and eyelashes with black gouache, wait until the paint dries, then paint white highlights on the eyes.
- Glue a pink bow over the wing.
- Glue a button with a corrugated stripe bow onto the lace.
- Varnish the craft and wait until it dries completely.
Salt dough pencil is ready!
Salt dough dachshund
You will need: salt dough, simple pencil, scissors, cardboard, paints, brush, string, toothpick, foam sponge, clear varnish, PVA glue.
Tutorial
- Draw a dachshund on cardboard as shown.
- Cut out the template.
- Roll out the dough to a thickness of 5 mm and cut out the dachshund according to the template.
- Roll up oblong eyes, then glue them on.
- Blind eyelids and glue over eyes.
- Mark the paws, nose, mouth, ear and body contours with a toothpick.
- Roll an oval, then glue it on the ear and smooth the seam with a wet finger. In the same way, add volume to the back of the dachshund and the tail.
- Mark stripes in different directions around the entire dachshund, in such a way that the stripes resemble wool.
- Dry the figurine.
- Paint the figurine then leave to dry.
- Glue a piece of rope on the back of the craft for further hanging.
- Varnish the craft and wait for it to dry.
Salt dough dachshund is ready!
Salt dough mushroom
You will need: salt dough, light bulb, paints, brush, foil, cardboard, masking tape, superglue, PVA glue, paper napkins, clear varnish, stack.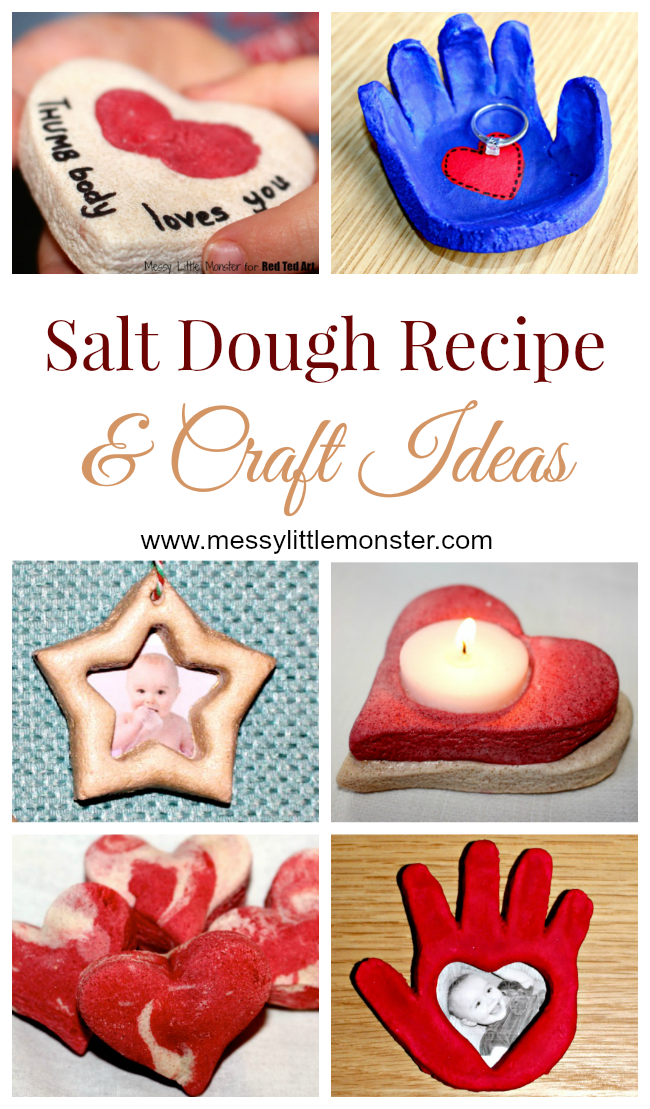
Master class
- Cover the light bulb with adhesive tape, then cover with dough and dry the workpiece.
- Cut out a cardboard ring and put it on the light bulb as a hat base.
- Make a hat out of crumpled napkins, then secure with tape.
- Wrap the hat in foil.
- Roll out the dough to a thickness of 5 mm and wrap around the hat.
- Remove the cap from the stem, cover the bottom with dough and make the strips into a stack.
- Glue the hat onto the leg.
- Mold the handles, legs and spout to the fungus, then glue them onto the PVA.
- Blind the caterpillar and glue it to the hat.
- Dry the figurine.
- Paint the figurine then leave to dry.
- Varnish the craft and wait for it to dry.
Salt dough mushroom is ready! I recommend watching this video!
Salt dough modeling: Basket with mushrooms. Master class for adults and children.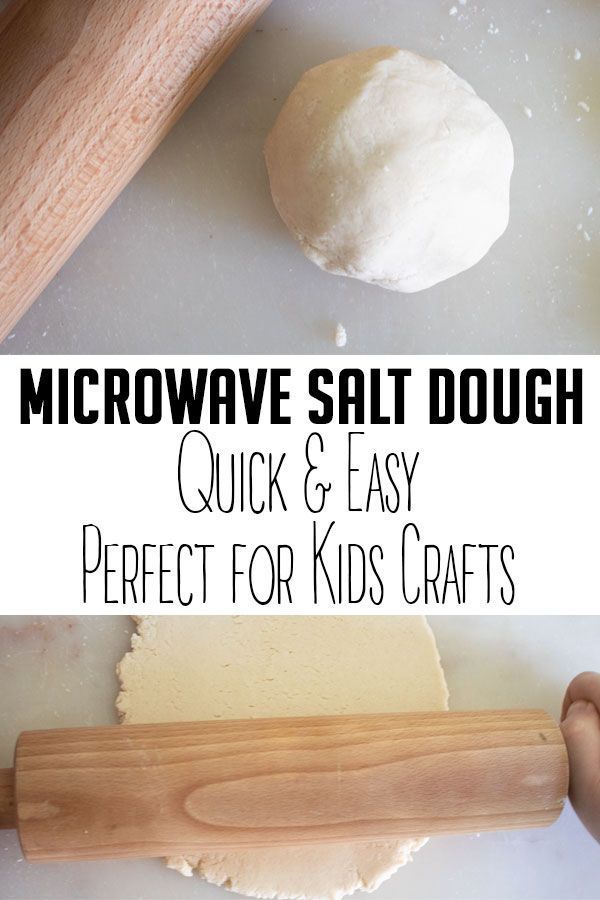
Watch this video on YouTube
Salt Dough Pigs
You will need: salt dough, paints, brush, foam sponge, stack, thin string, toothpick, black helium pen, PVA glue.
Tutorial
- Roll 2 snout balls and use a toothpick to make nostrils.
- Blind the muzzle, glue the snout and eyes over it.
- Blind the ears into a triangular shape, glue them, then mark the stripes in a stack at the junction of the ears and head.
- Make a heart and glue it on the bottom side.
- Make indentations around the edge of the entire circumference.
- Use a toothpick to make 2 holes at the top for attaching the rope and 2 holes at the bottom for the legs.
- Roll up the handles and glue them in such a way that they hold the heart.
- Blind the hooves and make holes in them for the rope.
- Dry the blanks.
- Paint the blanks black and let dry.
- Rinse off the paint from the convex parts of the workpiece under running water with a sponge, and wait for it to dry.
- Prime the figures with a sponge and white paint.
- Color the pigs.
- Draw fine details with a black helium pen.
- Varnish the craft and wait for it to dry.
- Glue on the wool threads as hair.
- Make a rope pendant.
Funny salt dough pigs are ready! I recommend watching this video!
Salt dough cat
Watch this video on YouTube
Salt dough fish
You will need: salt dough, baking sheet, rolling pin, knife, sheet of paper, acrylic paints, brush, ribbon, water, shoehorn, pencil, sandpaper, clear nail polish.
Master class
- Draw a fish or print out a template.
- Sprinkle a baking sheet with flour.
- Roll out the dough on a baking sheet.