Crafts for 3 year olds boys
41 Fun Crafts for 3-Year-Olds
18 shares
Got a 3-year-old that desperately needs an activity? Why not engage them with these Fun Crafts for 3-year-olds.
Crafting with kids is a fun way of educating them about a lot of different things like textures, colors as well as shapes. Crafting not only helps with creativity, and independent play but also develops fine motor skills.
Moreover, it keeps the toddlers engaged for hours. Here are 41 Crafts for 3-Year-Olds that you can also enjoy with them.
Source: craftsyhacks.com
Kids’ art taking too much space on the fridge door? Here’s a super cool idea that will keep the art on the fridge without hogging up much space.
Fingerprint Glass Magnets! These are a great way to save your child’s cute little art projects and create memories of their early days.
To make these fridge magnets, you will need magnets and large glass cabochons, among other supplies. If you are new to the world of DIY projects, you can order your cabochons here.
Source: thediynuts.com
Apart from ABCs, kids pick up colors very easily. However, you need to pick the right object to teach your kids different colors. Most preschool teachers start with a rainbow.
Hence, we have come up with a cute rainbow craft that will serve as a fun activity and a color teaching lesson.
To make this rainbow, you will need marshmallows, cardboard, a black marker, and glue. You can also get some food coloring to make the art more enticing for the kids.
Cut out your cardboard in an arch shape and draw your rainbow lines. Now, help your toddler stick the marshmallows, one color at a time, between the given lines. This is a fun activity that needs very little supervision.
Source: craftsyhacks.com
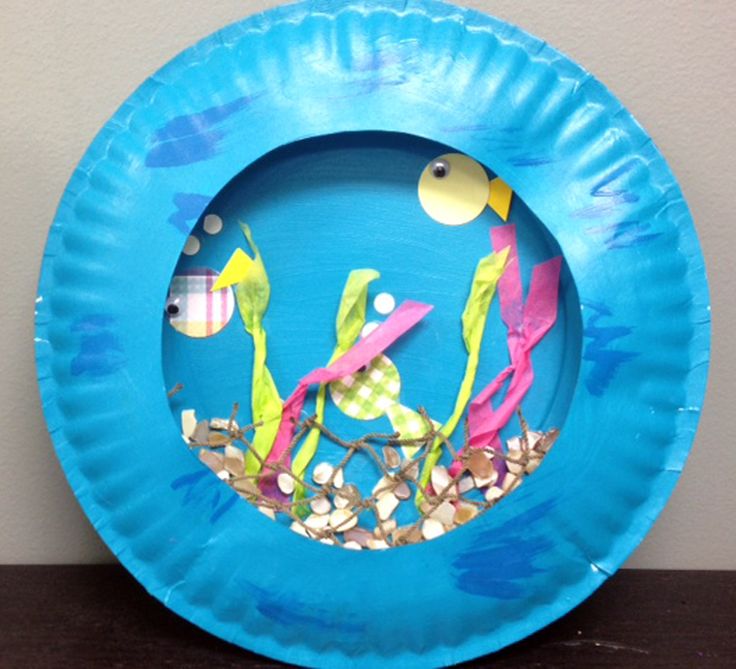
Every DIY craft project can become the perfect way to teach our kids about the underwater world and how it works. For example, this fish art is great for teaching how fishes live in water, what they eat, and how they breathe underwater.
It’s pretty easy to make; you can do this as a classroom project or a summer project at home. Supplies needed are, popsicle sticks, order yours here, some colorful felt sheets, and crafts glue.
Make a triangle with your popsicle sticks, and stick your felt after cutting it in the same shape and size as the fish. You can add as many details as you want, like fins, tail, mouth, and gills.
If you don’t have felt at hand, you can also use colored paper sheets; get some here.
Source: burlapandblue.com
Tissue paper crafts are our favorites for a lot of reasons. For one, they are very affordable because the key element is tissues. One roll goes a long way. You can create just about anything with this tissue craft, but we will start with an Apple.
You can either get pre-colored tissue paper or paint with your toddlers. We suggest colored tissue paper since it’s less messy.
Just cut up your tissue into small pieces, and help your little one glue it to the pre-drawn apple.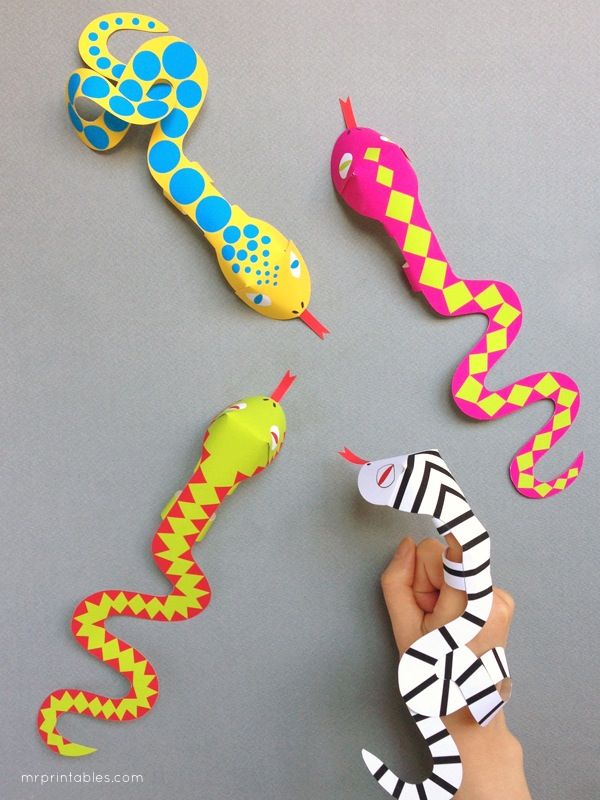 Check out more tissue paper crafts.
Source: craftsyhacks.com
Salt Dough is one of the best doughs out there for kids. You can make just about anything with this dough, be it ornaments or little trinkets for your toddlers.
For the dough, you will need salt, flour, and water. To make the dough more interesting and attractive for the kids, add acrylic paint. You can order all colors here.
To make fun ornaments, you will need a few tools like baking sheets, rolling pins, and cookie cutters.
Order cute cookie cutters here for your salt dough ornaments. All these tools are an investment; you will love making more once you get started with this DIY project.
Source: sweethazelhoney.com
Suncatcher is an excellent craft to make with small kids. Hang them in the sunniest windows and enjoy the colors reflecting in the light.
All you need are some styrofoam plates, contact paper, and tissues to make this cute suncatcher. If you don’t have contact paper at hand, here’s where you can order some.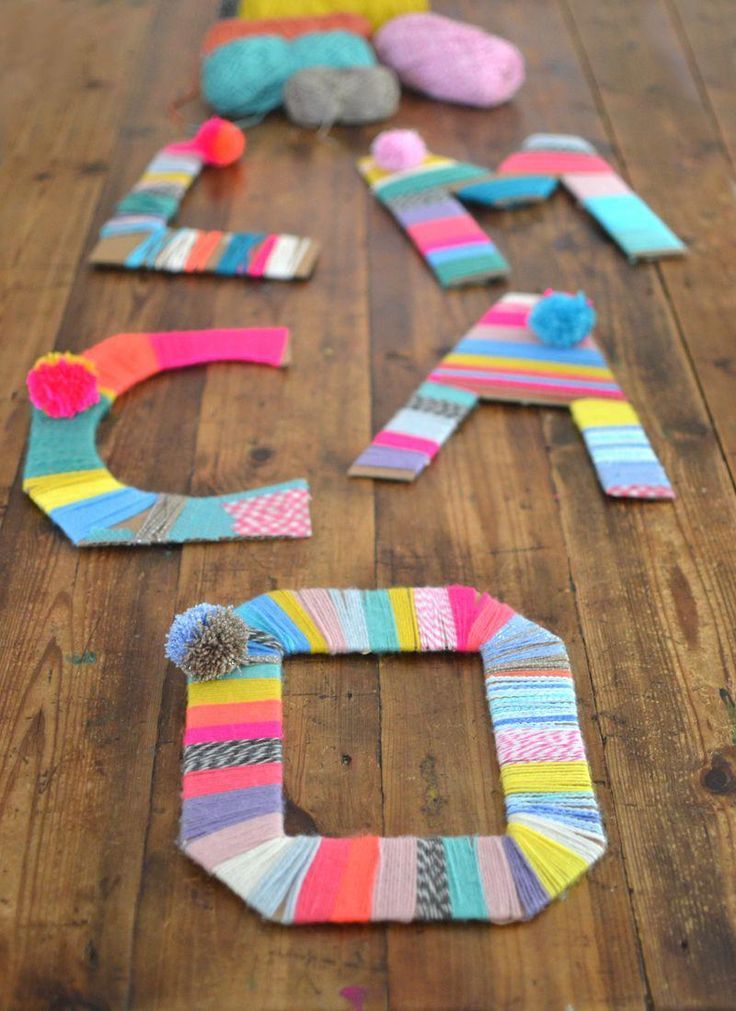
Cut the heart hole in your plate, stick the contact paper where the heart is, and stick your colorful tissue in the shape of the heart. Once you are happy with your heart’s density, stick another contact paper on it to secure the tissue in place.
Source: hezzi-dsbooksandcooks.com
Decorating Easter eggs is a favorite, but why wait till Easter to paint the eggs. This pasta egg craft is perfect for kids missing easter eggs.
The best part is finding all the needed supplies in your home. If you are short on construction paper, get the white sheets here.
Once you are all set with the supplies, draw an egg on the construction paper, give your kids some glue and painted pasta and let them figure out their favorite patterns.
Source: craftingwithkids.net
If you like sorting crafts according to seasons, here’s one for winter. The Penguin craft is the easiest to do. You don’t even have to supervise your kids much with this one.
You will need colored paper, cotton balls, and some glue.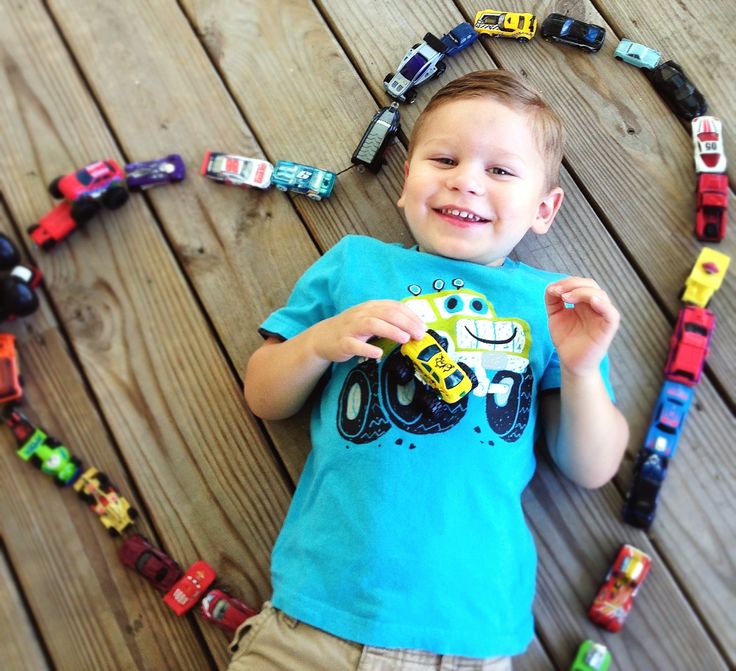 Download the penguin template. Using the template cut out the penguin’s body parts.
Once all the parts are cut out, stick them one by one. Lastly, let your kids glue the cotton balls on the white part and then glue the white part over the black body of the penguin.
This is a fun craft to do on a cozy winter night. Check out more penguin crafts here.
Source: teachingideas.ca
All toddlers love hands-on projects that they can do themselves. This is one of those projects that toddlers can start and end without any help from an adult.
A little guidance goes a long way. Help your toddler sharpen the crayons till they have a neat pile of shavings. Once you have a neat pile of different colors, you can start making your picture.
There are two ways to either let the kids make the picture freehand or draw one for them to fill up with the crayon shaving.
Now comes the fun part, setting the paintings in the sun to melt. Your kids will love going in and out to check on their paintings and see how far they have melted every five minutes.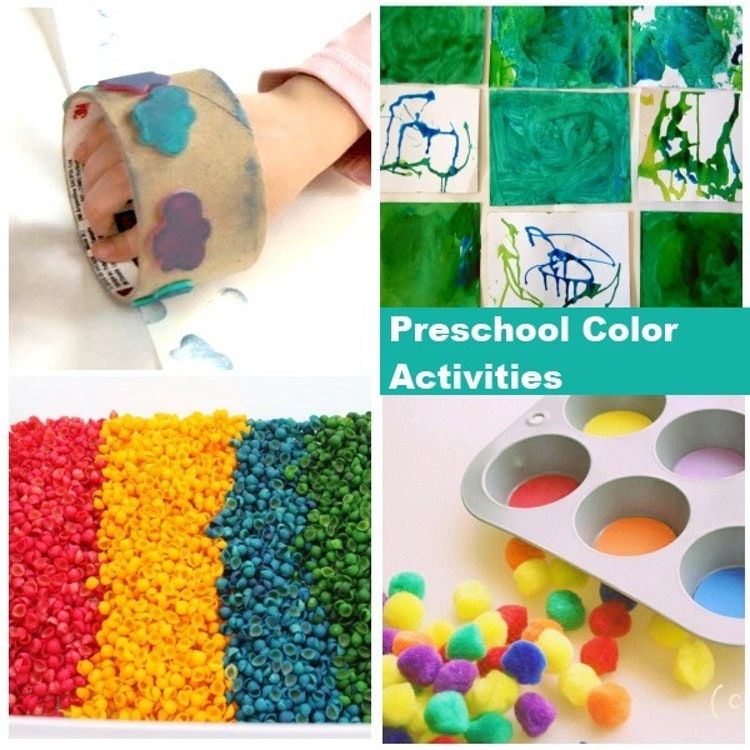
This craft is the best to keep the kids busy while mothers get their chores done.
Source: teachingideas.ca
Let’s create a color wheel, but this isn’t your ordinary color wheel. This one is with a cool twist. If you are a teacher or have a few kids at home, this is the perfect activity for them.
Teaching kids to color the color wheel will become the best lesson ever with this color wheel activity. The twist is the extra material that goes in your paint bowls to change the texture of the paint.
Again, it’s a great way to help kids understand different textures through paint and play. For this excellent activity, you will need six colors, six bowls, and six different materials like rice, flour, couscous, etc.
You can use the blank color wheel template as your base for the color wheel.
Source: teach-me-mommy.com
Let’s teach our kids how to be frugal with paint. Have you got any brown paper bags lying around the house? If not, you can order some here for this craft and use them later for presents.
Get some empty toilet paper rolls and bend them to make a heart shape. Now dip this heart shape in paints and stamp your brown paper bag. Your kids will love this fantastic paint activity.
Source: teachingideas.ca
Paint and magnets together sum up an evening full of fun activities. With this painting with the magnet activity, you can help your kids understand the pull of the magnetic force.
For this activity, you will need two magnets and paint. On a foil or tin tray, tape your paper, and put some blobs of paint. Now place your 1st magnet in the paint and drag the second one under the tray.
As the 2nd one pulls the 1st around, the art will start to emerge. This is an excellent way to teach the kids about color mixing and how magnets work.
Source: daisiesandpie.co.uk
The kids around me love crafts projects, so I am always on the lookout for easy and simple crafts projects for them. This cute little sheep project is one of the easy ones that you can do with young kids.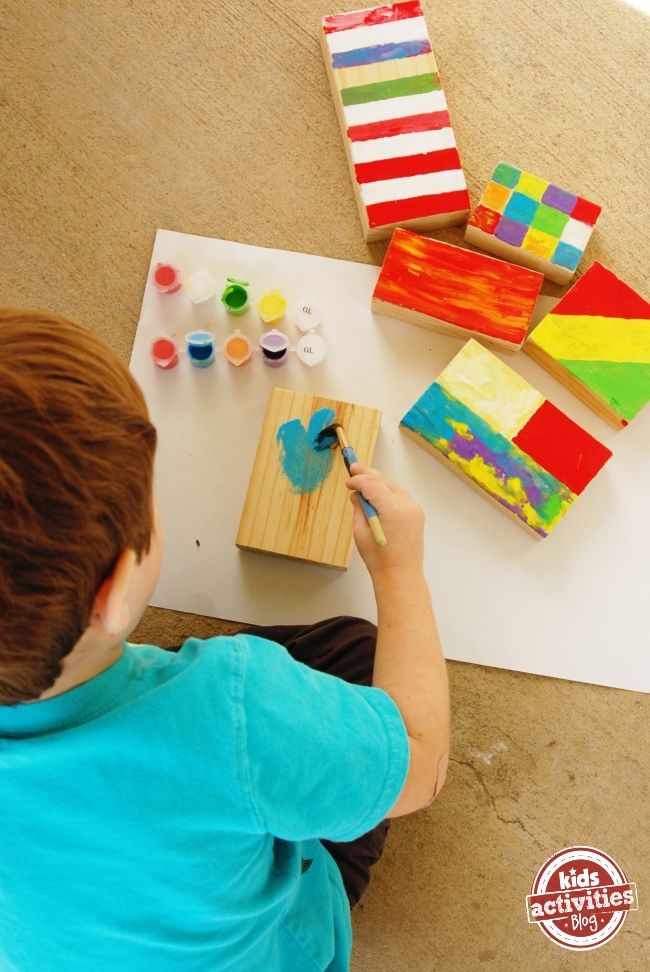
Pre-cut all the sheep pieces, i.e., the white body, the black face, and with the help of kids, glue on some googly eyes. If you don’t have googly eyes, you can order a pack here and use it for other DIY projects too.
Once you have all the pieces, you can stick the lamb on the popsicle stick and glue a bit of green tissue or grass. And there you have it; your popsicle lamb is ready for his farm.
You can create a series of farm animals just like this lamb and have fun at storytime.
Source: hezzi-dsbooksandcooks.com
I love handprint crafts. They are so easy to make and are such great keepsakes. This particular one, the carrot, is the easiest to make. Only red and green construction paper and a cute little toddler are required.
Trace your kid’s hand on the green paper and set it aside. Now trace and cut the shape of the carrot from the red paper and glue your green handprint on the red carrot. That’s it! You are done with your carrot handprint craft.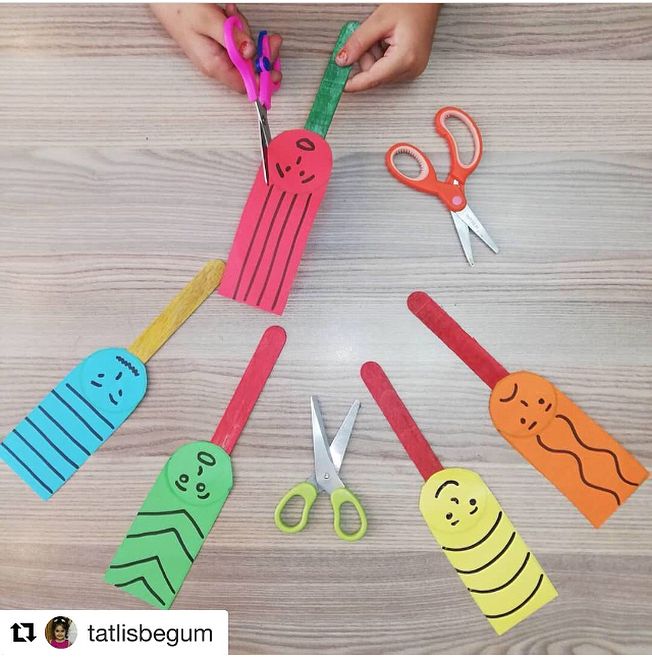
Source: tikkido.com
Are you looking for a craft that just needs a couple of elements yet keeps your kids engaged for a long time? We have just the thing for you, Comet Craft Activity. These are so easy to make that your kids can do it themselves without any help from you.
You need a pack of pre-cut foil sheets and colorful crepe paper strips. Place a couple of strips in the middle of the foil paper, and crumple the paper into a ball, trapping the strips trapping one end of the strips inside.
You can either use the foil from your pantry or get the easy pre-cut one from here. Having a pre-cut one saves a lot of preparation time when you have a couple of more kids.
Source: momsandcrafters.com
These spoon puppets are so easy to make, and by the end of this craft, your kids will have material for their magical puppet show.
All you need are spoons, a sharpie, and some face stickers. You can either buy some face stickers here or get them printed on your own.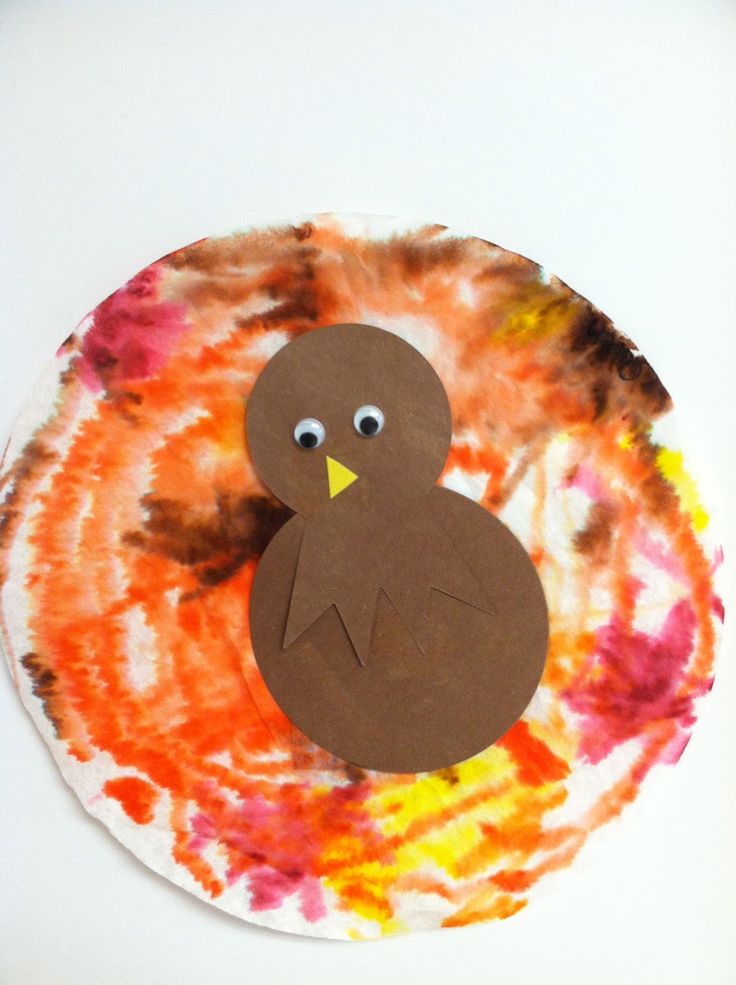
You can even help your kids add details to these spoon puppets with yarn and pom-poms. Your kids can later name their puppets and have a full-blown puppet show with them. This is the only activity that keeps the kids amused for hours.
Check out more crafts for kids here.
Source: intheplayroom.co.uk
Do you know the best kind of craft? Paper plate craft! There is nothing better than paper plate craft because it’s so EASY! With one pack of paper plates, you can make tons of things and keep your hyper toddlers occupied.
The best part is that you don’t even need to supervise them at one point. So, more than anything, paper plate craft encourages independent play.
Here’s how you can make a Blue Whale out of paper plates with your toddler. If you need paper plates to start, here’s where you can get a whole pack. You will also need googly eyes, get them here and use them for all your other crafts.
First, paint the plate blue. Once it’s dry, cut the button and for the tail and use spare blue paper to depict water coming out of the whale.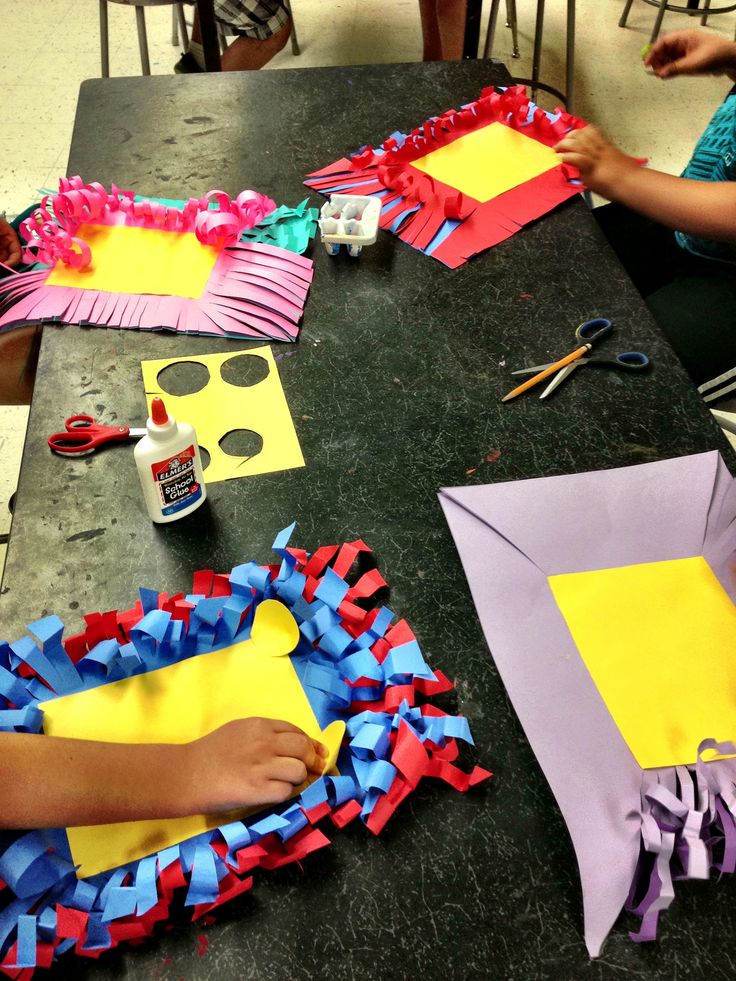
Add details with googly eyes and a black marker. See, how easy that was? Get your paper plate craft started today.
Source: simpleeverydaymom.com
Toddlers of all ages can enjoy this craft, whether you have a preschooler, pre k, or kindergarten child. It’s the perfect one for fall as the main element is an Acorn and a couple of other basic supplies.
With some colored brown paper, you can create a cute acorn girl or boy and even have a quick storytime using your acorn puppets. You will also need pipe cleaners for this one; click here to order a new pack if you are fresh out.
Using the template, trace and cut your colored paper in the shape of an acorn. Using your pipe cleaners, add details for hands and legs. Stick the eyes and the mouth to your acorn, and you are done.
Kids love sticking things with glue; it makes them feel grown-up working with glue and paper. It also helps develop their motor skills, so this one is a win-win.
Source: messylittlemonster.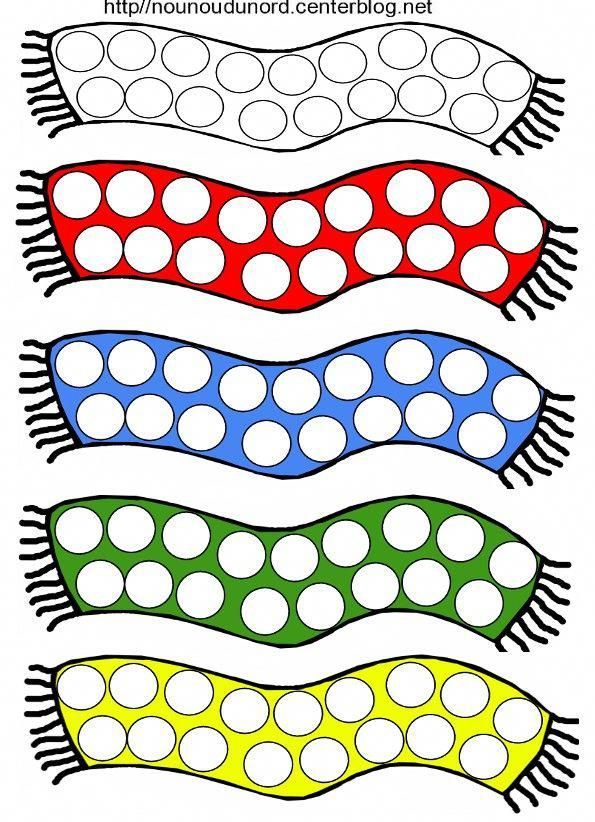 com
com
Sending the same kind of Christmas cards every year gets boring, so we came up with a new tradition, making DIY cards. Our Snow Globe is a Christmas favorite.
Download the template, and let’s get started. You will also need to print out a few pictures of your kids to use for the card. Paint the globe, add the photo and use Q-tips to add the snowy details.
Make one as a sample, and let your kids have fun with the rest. It’s a great family activity for the Christmas holidays.
Source: momsandcrafters.com
Crafting monster magnets is a fun activity for birthdays as well as a classroom activity. This one isn’t as frugal as the others but is still a good one as a one-time project.
To make this a fun and easy painting activity, you will need to let conventional paints go and order these paint sticks. They last long, so the cost is worth the buy. You can also get a small pack of 12 colors if you do this at home with a couple of kids. Order your paint sticks here.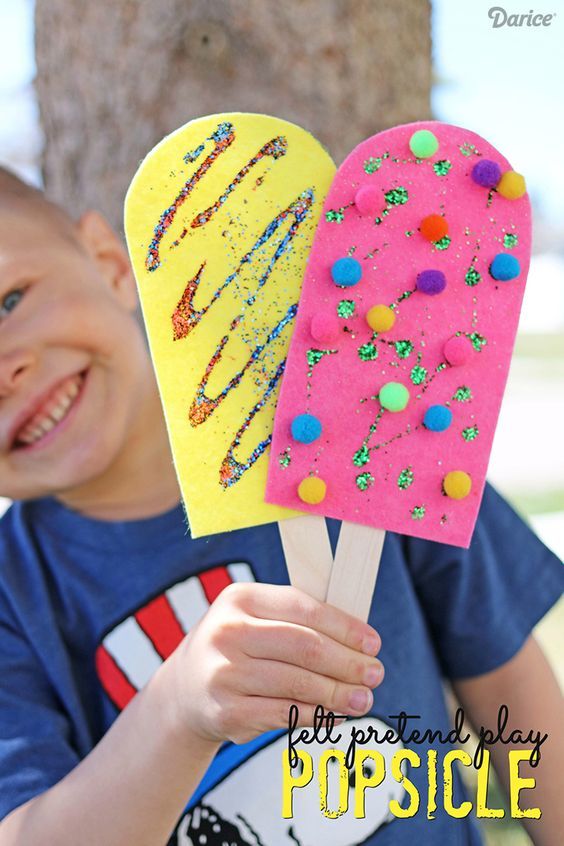
The dough needs to be prepared, shaped, and dried beforehand. You can also convert this into a two-day activity. Once you have the monster’s base, you can then paint and add all the details to it.
Source: mombrite.com
Ask any kid about the cutest animal on earth, and they will instantly say a Penguin. Hence, all kids love crafts that involve penguins.
This penguin craft is easy, fun, and needs very few supplies. You can do this on a cozy winter day with your kids. All you need is a pack of cotton balls, black and orange construction paper, and googly eyes.
Source: messforless.net
Seashell watercolor activity has a few benefits. It teaches your kids about recycling, and it’s also an activity that develops fine motor skills. Moreover, you can teach your kids color mixing with this fun activity.
While you can use any kind of paint on seashells, watercolor is suggested so the kids can use a free hand with the paints. You can use as many or as few colors you want for this activity.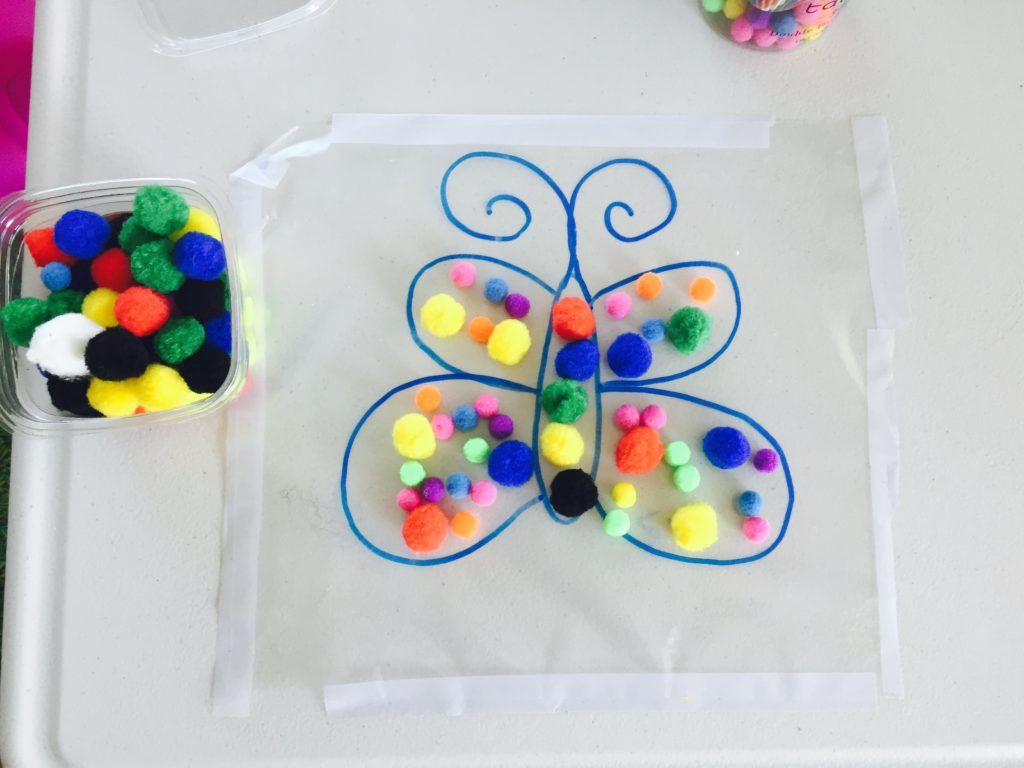
The only thing you will need is clean seashells apart from watercolors. If you aren’t going to the beach any time soon, you can order a pack of seashells here.
Dress your kids in old t-shirts and let them have fun while painting the shells.
Source: craftsbyamanda.com
Why is playdough the best activity supply? Because you can make it under 10 minutes and give your kid hours of imaginative sensory play.
This simple playdough can be made with six ingredients, and it will yield you hours of independent play. Isn’t this just the best thing in the world for moms with toddlers?
The best part about making this playdough is that you can find all the ingredients at home. The key ingredient is a cream of tartar that keeps the dough soft and supple for the kids to mold and have endless hours of fun.
Use food coloring to give your dough vibrant colors. Order your food colors here.
Source: mimosasandmotherhood.com
Many parents avoid painting activities with kids, as they know the cleaning will be too hard for them to handle. Hence, we have brought to your mess-free smush painting.
Now, not only can your kids have their paint time, but you can also relax around the paint.
You can do this craft for all holidays and themes, hearts for valentines, a Christmas tree for Christmas, and a rainbow for St. Patrick’s day.
To create this super sun smush activity, you need cardstock, paint, and ziplock bags. You can order your ziplock bags here.
Once you have all the supplies, you can add your cardstock to the ziplock, add paint and let your kids go wild, smushing the bag to create their art. Once they are done, take out the cardstock paper and let it dry.
Source: simpleeverydaymom.com
Are you planning an animal theme party for your kid’s birthday? We have just the perfect accessory for you. Frog headbands! These headbands are pretty easy to create if you have the template.
You can take inspiration from this one and create other animals too. To make the frog headband, you will need green cardstock and the template.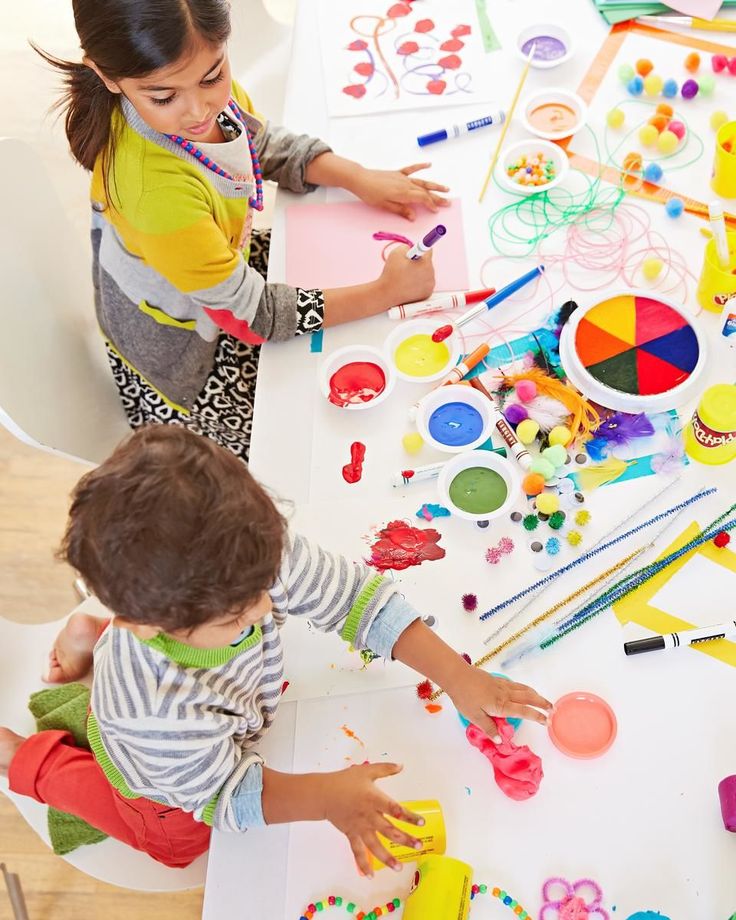 You can also get a pack of headband extenders so that your band fits all heads.
Just cut all the pieces neatly and glue the details; in under 10 minutes, your frog headband will be ready to use.
Source: taminglittlemonsters.com
Splat painting is such a fun activity for kids. Once they get the hang of it, they will ask you again and again. This can be an excellent treat for weekend fun.
It’s better if you do this out in the open, you wouldn’t want the paint to splatter the walls of your house. You will need acrylic paint and sponges for this activity.
Click here to order sponges. If you cut the sponges into smaller pieces, your kids will have more pieces to hammer.
Place your paint-soaked sponges on white cardstock paper and let the kids splat them with wooden spoons. Pretty soon, you will have a couple of masterpieces in your hand.
Source: dfwcrafts.com
Kids love stamping activities, but it’s hard buying stamps time and again, as toddlers are masters of losing their smaller toys.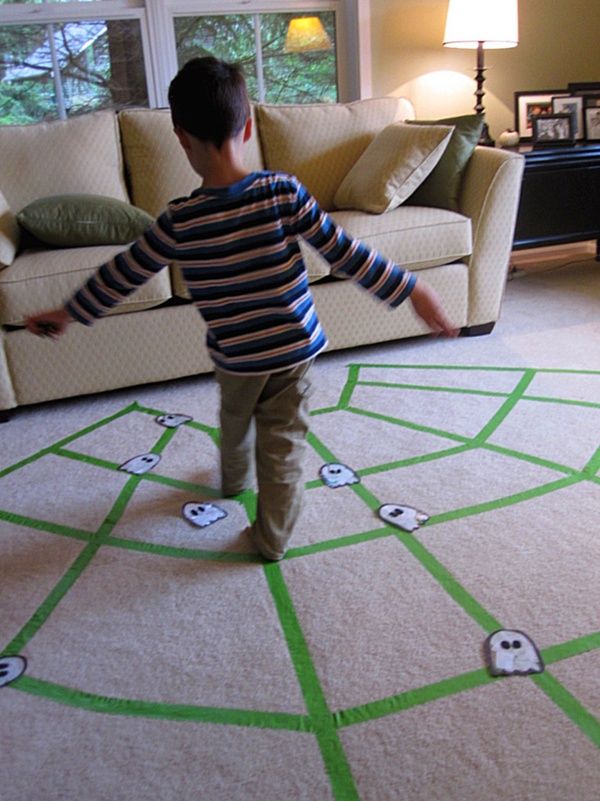 Don’t worry; we have the perfect solution. Let’s make some potato stamps.
Potato stamps are easy to create; all you need are some cookie cutters and paint. Give your kids the stamps and paint, and let them enjoy their newly acquired treasure.
You can order metal cookie cutters for this activity here. Wash and reuse them for other activities as well.
Source: taminglittlemonsters.com
Paper plate activities are the best ones ever. If you have a paper plate pack lying around, use it for this fantastic Dinosaur activity. If you don’t have paper plates, you can order a pack here.
This activity can be used to teach your kids about a lot of things like numbers, colors, Dinosaurs, as well as how to match.
Let your kids paint the clothespins; use wooden ones; they are easier to paint. You can order these here as well. Once they are all painted and dried, cut up the shape and help your kids add the clothespin as the legs of the dino.
You can add dots to your Dinosaur and use this as an opportunity to teach your kids counting.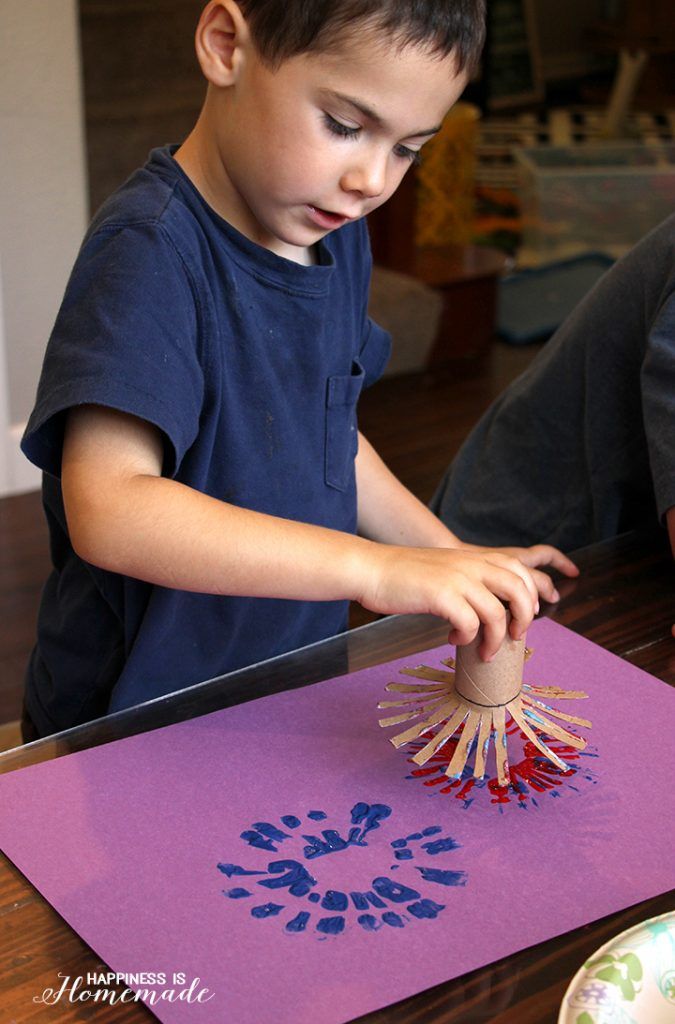 Using multiple colors for the legs can also help your kids match the colors.
Check out these paper crafts for kids for more inspiration.
Source: littleladoo.com
Whoever said science can’t be taught using fun craft activities hasn’t met us. With our Q-tip skeleton, you can help your kids learn different bones in the bone and have a great time while doing it.
You will need any dark-colored Cardstock, glue, and Q-Tips for your Q-tip skeleton. You can get white Q-tips here to make a realistic skeleton.
Paste your Q-tips following the bone structure of a human skeleton. Your kid will love this activity for so many reasons, and biology is the least of them.
Source: simplyfullofdelight.com
Painting with marble is the most fun way of painting. You can use any kind of paint for this one, but it’s best to use washable ones; click here to get Crayola Washable Paints.
Simply print out your copy of a large apple, stick it inside a flat box or a deep tray.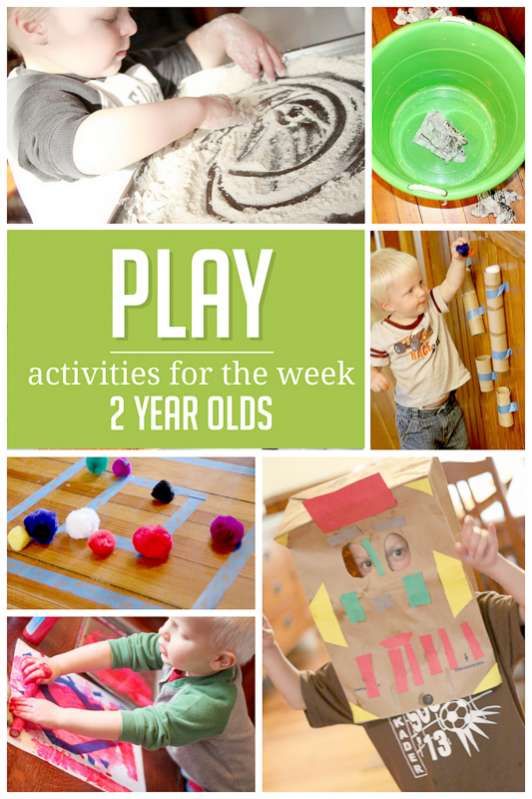 A box is light and easy to maneuver. You can cut any old cereal box for this craft.
Get some marbles, roll them in paint and let your kids roll the paint-soaked marbles on the apple. Teach them to go up/down and left/right to create fun patterns.
Once they get the hang of it, you will have a painted apple that even Picasso will be proud of. Check out more indoor activities for kids.
Source: goplaceswithkids.com
Toilet paper roll binoculars are great for all kinds of games; making them is itself a fun activity. If you are someone who feels these empty toilet rolls are useless, you need to try this one to know better.
Making these is the easiest; all you need is to download the template on cardstock paper and fold and cut as per the instructions. Once you have the holes for the rolls out, insert the roll and glue the whole thing together.
Trust me when I say this, your kids will love playing safari or bird watching with these animal binoculars.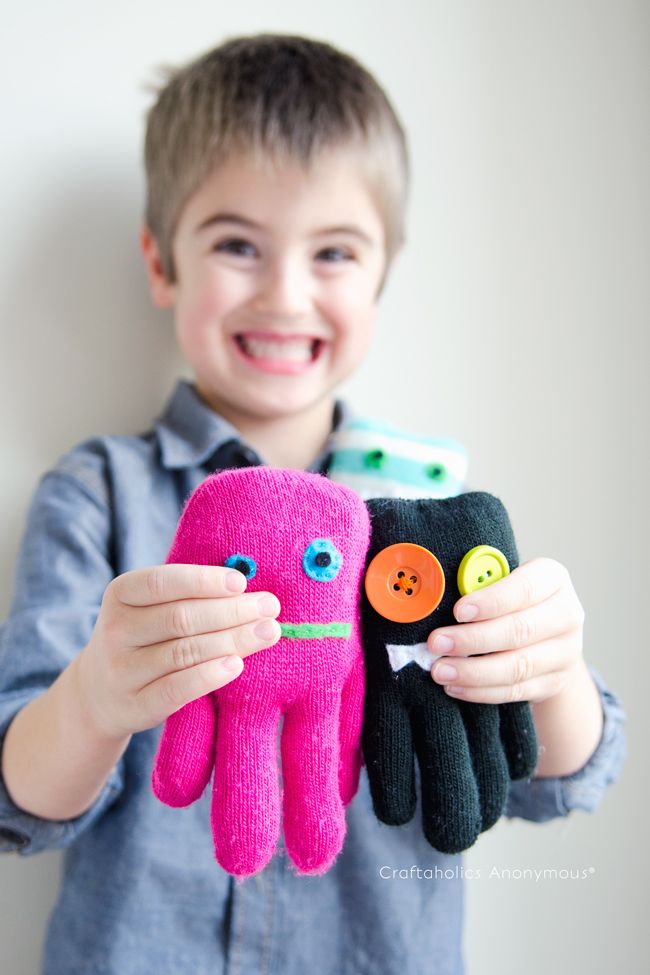 You never know; you might awaken the explorer in them.
Source: ottawamommyclub.ca
Do you have leftover crayons that are useless? If yes, we have just the perfect DIY for you. Make this with your kid and give them the new crayons to color with.
To make the DIY crayons, you will need some old crayons and silicone molds. If you need cute heart molds, you can get them here. Sort your crayons and add them to the molds and bake them to melt the crayons.
Once they settle, you will have brand new crayons ready to be used. This is a great activity to teach kids about different states of matter and how solid can change into liquid through heat.
Source: mamaofminis.com
This one’s for you if your kid loves zoo animals and has been super excited since the last zoo trip. Make zoo animals with colored construction paper and have a ton of fun with your kids.
This craft is ideal for preschoolers and toddlers both. Cut the shapes and details beforehand, and let your kids glue them on the right spot with your help.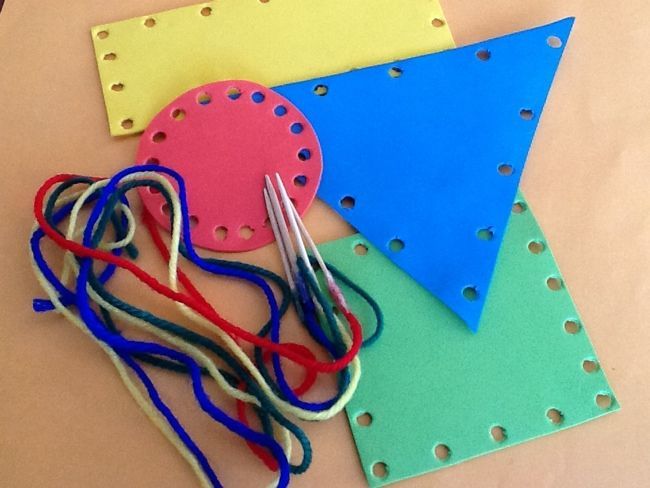 You can order construction paper here.
Source: bunnysgarden.com
I used to love painting rocks and using them as paperweights. Rock painting is a fun activity to do with your toddlers, and use the painted rocks as gifts to aunts, uncles, and teachers.
Apart from smooth rocks, you will need yellow and black paint as well as a sealer. You can get your sealer here. Paint your bee and allow the paint to dry. Once dried, use the sealer to seal the paint, and your bee paperweight is ready to be used or gifted.
Source: momscollab.com
Just like the bee, you can use any other inspiration to color your rocks. As per your desired activity, you can buy all sorts of stones. We prefer the smooth river ones; kids love painting these as well. Get your smooth river rocks here and paint your heart away.
Suppose you or your kids end up making a stunning one, seal and use it as a paperweight. You can use this activity as a birthday activity too.
Check out more rock painting ideas here.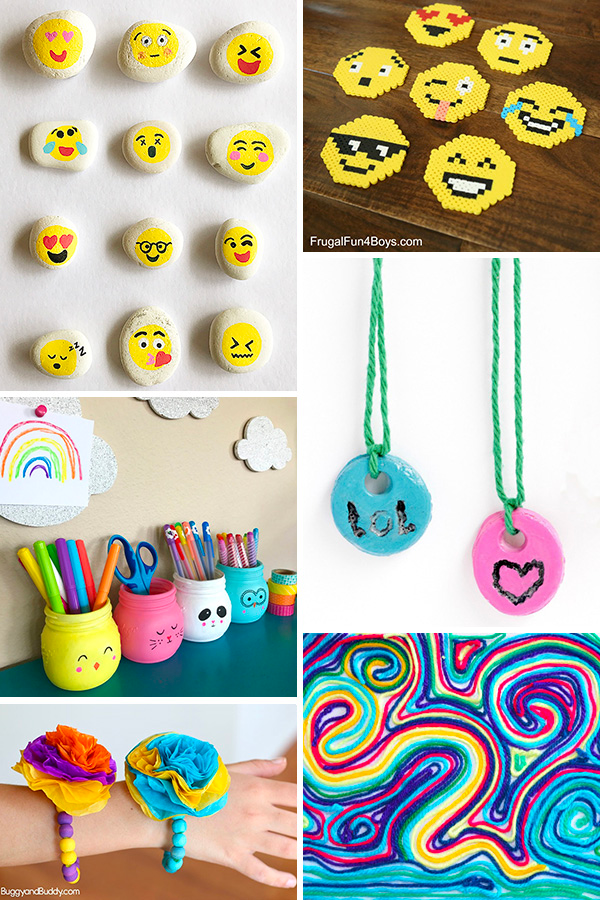
Source: liltigers.net
Are you looking for a fun and easy sensory activity for summer? Why not use water balloons to paint a summer masterpiece with your kids?
Kids love water balloons, add paint, and this activity will become their favorite summer activity. You will need a pack of balloons, order the perfect size here, some paints, and a muffin tray.
Dip your balloons in paint, and use that as a brush to paint your paper. Ask your kids to be gentle, for if the balloon pops, their painted paper will soak, and they will have to start all over again.
This is a great activity that helps develop motor skills as well as increase focus.
Source: littleladoo.com
Cut and paste crafts are lifesavers. You can use these crafts only to keep your kids occupied during the summer break but also to teach them a thing or two.
This walrus cut and paste craft is a great initiative to teach them about walrus and their habitat. Download the template, cut it, and with the help of your kids, paste it on a blank paper.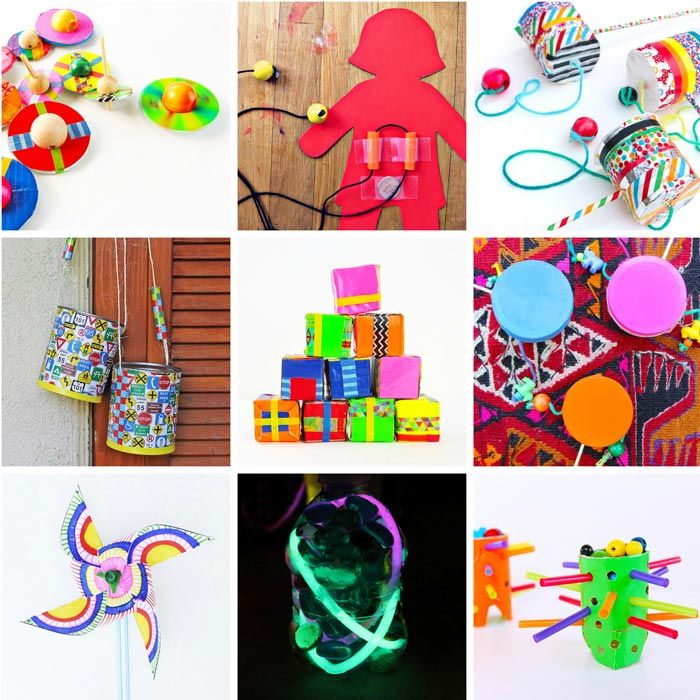
If you have older kids, you can just give them the pieces and let them figure out which piece goes where.
Source: taminglittlemonsters.com
And we are back to our cool paper plate crafts; this time, we are making watermelon. Paper plate crafts are a huge hit in our home because they encourage creativity and are also super fun. Did you know you can also promote self-expression with such crafts?
To start your watermelon paper plate craft, you will need a pack of paper plates, green and red paint, and some dried black beans. You can order your beans here.
Once you have your supplies, you are all set to make your watermelon craft. After the paint dries on your melon, glue the seeds to finish your art.
I am sure your kids will love showing off the watermelon at school.
Source: momsandcrafters.com
Teaching ABCs with craft is a fun learning activity. Here’s how you can make your letter series with Alphabet puppets to teach your kids.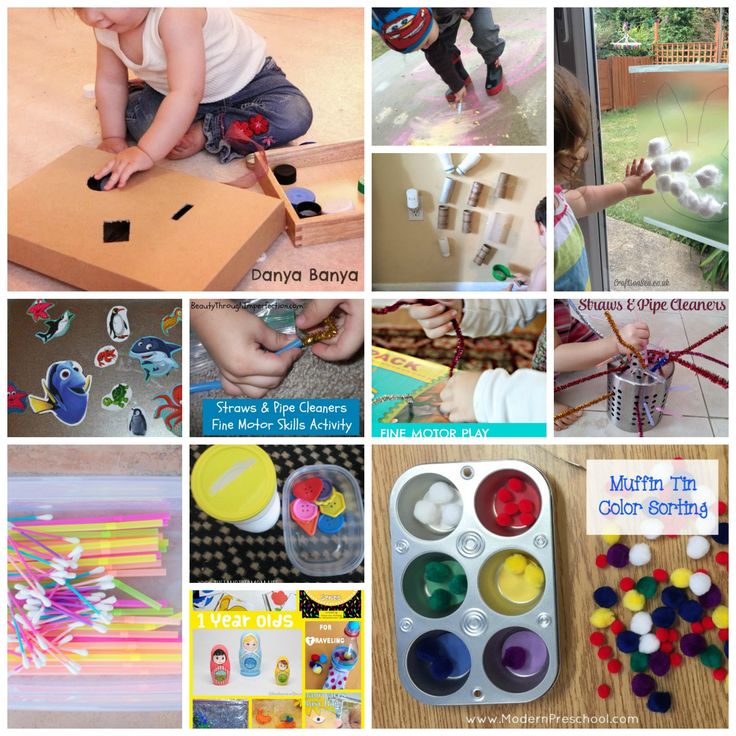
Print and paint your puppets, and stick them on jumbo craft sticks. If you don’t have the sticks, you get them here. These sticks will make your puppets look amazingly neat.
Source: messylittlemonster.com
Are you looking for ways to educate your kids about shapes? Well, check this cute under the sea shapes craft. Isn’t the sun the way to teach your kids the basic shapes?
For this craft, all you need are some scissors, colored construction paper, and glue. Cut all the shapes and spread them out in front of your kid. Now, help your kid recognize the shape, and make the craft.
Source: simpleeverydaymom.com
Have you seen Nemo with your kids? Did they love the clownfish in the movie? If they did, you should try this clown fish craft. If you haven’t seen the movie, this is the perfect time for some movie time and craft with your toddler.
To make the clownfish, you will need, Colored card stock, Googly eyes, and glue. We recommend Elmer’s School glue; order here.
Use the clownfish template to make your craft. Cut out all the parts and stick them on blue construction paper.
Lastly, let your kids name their new pet and hang it in their room.
DIY projects and crafts are not only fun, but they are also great for many other things like encouraging independent play, self-expression, and creativity.
You can also develop your toddler’s focus and fine motor skills through arts and crafts.
Prep Time 10 minutes
Active Time 20 minutes
Total Time 30 minutes
Materials
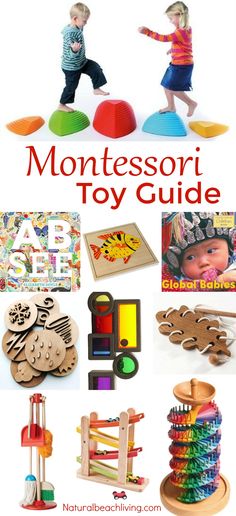
- 1. Fingerprint Glass Magnets
- 2. Rainbow Craft
- 3. Fish Craft
- 4. Tissue Paper Apple
- 5. Salt Dough
- 6. Sun Catcher
- 7. Pasta Easter Egg Craft
- 8. Penguin Craft
- 9.
 Melted Crayon Art
 - 10. Colour Wheel
- 11. Heart Printed Paper Bags
- 12. Magnet Craft
- 13. Spring Lamb Craft
- 14. Carrot
- 15. Comet Craft Activity
- 16. Spoon Puppet
- 17. Paper Plate Whale
- 18. Acorn
- 19. Snow Globe
- 20. Monster
- 21. Cotton Ball Penguin
- 22. Watercolour Seashells
- 23. Playdough
- 24. Smush Paintings
- 25. Frog Headband
- 26. Splat Painting
- 27. Potato Stamp Art
- 28. Paper Plate Dinosaur
- 29. Q Tip Skeleton
- 30.
 Marble Apple Painting
 - 31. Paper Tube Binoculars
- 32. DIY Crayons
- 33. Zoo Animals
- 34. Bumble Bee
- 35. Rock painting
- 36. Water Balloon Painting
- 37. Walrus
- 38. Paper Plate Watermelon
- 39. Alphabet Puppets
- 40. Under the Sea Shape
- 41. Clownfish
Instructions
- Choose the craft you like.
- Gather your tools and supplies.
- Get crafty with the kiddos!
21+ Crafts & Activities for 3 Year Olds
ByMichelle McInerney | MollyMoo Updated on
It’s a few years since my daughter was a 3 year old, but the memories of her enjoying independent play and my eavesdropping on her playroom chats are happily fresh in my mind.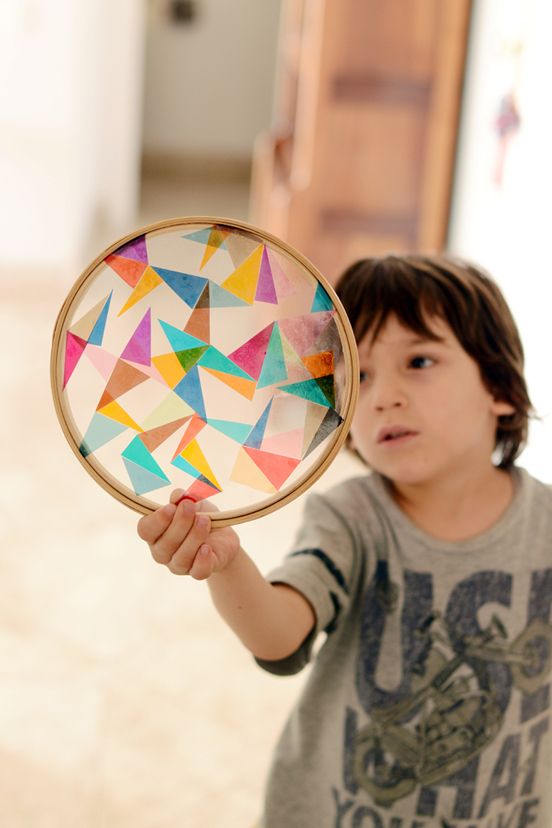 Being 3 is all about playing, being curious, having fun and ‘more’ playing! – watch them get busy with these 21 handpicked activities for 3 year olds, from easy art projects to pretend play.
Learning Activities for 3 Year Olds
FELT SHAPES BOARDA great quiet, calm-down activity to help engage little minds.
via kidsactivitiesblog
Making these creative little fishies is a really simple and fun craft “ perfect for home and the classroom.
via mollymoocrafts
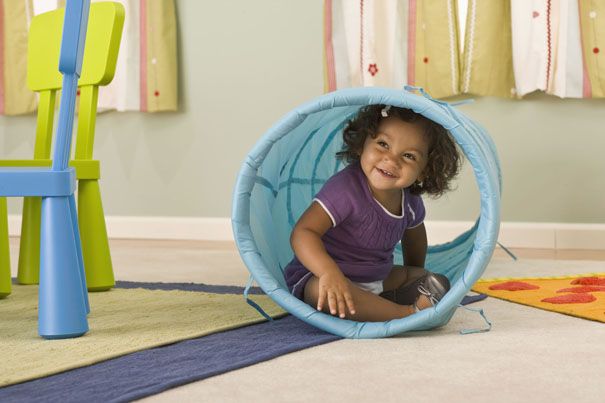
Brace yourselves because this is the most awesome activity – wonderful for sensory learning and the kids can get involved in making too.
via laughingkidslearn
Keep the kids busy while encoring creativity learning.
via powerfulmothering
Practicing fine motor skills with beads.
via Mom
Preschool Activities for 3 Year Olds
DIY T-SHIRTSKids love seeing their doodles explode with color
Just draw with sharpie markers, spray, air dry and wear.
via kidsactivitiesblog
With fruit loops, paper bags, packing peanuts and pipe cleaners – Oh how I love the packing peanut teeth!!
via PinkStripeySocks
Suuuuuper easie peasie made with craft sticks and sharpie markers. Place your sticks in a plastic bag until you’re ready to play again, and again and again!
via PinkStripeySocks
Things To Do With 3 Year Olds Indoors
SALT DOUGH MOSAIC TILESSalt dough is such a versatile and fun material. You can never run out of activities to do with it.
via lifelessonplans
A simple way to create a pretend city for your child to act out their imaginative stories.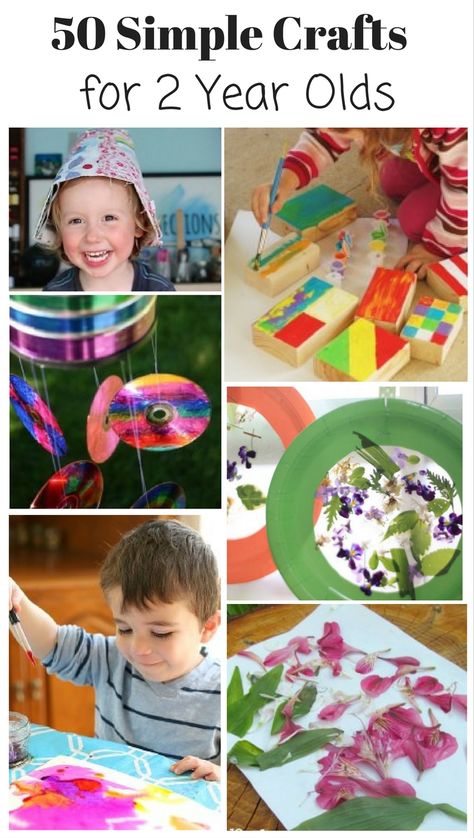
via kidsactivitiesblog
Fun for all with a roll of craft paper, a packet of crayons and the kitchen floor!
via mollymoocrafts
Crafts for 3 Year Olds with Glue
YARN FAMILY PORTRAITSDoodle a bald family on a piece of paper and let the kids get creative with yarn and a glue stick. Oh what fun!
via PinkStripeySocks
Incredibly cute, and incredibly easy to make with just toilet rolls and scraps of fabric. Crafts that inspire play – my favorite type of crafts.
via danyabanya
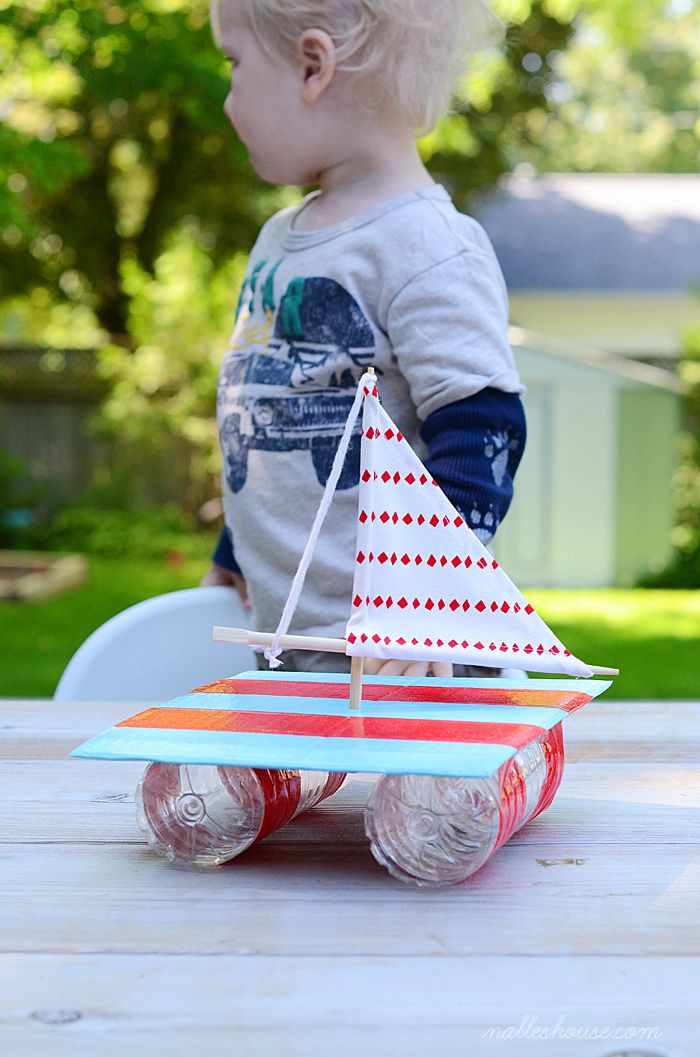
With egg cartons, lollipop sticks and a glue gun make a sturdy raft with a mast and crows nest for hours of imaginative play.
via mollymoocrafts
Don’t stop at one – make a whole little owl family.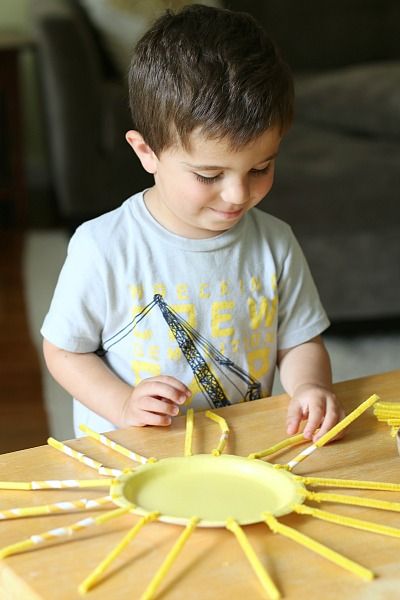
via kids activitiesblog
Painting Activities for 3 Year Olds
PAINTED STICK INSTRUMENTSKid painted sticks, decorated with yarn and a few beads and bells and your 3 year old will be making sweet music.
via Naturestore
Painting and science fun all in one.
via taminglittlemonsters
Painted card box box with button remote control – let teddy read the news!.
via mollymoocrafts
Fun Food Activities for Three Year Olds
CHOCOLATE ICE CREAM PLAY DOUGHThis homemade play dough recipe can jumpstart that journey to owning their own ice cream shop, becoming an ice cream pastry chef.
via kidsactivitiesblog
With some potatoes, paint, googly eyes and a few cotton buds you have all the necessary ingredients for creating goofy, scary or pretty monsters ¦ potato printing is fun in the kitchen.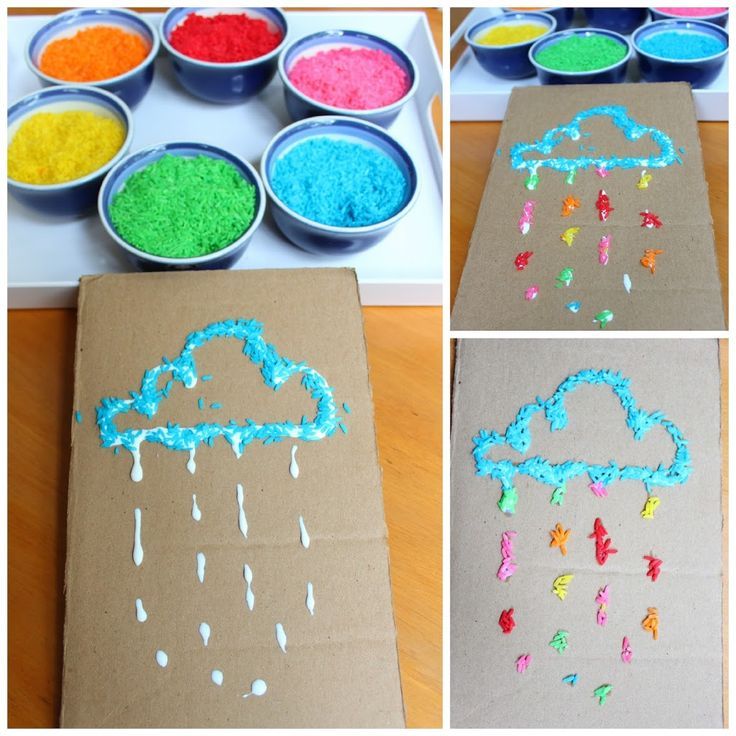
via mollymoocrafts
Mess-Free Fun Things To Do With 3 Year Olds
CARDBOARD BUNNY LACING CARDA simple cardboard bunny lacing card template to keep little hands busy and engaged.
via kidsactivitiesblog
Time to get your crafty pants on!
Michelle xx
Here Is More Learning Fun:
- Printable Christmas coloring pages
- Scholastic Book Club
- Want to make a rainbow puzzle for your toddler? We can help you make it!
- Car drawing
- Have you seen this Harry Potter Butterbeer recipe?
- Try this flower drawing easy activity
- Play to learn preschool
- 5 minute crafts for kids
- Help your little one hone their fine motor skills with these fun activities.
- A macaroni salad recipe that’s sure to please
- We made Arepa Con Queso in honor of the new hit movie Encanto
- Jokes for kids they’ll love!
- You’ll love at least one Puppy Chow Recipe out of these 30.
What fun activity for 3 year olds are you going to start with first?
Michelle McInerney | MollyMoo
Michelle McInerney, an Irish based graphic designer and mum of one, is the craft designer behind award winning blog MollyMooCrafts.com - a fun and colorful online world of unique and cute crafts for children and their parents.
Michelle can also be found on Facebook, Twitter, Instagram and Google+ and one of her favorite places to hang out is on Pinterest.
95 photos of the best ideas for developing children's creativity
The importance of early childhood development cannot be underestimated. As soon as the child begins to move independently, an endless process of learning and cognition begins, in which it will not be superfluous to help him.
Today our topic will be crafts for children 3 years old. We will talk about how needlework should be at this age, what is better to do and much more.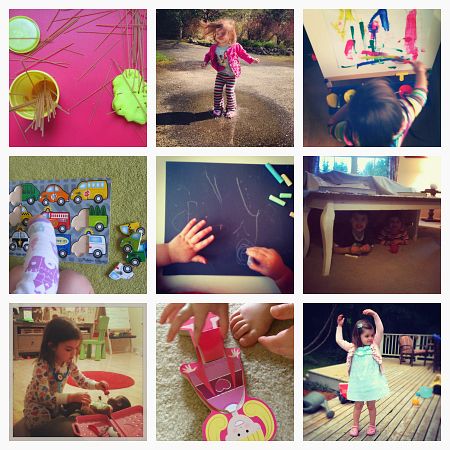
Review content:
- Office
- kindergarten
- thematic crafts
- Crafts aged 3-4 years
- Class
- Photos for 3 years
at this age should be trained only in the game form. This is because the baby should be interested in the process itself, he should be interested, and boring activities at this time do not attract them at all.
That's why crafts for 3-4 year olds should include an interesting workflow along with the right environment.
The preparation of the environment lies entirely with the parent, and it must be done in advance. The fact is that if you are distracted by various organizational details during the process itself, the child will be less focused on the lesson. As a result, we get a restless child, whose attention is also distracted by third-party things.
If you are planning to do appliqué work, you should prepare all the necessary details in advance.
At the same time, pay attention to scissors, paints and glue.
Scissors should be purchased with child protection. Paints should be natural, because we know how kids love to taste everything.
The same story applies to the adhesive base - bad adhesive can harm not only by direct contact, but also by airborne droplets.
If you want a child at the age of 3 to perceive children's crafts as a regular activity with their own rules, you need to allocate a specific place for this, which he will associate with the appropriate mood.
A small table in the nursery is fine for this, but you will find it more comfortable to do it in an armchair or sofa. A good choice would be a place on the floor, on a rug, especially if you do not want to stain the furniture.
If you plan to work with paint, it will not be superfluous to find or buy a simple film with which you will not constantly worry that the baby will now paint not only paper, but also his favorite carpet.
Let's go back to the moment where children love to try everything. If you want to make, for example, an application with different details, and you know that your child loves to put everything in his mouth, immediately make sure that small, especially hard objects, like buttons, are not involved in the workflow.
Kindergarten
Depending on the kindergarten, the school may start practicing creative activities such as needlework from an early age. Sometimes children try to make some of them at home, and then they bring them and show them to friends.
Since 3-4 years of age, when children are already quite active in talking, there is an advanced communication between children, which also concerns what they do.
If you are doing crafts with your child in kindergarten at 3 years old, do not forget that you should not expect very fast results, even if other children do everything a little faster.
In fact, at this age, not only the upbringing of the child takes place, but also the parents, because their behavior always leaves its mark on the development of the baby.
Themed crafts
One way to get your child's attention is to make crafts that will be associated with the coming holidays or the weather outside.
Therefore, many parents try to make crafts for the New Year with their children at the age of 3. Depending on what happens, they can decorate the New Year tree, which will be very important for the child.
In this way, the child will learn to do something with his own hands to please himself or make a gift to another person, including you.
Crafts at the age of 3-4 years
You already know that at this age the child learns in a playful manner. This applies to both mental development and physical development, because fine motor skills of the hands are very important in life.
Do not forget that if you do crafts with your child at the age of 3, you not only help him learn to do something, but also develop your relationships, including trust.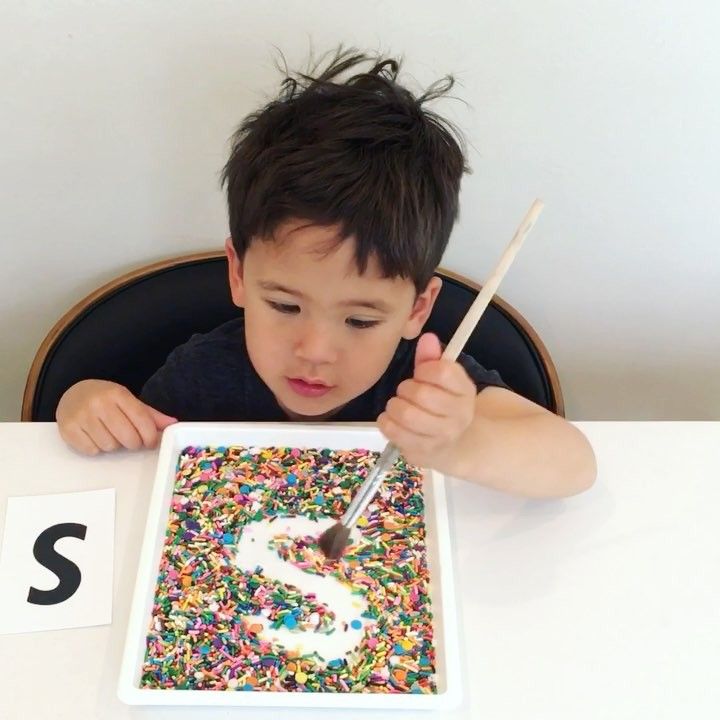
To do this, you must make sure that the child likes the activity, and if he does not like it, choose a new one.
At the same time, if the child sees that you rejoice in his success with him, he will also trust you more.
Choice of activity
If you don't know what crafts to do for kids 3 years old, then you should gradually try everything - applications, drawing, working with plasticine and much more.
Each lesson will have a positive effect on the development of the baby's memory, just like fine motor skills of the hands, but most importantly - you can find what he likes the most.
Another interesting activity that attracts almost any child is just finger painting.
Partly because the process turns out to be especially interactive, and the child immediately sees the result of his work, which is why there is a special involvement.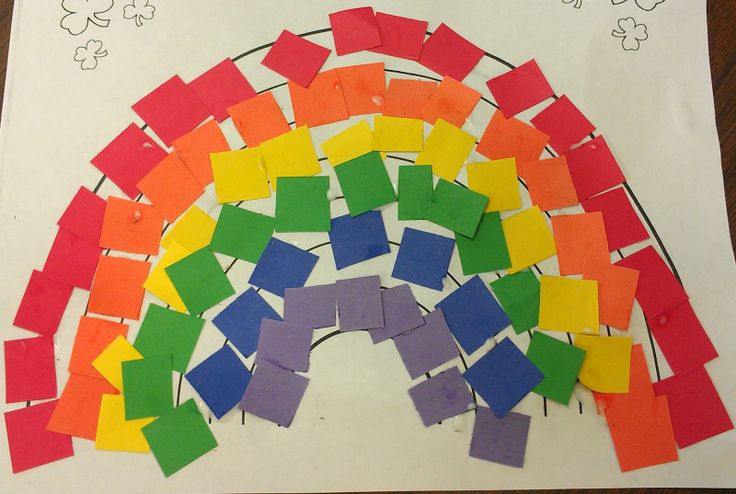
Photo crafts for 3 years old
Help the project, share it on social networks ;)
42 crafts FOR KIDS (for children 1-3 years old).
Good afternoon. Today I publish a piggy bank of ideas for children's crafts.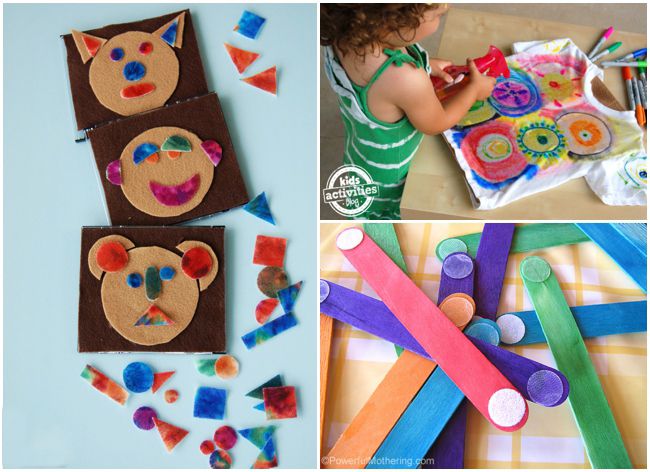 I think this will not be the last article of crafts for the little ones, so stay tuned - there will be a lot of new things ahead. So that all ideas are systematized (as I like), I decided to sort all the crafts by age. So it will be convenient for you to choose a craft - according to the age capabilities of your child. The works collected in this article are crafts for the little ones, they are easy to implement and understandable to a baby from 1 to 2 years old. Here you will find creative tasks in which even a small child can take an active part.
All the crafts for babies I found I sorted into 3 bags:
- Crafts that need paint.
- Simple paper crafts .
- Crafts-appliques from cotton pads.
- Crafts-experiments (experiments available for kids).
So it will be easier for you to choose a craft for the material that you have available.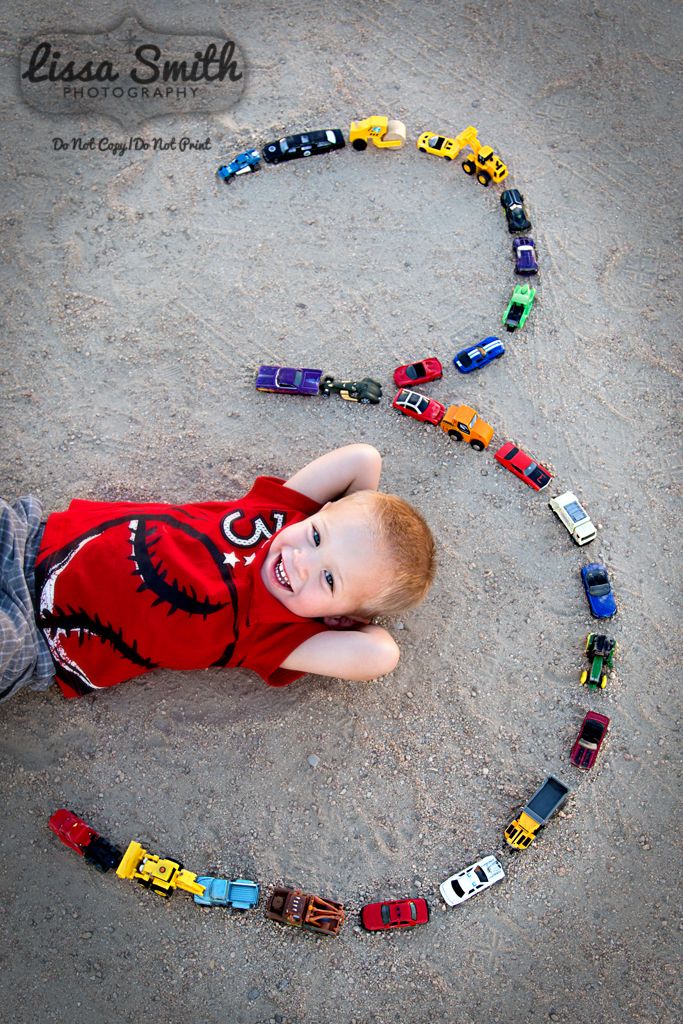 Even if there is no colored paper, you can make crafts from a newspaper, from cotton pads (which are always in your mother's cosmetic bag), from toilet paper or table napkins, etc.
So let's get started.
PACKAGE OF CRAFTS #1
(for the little ones)
WORKING WITH PAINT.
Little children 1-2 years old love to work with paints. Parents don't always love. And children always. It is necessary to give children paint as often as possible. Don't be lazy. Create an environment where the child can work without you worrying about the cleanliness of the furniture. Allocate a corner for him in the kitchen and separate clothes - the one that you don’t mind getting dirty - call it an artist’s costume and always put on this set before painting work.
Now I will show 5 interesting painting techniques suitable for 1-2 year olds.
First idea
finger crafts.
Below is an example of the simplest craft for children who are not even 1 year old. It is good to do such a craft in May-June, when the baby has already enthusiastically encountered the first fluffy dandelions in his life. The child will be happy to create a recognizable image of a familiar flower.
In the lids of jars (flat saucers, plates from flower pots) we dilute the paint (recipe below) .
Your little one dips his finger into the paint and points at the picture . On a sheet of paper, you should already have a ROUND BORDER drawn - the circle of a dandelion (the circle of the lamb's body in another craft work). The child should not go beyond this border. For a baby 1-2 years old, this is also a difficult task - but he must cope.
Children really like to repeat the same action. Return to the same activity repeatedly. (That's why they love commercials. That's why they love having the same books read to them, or playing the same cartoon CD).
Therefore, you can offer this finger painting method in different new craft ideas .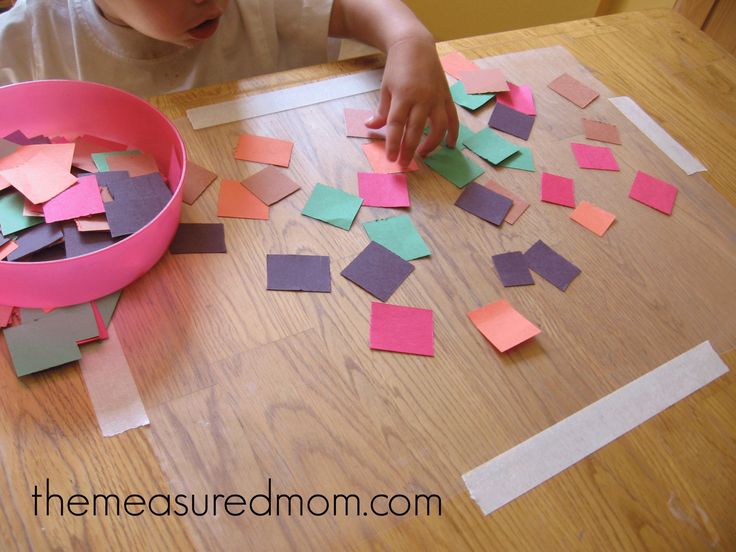 For example, an aquarium with fish. You make such a craft yourself, show the child - MANDATORY !!! there must be a visual sample craft, otherwise the child will not understand what to strive for. And on the second sheet - already for the child - draw the silhouette of an empty aquarium. The child looks at the sample and he has an image of the result that he should get. And then he will understand what needs to be done - First, you poke with your hand and show how to line up prints in even rows.
PAINT for such work may be finger-type. Or gouache. Watercolor will not work.
HOW TO MAKE FINGER PAINT.
Finger paint can be MADE YOURSELF - for this we mix ordinary gouache with PVA glue. So the paint becomes much larger, and the gouache will last longer. We mix the paint on the palette - this is most convenient. They put a drop of gouache of different colors on the palette and then poured PVA glue on each drop and mixed it with toothpicks.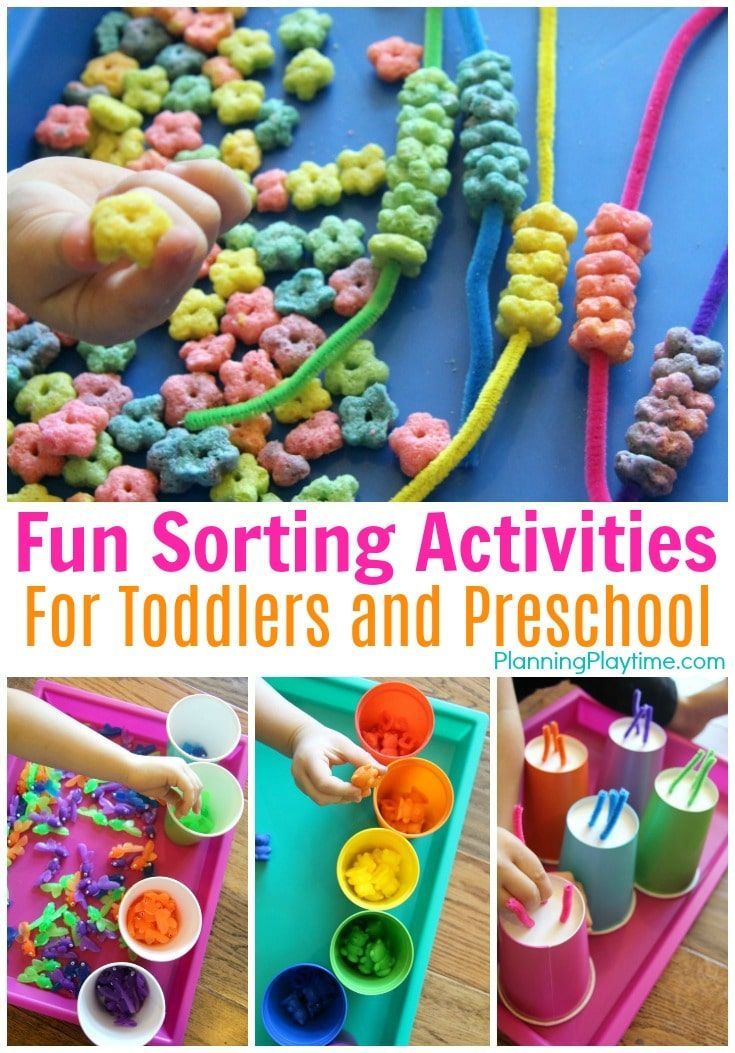 Got a full palette of bright finger paints. Another advantage is that they dry better and then after drying the paint remains bright and thick in color.
Plus, I'll tell you a SECRET - PVA glue is best bought in hardware stores. There it is sold in liter buckets. The ruble jumps, so I’ll say in dollars - for a dollar and a half you buy a liter of PVA glue in a hardware store - or for a dollar and a half you buy 3 small jars of school PVA glue (only 45 grams). Compare 45 grams and 1000 grams for the same money. Construction PVA and stationery PVA are no different from each other - they have the same chemical composition.
It is also good to draw the crown of a tree with this finger method. With leaves. Or one branch. You draw a branch, and a child draws leaves on a branch. And the birds too. You only draw the legs, beaks and eyes. It turns out a beautiful and affordable craft for the smallest children.
You can paint the whole palm with paint at once and make an imprint of a goldfish in an aquarium or craft an owl on a tree branch.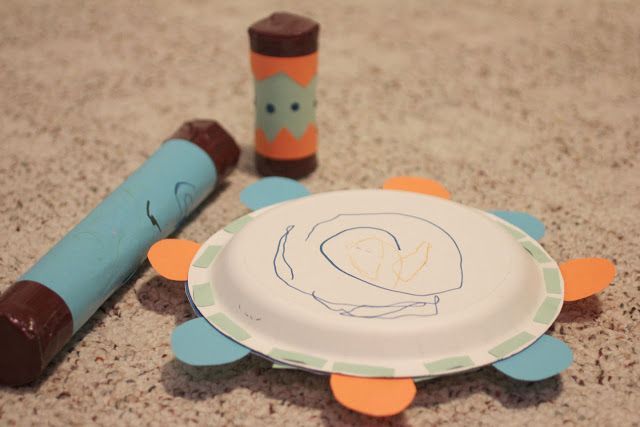 Eyes can be glued directly onto the paint (PVA glue has already been added to it - everything sticks perfectly).
Green algae can be attached to such a fish (also using a finger method). And at the bottom to poke gray blue and brown pebble prints.
Later I will write a separate article on handprint crafts. This is a very large topic, and I want to understand it in detail and fully.
Crafts with paints
For the little ones
potato stamps.
From a potato (or an apple, or a carrot - it is long and easy to hold for a child of 2 years old) we make a curly seal stamp. We drip gouache on the bottom of the plate - pour a little PVA glue on the gouache - stir everything into a thick colored slurry. If desired, you can add a little flour to the paint - so the paint will be thicker and the prints from it will be greasy and juicy.
Dip the figured cut of the potato into the paint. And we leave a colorful imprint on paper. Below is a craft idea with beautiful tulips, a picture with owls on a branch.
You can also cut the stamp out of a piece of foam sponge for washing dishes. craft cocktail
Cut out the outline of a glass from cardboard. With a square sponge we make imprints of ice cubes in a cocktail. We glue the straw (on PVA glue or on plasticine). And on top we attach a slice of lemon - it can be a dried lemon. Or application-lemon from colored paper.
Third idea
For children 1-2 years old
pompon stamps.
And here is a craft for a child of one year old, where pompom and a clothespin holder are used as a stamp. Remember that we mix gouache with PVA glue - this is how we achieve the thickness of the paint and, in addition, such glue paint can stick additional attributes on itself, in the form of a shiny craft or paper applications-inserts.
If you don't have store-bought pompoms, you can make your own. Here is a simple way below: knitting threads are wound around the fork. Pass the ends of the thread between the middle teeth and tightly tie a knot. We put scissors under the fork and make a cut - and on the other hand we also cut a bunch of threads. It turns out a pompom - we take a clothespin, it will be a holder for a pompom.
What craft ideas can be made with pom-pom stamps:
- yellow prints of chickens , and any other chicks in the nest (since the paint is mixed with PVA glue, you can immediately put a beak on a wet print, paper eyes - they will instantly stick).
- colorful ice cream balls , in a vase you have drawn,
- caterpillar from a chain of round imprints.
And for the new year, your little child 1-2 years old can independently, with his children's hands, make just such a Christmas tree - with bright New Year's balls.
These pom poms on clothespins after crafts should be washed from paint and dried in a fluffy state.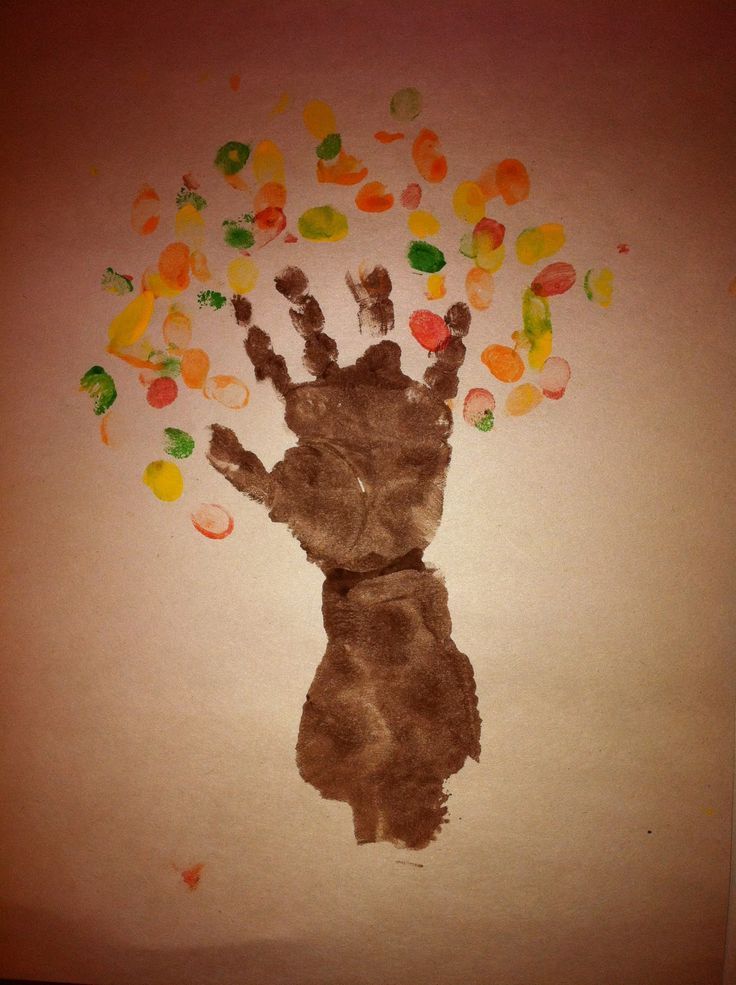 And they will serve you more than once to create simple and bright crafts for young children.
Fourth idea
toilet roll stencils.
You can also make interesting stamps out of used toilet paper rolls. You can cut the top of the roll into strips and push the rays in different directions. Such a stamp is suitable for creating crafts with bright aster flowers, or crafts for Victory Day - such an imprint looks like a festive fireworks display.
By bending the round socket of the roll, you can create stamps with contours of any geometric shapes. Children 1-2 years old will love to draw patterns using these ready-made templates.
DIY ideas
for 1-2 year olds
wax paintings.
All children love this technique. Because the picture on such a craft appears by itself. Here's how it happens.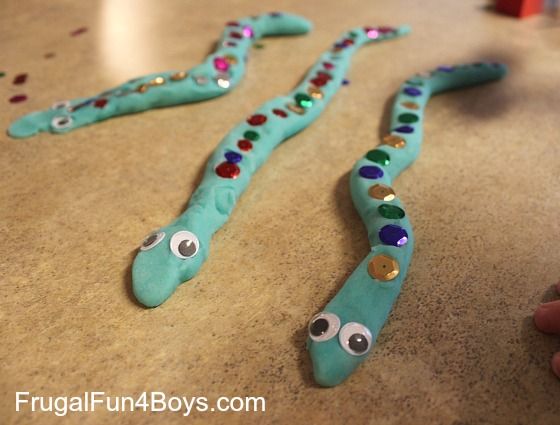 The child receives a blank white sheet, on which nothing seems to be drawn. The kid dips the brush into the paint, begins to paint over the sheet - and a picture appears on it - the white outlines of an interesting contour. For example, web. It remains to draw only a spider on a thread.
The only job of the educator (or parent) is to draw in advance the outlines of future hidden objects with wax. Let's see how it's done.
How to make such a picture. We take a clean sheet and put it on a well-lit table so that we ourselves can see the lines that we will draw with a colorless candle fragment. A light-colored paraffin or wax candle is suitable. White wax crayon is also suitable - but only the one with more fat.
We draw with a piece of wax (or paraffin), for example, underwater inhabitants - jellyfish, whales, shrimps, turtles.
Then we give this piece of paper to the child. In a plate we mix paints of different shades of the sea depths (blue, purple, blue, black) and allow the child to paint over this white sheet as he wants.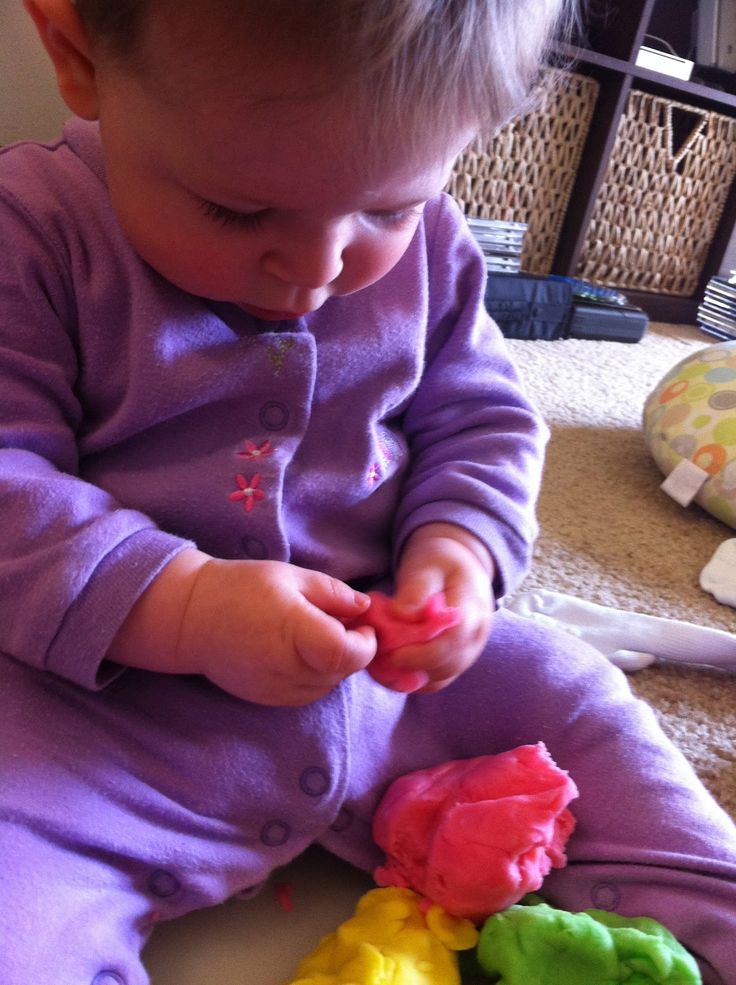 We say that then he will know who lives there. And as you paint over under the brush of a small artist, the inhabitants of the water kingdom come to life.
What craft ideas for young children can be realized with this WAX TECHNIQUE.
- A white bunny under a snowy Christmas tree.
- A white cat sitting on a fence on a twilight evening.
- White snowflakes against a bright blue sky.
- Frosty white patterns on a dark window.
- White snowman and snowdrifts on a blue winter evening.
Implement the proposed options, come up with your own crafts for kids. And enjoy co-creation. Early childhood is a golden age. Then you will remember these evenings, together shoulder to shoulder, hands stained with paint and diligent sniffing and a long wait for dad, who is unaware of such a chic surprise.
PACKAGE OF IDEAS №2
crafts-appliques
For children 1 and 2 years old.
The younger the child, the easier the task should be for him.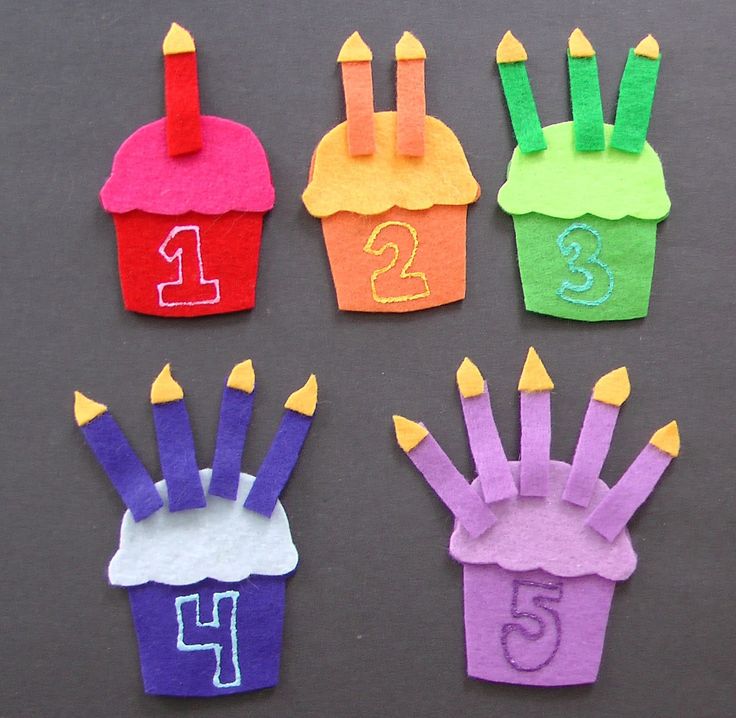 But in every simple task there are difficult moments - there are then mental task , which the child should try to do himself .
The child is still poorly oriented in the world of verbal instructions, so explaining to him only by speech is not enough. You need it yourself show the dependence of things (applique details on each other) and be sure to show what errors can be .
Do it yourself, then break it down and invite your child to help you assemble the craft again.
For example, here is in the photo below we see the task of creating a caterpillar application. Here you yourself drew the bend of the future caterpillar - and the child was given the task of making not an arbitrary caterpillar - but putting all the details on this line. First, do everything together with it - without glue.
Then destroy the craft and pretend to forget how to do it right - the child will be happy to help you "remember" how to put the pieces.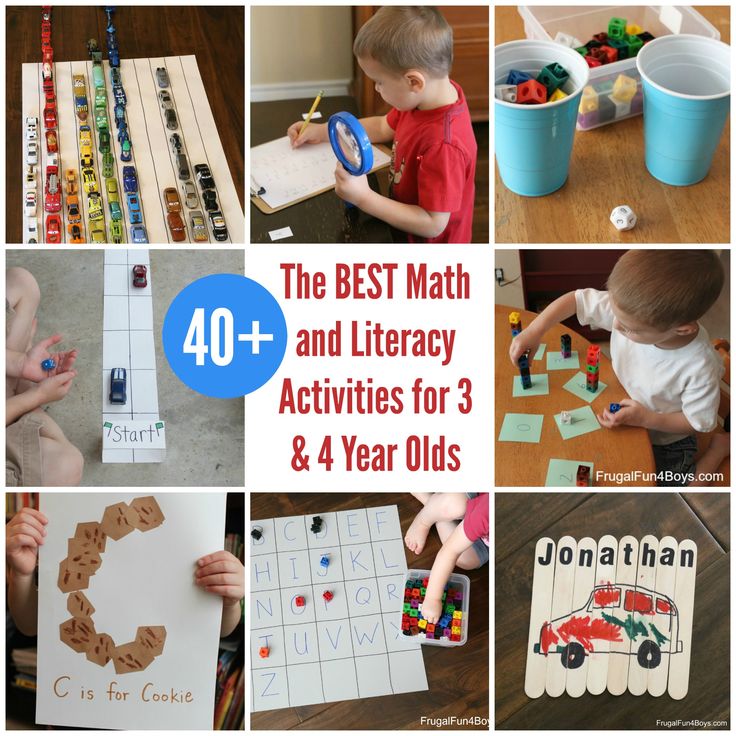
Children 1-2 years old like MULTILAYER appliqués - where layers of colored figurines overlap each other. Like, for example, circles or hearts on the snail craft from the photo below.
Small children also love appliqués with elements of paper discs BENT IN HALF. The halves can be the ears of a dog or a pig, or they can be the halves of a ladybug or a cockchafer.
The child loves to stack VOLUME to complement the design of a semi-finished craft. For example, you already have a silhouette of a sheep pasted on a green background. And there are lumped paper lumps. The task of the child is to “dress” the sheep so that it does not freeze.
You can stick a mane of brown thread on a cardboard horse, feathers on a mother hen from white thread bundles.
Always play craft, talk about the character. Here the child has already been offered a ready-made hedgehog, he came to visit, he must be treated with apples.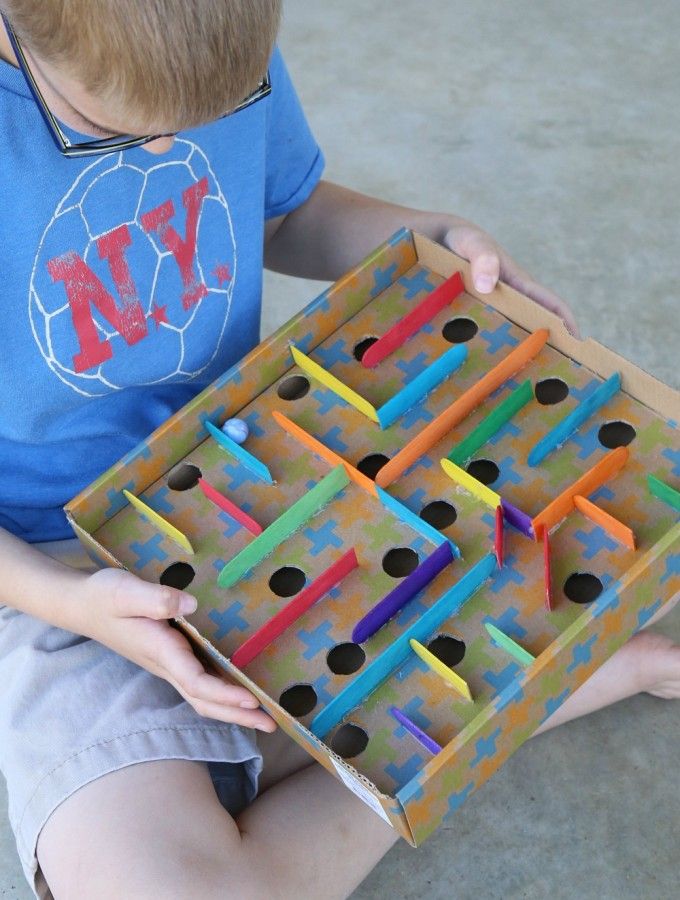 Only as he carries them away, he does not have thorns to hook the apples. The task of the child is to add thorns to the hedgehog (from chopped straw, from chopped threads, dry grass). And stick apples on these prickly places - gifts to the hedgehog.
Small children 1-2 years old should be offered small-sized crafts - otherwise they will get tired of stacking so many modules (pellets or scraps) on the silhouette of crafts. Therefore, work in pairs with children, help those who are lagging behind - praise and encourage - this will stimulate children to work with great pleasure and creative passion.
CUTTING APPLICATION is also very popular with young children. Children 1-2 years old love to tear paper into pieces. You can pick long strips, and the child himself will tear each strip into pieces. And he will make, for example, such a cute owl. The smaller the child, the easier the paper should tear. It is better to crumple the paper in advance - then smooth it out, along the washed lines, the paper will be easier to break off in children's hands.
Then you can teach your baby to tear long narrow strips - pull the paper long and slowly. And then make grass out of the strips - and place ants on the grass (3 fingerprints in black paint). Or populate the grass with ladybugs.
THE THEME OF CHILDREN'S CRAFTS at this age should be close to the child. He likes everything small, cute (birds, goosebumps, ladybugs) and sweet treats - ice cream, sweets, cupcakes made of paper.
And at the age of 1-2 years, children have a very strong connection with their mother. Therefore, crafts with the theme of MOTHERHOOD “mom and baby” are very important and interesting for him - a chicken and chickens, a mother bird and a chick, an elephant and a baby elephant, etc.
PACKAGE OF IDEAS №3
Crafts for children 1-2 years old
from cotton pads.
Delicate crafts for babies, made from a soft fluffy cotton pad. There's a whole nest of chicks right there. Cotton wool is easily glued to PVA glue. We put a puddle of glue on the paper and lay the disk on top.
Discs are easy to paint with gouache or watercolor (foam sponge). Dry overnight and you can do crafts.
Elements - comb and beak can be added from plasticine. You yourself roll the plasticine balls and your baby sticks them by pressing with your finger, then you squeeze them yourself.
You can add any elements to colored paper cotton pads and finish drawing the legs.
Here is a white bunny made of cotton pads - round and half. His eyes and nose are also made of plasticine. And a spaghetti pasta mustache.
You can add any natural material to your joint appliqué craft.
Any shape can be cut from the cotton pad. Here, with ordinary scissors, they cut out the teeth, gave the disk an oval shape and got a snowdrop flower. Delicate spring craft for kids 1-2 years old.
These are the craft ideas for small children 1-2 years old I have collected in this article.