Flour dough craft
The Best Salt Dough (for Ornaments and Crafting!) to Make with the Kids
Learn how to make classic salt dough with the kids, with baking, painting, and storage info. This method is straight forward, easy, and thorough—and they a perfect kids holiday gift for grandparents, teachers, and loved ones!
Salt Dough
This salt dough is a staple of childhood and I love doing this Christmas activity with my kids each year—and throughout the rest of the year too! We love to make salt dough handprints, ornaments, and sometimes, just any old shape they want to. It’s an easy project that we can do together—and then share as kid-made holiday gifts, keepsakes, or house decorations.
Salt Dough Recipe
Making salt dough at home is as easy as combining three pantry staples together into a dough. It’s fairly fool proof (as long as you follow the measurements!) and is a recipe that even little kids can help make.
Ingredients in Salt Dough
To make this recipe, you’ll need:
- table salt
- all-purpose flour
- water
TIP: That’s it! (I buy store brand, cheap flour for this since project to keep it very budget-friendly. )
How to Make Salt Dough Ornaments Step-by-Step
Here’s a look at how to make the dough for this salt dough. Scroll down to the bottom of the post for the full information.
- Measure out the flour and water. (photo 1)
- Add the water. (photo 2)
- Stir with a wooden spoon. (photo 3)
- Keep stirring until the dough is mostly together and is hard to stir any longer. (photo 4)
- Knead a few times with hands to bring the dough together. (photo 5)
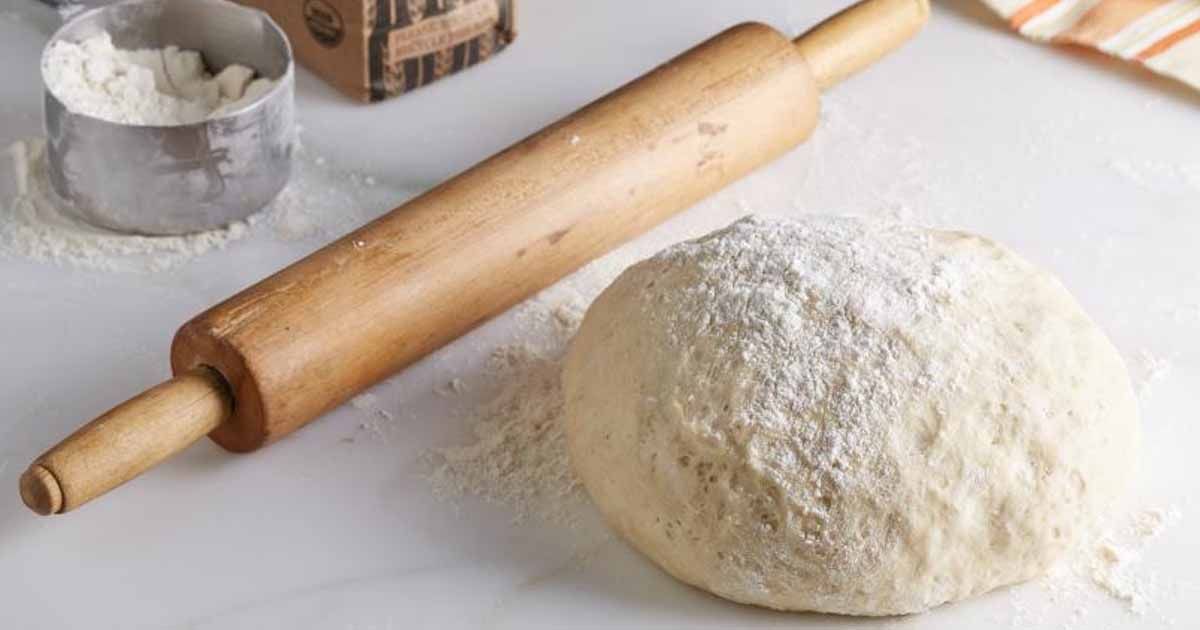
- Place dough between two pieces of parchment paper and roll out. (photo 6)
TIP: You can divide the dough in sections so multiple kids can have their own dough to work with.
How to Cut Out, Bake and Decorate Salt Dough Ornaments
Once you start rolling, here’s a look at what will follow if you want to make these into ornaments. (Skip the hole poking if you want to just make these as shapes for the kids to paint.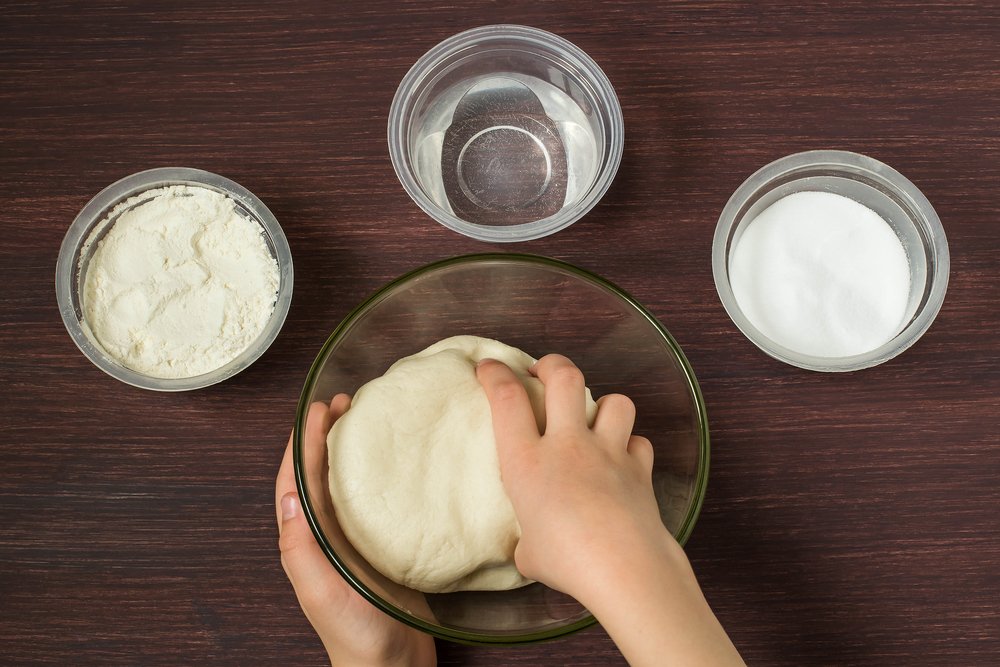 )
)
- Roll out, changing directions occasionally, until about 1/4-inch thick. (This may not get precise if you’re working with kids and that’s okay!) (photo 1)
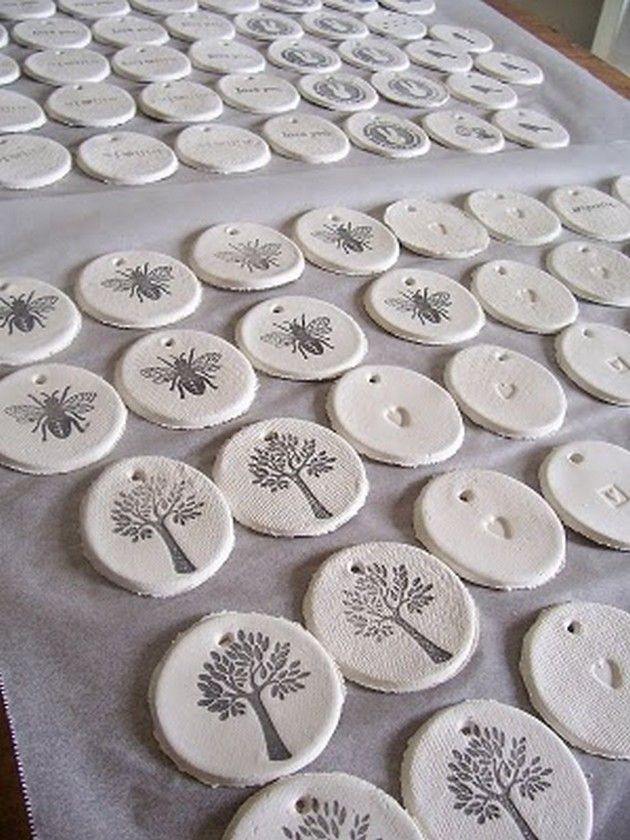
- Stamp cookie cutters. (photo 2)
- Remove the dough around the shapes, then either transfer the whole piece of parchment paper to a cookie sheet OR transfer just the shapes to a parchment-lined cookie sheet. (photo 3)
- Poke holes so you have a place for a string to hang as ornaments. (photo 4)
- Press in a hand to make a handprint, if desired. (photo 5)
- Bake, let cool and decorate! (photo 6)
TIP: Re-roll any remaining dough after Step 3 here to make additional ornaments.
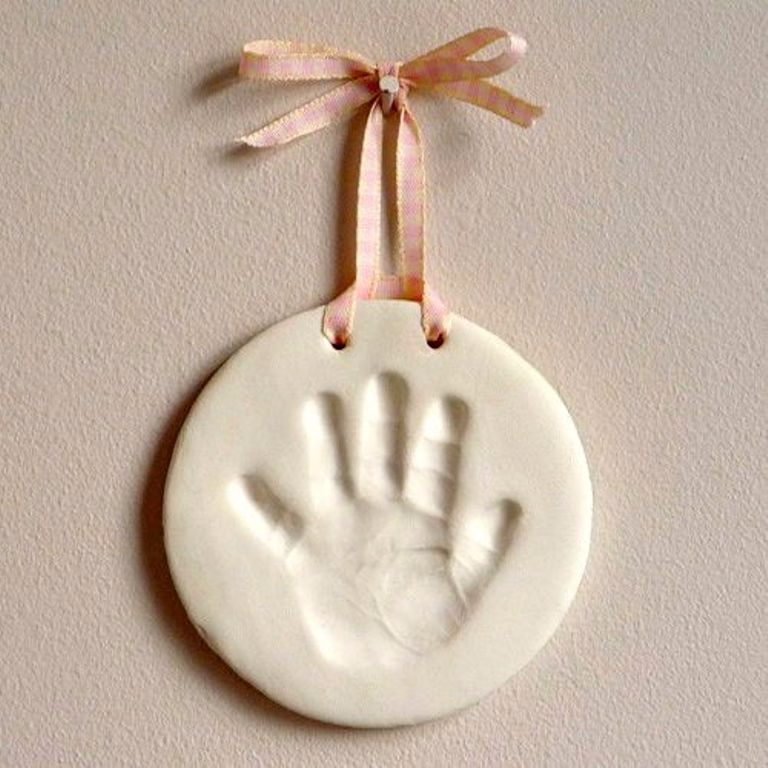
Salt Dough Handprint Ornament
Capturing a handprint in salt dough is a perfect grandparent gift, or a keepsake ornament to make for your own tree. I love pulling out our little collection year after year. Know that getting a good print may take a few tries if doing a baby’s hand!
TIP: Check the size of your round cookie cutter against your child’s hand to make sure that it’s big enough.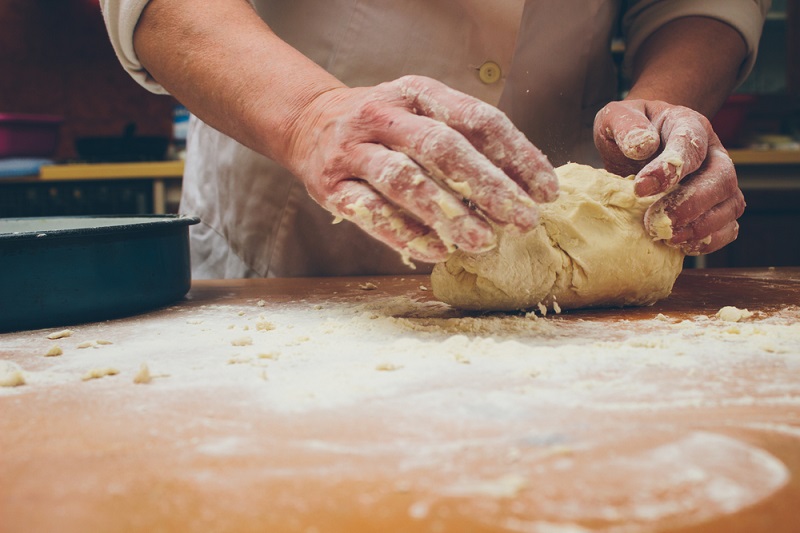 You may need one that’s 4-5 inches in diameter.
Best Paint for Salt Dough Ornaments
If the kids are wearing smocks, the table is protected, and you are reasonably sure they won’t paint all over their hands and faces, I like using regular acrylic craft paint since it holds up best on crafts. With younger kids who may wind up wearing more of the paint, I’d recommend tempura washable paints.
TIP: We put our paint into the base of old egg cartons since we always have those on hand. You can also use paper plates.
How to Preserve Salt Dough Ornaments
To help preserve your finished dried ornaments, you can coat with a layer or two of Mod Podge or spray with a sealer. Either work well. I’d recommend coating or sealing both sides, so do one side and let it dry, and then do the second side. If using the sealer, do it in a well ventilated area without the kids too close by.
TIP: To store these ornaments from year to year, you’ll want to wrap in bubble wrap.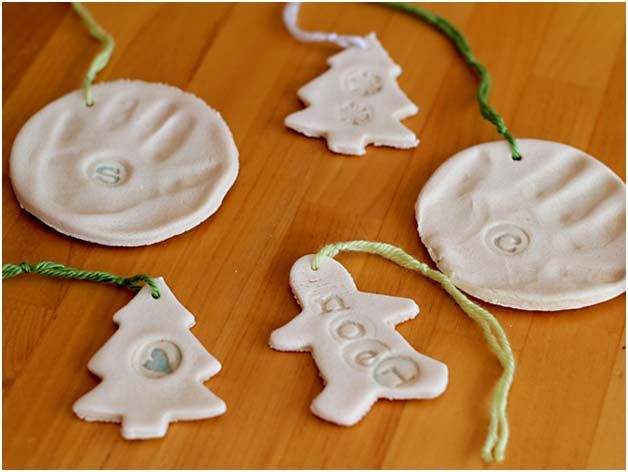 Store in a container that won’t be banged around, dropped or exposed to excess moisture.
Why is my salt dough puffing up?
If you mistakenly use self-rising flour, they may puff. And sometimes it happens randomly. Keep the oven temperature low and if it happens consistently, you can try baking at an even lower temperature for a slightly longer amount of time.
Tips for Making the Best Salt Dough Ornaments
- If the dough is too wet and sticky, knead in a little more flour. If it’s too stiff, add a little more water. There is a big range in the way different flours absorb liquid, so there is a normal range of variation in liquid needs. It should be easy to work with—soft and not too stiff and not excessively sticky.
- Use paper lollipop sticks or a skewer to make your holes.
- Use a 4-5 inch round cookie cutter to make handprint ornaments.
- Tie on baker’s twine or thin ribbon to hang as ornaments.
- Try to get the dough to an even thickness before baking so the ornaments bake evenly.

- Bake for the time indicated and then longer if your ornaments still feel soft. They should be firm to the touch without much give.
- Let cool fully before painting.
- If you want to paint the background of a handprint ornament, do that before you paint the inside of the hand. Let dry before adding a second color. Some people like to paint the whole thing white or cream to give it a more finished look.
- Use acrylic craft paint for older kids who can be trusted with paint and tempura washable paints with younger toddlers.since it holds up best on crafts. With younger kids who may wind up wearing more of the paint, I’d recommend.
- To help preserve your finished dried ornaments, you can coat with a layer or two of Mod Podge or spray with a sealer.
I’d love to hear your feedback on this project and what your kids thought of it, so please comment below to share!
Prep Time 30 minutes
Cook Time 2 hours
Total Time 2 hours 30 minutes
Author Amy Palanjian
Cuisine American
Course Holiday
Calories 1kcal
Servings 2 dozen ornaments
- ▢ 4 cups flour
- ▢ 1 cup table salt
- ▢ 1.
 5 cups water
Mix the ingredients together in a large bowl using a wooden spoon. When it becomes too stiff to stir, use clean hands to bring the dough together.
NOTE: If the dough is too wet and sticky, knead in a little more flour, about 1 tablespoon at a time. If it's too stiff, add a little more water, about 1 tablespoon at a time. There is a big range in the way different flours absorb liquid, so there is a normal range of variation here. It should be easy to work with—soft and not too stiff and not excessively sticky.
Knead a few times until the dough is uniform and soft, about 3-5 minutes.
Divide dough into 2 or 4 sections and roll out to about 1/4-½ inch thick between two sheets of parchment paper. This will help prevent sticking.
Cut out with cookie cutters. Transfer shapes to a parchment-lined baking sheet.
Repeat rolling and cutting out shapes to use up the dough.
Preheat oven to 250 degrees F.
Do a 4-5-inch circle and press in a child's handprint if desired.
Use a paper lollipop stick or a skewer to make a hole to hang as an ornament.
If making ornaments, bake for 90 minutes to 2 hours; if baking handprints, bake for 2-3 hours. Continue baking both ornaments and handprints as needed until they are until just firm to the touch, checking every 20 minutes. (It's not a problem if yours take longer than the initial baking time—it varies based on thickness and size...which will likely vary if you are baking these with kids!) They do not need to be rock hard, but should not feel squishy. Handprints will likely take longer than smaller ornaments and may take closer to 4 hours.
Remove from oven, let cool, and paint if desired with acrylic or washable tempera paint.
Once paint is completely dry, seal with Mod Podge if desired.
Mixing Bowl
parchment paper
Mini Cookie Cutters
- Divide the recipe in half to make a smaller portion of dough if desired.
- Use paper lollipop sticks or a skewer to make your holes.
- Use a 4-5 inch round cookie cutter to make handprint ornaments.
- Tie on baker's twine or thin ribbon to hang as ornaments.
- Try to get the dough to an even thickness before baking so the ornaments bake evenly.
- Bake for the time indicated and then longer if your ornaments still feel soft. They should be firm to the touch without much give but do not need to be rock hard. It is not a sign of a problem if yours take longer than mine did to bake—flours and ovens vary!
- Let cool fully before painting.
- If you want to paint the background of a handprint ornament, do that before you paint the inside of the hand. Let dry before adding a second color.
- Use regular acrylic paint for older kids who can be trusted with paint and washable tempera paint with younger toddlers.
- To help preserve your finished dried ornaments, you can coat with a layer or two of Mod Podge or spray with a sealer.

Calories: 1kcal, Fat: 1g, Saturated Fat: 1g, Polyunsaturated Fat: 1g, Monounsaturated Fat: 1g, Fiber: 3g, Sugar: 1g, Calcium: 31mg, Iron: 6mg
Tried this recipe?Rate in the comments and tag @yummytoddlerfood on IG!
Easy Salt Dough Recipe for Kids (3 Ingredients!)
Jump to RecipeThis simple and easy salt dough recipe is the perfect rainy day activity… Kids will master valuable kitchen skills while learning how to make salt dough, and then spend hours playing with it!
Salt Dough Recipe for Kids
We encourage our kids to get outside and play as much as possible during the summer, but inevitably there’s going to be those rainy days when outside play isn’t an option — like today…
Rather than turning to video games and television for entertainment though, I gathered up my younger three children for a quick kitchen lesson on how to make salt dough. And it actually turned out to be loads of fun AND educational! #momwin
Learning How To Make Salt Dough
While my kids think making and playing with this salt dough recipe is all fun and games, they’re actually learning a whole slew of valuable skills — like brushing up on their math, how to measure solids and liquids, and what happens when you mix certain ingredients.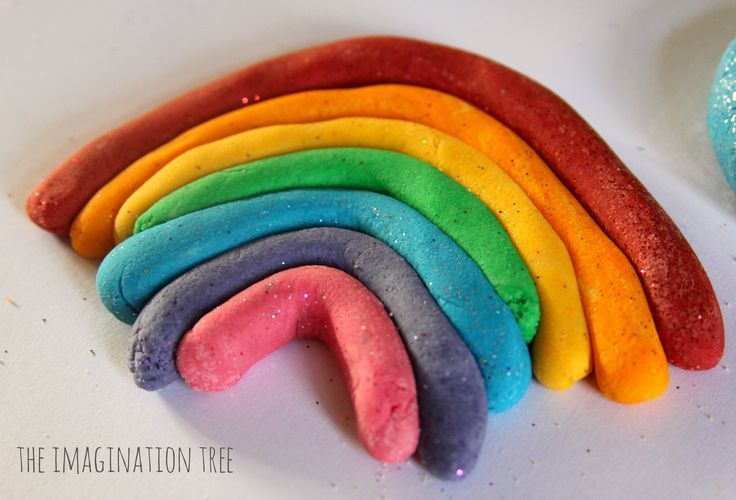 Just to name a few!
RELATED: How To Make Oobleck With Cornstarch and Water
And with only three ingredients — flour, salt, and water — this simple salt dough recipe is the perfect intro to kitchen basics. Luckily, I picked up some inexpensive fresh flour and salt at the grocery store earlier this week in anticipation of a rainy day!
I gave Camden the job of measuring out the flour, showing her how to level it off for a consistent measurement.
Addie measured the salt, again leveling it off using a butter knife.
And I helped Drew measure the water, showing them all how the liquid should be level with the lines on our Pyrex measuring cup.
Then they all took turns mixing the salt dough, and I gave a quick demonstration on how to knead dough. You know they were getting quite antsy to start playing by this point!
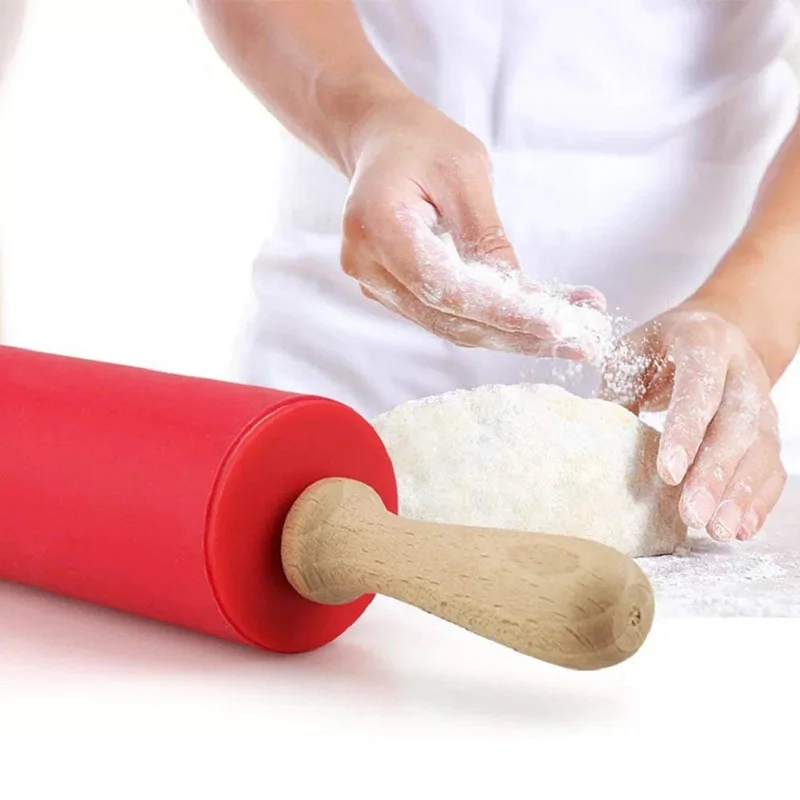
They had a blast playing with their salt dough. I gave them a kid-sized rolling pin and some cookie cutters to use. This kept them busy ALL afternoon! These plastic clay tools are super inexpensive and would be fun to play with, as well.
RELATED: 4-Ingredient Glitter Slime Recipe (No Borax!)
Ingredients
- 2 cups all-purpose flour*
- 1 cup salt
- 1 cup water
Instructions
- Combine the flour and salt in a large mixing bowl.
- Gradually add water while stirring and mixing to form a dough with a Play-Doh like consistency.
- Form the dough into a ball and knead for approximately 5-7 minutes, until the dough is smooth and firm. Additional water may be needed, depending upon humidity. Add a teaspoon of water at a time until the dough reaches the proper texture. On the other hand, if the dough is too sticky, add more flour by the teaspoon until it's no longer tacky.
- Store the salt dough in a Ziploc bag when it's not in use to prevent it from drying out.
Notes
I recommend covering your work/play area with an inexpensive plastic tablecloth to make cleanup easier!
How Long To Bake Salt DoughIf you want to bake your salt dough crafts, place them on a foil-covered baking sheet in a 250-degree oven.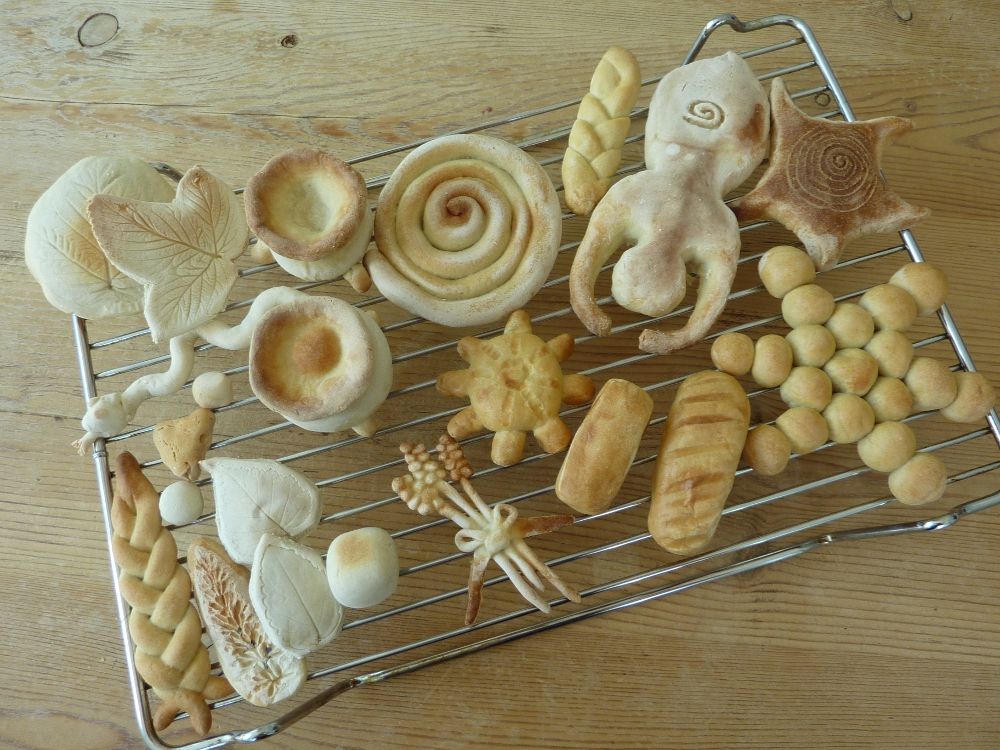 Baking time will vary depending on the size and thickness of your crafts. For each 1/4" in thickness, allow approximately a half hour of baking time, or bake until surface turns light golden brown. Turn each piece frequently so that they dry out evenly. If an area puffs up, poke a hole in it with a pin or toothpick to release the air.
If you or your child has a gluten sensitivity, substituting your favorite gluten-free flour one for one will work well in this recipe.
Recommended Products
As an Amazon.com Services LLC Associates and member of other affiliate programs, I earn from qualifying purchases.
-
Silicone Rolling Pins For Kids (2-pk.)
-
Heavy Duty Plastic Table Cloth
-
Plastic Clay Tools For Kids (10-ct.)
Nutrition Information:
Yield: 1 Serving Size: 2.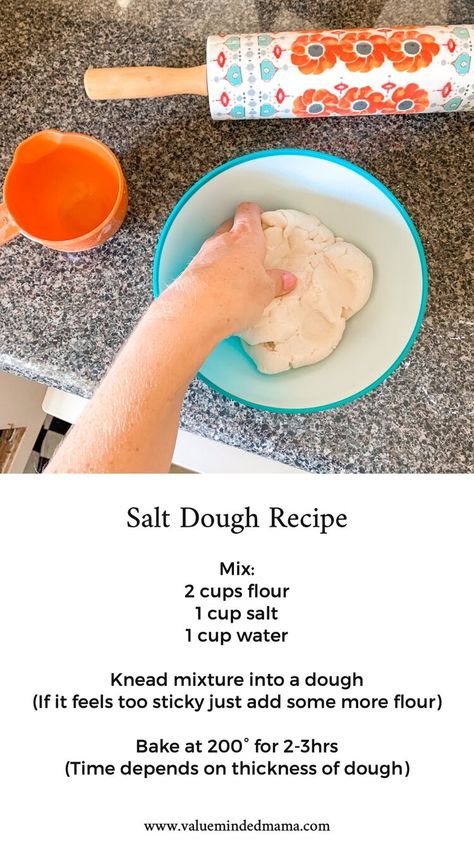 5 cups
 Amount Per Serving: Calories: 0Total Fat: 0gSaturated Fat: 0gTrans Fat: 0gUnsaturated Fat: 0gCholesterol: 0mgSodium: 0mgCarbohydrates: 0gFiber: 0gSugar: 0gProtein: 0g
Important: while salt dough may look good enough to eat, it should not be consumed. Young children should be supervised while playing with salt dough playdoh.
No Bake Salt Dough Recipe
You can store salt dough in an airtight container for future use. Or you can let your creations dry and paint them with acrylic paints.
RELATED: DIY Easy Bake Oven Recipes
If you do want to speed up the drying process by baking them, just place your salt dough crafts on a baking sheet and pop them into a 200-degree oven. Baking time will vary based on the size and thickness of your crafts, so just keep a close eye on them.
I’d love to see how your salt dough crafts turn out… Tag me @Unsophisticook on Instagram or use the hashtag #Unsophisticook so I can check them out. Enjoy!
95 photos of crafts and the secrets of sculpting complex figures
Hobbitania Needlework School 🎨 | Site Policy | Contacts
Author: School of Needlework Hobbitania
Dough modeling is a fun way to spend time with children. After all, at the same time, they not only sculpt, but also cook: they can experiment with the flour mixture in the process of measuring and mixing the ingredients, and then observe the metamorphoses that occur with the finished product when temperatures change during the drying process, see photos of finished works here.
In addition, crafts made from salt dough are harmless to children, they do not contain allergens and can be tasted safely.
Figures made from homemade flour mixture are harder and hold better than plasticine.
Review content:
Basic recipe for modeling dough
Before making dough for modeling, you need to imagine what kind of products will be made, whether the dough needs to be dyed, how long modeling will take, what drying mode will be selected.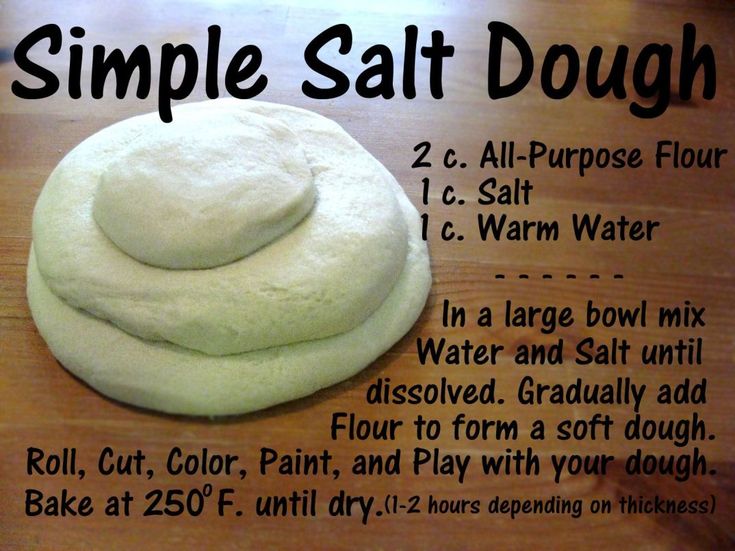
The basic dough recipe for crafts consists of one part salt and two parts wheat flour to which citric acid is added - 2 tsp. 1 cup salt and 1 tbsp. l. vegetable oil. The amount of water added during mixing should be equal to the amount of salt.
Dough preparation method
The dough is prepared in the following order:
- Mix flour with salt and citric acid and pour this mixture into a saucepan;
- Put the pan on a moderate heat and, stirring constantly, gradually add water until the dough leaves the pan and can be rolled into a ball
- Remove from heat and knead the dough with your hands.
Food coloring or gouache must be diluted in water, which is added before kneading the dough.
During operation, depending on the required consistency, the salt-flour mixture can be further diluted with water or oil, or flour can be added to harden it.
It is better to prepare the dough in as small portions as possible, right before sculpting, and store it only in a tightly closed container or cling film.
Drying salt dough crafts
In order for handmade salt dough crafts to retain their shape, not break or crack, you need to choose the right drying mode. You can simply leave the figurines to dry naturally in the air, you can put them in the oven.
There are two different methods for oven drying. The first is to preheat the oven, then turn it off and place the figurines in the heated space. You can also bake products at 100-degree mode, making sure that there is no burning.
A master class on making crafts from dough involves, first of all, experimenting with the material: the composition of the dough and its drying mode, so failures in this process are inevitable.
Helpful Hint: When you start modeling with children, you need to set them up so that the first success, after a lot of not quite aesthetic attempts, becomes a real miracle for them.
Salt dough modeling ideas and tips
It is best to start with simple and uniform shapes, such as round beads of various colors and sizes.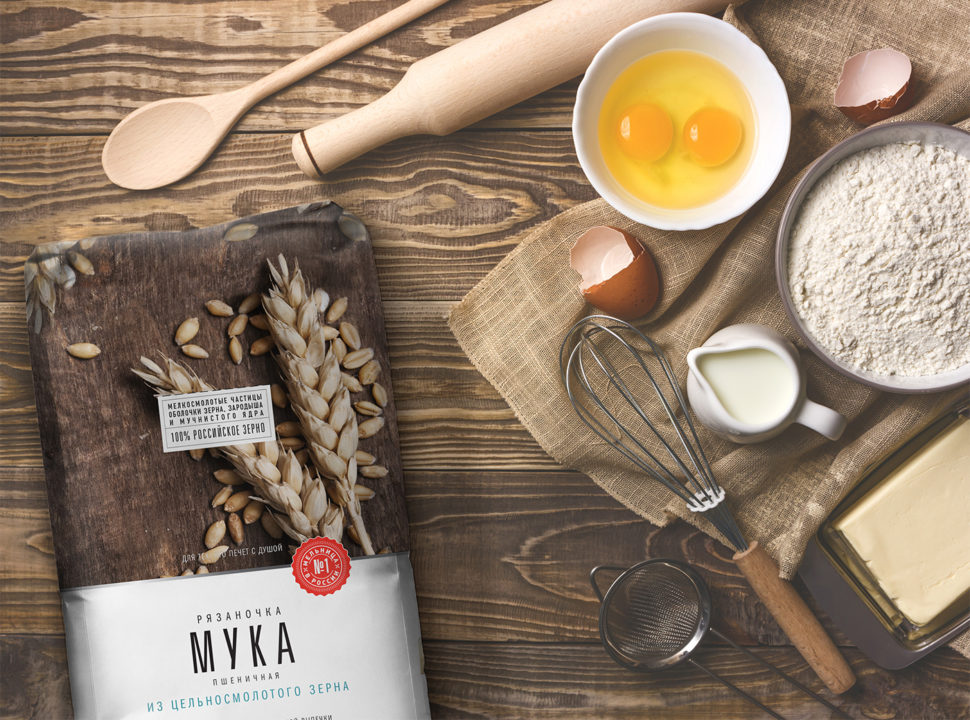 From them you can make garlands to decorate the room.
Then you can master more complex silhouettes - stars, hearts, and three-dimensional figures - New Year's snowflakes, Christmas trees, Easter eggs with patterns, egg coasters, chickens.
You can time the production of figurines for the holidays, or choose more neutral motifs for all occasions, making souvenirs and gifts in the form of stylized horseshoes, suns, stars, airplanes and funny faces.
During modeling, you can use special molds for modeling and baking, and other things, at the prompt of your imagination: garlic crush - to get thin ropes from dough, bottle caps - to cut out circles, plastic parts of toys - to get prints, almost everything at hand from a toothpick to wheels from toy cars can become a tool for sculpting dough.
It is easy to make holes in salt dough, both decorative and for hanging on threads. Holes on flat figures retain their shape when dry.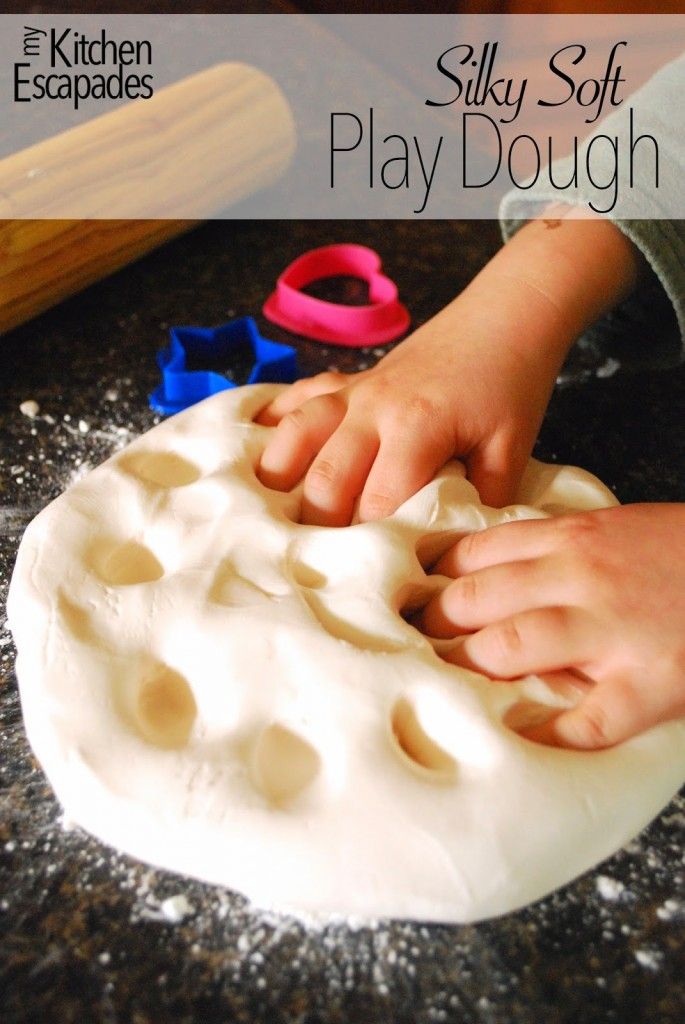
But when making more voluminous parts, such as spherical balls, in order to get a hole for the thread, you need to pierce the figure with a toothpick or other sharp tool made of wood or plastic and do not remove it until the product dries.
Helpful Hint: To glue the pieces of dough, all you need to do is wet the individual areas and apply them to each other.
Three-dimensional and flat figurines can be used to make garlands, key chains, medals and pendants. You can fashion chests and cups for storing jewelry, small treasures and pencils.
3D animal figurines
Especially popular with children are 3D animal figurines, they can be made in accordance with popular step-by-step instructions that are designed for plasticine and clay crafts.
-
Plasticine crafts for children: a master class + instructions on how to do it yourself.
 Photos, best ideas, videos, secrets, reviews
 -
Autumn crafts: TOP-200 photos of the best options with an exclusive design. Step-by-step instructions, master class, secrets of craftswomen, reviews + video
-
Do-it-yourself night lamp - instructions and design tips
You can sculpt from dough without dyes, then paint the finished figure and, after drying, varnish it.
You can also cut out various figures: having made a model of them from cardboard, lay it on a flat dough previously rolled out with a rolling pin and carefully cut out the edges. Then you can color the figurine, add the necessary texture - roughness, strokes, make eyes, nose or bead jewelry.
An excellent handmade gift can be a photo frame or a unique candle holder.
Making panels that combine elements of mosaics, appliqués and moldings can captivate both children and adults. For the smallest, the simplest drawings are suitable: you must first draw a silhouette on parchment, then carefully fill it with dough along the lines.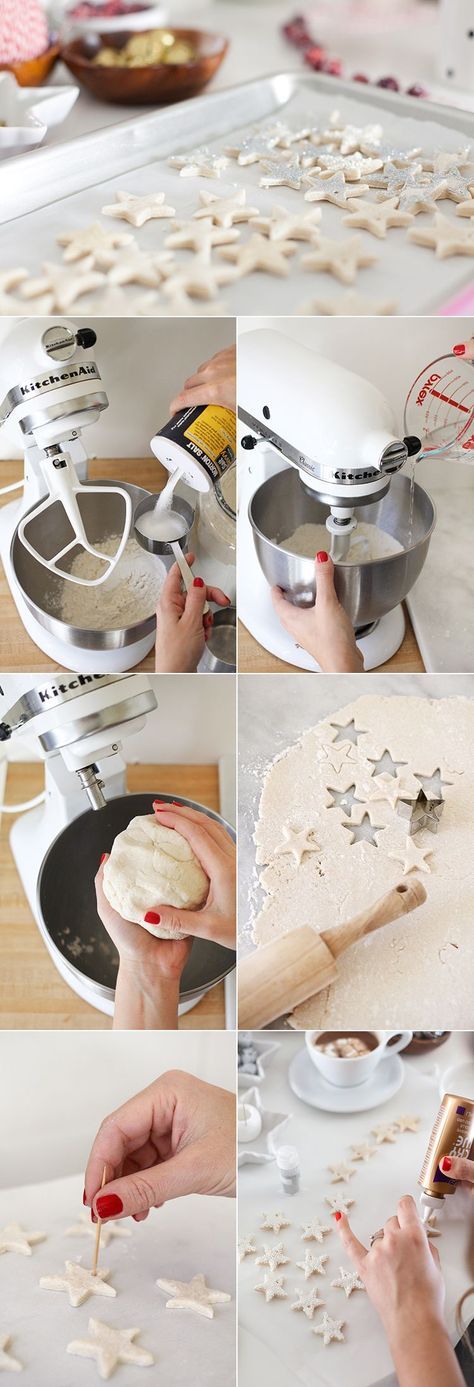
More complex ideas can also be conceived and implemented using beads, cereal mosaics, dried flowers, etc.
Photos from the test
9000 9000
0004
Scroll Up
Adblock
detector
hobby for women and children
Flour can be used not only to bake pies and boil dumplings. Try using this raw material for beautiful salt dough crafts. We invite you to master a new female hobby, the results of which will not be difficult to find practical application.
History does not know who first came up with the idea to create sculptures from flour, water and salt, but there is a version that beautiful crafts made from salt dough were invented by confectioners.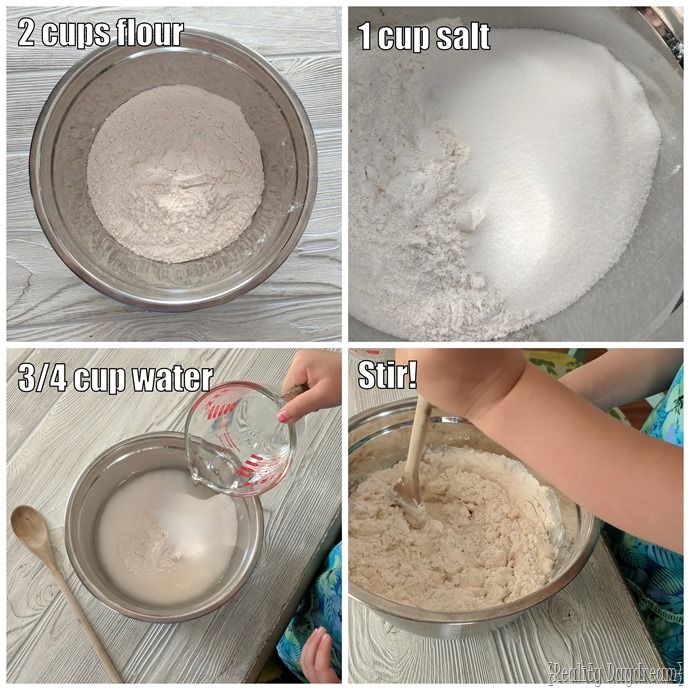 Creative cooks got bored of baking quickly stale buns and, having improved the recipe, they invented a material that does not deteriorate over the years and does not lose its attractiveness. Today, testoplasty is a popular women's hobby that you should definitely try too.
- Testoplasty - a fun hobby with a serious approach
- Salt Dough Recipe for Crafts
- Secrets of Sculpting and Forming Figures
- How to Decorate Dough Crafts
- Pretty Dough Crafts: 9 Photos for Inspiration
- Figure Making Workshops
Testoplasty is a fun hobby with a serious approach
Salt dough is a plastic material that can be molded into crafts no less interesting than polymer clay. Finished figurines are easy to color and decorate, turning into real works of art, which are easy to find a place not only in the home and office, but also in the museum. The presence of salt in the dough preserves the finished product and protects it from various pests that are not indifferent to flour products.
The main advantage of testoplasty is the availability of materials. The cost of finished crafts is mere pennies, and products for modeling, as well as for choux pastry for dumplings, are always in any home.
Once you master salt dough, you can make small souvenirs to sell and turn your new hobby into an extra income. Figures can be sold via the Internet, social networks or offer your masterpieces in crowded places: at train stations, in parks, on the beach.
Now in many cities open fairs are held, where everyone has the opportunity to sell what they have made with love with their own hands. Amulets, fridge magnets, kitchen decor are in great demand.
Craft Salt Dough Recipe
All-in-one DIY Salt Dough recipe requires only three ingredients: flour, salt and water.
Flour should be used only the highest grade, not containing bran and any improving additives. In no case do not buy pancake, pancake and self-rising flour - during drying, the dough made from it will begin to rise, which will lead to cracks.
Salt should also be taken plain without iodine and other additives, but clean and white. Perfect for Extra. If it was not possible to find finely ground salt, you can take pure coarse salt by dissolving it in water taken in volume according to the main recipe.
Water must be filtered and cooled before mixing. It is recommended to take ice water prepared in the freezer.
Proportions of ingredients:
- Flour - 300 grams;
- Salt - 300 grams;
- Water - 200 ml.
Video recipe from experienced craftsmen
Some crafters use additives to improve plasticity, such as starch, vegetable oil or glue. However, for the first masterpiece, it is better to prepare salty dough for crafts according to the main recipe. It is important to consider that flour and salt are taken in the same proportions by weight, but salt is heavier than flour, so it turns out to be half as much in volume! For example, a glass of flour will require half a glass of salt!
Secrets of sculpting and shaping figures
Working with dough does not require special talents, but it is unlikely that you will be able to mold something special the first time.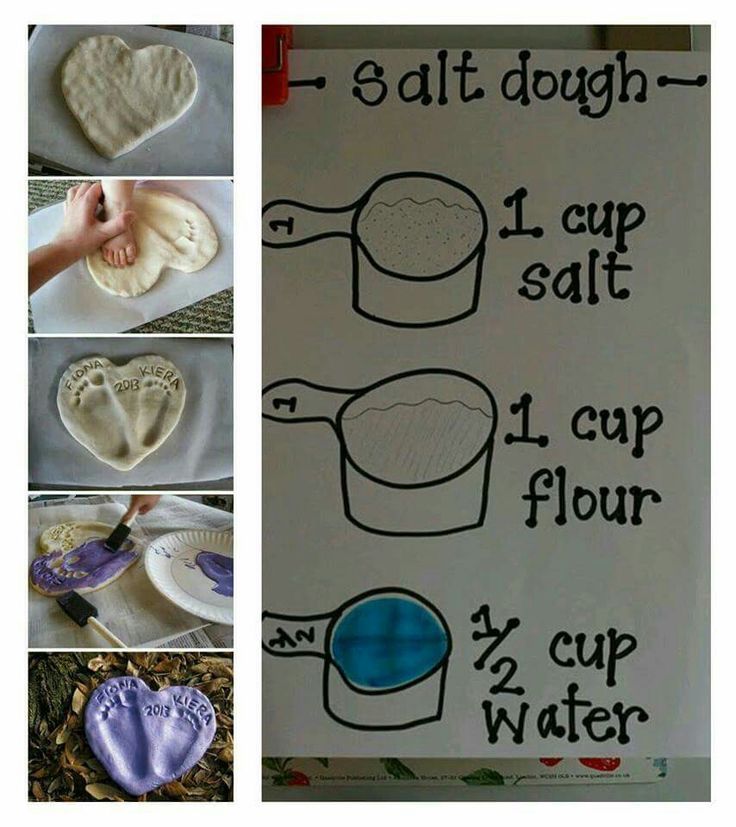 In the air, the mass of flour and salt quickly hardens, so you need to store it in a tightly closed jar, separating, if necessary, the right amount for sculpting a separate element. If the mass was dyed in different colors, then portions of hotel shades of different colors should be stored in separate containers.
There are many techniques for working with dough. It can be rolled into a layer, and then cut out figures and form compositions from them, like flowers from sugar mastic and cold porcelain. At the joints, the parts are moistened and gently pressed against each other. Also, the same dough, diluted to a more liquid consistency, is used as glue.
For large three-dimensional figures, wire frames are used or put inside jars and boxes, which reduces the volume of raw materials and speeds up the drying process. To fasten the elements, you can use toothpicks, fastening the parts to be joined with them.
Finished work is dried in the open air or baked in the oven, which greatly speeds up the process of gaining the desired strength.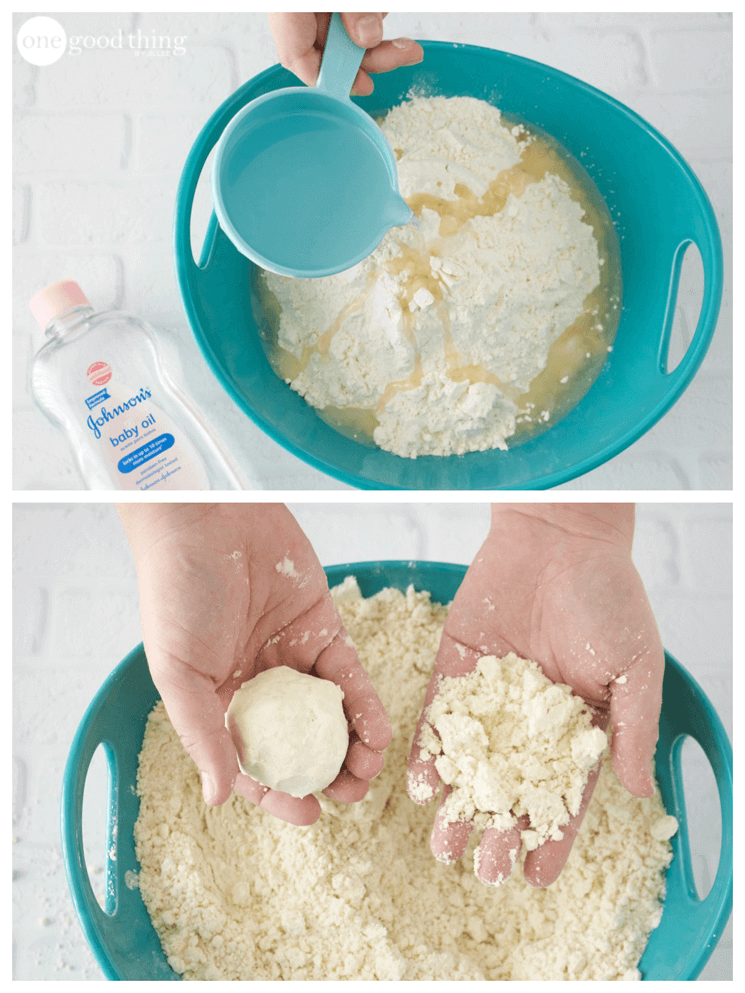 During drying, the oven is turned on at the lowest temperature, and the door is slightly opened. At high temperatures, the craft may crack.
How to decorate dough products
To form reliefs and three-dimensional figures, you can use any materials at hand: stencils, coins, toothpicks, sushi sticks, combs, penknives, a pastry syringe, cookie cutters, knives for vegetables and carving .
Figures made from undyed dough have a light beige tint, but the mass can be dyed at the kneading stage, and finished products can be varnished, acrylics, watercolors or gouache.
Natural products such as cocoa or beet juice can be used as dyes. If dyes require dilution with water, reduce the total amount of liquid indicated in the recipe.
Video: delicious strawberries for beginners
Check out a selection of beautiful crafts, maybe you will fall in love with this art and make it your hobby. For starters, try to make a simple figurine - a hedgehog according to the master class on our website or a colorful fish pendant. If you have small children, make casts of their arms and legs, in 20 years this craft will be of high value.
Beautiful crafts from the dough: photo for inspiration
Master classes to create figures
If you are interested in this simple technique, try to start with simple crafts. We have prepared several master classes available for beginners.
Tea Candle Holder
Candle House
Fridge Magnet Dog
Interior suspension Cockerel
Fish with decor
New Year's toy Snowman
Panel for beginners Rooster
Do not limit the proposed instructions.