How to draw sid the science kid
"Sid the Science Kid" Encyclopedia of Discovery: Drawing (TV Episode 2015)
Sid the Science KidS3.E26
All episodes
All
- Episode aired 2015
YOUR RATING
AnimationComedyFamily
YOUR RATING
- Directors
- Greg V. Fera
- Katy Garretson
- Dean Gordon
- Writer
- Michael Foulke
-
Stars
- Julianne Buescher(voice)
- John Munro Cameron
- Alice Dinnean(voice)
- Directors
- Greg V.
Fera
- Katy Garretson
- Dean Gordon
- Greg V.
- Writer
- Michael Foulke
- Stars
- Julianne Buescher(voice)
- John Munro Cameron
- Alice Dinnean(voice)
Photos
Top cast
Julianne Buescher
- May
- (voice)
- …
John Munro Cameron
Alice Dinnean
- Gabriela
- (voice)
- (as Alice Dinnean Vernon)
- …
Donna Kimball
- Susie
- (voice)
- …
Sonya Leslie
- Susie…
Drew Massey
Mia Ella Mimica
Misty Rosas
Alon Williams
- Gerald…
Dana Michael Woods
- May
- (as Dana Woods)
- …
Victor Yerrid
- Gerald…
- Directors
- Greg V.
 Fera
Fera - Katy Garretson
- Dean Gordon
- Greg V.
- Writer
- Michael Foulke
- All cast & crew
- Production, box office & more at IMDbPro
Storyline
Did you know
- Connections
References Rowan & Martin's Laugh-In (1967)
User reviews
Be the first to review
Details
Technical specs
- Runtime
27 minutes
Related news
Contribute to this page
Suggest an edit or add missing content
More to explore
Recently viewed
You have no recently viewed pages
Sid the Science Kid: Hello, Doggie
None Join Sid the Science Kid in this interactive story to see if animals talk! Woof! Do you think animals talk? They don’t use words like people do, but listen. ..are they saying something? What do you think a dog is trying to say when he barks? Does he want something? Or when a cat purrs? Is she trying to tell you she is happy? Join Sid the Science Kid in this interactive story to find out! show full description Show Short Description
 Science
Enjoy our collection of fun science stories for kids. With favorites like Sid the Science Kid and Hayley Rides into Space, you're sure to find stories your child will love.
view all
Robot in Space
Hayley Rides Into Space
My Terrific Spaceship
Sid The Science Kid: Reused Robot
Sid the Science Kid: Hello, Doggie
Sid The Science Kid: Rolie Polies
Sid the Science Kid: Optical Illusions
Sid the Science Kid: Gravity and Weightlessness
Sid the Science Kid: Primary Colors
Sid the Science Kid: Ants
Sid the Science Kid: States of Water
Sid the Science Kid: Pollination
One membership, two learning apps for ages 2-8.
TRY IT FOR FREE
Full Text
Woof, woof, woof! “Do you hear that?” Sid runs to the window. He sees the neighbor’s dog wag its tail. Woof, woof, woof! “It’s a dog! What’s that, doggie? Are you trying to tell me something?” Woof, woof, woof! “Do you want to play with me?” Woof, woof, woof! “Hmm. I don’t know what his woofs mean, but he sure has a lot to say. It almost sounds like he’s talking. What do you think? Can animals talk?” “Hey, Mom! Do you hear the neighbor’s dog out in the yard?” “I hear a lot of barking, that’s for sure,” says Mom. “Do you think animals talk?” “Let’s look up some animal sounds on the computer.” They listen to the sounds of a dolphin, a penguin, and an elephant. “Hmmm. All those animals are making different sounds. But are they talking?” “Why don’t you ask your friends at school what they think?” “Now it’s time for the Sid Survey! Do you think animals can talk?” “Well, I don’t think they can talk like we do, but I have heard a cow ‘mooo’ and a chicken ‘bock, bock, bock. ’” “But do you think they’re talking?” “Sure! Maybe they are talking to each other.” “May, do you think animals can talk?” “Well, I have a cat. When I pet her she says ‘purr, purr.’ I think she’s saying ‘I love you!’ I think, yes, animals can talk.” “What about you, Gerald, do you think animals can talk?” “I can speak dog. Wanna hear? ‘Woof, woof, woof.’ I think that means hello! I think animals can talk, for sure.” “Hmmm . . . Gabriela says cows and chickens talk. May says cats talk, and Gerald says dogs talk. What do you think?” Inside the classroom, Sid tells Teacher Susie, “I’m trying to find out if animals can talk.” “That’s a great question, Sid. Animals may not talk like we do, but they do communicate. They communicate by making sounds and moving their bodies. Let’s think of some examples. When gorillas move like this and beat their chests, they’re communicating that they are in charge.” “Like this! I am in charge!” “That’s right, May. Here’s another example. When lions roar a certain way, they’re letting other lions know where they are.
 ” “ROAAAR! I’m right here!” “Teacher Susie, can we see some animals communicate?” Sid asks. “Of course! Let’s go outside to observe.” “Who can find an animal?” “Look, bees!” “Yes, Sid! How do you think these worker bees communicate?” “Well, they move around a lot.” “That’s true! The bees are doing the busy bee dance to communicate. This dance tells the other bees where to find flowers that have pollen. See? First, they waggle. Then, they go ’round and ’round. Come on everybody, let’s try it! First we waggle. Then we go ’round and ’round!” “See? They found the pollen to eat. Now, let’s observe the way other animals communicate. I have something special waiting for you in the . . . Super Fab Lab!” “Investigate! Explore! Discover!” “I brought a special friend to meet you. Does anyone know what animal this is?” “I’ve seen one of those animals before. It’s a guinea pig!” “That’s right. And look! She’s jumping up and down. That’s called popcorning. It probably means she’s very excited to see us!” “Well, I’m excited to see her.
 I’m going to jump up and down too!” “Me too!” “Me three!” “Wow! A guinea pig can tell us she’s happy just by jumping up and down! Animal communication is super cool because they don’t really talk, but they tell us stuff by making sounds and moving their bodies!” “You’ve all learned a lot about animal communication today. Now, think about other animals you know and how they communicate. Grab your journals and draw what you come up with.” Gerald thinks, then draws a rabbit. “I’ve seen rabbits jump up and down and kick their legs. I think that means they're happy. It’s like a rabbit is saying, ‘Hey, hey, life is great!’” Sid draws a peacock with its feathers spread out. “My dad told me they do that to get the attention of other peacocks. It’s like this peacock is saying, ‘Look at me! Look at me!’” When Sid arrives home from school, he sees the neighbor’s dog. “Hmm. He’s not barking, but look!” “Maybe that’s why he was barking this morning. He was trying to communicate that he was hungry! I like to tell everybody when I’m hungry too! Glad you got to eat, little buddy.
 ” Woof, woof, woof! “Hey, where’s that bark coming from?” Sid turns to see Grandma’s new dog. “Hello, Philbert!” Woof, woof, woof! “Hi Grandma, did you know dogs can communicate?” “Ooh, communicate. That’s a great word, Sid. What do you think Philbert is trying to communicate?” “I think Philbert is barking to say hello.” Woof, woof, woof. “I also think Philbert is communicating that he’d like to spend the night.” “Well, if that’s what he’s communicating, it’s okay with me!” “When he wags his tail like that, I think he’s trying to tell us he’s happy. I’m happy too. See?” Sid takes Philbert up to his room. He reaches out to rub Philbert’s belly and hears Philbert panting. “Hmm. That sounds like communicating. What are you trying to say, Philbert?” “Oh, you want more belly rubs! Who’s a good boy? That’s it. You’re a good boy, Philbert!” Woof, woof, woof. Philbert licks Sid’s face and Sid laughs.
1
We take your child's unique passions
2
Add their current reading level
3
And create a personalized learn-to-read plan
4
That teaches them to read and love reading
TRY IT FOR FREE
How to draw a cute squirrel with pencils, felt-tip pens and not only
January 30, 2021LikbezDo it yourself
12 ways that even a novice artist can handle.
Share
0How to draw a cartoon squirrel with a pencil or marker
Frame: Simple Kids Drawing / YouTubeWhat you need
- Paper;
- marker or pencil.
How to draw
Draw an arc like in this picture:
Frame: Simple Kids Drawing / YouTubeAt the bottom end of the arc, draw a nose that looks like a diamond with rounded edges. From the nose, continue the line slightly down and take it to the right. This is the animal's head. Complete it with the lower jaw by drawing a wavy line below.
Frame: Simple Kids Drawing / YouTubeNear the right border of the upper arc, draw a pointed ear. Add three strokes inside, converging to one point.
Frame: Simple Kids Drawing / YouTubeDraw the eye of a squirrel - an oval with a small round highlight inside. Draw the right ear. Its edge is visible from behind the head above the eye and resembles a triangle.
Frame: Simple Kids Drawing / YouTube Paint over the eye, leaving the highlight white. Give the eye an almond shape, let it taper towards the corners. Add a couple of dots near the squirrel's mouth. Draw an arc below the head - the upper contour of the foot.
Sketch three fingers under the arc and from them draw an arcuate line up and to the right, completing the paw. Draw wool at the end in a zigzag pattern.
Frame: Simple Kids Drawing / YouTubeUsing a zigzag line from the lower jaw down, draw the furry chest of the squirrel. On the right, under the front paw, add a semicircle. This is a bent hind leg.
Frame: Simple Kids Drawing / YouTubeDraw the head and torso with two arcs.
Frame: Simple Kids Drawing / YouTubeAdd feet, with three toes each.
Frame: Simple Kids Drawing / YouTubeDraw a curved tail line upward from under the hind leg. Twist it at the end with a spiral.
Frame: Simple Kids Drawing / YouTube Draw the top border of the tail. Make it wide and long to make your squirrel beautiful.
Give the beast an acorn in its paw. To do this, first draw his hat and petiole.
Frame: Simple Kids Drawing / YouTubeAnd then draw the part of it that is visible behind the paws.
You can see the whole progress here:
What other options are there
Try to draw a squirrel sitting on a stump:
Here is another sitting squirrel:
900 :How to draw an Ice Age squirrel with colored pencils
Frame: Easy Drawing / YouTubeWhat you need
- Paper;
- black liner or pencil;
- colored pencils.
How to draw
With a liner or black pencil, draw two small circles on the same level and a short stroke between them. These are blanks for the eyes.
Frame: Easy Drawing / YouTubeAdd zigzag lines of fur between the circles and the bridge. In the center of one of the eyes, draw a circle, and inside it - another one, the pupil. Paint over the last one, leaving a small white highlight.
Frame: Easy Drawing / YouTubeRepeat the same with the other eye. Draw fur under the eyes.
Frame: Draw Simple / YouTubeFrom the fur under the eyes, draw down the lines of the muzzle, connect them with a smooth rounding. Inside draw an oval nose.
Frame: Draw Simple / YouTubeDraw a wave in its center with two lines. Paint over the entire nose, except for this shape.
Frame: Easy Drawing / YouTubeAdd hair to the cheeks in a zigzag motion. It starts from the middle of the muzzle and reaches the sides of both eyes.
Frame: Easy Drawing / YouTube With the same slightly zigzag contours draw the hair on the animal's chest. It should be longer than the muzzle.
Draw lines down from the cheeks and finish them at the level of the middle of the chest. Continue the line from the left, drawing the thigh with zigzags of fur. The arc ends just below the contour of the chest and passes into an inclined line of the foot with three fingers at the end. The inner side of the thigh is drawn almost parallel to the line of the chest.
Frame: Draw Simple / YouTubeDraw the squirrel's left hind leg. It also consists of the arch of the thigh, the foot with three fingers and the inner line of the thigh. This paw is slightly smaller than the first one.
Frame: Easy Drawing / YouTubeDraw an acorn sandwiched between the toes of the left foot. Start with the ponytail, draw an oval hat around it, and under it, with a crescent moon, the acorn itself with a small stroke on the tip.
Frame: Easy Drawing / YouTube From the eyes of the squirrel, draw four lines upwards, as shown in the figure. These are the front legs.
Draw an arbitrary branch where the squirrel will hang. Paws slightly widen near the tree, forming palms. Above the top line of the branch, draw three fingers in small ovals.
Frame: Easy Drawing / YouTubeBetween the hind legs, draw a large, fluffy, curved tail. Some parts of it may not be visible behind squirrel legs.
Frame: Easy Drawing / YouTubeUnevenly paint the torso, paws and cheeks of the squirrel with a yellow pencil.
Frame: Easy Drawing / YouTubeUse orange to tone the muzzle and feet. Add strokes of the same color to the sides, thighs and front paws. Lightly draw the edges of the cheeks and circle the contours around the pupils.
Frame: Easy Drawing / YouTubeColor the tail gray, but not evenly, but alternating gray and white stripes. Make short, soft, parallel strokes to mimic the texture of wool.
Frame: Easy Drawing / YouTube Put a gray pencil shadows on the sides, cheeks and around the eyes. With a red-brown color, add shadows to the side surfaces of the muzzle, under the eyes and on the sides. Using short strokes, draw stripes of darker fur on the back and front legs of the squirrel.
Add some brown lines around the pupils. Color the branch the squirrel is hanging from dark brown or black.
Frame: Easy Drawing / YouTubeAlternating orange and light green, give the necessary shades to the acorn.
Frame: Easy Drawing / YouTubeComplement the color of the fruit with light yellow on top of the other colors. With dark red, draw shadows on it and a grid on the hat.
Frame: Easy Drawing / YouTubeWatch the video if something is unclear:
Other options
Ice Age squirrel standing on its hind legs:
How to draw a realistic squirrel with colored pencils
Frame: Trupti’s Art Gallery / YouTubeWhat you need

How to Draw
Use thin lines to outline the top of the head. Draw a small arc first. A little to the right of its middle, draw a protruding pointed ear, and at the right end - the second, about three times wider than the first. Draw a rounded line along the left edge of the ear.
Frame: Trupti's Art Gallery / YouTubeMark the scruff line going to the right and down from the left ear. Mark the lower part of the muzzle with a wavy line.
Frame: Trupti's Art Gallery / YouTubeThe muzzle smoothly passes into the chest. In the middle between the back and chest, start drawing a paw, take it to the left and finish with three fingers. You don't need to draw the details clearly. This is just a sketch, which you will then paint over with colored pencils.
Frame: Trupti's Art Gallery / YouTubeDraw the animal's back. It bends slightly to the left where the front paw is located, and then just as slightly - in the opposite direction.
Frame: Trupti's Art Gallery / YouTube Draw the outline of the belly. The squirrel should turn out to be quite rounded. Mark the tips of the hind legs.
Draw an arc under the front paw that curves to the left and sharply goes down and to the right. To the right of it, draw another smooth line, turning into the contour of the back, as in the picture, this is the hind leg bent at the knee.
Frame: Trupti's Art Gallery / YouTubeSketch in a few strokes where the tail will be.
Frame: Trupti's Art Gallery / YouTubeStarting from the front paw, draw down the line of the tree trunk. Release it and up - between the ears of the squirrel.
Frame: Trupti's Art Gallery / YouTubeThe border of the trunk on the left rests against the squirrel's back where the front paw ends. Mark the branches of the tree above the tail and head of the animal.
Frame: Trupti's Art Gallery / YouTube Under the tail and hind legs, mark the branch on which the squirrel sits. Add a couple of sprouts to the left of the trunk.
Erase the overly bright pencil outlines and move on to drawing in color. Circle the squirrel with a light brown pencil. At the belly and on the tips of the ears, mark the fur with strokes.
Frame: Trupti's Art Gallery / YouTubeDraw an eye located about the same distance from both ears. It consists of two circles inscribed one into the other. Shade the second lightly inside, indicating the outline of the pupil. On the tip of the muzzle, mark the nose. Continue painting over the body of the squirrel.
Frame: Trupti's Art Gallery / YouTubeLoosely shade the top of the head, front and hind legs, and back with a light brown pencil. Draw the line of the back and with light long strokes from left to right, start drawing the hair of the tail.
Frame: Trupti's Art Gallery / YouTube With a darker, reddish-brown pencil, draw the curve of the tail more clearly and add new strokes. Also lightly walk this color along the paws and back of the squirrel.
Add orange strokes to the paws and back. Draw with this color the fur that is visible on the side of the squirrel's belly.
Frame: Trupti's Art Gallery / YouTubeUse a gray pencil to draw a shadow on the squirrel's belly. Line the nose with the same color, add a dark stroke in the middle of the ear and paint over the pupil, leaving white highlights. A little black can be added to the pupil and tip of the nose.
Frame: Trupti's Art Gallery / YouTubeWith rich brown, draw the details: circle the ear and the outer contour of the eye, the mouth of the squirrel and claws. Add additional strokes to the tail, and on the muzzle - points from which the mustache will grow.
Frame: Trupti's Art Gallery / YouTube Use a dark red pencil to outline the squirrel's mouth. Lightly go over the coat and tail with this color, and then dark gray in the same place. The more shades, the more interesting the picture looks. With a sharpened black pencil, draw a mustache sticking out in different directions.
If there are sharp transitions somewhere, soften them with a light brown pencil. To do this, it is convenient to take a picture of the drawing on the phone: on the screen you will see what you did not notice on paper.
Outline the tree in gray. Mark the shadows: do not press hard on the pencil, the lines should be soft.
Frame: Trupti's Art Gallery / YouTubeAt the bottom of the trunk, mark the relief of the bark with ragged strokes, this time pressing hard on the pencil.
Frame: Trupti's Art Gallery / YouTubeMake the same strokes on the top of the trunk. Draw a branch. It's in shadow at the bottom, so the bottom outline will be wider and darker than the top.
Shot: Trupti's Art Gallery / YouTubeUse a green pencil to outline the ivy growing on the tree. Draw one branch sticking out above the squirrel's tail.
Frame: Trupti's Art Gallery / YouTube Add green shoots growing on red-brown stems growing from the left of the trunk.
Draw more relief and shadows on the tree. Add a shadow under the branch where the squirrel sits.
Frame: Trupti's Art Gallery / YouTubeDraw another branch behind the squirrel.
Frame: Trupti's Art Gallery / YouTubeRoughen up the new branch by painting it with uneven gray strokes. Add a little yellow to the greens on the tree trunk.
Frame: Trupti's Art Gallery / YouTubeYou can add yellow and green near the new branch. Check the drawing again. Add greens in different shades, as well as yellow highlights and gray shadows wherever you think they are needed.
Frame: Trupti's Art Gallery / YouTubeYou can make the composition more harmonious and depict another branch on the left, as shown in the figure.
Frame: Trupti's Art Gallery / YouTubeDon't forget to decorate this new element with green leaves too.
Frame: Trupti's Art Gallery / YouTube If you have a white pencil, then add the final touches to the fur. All the details - in the video:
What other options are there
Try to draw such a squirrel with a nut with pencils:
How to draw a realistic squirrel with nuts with felt-tip pens
Frame: Volha Sakovich / YouTubeHow to Draw
Draw a line on the paper at an angle of about 45 degrees from the lower left to the upper right corner. Using it as an axis of symmetry, draw an oval.
Shot: Volha Sakovich / YouTubePlace the head on top of the resulting body with a slight overlap. Its contours slightly expand downwards.
Frame: Volha Sakovich / YouTube With a slightly curved line going from the head to the body, outline the outline of the chest.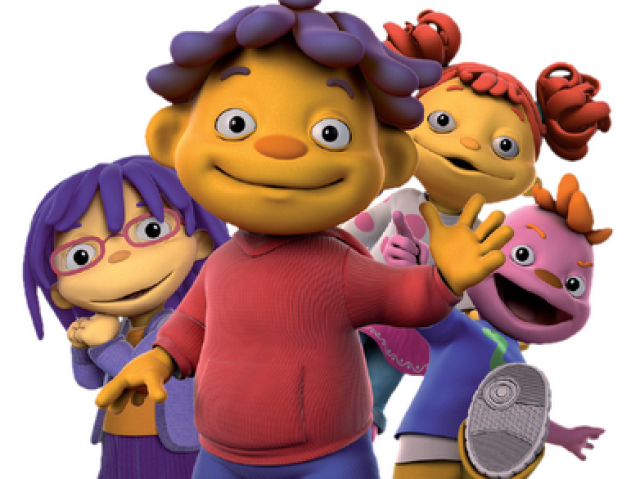
From the middle of the oval body, draw a semicircular line of the hind leg to the right. Below it draw two rounded feet.
Shot: Volha Sakovich / YouTubeFrom the level of the squirrel's shoulder, draw two slightly converging inclined lines to the feet, this is the right front paw. Finish it with a small foot. Draw the left front paw from the chest level of the animal.
Frame: Volha Sakovich / YouTubeOutline the wide tail, curved to the left.
Frame: Volha Sakovich / YouTubeDraw the eyes of a squirrel. They are located on the midline of the head and are set wide apart on the sides. Below, outline the nose and mouth. Refine the outline of the head by adding prominent cheeks.
Frame: Volha Sakovich / YouTubeMake the ears quite long. Draw a straight line inside each to show a crease.
Frame: Volha Sakovich / YouTube Draw scattered nuts of various sizes around the squirrel. On the largest ones, draw a belt where the shells meet.
Outline the drawing with a liner. Draw the tail, ears and chest not with a solid line, but with intermittent vertical strokes, imitating the texture of wool. Erase all pencil sketches with an eraser.
Shot: Volha Sakovich / YouTubePaint over almost the entire figure of the squirrel with a light brown marker, leaving white part of the muzzle, chest, belly, inner parts of the legs and the area around the eyes.
Frame: Volha Sakovich / YouTubeUse a darker brown color to work on the shaded areas: ears, forehead, neck creases, paws, back of the squirrel and tail. On top of the latter, make short, thin strokes to show the coat.
Frame: Volha Sakovich / YouTubeFill in the white areas with light gray.
Frame: Volha Sakovich / YouTubeWith a darker shade of gray, draw shadows in these areas - on the squirrel's neck, on the stomach and under the arm.
Shot: Volha Sakovich / YouTube Dark brown, apply shadow inside the ears and on their tips, under the nose and mouth.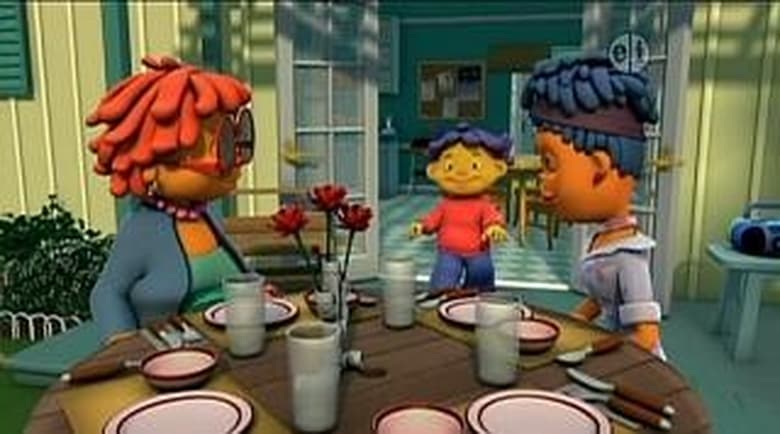 Label the toes. Work out the tail with shading movements.
Dark gray paint over the eyes, add dashes of this color to the tips of the ears and tail hair. Add gray coloring to the back of the squirrel's body and the middle of the tail. Walk along the contour of the latter with light gray to soften the border.
Frame: Volha Sakovich / YouTubeAdd an orange color to the body - the coat will turn red.
Shot: Volha Sakovich / YouTubeIf you want to make the animal's coat even more colorful, add bright pink to the shaded areas.
Shot: Volha Sakovich / YouTubeOn top of the pink, you need to tint the wool with a thin layer of orange again.
Shot: Volha Sakovich / YouTubeLight brown paint over large nuts, leaving white spots on them at the top right.
Frame: Volha Sakovich / YouTubeFill these highlights and the top of the hazelnut with beige. Brown draw along the diametrical lines on large nuts.
Frame: Volha Sakovich / YouTube Longitudinal strokes work on the walnut shell and the shadows on it from the rest. Dark brown paint over small nuts, leaving white highlights.
Make the highlights light brown. Hazelnuts are unevenly painted over with brown and tinted with red.
Image: Volha Sakovich / YouTubeAdd dark gray shadows from the squirrel and nuts. Draw small details with a liner: the mustache of the beast, protruding hair on the ears, individual hairs on the back.
Shot: Volha Sakovich / YouTubeWith a white gel pen or pencil, add highlights in the squirrel's eyes and nuts, hairs in the tail and on the muzzle.
Frame: Volha Sakovich / YouTubeIf you have any questions, watch this video:
How to draw a cartoon squirrel with paints
Frame: Artmimishki Ira Rudnitskaya / YouTubeWhat you need
- Paper;
- gouache;
- brushes;
- palette;
- glass of water.
How to draw
Mix blue and white to make blue, or use ready-made paint of this color. Cover ¾ of the sheet with it. Color the rest brown - this is the trunk of the tree.
Frame: Artmimishki Ira Rudnitskaya / YouTubeDraw a line from the tree to the left. With a dovetail brush or two regular brushes fastened together, draw shaded yellow lines along the trunk.
Frame: Artmimishki Ira Rudnitskaya / YouTubeWith red-brown paint, draw an oval slightly narrowing up and to the left above the branch and paint over it. You don't need to do it evenly, you'll come back to this part of the drawing. Draw another oval adjacent to the narrow section of the first. This will be the head of the squirrel.
Frame: Artmimishki Ira Rudnitskaya / YouTubeForm a smooth transition from the head to the body. Draw a muzzle narrowed down. With light strokes with a thin brush, outline pointed ears with protruding hair.
Frame: Artmimishki Ira Rudnitskaya / YouTube Draw a squirrel's tail. It lies along the back, approximately repeating its contour.
Draw a hind leg between the body and a branch: a short, wide thigh and a long, thin foot. Add the forelimb. It is about the same thickness as a foot. Use orange color so that the parts of the body do not merge: make a few strokes along the tail, highlight the paws.
Frame: Artmimishki Ira Rudnitskaya / YouTubeAdd the right one between the left upper paw and the head. It should be darker than the first, as it is in the shade. Mark the thick part of the branch, but do not draw the details yet.
Frame: Artmimishki Ira Rudnitskaya / YouTubeAdd some black to the brown paint and draw a branch. Bring it to the edge of the paper and paint over. If you accidentally land on a squirrel's leg, it's okay. Just wait for the paint to dry and paint the paw on top again.
Frame: Artmimishki Ira Rudnitskaya / YouTube Using the same color as the branch, paint the irregularities of the wood on the trunk..jpg) Add in a shade of white paint and make a few strokes on top of the branch. Take ocher, mix with yellow and draw a few more lines along the branch and trunk. Highlight the muzzle and tail with the same color. To better show the structure of the fur, work with a semi-dry brush.
Add in a shade of white paint and make a few strokes on top of the branch. Take ocher, mix with yellow and draw a few more lines along the branch and trunk. Highlight the muzzle and tail with the same color. To better show the structure of the fur, work with a semi-dry brush.
Add some white paint to the mixture of ocher and yellow and draw a light coat on the squirrel's neck, chest and belly with light strokes. Highlight the light tip of the left ear.
Frame: Artmimishki Ira Rudnitskaya / YouTubeDraw dark brown fingers on all paws. With the same color, mark the darker hair on the back, under the tail and on the ears. Add a couple of dark and light strokes to the hind leg so that the foot does not merge with the branch.
Frame: Artmimishki Ira Rudnitskaya / YouTube Draw a round black eye. Wait until the paint dries, and circle it with ocher and white. Put a white dot in the center. Draw a round black or dark brown nose. Add light highlights to the upper parts of the front paws, back and cheeks.
Use a dovetail brush or two regular brushes fastened together to draw greenery sticking out from behind the branches. Do not take a lot of paint, the tools should be semi-dry.
Frame: Artmimishki Ira Rudnitskaya / YouTubeAdd another shade of green, darker or lighter than the previous one. Walk on top with just a few strokes of yellow paint.
Frame: Artmimishki Ira Rudnitskaya / YouTubeDraw a dark brown hollow in the trunk and circle it with ocher and whitewash.
Frame: Artmimishki Ira Rudnitskaya / YouTubeWhen the paint dries, add a few light and dark strokes to the hollow. Draw a large nut under the squirrel's paws in the same brown color as the hollow.
Frame: Artmimishki Ira Rudnitskaya / YouTubeAdd dots to the walnut with ocher and black.
All the details are shown in this video:
What other options are there
Magic squirrel with a decorated tail:
And fluffy watercolor squirrel:
Read also 🎨🐶🦄🦔
- 5 ways to draw fabulous unicorns
- 29 ways to draw a deer that even a non-artist can handle
- How to draw a bullfinch with felt-tip pens, pencils or paints
- How to draw a dog for those who are not an artist at all
- 19ways to draw a hedgehog with pastels, paints and more
Step by step pencil drawing of a tiger for kids. Step by step instructions how to draw a tiger
One of the most common predators on the planet from the cat family is the tiger.
According to the latest information, these cats live in only 16 countries of the world and hunting for them is prohibited. It is unlikely that any of the people would want to meet this huge predator one on one in the wild. But to learn how to draw a tiger with a pencil in stages, many strive.
Tiger - a graceful panther
Yes, these felines belong to the genus of panthers. Graceful, very strong and muscular animals cause fear and admiration at the same time. Only nine species of these inhabitants of the fauna remain on the planet, some have long since become extinct.
In order to preserve their population, hunting has been banned in all countries. You can see this animal on TV, in a zoo or a circus.
But you can draw a tiger with a pencil in stages for beginners without leaving your home. The main thing is to learn how to correctly depict the animal's head. This is where we begin our creative journey.
- set of pencils with different degrees of softness;
- eraser;
- landscape sheet;
- compass.
Step-by-step description of drawing:
Developing creative imagination
Beginning artists try to immediately learn all the basics of fine art. Now you will learn how to draw an Amur tiger with a pencil step by step. We will draw it in a jump, connect your imagination. In order for the drawing to turn out alive, you will need paints or colored pencils. Before starting work, look in the encyclopedia for what the Amur tiger looks like.
Necessary materials and tools:
- landscape sheet;
- pencil set;
- eraser;
- gouache or watercolors.
Step by step drawing description:
Fairy Sherkhan
It is very easy to do this. The child imagines the tiger as a huge cat. It is better to choose cartoon characters. They are always sweet, playful and funny. For coloring, choose a bright orange and black shade. A child would love to play with such a tiger cub.
Materials and tools needed:
- set of pencils;
- landscape sheet;
- eraser.
Step by step drawing description:
The tiger is a powerful, wonderfully beautiful, magnificent predator. It is very understandable why we want to portray him so much, because in any picture the artist depicts himself, himself. And by drawing a tiger, we are partly reincarnated as a free wild and invincible beast. What can I say, I have heard the roar of a tiger - it shakes the walls and shakes the soul.
How can we draw a tiger? First, we draw, and having understood and felt, we will draw a tiger already from ourselves. Let's start with the "tiger is coming" picture. The tiger belongs to the cat family, we already know how to draw a lion and a cat - its relatives, and this will come in handy for us now.
Draw a walking tiger step by step - lesson 1
We will draw directly from the monitor:
Draw the torso - pay attention to the bend of the back - the croup is very clearly hunched:
The hind legs walk wide:
The front legs are straighter and look somehow strangely thicker than the hind legs:
The muzzle . .. hmmm ... quite human:
And now - all together - got a contour drawing Tiger:
However, this drawing can depict any large cat, even a puma, even a leopard. To give it a brindle look, it needs stripes!
Now, you can't confuse anyone with anyone - you can immediately see, TIGER. Now to color it correctly:
Drawing tiger - lesson 2
Take a rectangular sheet, place it horizontally and draw the contours with a pencil. The tiger walks slowly, head slightly lowered. I note that in many photographs wild animals lower their heads while walking. I think they sniff. And if you need to look around, then stop and raise your head.
So, the body is very large, the back is even, only the shoulder blades protrude slightly, the belly is not tucked up. I would say - a spacious belly, a gazelle can fit.
The paws are powerful, and again I draw your attention to the step: the right front - forward, the right back - back. On the left side - on the contrary: paws towards each other. The tiger, of course, is digitigrade (unlike, for example, a bear), but the part of the paw on which it steps is huge, its traces will terrify anyone. We depict the folds on the front and hind legs honestly: mentally list where the elbow is, where the knee is.
Powerful neck - forward and slightly down. The head is massive, turned to us in profile. The mouth is slightly open: it may be hot for him and he is ventilated. However, the teeth look very serious. Let's make sure that the eye is drawn where the eye socket is, and the ear corresponds to the ear canal. The figure of the tiger was drawn, now the stripes. We don’t relax - the stripes also need to be drawn wisely: the sides of the tiger are not flat, we arrange the stripes according to the shape of the bulges - sides, paws. The tail is also covered in rings of stripes.
Here I ask for attention: as a visual aid, my picture "Tiger", drawn on the basis of children's inventions on the theme of stripes.
Stripes
It is dedicated to the problems of mindfulness.
I see with great surprise how the children, having drawn a beautiful and proportional figure, and having reached the pattern of stripes, seem to turn off and line the animal like blinds or like a striped sweater. Then we find out with them how the tiger turned out to be so flat. And so: they painted without thinking, so they flattened out. Well, we looked, laughed and now we draw. Here's a cheat sheet for you - how to draw stripes on the sides of a tiger:
But what will happen if you bring the real color:
Now let's think about how to draw a lying tiger. It would seem that the pose is simpler here, but no, let's not be frivolous: bent legs in perspective and here an eye and an eye is needed to maintain proportions and not disturb the balance of the figure.
Draw a lying tiger - lesson 3
Actually, only the back of the body is lying, the front legs rest on the elbows, the chest and head are raised. So the spine is rather complicatedly curved.
The torso is powerful, muscular, but look, no such broad shoulders.
How easy it is to draw a tiger with a pencil step by step - for children and adults. We learn to draw a beautiful tiger with a pencil in stages with a child. Learn how to quickly and easily learn how to draw a beautiful tiger cub.
Every person in his life dreams of learning how to draw beautifully, especially children, they are interested in learning how to draw not only trees, the sun, people, houses, flowers, but also different animals.
Today we will see how you can easily and quickly learn how to draw a tiger. Take a sheet of paper and a pencil, look carefully at the picture where the tiger is drawn. Look at the location of the tiger, how and where its body, head, tail, paws are located.
The body of the tiger is drawn in the center of the picture, the head of the tiger is on the left, the tail of the tiger is on the right, the paws of the tiger are drawn below.
Start drawing the tiger from the body, it consists of two identical circles, there should be a small distance between the circles, draw one circle higher, the second lower, connect these two circles with a line from below.
Now, just above the tiger's body, draw a small circle - this will be the tiger's head and connect the tiger's head and body with two lines.
Draw the muzzle of the tiger, it should be round and slightly pointed towards the bottom, draw the eyes of the tiger.
Now draw the two front paws of the tiger, they should be drawn as curved lines.
Draw the tail of the tiger, it should be drawn from the right side to the top long and curved.
Now we need to draw the face of the tiger.
Draw the ears of the tiger, they should be drawn at the top in the form of small triangles, the edges of the ears should be slightly rounded, draw the eyes in the form of small ovals, with pointed corners at the ends.
Draw the tiger's eyebrows, they should be drawn in two small arcs. Draw the nose in the form of a small oval, elongated to the left and right. Draw the mouth as a small curved line.
Draw a little shading on the tiger's head on the right and on the chest - this will be the tiger's hair. In the figure, everything that needs to be drawn is drawn in red.
Now connect the tiger's head and body with a smooth line - this will be the back of the tiger, draw a curved line around the lower circle that ends in the center of the lower circle - this will be the tiger's hind leg, because he is sitting in the picture. Draw the front paws of the tiger. In the figure, everything that needs to be drawn is highlighted in red.
Draw the front paws of the tiger, draw the fingers. Draw the hind paw of the tiger and its fingers, the second paw is not visible, because the tiger sits sideways. Draw the tiger's tail, it should be long and beautiful. Circle the contour of the tiger, erase the extra lines, color the tiger so that it is beautiful, striped.
Now let's draw another tiger, it is drawn standing and looking the other way four paws.
Take paper and pencil and start drawing the tiger from its torso. First draw two identical circles - this will be the body of the tiger. A little higher, draw another circle, a little smaller - this will be the head of the tiger.
Draw the ears of the tiger, they should be drawn in the form of two small triangles, the edges of the triangles should be slightly curved at the edges. Apply a small shading around the head - this will be the fur of the tiger.
Now draw the face of the tiger. First you need to draw the eyes, draw two small arcs, then draw the tiger's nose in the form of a small oval. At the bottom draw a mouth, it should be drawn in the form of small curved lines. Everything that needs to be drawn in the picture is drawn in red.
Draw the eyes of the tiger in the form of small ovals, elongated and pointed at the corners, draw the lower part of the tiger's head. Everything that needs to be drawn in the picture is drawn in red.
Now you need to draw the two front paws of the tiger, draw the fingers on the paws. Connect the head and torso of the tiger, draw the chest and put a small stroke on it. Everything that needs to be drawn in the picture is drawn in red.
Connect the head and body of the tiger with a curved line and connect the front of the body and the back of it from below. Draw the hind legs and fingers on them. Everything that needs to be drawn in the picture is drawn in red.
Now draw the tail of the tiger, it should be drawn long on the left, almost to the ground. The tail in the figure is drawn in red.
Outline the tiger, erase extra lines that you no longer need, draw stripes on the tiger, color them.
Look what a beautiful tiger you have.
Courses for the development of intelligence
We also have interesting courses that will perfectly pump your brain and improve intelligence, memory, thinking, concentration:
Development of memory and attention in a child 5-10 years old
The course includes 30 lessons with useful tips and exercises for the development of children. Each lesson contains useful advice, some interesting exercises, a task for the lesson and an additional bonus at the end: an educational mini-game from our partner. Course duration: 30 days. The course is useful not only for children, but also for their parents.
Secrets of brain fitness, train memory, attention, thinking, counting
If you want to overclock your brain, improve its performance, pump up memory, attention, concentration, develop more creativity, perform exciting exercises, train in a playful way and solve interesting puzzles then sign up! 30 days of powerful brain fitness are guaranteed to you :)
Super-memory in 30 days
As soon as you sign up for this course, you will begin a powerful 30-day training for the development of super-memory and brain pumping.
Within 30 days after subscribing, you will receive interesting exercises and educational games in your mail, which you can apply in your life.
We will learn to memorize everything that may be required in work or personal life: learn to memorize texts, sequences of words, numbers, images, events that happened during the day, week, month, and even road maps.
Money and the mindset of a millionaire
Why are there problems with money? In this course, we will answer this question in detail, look deep into the problem, consider our relationship with money from a psychological, economic and emotional point of view. From the course, you will learn what you need to do to solve all your financial problems, start saving money and invest it in the future.
Speed reading in 30 days
Would you like to read interesting books, articles, newsletters and so on very quickly? If your answer is "yes", then our course will help you develop speed reading and synchronize both hemispheres of the brain.
With synchronized, joint work of both hemispheres, the brain starts to work many times faster, which opens up many more possibilities. Attention , concentration , speed perception are amplified many times over! Using the speed reading techniques from our course, you can kill two birds with one stone:
- Learn to read very quickly
- Improve attention and concentration, since they are extremely important when reading quickly
- Read a book a day and finish work faster
We speed up the mental calculation, NOT mental arithmetic
Secret and popular tricks and life hacks, suitable even for a child. From the course, you will not only learn dozens of tricks for simplified and fast multiplication, addition, multiplication, division, calculating percentages, but also work them out in special tasks and educational games! Mental counting also requires a lot of attention and concentration, which are actively trained in solving interesting problems.
Conclusion
Learn to draw yourself, teach your children how to draw two tigers step by step, it took you a little time, but now you can draw. We wish you good luck in your future work.
All domestic cats are so cool! They live next to a person for years, catch mice, protecting supplies, drink milk from a saucer and gently rub against their legs. If the family starts purring, this is not surprising.
Looking at the pictures for children with tigers, you immediately understand that these animals are close relatives of domestic cats. The same habits and hypnotizing look, the same playfulness and grace. Read the article to learn a lot of interesting things about striped predators, as well as take a good look at them in drawings and photos.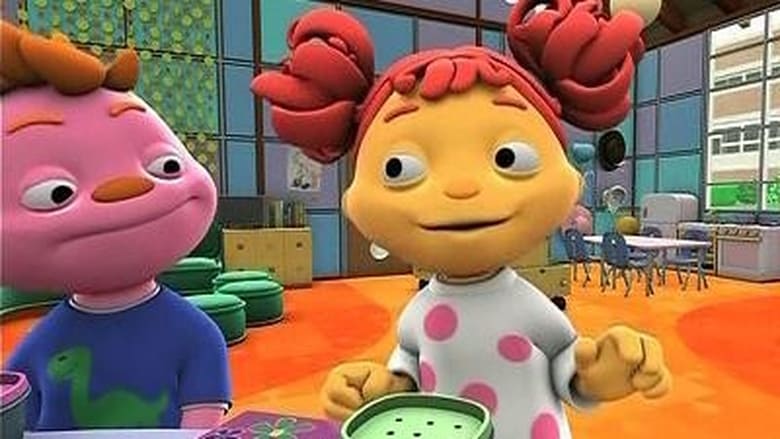
Pictures of tigers for children
The tiger is the largest predator of the Felidae family. In length, it can reach 3 m, weigh more than 300 kg. Females are usually slightly smaller than males. The life expectancy of animals is about 20 years.
| |
| | |
Scientists count 9 species of tigers, 3 of which are considered extinct due to human fault.
| | |
Cool and funny pictures with tigers and cubs
Impressive sizes do not prevent striped predators from being excellent hunters. A wild cat hunts down its prey, sitting in ambush, or silently creeps up to it, then to make a lightning throw. If the tiger misses, he pursues the victim for a maximum of 200 m, then retreats and tries again.
Striped beauties feed mainly on ungulates - deer, wild boars, roe deer, etc.
| | |
To hold the prey, and after its transportation, the wild tabby cat uses powerful 10 cm fangs. Beautiful photos with a grinning tiger can be downloaded for free. You will get very beautiful wallpapers for your desktop.
| | |
Unlike a cat, a tiger is a big fan of water procedures. He swims not only for business, but also for pleasure.
| | |
Tigers come in two basic colors - gold and white. White color has only one species, Bengal. Do not confuse the white tiger and the albino! In the first case, the color is determined not by a mutation, but by the presence of a recessive gene.
| |
In the wild, a tigress mother gives birth to 2 to 4, rarely up to 6, blind and helpless tiger cubs. They weigh only 1.5 kg! Mom feeds them with her milk, protects them from male tigers and other predators.
| | |
From the age of two months, she begins to teach them how to live independently and how to hunt. Tiger cubs live with their mother for 2-3 years.
| | |
Funny babies are very playful. They run, jump, climb trees, roll head over heels, bite each other. Tigers retain playfulness into adulthood.
| | |
Amur tiger, photo and description for children
The Amur tiger is the northernmost species. It is listed in the Red Book, as there are about 500 of its representatives left in the wild. A striped predator on the snow is an impressive sight. It is not surprising if there is a desire to draw a drawing of the Amur tiger with a pencil.
| | |
Cartoon tigers. Guess the cartoon from the picture
A cartoon tiger can be evil, like Shere Khan, Mowgli's enemy from The Jungle Book, or kind, even a little stupid, like Tigger from Winnie the Pooh. Let the children look at these funny pictures and guess what cartoon or fairy tale they are from.
| | |
| | |
| | |
| | |
Beautiful pencil drawings
Looking at these drawings for kids, you begin to forget that a tiger is not an affectionate domestic kitten with a striped color, but a formidable predator. These cartoon-style babies are incredibly cute!
| | |
| | |
| |
Pencil drawings of a golden or Amur tiger for children are quite another matter. They convey the important look and grace of these stunning animals.
| | |
Pencil drawing step by step for kids and beginners
After viewing all these pictures, the kid will want to try to draw an Amur or golden tiger on his own. To make it easy for him, you should use one of the proposed schemes for beginners. They show how to depict the torso, paws and head of a tiger step by step, how to draw its stripes. By the way, there are stripes on the coat of the animal and on its skin. There are about 100 of them in total. The drawing of each animal is unique, like the lines on the fingertips of a person.
| |
In this video, kids from 3 years old are explained in an easy to understand way how to draw a tiger with a pencil, and then color it with paints.
Rhymes and videos for kindergarten and elementary school children
Kindergarten kids and elementary school students love stories about exotic animals.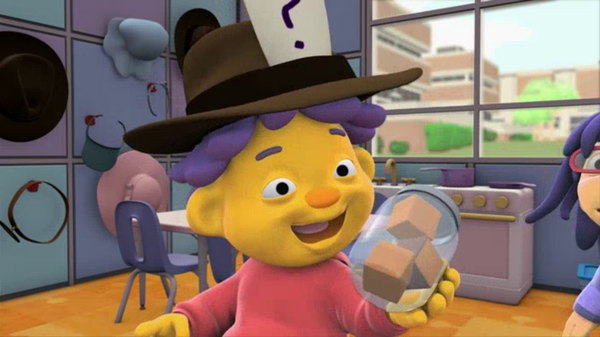 Information about tigers and other wild cats today is easy to get not only from zoological encyclopedias, but also from educational videos on the Internet. Not everyone has the opportunity to observe the habits of a predator in nature. On the captured footage, you can see how the tiger hunts, plays, bathes, takes care of its babies.
Short rhymes for kindergarten and elementary school
This rhyme for kindergarten children will help them distinguish tigers from lions and other large feline predators by their striped coats.
| |
It will be very easy for kids to solve this long riddle in verses.
| |
V. Sibirtsev's nursery rhyme is dedicated to the hunting of the Amur tiger.
| |
Baby video about tigers
Do babies know that tigers can imitate the voices of other animals? This and other interesting facts are described in an informative video.
This cartoon teaches that even tiger cubs should be treated politely.
Kids will be happy to watch a good fairy tale about the adventures of the Ussuri tiger cub.
The main thing in the image of a tiger is the stage-by-stage study of the drawing. So you can avoid basic mistakes and make the drawing beautiful and even. Having learned how to draw a head, you can move on to the image of a whole animal. And you can just make a cartoon sketch, or apply face painting, which is easily washed off.
Draw the head of a tiger
The base of the tiger's head in profile is a circle. Draw it approximately in the center of the sheet. Designate the kennels of the future nose and neck.
On the basis of the resulting shape, draw the shape of the muzzle, ears with hair, chin, nape and front of the neck. The muzzle of the tiger does not have pronounced swirls of wool. Adding details. Outline the mouth and nostrils and paint over it. Mark the line of the nose, eyes and hair in the ears, "beard" and hair on the chest in 2 rows.![]() It remains to add only small details: black stripes, mustaches, and short hairs if necessary.
It remains to add only small details: black stripes, mustaches, and short hairs if necessary.
The base of the full face is also a circle. To draw a tiger's face, divide the workpiece into 4 parts for the symmetry of the future portrait. Draw lines for the neck. Mark the eyes, nostrils and wrinkles at will. The tiger will growl, so draw an open mouth with fangs, tongue, gums, and mouth texture. Add volume to the cheeks and neck by painting fluffy fur. Add small details, hairs and mustaches and color the finished drawing.
How to draw a tiger step by step
The easiest way to draw a tiger is with a pencil and step by step, because it's easier to make a rough sketch first, in which you can correct something, and then gradually complicate it. We outline the general outline of the head and torso. To do this, draw a large oval - the torso, a slightly smaller oval covering the body - the chest, and a small circle - the head. Moreover, the body and chest should expand on the left side. Start drawing the face of the beast and then fill it in with the main details. Draw the front llamas fairly straight. In order to show the dynamics, you can depict one of them raised up. Paws are drawn, narrowing the contour downward. The elbows of the animals are not very pronounced, but still present. Their paw pads are large, with claws. The hind feet can be roughly divided into 3 elements: wide, leg-like, thin, and pads with toes. Now delete the extra parts of the sketch and circle the main drawing. Select the fur and draw the tail. Add stripes. Remember that they should not be drawn in whole spots, try to convey the structure of the coat. Now the drawing can be colored.
Cartoon tiger cub
It will be easier for children and beginners to draw a cartoon tiger with a pencil. And the easiest option is a cartoon tiger cub depicted step by step. Circle some round object - the basis for the head and make an elongated shape for the body. As always, divide the circle into 4 slices to make it easier to make the face symmetrical. Start processing the shape of the face: mark the contour of the ears, cheeks with protruding hair. Here it is not necessary to depict the detailed structure of the hairs, it is enough to indicate the general shape. Line up the eyes along the guide lines. They must be exaggerated. Mark the shape for the nose and mouth. Now add the inner contours of the ear and mark the transition from the ear to the head. Outline the iris, but do not paint over it. Make the pupils large, leave white highlights. Draw a short mustache, the upper contour of the nose and nostrils - dots. Now draw the paws of a tiger cub. They must be raised. Their peculiarity is that they are much shorter than those of an adult animal. Add a body. It should turn out pretty plump, because it's small. And complete the general sketch by drawing the hind legs with claws. Draw pads for the front paws, and do not forget to draw a tail. Paint over the ears and stripes with black. You do not need to make a wool texture, this is a simple drawing for children.