How to preserve salt dough ornaments
How to Save a Cracked Salt Dough Ornament
Save your family keepsake.
Each product we feature has been independently selected and reviewed by our editorial team. If you make a purchase using the links included, we may earn commission.
A pet's paw. A child's handprint. A personalized gift for newlyweds. A salt dough ornament is more than just a trimming for your Christmas tree: It's a family keepsake. And it's one which, once broken, cannot be replaced. Luckily, they can be repaired, but they'll never look the same as they once did. In order to repair a broken salt dough ornament, it's important to first understand how one's made in the first place.
How do you make a salt dough ornament?
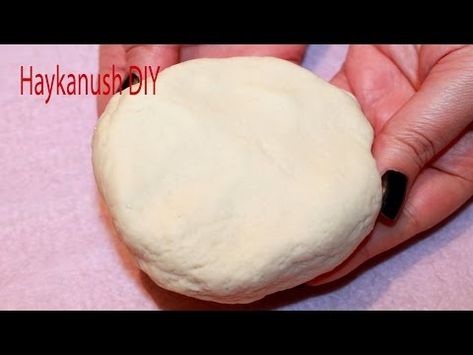
Salt dough ornaments are made by combining common kitchen staples: flour, salt, and warm water. Knead the dough, freeze it, then bake it for several hours and, once cooled, they'll be ready for decorating with cookie cutters, microbeads, craft paint, and glitter for extra sparkle.
You can paint a coat of glossy decoupage glue over the entire ornament to seal and protect it, and to give it a shiny finish. You can also spritz it with a light coat of polyurethane spray. Both methods, along with the salt acting as a natural preservative, help to extend the ornament's longevity. Hooks and wire help them to hang securely on the tree's boughs, in a garland, or along the mantel.
What are the best storage methods?
Out of season, store salt dough ornaments as you would store your most prized heirlooms and collectibles: by avoiding heat, humidity, and moisture. If you have multiples, layer them between sheets of wax paper (never tissue, which can stick to them in the heat) and store them in a sturdy box. When handled with care, these ornaments can last for several years. That said, accidents and "oops!" moments do happen.
What do you do if you crack or break your salt dough ornament?
Sadly, it's unlikely that you can repair a salt dough piece to look like it did before, says crafter and longtime Martha Stewart Living contributor Silke Stoddard. Much like trying to repair a baked cookie—you can't go back to the dough the way it was unbaked. Our suggestion? Prevent it from cracking further by filling the fissure with craft glue. You'll want to use an applicator that is bottled with a fine tip to neatly get into the crack, but not have it spill beyond. Then, create a new imprint that will last longer: Use a mold maker kit
($24.99, michaels.com), then fill it with plaster or clay. Depending on how deep the crack is and how well the glue was able to fill it, it may show in the mold. However, this can be sanded off if using plaster or clay.
Much like trying to repair a baked cookie—you can't go back to the dough the way it was unbaked. Our suggestion? Prevent it from cracking further by filling the fissure with craft glue. You'll want to use an applicator that is bottled with a fine tip to neatly get into the crack, but not have it spill beyond. Then, create a new imprint that will last longer: Use a mold maker kit
($24.99, michaels.com), then fill it with plaster or clay. Depending on how deep the crack is and how well the glue was able to fill it, it may show in the mold. However, this can be sanded off if using plaster or clay.
Another option is to repair the crack to intentionally show by using colored glue, like kintsugi. In Japanese, the word kintsugi means "golden rejoining," and refers to the Zen philosophy of acknowledging flaws, embracing change, and restoring an object with a newfound beauty-which is a lovely sentiment for such a special ornament.
Here's to keeping your treasures pretty and protected for holiday seasons to come.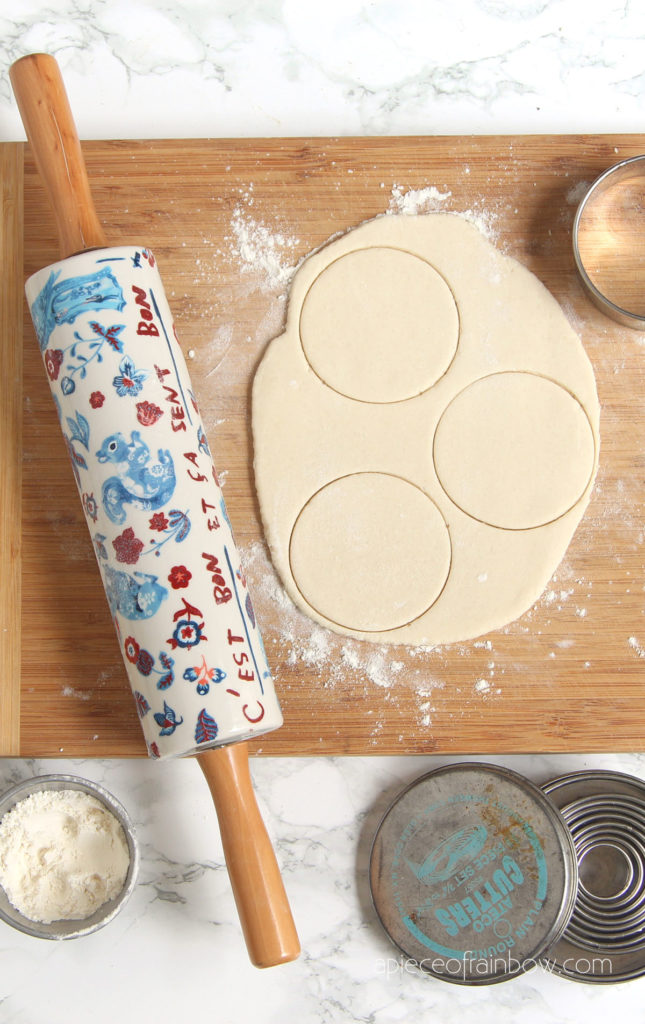
EASY Salt Dough Ornaments That Last Forever
6.3K shares
Use this recipe to make salt dough ornaments that double as personalized gift tags – both kids and adults will love this EASY craft. Preserve the ornaments with Mod Podge.
Skills Required: Beginner. You’ll make salt dough according to the recipe, cut your shapes, and then bake it. Then you’ll paint and Mod Podge the resulting ornaments. Anyone can do this project without prior experience.
I have a confession to make: I LOVE wrapping gifts. Presentation may not be everything, but it’s worth a lot in my book. When I can add a unique, handmade, and thoughtful topper to my gifts, I’m definitely going to take the time to do so.
In addition to gift wrap, I also love Christmas ornaments. Especially something personalized, that I can make myself.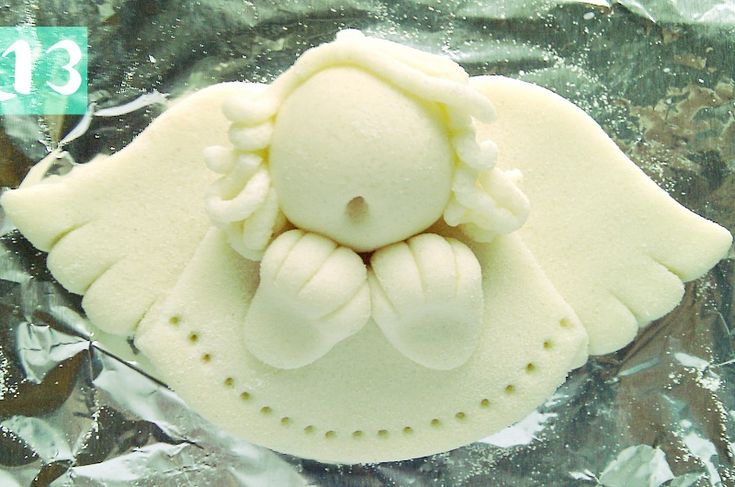 “So what,” I thought, “if I can combine the two together?” So I did. AND they are a perfect craft for adults or winter boredom buster for kids. You’ll really enjoy making these!
Table of Contents
DIY Salt Dough Ornaments
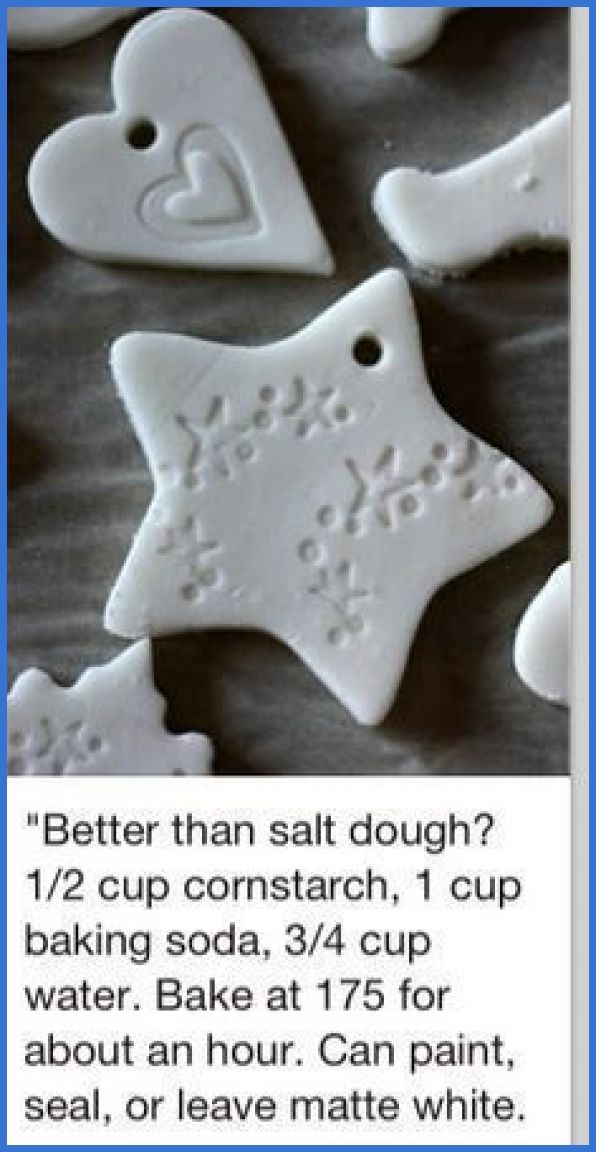
These salt dough ornaments, sealed with my new favorite Mod Podge (Sparkle!), are perfect for adding a personalized touch of fun to your gift wrap. Then, of course, you can hang them on your Christmas tree instead of throwing them away as you would a typical gift tag.
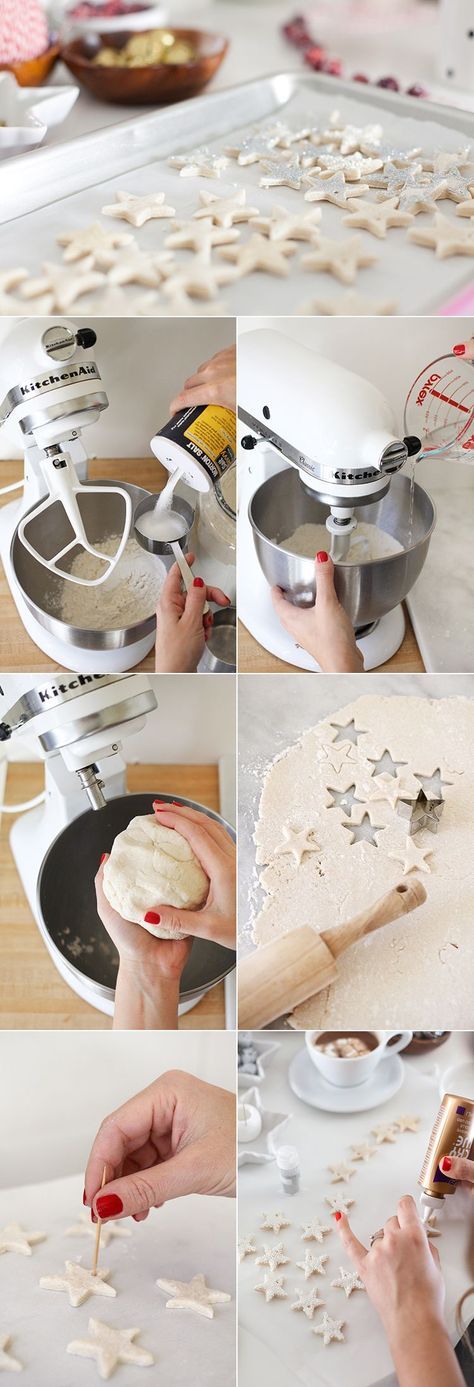
How to Make Salt Dough
Salt dough is easy to make with ingredients you probably already have in your kitchen! Our salt dough recipe is made with flour, salt, and water. It’s *really* easy and you can’t mess it up. The only thing I ask is that you don’t eat the dough, or let your children eat it. It tastes terrible anyway!
Preserving the Ornaments
You have a few options for preserving your ornaments. Before you do any preservation, you’ll want to paint them (if you want to use paint). You can paint the entire ornament or partial . . . and I recommend acrylic paint.
After that you can do one of two things. You can seal the ornaments with Mod Podge (giving them a few coats) or you can use a spray sealer. Or both. In this project, we’re using Sparkle Mod Podge to both seal the ornament and add a bit of bling to the project. So Mod Podge serves double duty in this instance!
The finish you use to preserve the salt dough is up to you – pick Satin, Gloss, or Matte depending on what you like. My personal favorite (besides the Sparkle) is a Satin finish.
How Long do Salt Dough Ornaments Last?
If you preserve your ornaments properly, salt dough can last for years. I have some dough ornaments from my childhood, so they would be at least 35 years old. They are still in great condition and there’s been no disintegration whatsoever!
Salt Dough Recipe
Gather These Supplies
- 2 cups flour
- 1 cup salt
- 3/4 – 1 cup water
- Initial cookie cutters
- Mod Podge Sparkle
- Paint for dipping (if desired)
- Twine or ribbon for hanging
Step 1: Make your dough by mixing your flour, salt, and water.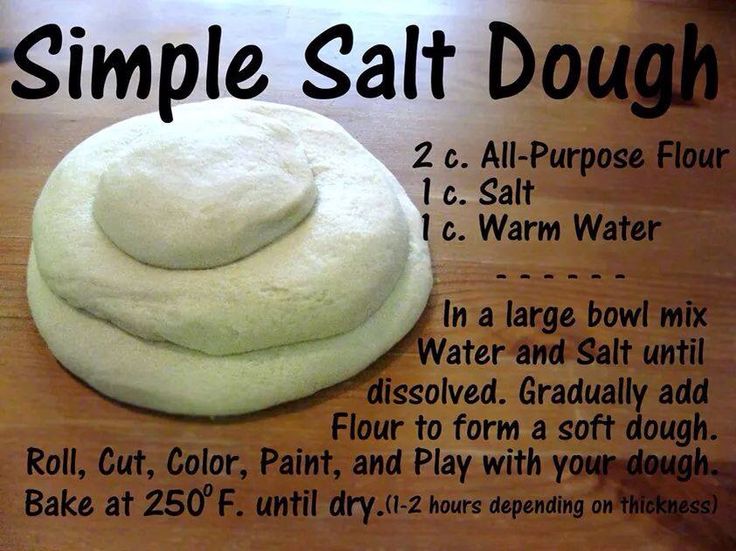 If your dough is too dry, add a bit more water, if it’s too wet, just add more flour . . . salt dough is very forgiving; it’s hard to mess it up!
Step 2: Roll out your dough and cut out your initials. Place on a sheet pan lined with parchment paper. You can cut your salt dough ornaments into any shape you like. I did letters, but you can use any cookie cutter shape you find.
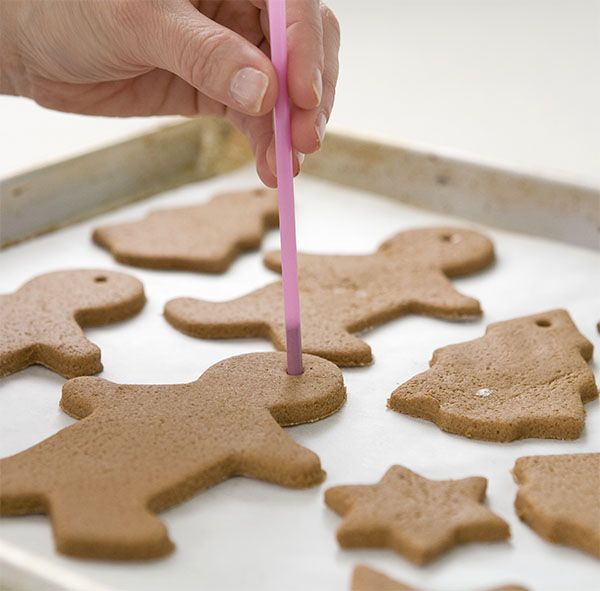
Step 3: Use the end of a skewer to poke a hole at the top of each initial for hanging. Bake at 250 degrees for 2 – 3 hours. Let cool.
Step 4: I decided to dip my salt dough ornaments in gold paint (which I added to a cup and mixed with about a tablespoon of water to thin).
You can decorate your ornaments with glitter, craft paint, or anything else your heart desires. Dip your initials, and let dry on parchment paper.
The salt dough ornaments are being shown dipped in the paint, but you could dip them into Mod Podge and then sprinkle with glitter.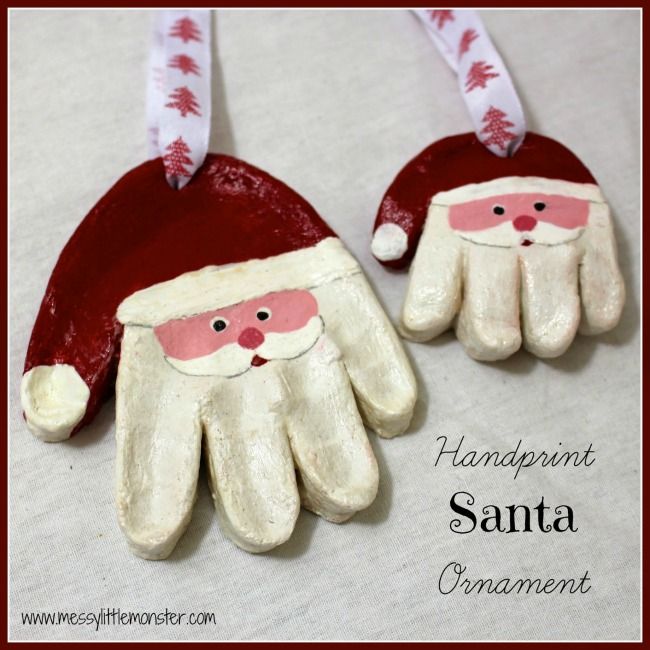 If you do that, wait until dry and brush off the excess with a dry brush before hanging.
Step 5: Once dry, add a coat (or more) of Mod Podge Sparkle to help seal the ornaments and give them a bit of shimmer.
It’s as simple as that! These are so fun and easy to make, and it’s a great kids’ craft, as well!
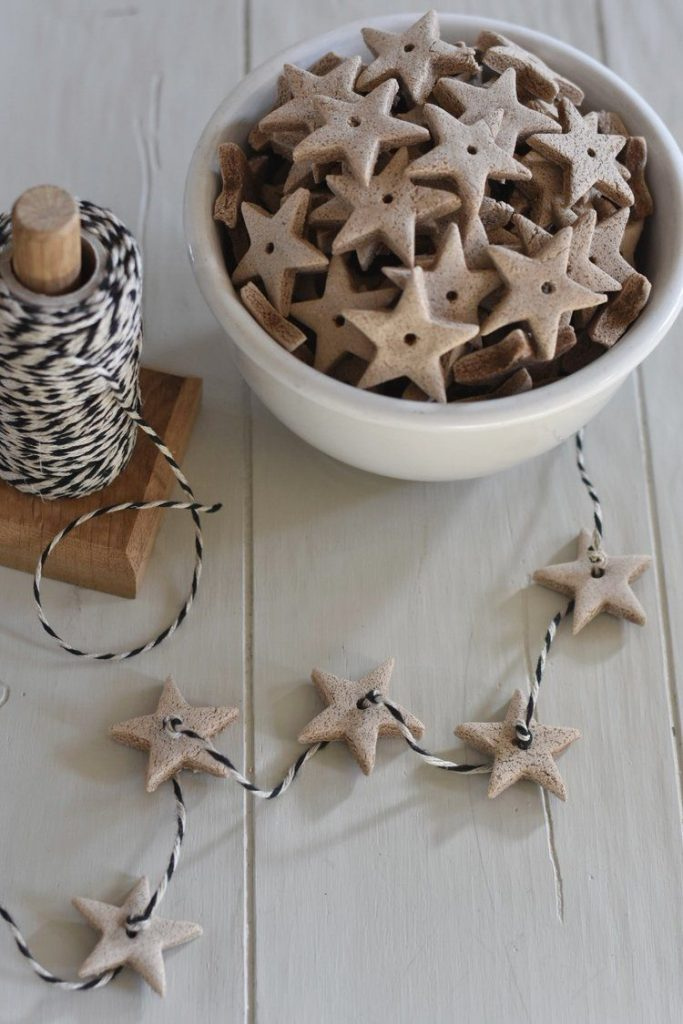
You can tie these salt dough ornaments to gifts with baker’s twine, or you can grab some ornament hooks and put them on the tree.
They look great on top of packages . . . wouldn’t it be fun to spell out a name and tie one letter to each gift? There are so many things you can do with this idea!
Thank you so much for letting me share my salt dough ornaments with you all today! You can find lots of other tutorials and inspiration on my blog.
Prep Time 5 minutes
Active Time 20 minutes
Total Time 25 minutes
Difficulty Easy
Estimated Cost $5
Materials
- 2 cups flour
- 1 cup salt
- 3/4 - 1 cup water
- Mod Podge Sparkle
- Paint for dipping (optional)
- Baker's twine
- Parchment paper
Tools
- Cookie cutters
- Scissors
- Cookie sheet
- Oven
Instructions
- Make your dough by mixing your flour, salt and water.
 If your dough is too dry, add a bit more water, if it's too wet, just add more flour . . . salt dough is very forgiving; it's hard to mess it up!
 - Roll out your dough and cut out your shapes (in this case, initials) with the cookie cutters. Place on a sheet pan lined with parchment paper.
- Use the end of a skewer to poke a hole at the top of each ornament for hanging.
- Bake at 250 degrees for 2-3 hours. Let cool.
- If desired, dip ornaments in paint or glitter. Let dry on parchment paper.
- Once dry, add a coat (or more) of Mod Podge Sparkle to help seal the ornaments and give them a bit of shimmer. Let dry.
- Use baker's twine to hang.
And if you are interested in making some additional gift tags with salt dough, get inspired by our faux cookie gift tags. I’d also love for you to check out these other kids’ Christmas crafts:
6.3K shares
The perfect salt dough recipe.
 Tips for beginners
 I'm here: home ›
Creativity
›
Crafts
›
Plasticine
› The perfect salt dough recipe. Beginner Tips
From plasticine
A real miracle when a shapeless plastic mass turns into a playful kitten or a fabulous house. I suggest you feel like a magician and prepare the perfect salty dough for future masterpieces.
1294 t.0
Weight, which keeps its shape perfectly floats and does not deteriorate over time, - dream of all lovers modeling. And the dream of all parents - safe plastic mixture without allergens and harmful additives . Salt dough skillfully brings everything together these qualities and thanks to baking better preserved than plasticine.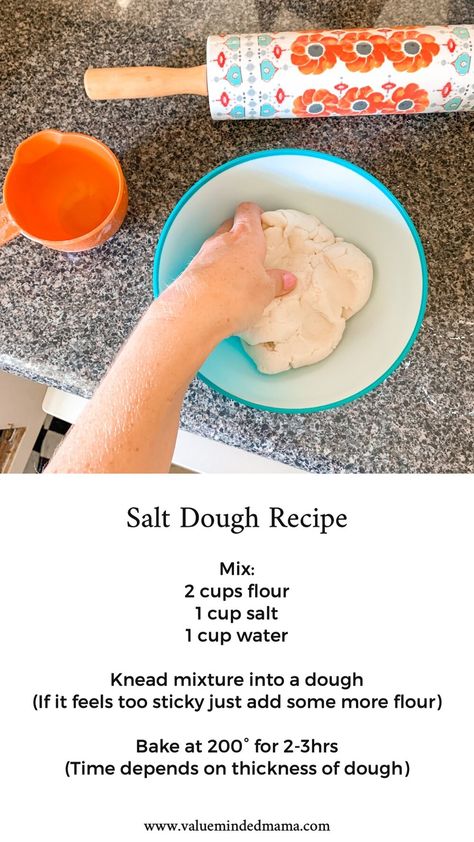
figurine from salt dough will become an exquisite decoration of your rooms and a wonderful tool for games. How to make salt dough soft and pliable, and even for a long time to keep flour mixture? Desert Boy Knows answer!
Classic salt dough recipe
modeling from salt dough is not a new occupation. The origins of this type of creativity are lost deep in the history of our culture. Remember only Kolobok from a folk tale and the custom of baking larks on Candlemas. Hold the basic salt dough recipe for crafts - continue traditions of ancestors with pleasure!
For making salt dough for you will need:
- 1 glass of fine salt
- 2 cups of flour
- half a glass water,
- 5 Art. l. sunflower oil,
- natural juice or gouache (optional).
K cause!
IN In a deep bowl, mix dry ingredients: salt and flour.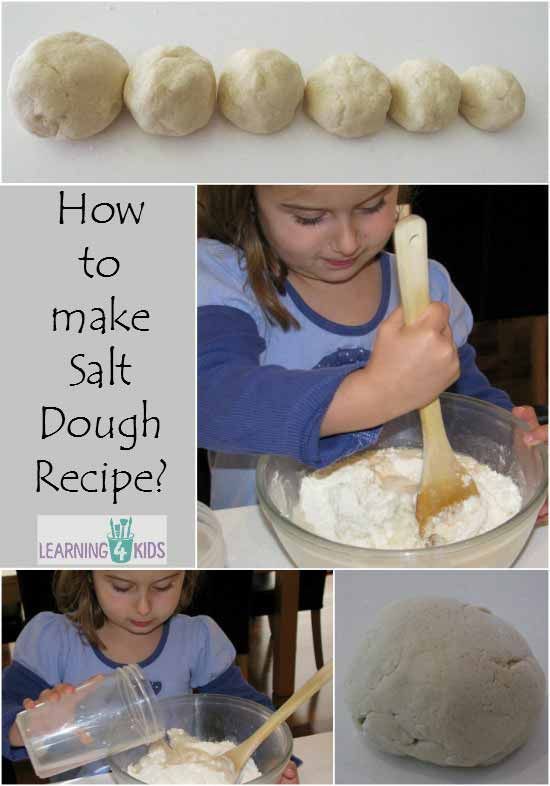 Add sunflower oil and pour some water. Knead the dough. To give the mixture a certain color, carefully stir in the carrot (beetroot) juice or diluted in water gouache. If necessary, small add water or flour in portions to adjust the viscosity of the dough.
Important! It is best to store the finished dough in refrigerator no more than a day, tightly wrapping the mass with cling film.
Salt dough recipe for sophisticated works
If you plan to make thin embossed figurines or miniatures salt dough, to the classic recipe you have to add a secret ingredient. Which? Read on - I'll tell you everything!
For making salt dough in a special way the recipe you will need:
- 1.5 cups of flour
- 1 a glass of salt
- 125 ml of water
- 1 Art. l. PVA glue or starch
- food dye.
K cause!
Prepare deep container.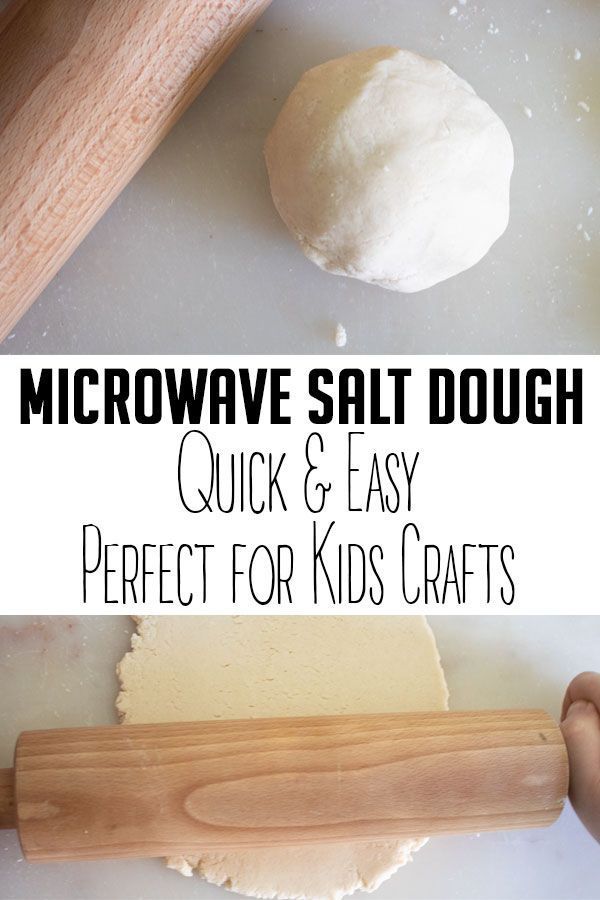 Mix flour and salt and add 125 ml of water. Mix thoroughly Ingredients. Now add a dining room a spoonful of starch or PVA glue. Starch increases the plasticity of the mass, and the glue increases its strength. PVA can be replaced 2 tsp wallpaper glue diluted in water, according to instructions. At the end add food coloring and mix well. If you need a lot of different colors, divide the dough into several pieces and add the colors you want. Merry creativity!
Preparing tools for working with salt test
From salt dough can be made that anything - toy products, animals, flowers and luxurious paintings. But so that your the work looked original and intricate, you will need different tools. You don't need to buy anything, use items that are at hand.
For creating unique patterns on the surface salt dough is ideal:
- curly rolling pin or water bottle
- toothpicks (for punching holes)
- caps from markers,
- rod from a ballpoint pen
- knife for plasticine,
- molds for cookies,
- buttons,
- beads,
- pasta,
- lace and other stamps for embossing,
- press for garlic.

Boldly Experiment with patterns and shapes! IN in case of failure, the item is easy to fix or blind again.
How to dry products from salty test?
To the finished craft pleased the eyes for a long time your guests, it needs to be right dry. Remember: the main rule of drying salt dough products - no sudden changes in temperature.
There are two ways to dry figurines from salt dough:
1. The simplest is natural. Just leave the figurine to dry room temperature for several days or weeks. In no case can dry the product on a hot battery - it will crack or crumble. Too humid room is also not suitable - the dough, like a sponge, absorbs moisture and can easily get wet. The natural way is extremely easy, however, oh-so-very slow. And to us want to go faster, right?
2. Drying in the oven. Put figurine on parchment in a cold oven and bake on low heat, gradually increasing the temperature.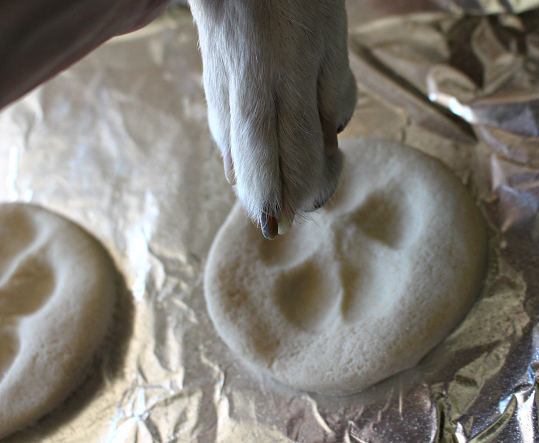 Regularly turn the product over so that it baked evenly on all sides. After finishing work, the craft immediately do not take it out - let it cool in the oven.
Vo drying time for salt dough refer to the following table.
| Short products (thickness up to 2 cm) | Volumetric work (more than 2 cm thick) |
| 1 hour at 50 °C | 1–2 hours at 50 °C |
| 1-2 hours at 75 °C | 2-3 hours at 75 °C |
| 1 hour at 100 °C | 1–2 hours at 100 °C |
| 1 hour at 125 °C | 2 hours at 125 °C |
0. 5–1 hour at 150 °C 5–1 hour at 150 °C | 1 hour at 150 °C |
Dry dough products can be turned off oven. Warm it up properly and put it down figurines in heat. Wait until the oven cool down. Repeat the process for several once.
In time to work with salt dough fail inevitable. However, don't be upset and put your hands down. If during the drying the craft is cracked or fell away from it detail, return the toy shape will help construction glue PVA or Moment.
cracks and irregularities can be smoothed out by small files for metal. Such for sure found in dad's tools.
Finished it is better to varnish the product - so it longer pleasing to the eye his talented master.
More sculpting ideas here:
- Mushroom polymer clay panel,
- Animals plasticine,
- Interesting plasticine products.
Tags: DIY toys
Noticed a spelling mistake? Select it with the mouse and press Ctrl+Enter
Related materials
New Year's tree toys in e...
Coffee heart
Polymeric candlestick house...
Pocket Elephant
Sushi cars
Cute birds
DIY doll
Wizard Robbie
Where, how much and how to store salt dough for modeling
Today there are a large number of goods for creativity on sale. These are sets of ordinary and ball plasticine, as well as various plastic masses for modeling, which harden when heated and those that never dry out. Despite the fact that the variety of colors and textures of such materials is very large, salt dough has been invariably popular for many years. This affordable and plastic material allows each child to be creative and create a beautiful and original craft. But each time, mothers often do not have time to make a new mass. It is easier to make a lot of blanks, and store salt dough so that it remains elastic. But to store such material you need to follow certain rules.
How to make modeling clay
Even a mother inexperienced in such matters can make flour-based modeling materials. This will require only 3 things:
- flour;
- water;
- salt.
In this case, flour and salt are used in the same amount. And water is added until the mixture reaches the desired consistency.
If the resulting mass is to be used for the manufacture of graceful figurines with small details, a little PVA glue is added to the dough. You can also add wallpaper paste diluted with water. This will make the material more elastic and sticky. But if there was no glue at hand, you can use ordinary starch. It has almost the same adhesive properties.
- Larger pieces will be firmer with dough with a higher salt content. And for more professional crafts, it is recommended to use dough with glycerin, which can be purchased at a pharmacy.
- To obtain a more homogeneous and soft molding mass, it is better to mix the components with a mixer.
- Extra salt dissolves faster. It is much smaller than usual, which helps to make the mass more plastic.
- If colored dough is required, food coloring is used in its production.
Another important rule. Salt and flour should be used based on their weight, not volume.
Storage conditions
It is a pity to throw away the material that turned out to be superfluous after the figurine was made. Therefore, you need to know where to store salt dough for modeling.
The remaining mass is formed into a ball, placed in a sealed plastic bag and tied tightly.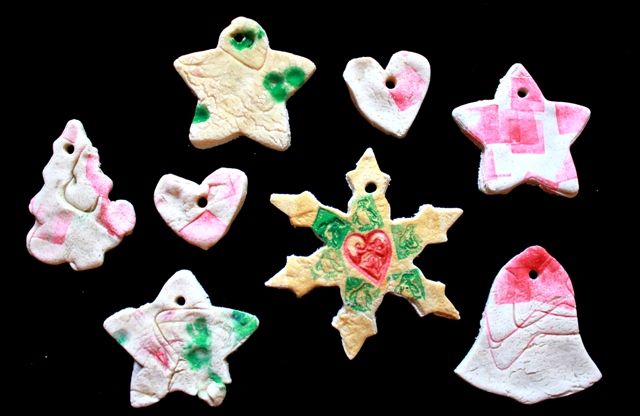 You can also use a food-grade plastic container with a tight-fitting lid.
Salt dough is best stored on the refrigerator door. Storage is allowed on the shelves of the refrigerator, where the temperature is slightly higher. Depending on the model, this can be either the top or bottom shelves.
When it is necessary to take a part of the dough, keep the bulk of it open for a short time. If a dry crust forms on the surface, it will not be possible to quickly restore elasticity.
Even proper storage of salted modeling dough does not guarantee its protection from exposure to air. As a result of interaction with air, the product changes color to a darker one and loses its elasticity. Therefore, the recommended storage time should not exceed 3-4 days.
It is believed that modeling dough can be stored for about 30 days. Like it or not - anyone can check empirically. But even if the mass retains elasticity, a whole colony of harmful microorganisms can form in it, interaction with which the child is highly undesirable.
Colored doughs are best kept in separate containers. But the color of the mass does not affect the shelf life. In addition, after staining, it practically does not change the original color.
Before use, the material is preliminarily kept in natural conditions and thoroughly kneaded.
Frozen storage
Modeling dough can be stored in the freezer as a last resort. Under the influence of negative temperature, the product loses its elasticity, which will be quite difficult to restore.
What to do when the mass has lost its elasticity
If the mass has lost its original structure and plastic properties, it can still be restored.
- If the dough becomes sticky, add flour and salt. Also add part of the starch, which has the ability to absorb excess moisture.
- Knead the dried crust with wet hands to keep the dough sticky. There is no need to add water.
- It happens that during storage the mass begins to darken.
 The addition of dyes will help correct the situation. And if the finished product is planned to be baked in the oven, it is not necessary to artificially give it some kind of shade. When baked, the figurine will acquire a beautiful brownish color.
 - A small amount of glue will help restore the mass to its former elasticity. In this case, you can also add part of the flour with salt.
If it becomes clear that the dough is hopelessly spoiled, it is better to throw it away so as not to waste time and effort on restoring plastic properties.
Anyone who has experience in children's creativity can calculate the required amount of plastic mass for the manufacture of a particular product. But for those who first picked up this material, it will be useful to know how and where to store salt dough for modeling. Some parents are ready to produce daily raw materials for the creative finds of their children. But there are also those who do not have enough time for this.