Recognizing the alphabet letters
How To Help Your Child Learn The Alphabet
One of the first steps your child will take on their reading journey is learning to recognize letters. Before your young learner can start to sound out words, blend syllables together, or master other early reading foundations, they’ll need letter recognition skills.
Maybe you’re just getting started with letter recognition (or looking for some new ideas) and wondering about the best ways to practice with your child. Good news: HOMER is here to help!
Letter Recognition: Beginnings
When helping your child learn to recognize letters, it’s good to remember that all children have unique personalities, which means they have unique learning styles, too. This will help you and your child feel confident with their reading and learning development!
That being said, many children may express an interest in learning the alphabet by age two or three. This can manifest in a few different ways. If they have older siblings, your child may ask for “homework” to do while their siblings do theirs.
Around this age, your child may also notice the people around them reading books that look different than theirs. Instead of pictures, these books have lots of words. Your toddler may want to know how to read those “big” books, too!
Since your child likely isn’t enrolled in any sort of formal schooling yet, their initial interest in reading and letter recognition may be light and casual. This is great! There’s no need to rush into it.
But if you want to expand your child’s letter recognition skills or engage their interest more purposefully, stay tuned for tips on how to help your child learn the alphabet!
Tips For Encouraging Letter Recognition
Prioritizing letter recognition activities that are fun, simple, and engaging for your child is a great way to help them practice consistently and effectively.
There are many ways to introduce the alphabet to your child and help them learn letters or build their alphabetic skills if they’ve already started recognizing letters.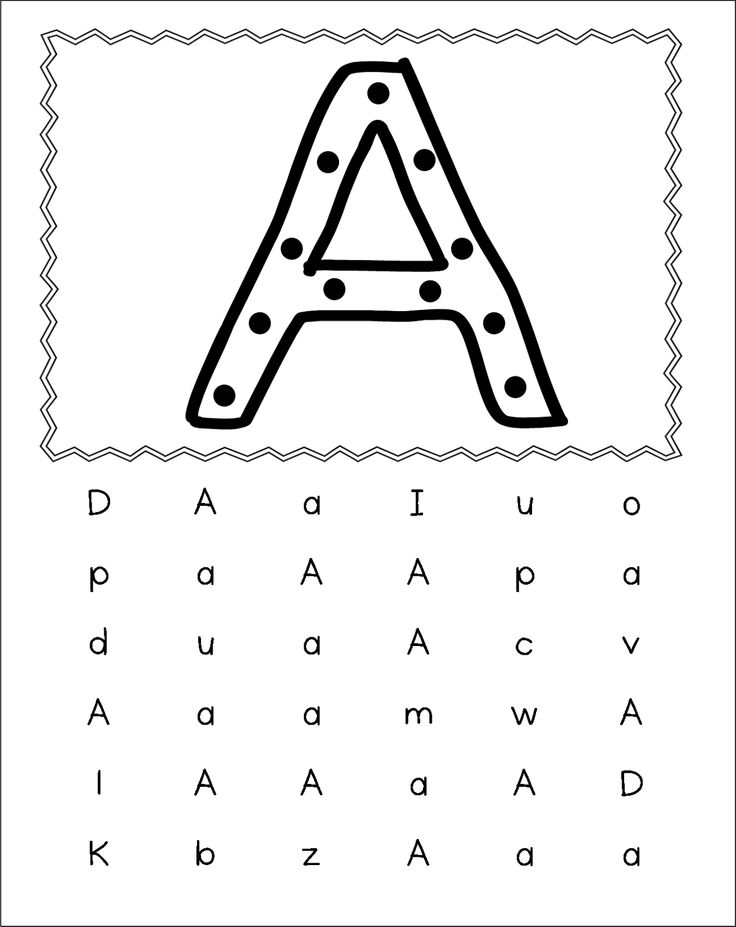 Here are some fun and easy ideas you can try from the comfort of your own home!
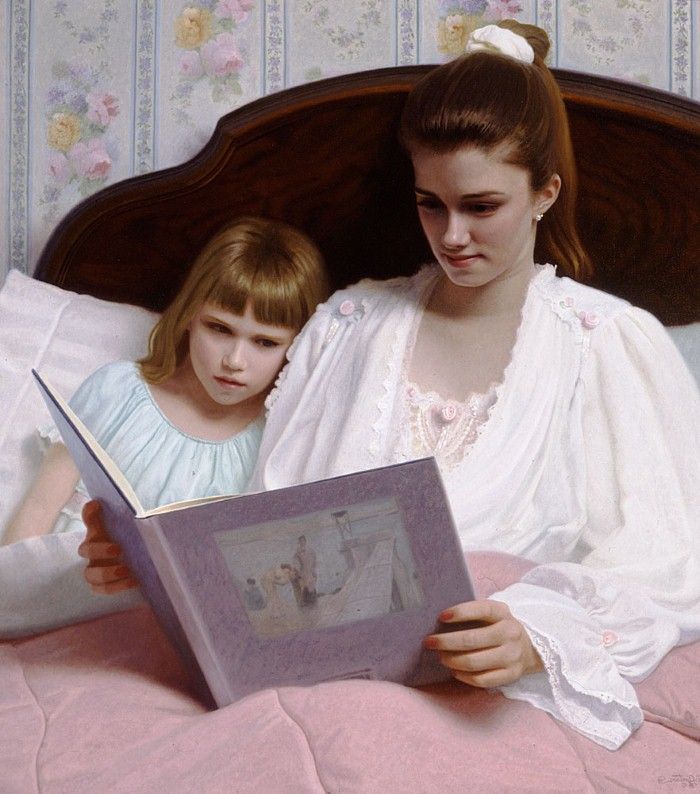
Read Alphabet Books
Although this technique may seem simple and common, it’s common for a reason — because it’s effective! And, as a bonus, you likely have several alphabet books around your home already.
Repeated exposure to the alphabet sets a strong foundation for your child to develop their letter recognition skills. Starting with the basics is essential to preparing them for more reading activities as they grow and develop.
Once your child is introduced to the basics, they can move on to more advanced beginning reading activities.
Touch And Feel Letters
Kids spend all day touching and exploring the world around them. Teaching your child letter sounds can be easier (and more fun for them!) when you engage skills that aren’t just visual or auditory.
Plus, let’s be honest — kids love to get messy! Letting them make a mess with letters offers them a great incentive to learn.
We recommend using anything you have around the house that is malleable enough to turn into letters. Shaving cream, pipe cleaners, PlayDoh, and popsicle sticks are all great options.
Play with your child as they build letters out of these materials (or swipe their fingers through a big pile of shaving cream!). If you want to go mess-free, you can also cut out letters from textured paper (like sandpaper).
Here’s how this method works:
- First, introduce the letter to your child. Trace or make the letter in whatever material you choose.
- Next, establish an association for your child. Ask your child to follow along while you draw the letter.
- Once your child has mastered following along with you, you can engage their recall skills. Draw a letter and ask them which one it is.
This activity might take a bit of time and practice, but don’t worry! You and your child will get there.
Explore Names Together
This activity can be effective and useful for helping your child learn letter recognition as well as the names of people on their sports teams, in their school classroom, or any other group of people.
If you want to try this with your child, write down a list of the names of the people in the group you’re focusing on. If it’s your first time doing this activity, consider starting with just your child’s immediate family to make it a bit easier.
Print the names on a large sheet of paper in a dark, easily readable color. Then ask your child to identify letters by saying something like, “Which name has an O in it?”
Change up the letter in question until you cover each name, and then help them tally up all of the letters they find!
To amp up the fun, make a game of seeing which letter appears the most times. You can even make bets beforehand (we suggest banking on a vowel). Whoever guesses which letter will appear most often gets a reward!
This activity helps reinforce two ideas to your child: first, it engages their letter recognition skills by exposing them to the alphabet repetitively.
Secondly, it helps them understand that the alphabet is a code made up of symbols (letters). In order to learn how to read, they must learn how to recognize their letters first!
Create A Personalized Set Of Alphabet Cards
Similar to alphabet books, alphabet cards are an easy, reliable option to help your child learn letter recognition. And while there are many alphabet cards on the market, it’s way more fun to let your child make their own!
If you want to try this activity with your young learner, all you need are some large index cards (blank sheets of paper will work if you don’t have index cards) and lots of fun, decorative materials and supplies (glitter is our personal favorite)!
Simply have your child write one letter on each card and then color and decorate it. For younger children, you can also write the letter for them and let them spruce it up to their heart’s content!
This activity is amazing because it allows your child to make their learning highly personal and tailored to their specific interests.
By creating their own cards, your child will be able to exert some autonomy and independence over their learning goals.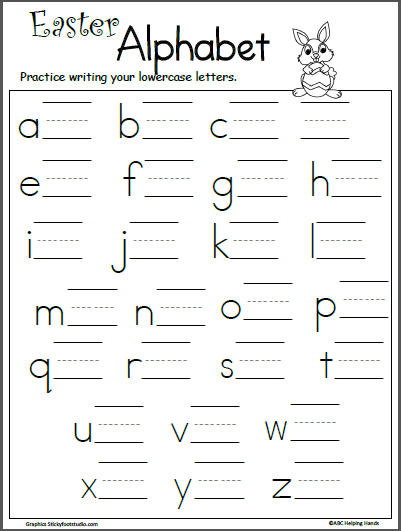 It may help them become even more invested in their journey toward letter recognition!
Fill In The Dots
One challenge for children when it comes to recognizing letters is understanding what shapes letters are “made” of.
For example, the letter O is often taught as a letter that looks like a circle. Other letters are made up of curves, straight lines, dashes, and all sorts of shapes!
A helpful option for supporting your child’s efforts to recognize their letters is to break down the shapes that make up letters. This is where dot markers (or round stickers) can come in handy!
By utilizing a uniform shape — like a dot — to work through the alphabet, your child can begin to grasp the shape of letters both visually and physically. Understanding how letters are formed can help kids recognize letters more readily.
There are many free downloadable “dot letter” worksheets online that you can use for this exercise. But if you want to create them on your own, simply write out the alphabet in a large script, using empty circles to form the letters.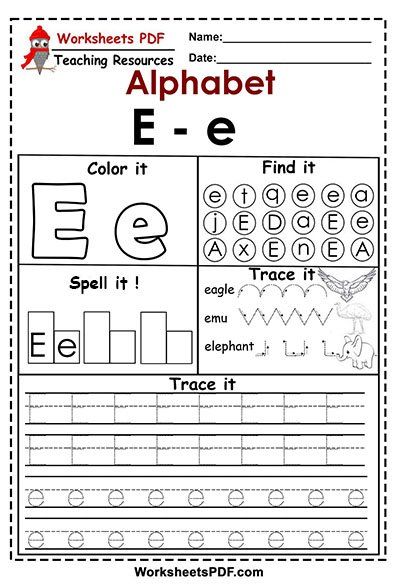
Your child can then follow along with stickers or dot markers and fill in the empty circles.
Letter Recognition As A Strong Foundation
At the end of the day, practicing letter recognition with your child is all about setting up a strong, solid foundation they can use to launch the rest of their reading and learning journey!
We hope these suggestions come in handy for helping to develop your child’s letter recognition skills. As your emerging reader learns to recognize letters, remember that every child is unique. What works for one may not work for another.
For those days when you need a little extra help, our online learning center is the perfect place to find safe, personalized, and effective activities for your child. Try our free onboarding quiz to get started!
Author
How to Teach Kids the Letters of the Alphabet
73 shares
- Share
- Tweet
Are you teaching letter recognition skills to your children? When it comes to pre-reading skills, Letter Recognition is an important part!
Learn how to teach and help your children learn their ABC’s with these tips and strategies!
If your kids are eager to learn the letters of the alphabet, provide them with a literacy-rich environment which includes letters and words around your classroom or home.
You can also add letters to your children’s play and introduce them to many different letter recognition activities.
What You'll Find On This Page
What is Letter Recognition?
One of the 5 Pre-Reading Skills Kids Need To Be Successful Readers is Letter Knowledge. Letter Knowledge begins with Letter Recognition which is also known as Alphabet Recognition.
Letter Recognition is the ability to recognize and name all of the lowercase and capital letters. Children who know the letters can also distinguish between them.
Why Is Letter Recognition Important?
Being able to say the names of the letters quickly in sequential order will help children learn the sounds more easily.
Sometimes, a letter name will give children clues as to the sound that it makes too.
Kids who can easily name the letters of the alphabet are also more motivated to learn about words and how to spell. They have an easier time learning to read too.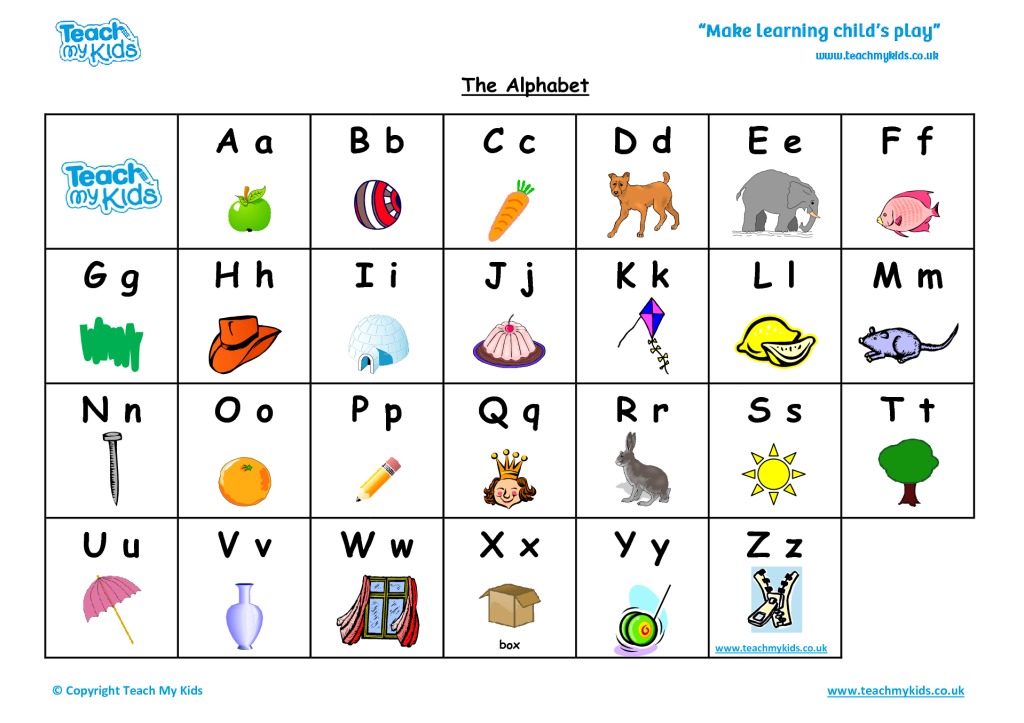
Is My Child Ready To Learn The ABC’s?
Just like learning to walk or potty training, children need to be developmentally ready to learn the letters of the alphabet.
Before they can begin, they need to visually discriminate or recognize the similarities and differences between the different letter shapes.
Children need to able to differentiate between straight and curved lines or tall and short letters.
They also need to understand the difference between letters, numbers, and other symbols.
What Order Should The Letters Be Taught?
When teaching your children the letters, you don’t have to introduce them in alphabetical order.
You should start with high-frequency ones like the letters in their names.
The letters in their names will have more meaning to them and give them more chances to practice recognizing those letters in different ways.
When first introducing the letters in their names and the rest of the alphabet, only give your children two unknown letters to work on at a time.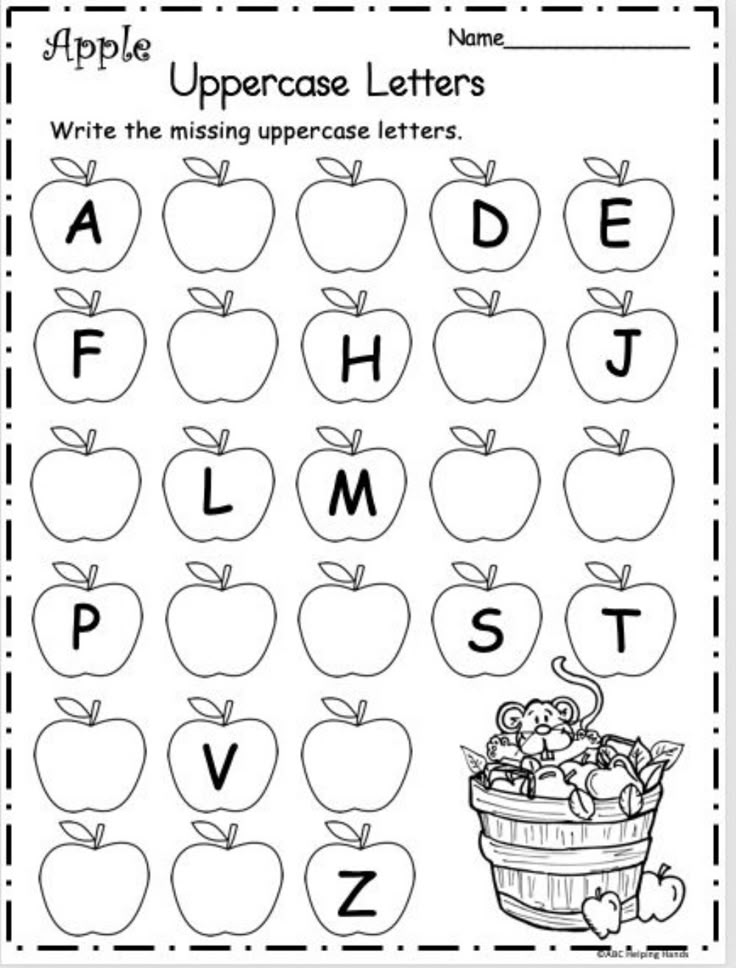
After they have mastered those letters, give them one or two more letters to learn until they know all 26!
Should My Child Learn Capital Letters or Lowercase Letters First?
Young children need to be exposed to both capital and lowercase and will need to learn all of them before becoming a successful reader.
Even though lowercase letters are more common in reading, it’s easier for children to learn capital letters first.
They don’t confuse them like they do lowercase letters, because capital letters are easier to visually distinguish.
If you look at all of the capital letters, the only ones that are commonly mistaken for one another are capital M and W.
When teaching children two letters that can be mistaken for one another such as capital M and W, teach one at a time.
After your children know both letters, give them activities to reinforce the differences between the two such as sorting the two letters.
Letter recognition is an important part of pre-reading! Your children are on their way to learning how to read!
Your May Also Like:
Are you looking for Alphabet Activities to help you teach and your children learn the letters of the alphabet? From Letter Dot Painting to Letter Mazes, there are so many printable activities that will give your children a fun, hand-on way to learn the letters.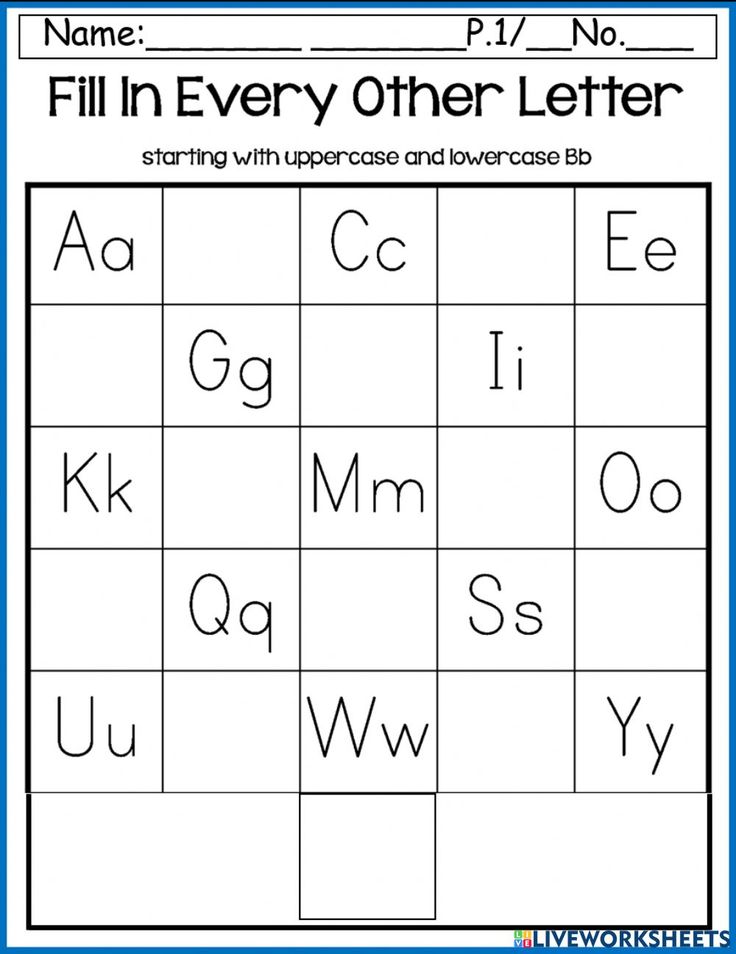
These interactive resources will help your kids to work on letter identification, formation, and much more. Click on the picture to learn more about the activities included in this bundle!
Letter Recognition Resources:
Your preschoolers and kindergarteners can use these letter recognition resources to help them practice the skills that they are learning.
- Letter Recognition Activities
- Letter Recognition Games
- Alphabet Sequence Worksheets from Homeschool Preschool
- Letter Recognition Cards
- Letter of the Week Crafts from Crystal and Comp
from collecting a dataset to creating a GUI / Habr
Hello, Habr! In this article, I would like to tell you how I made a Russian letter recognizer and screwed a small graphical interface to it.
Spoiler: the result should look like this:
Downloading the dataset
So let's get started! The first thing we need is a dataset.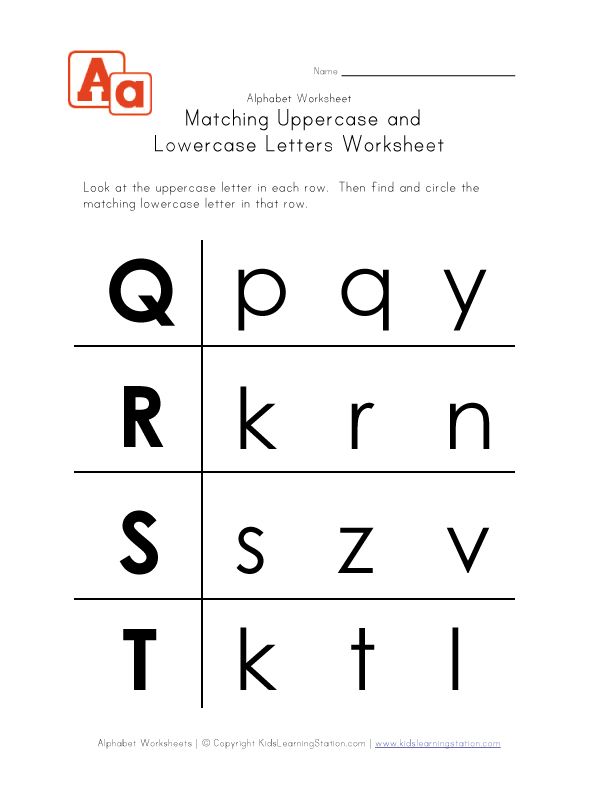 As a dataset, I chose CoMNIST. We download the data set, unpack and delete the folder called I, since this letter is not included in the Russian alphabet.
Data processing
As we can see, the image data has four channels. The fourth channel is the alpha channel, which we do not need and we remove it:
def make_background(): image=' ' file_without_extension = image.split('.')[0] image = cv2.imread(image, cv2.IMREAD_UNCHANGED) trans_mask = image[:, :, 3] == 0 image[trans_mask] = [255, 255, 255, 255] new_img = cv2.cvtColor(image, cv2.COLOR_BGRA2BGR) cv2.imwrite(file_without_extension + '.jpeg', new_img) That is, at the input we had an image that is presented on the left, and the output should be an image that is presented on the right:
per class). Therefore, we need to "inflate" our data. For these purposes, I used the following techniques: shifts, this is when we move our letter by some value up / down and left / right along the axes, and rotations, when we rotate our letter by a certain degree.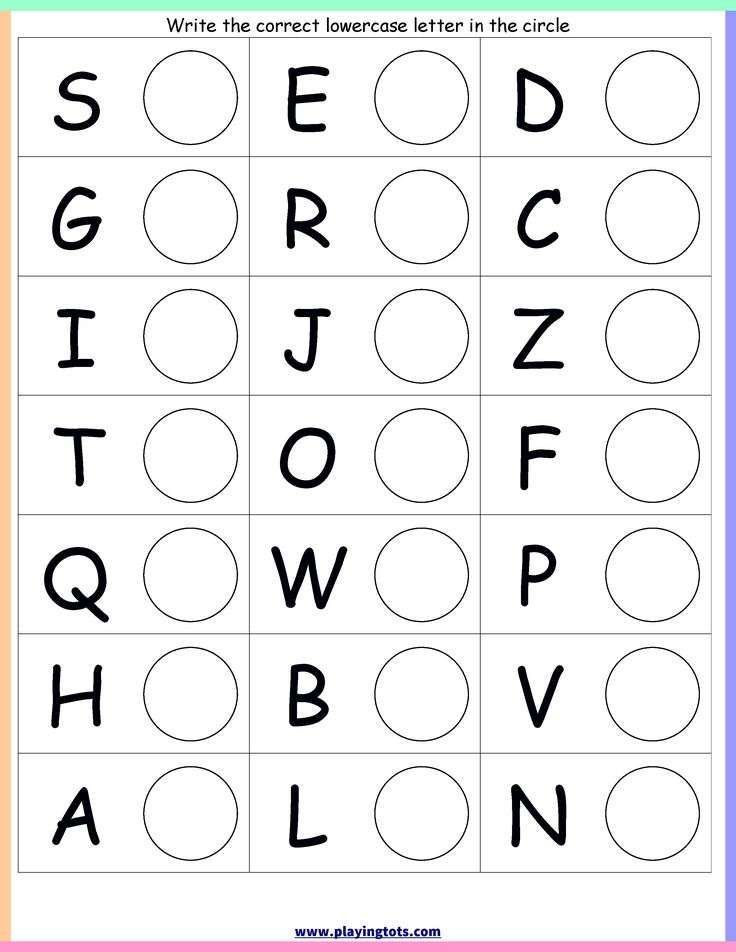
Shifts
def shift(): image = '' img = cv2.imread(image) file_without_extension = image.split('.')[0] arr_translation = [[15, -15], [-15, 15], [-15, -15], [15, 15]] arr_caption=['15-15','-1515','-15-15','1515'] for i in range(4): transform = AffineTransform( translation=tuple(arr_translation[i])) warp_image = warp(img, transform, mode="wrap") img_convert = cv2.convertScaleAbs(warp_image, alpha=(255.0)) cv2.imwrite(file_without_extension + arr_caption[i] + '.jpeg', img_convert) Rotations
def rotate(): image = '' img = Image.open(image) file_without_extension = image.split('.')[0] angles = np.ndarray((2,), buffer=np. array([-13, 13]), dtype=int) for angle in angles: transformed_image = transform.rotate(np.array(img), angle, cval=255, preserve_range=True).astype(np.uint8) cv2.imwrite(file_without_extension + str(angle) + '.jpeg', transformed_image)
 Data balancing
Next, we can see that the number of images belonging to each class is different, so we need to balance our dataset.
def balancing(): arr_len_files = [] for path in root_path: name_path = name_root_path+path+'/' files=os.listdir(name_path) arr_len_files.append(len(files)) min_value=min(arr_len_files) for path in root_path: folder = name_root_path+path arr = [] for the_file in os.listdir(folder): arr.append(folder + '/' + the_file) d=0 k = len(arr) for i in arr: os.remove(i) d += 1 if d == k - min_value: break
As a result, for each letter the number of images should be the same. Next, you should independently divide the data into training, test and validation approximately in the ratio of 70%, 20% and 10%, respectively.
Neural network training
Let's move on to the longest stage - network training. As a neural network, I chose CNN, as it is good for classifying objects. The learning process itself takes 2-2.5 hours and the accuracy was approximately 94% which is pretty good. Below is the code for training the network.
import tensorflow as tf ImageDataGenerator = tf.keras.preprocessing.image.ImageDataGenerator TRAINING_DIR = "path/to/train/dataset" train_datagen = ImageDataGenerator(rescale=1.0 / 255.) train_generator = train_datagen.flow_from_directory(TRAINING_DIR, batch_size=40, class_mode='binary', target_size=(278,278)) VALIDATION_DIR = "path/to/test/dataset" validation_datagen = ImageDataGenerator(rescale=1.0 / 255.) validation_generator = validation_datagen.flow_from_directory(VALIDATION_DIR, batch_size=40, class_mode='binary', target_size=(278,278)) model = tf.keras.models.Sequential([ tf.keras.layers.Conv2D(16, (3, 3), activation='relu', input_shape=(278,278, 3)), tf.keras.layers.MaxPooling2D(2, 2), tf.keras.layers.Conv2D(32, (3, 3), activation='relu'), tf.keras.layers.MaxPooling2D(2, 2), tf.keras.layers.Conv2D(64, (3, 3), activation='relu'), tf.keras.layers.MaxPooling2D(2, 2), tf.keras.layers.Flatten(), tf.keras.layers.Dense(512, activation='relu'), tf.keras.layers.Dense(33, activation='softmax') ]) model.compile(optimizer='adam', loss='sparse_categorical_crossentropy', metrics=['accuracy']) model.summary() history = model.fit_generator(train_generator, epochs=2, verbose=1, validation_data=validation_generator) model.
save('model.h5')
Next, we need to test our neural network on the validation images, in order to make sure that the accuracy on the test data corresponds to reality:
prediction.py
letters = "YABVGDEZHZYKLMNOPRSTUFFHTSCHSHCHJYYYYY" return letters[result] def predicting(path_to_image): image = keras.preprocessing.image model = keras.models.load_model('path/to/model') img = image.load_img(path_to_image, target_size=(278, 278)) x = image.img_to_array(img) x = np.expand_dims(x, axis=0) images = np.vstack([x]) classes = model.predict(images, batch_size=1) result = int(np.argmax(classes)) result = print_letter(result) print(result) Screwing on the GUI
And the last thing we have to do is to screw on the graphical interface with minimal features: a canvas on which you can draw numbers, a field where the recognized letter will be displayed, a button for recognizing what is on the canvas, a button to clean up the canvas and put it all together.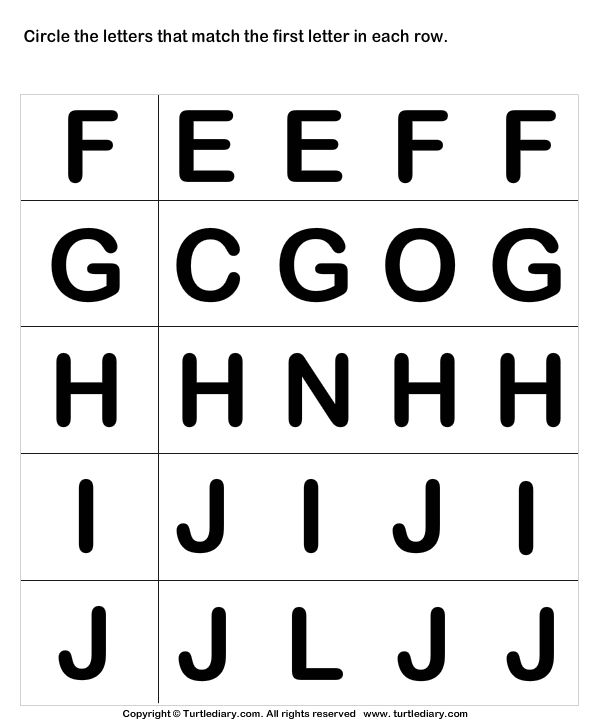
app.py
from PyQt5.QtWidgets import QMainWindow, QApplication, QMenu, QMenuBar, QAction, QFileDialog, QPushButton, QTextBrowser from PyQt5.QtGui import QIcon, QImage, QPainter, QPen, QBrush from PyQt5.QtCore import Qt, QPoint import sys from PyQt5.QtWidgets import QMainWindow, QTextEdit, QAction, QApplication from PyQt5.QtWidgets import (QWidget, QLabel, QLineEdit, QTextEdit, QGridLayout, QApplication) import numpy as np from tensorflow import keras classWindow(QMainWindow): def __init__(self): super().__init__() title = "recognition cyrillic letter" top=200 left=200 width=540 height=340 self.drawing = False self.brushSize = 8 self.brushColor = Qt.black self.lastPoint = QPoint() self.image = QImage(278, 278, QImage.Format_RGB32) self.image.fill(Qt.white) self.nameLabel = QLabel(self) self.nameLabel.setText('RES:') self.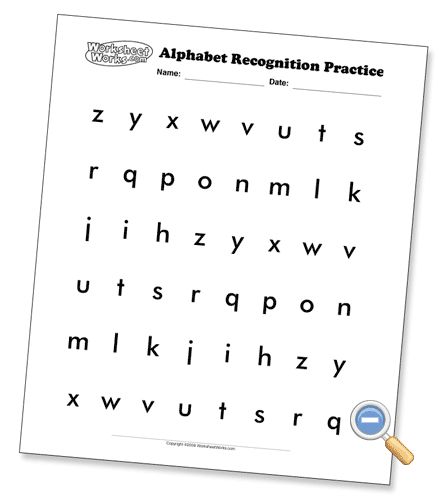 line = QLineEdit(self) self.line.move(360, 168) self.line.resize(99, 42) self.nameLabel.move(290, 170) prediction_button = QPushButton('RECOGNITION', self) prediction_button.move(290, 30) prediction_button.resize(230, 33) prediction_button.clicked.connect(self.save) prediction_button.clicked.connect(self.predicting) clean_button = QPushButton('CLEAN', self) clean_button.move(290, 100) clean_button.resize(230, 33) clean_button.clicked.connect(self.clear) self.setWindowTitle(title) self.setGeometry(top, left, width, height) def print_letter(self,result): letters = "YABVGDEZHZYKLMNOPRSTUFFHTSCHSHCHJYYYYY" self.line.setText(letters[result]) return letters[result] def predicting(self): image = keras.preprocessing.image model = keras.models.load_model('model/cyrillic_model.h5') img = image.load_img('res.jpeg', target_size=(278, 278)) x = image.
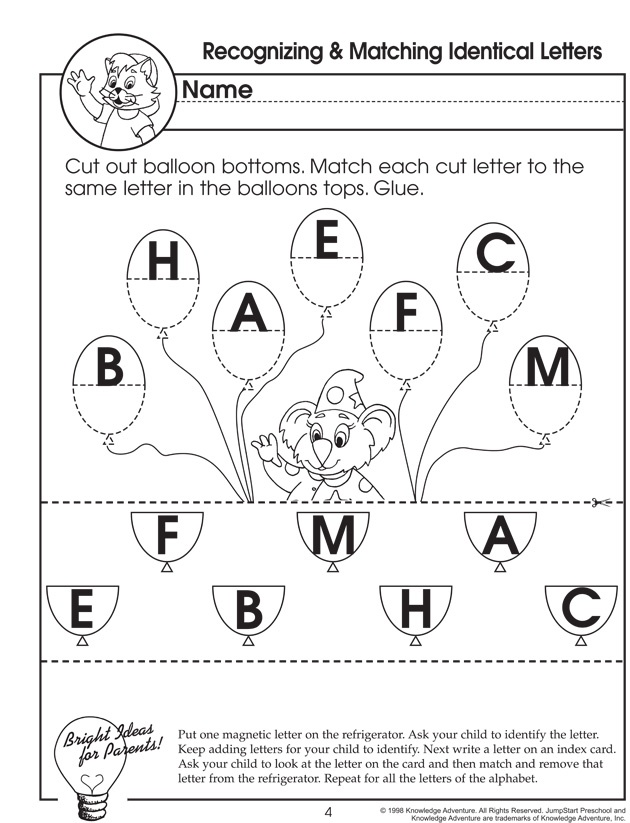 img_to_array(img) x = np.expand_dims(x, axis=0) images = np.vstack([x]) classes = model.predict(images, batch_size=1) result = int(np.argmax(classes)) self.print_letter(result) def mousePressEvent(self, event): if event.button() == Qt.LeftButton: self.drawing = True self.lastPoint = event.pos() def mouseMoveEvent(self, event): if (event.buttons() & Qt.LeftButton) & self.drawing: painter = QPainter(self.image) painter.setPen(QPen(self.brushColor, self.brushSize, Qt.SolidLine, Qt.RoundCap, Qt.RoundJoin)) painter.drawLine(self.lastPoint, event.pos()) self.lastPoint = event.pos() self.update() def mouseReleaseEvent(self, event): if event.button() == Qt.LeftButton: self.drawing = False def paintEvent(self, event): canvasPainter = QPainter(self) canvasPainter.drawImage(0, 0, self.image) def save(self): self.
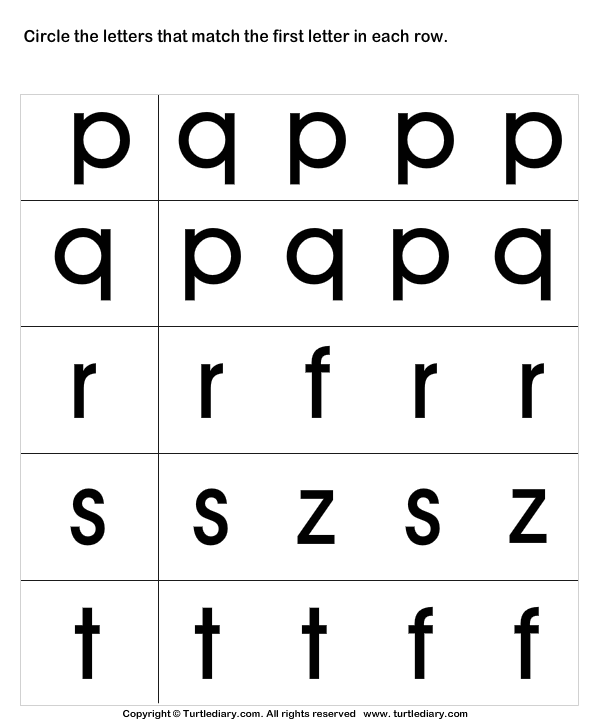 image.save('res.jpeg') def clear(self): self.image.fill(Qt.white) self.update() if __name__ == "__main__": app = QApplication(sys.argv) window = Window() window.show() app.exec()
 Conclusion
As you can see, what once seemed like “magic” is quite easy to do with the help of modern libraries.
Since Python is cross-platform, the code should work everywhere, on Windows, Linux and OSX. I did all this on Ubuntu 18.04. For those who want to experiment on their own, I posted the source code on GitHub.
Russian scientists taught the neural network to "read" handwritten letters of the Russian alphabet
With the development of IT technologies, the importance of fast and high-quality conversion of handwritten text into a digital printed version is growing, so that it is more convenient to copy, edit or extract data from it. Obviously, the first step in this process will be the recognition of letters of the Russian alphabet written by hand.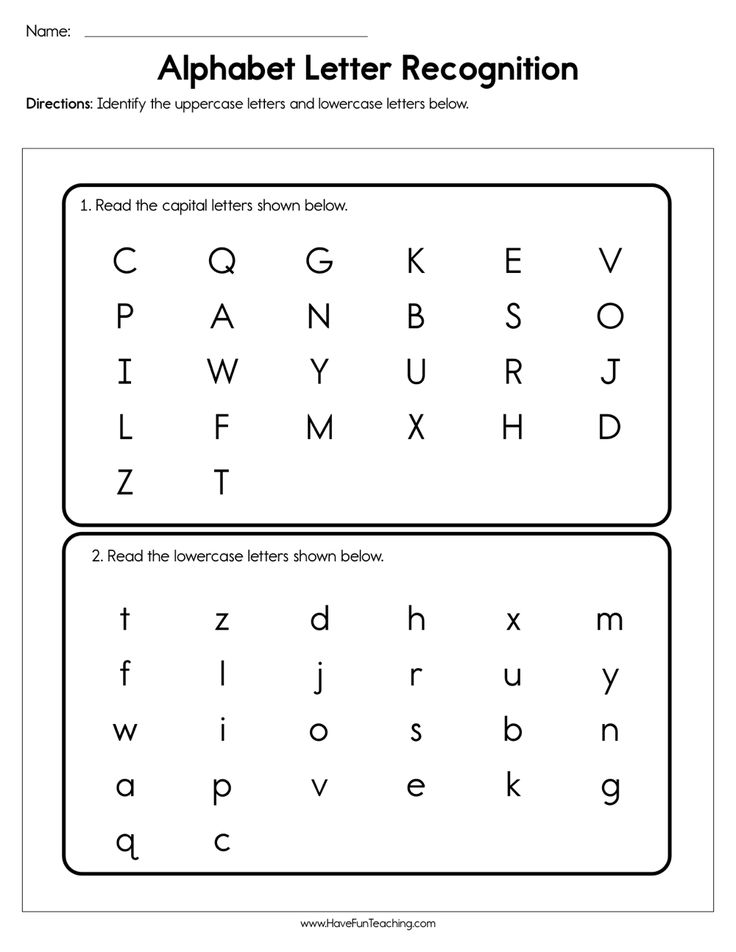 SibFU scientists have developed a new convolutional neural network (CNN) capable of recognizing images of handwritten letters with high accuracy. The resulting algorithm transforms the image and "recognizes" the letter encrypted in it. According to scientists, the classification accuracy is 99 %.
Today, 2.4% of the world's population speaks Russian. The complexity of recognizing text written in Cyrillic by hand is quite high - especially for people who are not familiar with the Russian alphabet. There are many services on the Internet that can be used to recognize and convert text of any type, both digital and handwritten. However, the use of such services is fraught with information leakage and is unreliable in terms of user privacy and security. An application that can easily and quickly recognize text in Cyrillic, running on the client side and not requiring an Internet connection, can be in demand both from individual users and from organizations.
“Perhaps the most interesting feature of handwritten Russian text is the individual style of writing letters - what we call handwriting.Writing styles tend to change over time, it is enough to compare the calligraphic lines in the copybooks of the generation of the 70-80s and the way modern schoolchildren write. Even one person's handwriting changes throughout life. The aim of our study was to recognize handwritten text in Russian by a neural network using deep learning (DL) models. As far as we know, this is the first work of its kind in the world.0095 , - said the co-author of the study, student of the Institute of Information and Space Technologies of the Siberian Federal University Andrey Levkov .
To achieve the goal, scientists have taken a number of steps. We built a new dataset with a labeled image at a resolution of 32×32 pixels for 33 letters of the Russian alphabet. We developed a new CNN architecture for the problem of detecting handwritten letters of the Russian alphabet and compared it with already existing powerful CNN models. In addition, experts from Krasnoyarsk and St.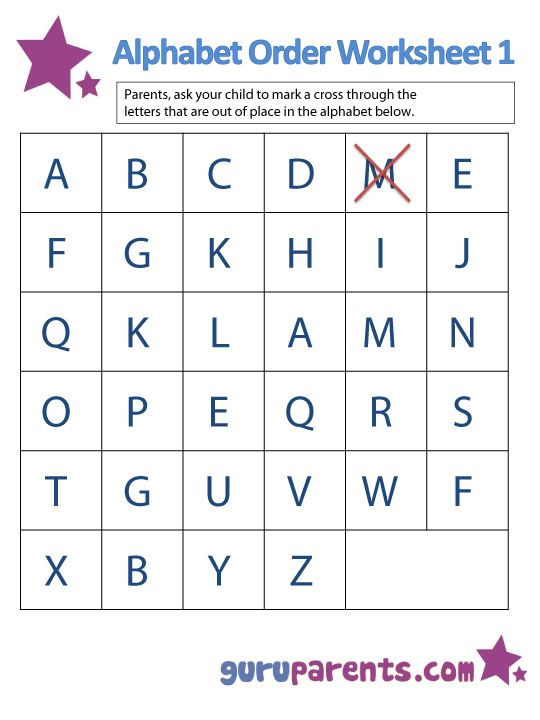 Petersburg provided a complete description of the CNN used and the source code so that other researchers can reproduce this data to detect handwritten letters of the Russian alphabet. For programming, the Python language and the Jupyter interactive development environment were chosen.
The neural network was trained using preprocessed data from the CoMNIST repository, a well-known database containing samples of handwritten letters in Latin and Cyrillic. The data set in the database consists of 4-strip images with a resolution of 278×278 pixels in .png format.
“The dataset contains 13,299 photos, each in a separate folder. Folders, in turn, belong to a particular class. There are 33 such classes in the set, and each corresponds to a letter of the Russian alphabet. There are 300 to 500 images for each class. Caps, printed and cursive letters are fixed on these images. And for about 85% of these images, the neural network (CNN) learned to recognize the letters of the Russian alphabet, and for another 15%, the acquired “knowledge” was checked,- Anastasia Safonova , Associate Professor of the Department of Artificial Intelligence Systems, SibFU , said the head of the study.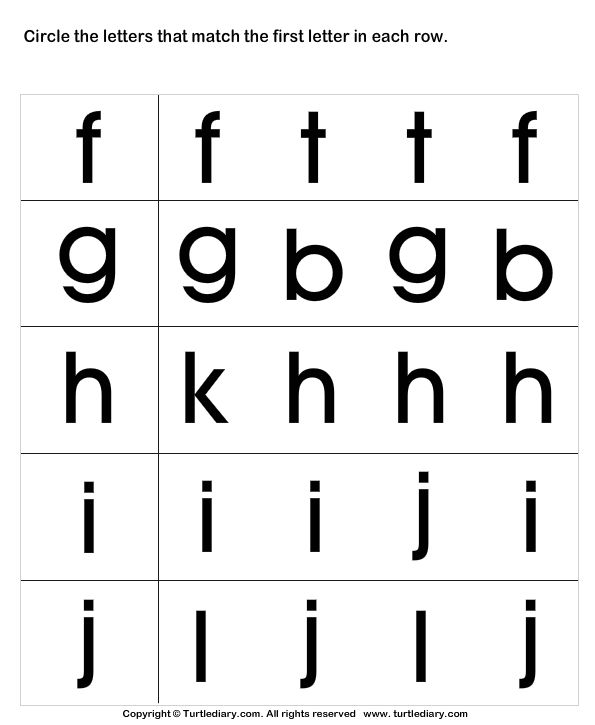
A new unique set of data (images) created by scientists was needed to independently verify the developed model. Each photograph featured only one letter in print or writing. The set contains 5 to 10 images for each class. To increase the data set and its variability, the scientists applied different image transformation functions — rotated the images to the right and left, applied the Gaussian distribution, etc. As a result, the experts received 79794 images, 67,825 of which the neural network could learn from, and 13,084 served for verification.
“We compared the model developed by our team with the most powerful CNN models, such as VGG-16, VGG-19, Xcept, Resnet-101, Mobilenet-V2 and others. It turned out that the accuracy of our model during training was up to 99%, the entire training took 3 hours. The forecasting accuracy of the model was up to 95.83%. In general, our model lost only one alternative - VGG-16, which demonstrated up to 99% accuracy, the lowest accuracy is characteristic of the Xception and Inception-V3 models”,— emphasized Anastasia Safonova .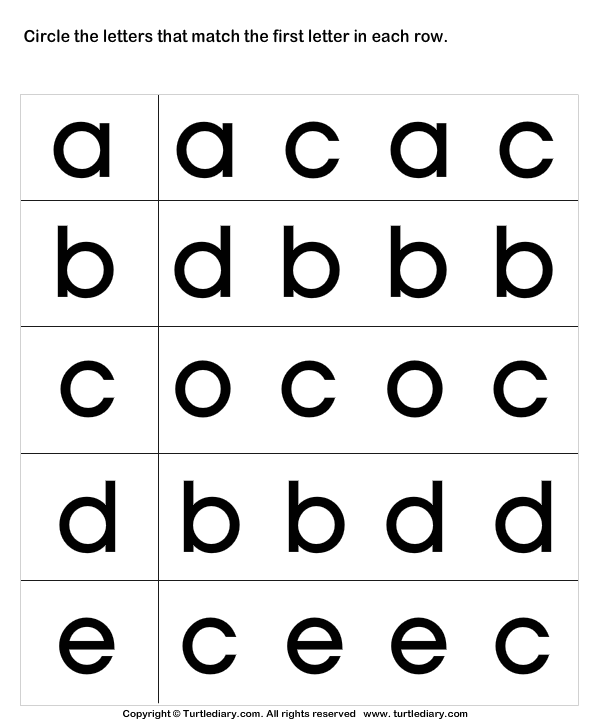
Learn more