Preserving salt dough ornaments
The Best Salt Dough (for Ornaments and Crafting!) to Make with the Kids
Learn how to make classic salt dough with the kids, with baking, painting, and storage info. This method is straight forward, easy, and thorough—and they a perfect kids holiday gift for grandparents, teachers, and loved ones!
Salt Dough
This salt dough is a staple of childhood and I love doing this Christmas activity with my kids each year—and throughout the rest of the year too! We love to make salt dough handprints, ornaments, and sometimes, just any old shape they want to. It’s an easy project that we can do together—and then share as kid-made holiday gifts, keepsakes, or house decorations.
Salt Dough Recipe
Making salt dough at home is as easy as combining three pantry staples together into a dough. It’s fairly fool proof (as long as you follow the measurements!) and is a recipe that even little kids can help make.
Ingredients in Salt Dough
To make this recipe, you’ll need:
- table salt
- all-purpose flour
- water
TIP: That’s it! (I buy store brand, cheap flour for this since project to keep it very budget-friendly. )
How to Make Salt Dough Ornaments Step-by-Step
Here’s a look at how to make the dough for this salt dough. Scroll down to the bottom of the post for the full information.
- Measure out the flour and water. (photo 1)
- Add the water. (photo 2)
- Stir with a wooden spoon. (photo 3)
- Keep stirring until the dough is mostly together and is hard to stir any longer. (photo 4)
- Knead a few times with hands to bring the dough together. (photo 5)
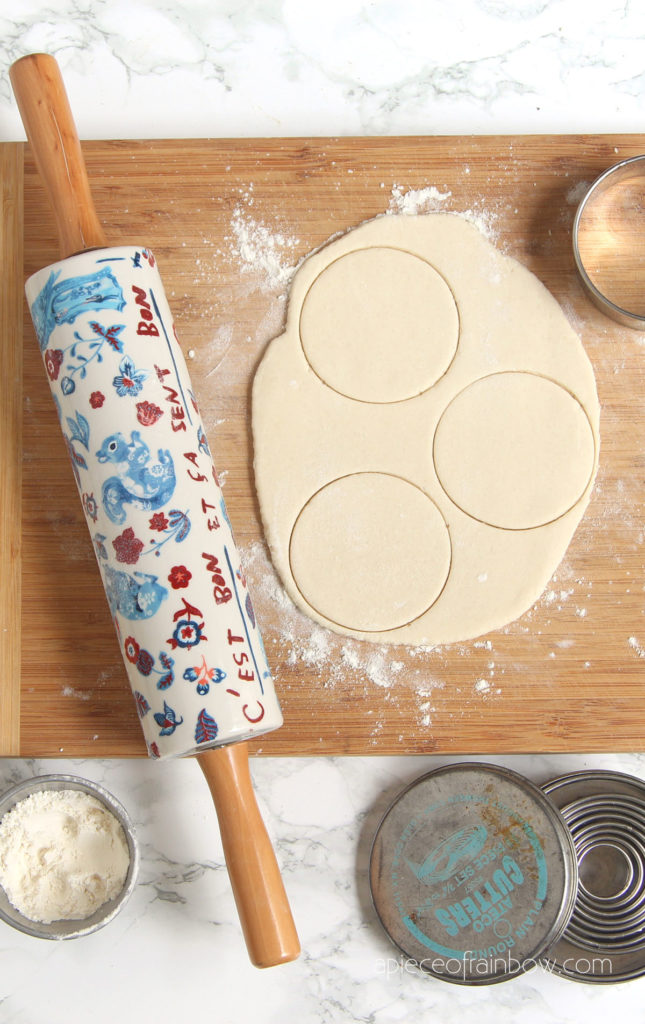
- Place dough between two pieces of parchment paper and roll out. (photo 6)
TIP: You can divide the dough in sections so multiple kids can have their own dough to work with.
How to Cut Out, Bake and Decorate Salt Dough Ornaments
Once you start rolling, here’s a look at what will follow if you want to make these into ornaments. (Skip the hole poking if you want to just make these as shapes for the kids to paint. )
)
- Roll out, changing directions occasionally, until about 1/4-inch thick. (This may not get precise if you’re working with kids and that’s okay!) (photo 1)
- Stamp cookie cutters. (photo 2)
- Remove the dough around the shapes, then either transfer the whole piece of parchment paper to a cookie sheet OR transfer just the shapes to a parchment-lined cookie sheet. (photo 3)
- Poke holes so you have a place for a string to hang as ornaments. (photo 4)
- Press in a hand to make a handprint, if desired. (photo 5)
- Bake, let cool and decorate! (photo 6)
TIP: Re-roll any remaining dough after Step 3 here to make additional ornaments.
Salt Dough Handprint Ornament
Capturing a handprint in salt dough is a perfect grandparent gift, or a keepsake ornament to make for your own tree. I love pulling out our little collection year after year. Know that getting a good print may take a few tries if doing a baby’s hand!
TIP: Check the size of your round cookie cutter against your child’s hand to make sure that it’s big enough.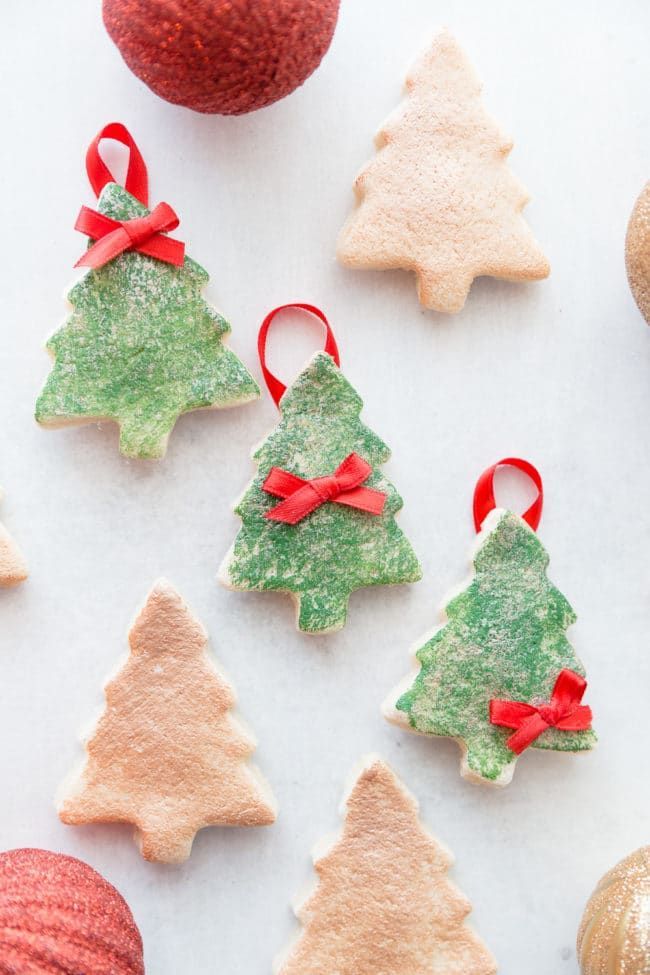 You may need one that’s 4-5 inches in diameter.
Best Paint for Salt Dough Ornaments
If the kids are wearing smocks, the table is protected, and you are reasonably sure they won’t paint all over their hands and faces, I like using regular acrylic craft paint since it holds up best on crafts. With younger kids who may wind up wearing more of the paint, I’d recommend tempura washable paints.
TIP: We put our paint into the base of old egg cartons since we always have those on hand. You can also use paper plates.
How to Preserve Salt Dough Ornaments
To help preserve your finished dried ornaments, you can coat with a layer or two of Mod Podge or spray with a sealer. Either work well. I’d recommend coating or sealing both sides, so do one side and let it dry, and then do the second side. If using the sealer, do it in a well ventilated area without the kids too close by.
TIP: To store these ornaments from year to year, you’ll want to wrap in bubble wrap. Store in a container that won’t be banged around, dropped or exposed to excess moisture.
Why is my salt dough puffing up?
If you mistakenly use self-rising flour, they may puff. And sometimes it happens randomly. Keep the oven temperature low and if it happens consistently, you can try baking at an even lower temperature for a slightly longer amount of time.
Tips for Making the Best Salt Dough Ornaments
- If the dough is too wet and sticky, knead in a little more flour. If it’s too stiff, add a little more water. There is a big range in the way different flours absorb liquid, so there is a normal range of variation in liquid needs. It should be easy to work with—soft and not too stiff and not excessively sticky.
- Use paper lollipop sticks or a skewer to make your holes.
- Use a 4-5 inch round cookie cutter to make handprint ornaments.
- Tie on baker’s twine or thin ribbon to hang as ornaments.
- Try to get the dough to an even thickness before baking so the ornaments bake evenly.
- Bake for the time indicated and then longer if your ornaments still feel soft. They should be firm to the touch without much give.
- Let cool fully before painting.
- If you want to paint the background of a handprint ornament, do that before you paint the inside of the hand. Let dry before adding a second color. Some people like to paint the whole thing white or cream to give it a more finished look.
- Use acrylic craft paint for older kids who can be trusted with paint and tempura washable paints with younger toddlers.since it holds up best on crafts. With younger kids who may wind up wearing more of the paint, I’d recommend.
- To help preserve your finished dried ornaments, you can coat with a layer or two of Mod Podge or spray with a sealer.
I’d love to hear your feedback on this project and what your kids thought of it, so please comment below to share!
Prep Time 30 minutes
Cook Time 2 hours
Total Time 2 hours 30 minutes
Author Amy Palanjian
Cuisine American
Course Holiday
Calories 1kcal
Servings 2 dozen ornaments
- ▢ 4 cups flour
- ▢ 1 cup table salt
- ▢ 1.
 5 cups water
Mix the ingredients together in a large bowl using a wooden spoon. When it becomes too stiff to stir, use clean hands to bring the dough together.
NOTE: If the dough is too wet and sticky, knead in a little more flour, about 1 tablespoon at a time. If it's too stiff, add a little more water, about 1 tablespoon at a time. There is a big range in the way different flours absorb liquid, so there is a normal range of variation here. It should be easy to work with—soft and not too stiff and not excessively sticky.
Knead a few times until the dough is uniform and soft, about 3-5 minutes.
Divide dough into 2 or 4 sections and roll out to about 1/4-½ inch thick between two sheets of parchment paper. This will help prevent sticking.
Cut out with cookie cutters. Transfer shapes to a parchment-lined baking sheet.
Repeat rolling and cutting out shapes to use up the dough.
Preheat oven to 250 degrees F.

Do a 4-5-inch circle and press in a child's handprint if desired.
Use a paper lollipop stick or a skewer to make a hole to hang as an ornament.
If making ornaments, bake for 90 minutes to 2 hours; if baking handprints, bake for 2-3 hours. Continue baking both ornaments and handprints as needed until they are until just firm to the touch, checking every 20 minutes. (It's not a problem if yours take longer than the initial baking time—it varies based on thickness and size...which will likely vary if you are baking these with kids!) They do not need to be rock hard, but should not feel squishy. Handprints will likely take longer than smaller ornaments and may take closer to 4 hours.
Remove from oven, let cool, and paint if desired with acrylic or washable tempera paint.
Once paint is completely dry, seal with Mod Podge if desired.
Mixing Bowl
parchment paper
Mini Cookie Cutters
- Divide the recipe in half to make a smaller portion of dough if desired.
- Use paper lollipop sticks or a skewer to make your holes.
- Use a 4-5 inch round cookie cutter to make handprint ornaments.
- Tie on baker's twine or thin ribbon to hang as ornaments.
- Try to get the dough to an even thickness before baking so the ornaments bake evenly.
- Bake for the time indicated and then longer if your ornaments still feel soft. They should be firm to the touch without much give but do not need to be rock hard. It is not a sign of a problem if yours take longer than mine did to bake—flours and ovens vary!
- Let cool fully before painting.
- If you want to paint the background of a handprint ornament, do that before you paint the inside of the hand. Let dry before adding a second color.
- Use regular acrylic paint for older kids who can be trusted with paint and washable tempera paint with younger toddlers.
- To help preserve your finished dried ornaments, you can coat with a layer or two of Mod Podge or spray with a sealer.
Calories: 1kcal, Fat: 1g, Saturated Fat: 1g, Polyunsaturated Fat: 1g, Monounsaturated Fat: 1g, Fiber: 3g, Sugar: 1g, Calcium: 31mg, Iron: 6mg
Tried this recipe?Rate in the comments and tag @yummytoddlerfood on IG!
EASY Salt Dough Ornaments That Last Forever
6.3K shares
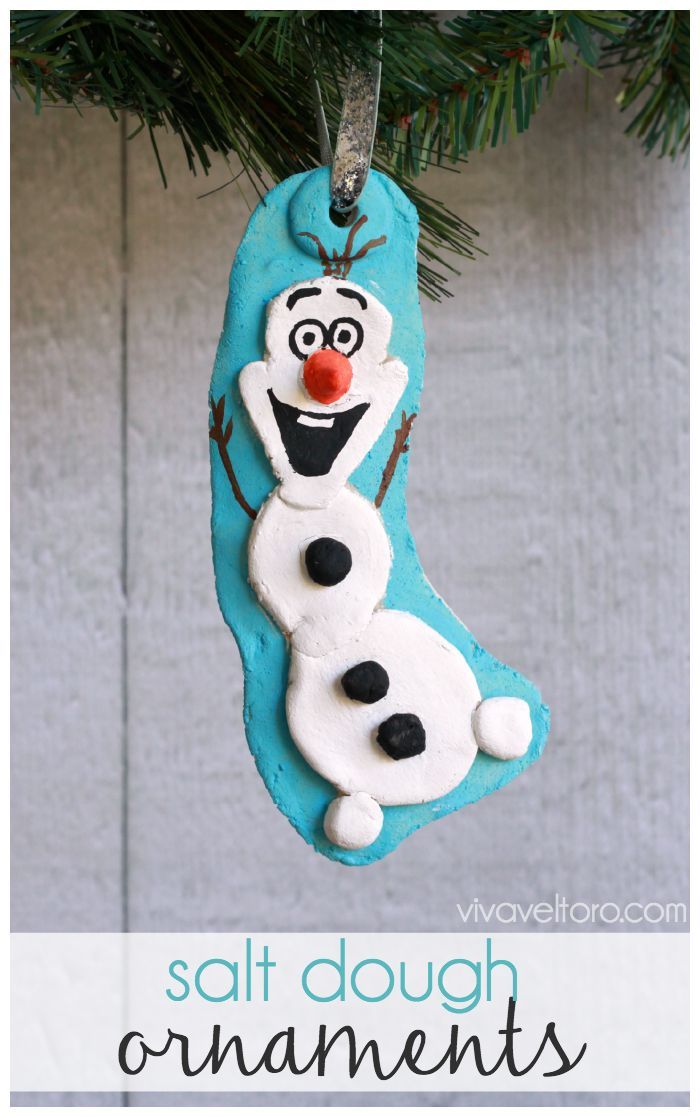
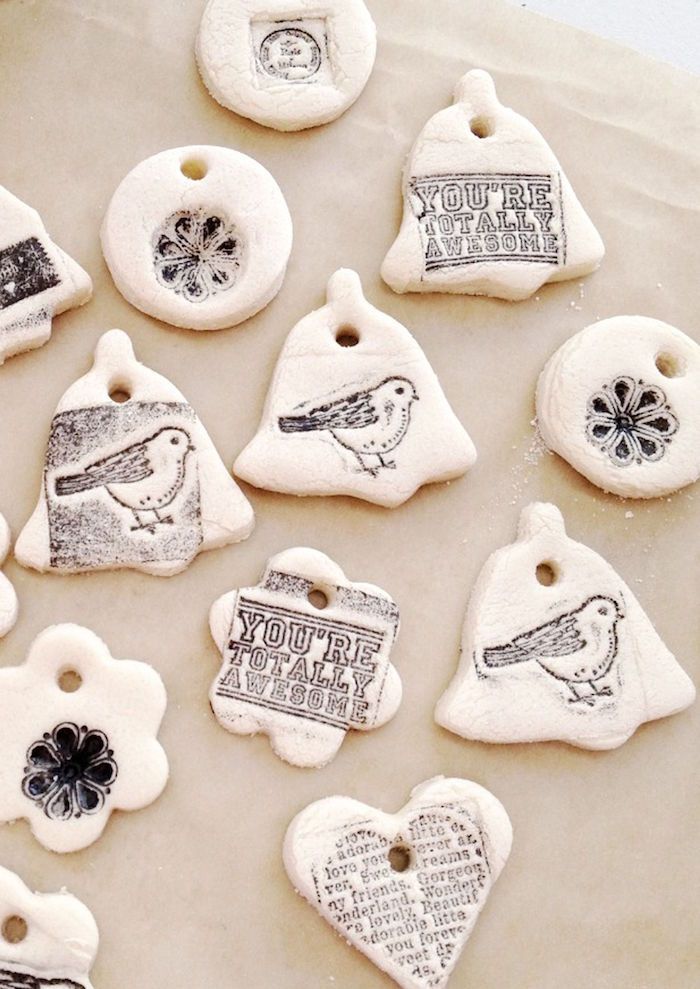
Use this recipe to make salt dough ornaments that double as personalized gift tags – both kids and adults will love this EASY craft. Preserve the ornaments with Mod Podge.
Skills Required: Beginner. You’ll make salt dough according to the recipe, cut your shapes, and then bake it. Then you’ll paint and Mod Podge the resulting ornaments. Anyone can do this project without prior experience.
I have a confession to make: I LOVE wrapping gifts. Presentation may not be everything, but it’s worth a lot in my book.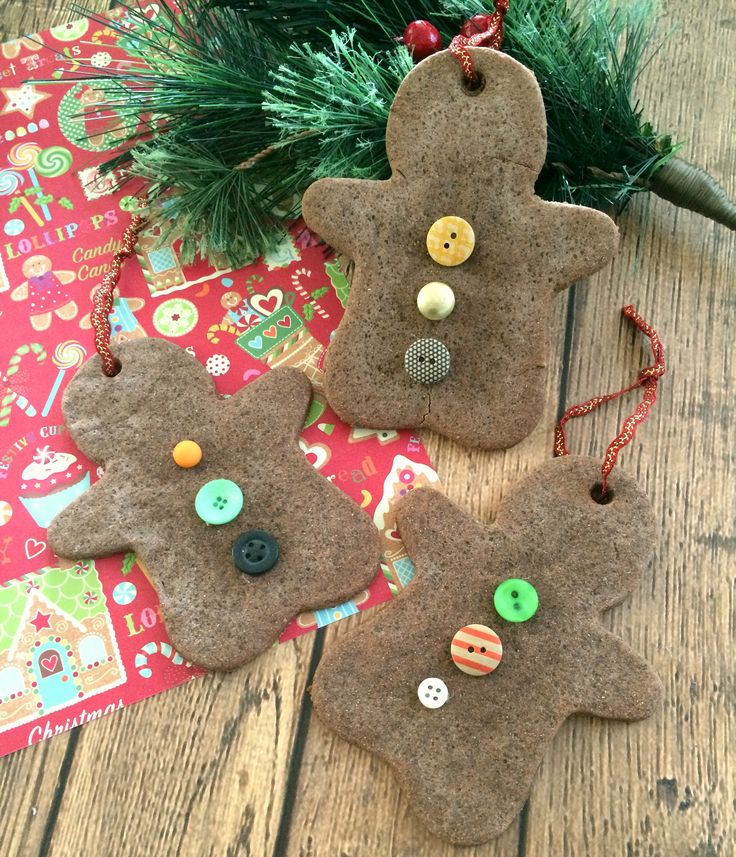 When I can add a unique, handmade, and thoughtful topper to my gifts, I’m definitely going to take the time to do so.
In addition to gift wrap, I also love Christmas ornaments. Especially something personalized, that I can make myself. “So what,” I thought, “if I can combine the two together?” So I did. AND they are a perfect craft for adults or winter boredom buster for kids. You’ll really enjoy making these!
Table of Contents
DIY Salt Dough Ornaments
These salt dough ornaments, sealed with my new favorite Mod Podge (Sparkle!), are perfect for adding a personalized touch of fun to your gift wrap. Then, of course, you can hang them on your Christmas tree instead of throwing them away as you would a typical gift tag.
How to Make Salt Dough
Salt dough is easy to make with ingredients you probably already have in your kitchen! Our salt dough recipe is made with flour, salt, and water. It’s *really* easy and you can’t mess it up. The only thing I ask is that you don’t eat the dough, or let your children eat it. It tastes terrible anyway!
Preserving the Ornaments
You have a few options for preserving your ornaments. Before you do any preservation, you’ll want to paint them (if you want to use paint). You can paint the entire ornament or partial . . . and I recommend acrylic paint.
After that you can do one of two things. You can seal the ornaments with Mod Podge (giving them a few coats) or you can use a spray sealer. Or both. In this project, we’re using Sparkle Mod Podge to both seal the ornament and add a bit of bling to the project. So Mod Podge serves double duty in this instance!
The finish you use to preserve the salt dough is up to you – pick Satin, Gloss, or Matte depending on what you like. My personal favorite (besides the Sparkle) is a Satin finish.
How Long do Salt Dough Ornaments Last?
If you preserve your ornaments properly, salt dough can last for years. I have some dough ornaments from my childhood, so they would be at least 35 years old. They are still in great condition and there’s been no disintegration whatsoever!
Salt Dough Recipe
Gather These Supplies
- 2 cups flour
- 1 cup salt
- 3/4 – 1 cup water
- Initial cookie cutters
- Mod Podge Sparkle
- Paint for dipping (if desired)
- Twine or ribbon for hanging
Step 1: Make your dough by mixing your flour, salt, and water. If your dough is too dry, add a bit more water, if it’s too wet, just add more flour . . . salt dough is very forgiving; it’s hard to mess it up!
Step 2: Roll out your dough and cut out your initials. Place on a sheet pan lined with parchment paper. You can cut your salt dough ornaments into any shape you like. I did letters, but you can use any cookie cutter shape you find.
Step 3: Use the end of a skewer to poke a hole at the top of each initial for hanging. Bake at 250 degrees for 2 – 3 hours. Let cool.
Step 4: I decided to dip my salt dough ornaments in gold paint (which I added to a cup and mixed with about a tablespoon of water to thin).
You can decorate your ornaments with glitter, craft paint, or anything else your heart desires. Dip your initials, and let dry on parchment paper.
The salt dough ornaments are being shown dipped in the paint, but you could dip them into Mod Podge and then sprinkle with glitter. If you do that, wait until dry and brush off the excess with a dry brush before hanging.
Step 5: Once dry, add a coat (or more) of Mod Podge Sparkle to help seal the ornaments and give them a bit of shimmer.
It’s as simple as that! These are so fun and easy to make, and it’s a great kids’ craft, as well!
You can tie these salt dough ornaments to gifts with baker’s twine, or you can grab some ornament hooks and put them on the tree.
They look great on top of packages . . . wouldn’t it be fun to spell out a name and tie one letter to each gift? There are so many things you can do with this idea!
Thank you so much for letting me share my salt dough ornaments with you all today! You can find lots of other tutorials and inspiration on my blog.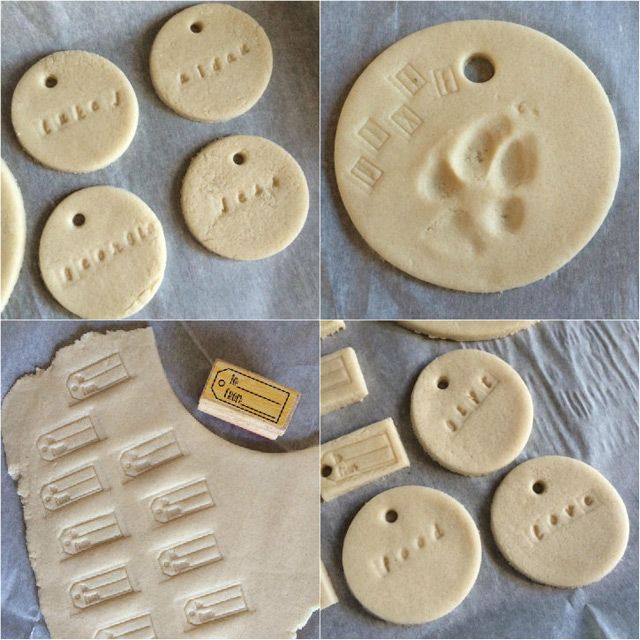
Prep Time 5 minutes
Active Time 20 minutes
Total Time 25 minutes
Difficulty Easy
Estimated Cost $5
Materials
- 2 cups flour
- 1 cup salt
- 3/4 - 1 cup water
- Mod Podge Sparkle
- Paint for dipping (optional)
- Baker's twine
- Parchment paper
Tools
- Cookie cutters
- Scissors
- Cookie sheet
- Oven
Instructions
- Make your dough by mixing your flour, salt and water. If your dough is too dry, add a bit more water, if it's too wet, just add more flour . . . salt dough is very forgiving; it's hard to mess it up!
- Roll out your dough and cut out your shapes (in this case, initials) with the cookie cutters.
 Place on a sheet pan lined with parchment paper.
 - Use the end of a skewer to poke a hole at the top of each ornament for hanging.
- Bake at 250 degrees for 2-3 hours. Let cool.
- If desired, dip ornaments in paint or glitter. Let dry on parchment paper.
- Once dry, add a coat (or more) of Mod Podge Sparkle to help seal the ornaments and give them a bit of shimmer. Let dry.
- Use baker's twine to hang.
And if you are interested in making some additional gift tags with salt dough, get inspired by our faux cookie gift tags. I’d also love for you to check out these other kids’ Christmas crafts:
6.3K shares
DIY salt dough products!
Salty dough — soft and plastic material easy to make in any kitchen. Out of him make fantastic products. Plus - no harmful additives and allergens! Ready-made crafts will decorate not just your table or a friend's room.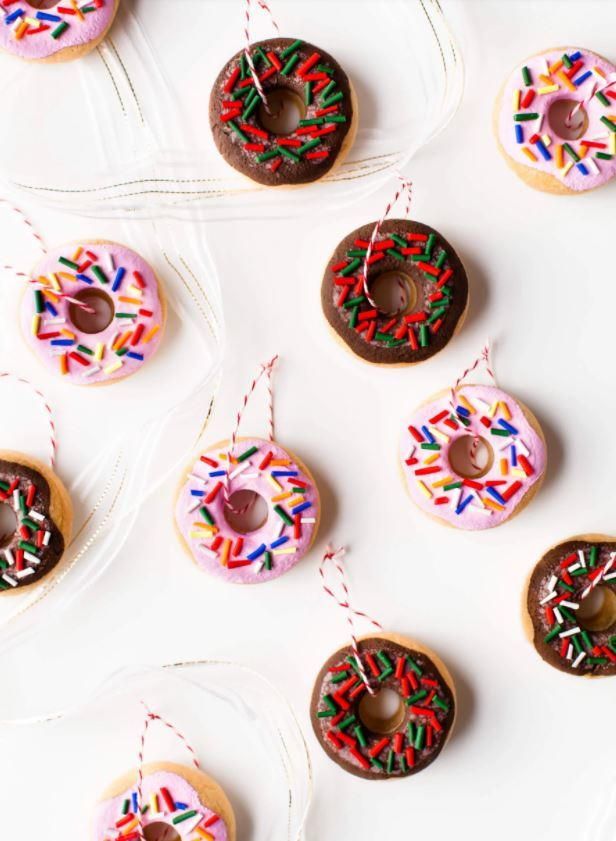 Them there will definitely be a place in mom's office and even my dad's car.
Recipe perfect salt dough, I already told you. And now find out what amazing figurines you can make it out of it.
Salt dough hedgehog
Suggest younger brother or sister fun entertainment - blind a prickly forest inhabitant, a hedgehog made of salt dough.
to you will need:
- salty dough,
- food dyes,
- watercolors, acrylic paints or gouache.
one. Form a piece of salt dough balls with an elongated nose - this is the body and a hedgehog's head.
2. Now make him a nose and eyes. You can use colored dough or peppercorns.
four. With scissors in a checkerboard pattern make incisions on the back - needles hedgehog. Optionally, put on the back of the hedgehog red apple.
5. Leave the craft for a few days before complete drying.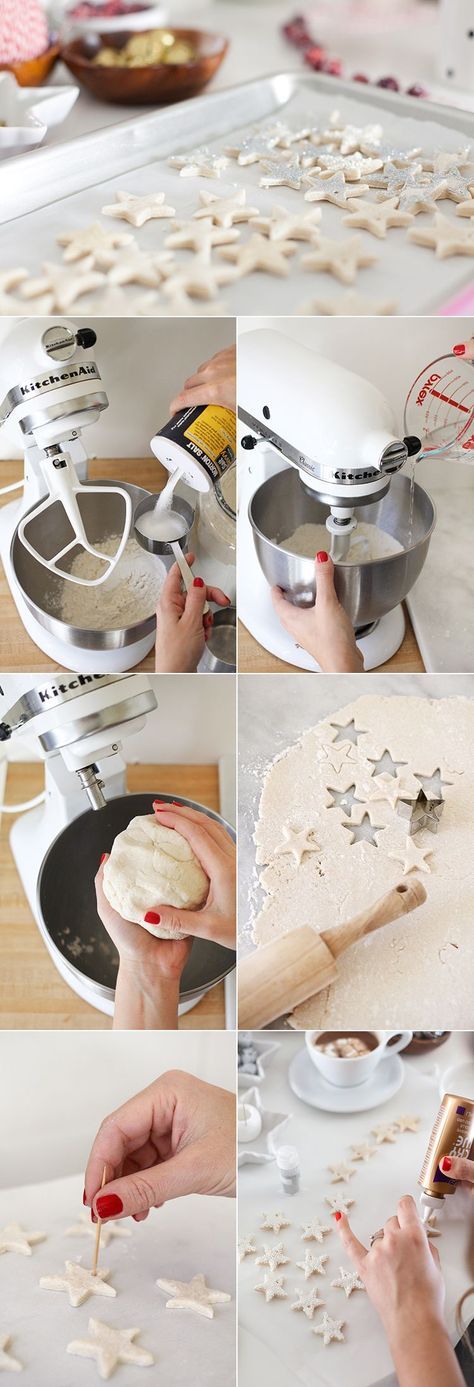
When the figurine will become solid, it can be paint or varnish.
Not be afraid that the dough will deteriorate over time, - salt preserves the figurine, protects it from moisture and pests, not indifferent to flour products. Therefore your hedgehog for a long time to please his talented host.
Salt Dough Mushroom Basket
A great a gift for mom and a worthy craft for school exhibition. mushroom panel will perfectly decorate the interior of your room and bring home the atmosphere of late summer.
to you will need:
- salty dough,
- stacks for plasticine,
- glue PVA,
- paints,
- cardboard,
- burlap,
- braid,
- universal polymer glue,
- transparent varnish.
one. Roll out a piece of dough to a thickness 0.5 cm. basket base — trapezoid.
2. Four thin rollers from the dough lay out on the base with a fan.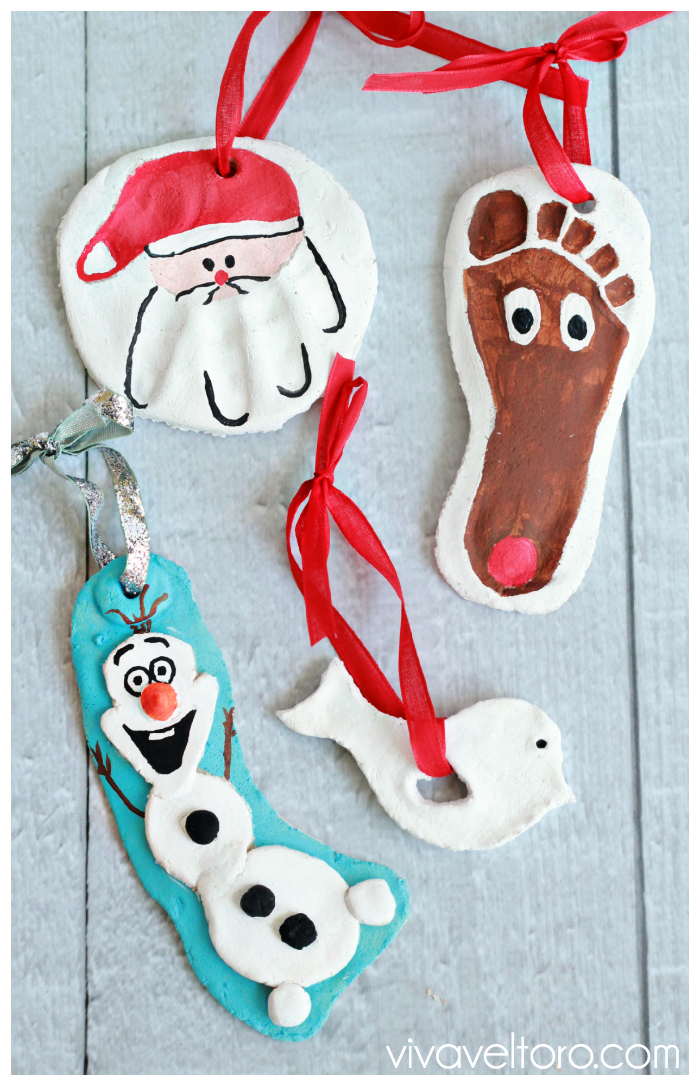
3. Download another roller, roll it in stripe shape. Divide and imitate weaving. Mochi parts attachment points water. Lay out each next row in a checkerboard pattern.
four. Now make a thin long dough roller and fold it in half. Spin in shape spirals and decorate the top baskets. Decorate the bottom of the basket in the same way. From make a handle of a thicker tourniquet. Moisten the tips and attach to the base.
5. Well done! Start making mushrooms and leaves. Make hats from flattened balls. Legs - thick rollers. Connect the parts of the mushrooms by moistening water attachment points.
leaflets make from droplets downloaded from balls and flattened between the fingers. stack make veins.
From mushrooms and leaves form a composition.
6. Dry the mushroom basket in the oven.
7. Color the composition with gouache or acrylic paints.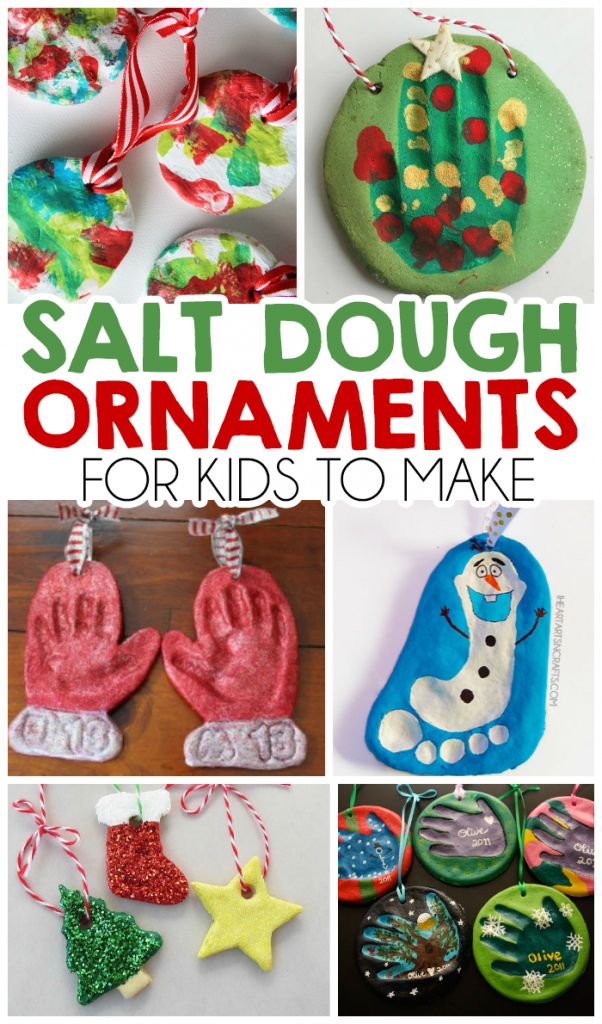 Cover with varnish.
Wonderful! It's time to move on to the design of the mushroom panel.
eight. Glue to the cardboard sheet with PVA glue fringed square burlap (refer to the size of the basket). Flatten and iron everything except fringes.
9. On the back, make a loop of braid.
ten. For the last step of the job You need help from your mom or dad. FROM glue with polymer glue basket to burlap.
chic Work!
Jewelry for gifts. Simple and with taste!
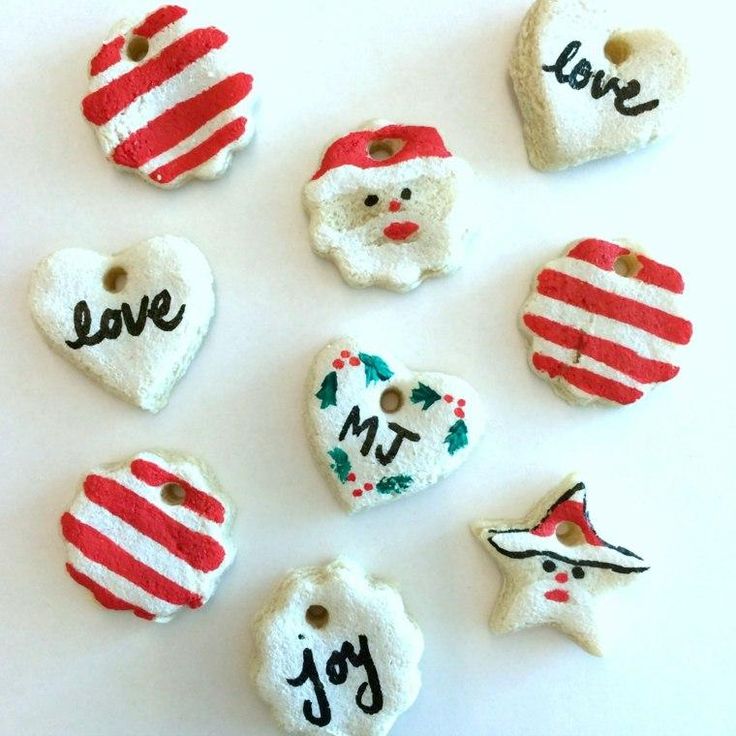
At I have a pleasant surprise for you - tag making master class for gifts. Of course, from salty test. Make no mistake: such a cute accent will decorate any present, and in combination with original packaging your gift for sure become a small masterpiece.
to you will need:
- salted dough,
- molds for cookies,
- materials for impressions: spruce twigs, lace and so Further.
one. Make a few on the rolled out dough impressions.
2. Cut out with cookie cutters hearts, rhombuses, circles. Do It ribbon holes.
3. Bake figurines in the oven. colorize watercolor or gouache mixed with PVA.
Original Tags are ready to decorate your gift.
Salted dough fruits and vegetables
Products from salt dough you can feed toy farm animals, explore with use them to color and learn to count. And how many entertaining games are easy arrange with homemade fruit and vegetables: for memorization, pairing, treasure hunt!
to you will need:
- salty dough,
- acrylic paints,
- pointed pencil for dots and lines on fruits.
one. Make fruit from salt dough vegetables. Try to mimic natural forms. With stacks and a pencil, do it on vegetables and fruits dots or lines.
2. Leave for a few days until complete drying.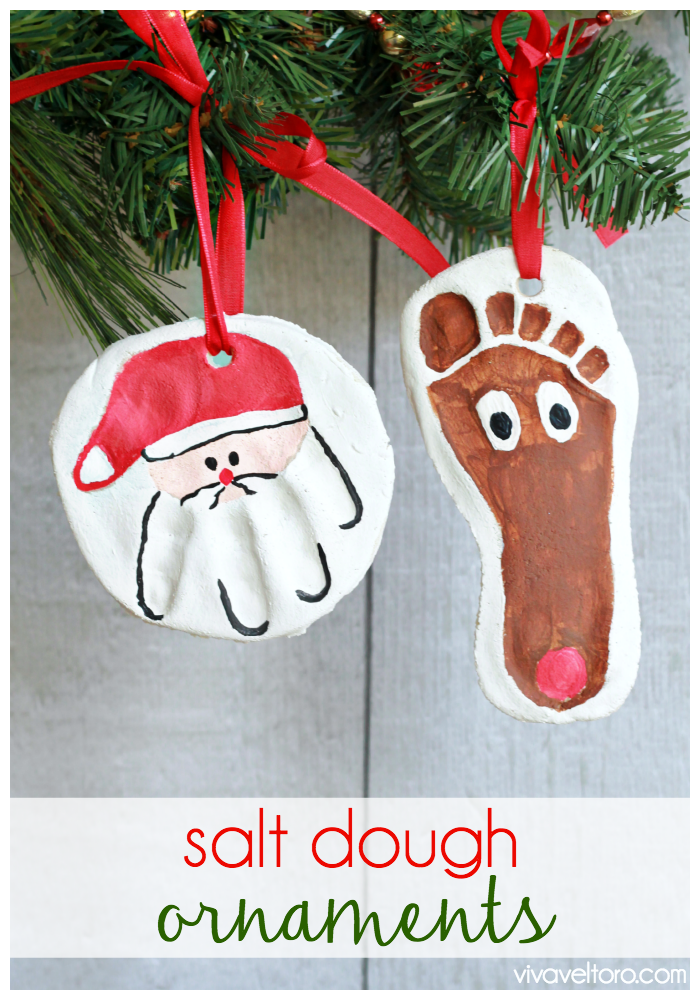 Or dry in the oven.
3. Paint with acrylics.
BUT here is a new weapon for games.
Original ideas for crafts from salt test
If a you are not a beginner in the art of modeling, catch interesting craft ideas from salt dough. Let these products cheer you up, create houses cozy atmosphere and delight the views of your guests.
Cottage from dough for your favorite toys — about this for sure Every miracle lover dreams! For making magic house fairies and elves, put dough around a small jar, make roof, windows and doors. Decorate your home with flowers or dough mushrooms. Wait until complete drying.
make garland from starfish - Feel like you're at the seaside.
Interesting compositions with hearts perfect for Mother's Day or Valentine's Day.
Winter candlestick-house - colorful decoration for Christmas holidays.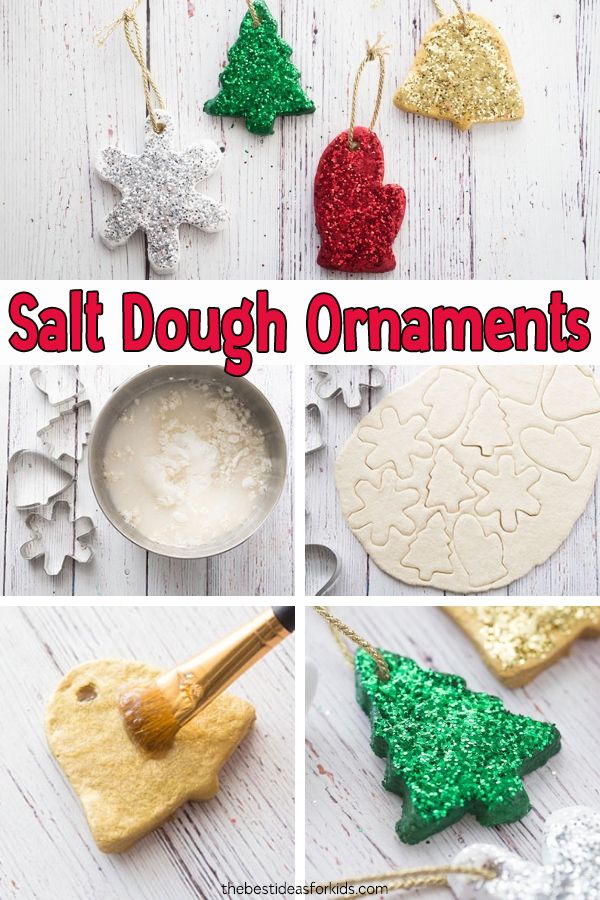
BUT Easter rabbits will be a great gift for Easter.
Golden The fish is a classic.
Not forget to use different elements for decor and prints. It can be cereals, pasta, buttons, shells, beads, lace and ribbons. room for fantasy unlimited!
Read also:
- Animals plasticine,
- Flowers plasticine,
- Lepim figures of transport from plasticine.
Salt dough Christmas decorations / Needlework and creativity / Blogs Million Menu
← Back to the section "Needlework and creativity" Just like plasticine, you can sculpt products of any level of complexity from salt dough, so children of any age can make crafts from salt dough. The recipe for making salt dough for modeling is very simple, the ingredients for it can be found in every home
You will need:
- flour - 2 cups
- salt - 1 cup
- water - 250 gr.
Wheat flour is needed, the most common, without baking powder, dyes and other additives. Salt - "Extra". Water - ordinary cold.
How to make salt dough: mix flour and salt, add water, knead the dough. The degree of readiness of salt dough can only be determined by hand. If the dough crumbles, add water. If, on the contrary, it stretches too well and sticks to your hands, then there is a lot of water, and you need to add a little flour. Roll up the ball, make a few indentations in it with your finger. If the dough does not spread and holds its shape, then it is ready. In the process of kneading, it is recommended to add vegetable oil. Now the dough will not stick to your hands, dry out quickly and become covered with a crust during work. However, it should be remembered that the best is the enemy of the good! If there is a lot of oil, the dough will get dirty, and the final drying may take a very long time. For our recipe, a couple of tablespoons is enough.
Well, the dough is ready, now you can proceed directly to the process of sculpting from salt dough.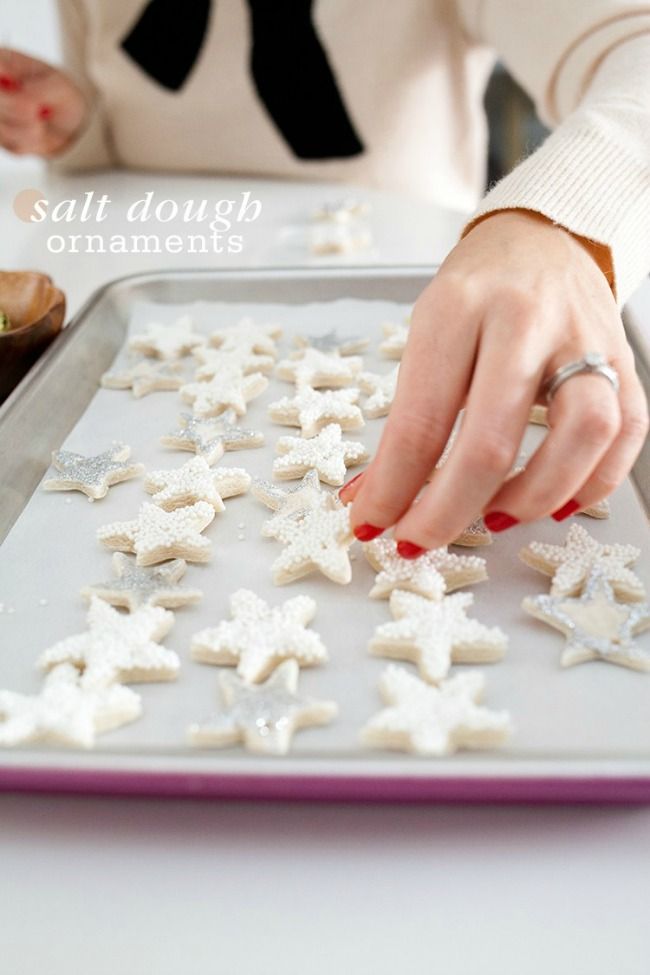
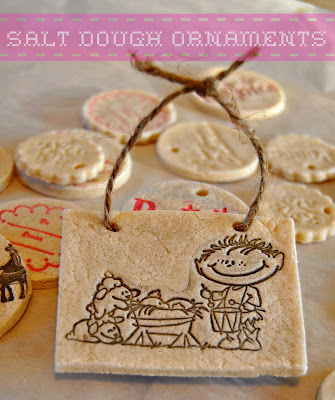
For making Christmas decorations from salt dough, you will need cookie cutters. With their help, even a kid can cut out figures from a rolled out layer of dough.
The resulting salt dough figures can be left as is, but it is even better to decorate them. For example, like this.
You can use a cocktail tube to make many holes in the dough and then you will get lace figures.
Or decorate salt dough crafts with beads. Just keep in mind that if you use plastic beads, etc., then you will not be able to dry finished salt dough products in the oven, otherwise the beads may melt.
Instead of beads, you can use various cereals, shells, buttons and even broken dishes to decorate New Year's crafts from salt dough.
You can add a festive look to salt dough Christmas toys with the help of beautiful ribbons and threads.
Note: if you don't have a suitable cookie cutter, you can cut out a cardboard template and cut the salt dough for crafting.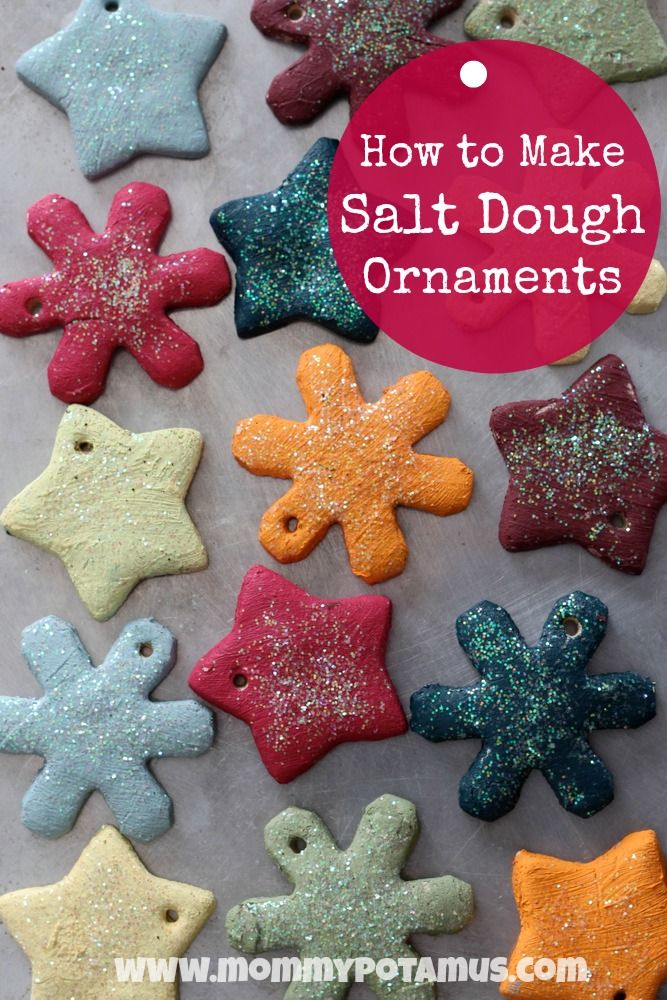
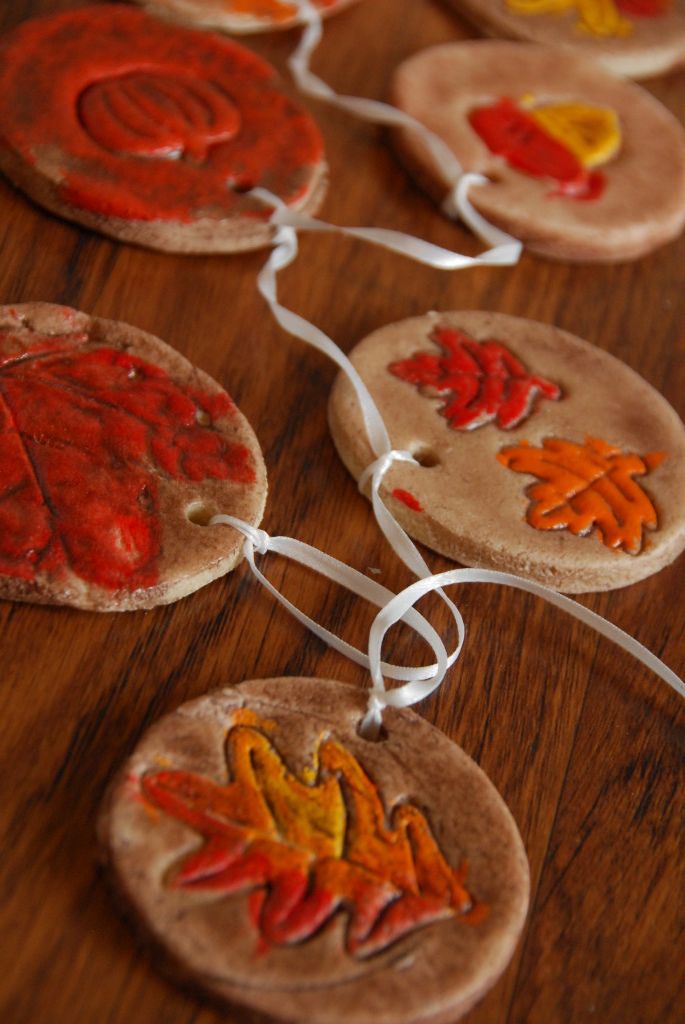
Ready-made, already dried salt dough products can be decorated with sparkles by applying them on a layer of glue
Christmas decorations made of salt dough, painted with colored permanent markers, look beautiful.
A simple and original way to decorate salt dough is to make prints on them. Prints can be made with all kinds of objects with an interesting texture that you can find at home.
Christmas decorations made of salt dough with imprints of children's hands or feet look touching. On the back of the salt dough craft, write the date the imprint was made.
Source: http://adalin.mospsy.ru/
Crafts New Year dough
← Return to the section "Needlework and Creativity"
Read also
| Fir -tree toys from the pins. ... | New Year's jewelry for home and fabric Christmas toys Salt dough crafts | Pepsi with a taste of salt watermelon Himalayan salt: amazing combination of sweet and salty | Free fantasy fantasies. 
|