The mini page printable
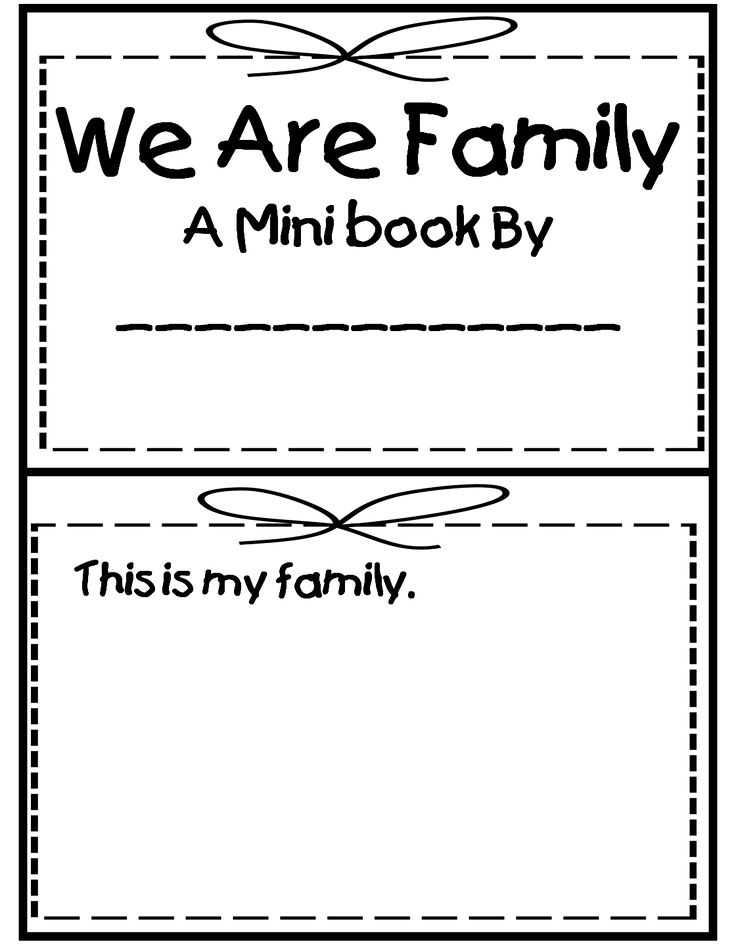
DLTK's Make Your Own Books
< More Mini Books
The mini-books are quite simple with images that should appeal to young children and simple, repetitive words that children in Preschool thru Grade 2 should be able to read themselves.
Feel free to make as many copies as you need (just don't sell them as they're meant to be free for all to use.).
Use our Activity Sheets (see template below) to complement the mini book.
Materials:
- printer,
- paper (you can use a slightly heavier paper for a longer lasting book)
- stapler
- something to color with (if using B&W template)
Directions:
We have prepared a demonstration video about assembling your mini book. Watch it here.
- Print template of choice. The B&W version is fun for young
children to color in or for older children to color as gifts for younger
ones.
I like printing a color cover and B&W pages.
- Color the template pieces if you are doing the B&W version.
Photos aren't for this book,
but the system works the same
Fold with pictures out
and trim if necessary
stack with odd
numbers on top
staple
enjoy!
Watch a demonstration
video to help you
assemble your mini book.
NUMBERED PAGES:
- If you imagine a 'real' book for a second, you know that each page
has printing on the front and the back. We're going to fold
the pages to make it like a real book.
- Ignore the cover for now.
- Fold each page along the center dotted line so the images are
on the OUTSIDE and the blank sides of the paper are on the
inside (imagine you're making a greeting card).
- You can use a glue stick, if you like, to glue the pages together (WITH THE EXCEPTION OF THE COVER!)
- Stack the pages, so the odd numbers are on top and the folded edges are lined up. Trim with scissors or paper cutter if needed.
COVER PAGE:
- Fold the cover page along the dotted line, again with the images on the outside.
- OPTIONAL: You can laminate the cover page or print it on cardstock if you want it to be more like a real book's cover.
ASSEMBLE THE BOOK:
- Open the cover page (like a folder) and slip the pages inside so that when you open the cover you'll see page 1 -- the unfolded edges of the pages will go against the folded part of the cover.
- Close the cover page and tap the book so everything lines up.
- Put three or four staples along the edge to hold the book together.
- Trim again, if needed.
- Flip through the book once, carefully folding the pages to make the book easier for the children to read.
PRINTING THE TEMPLATES
- Close the template window after printing to return to this screen.
- Set page margins to zero if you have trouble fitting the template on one page (FILE, PAGE SETUP or FILE, PRINTER SETUP in most browsers).
- There'll be less trimming to do if you also turn off the headers and footers.
Text of
the Mini Book
(so you can read through it before printing)
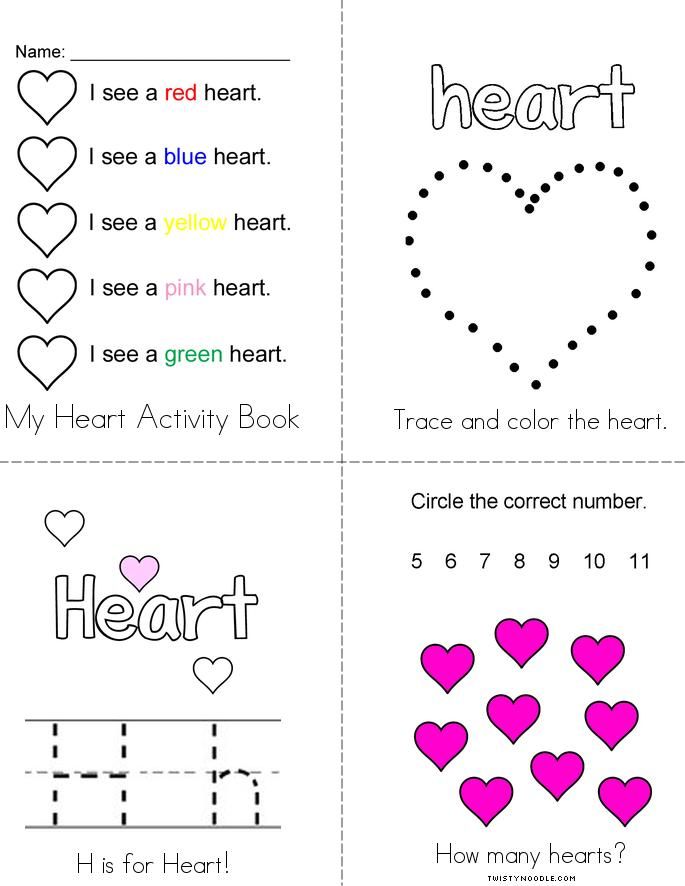
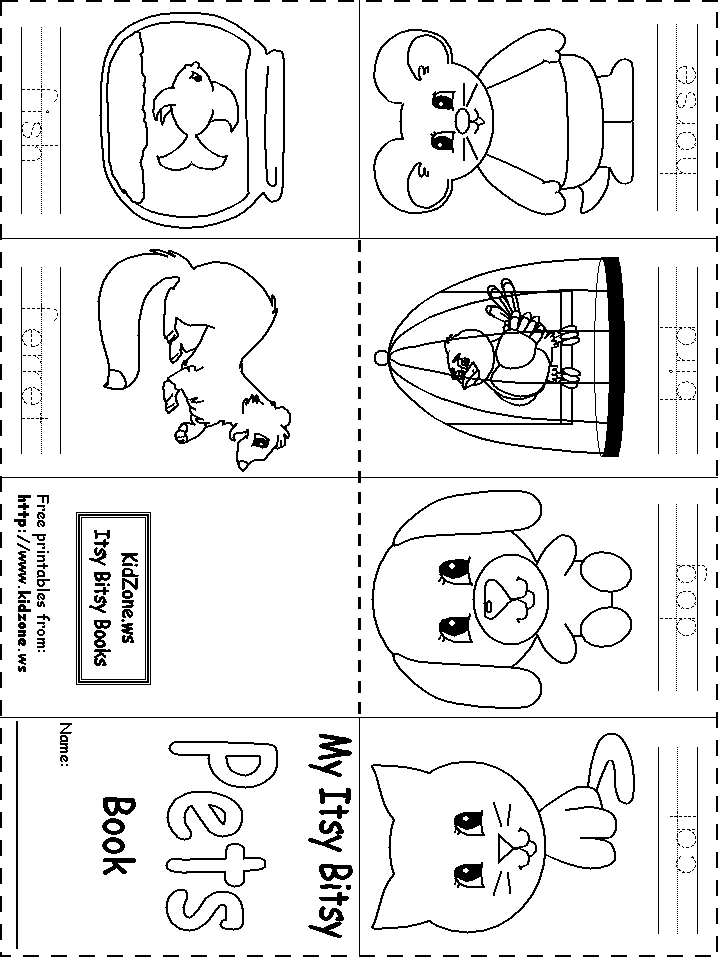
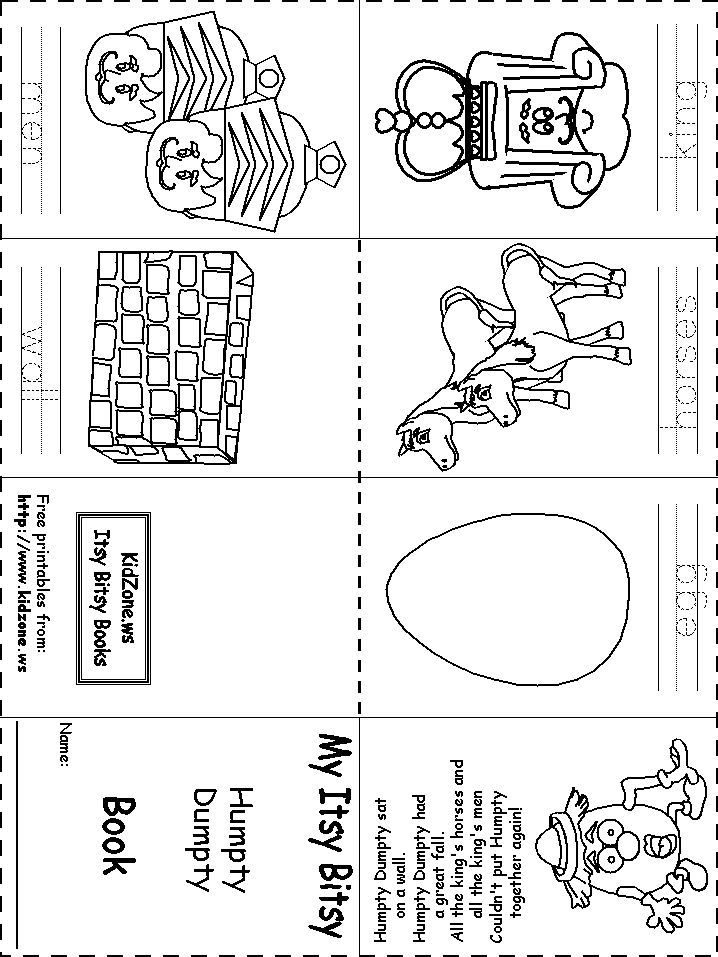
Pg 1 I see an airplane. Go airplane go!
Pg 2 I see a boat. Go boat go!
Pg 3 I see a car. Go car go!
Pg 4 I see a helicopter. Go helicopter go!
Pg 5 I see a jet. Go jet go!
Pg 6 I see a rocket. Go rocket go!
Pg 7 I see a sailboat. Go sailboat go!
Pg 8 I see a train. Go train go!
Pg 9 I see a truck. Go truck go!
Pg 10 Go! Go! Go!
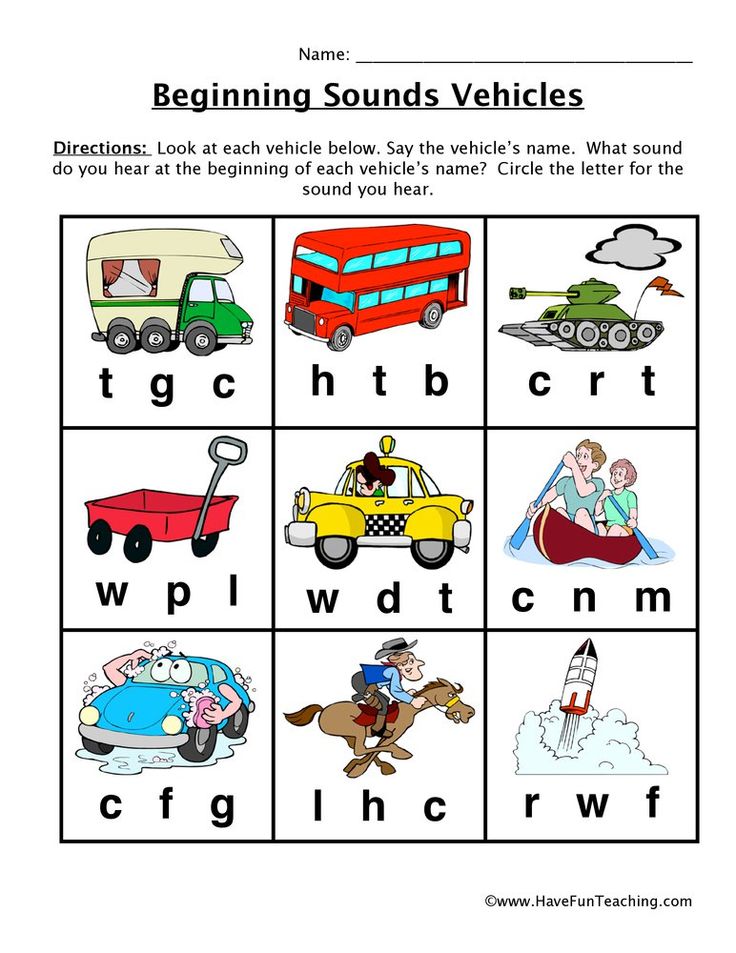
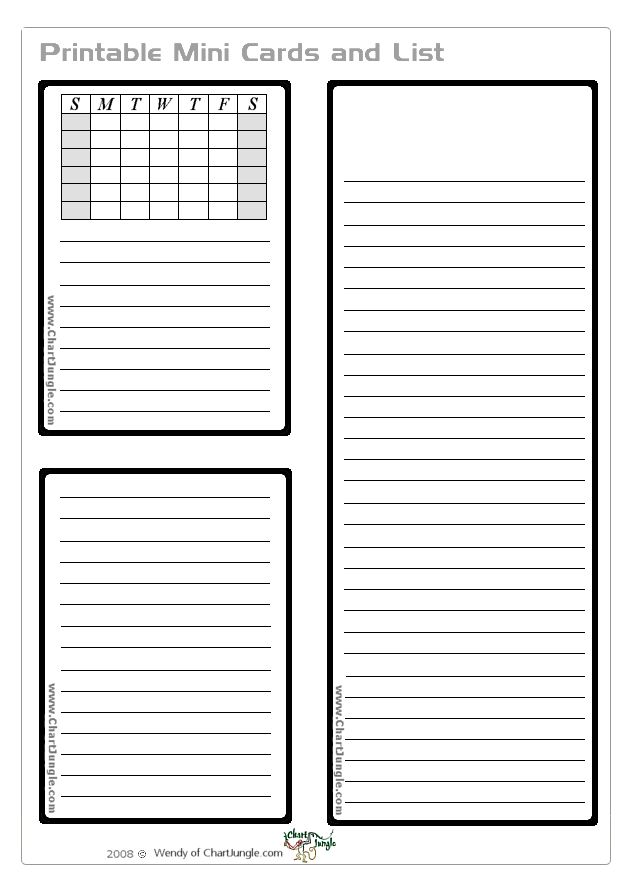
Activity Worksheet Templates:
Worksheet 1 (color) (B&W)
(practice first letters of words)
Worksheet 2 (color) (B&W)
(match vehicle with place you'd see it)
Mini Book Templates:
Page 1 and 2 (color) (B&W)
Page 3 and 4 (color) (B&W)
Page 5 and 6 (color) (B&W)
Page 7 and 8 (color) (B&W)
Page 9 and 10 (color) (B&W)
COVER (color) (B&W)
Free Happy Planner Printables | Customize Online & Print at Home
Planner Printables
Planner Stickers
As an Amazon Associate, I earn from qualifying purchases. This means that if you purchase anything I earn a commission on your purchase but it doesn’t cost you anything. Please see our Privacy Policy.
The Happy Planner is produced and sold by “Me and My Big Ideas” (MAMBI). It is sometimes called the Create 365 Planner.
The planner is available in five different sizes (micro, mini, classic, skinny classic and big) and various covers. To start creating free Happy Planner printables for your planner click on the size of your planner below. Once the free planner maker app opens select a background, planner content, stickers, and add your own text and images.
Free Happy Planner Printables
BIG HAPPY PLANNER
Page Size:
8.5” x 11”
Cover Size:
9” x 11.25”
Big Size8.5"x11"
CLASSIC HAPPY PLANNER
Page Size:
7” x 9.25”
Cover Size:
7.75” x 9.75”
Classic Size8.5"x11"
Print a full page at 82% to fit.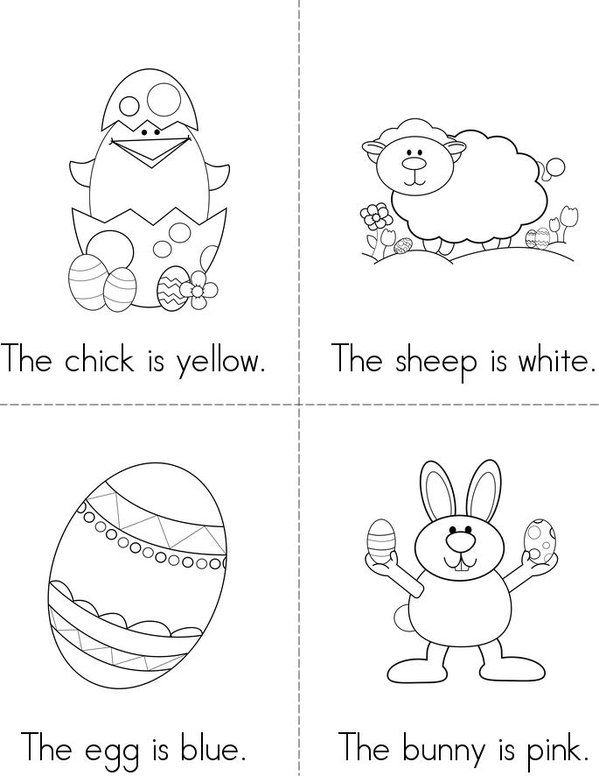
MINI HAPPY PLANNER
Page Size:
4.5” x 7”
Cover Size:
5.125” x 7.5”
Mini Size8.5"x11"
Print a full page at 54% to fit.
We offer free inserts for each of the four sizes. Each planner printable can be totally customized. You can select the background and the content. There are more than 101 different backgrounds available. You can print each page with a different background or use a similar style for each page. The content of the planner page can also be customized. There are hundreds of options including a monthly, weekly, or daily planner, water tracking charts, goal charts, 30-day challenges, and many more. You can add as many elements as you want on each page. You can also add text and images. We have many planner stickers that can be added before you print.
You can also resize full-page printables to fit all Happy Planners. See the explanation below on how to resize pages.
Since the Happy Planner is disc-bound, the pages can easily be removed and replaced with our free printables or others.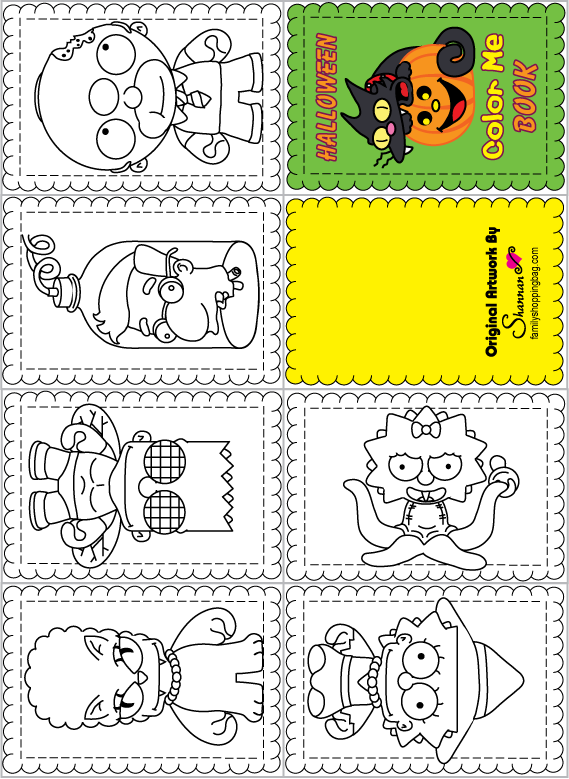 It’s perfect for creative people looking to customize their planner to suit their needs. It’s also a great creative outlet.
You can purchase many add-ons such as stickers, stamps, and other accessories. You can also download free planner stickers and inserts from this site.
If there are any elements that you would like us to add then please leave a comment below. Also, if any printable did not fit your planner then please let us know.
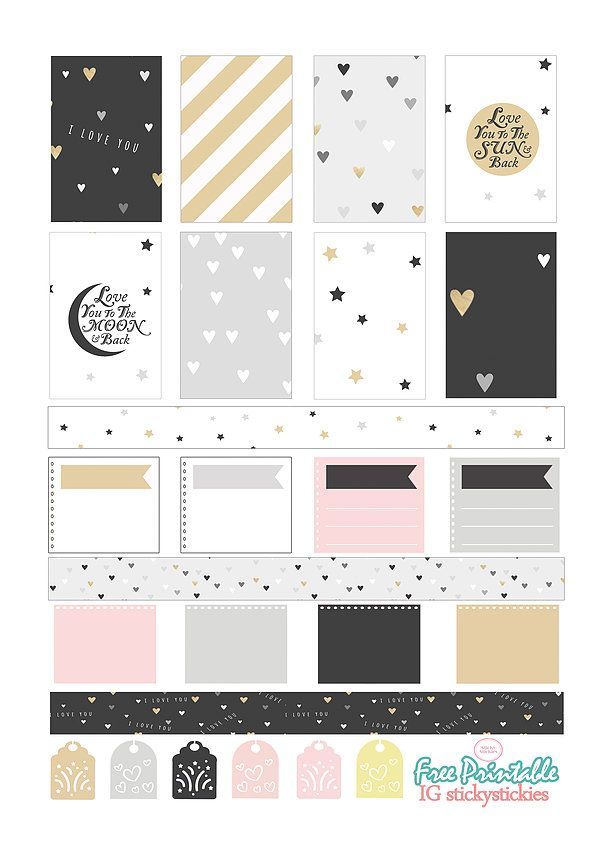
Free Printable Happy Planner Stickers
Free Printable Classic Happy Planner Stickers
Free printable stickers for the classic planner size. Print on full-sheet sticker paper or on copy paper and adhere with paper glue ( 8.5” x 11” size).
Kawaii Planner Stickers
These cute planner stickers can be edited before you print. Edit the text.
Happy Planner Mini Size Stickers
These planner stickers are for the Happy Planner mini size. Print on full-sheet sticker paper or on copy paper and adhere with paper glue ( 8. 5” x 11” size).
Kawaii (cute) style
Cute planner stickers that you can use with any Happy Planner size.
Happy Planner Page Sizes
- The Big Happy Planner pages are 8.5” x 11” (all planners on this site fit this size and can be printed on US letter paper)
- The Classic Happy Planner pages are 7” x 9.25”
- The Skinny Classic Happy Planner pages are 4.125” x 9.25”
- The Mini Happy Planner pages are 4.625” x 7”
- The Micro Happy Planner pages are 3” x 4”
Happy Planner Cover Sizes
The Happy Planners do come with pretty covers but you can customize your cover if you prefer. We offer a variety of customized free printable DIY Happy Planner covers.
- The Big Happy Planner covers are 9” x 11.25”
- The Classic Happy Planner covers are 7.
 75” x 9.75”
 - The Mini Happy Planner covers are 5.125” x 7.5”
- The Micro Happy Planner covers are 5.62″ x 4.12″
Happy Planner Dashboards
What is a planner dashboard? It is basically like a bookmark and/or binder divider. It has a tab on the top just like a divider so you can easily find your place. You can move it from page to page to mark various sections or you can also stick removable stickers or notes on it. You can print our own Happy Planner dashboard DIY from this site.
DIY Planner Inserts
The HP is disc bound which enables you to insert planner extensions that you can purchase or print. You can also move pages around or easily remove them. This to me is a major advantage. You can buy a Happy Planner punch and then print any of our pages and easily insert them into your planner.
Resizing Pages: How to print our planner printables to fit the Happy Planner size
Most printables on this site and on the internet are available in full size (8. 5″ x 11″). When you use our planner app you can create the page with the cutting marks for each planner size. However, you might find specific planner pages that are full size and need to be resized to fit your planner.
Download the planner printable that you want to insert into your Happy Planner in PDF format. You can download any planner printable as a PDF document (by clicking on the folded page icon once you have customized your printable).
You can create free Happy Planner printables for any size planner. However, you might want to print one of our ready-made printables and adapt it to the Happy Planner. To do so, see the instructions below.
1. Open the planner printable in Adobe Reader. If you don’t have it, you can get it free here.
2. Go to File -> Print.
3. Select your printer.
4. Click on “fit” to page (NOT “actual” size).
5. Select the page orientation (portrait or landscape).
6. Click on properties.
7. Go to “Page Size,” then go to “Custom. ”
”
8. Enter the page size:
- Big Happy Planner pages are 8.5” x 11”
- Classic Happy Planner pages are 7” x 9.25”
- Skinny Classic Happy Planner pages are 4.125” x 9.25”
- Mini Happy Planner pages are 4.625” x 7”
- Micro Happy Planner pages are 3” x 4”
OR
Look for the scale box and insert 82% for a classic HP or 54% for a mini HP. A big planner does not need to be resized.
9. Click on “OK.”
10. Print.
11. Cut the pages using a paper guillotine or scissors (if you don’t have a paper guillotine).
12. Punch holes in the correct places. If you are going to be printing a lot of planner printables, then it is worth investing in a Happy Planner punch, which will punch holes in the correct places.
Click to rate this post!
[Total: 32 Average: 4.4]
Create a brochure or book in Word
Word for Microsoft 365 Word for Microsoft 365 for Mac Word 2021 Word 2021 for Mac Word 2019 Word 2019 for Mac Word 2016 Word 2016 for Mac Word 2013 More.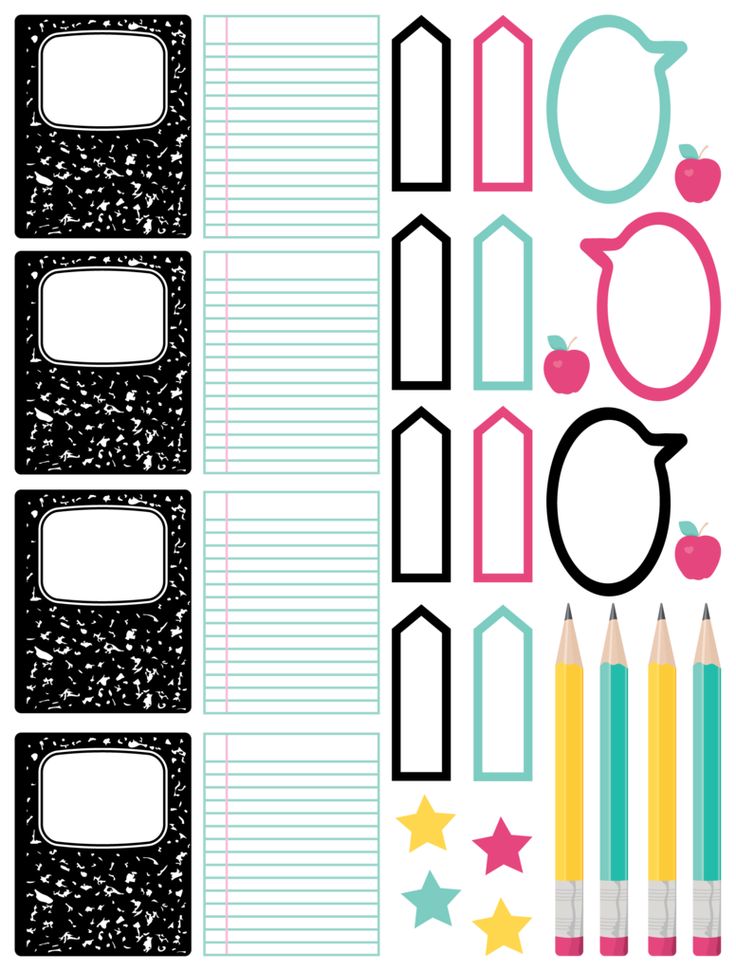 ..Less
Whether you want to create a brochure for an event or print a book, consider using the built-in page setup for brochures that include Word. The Booklet layout helps you automatically print your document the way you want it to fold and bind.
For best results, change the document's layout before you start writing it. This way you don't have to do extra steps if it turns out that tables or other objects in the document are not positioned correctly.
Create a book or brochure
-
Navigate to the Layout window and select the Page Setup dialog launcher icon in the lower right corner.
-
On the Fields tab, change the Multiple Pages option to Booklet. Orientation will automatically change to Landscape.
Tip: If your document is long, you may want to split it into several booklets and then combine them into one book. In section the number of pages in the booklet is Select the desired number of pages for each booklet.
-
You can select and increase the binding value to reserve space in the inner fold for binding.
-
Go to Paper tab and select paper size . The final brochure size is half the paper size.
Tip: You can design your brochure using a variety of media. For example, to add borders to each page, on the Layout tab of the Page Setup window, click the Borders button.
-
Press button OK . If the document already has content, the text will be formatted automatically, but you may need to manually adjust objects such as images and tables.
Booklet printing options
When printing a booklet, check the print settings to make sure you are printing on both sides of the paper and that the sheets are flipping properly.
-
Click File > Print .
-
If your printer supports automatic printing on both sides, change Print one-sided to Print on both sides . Select parameter Flip pages on short edge so that the text on the reverse side is not turned over.
-
If your printer does not support automatic two-sided printing, select Manually print on both sides and insert pages into the printer when prompted. To ensure that pages print correctly, turn them over relative to the short edge of the paper as instructed by the printer.
Tip: To make your document look professional, you can add page numbers to the header or footer.
 See adding page numbers for more information.
See also
Create a brochure using a Word template
Brochure: page number tips.
Create different headers and footers for odd and even pages
Get Microsoft Publication Templates
Create a book or brochure
-
Navigate to > Layout Fields > Custom Fields .
-
Change the parameter for parameter Multiple pages to Booklet. Orientation will automatically change to Landscape.
Tip: If your document is long, you may want to split it into several booklets and then combine them into one book. Under Number of pages in booklet , select the desired number of pages for each booklet.
-
To leave space for binding, increase the value of parameter Binding .
-
You can design your brochure using a variety of media.
 For example, to add borders to each page, on the tab of the Layout tab of the Custom Margins window, select Borders.
 -
Press button OK .
If the document already has content, the text will be formatted automatically, but you may need to manually adjust objects such as images and tables.
-
Go to to > pages and check the paper size. Remember that the final brochure size is half the paper size. Make sure the correct size paper is loaded in the printer.
Booklet printing options
When printing a booklet, check the print settings to make sure you are printing on both sides of the paper and that the sheets are flipping properly.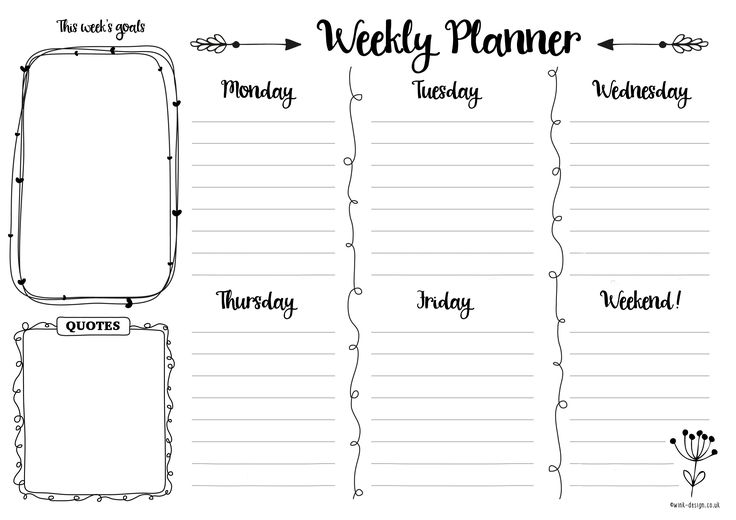 If your printer supports automatic printing on both sides, follow the steps here.
-
On tab File select Print .
-
In the area Double-sided , select Brochure .
Tip: To make your document look professional, you can add page numbers to the header or footer. See adding page numbers for more information.
Note: If your printer does not support automatic printing on both sides, you must print each page manually.
See also
Create a brochure using a Word template
Brochure: page number tips.
Create different headers and footers for odd and even pages
Get Microsoft Publication Templates
PDF Brochure & Portfolio Printing, Adobe Acrobat
User Guide Cancel
Search
Last update Sep 28, 2022 03:09:52 PM GMT | Also applies to Adobe Acrobat 2017, Adobe Acrobat 2020
- Acrobat User Guide
- Introduction to Acrobat
- Access Acrobat from desktops, mobile devices, and the web
- What's new in Acrobat
- Key combinations
- System requirements
- Workspace
- Workspace basics
- Opening and viewing PDF files
- Opening PDF documents
- Navigating PDF pages
- View settings PDF
- Customizing PDF viewing modes
- Enable thumbnail preview of PDF files
- Display PDF in browser
- Working with online cloud storage accounts
- Accessing files from Box
- Accessing files from Dropbox
- Accessing files from OneDrive
- Accessing files from SharePoint
- Accessing files from Google Drive
- Acrobat and macOS
- Acrobat notifications
- Grids, guides and measurements in PDF
- Use of Asian text, Cyrillic and left-to-right text in PDF documents
- Workspace basics
- Create PDF Documents
- Overview of the procedure for creating PDF documents
- Create PDF files in Acrobat
- Creating PDF documents with PDFMaker
- Using the Adobe PDF Printer
- Converting web pages to PDF
- Creating PDF files with Acrobat Distiller
- Adobe PDF conversion settings
- Fonts PDF
- Editing PDF documents
- Editing text in PDF documents
- Editing images and objects in a PDF document
- Rotate, move, delete and renumber pages PDF
- Edit scanned PDF documents
- Enhance document photos taken with a mobile device camera
- Optimizing PDF documents
- PDF document properties and metadata
- Links and attachments in PDF
- Layers of PDF documents
- Thumbnails and bookmarks in PDF 9 documents0016
- Action Wizard (Acrobat Pro)
- PDF files converted to web pages
- Set up PDF documents for use in a presentation
- Articles PDF
- Geospatial PDF
- Applying actions and scripts to PDF files
- Changing the default font for adding text
- Deleting pages from PDF documents
- Scanning and OCR
- Scanning Documents to PDF
- Document photo enhancement
- Troubleshooting scanner problems when using Acrobat to scan
- Forms
- PDF Form Basics
- Create forms from scratch in Acrobat
- Create and distribute PDF forms
- Filling out PDF forms
- PDF form field properties
- Filling out and signing PDF forms
- Configuring Buttons to Perform Actions on PDF 9 Forms0016
- Publish interactive web forms PDF
- Basics for working with PDF form fields
- PDF form fields for barcode
- Collecting and Managing PDF Form Data
- Shape Inspector
- Help with PDF forms
- Send PDF forms to recipients using email.
 mail or internal server
- Combining files
- Combining or merging files into one PDF file
- Rotate, move, delete and renumber pages PDF
- Adding headers, footers, and Bates numbering to PDF documents
- Crop PDF
- Adding watermarks to PDF documents
- Adding a background to PDF documents
- Working with PDF Portfolio Files
- Publish and share a PDF portfolio
- Portfolio overview PDF
- Creating and customizing a PDF portfolio
- Sharing, editing and commenting
- Sharing and tracking PDF documents online
- Mark text when editing
- Preparing to edit a PDF document
- Starting PDF editing process
- Hosting collaborative reviews on SharePoint or Office 365 sites
- Contribute to the editing of a PDF document
- Adding comments to PDF documents
- Adding a stamp to a PDF file
- Approval processes
- Manage comments | view, add answer, print
- Import and export of comments
- PDF editing tracking and management
- Saving and exporting PDF documents
- Saving PDF
- Convert PDF files to Word format
- Convert PDF document to JPG file
- Converting and exporting PDF documents to other file formats
- File formatting options for exporting to PDF
- PDF content reuse
- Security
- Enhanced security for PDF documents
- Protect PDF documents with passwords
- Digital ID Management
- Protecting PDF Documents with Certificates
- Opening protected PDF documents
- Removing sensitive data from PDF documents
- Setting security policies for PDF files
- Selecting a security method for PDF documents
- Security warnings when opening PDF documents
- Protect PDF files with Adobe Experience Manager
- PDF Protected View
- Overview of security features in Acrobat and PDF files
- JavaScript in PDF files is a security risk
- Attachments as a security risk
- Allow or block links in PDF files
- Electronic signatures
- Signing PDF documents
- Capture a signature on a mobile device and use it in any application
- Sending documents for electronic signatures
- About certificate signing
- Certificate based signatures
- Confirmation of digital signatures
- Trusted list approved by Adobe
- Proxy Management
- Printing
- Basic tasks for printing PDF files
- PDF Brochure & Portfolio Printing
- PDF advanced print settings
- Print to PDF
- Print color PDF documents (Acrobat Pro)
- Printing PDF files using custom sizes
- Accessibility, tagging, and reflow
- Create and test accessibility tools for PDF documents
- Accessibility features in PDF files
- PDF Reading Order tool
- Reading PDF documents with accessibility and reflow features
- Edit document structure in the Content and Tags panels
- Creating Accessible PDF Documents
- Search and indexing
- PDF indexing
- Search in PDF documents
- 3D models and media
- Add audio, video, and interactive objects to PDF files
- Add 3D models to PDF files (Acrobat Pro)
- Displaying 3D models in PDF files
- Interaction with 3D models
- Measuring 3D objects in PDF files
- Setting up 3D views in PDF files
- Enable 3D content in a PDF document
- Adding multimedia content to PDF documents
- Add comments for 3D layouts in PDF files
- Play video, audio and multimedia formats in PDF files
- Adding comments to videos
- Prepress Tools (Acrobat Pro)
- Overview of prepress tools
- Printing marks and fine lines
- View separation
- Processing transparency
- Color conversion and ink management
- Color Trapping
- Preflight (Acrobat Pro)
- PDF/X-, PDF/A-, and PDF/E compliant files
- Preflight profiles
- Enhanced Preflight
- Preflight reports
- Viewing preflight results, objects, and resources
- PDF output methods
- Fixing problem areas with the Preflight tool
- Automating Document Analysis with Droplets or Preflight Operations
- Analyzing documents with the Preflight tool
- Additional check with the Preflight tool
- Preflight Libraries
- Preprint variables
- Color Management
- Color Consistency
- Color settings
- Document Color Management
- Working with color profiles
- Basic Color Management
Pamphlet is a multi-page document that has been arranged so that when folded in half, the correct page order is obtained. Stapled booklets can be designed for duplex printing, where two consecutive pages printed on both sides are folded and stapled at the fold. The first page is printed on the same sheet as the last page. The second page is printed on the same sheet as the penultimate page, and so on. Each page is automatically centered on the sheet, and large pages are scaled (compressed) to fit the printable area. As a result, after folding and stapling the sheets, a book with the correct page numbering is obtained.
To print brochures, the printer must support automatic or manual duplex printing (printing on both sides of the paper). Manual duplex printing involves two separate steps: front side printing and back side printing. For information about duplex printing support for your printer, see the user's guide or contact the printer manufacturer.
Multi-page document (left), pages arranged for booklet printing (center), and pages printed and folded into a new booklet (right)-
Choose File > Print, then select your printer.
-
Specify the pages to be printed.
- Select All to print pages from first to last.
- To divide a large booklet into smaller groups, select Pages and specify the page range for the first group. Print each page separately.
-
Select Brochure.
-
To print specific pages on a different paper or type of paper, specify them using the Sheets From/To option. Click the Properties button, select the appropriate paper tray, and set other options as needed.
-
Select advanced page processing options. As you set the options, the image in the preview area changes accordingly.
Brochure range
Specifies which side of the paper to print on. To automatically print on both sides of the paper, select Both Sides (the printer must support duplex printing). Select Front Side Only to print all pages that should be printed on the front side of the paper.
 After printing these pages, turn them over, choose File > Print again, and set the mode to Back Side Only. Depending on the printer model, you may need to turn the pages over and reverse the order to print on the reverse side.
 If your printer does not support duplex printing, you will need to remove the sheets, rotate or flip them, and reload them in the printer. The procedure depends on your printer model. You can change the settings in the Printer Properties section of the Print dialog box. For more information, see Duplex printing.
Automatic page rotation within each sheet
The orientation of each page is determined automatically, adapting to the printable area.
Sheets with
Specifies which sheet will be printed first and which sheet will be printed last. Acrobat determines which sheets should be printed. For example, if the document has 16 pages, every fifth sheet will be printed.
Spine
Specifies the spine orientation. Select Left if the text reads from left to right; to fold the paper parallel to the long side, select Left (height): in this case, the printable area is narrow and long. Select Right if the text reads from right to left or top to bottom in East Asian style; to fold the paper parallel to the long side, select Right (height).
Comparison of spine "Right" with "Right (height)".If the printer is networked and can be used by other users, to prevent another user from printing their document on your pages before you print the back side, it is recommended to print the back side of the paper from a different tray.
A PDF Portfolio consists of multiple documents combined into a single PDF file. Merged PDF documents in a portfolio can be printed individually or all together. Documents are printed in alphabetical order, regardless of file order.
Use the Details view to rename a file or change the order of files in the PDF Portfolio. See Working with Component Files in PDF Portfolio.
-
Open PDF Portfolio. To print only certain PDF documents, select them.
-
Select File > Print , then select one of the following options.
All PDF files
Prints all PDF documents contained in the portfolio.
Selected PDF files
Prints the selected PDF documents. This option is available only when multiple files are selected in the list of documents contained in the PDF Portfolio.
-
Select the appropriate print options and click OK
To print a non-PDF component of a PDF Portfolio, you must use the original application. To open a component file in the source application, right-click the file icon and select Open File in Source Application (you must have a dedicated application installed on your computer to open this file).
Pages associated with bookmarks can be printed directly from the Bookmarks tab. Bookmarks are arranged in a specific hierarchy with parent and child level bookmarks. When you print a parent bookmark, the contents of all pages associated with child bookmarks are printed.
Not all bookmarks display the contents of the pages, and therefore not all of them can be printed. For example, some of them are used to open a file or play a sound. If both are selected, then non-printable bookmarks are ignored.
Tagged bookmarks always display page content because tagged content represents printable elements of the document's structure (headings, pictures, etc.).
-
Opening a PDF file with bookmarks. Optionally select View > Show/Hide > Navigation Panes > Bookmarks to display bookmarks in the navigation bar.
-
Select one or more tabs, and then right-click the selected items.

Learn more