2 step instructions
30 Fun 2 Step Directions for Preschoolers
- Share
“Put your slippers on and grab a spoon for your cereal.” Easy to do, right?
For adults and older kids, following directions that have two steps can be quite an effortless task. For toddlers and young preschoolers, following multiple directions is a skill that takes time and maturity.
You can practise this skill in a fun way by using these 2 step directions for preschoolers.
What are Two Step Instructions?
Following directions that include two tasks is an important listening skill for children to learn. This helps them play games, follow instructions and procedures in the classroom and fit in socially with friends.
Being able to follow two-step instructions involves developing different types of skills.
Working memory is about holding onto information in order to use it. We want to be sure that kids can follow one-step directions effectively before moving ahead to giving them two steps to follow.
Auditory processing skills are also very important for enabling kids to follow directions they hear.
For example, auditory memory refers to when kids remember what they have heard, to use that information later.
Auditory closure helps them “fill in the blanks” when they have missed hearing the complete direction and auditory figure-ground aids kids in tuning out background noise to hear instructions. [source]
Speech therapy addresses not only how well children speak in words (expressive language) but also how well they understand what they hear (receptive language).
The receptive aspects of speech therapy are connected to auditory processing, and getting lots of practice in following directions is helpful to build those skills.
Verbal reasoning and vocabulary skills are also essential for children to comprehend your instructions.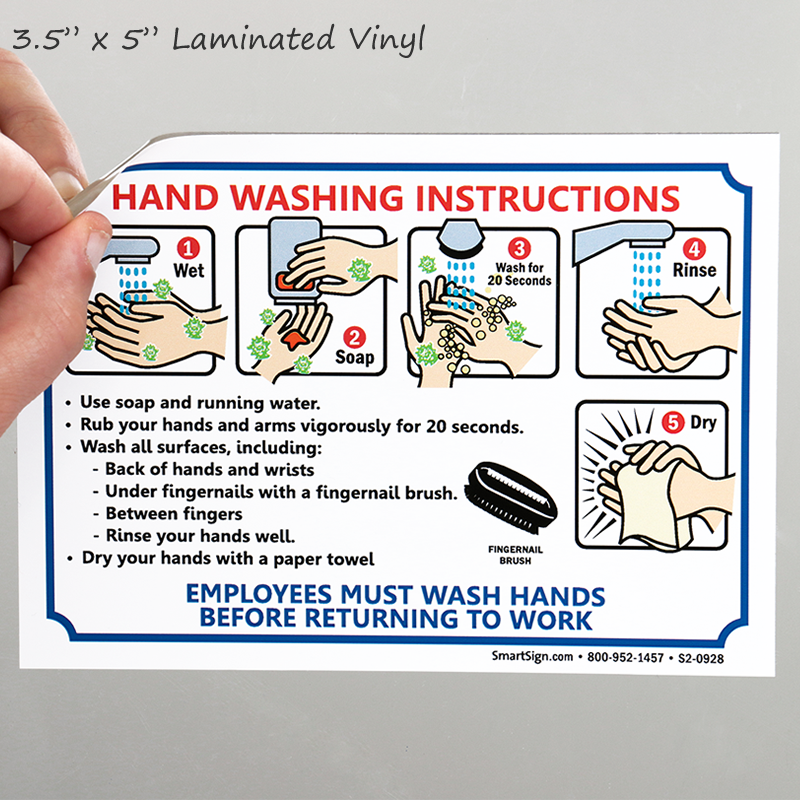 They must understand the words you are saying to be successful.
When Should a Child Follow 2 Step Directions?
At what age should a child start listening to and following one-to-two step directions?
At 24 months of age, many children can follow two or even three-step directions, especially those that are related, such as picking up two specific toys to put away on a shelf.
Although they can do this, research shows they choose to follow through only about half the time.
At around age three, most kids effectively follow two-step directions.
So then, when should a child follow 3 step directions?
Four-year-old children are usually able to follow through on three-step instructions, especially those that are given in a logical order.
[source]
How do I Teach My Child to Follow Multi-Step Directions?
It’s important to talk to your children often, giving voice to your own thought process as you move through your day. Verbalize what you observe about your child’s movements throughout the day, as well.
Read to your children, pointing to illustrations, and urging them to name objects.
How do you teach following instructions?
Listening skills in early childhood are very important and must be practised. Here are some tips:
- When giving your child instructions, state them clearly, in simple language, and give your child enough time to respond.
- Look at them when giving directions, and make sure they are looking at you.
- Restate or clarify if your child has not followed through on the instructions given.
- Model the correct actions, if necessary.
- Praise your child when they follow through on a single instruction and they will eventually build the ability to follow multiple part instructions.
- Don’t start giving 3 step directions until your child has mastered 2 instructions.
A list of 2 Step Directions for Preschoolers
Some of the following examples include 2 step directions with prepositions or spatial concepts, such as “on,” “under”, and “over.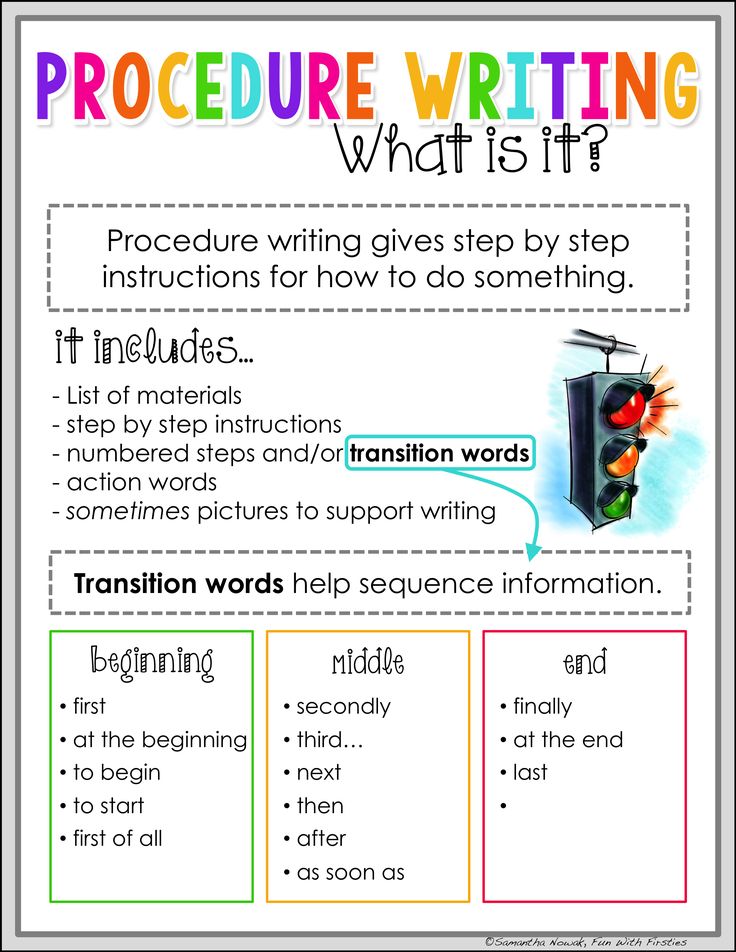 ”
”
These types of words address the relationships between objects or between objects and individuals and can help teach positional language.
Make a game out of requesting that your children complete two actions. You can also make it fun by using these directions in familiar games that require giving directions, such as “Simon Says” or “Follow the Leader.”
You could also play “Broken Telephone,” to see if the last person who hears the directions can follow through successfully.
Another fun game is Listen and Draw. Give multiple directions that your child must follow to draw the picture you describe.
[source]
Here is a list of instructions suitable for preschoolers:
1. Sit down on the floor and close your eyes.
2. Touch your head and turn in a circle.
3. Stand up and pretend to be frozen.
4. Bounce the ball and say your name.
5. Do a jumping jack and then sit on the chair.
6. Hop on one foot and smile.
7. Place the teddy bear under the table and sit on the chair.
8. Walk along the fence and sit on the swing.
9. Reach your hands over your head and clap your hands.
10. Stand next to Grandma/Grandpa and hold onto their hand.
11. Draw a yellow sun above the green grass.
12. Draw blue water next to a brown beach.
13. Touch your toes and then spin around in a circle.
14. Wash your face with this cloth and comb your hair.
15. Spread peanut butter on one slice of bread and place the other slice on top.
16. Pull your blanket up on the bed and arrange your stuffed animals.
17. Take a book out of your bag and set it on the table.
18. Lie down next to Mom/Dad and close your eyes.
19. Take off your mittens and hang them up to dry.
20. Point to your eyes and say your name.
21. Point to your lips and smack them together.
22. Turn off the TV and place the remote on the coffee table.
23. Stomp your feet and say, “I’m a dinosaur!”
24. Choose a book from your shelf and read it to your doll.
25. Cover your eyes and say, “Boo!”
26. Turn around in a circle and then sit down on the grass.
27. Wave goodbye to me and walk to the door.
28. Climb up the steps and then walk back down.
29. Fetch your school bag and put your lunch box inside it.
30. Wash your hands for dinner and come back to sit on a chair at the table.
These are just a jumping-off place to start your mind working! Involve your children and challenge them to make up their own directions and ask you to follow them!
Check out these other listening activities for kids to get even more practice!
Get FREE access to Printable Puzzles, Stories, Activity Packs and more!
Join Empowered Parents + and you’ll receive a downloadable set of printable puzzles, games and short stories, as well as the Learning Through Play Activity Pack which includes an entire year of activities for 3 to 6-year-olds.
Access is free forever.
Signing up for a free Grow account is fast and easy and will allow you to bookmark articles to read later, on this website as well as many websites worldwide that use Grow.
- Share
Unrelated 2 Step Directions - Speech Therapy Activities — Toddler Talk
Receptive Language Lessons
Written By Stephanie Keffer
Toddlers typically begin to follow directions with two unrelated steps just before their third birthday.
These directions include 2 different actions that are completely separate from one another. You can think of these directions as following this template: First do action 1 with item 1, Then go do action 2 with item 2. For example, “Push in your chair and go to the sink,” or “Take off your shoes and hang up your coat.”
These types of directions are more complex and therefore more challenging than two-step directions with a single item.
As you practice, keep in mind that your toddler’s success in following directions will vary based on how tired they are, their general mood, and their current level of attention. Day-to-day fluctuations are expected and completely normal.
Speech therapy tips for practicing with 2 step unrelated directions
Tip 1 - Create two-step unrelated directions
In this lesson, we’ll focus on following directions that:
Have two or more steps (two different actions with two different items)
Have not been practiced before and are not part of a daily routine
Are __NOT__ related to an activity your child is doing when you give the direction.
For example, if your child is coloring on the floor, you could tell them, *“Sit at the table and open the Play-Doh.”* If they’re playing with a babydoll, you could say, “Oh no, your shark looks hungry and sleepy! *Feed the shark* and *put him to sleep*.”
Tip 2 - Offer the minimum amount of help your child needs
As you practice following directions with your child, it’s best to practice at a level where your child can successfully complete a direction with minimal help. Follow this step-by-step breakdown to help wean your child off of needing your assistance to complete directions. If your child completes the direction at any point, you do not need to continue with the remaining attempts. Praise your child for completing the two-step direction correctly. (“Yay, you got the cow and gave him a cookie!”).
Here are the steps:
Say your child is playing with a toy turtle. Start by giving the direction, “Get the cow and give him a cookie.
 ” Don’t offer any visual clues about what you want them to do, like motioning with your eyes or hands.
 If your child is unable to complete the direction on their own, repeat the direction and offer one piece of help, such as pointing to what you want your child to do. Say, “Get the cow and give him a cookie,” point to their cow, and then point to the cookie.
For your third attempt, repeat the direction again, but break it into two parts. First, say “Get the cow.” Once they grab the cow, then say “Give the cow a cookie.”
Finally, you can complete the direction together. Repeat the direction, and then actually help your child through the actions. Say “Get the cow and give him a cookie” as you guide your child to get the cow and feed it a cookie.
You’ll know your child has mastered this skill once they can consistently follow your directions in at least four out of five tries.
Tip 3 - Expand your child’s vocabulary to help them follow directions
Following directions is a perfect opportunity to teach your child the meaning of new words.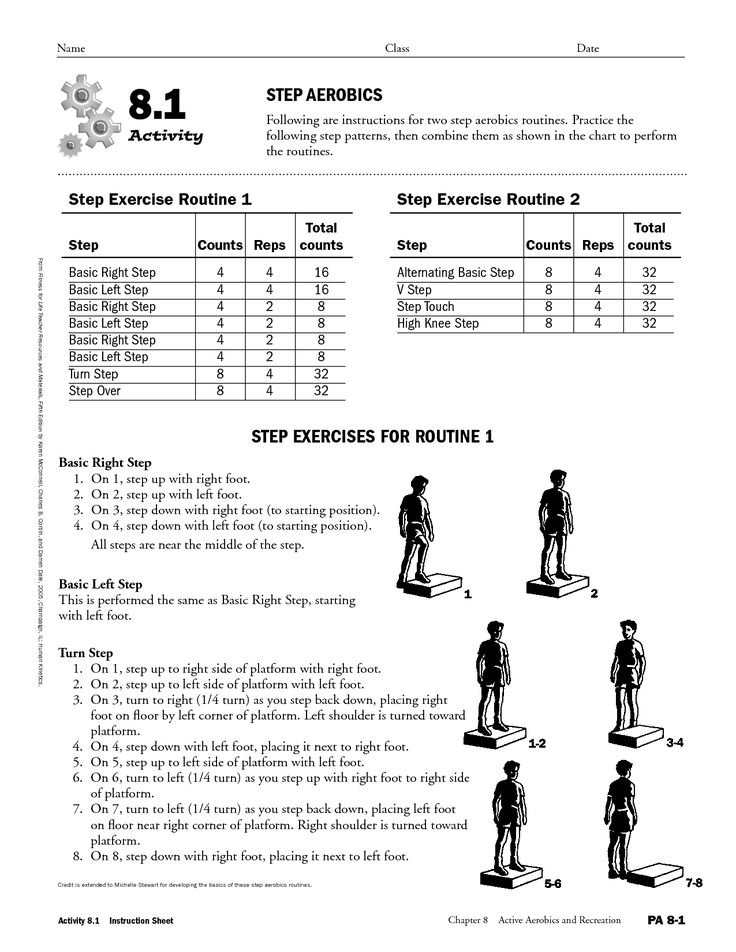 If you discover during practice that your child does not understand the meaning of a particular word, incorporate that word into your daily activities. For example, if you discover that your child doesn’t know what “scrub” means, talk about SCRUBBING your hands in the sink while you wash, and have them help you SCRUB pots and pans after dinner. As always, practice learning just a few words at a time to prevent you AND your child from feeling overwhelmed.
And I will be the first to admit that thinking of these directions on the fly when you’re playing isn’t easy! We created 3 different activities with items and toys most people have. For each activity we’ve listed out directions you can practice with for this lesson!
Download our PDF activities guide for practicing with 2 step directions - speech therapy at home practice ↓
Practicing with 2 step directions - speech therapy at home activity
Washing Hands Before Snack
Materials: Set-up:Gather the items you need for your snack so that your child sees that it is almost snack time.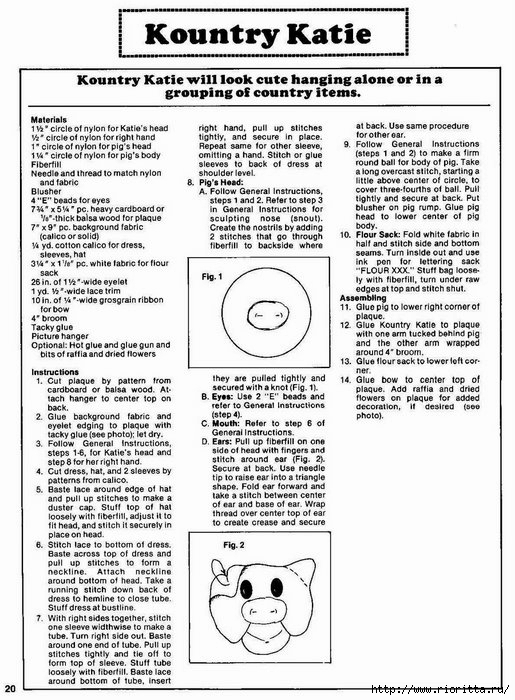
In this activity, you will be helping your child understand 2-step directions where the parts are unrelated. The second part of the direction is “wash your hands” and the first part is something else in your home.
You will practice this skill before snack time, if your child likes snacks. If they don’t, pick another daily activity that your child looks forward to. You will tell them something simple to do, and then to go wash their hands. You will say, “it is almost time for snack! But first, put your shoes in your room and wash your hands.” Or “throw the wrapper in the trash and then wash your hands”, “put the cars in the box and then wash your hands.” The first part of your direction should be something your child already does, but maybe they don’t always do it routinely before washing.
If they follow the direction correctly, celebrate that your child did it correctly by repeating what they did (“Yay, you put your shoes away and washed your hands!”) If your child does not do it, repeat the direction again.
If they do not follow the direction the second time, break up the direction into two parts. Say, “put your shoes away” and wait for your child to put their shoes away. Then say, “go wash your hands.” Then celebrate by repeating what they did (“Yay, you put your shoes away and washed your hands!”)
What to say:Here are examples of 2 step directions you may use:
“Throw the wrapper away and go wash your hands.”
“Put the book away and go wash your hands.”
“Give me my phone and go wash your hands.”
“Put the banana on the table and go wash your hands.”
Download our PDF activities guide for practicing with 2 step directions - speech therapy at home practice ↓
© 2020-2022. Stephanie Keffer, MS CCC-SLP. All Rights Reserved.
The content offered on ToddlerTalk.com is for informational purposes only. Toddler Talk is not engaged in rendering professional advice, whether medical or otherwise, to individual users or their children or families. No content on this site, regardless of date, should ever be used as a substitute for direct medical advice from your doctor, speech language pathologist, or other health professional. By accessing the content on ToddlerTalk.com, you acknowledge and agree that you are accepting the responsibility for your child’s health and well-being. In return for providing you with information related to home speech and language practice, you waive any claims that you or your child may have as a result of utilizing the content on ToddlerTalk.com
Stephanie Keffer
Read online “Two simple steps - a million in your pocket! Or a step-by-step guide on how to make a million on the Internet”, Helen Viktorovna Voropaeva – LitRes
© Helen Viktorovna Voropaeva, 2021
ISBN 978-5-4493-8137-8
Created in the intellectual publishing system Ridero
90–08 the most progressive direction Hello dear friend! You will probably be surprised and at the same time delighted that among the heaps of garbage on the Internet, you have found something worthwhile in terms of earnings, moreover, from step by step plan next steps.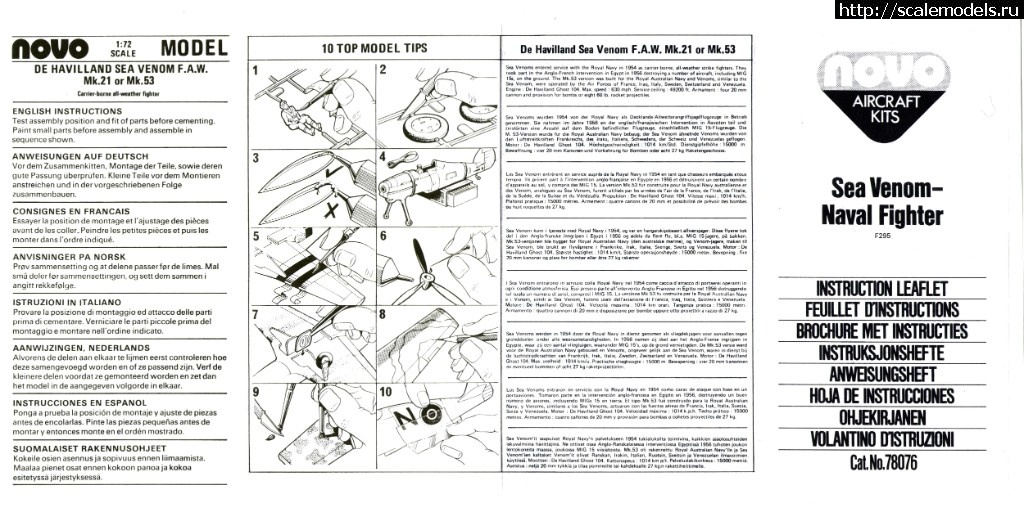 I must say right away that a step-by-step plan for earning your first, and maybe second million will be at the end of this book. In the meantime, a little training, because without it you will not be able to apply my plan.
It's no secret that in the 21st century most of the money is on the Internet and Thank God we live with you in this era. Few of you know that huge mechanisms have been launched in the world to change the economy throughout our planet in order to create a more perfect human society, which will be based on automated financial asset management systems and mechanisms that ensure the transparency of public administration. nine0003
Companies that are constantly developing and researching in this area determine new trends.
This inevitably entails the emergence of new opportunities for each person. Already today, one can observe how established processes are simplified, automated and become more and more accessible. At the same time, many other alternative ways of satisfying individual needs are emerging. It is beneficial to change the usual form, set priorities correctly, study traditional phenomena in order to then create innovations - this is the essence of progress
Earn money, live in a new way, fulfill dreams, such an opportunity and progress in the 21st century, gives us the BITBON system
The BITBON system is a technological breakthrough in the evolution of the financial industry
One of the main advantages of the BITBON system is to increase efficiency and functionality, security, reliability of storing information about property rights to Assets and the use of innovative software and hardware solutions. As well as creating a convenient and efficient digital way to redistribute, transfer, record and manage property rights to Assets designated in BITBON. nine0003
The Bitbon System is an integral decentralized system based on Blockchain technology, which is essentially a platform for Contributing [1] under the terms and conditions of Projectbon Public Contracts [2] of various projects and managing legal relations between its Participants, the key component of which is Bitbon [3 ].
The Bitbon System is intended for use in the financial sector, jurisprudence, doing business, managing rights to Assets, performing an assessment of property rights to Assets, transferring property rights to various types of Assets, including: movable and immovable property, machinery and production equipment , bank deposits, copyrights, financial instruments, securities, know-how, trademarks, shares in authorized funds and other companies, shares in various projects with legal entities and individuals and other values. nine0003
The Bitbon System provides services that allow keeping records, exchanging settlement funds, raising funds through Contributing and concluding secure transactions, as well as performing secure digital transfer of property rights to Assets [4]. At the same time, the stages of Contributing can be divided into basic processes (for more details, see the “Principle of Interaction of the Bitbon System Participants in the Contributing Process”). All transactions in the Bitbon System are instant and irrevocable, and its operation is based on providing all Participants with the opportunity to create and use their Assetboxes [5] to directly manage their property rights to the Assets indicated in the Bitbon. nine0003
One of the main advantages of the Bitbon System is to increase the efficiency and functionality, security, fault tolerance, and reliability of storing information about property rights to Assets by optimizing the system for managing property rights to Assets and applying innovative software and hardware solutions. As well as the creation of a convenient and efficient digital way to redistribute, transfer, record and manage property rights to the Assets indicated in Bitbon. nine0003
In addition, the Bitbon System increases the transparency of the contractual relations of the Bitbon System Users regarding the transfer of property rights to Assets and their management by providing free access to the Blockchain and system components that ensure its operation. Separately, it should be noted that the Bitbon System provides the ability to automatically record all transactions [6] in the Blockchain.
In general, the Bitbon System covers all types of human and government activities on a transnational scale and is based on the absolute potential for developing global social significance in all areas of public life. nine0003
1 Contributing is a type of activity of the Bitbon System User aimed at obtaining additional income from participation in the implementation of the selected business project under the terms and conditions of the Projectbon Public Contract of this project. The Contributing process starts from the moment of exchanging the User's Bitbon for a Projectbon. The value of the Contributor's Benefit is directly proportional to the share he has in Projectbon. The benefit from Contributing is expressed in income received in accordance with the number of Projectbons, which the Contributor has the right to dispose of at its own discretion at any stage of the business project implementation. nine0003
2 Projectbon Public Contract is a digital document of a certain class according to the classifier adopted in the Bitbon System, which defines and regulates: the rights and obligations of the Contract, Bitup-Agency and Contributors, as well as the procedure, method and conditions of their relationship as three parties of a specific Projectbon Public Contract project; scope of the Projectbon, as well as all products and operations that may be applicable to the Projectbon. The Projectbon public contract of a specific project may define the procedures and conditions for issuing Projectbons, the rules for transferring Bitbons and Projectbons, the procedure for repurchasing Projectbons from a Contributor, and a link to the Assets valuation methodology. nine0003
How to write instructions or manuals correctly
Contents
Everyone periodically encounters unfamiliar devices and processes. An unknown computer program or new features at work all require clarification for a successful interaction. In the article, we will consider how to write instructions correctly.
Instruction is a document that explains how or how to perform certain actions. A clear instruction does the same, but in simple language. Many manuals are very complicated and people prefer not to look into them until something breaks. nine0003
However, this approach may not lead to the best results. For example, a worker did not learn the rules for working on a drilling rig or misunderstood the material described, and was injured due to improper use of the equipment. Therefore, it is important to responsibly approach the compilation and figure out how to write instructions correctly.
3 main types of instructions
There are several types of instructions. They are designed for different purposes, but are developed according to similar principles. For example, having understood how to write a system administrator's manual, you can easily apply this knowledge when preparing a manual for using a mini-PBX. nine0003
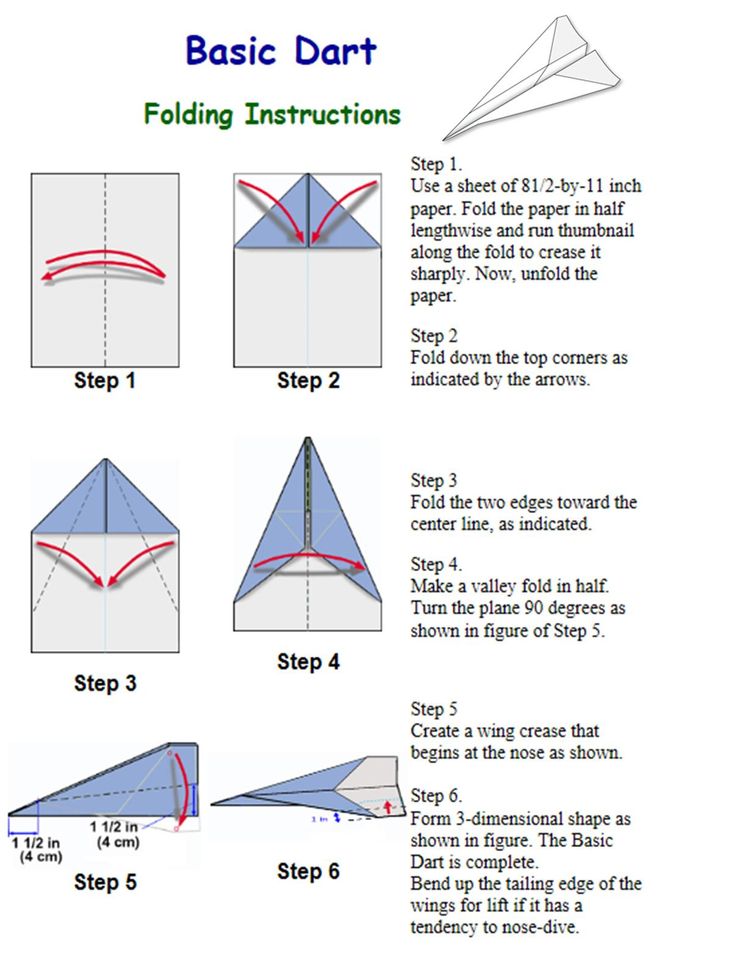
Step-by-step instructions
Such manuals allow you to regulate all possible repetitive processes. The task is divided into several stages, and each stage is supplemented with explanations. Examples of such instructions are step-by-step algorithms for compiling financial statements, connecting to a remote desktop, or actions in case of a fire.
This is what a quick step-by-step guide to replacing a cartridge in a Brother HL-1110R laser printer might look like:
- Open the upper cover and remove the photo bank block
- Set in the lower position the switch in the lower right corner of the photobran block
- Pull the toner-cartridge green tab in the upper left corner of the drum unit.
 Be sure to return it to its original position
 - Install the drum unit back into the printer
- Close cover
- Make a test print. If the message "Replace toner" appears, the drum unit is not installed correctly and you need to repeat steps 1-7. If the problem persists - contact your system administrator
Instructions for use
This is a list of recommendations for the correct use of the instruments, such as the manual for the barcode scanner. Such manuals will be useful to users of complex devices - at the workplace or at home. nine0003
Unlike a step-by-step algorithm, the emphasis is not on achieving a certain result, but on the features of the application. For example, here's how to write a short instruction manual for the Rayson LM 330iD Laminator:
- Depending on the thickness of the film, set the desired temperature. For example, for 75 mic you need 100-120°C, and for 250 mic - 160-180°C.
- Laminator - maximum run time 4 hours. Then you need to take a half-hour break. nine0071
- If a document is jammed inside the laminator, press the " Reverse " button and remove it.
- Do not laminate wet specimens – liquid can damage electronic components!
- After laminating 10-15 sheets, the machine must be cleaned of adhesive material. To do this, the laminator is disconnected from the network and the shafts are wiped with a cloth and detergent.
- Attention! Do not use gasoline or solvents for cleaning - this will cause a fire! nine0071
Job description
This is the name of the document regulating the scope of duties for a particular position. It also defines the rights of the employee, qualification requirements, area of responsibility and forms of bonuses. Job descriptions can be drawn up for any employee - from a cleaning lady to a general director. They are prepared together with a lawyer.
This is what the section of duties for a loader of Delta LLC might look like:
- The employee is obliged to carry out loading and unloading operations on the territory of the Organization's warehouse
- When working, he can use special equipment (electric car) if he has the necessary permits
- The foreman distributes lists according to which the goods are completed.
- The selected goods are placed on a pallet and fixed in accordance with the safety regulations for the transportation of goods
- If necessary, the loader can be involved in other work in the warehouse - cleaning, entry control, etc.
A job description is more of a legal document than a user document. And in order to instruct the employee on his work in an understandable language, they usually make up a separate training - “Position Manual”. It talks in detail about the role and valuable end product, describes the motivation system, metrics and algorithms for performing work. And they place these materials on the platform for online learning.
Below you can get a complete training structure for the Job Benefit course. nine0003
General rules for the preparation of instructions
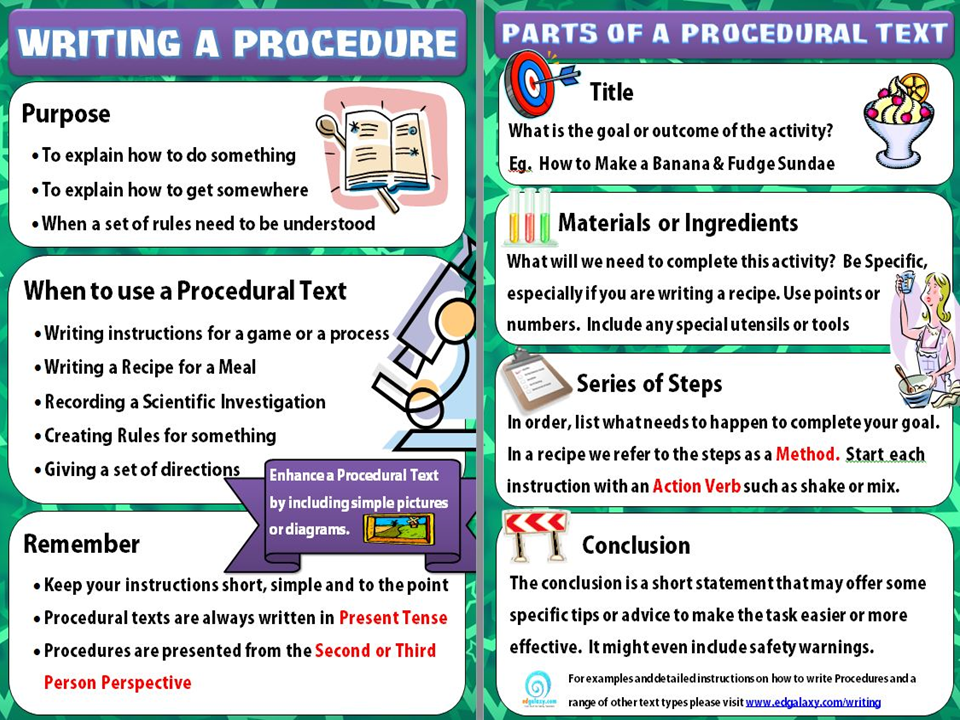
The same methods of working with information are used to prepare any type of manual. Here are some tips on how to write a good instruction:
- Determine the level of preparedness of the audience. Depending on the experience of readers, the presentation style and structure of the text changes. Write in a language they understand
- Take the time to collect and process information. The author must understand the subject of the presentation - act as an expert or carefully study the necessary documentation. If initial competence is not enough, a specialist should be consulted
- Define the input data and the result.
 For example, “at the entrance” there is a management decision on new rules for access to the building, and “at the exit” there should be a manual for using an electronic pass
 - Structure information based on the type of document. So, for a step-by-step algorithm, you need to break the procedure into several stages. And the job description implies a series of separate descriptions with responsibilities. Depending on the type, the submission form also changes
How to structure a lot of data → - Warn of problems that a person may encounter. First of all, this applies to situations that are dangerous to life and health. Place warning labels that will be highlighted in bright color or larger font size
Algorithm for developing a manual: 9 steps
Consider how to write an accessible instruction for employees using the example of a description of the algorithm of actions. The peculiarity of this guide is that for it you need not only to list individual actions, but to put them in the correct sequence in order to lead the reader to the desired result.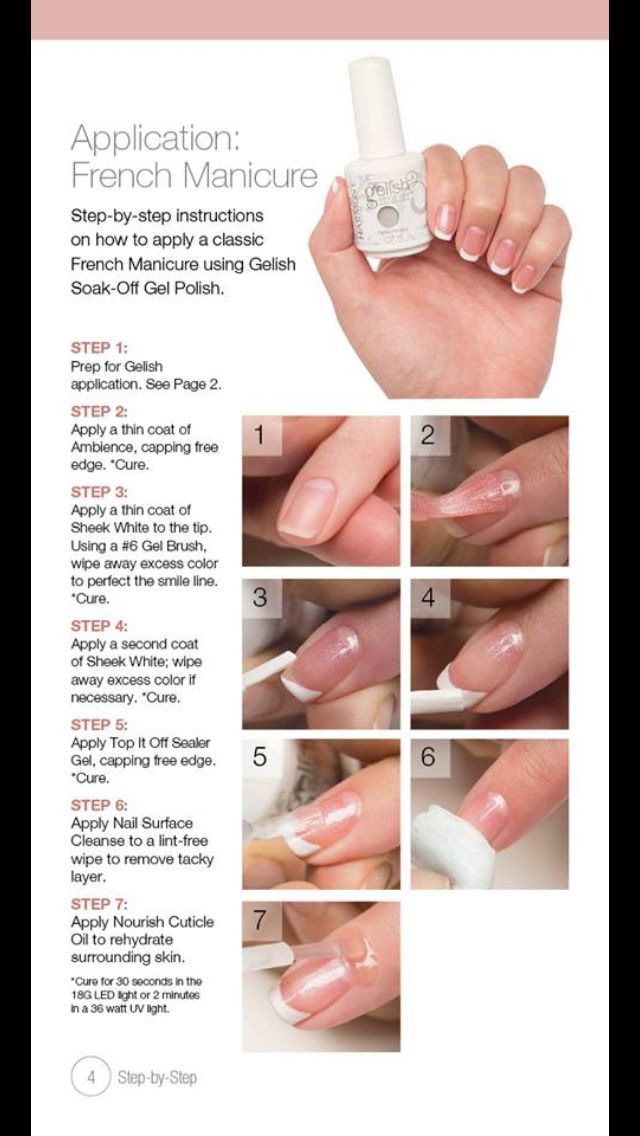 In general, you need:
- Collect information
- Group it into separate stages
- Outline the sequence of each stage, taking into account the reader's level of knowledge
As an example, let's take a situation when an organization switched to electronic document management. At the same time, some of the employees do not know how to work with the Microsoft Word program and they need to be explained to them how to prepare an application for the issuance of workwear.
Step 1. Study the situation
Of course, you have been using Word for more than one year and you can easily prepare the required application. But in this case, you need look at the problem through the eyes of user - a person who first encounters this program. Therefore, you need not rely on current knowledge of working in Word, but independently go all the way again. With a high probability, you will discover something new for yourself - after all, before, many operations were performed automatically.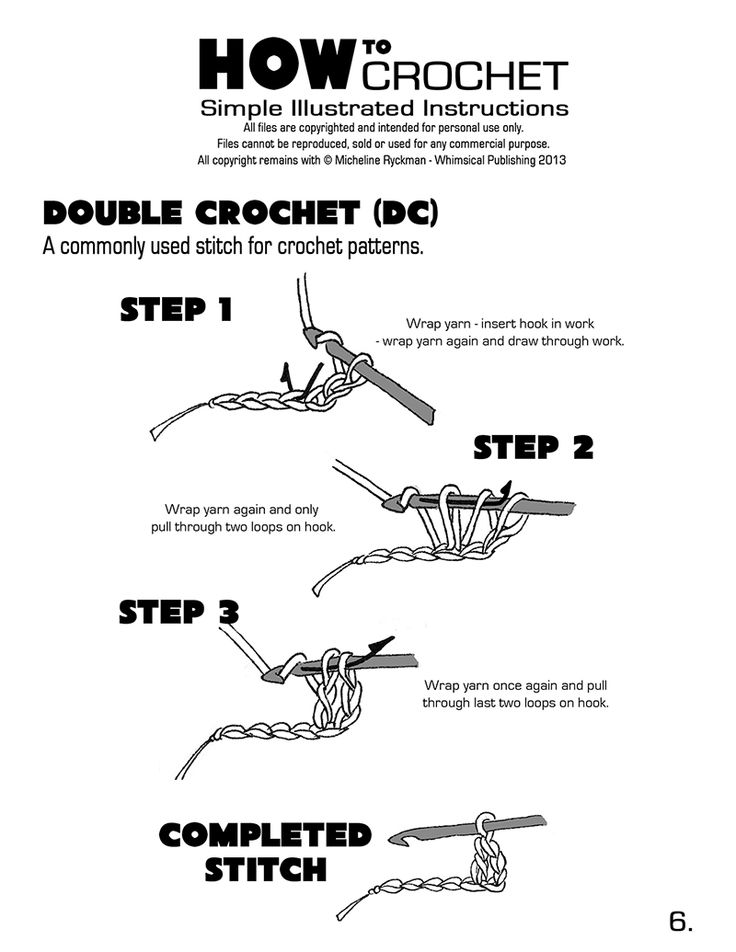 It's very hard to remember right off the bat what "that button to create a list" and other details were called.
Step 2. Decompose everything into separate stages
The purpose of this step is to create a preliminary plan for solving the problem. Such an algorithm begins with the initial situation and ends with the achievement of the result. At the beginning of each paragraph, put a verb that defines the key action of this step:
Do not be afraid of too ordinary explanations - most likely there will be those who do not know this yet, and the rest will easily miss such a description. For example, for those who have not worked with the Word program, you need to explain how the file is created:
2. Click on the “New Document” section on the right side of the screen
If the guide is intended for beginners, avoid professional vocabulary. In our example, it is better to do without the concepts of "Interface" and "Status Bar". It is important to understand that you are not writing a theoretical textbook to transfer systemic knowledge, but a practical guide that a person can use here and now to perform actions and achieve results.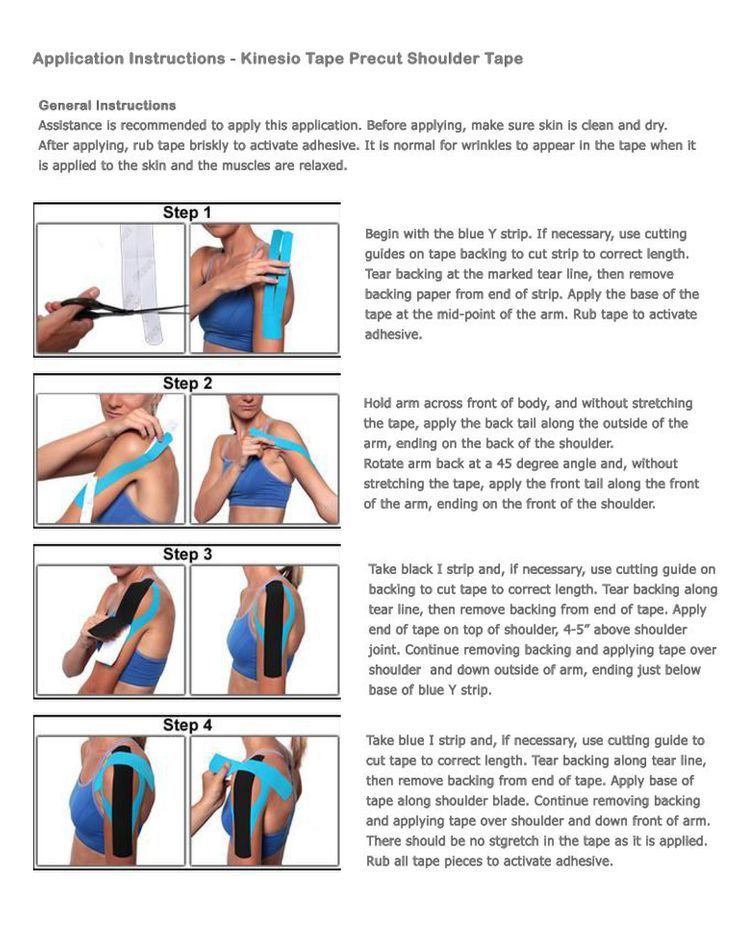 If you cannot do without terms and abbreviations, explain them. nine0003
Tip . Try not to pile up your instructions with unnecessary actions. For example, information about what font to use for the statement will be superfluous - in most cases, the user will encounter the Normal template, which contains the appropriate Calibri 11 points in size.
Step 4. Consider non-standard scenarios for the development of the situation
Trying to foresee force majeure, improve your algorithm by suggesting solutions. For example:
3. <…> If Latin characters are printed, change the layout. To do this, simultaneously press the "Shift" and "Ctrl" keys in the lower left part of the keyboard
Step 5. Select images and give examples
If you can illustrate some operation, be sure to do it. For recipes, pictures of each step are suitable, and for assembly instructions, explosion diagrams (sketches in which the entire structure is disassembled into parts and they are spaced in different directions).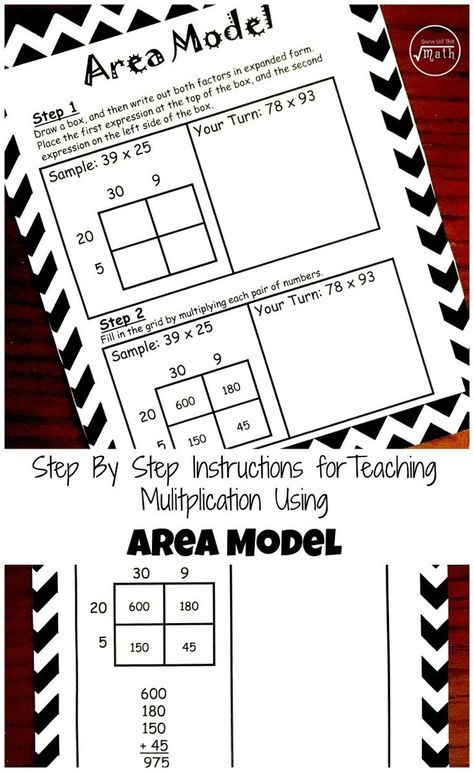 And in order to visually show the work in a computer program, you should prepare screencasts or screenshots with explanations. nine0003
Step 6: Come up with a title
Even if you wrote a manual for internal use and not for publication on the Internet, a bright title will attract attention and set you up to do the right job. Here are a few options for our example:
- “How to write instructions for preparing an application”
- “6 steps to prepare an electronic document”
- “An easy way to write an application on a computer”
- “Detailed algorithm for preparing a document for paperless circulation”
Step 7. Evaluate the intermediate option
The result should be a similar text:
How to write a simple instruction (sample):
- Launch the Microsoft Word PLA » on the right side of the screen
- Type the required text in the window that opens.
 A sample is shown below.
 - Format the typed text using the top bar of Word. nine0071
- First Highlight the header of the application (addressee and originator of the application). Click on the "Right Alignment" button on the top bar of the Word program. The rows will move to the right
- Format the title in the same way (use the "Center Alignment" button)
- Select the workwear list and apply the "Bulleted List" function to it
- Press the key combination "Ctrl + S" or on the floppy disk icon in the upper left corner
- Select the path to save the file
- In the "File name" line, delete the current contents and write: "Statement from ...". Instead of an ellipsis, indicate the surname, initials of the applicant and the date, for example, “Statement from Ivanov V.I. 03/27/2022"
- Press the "Save" button HR Director (t.
 : 2-42) that the application has been prepared. nine0071
save the file. For this:
An example of an announcement that you can use as a reference when preparing:
Step 8. Testing
Carefully check the instructions for logical errors. It is desirable that colleagues or acquaintances look at her from the outside. Even better - when an inexperienced person studies the compiled algorithm and tries to achieve the desired result with its help.
Test the algorithm with these questions:
- Do you understand the procedure? nine0054 Yes, we improved it in steps 2-5
- Are all the nuances taken into account? Yes, the sequence of steps covers the entire procedure
- Are there complex steps in the algorithm that can be broken down into several parts? No, they were all corrected in the previous steps
- Is the result achieved? Will it be the same under different conditions of using the algorithm? Yes, at the output we get a file for paperless circulation.
 With the correct following of the above sequence, the result can be achieved regardless of who draws up the application - a loader or a cleaner
Step 9. Train employees on instructions
If the manual is intended for company employees, it is important to ensure that they have studied it. To do this, upload the instruction for staff to the Unicraft platform, assign an employee to it and track his progress.
Features of such training:
- Information is accompanied by drawings, diagrams, animation, feedback forms is more exciting than just reading the text
- In real time, the leader can see how much material has already been studied
- At the end of sections and the entire course, control questions are provided. The percentage of correct answers for passing the course can be set independently (usually it is 80%)
Examples of ready-made instructions
Below are examples of instructions for using the Unicraft platform. Click on the image to go to the manual page.
Creating and deleting courses on the platform
Assigning students to a course
Checking answers to assignments and exams
Conclusion
Summarizing all of the above, we can draw up the requirements for an ideal instruction:
- Relevance. There is no obsolete information in the text
- Informativeness and integrity. The prepared manual contains all the necessary information
on the designated topic. The user has no questions left - Conciseness. The priorities for the compiler are the accuracy of the wording and the absence of secondary information. It often happens that the instructions are looked at in difficult situations, when you need to quickly get an answer to a question that has arisen
- Clearness. Information is accompanied by examples and illustrations
- Concrete result.
Learn more

