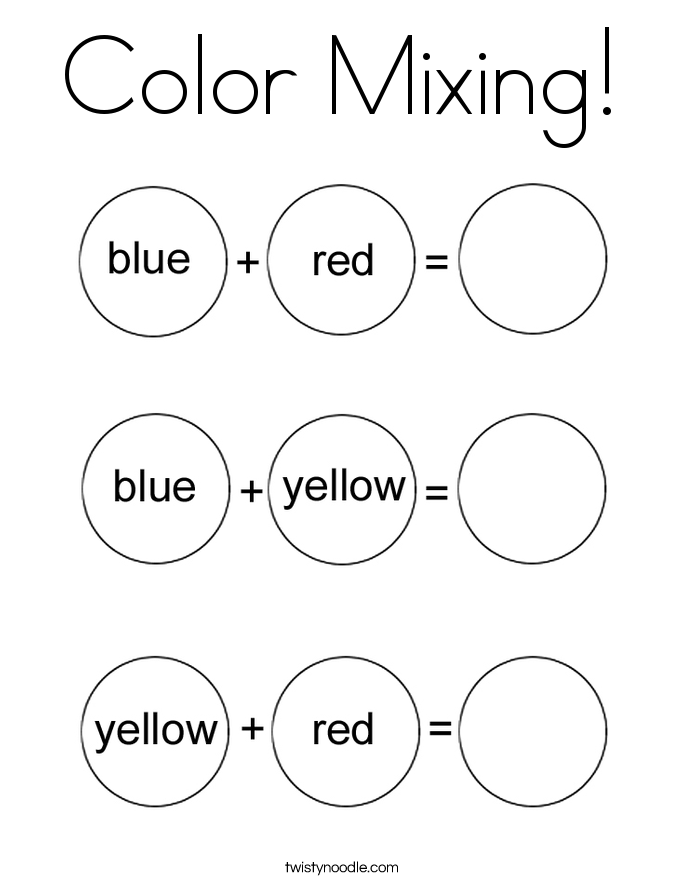
Color mixing sheet
How to Make a Color Mixing Chart
Creating a color mixing chart is a way for artists to study how colors interact with one another. They can be used by those who work paint with watercolor, acrylic, oil paints and any other medium you can mix colors with. It is an excellent way to learn more about color. While also creating a color mixing guide for you to refer to later.
Contents of this Article
- Why color mixing charts are helpful
- Become more confident mixing colors
- How to make a color mixing chart
- To start making a color chart you will need:
- Paper I used for painting color mixing chart
- Begin by drawing the squares that will be used for the color chart mixing guide
- Write the name of each color on the margin of the color mixing chart
- Add reference spots of color
- Begin filling in the boxes of the color chart
- Start mixing color chart colors!
- Create the color mix with 50% of each color
- A dark area and light area on your color chart
- Putting down the base colors in 3 directions – each with a different tonal value
- A note about different paint mediums
- Last but never least… Mixing all of the colors for your color mixing chart!
- How to use your color chart
- Recommended resources for making a color mixing chart
Why color mixing charts are helpful
When creating color mixing charts, you get to mix every color with every other color. Doing this exercise allows you to mix some colors that you would otherwise never think of mixing together. So, it is a great way to discover some great new color mixtures and understand how colors work together!
Become more confident mixing colors
Creating a color chart can also help to boost your confidence when it comes to mixing colors for painting. Very often one might know what color one wants but has no idea how to mix it. However if you have already gone through the process of mixing all of your colors with each other. Then you will have a much better idea how to get the colors you need, with the colors you have.
How to make a color mixing chart
To start making a color chart you will need:
- A ruler
- a sheet of paper (or canvas if doing an oil paint color chart)
- All the colors you wish to use for your color chart
You can make color mixing charts with as few or as many colors as you would like. Keep in mind though, if you want to create a color chart mixing 24 colors… You will be mixing 576 squares! Yikes! The color chart directly below has just 7 colors, as it is a great starting point, with colors I use often..gif)
Paper I used for painting color mixing chart
To make the above chart I grabbed a sheet of 9 x 12 watercolor paper. As I made this color chart with watercolor paints. You can also use watercolor paper if you are painting color charts with acrylic or gouache paint. You could technically use watercolor paper for an oil paint color mixing chart as well. Though it would not be archival. If you want your oil color mixing chart to last, use a sheet of primed canvas or primed heavyweight paper.
Begin by drawing the squares that will be used for the color chart mixing guide
Grab your ruler and measure out your color chart so that you have one inch square of space for each area. I also left one inch of space from the margin for the side and upper margin where I labeled the color names. I made each of my squares one inch but you can make the squares as small or big as you like!
Write the name of each color on the margin of the color mixing chart
Label each of the squares on the left side and top margin.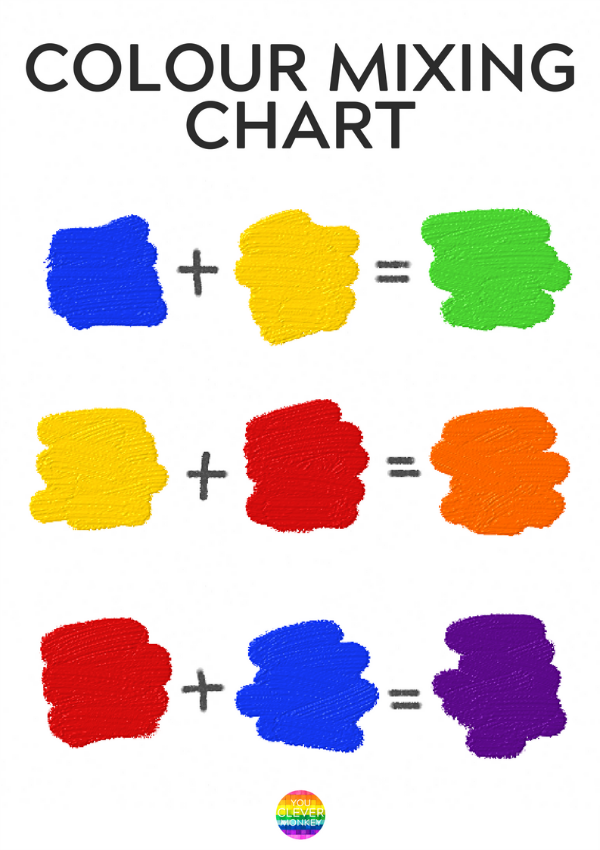 You will be labeling the same color on each side in the same order- as can be seen in the sample image below.
Add reference spots of color
Next, paint a spot of color next to each respective color name as seen in the image below. This serves as a reminder of what the color looks like next to the color name.
Begin filling in the boxes of the color chart
We begin by painting color chart boxes with their respective colors in in a diagonal line. So, the first square is filled with cadmium yellow, the square next to it is cadmium red and so on and so forth…
Start mixing color chart colors!
Now, comes the fun part of creating a color chart. You get to start actually mixing colors! When you are at the Cadmium red spot on the upper margin and move down to Ultramarine blue you will then mix cadmium red and ultramarine blue together.
You will do this for every single one of the colors. You will notice however that you create two sets of each color mixture.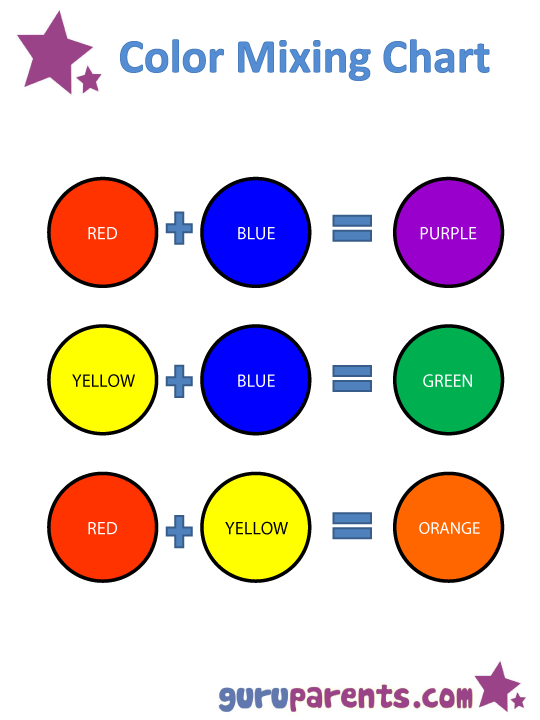 So, for each time that you mix cadmium + Ultramarine blue, you mix it a second time on the other side of the diagonal line.
If you haven’t already – grab my FREE Color Mixing Guide for helpful color mixing instructions and techniques!
Create the color mix with 50% of each color
If you are wondering how much of each color to put in a mixture, you will always do 50% of each. So, when you mix ultramarine blue + cadmium yellow you will mix 50% of cadmium yellow + 50% of ultramarine blue. This way it is an equal color mixture.
A dark area and light area on your color chart
Because it would not make much sense to mix the same color in the same manner twice. You will first create a color mixture that is light and then one that is darker the second time. See the image below and how the left side of the color chart is lighter and the right side is darker.
Putting down the base colors in 3 directions – each with a different tonal value
In addition, you will be putting down your base colors three times.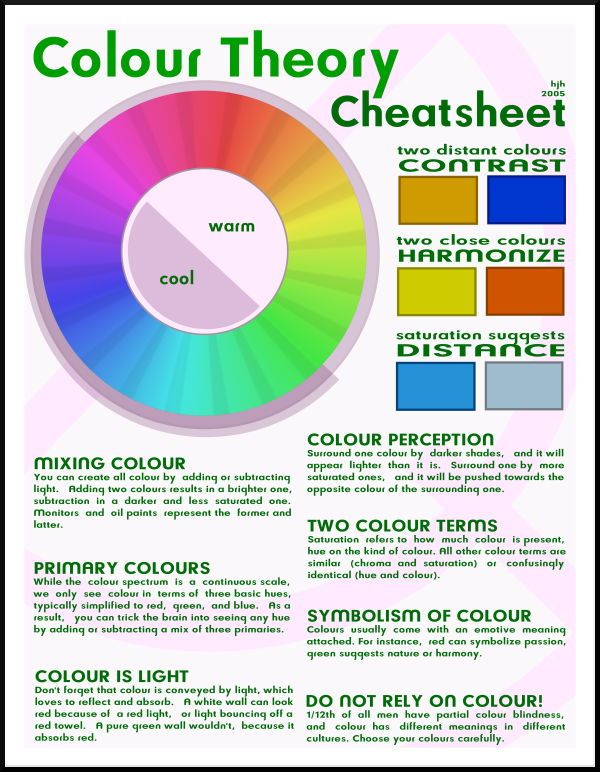 Once horizontally along the first top row of squares. Once vertically along the first left row of squares and then once diagonally down and across the middle. For clarification, when i say base colors, I mean the colors you are using that you wrote the names of.
You will put down these colors in three different values. On the far left margin the base colors will be lightest in value. Along the middle, diagonal line they will be a medium value. Then along the upper margin the colors will be the darkest value. This portion of the color chart creation will really help you in understanding tonal values and how to create them.
A note about different paint mediums
The color mixing chart used in this article is made with watercolor. However, the principles are the same no matter what medium you use. Whether it is acrylic, oil paint, gouache or something else!
When mixing your lighter colors with watercolor you will use less pigment and more water. However, when mixing a color chart with oil paint, acrylic or gouache you will use white to lighten your colors.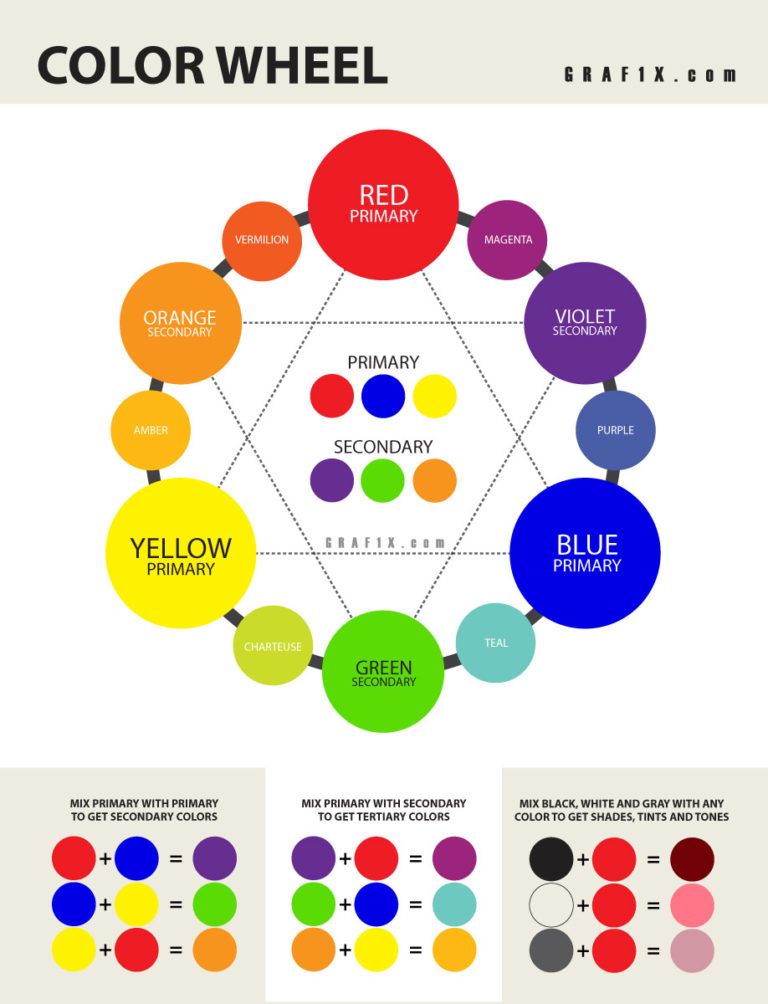
Last but never least… Mixing all of the colors for your color mixing chart!
Now all that is left, is to go ahead and mix all of the colors for your color chart! It can take a little bit of time to mix all of the colors… However, the learning is in the process of mixing colors and making the color chart! It can be a fun process of discovery, as you learn what color is made when each color is mixed together.
How to use your color chart
Now that you have a beautiful rainbow looking color mixing chart how do you use it?? Not only do you learn quite a bit while making a color chart. It can also serve as a useful reference and color mixing guide for when you work on your own projects. For example, if you are ever stumped and unsure how to get a particular color. Take a look at your color mixing chart as a reference, to see which colors you need to mix.
Also, you can add to your color chart mixing in new colors as you purchase them. It is a great way of getting to know your new color.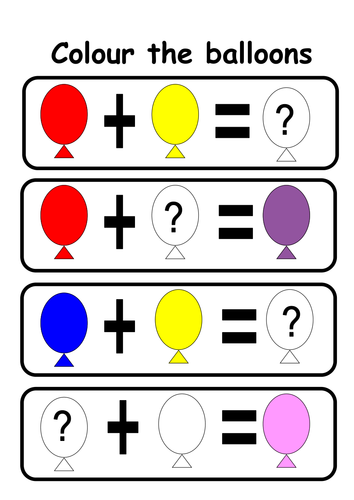 As well as what kinds and shades of colors that can be mixed with it!
Be sure to grab my FREE Color Mixing Guide!
Recommended resources for making a color mixing chart
Here is the exact same watercolor paper I used to create the color mixing chart in this article.
Want to remember this? Save How to Make a Color Mixing Chart to your favorite Pinterest board!
Color Mixing - Art P.R.E.P.
kindergarten
Color Mixing
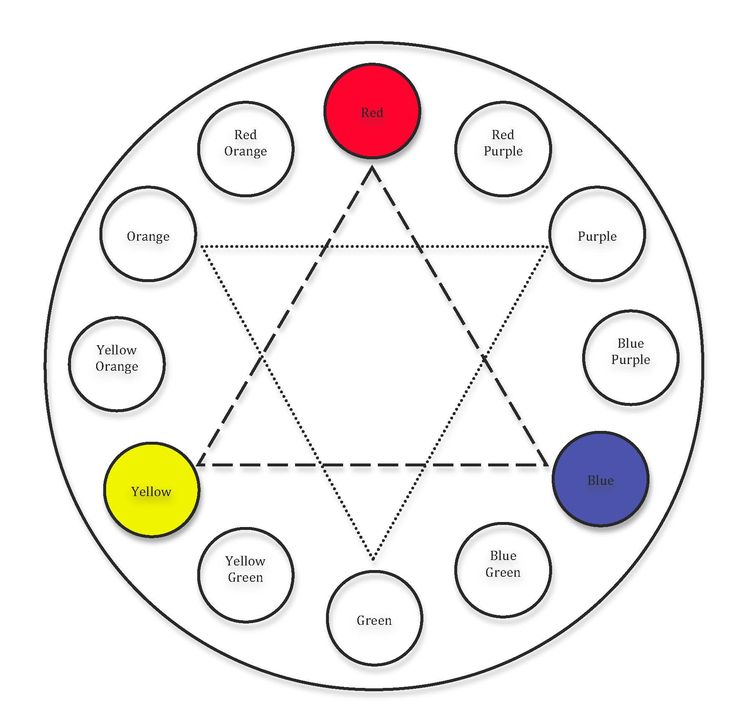
Most children are very familiar with the colors of the rainbow, but do they know why the colors belong in the particular order they do? The COLOR WHEEL can help explain color relationships. Think of the color wheel as a rainbow turned into a circle. In a circle, the color patterns can keep going all the way around, and don't stop when you get to the edge. Most artists think and talk about color in terms of a COLOR WHEEL.
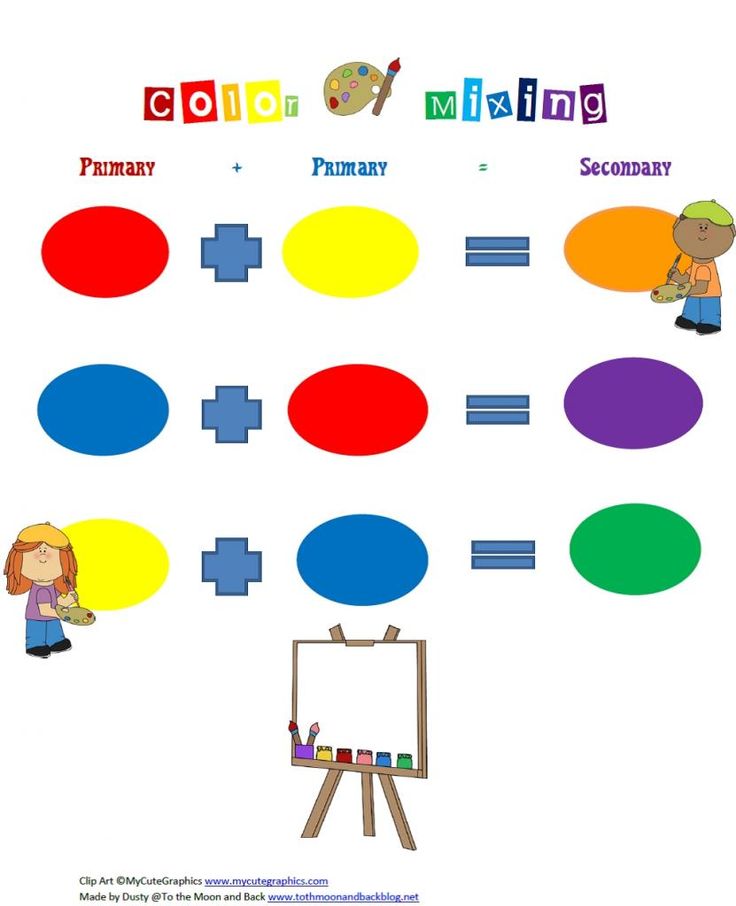
Today we will be talking about the most basic color relationships: those of PRIMARY colors and SECONDARY colors. The primary colors are red, yellow, and blue. These colors are the basic colors from which all other colors are mixed. Have the children note where the primary colors are on the color wheel. Note how they are not next to each other, but spaced out evenly around the circle.
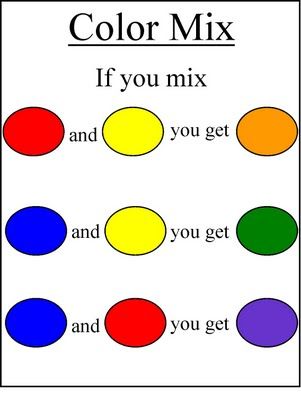
When you mix any two of the primary colors together, you will get a secondary color. Each secondary color is made from the two primary colors closest to it on the color wheel. For example, when you mix red and yellow, you get orange, and so orange sits between yellow and red on the color wheel. Have the students notice which two primary colors make the other secondary colors. As you mix the color wheel colors in the right order, you will make all the colors of the rainbow!
Note: most color wheels also show the tertiary or intermediate colors, which are achieved by mixing the primary and secondary colors next to them. Then you get colors like yellow-green or violet-red.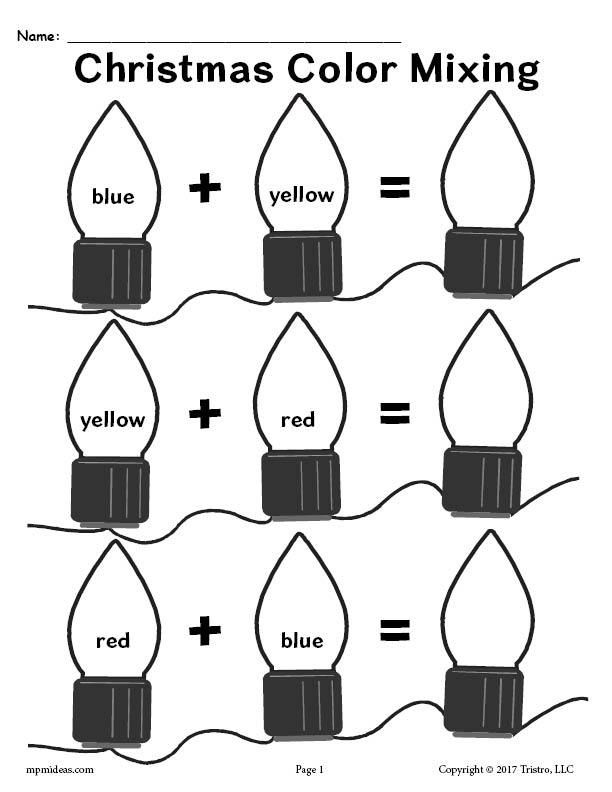 But we won't be talking about those colors today....
See also Color Wheel Flower project in 1st grade for more information on color wheels!
| color_mixing_page.pdf |
| color_mixing_birds.pdf |
The project
PREP - 45 minutes to make sample, pull supplies and go over color wheel
Print - Color Wheel Chart
Materials -
-small paint pallettes, one per two kids
-primary color tempera paint: red, blue, and yellow
-Q-tips, at least 6 per kid
-print out of color mixing page ( 1 per student)
-print out of color mixing birds ( 1 per student)
-you may bring newspaper from home to cover tables
Lesson -
Show students the color wheel chart and talk about the colors, as discussed above.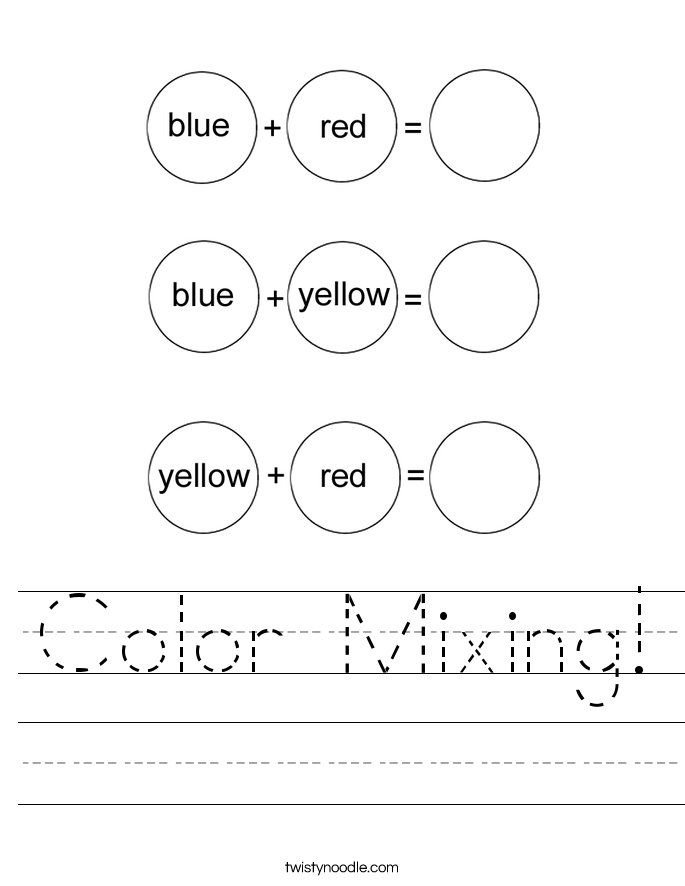
Model for the students with the paint on the color mixing sheet how when you paint yellow in the square and then blue in the square, you have yellow and blue. Ask the students what color they think you will get when you mix yellow and blue together? Show students on the color mixing paper how to mix yellow and blue in the last square and you get green. Use the Q-tips, just as they will be doing. Continue to model this for the other colors: red and blue make purple, yellow and red make orange!
Have parent helpers pass out supplies to students. Each student should have a color mixing paper, have them put their name on it, a paint palette they will share, and Q-tips. Remind students to only use each Q-tip in only one color and then use a separate Q-tip to mix the colors together.
Guided Art Lesson
After students have their supplies, have them follow you in painting each square. This would be a guided art lesson: students will follow along as you step by step lead them in making their colors.
When students are done with their color mixing sheet, you can pass out the bird paper and they can work on their own to paint the primary colors on their birds and then practice mixing colors to paint the other 3 birds. (yes, some kids will have brown birds, it is ok, remember that they are practicing and using paint is exciting)
*when lesson is over, please have parent helpers collect paint pallettes and wash them out and set them to dry near sink in Art PREP room.
| The course of the lesson. Organizational part Guys, if we carefully look around, we will see the bright colors of the world around us: blue sky, yellow sun, green grass, colorful houses. And imagine this picture: suddenly the colors disappeared and everything around became gray: the sky, and the sun, and the forest, and gray people in gray clothes with a gray face are walking along the streets. What would happen then? The teacher reads A. Shlygin's poem "Colorful Globe of the Earth". If only white flowers bloomed in the field, I and you would soon be tired of admiring. If only yellow flowers bloomed in the field, You and I would miss such beauty! It's good to have chamomiles, roses, asters, cornflowers, Dandelions and cereals, forget-me-nots and roasts! Chamomile is white, carnation is red. The foliage is green, it's so beautiful! Teacher. From such a multicolor world cheerful and bright. Look, please, at the spectral circle, what does it remind you of? . How many colors are in the rainbow? Please name them in the order in which they appear What other colors do you know and can name? Teacher. But it turns out that among this variety of colors there are main (basic) and non-main ones. Primary colors are red, blue, yellow. They are called chromatic, that is, colored, colored colors. Three colors, three colors, three colors, Guys, isn't that enough? Where can we get green, orange? What if we mix paints in pairs? Teacher. It turns out that paints also have a secret: when mixing some of them, you can get other colors. From blue and red, this one, We get the color purple. And we mix blue with yellow - What color do we get? Green. A red plus yellow, not a secret for everyone, Of course they will give us an orange color. The teacher asks the children to mix the colors on the palette to get purple, green and orange and apply them in the form of spots, circles on an additional sheet. Guys, tell me, what colors are missing in the spectrum? That's right, scientists do not even consider them colors, they say that they are not the main ones, and they call them achromatic, that is, colorless, or colorless. When they are mixed, a third achromatic color is obtained - gray. White color - sissy. It is very easy to spoil it. Therefore, when mixing it with other paints, it is necessary to observe an important rule: white paint is always typed on the brush first. And black, on the contrary, is the strongest, it can overlap any other, so it should be taken last and added to paints little by little, very carefully. Children mix black and white to make grey. Teacher. And the most interesting thing is that by mixing the main and non-main colors (red, yellow, blue, black and white), you can get a variety of color shades. When white is added to paints, light shades of the original color can be obtained, and when mixed with black paints, dark tones can be obtained: dark red, dark green, dark blue, etc. The resulting colors are called derived colors. The teacher draws attention to the fact that when mixing the same colors with white, children get different shades of the same color, lighter or darker. Teacher. 2. Practical part The teacher reminds children of a number of rules that must be observed during work: 1. Put the paints into the deepening of the palette in small portions, starting with the lightest tone, and then enter the dark color, carefully mix the paints together and only then apply them to a sheet of paper. 2. Always apply white paint to the brush first. 3. Add a little bit of black paint, at the tip of the brush. 4. Stir the paints very carefully so that the color is even and uniform. 5. Rinse the brush well after each color to avoid soiling subsequent paint. 6. When painting, do not go beyond the contours of the picture. 3. Summary of the lesson At the end of the lesson, the teacher reads to the children E. Ruzhentsev's poem "Tales about colors". If everything in the world were The same color, Would it make you angry Or would it make you happy? People are used to seeing the world White, yellow, blue, red. May everything around us be Surprising and different! | Everything would become ugly, people would stop rejoicing, and it would become boring and uninteresting to live in this gray world. Rainbow (there are seven colors in the rainbow: red, orange, yellow, green, blue, indigo, violet) Black, white, pink Children mix colors with interest. (White and Black) Children practice mixing different colors |
 Today I suggest you paint the petals of a flower with different colors by mixing the primary colors, as well as using white and black paint.
 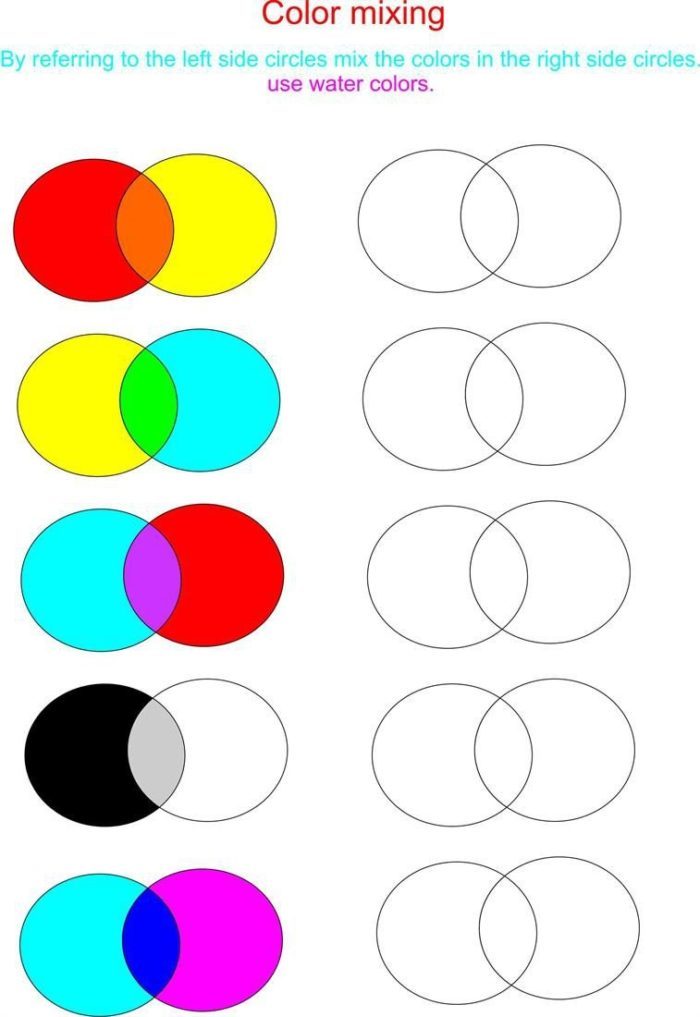 ..
.. Color mixing palette - choosing the right technique | Ogivitel-ART
When we hear the word 'palette', our mind is drawn to the image of an artist who performs some kind of magic ritual with paints, as a result of which new colors appear. And indeed, the process of mixing dyes is impressive, especially when, when combining two completely different shades, a third is born that is not like any of them.
More colors can be mixed in different ratios, which allows the artist to obtain any color tone that the human eye can perceive. Thus, the palette is one of the main attributes of an artist using standard writing methods. However, there is an alternative and, as practice shows, a more effective way to obtain new shades. We are talking about the technology that was used by the artists of the Renaissance, whose paintings are the standard of color harmony and realism. What is the difference between the traditional technique and the technique of the Old Masters, and why is it the latter that allows you to accurately convey shades and achieve color unity?
Types of palettes
Translated from Latin, “paleterum” means “plate” or “plate”. However, today palettes are made not only from wood, but also from plastic, glass, canvas paper and other materials, so everyone can choose the best option for themselves.
Oil painting palette
The classic oil painting palette is a thin sheet of wood covered with varnish. The industrial version is plywood with lightness, rigidity and strength, but if you decide to make a palette yourself, do not forget to varnish the front surface.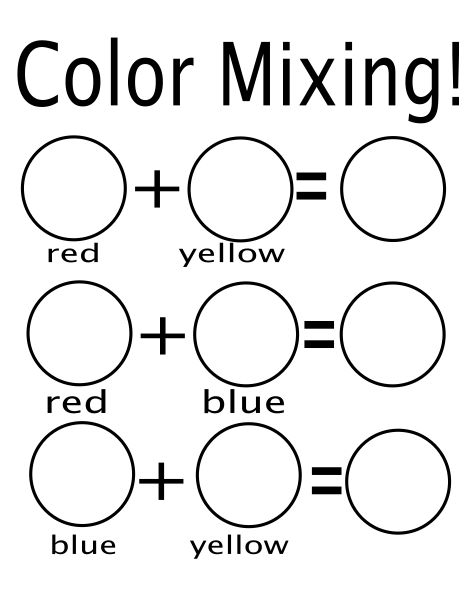 Otherwise, the oil will seep into the wood, and the paint will become too thick, which will lead to inconvenience in work and degrade the quality of the top coat.
Palettes for watercolors and other water-based paints
Many artists prefer white paper as their palette when painting with water-based paints. The dye fits well on the paper base, mixes easily and allows you to see the result, close to what it will be on the canvas of the future picture. The front surface of the sheet is impregnated with a water-repellent layer that prevents the palette from getting wet. In addition, the paper is a disposable palette, so you don't have to wash it.
Plastic and glass can be used to achieve the desired color by mixing water-based paints. The main advantage of plastic and glass palettes is a smooth surface that is easy to clean. True, for watercolors this is not the best option, since drops can form when watery paints are mixed. As an alternative to glass, plastic and paper, you can use canvas, which should be pre-painted over to level out the grain.
Palette dimensions
The optimal palette size is 30-40 cm. It is especially disappointing when you accidentally delete a combination that you have been choosing for a long time and scrupulously, and you have to “suffer” again. Artists who prefer creative space use boards up to half a meter in size, and when working while standing, they use two palettes - a stationary one, located near the easel, and a mobile one, which they hold in their hand when they often have to approach the picture and move away from it.
Disadvantages of the palette
Although the palette is a fairly simple tool, it plays a key role in the artist's work, saving him from having to buy a huge amount of paints. To get an alternative color, it is enough to have several basic dyes - the main thing is to choose the right proportions. At first glance - nothing complicated, but in fact this is the "stumbling block" that does not allow you to convey the desired shade.
The problem is the following. Firstly, paints from different manufacturers, when mixed, give a different color tone. Secondly, there is no formula that allows you to get the exact color. Even when using the color wheel, the artist has to act intuitively and add dyes virtually "by eye". Thirdly, the paint transferred from the palette to the canvas often looks different, and the artist has to “play” with the color again, which leads to dirt. It is necessary to have a natural flair and great talent to overcome all these limitations, so it is not surprising that most painters, even after spending decades, cannot unravel the “secret” of mixing colors.
Obtaining Harmonious Shades Using the Old Masters Technique
The great artists of the Renaissance never used a palette, but their work is striking in its realism, color harmony and fine detail. How did they do it? Were they holding thousands of paint bottles?
Of course not. It's all about technology, which is significantly different from traditional methods, in which the emphasis is on paint.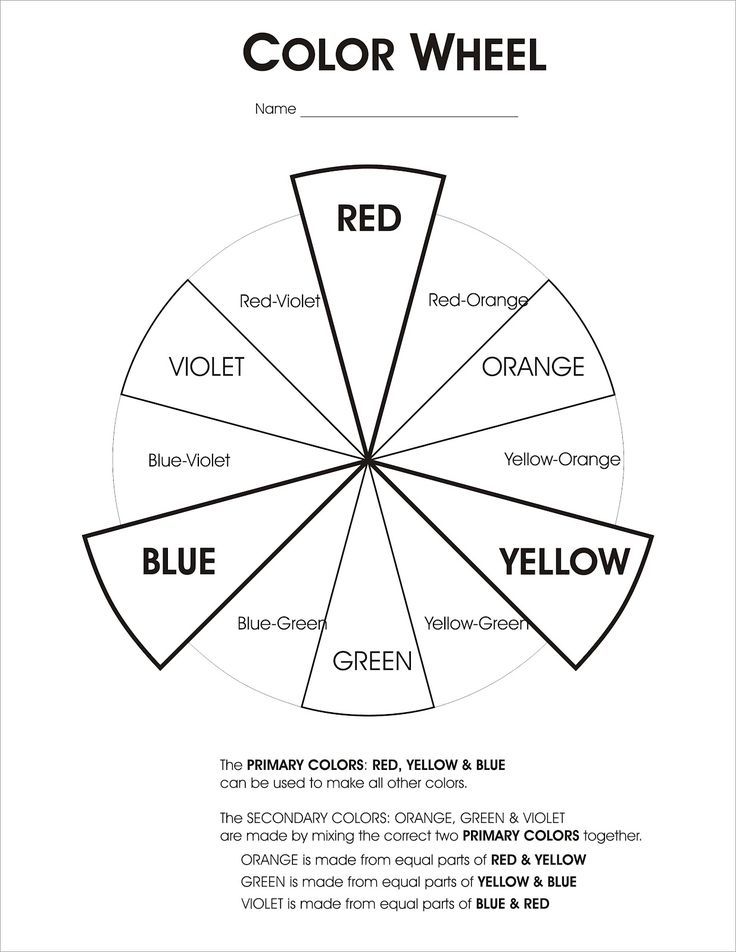 The technique of the old masters is a multi-layered painting, where the palette itself is dense, and the dyes are mixed not physically, but optically like the imposition of colored glasses on top of each other. Imprimatura, glazing, tempera mixtures and watercolor act as translucent layers. An important role is played by the preparation of the canvas, the work with sandpaper and the local introduction of paints in the thinnest layers without strokes. Only by applying an integrated approach can you get:
- exact colors;
- interesting color relationships;
- depth of space;
- realistic texture;
- correct volume.
The Old Masters' technique involves working "from the spot" using the laws of aerial perspective, which allows you to paint "live" paintings that compare favorably with the "artificial" works of corpus painting, where a palette is used. Most of the colors are obtained after working through the canvas with tempera mixtures, and paints are applied pointwise to enhance the effect and revitalize the tone.