How to make a bubble letter b
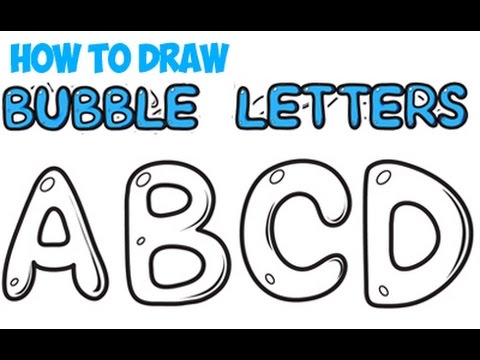
How to Draw the Letter B in Bubble Letters Graffiti
ByHannah Kercheval Updated on
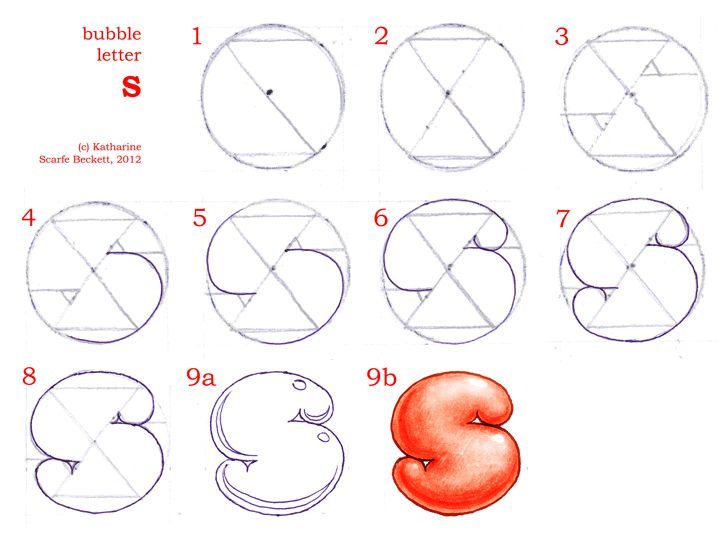
Use this printable tutorial to learn how to draw the LETTER B bubble letter step by step. Bubble letters are a graffiti-style art that allows the reader to still identify a letter, but it appears puffy and bubbly!
This capital bubble letter tutorial is so easy kids of all ages can get in on the bubble letter fun.
Let’s make a fancy, BIG bubble letter B!Capital B Bubble Letter
To make a capital letter B in bubble letter graffiti, we have some simple step-by-step instructions to follow! Print out the 2 page bubble letter tutorial pdf so you can follow along making your own bubble letter or even tracing the example when necessary.
This article includes affiliate links.
Supplies Needed for Drawing a Bubble Letter B
- Paper
- Pencil or colored pencils
- Eraser
- (Optional) Crayons or colored pencils to color your completed bubble letters
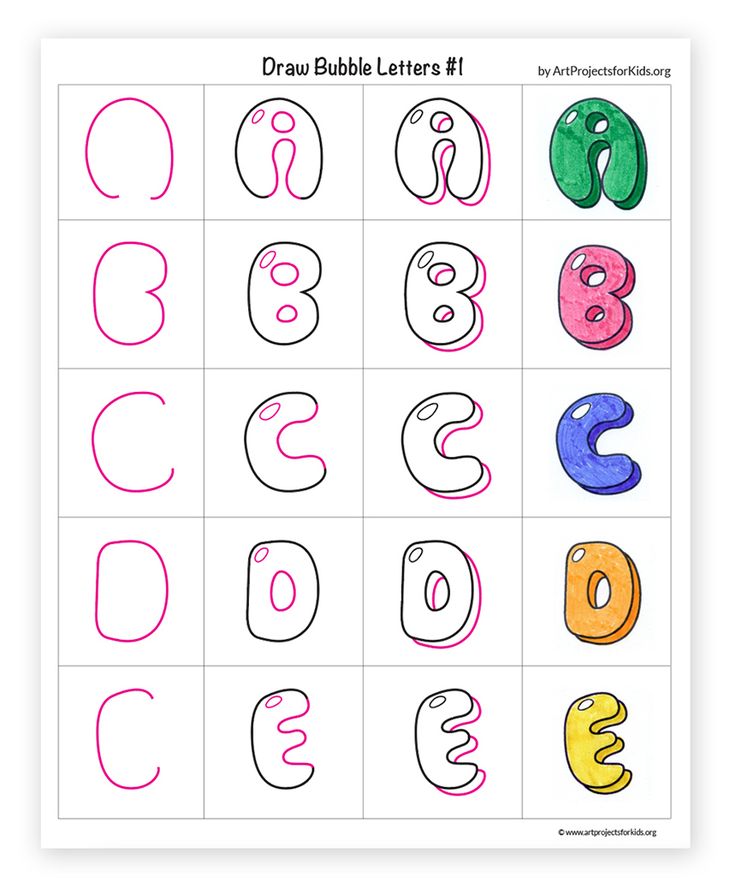
We have also created the 2 page printable bubble letter instruction sheets as coloring pages. If desired, start by coloring the steps and then try it on your own!
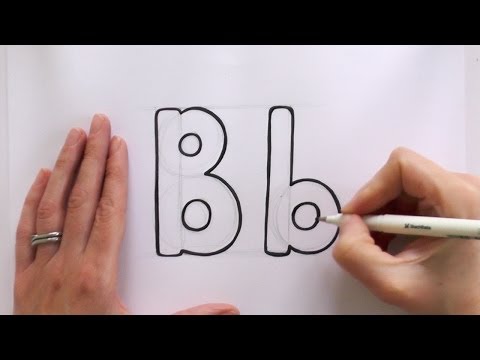
How To Draw Bubble Letter B
Follow these simple steps to write your own bubble letter uppercase B! You can print them below by pressing the button.
This is our very first step!Step 1
Start by drawing a horizontal oval that will be the top of the capital letter B bubble letter.
Add another bigger oval.Step 2
Add another horizontal oval on top of the other one, but make this one slightly bigger.
Connect them on the left side!Step 3
Connect the ovals on the left side by drawing a curved line.
Add half a circle inside the first oval.Step 4
Add a half circle in the middle of each oval to complete the bubble letter.
Draw another half circle on the bottom oval.Step 5
Draw another half circle on the other oval.
You can add little details like making it look like the letter B is glowing.Step 6
If you want to add details like shadows and a little bubble letter glow, then add them now!
Follow along the simple steps to writing your own bubble letter B!Download & Print pdf Files for Bubble Letter B Tutorial:
More Bubble Letters You Can Draw
What word are you going to write in bubble letters today?More Letter B Fun from Kids Activities Blog
- Our big learning resource for everything about the Letter B.
- Have some crafty fun with our letter b crafts for kids.
- Download & print our letter b worksheets full of letter b learning fun!
- Giggle and have some fun with words that start with the letter b.
- Check out over 1000 learning activities & games for kids.
- Oh, and if you like coloring pages, we have over 500 you can choose from…
- As you work to teach your toddler the alphabet, it’s important to get off to a great start!
- Find perfect preschool art projects.
- Check out our huge resource on preschool homeschool curriculum.
- And download our Kindergarten readiness checklist to see if you are on schedule!
How did your letter B bubble letter turn out?
Hannah Kercheval
Hannah loves designing coloring pages at printablesbyhannah.com
How To Draw Bubble Letters - Step By Step Tutorial (2022)
This post and the photos within it may contain affiliate links. If you purchase something through the link, I may receive a commission at no extra charge to you.
Bubble letters are a fun, easy, and expressive way of drawing letters.
In this step by step tutorial, you are going to learn everything you need to know about drawing bubble letters.
Let’s have a quick overview of what are we going to cover in this tutorial –
- What are bubble letters
- The basic construction of bubble letters
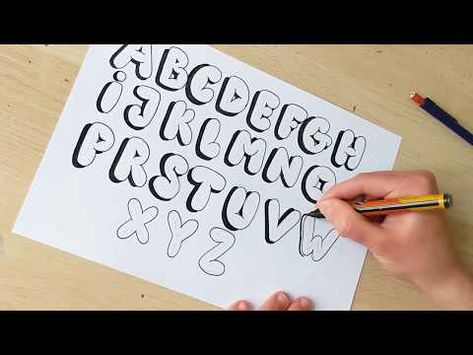
- The whole alphabet (video)
- Bringing bubble letters to life with shadows and highlights
- A few extra tips
- Final words
Without any further ado, let’s get started!
What are bubble letters?Probably most of you are already familiar with this style of lettering, and if you are, feel free to skip this part.
For those who don’t know what bubble letters are, it’s basically a lettering style where the letters look puffy and bloated kinda like bubbles – hence the name.
Bubble letters are easy to learn and fun to do, but at the same time without knowing some of the basics, it’s easy to get lost in the process.
Bubble letters are also quite popular in graffiti, but in this tutorial, we are going to focus only on how to create bubble letters on paper.
The basic construction of bubble lettersThere are different ways of constructing your bubble letters, and in this tutorial, I’m going to show you the most basic method of doing it.
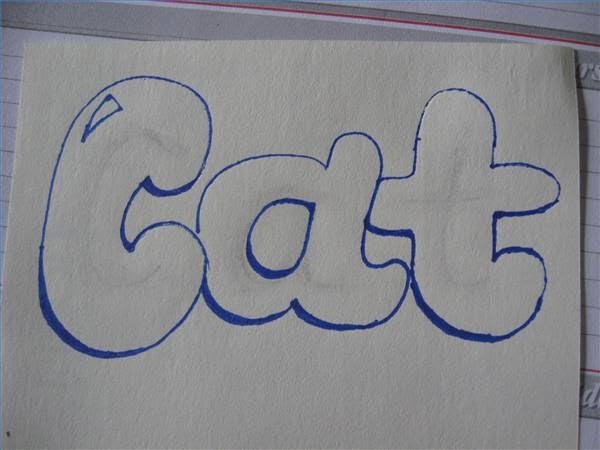
Let’s start off with an example of the letter A.
We always sketch with a pencil, this way we can make corrections if needed.
To demonstrate this process, I’m using a Staedtler mechanical pencil and a Sakura pigma micron fineliner
From this point, we thicken the letter by adding an outline.
Keep in mind that the outline should have the same thickness from both sides.
Here you can determine how thick you want your letters to be.
The key idea behind bubble letters is to have rounded (external) edges instead of sharp ones – like with block letters.
Once we added the thicker outline around the letter, we can erase the first shape that we made at the beginning.
And here we have our completed bubble letter A –
Note – that I mentioned that we don’t have any sharp outside edges, but having them inside helps to achieve that puffy/bloated look that we are after.
In the example below, you can see the difference between having sharp internal edges (left) and the one with all rounded edges (right).
I’m not saying that the one on the right is wrong, I just personally like the look of the left one more – This is totally up to you.
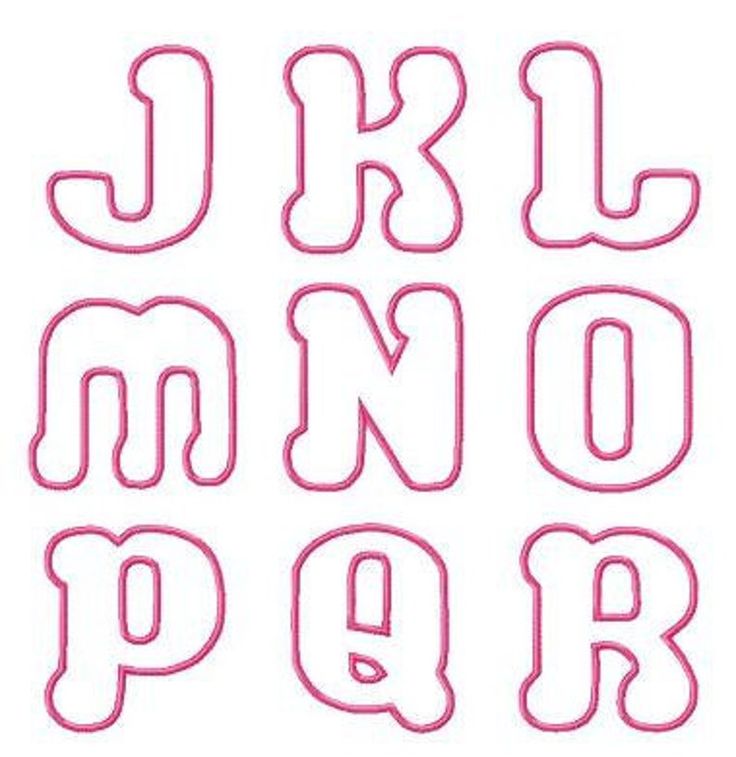
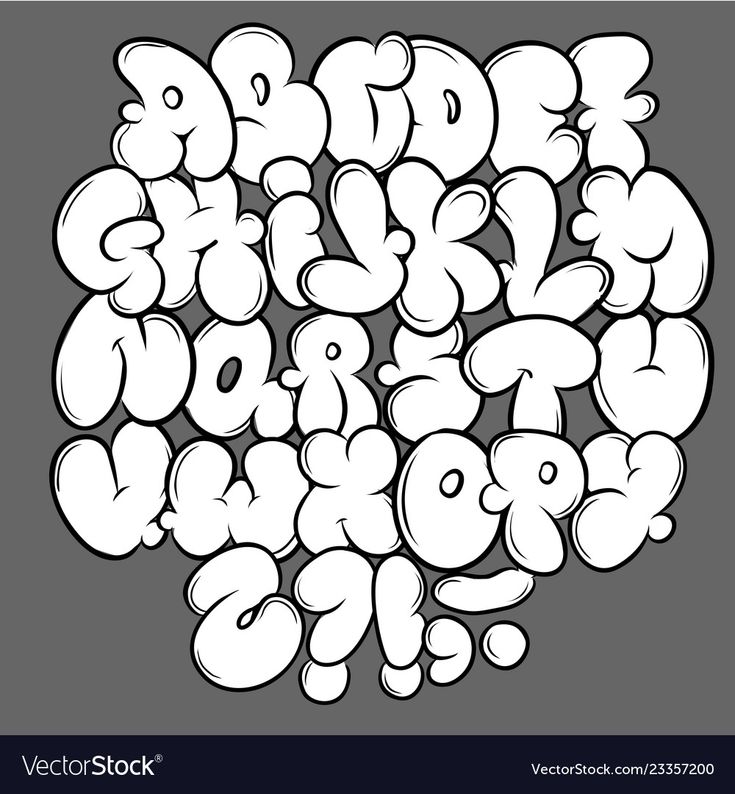
Now that we saw the basic construction of bubble letters with the letter A, we can apply that same idea to the other letters of the alphabet.
Here is how to draw the whole alphabet with the bubble letter style
Bringing bubble letters to life with shades & highlightsOk so, now that we know the basic construction of bubble letters it’s time to add them some details to make them pop even more!
The best way to do this is by adding shadows and highlights.
I’m going to show you the basics of shading and highlights because we already have a more in-depth step by step tutorial that will teach you not one but five different methods of shading your lettering & calligraphy.
You can check the shadowing tutorial here.
Let’s start with shading –I see many beginners struggling with adding shadows properly, and it can be tricky if you are just getting started.
Once you understand the underlying principle, the process is quite simple and straight forward.
The position of the shadows depends solely on the direction of the light.
Let’s make this easier to understand using our letter A as an example –
So in this example, we can see that the light source comes from the top right side.
This means that the shadows will appear on every bottom and left side – basically the opposite side of the light source.
Here is an example –
Easy right?
What if the light source comes from the opposite side?
Simple,
we just add the shadows on the opposite side of the light source!
Now we just need to color the letter and add a nice outline to it.
Like this –
In case you are struggling with outlining your letters smoothly, fear not!
We recently posted another article where we shared a couple of tips on how to improve your outlining and inking skills.
You can check it out here.
Now, let’s add some highlights to our bubble lettersNow that we added the shades, it’s time to add some highlights to make them really pop!
First of all, let’s understand what the highlights are.
Highlights are areas in an object that is closest to the light source, where the light is reflecting.
The easiest way to know where to add highlights, in this case, is basically the opposite side of the shadows.
Let’s take a quick example of our letter A with the previously drawn shadows.
We are not going to put the highlight all the way to the edge of the letter, we are going to leave a bit of space which will make the letter look more round-shaped.
Here is an example –
Keep in mind your color selection!
When working with colors, contrast is super duper important.
Since highlights are basically a reflection of the light, the best way for them to stand out is by using a brighter color (doesn’t need to be always white)
Working with color is a whole other story for itself, and explaining how to use them in your lettering correctly, it would really drag out this tutorial.
Lucky for you,
We have a separate beginners guide that explains the fundamentals of colors (color theory) and how to use them effectively in your lettering – you can check it out here.
Shadow and highlights are two robust methods of enhancing your artwork (not just letters).
Depending on how much time and detail we add we can create more simple looks like we just demonstrated –
Or even more intricate effect like this –
If you want to learn how to create this sort of effect, be sure to check out this other step-by-step tutorial on our website.
A few extra tips for drawing bubble lettersBefore we wrap up this tutorial, there are a few more things that I would like to bring up to your attention.
We mentioned above the basic construction of bubble letters, and once you feel comfortable enough with it, you can start to tweak the shapes and create your very own forms.
2. Adding a second outline for an extra pop!Adding a second outline around the letter and the shadows are a great way to make your bubble letters pop even more.
You can do this both in monochrome (single color) or with colors.
Remember to pick colors that go well together!
3. Play around with the spacing of your bubble lettersWhen drawing bubble letters, you can play around with the spacing of the letters in a word.
I personally prefer to have smaller spacing between the letters and have them clashing with each other.
If you want the letters to overlap each other, remember to add an outline – otherwise, it could hurt the readability of the word.
This is a super simple and easy tip that will make your letters look more ”bubbly”.
Remember that at the beginning of the tutorial, I mentioned that the internal angle should remain sharp?
Just by adding a bit more detail to these inner edges, you can make your letter look more bloated.
Check out this example –
Wrapping it upThat’s all for this time, gang.
I hope this tutorial helped you in your creative journey!
Be sure to also check out the ultimate hand lettering guide for beginners to start learning the basics of hand lettering.
Keep in mind that these are just the basics of bubble lettering, and once you are comfortable enough with the basics, you can start creating your own unique style.
This rule basically applies to any lettering style – learning the fundamentals is essential for progress!
Is there something I forgot to mention?
Or is there something you did not quite understand?
Maybe you have a specific question in mind, or perhaps you want to get some constructive feedback on your artwork?
Feel free to drop a comment below, or even better –
Join our official Facebook group!
Our group is a place where you can –
- Share your work
- Get constructive feedback
- Network with fellow lettering & calligraphy artists
- Ask specific questions about lettering & calligraphy
- Much more!
Thank you for joining for another tutorial, and until the next time –
Stay AWESOME!!
Stay updated with my tutorials and get instant access to the Lettering Crate –A growing library of free lettering & calligraphy resources that includes – FREE downloadable practice sheets, Procreate brushes, the 30-day lettering planner, printables, and more!Pin me!
Materials
- Paper (HP premium) - Practice paper
Tools
- Staedtler Mechanical Pencil
- Sakura Pigma Micron Fineliners
- Eraser
- Colored marker pens (refillable)
Instructions
- The basic construction of bubble letters - write a simple letter A
- Thickening the letters by adding an outline.
 Feel free to determine the thickness - a thicker outline will make them look more ''bubbly'' while a thinner outline will achieve the opposite look. It's important to keep a consistent thickness from both sides of the letter. Also, keep your corners rounded - it's the key to drawing bubble letters (no sharp corners). Like so -
 - Using the Sakura Micron fineliner, outline your letter and erase the pencil marks. Be sure to let the ink dry before you erase the pencil marks, to avoid any ink smudges.
- Although the outside edges should be rounded, by making the internal edges sharp, it will give you bubble letters a more puffy look. Here is an example -
- Add shadows, highlights, and other effects to achieve different looks and styles. Start from the basics, and gradually create more complex designs.
Notes
Check out the full step by step tutorial for more details on how to apply shadows, and different effects to your bubble letters.
Recommended Products
As an Amazon Associate and member of other affiliate programs, I earn from qualifying purchases.
-
Sakura Pigma 30062 Micron Blister Card Ink Pen Set, Black, Ass't Point Sizes 6CT Set
-
Staedtler Mars Technical Mechanical Pencil Set, 780SBK
-
HP Printer Paper, Premium32, 8.5x11, Letter, 32lb Paper, 100 Bright - 1 Ream / 500 Sheets - Presentation Paper (113100R)
About the author
Lettering Daily
Lettering Daily is an online community that provides educational and inspirational content for hand lettering and calligraphy beginners. Our mission is to help artists and enthusiasts from all around the world to learn and improve their hand lettering and calligraphy skills.
www.lettering-daily.com/
How to properly pack in bubble wrap — Volga Polymer
Air-bubble, or air-bubble film is a universal packaging material with unique properties and guarantees increased safety of your cargo. It is made of low density polyethylene (high pressure), can be two-layer or three-layer.
In the first case, the material consists of a smooth layer of polyethylene and a layer of bubbles, in the second case, it consists of two smooth layers and a layer of bubbles located between them. nine0004
Benefits of using this packaging material
Among the features of the pimply film are:
- absence of toxic substances in the composition, safety for the environment and humans;
- possibility of use for transportation of foodstuffs;
- increased water resistance and thermal insulation;
- reusable;
- light weight; nine0015
- increased damping characteristics;
- wide temperature range.
Due to this, it is actively used in the transportation of lighting fixtures, decor elements, furniture, as well as dishes, optics, electronics and other goods.
What to look for when choosing bubble wrap
The versatility of air bubble wrap makes it an indispensable material when transporting fragile items. For various purposes, a film with different performance characteristics is used. The most important factors are: nine0004
- electrical resistivity;
- density - the maximum load that the film can withstand depends on it;
- bubble diameter - affects the thickness.
In addition, the material can be of a different color (for example, pink - if it contains antistatic components). The composition of greenhouse films includes a light stabilizer. Other additives are often used - antifog, antistatic, foil, cardboard or polyethylene foam. As we have already said, it all depends on the purpose of the material. nine0004
Which side should be used?
To understand how to properly pack in bubble wrap, you need to decide on the choice of side. It is believed that the bubbles should be directed inward, since:
- adhesive tape sticks better to the flat side;
- if you plan to mark the package with markers or other writing utensils, the flat side will be easier to write on;
- In order to better protect the fragile cargo from accidental mechanical damage and external pressure, the bubble side filled with air should be adjacent to it; nine0015
- the soft side will hold the object better.

Another important nuance is that even if the integrity of one bubble is violated, the rest will retain their properties, since they are all clearly limited and separated from each other.
Rules for using bubble wrap
Before packing the goods in bubble wrap:
-
Make sure that the integrity of the bubbles is not broken. Remove broken bubbles, or wrap them last. nine0004
-
Cut a piece of the desired size using a knife or scissors, being careful not to damage the bubbles. They must be intact along the edges.
-
Place the material so that the bubble layer is in contact with the load around the entire perimeter.
-
To provide additional protection for the cargo, wrap it in several layers (relevant for both two-layer and three-layer film). nine0004
-
You can create the "perfect" protection by combining the film with other packaging materials - thick cardboard boxes, corners, stretch film or corrugated cardboard.
 Do not forget to mark the packaging with the inscription: "FRAGILE".
Additional questions ask the consultant by phone.
-
Polypropylene tape 19 X 1.0 Gray
Thickness, mm1.0
Tensile force, kGf400
Type of raw materialRecycled
Length, m1000
-
Stretch film primary manual 500 mm 17 µm 2.5 kg
Weight, kg2.5
Roll width, mm500
Film thickness, µm17
Raw materialPrimary
-
Bubble wrap 2-layer 1.2 m
Length, m100
Width, m1.2
Type 2-layer
-
Adhesive tape 48 mm 66 m 43 µm
Tape typeAdhesive tape
Thickness, µm43
Length, m66
Width, mm48
-
Polypropylene tape 15 X 0.
 8 with logo
 Thickness, mm0.8
Tensile strength, kgf240
Type of raw materialPrimary
Length, m2000
nine0015 -
Bubble wrap Pool blue with light stabilizer 1.5 m
Length, m25
Width, m1.5
Type Pool blue
-
Greenhouse bubble wrap 1.6 m
Length, m100
Width, m1.6
Type Greenhouse
-
Anti-static bubble wrap 1.2 m
Length, m100
Width, m1.2
TypeWith antistatic
-
Bubble wrap 3-layer 1.6 m
Length, m100
Width, m1.6
Type 3-layer
Representation of data as a bubble chart
A bubble chart is a type of scatter chart that replaces data points with bubbles, with their size serving as an additional dimension to the data. A bubble chart, like a scatter chart, does not have a category axis—both the horizontal and vertical axes are value axes. In addition to the X values and Y values plotted on a scatter chart, the bubble chart also shows Z (size) values. nine0004
You can use a bubble chart instead of a scatter chart if your data consists of three series, each containing a set of values. The bubble sizes are determined by the values of the third data series. Bubble charts are often used to represent financial data. Bubbles of different sizes allow you to visually highlight specific values.
To create a bubble chart, arrange the data on a worksheet in rows or columns so that the X values are listed in the first row or column, and the corresponding Y values and dimension (Z) values are listed in adjacent rows or columns. For example, place the data on the sheet as shown in the figure:
In this chart, the number of products is shown along the horizontal axis, sales amounts along the vertical axis, and market share percentages are represented by different bubble sizes.
A bubble chart is useful if the data includes the following:
-
Three values for each data point. Three values are required for each bubble. They can be specified in the rows or columns of the worksheet, but must be in strict order: X value, Y value, and then Z value.0004
-
Multiple data series. Plotting multiple data series on a bubble chart (multiple series of bubbles) is similar to plotting multiple data series on a scatter chart (multiple series of dots). Scatter charts use sets of X values and Y values, while bubble charts use sets of X values, Y values, and Z values.
When creating a bubble chart, you can choose to display the bubbles as 2-D or with a 3D effect.
Top of page
Creating a complex bubble chart
So how was this bubble chart created? The following procedure will help you create a similar bubble chart. For this chart, we used the data from the example sheet. You can copy this data to your sheet or use your own. nine0004
-
Copy the example data to a blank sheet, or open a sheet that contains the data you want to display as a bubble chart.
Copying example data
-
Create an empty book or sheet. nine0004
-
Highlight an example in a help topic.
Note: Do not highlight row or column headings.
-
Press CTRL+C.
- nine0002 Select cell A1 on the worksheet and press CTRL+V.
A
B
nine0002 C 1
Quantity of goods
Sales
Percentage of market share
2
5
5500 ₽
nine0002 3% 3
14
12 200 ₽
nine026612%
4
20
nine0002 60 000 ₽ 33%
5
18
nine026624 400 ₽
10%
6
22
32 000 ₽
42%
Note: Ensure that the worksheet has at least four rows or columns of data.
 If you try to build a bubble chart with three rows or columns of data, the bubbles will not display correctly. nine0004
 -
-
Highlight the data you want to display in the bubble chart.
Note: We do not recommend that you include row or column headings in your selection. If headings are highlighted along with the data, the chart may not be built correctly.
- nine0002 On the Insert tab , in the group Charts, click the arrow next to the Scatter Plot button.
-
Select bubble with 3-D effect icon.
-
Click the chart area. Tab 9 opens0206 Working with diagrams .
-
In the Chart Tools group on the Design tab, in the Chart Styles group, select the desired chart style.
-
If the chart has a legend, click it and press the DELETE button.
nine0204 -
To format and position the chart title on the chart, click the chart area and do the following:
-
Click on the title of the diagram and enter the desired text.
For this bubble chart, we entered Determination of market share in industry .
nine0015 -
To reduce the size of the chart title, right-click on it, select the font and enter the desired size.
Our bubble chart size was 12 .
-
To align the chart title with the plot area, click it and drag it to the desired location. nine0004
-
-
To add a horizontal axis title, click in the chart area and do the following:
-
Click the plus sign next to the diagram
-
Select Axis names , followed by Main horizontal .
-
Select the Axis name text box and enter the text.
For this bubble chart, we entered Number of products .
nine0015
-
-
Click the vertical axis or select it in the list of elements of the diagram (tab Format, Current selection group, field Chart elements).
-
On the Format tab, in the Current fragment group, click the Format selection 9 button0207 .
-
In section Axis parameters do the following:
-
For the minimum value is , enter 0 (zero).
-
For maximum number, enter the desired number. nine0004
For this bubble chart, we entered 80 00 .
-
-
In the Format Axis dialog box, click the Number tab.
-
In field Number in field Number of decimal places enter 0 (zero), and then click the down arrow in the upper right corner and click the Close button.
-
To apply a special formatting effect to a chart area, chart area, chart title, or chart vertical axis, click the chart element or select it from the chart elements list ( Format tab, group Current selection, Chart elements field) and do the following:
-
On the Format tab , in the Shape Styles group, click the More Actions button next to the Shape Effects button.
-
Click the desired effect.
nine0002
-
-
If you don't want to use the colors of the book's default theme, do the following:
-
On the Page Layout tab, in the Themes group, click the Themes button.
nine0002
-
Select the theme you want to use. (Hover over each topic to see how it will look when applied to a diagram.)
-
To change the format of the chart, on the Format tab, in the Size group, set the desired shape size in the Shape Height and Shape Width boxes, and then press Enter.
For this bubble chart, we have set the height and width of the shape to 8.9 cm .
nine0015
A chart can be saved as a template that can be used as a base for other similar charts. For more information, see the Save a custom chart as a template menu. nine0004
Top of page
Creating a complex bubble chart
So how was this bubble chart created? The following procedure will help you create a similar bubble chart.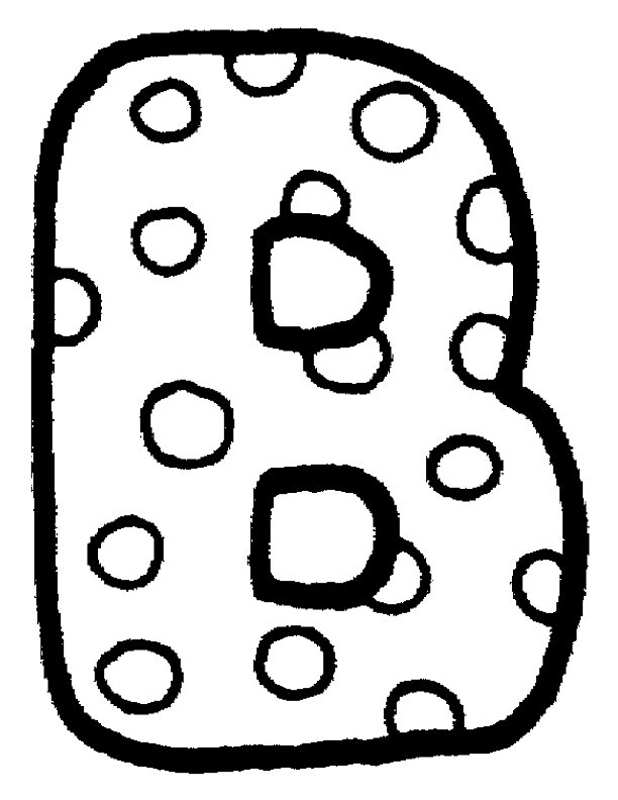 For this chart, we used the data from the example sheet. You can copy this data to your sheet or use your own. nine0004
-
Copy the example data to a blank sheet, or open a sheet that contains the data you want to display as a bubble chart.
Copying example sheet data
-
Create an empty book or sheet. nine0004
-
Highlight an example in a help topic.
Note: Do not highlight row or column headings.
-
Press CTRL+C.
- nine0002 Select cell A1 on the worksheet and press CTRL+V.
A
B
nine0002 C 1
Quantity of goods
Sales
Percentage of market share
2
5
5500 ₽
nine0002 3% 3
14
12 200 ₽
nine026612%
4
20
nine0002 60 000 ₽ 33%
5
18
nine026624 400 ₽
10%
6
22
32 000 ₽
42%
Note: Ensure that the worksheet has at least four rows or columns of data.
 If you try to build a bubble chart with three rows or columns of data, the bubbles will not display correctly. nine0004
 -
-
Highlight the data you want to display in the bubble chart.
Note: We do not recommend that you include row or column headings in your selection. If headings are highlighted along with the data, the chart may not be built correctly.
- nine0002 On the Insert tab, in the Diagrams group, click the Other Diagrams button.
-
Under Bubble , select option Bulk bubble .
-
Click the chart area. nine0004
The Chart Tools panel opens with additional tabs Design, Layout and Format.
-
On the tab of Design, in the Chart Styles group, select the style you want to use.
nine0004
Style 29 was used for our bubble chart.
-
In the chart, click the legend and press DELETE.
-
To change the chart format, on the Format tab, in the Size group, specify the desired size of the figure in the fields Shape Height and Shape Width , and then press ENTER.
For this bubble chart, we have set the height and width of the shape to 8.9 cm .
-
To add, format, and position a chart title, click the chart area and do the following:
-
On the Layout tab, in the Captions group, click the Chart Title button and select Above Chart .
-
Click on the title of the diagram and enter the desired text. nine0004
For this bubble chart, we entered Determination of market share in industry .
-
To reduce the size of the chart title, right-click it and enter the desired value in the context menu in the field Size .
Size 9 was used for our bubble chart0206 12 .
-
To align the chart title with the plot area, click it and drag it to the desired location.
-
-
To add a horizontal axis title, click in the chart area and do the following:
nine0237 -
On the Layout tab, in the Labels group, click the Axis Labels button, click Primary Horizontal Axis Title and select Title Under Axis .
-
Click the name of the horizontal axis, type the text you want, and then press Enter.
nine0002 For this bubble chart, we entered Number of products .
Click the vertical axis or select it from the list of chart elements (tab Layout , group Current fragment , field Chart elements ).
In section Axis parameters do the following:
-
Set switch minimum value to position fixed and enter 0 (zero) in field fixed .
-
Set switch maximum value to position fixed and enter the desired number in the field fixed .
For this bubble chart, we entered 80 00 .
nine0086
In the Format Axis dialog box, click the Number tab.
Select the format Numeric and in the Number of decimal places field enter 0 (zero) and then click the Close button.
-
On tab Format in group Shape styles press button Additional .
-
Click the desired effect.
For this bubble chart, we used the style Weak effect - Emphasis 4 for plot area, Strong effect - Emphasis 4 for chart area, Slight effect - Accent 4 for the chart title and Sharp line - Accent 6 for the vertical axis.
If you don't want to use the colors of the book's default theme, do the following:
-
On tab Page 9 layout0207 in the group Themes click the button Themes .
-
In the Built-in group, select the theme you want to use.
Our bubble chart theme was Foundry .
nine0015
Top of page
Saving a diagram as a template
If you want to create similar charts based on the chart you created, you can save it as a template.
- nine0002 Click the chart you want to save as a template.
-
On the Design tab , in the Type group, click the Save as template button.
-
In field File name , enter a name for the template. nine0004
Tip: If you do not specify a different folder, the template file (CRTX) will be saved in the Charts folder, and the template will be available in the Templates group in the Insert Chart dialog box ( Insert tab, Charts group, ) and the Change Chart Type dialog box (tab Designer, group Type, Change chart type).
Learn more