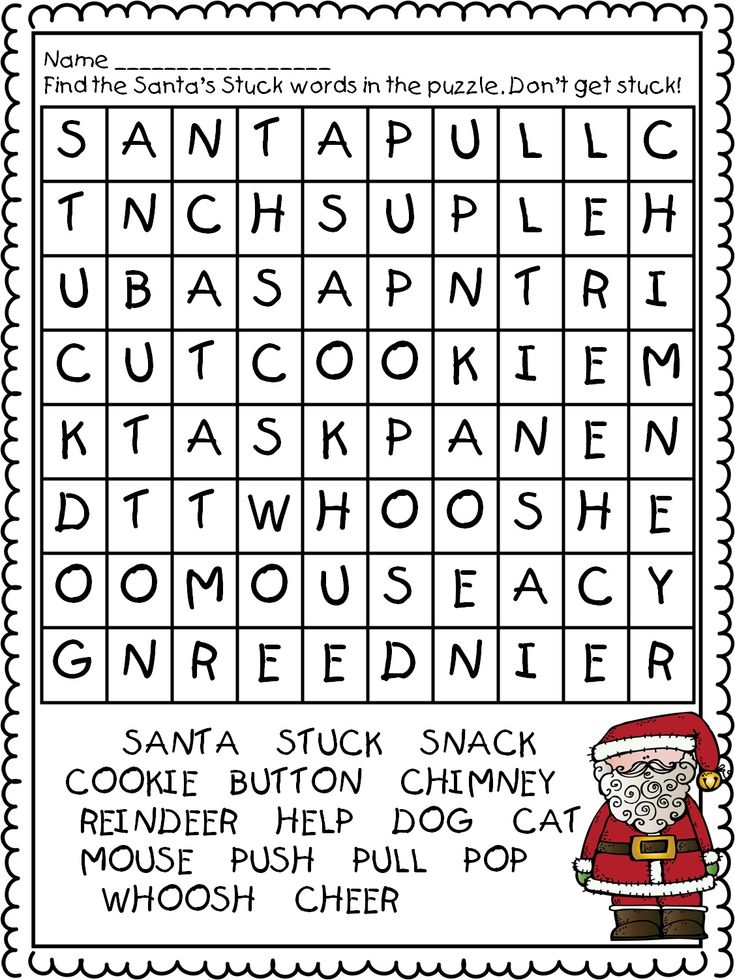
How to teach vowels
How To Help Your Child Learn Long And Short Vowel Sounds
It’s not uncommon for children to struggle with vowels. Most kids actually pick up consonant pronunciations much more quickly. Why is that?
One of the challenges with vowel sounds is that they can’t exactly be “felt” in the mouth. With consonants, kids can feel the friction created while using their tongue, lips, or teeth to produce the sounds. To produce a vowel sound, you only need to adjust the shape of your mouth.
Then there’s the challenge of distinguishing between long and short vowels or two similar vowel sounds. In a nutshell, learning vowels can be a monster!
But have no fear; we’re here to help! We’ve compiled a step-by-step guide you can use to help your child finally connect the dots with both short and long vowel sounds.
When Is Your Child Ready To Learn Vowels?
It’s challenging to teach your child vowel sounds if they cannot hear them. This is why one of the most important signs showing that a child is ready to learn vowel sounds is when they can hear the vowel sounds in simple words.
For instance, let’s say your child tries to spell a simple CVC (consonant, vowel, consonant) word like “cat.”
Even if they may misspell the word by writing “cet” instead of “cat,” this is still a beautiful moment, so celebrate it to the fullest because it indicates that your child can hear that there’s a letter between the C and the N.
If you feel that your young learner is developmentally ready to start learning more about vowels, how can you help? Let’s take a look.
Tips For Teaching Short Vowel Sounds
Since short vowels have more consistent spelling, this is a great place to start when teaching your young learner.
1) Begin With The Names Of The Vowels
Teaching your child A, E, I, O, U is the first step in helping to familiarize them with vowels. We recommend taking these one vowel at a time to avoid overwhelming your young learner.
The good news is that there are various tactics you can use to help your child remember their vowels.
Besides sounding them out, you can also help your child create three-dimensional letters with something as easy and accessible as PlayDoh. To help emphasize the differences between the letters, use a different color for each vowel.
As your child feels and creates vowels, more of their senses will be engaged, and this will help them get familiar and comfortable with the five vowels and their sounds.
2) Differentiate Between The Vowels
This point on our list is connected to the previous one. Still, it deserves its own emphasis because it can be easy for children to struggle with differentiating between the vowels.
The example we used earlier of a child spelling “cet” instead of “cat” is pretty common, especially when you consider how similar the sounds are to each other. This is why it’s important to make the letters distinct.
To add some fun into your child’s learning, you might consider using stick puppets made with the five vowels. Simply attach a printout of each letter onto a popsicle stick, and then let your imagination run wild!
A can go to the store with E; I can head out to the beach with O; and so on. While acting out your scene, remember to emphasize the difference between the letters and keep sounding the vowels out clearly.
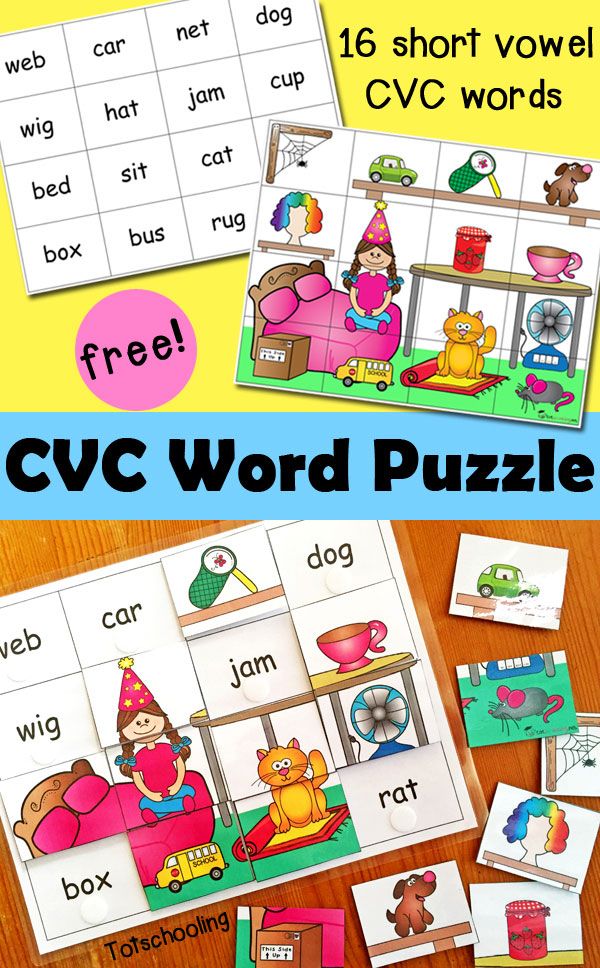
3) Introduce Word Families For Simple CVC Words
Word families can be described as a group of words that have a common pattern or features. Helping children learn these allows them to spell and sound out related words.
For example, a child who learns the word family -at, will have an easier time spelling cat, mat, hat, etc.
Remember to take it one word family at a time. This will help prevent your child from feeling overwhelmed with all the new information.
Here are some activities we recommend for working on word families:
- Say a word like “hat” and ask if it has the /a/ sound or the /i/ sound. Focus on sounding the letters out, not writing them, so your child can hear the differences better.
- Say two words and ask which has /o/ as the middle sound.
- Make a Tic-Tac-Toe board and put a vowel in each cell.
 Before placing their mark in a cell, your child will need to identify the vowel with its short sound.
 - Sound out CVC words by emphasizing the phonemes. For example, say /t/…/a/…/p/… and then blend together into tap.
- Place a t and a p with a space in-between. Ask your child to fill in the missing letter that will help form “top.”
- Switch the vowels. For this, you can play with magnetic letters. Ask your child to turn “tap” to “tip” and then to “top.”
Here are some great words with short vowel sounds to practice at home:
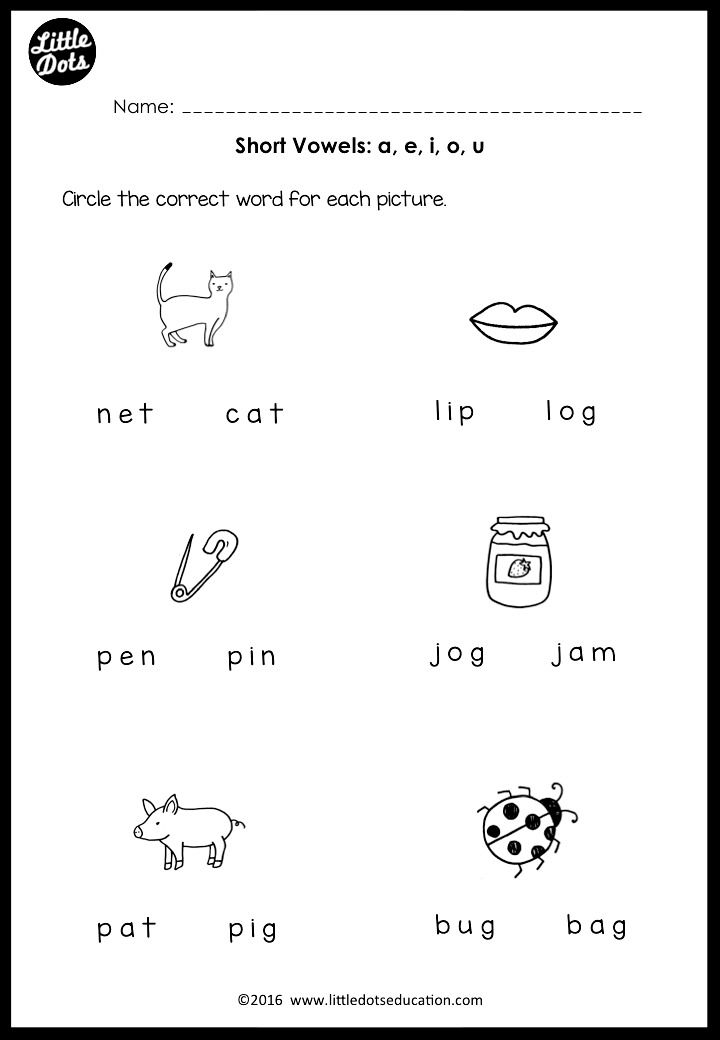
Short “A” Sound Examples:
- Cap
- Bat
- Bad
- Cat
- Dad
- Lap
- Tap
Short “E” Sound Examples:
- Bed
- Get
- Pen
- Bet
- Wet
- Fed
- Net
- Ten
Short “I” Sound Examples:
- Bin
- Sip
- Tip
- Zip
- Did
- Fit
- Nip
- Win
Short “O” Sound Examples:
- Rod
- Cod
- Jog
- Dot
- Fog
- Mop
- Pot
- Top
Short “U” Sound Examples:
- Bun
- Cut
- Pup
- Sun
- Sum
- Run
- Fun
- Hug
Tips For Teaching Long Vowel Sounds
1) Form Long Vowel Sounds
Although long vowel sounds are typically easier for kids to learn, we normally teach short vowels first.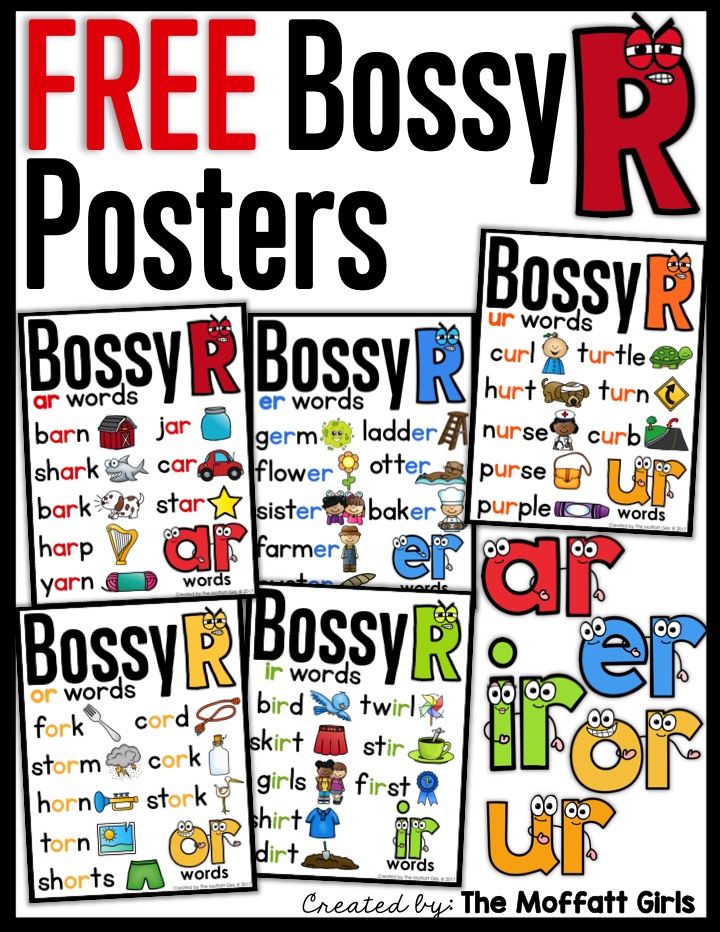 Why is that? It takes two vowels to make a long sound, and this can be tricky for kids to understand at first.
To get started with long vowel sounds, we begin teaching the silent e. It’s important for kids to understand that every vowel will change its sound when a silent e is put after the CVC form of a word.
For instance, if you put an e after the CVC word tap, the word changes to tape, and the vowel sound produced changes.
To help your child grasp this concept, begin with phonemic awareness. Ask them:
- Are tap and tape the same?
- Say the individual sounds slowly — t-a-p and t-ae-p.
- What changed?
You can also use magnetic letters to help illustrate the power of the silent e.
First, show your child the letter a. Make the short sound and then explain that you will give the power to its own name. Who can give the power? E! Tap the magnetic e on the magnetic a, adding it to the end of the word after, and — voila! — you now have a new word.
Using magnetic letters, you can then change tap to tape, bit to bite, dot to dote, and so on. While your child will hear that the sound changes, using magnetic letters will help them see what vowel contributes to the change in sound.
You can also use flip cards to demonstrate this concept. Fold the last eighth or so of an index card, and then write a CVC word, like tap, on the unfolded part and an e on the folded part. When you unfold the card, the word will change from tap to tape!
Note: The long o and u sounds can be a bit more complicated, so we recommend holding off on those until your child has gotten a good grasp on the others.
2) Correct The Spelling
To help your child gain a better understanding of long vowel sounds, why not play a game to help strengthen their knowledge?
To play this game, show your child the incorrect spelling of a CVC word and have them correct it. For example, using magnetic letters, spell out f-i-n-o but pronounce it as fine. Now your child, who’s learned the power of the silent e, will be able to replace the o with an e.
Here are some great words you can use for this activity:
Long “A” Sound Examples:
- Bake
- Lake
- Fame
- Date
- Fate
- Cake
- Make
Long “I” Sound Examples:
- Hide
- Fine
- Time
- Line
- Mine
- Pine
- Wife
- Ride
Long “O” Sound Examples:
- Joke
- Rose
- Woke
- Poke
Learning Vowels One Day At A Time
Learning vowels can be challenging for children. That’s why it’s important to take it one day at a time.
Help your child learn their basic vowels, start with the short CVC words, and then after some practice, help them nail the long vowel sounds, which are a little trickier.
Using the right strategy, you can give your young learner the confidence to face any unfamiliar word they may come across during reading activities.
With the help of the HOMER Learn & Grow App, continue exposing your child to all sorts of stories and reading activities. This will not only help them with their vowels, but it will also set a solid foundation for their literacy journey!
Author
Tips for Teaching Vowel Sounds
Learning letter sounds is one of the first steps in learning to read. And while most consonant sounds come easily to kids, vowel sounds can be an entirely different monster. For one, vowel sounds are not “felt” as much in the mouth as most consonant sounds, making it harder for kids to hear them. This is evident in kids’ invented spellings, such as VN for van. Vowel sounds can also be spelled several different ways, making reading and spelling them tricky {even for some adults}.
Today, I’m taking a bunch of readers’ questions about teaching vowel sounds and combining them to share some tips for teaching vowel sounds. If your young reader {or struggling reader} is stuck on learning vowels and vowel patterns, I hope that this post will bring some clarity.
*This post contains affiliate links.
{Update: This became a much longer post than I first intended it to be. 🙂 My best advice is to skim through the questions, which are in bold print if you have a specific question that you’d like answered. If you have another question related to teaching vowel sounds, please feel free to leave a comment.}
Tips for Teaching Vowel Sounds
Please note that my answers may not be your answers and that’s okay.
My goal in teaching vowel sounds is two-fold:
1- to teach in a developmentally appropriate way and
2- to teach the most common vowel patterns first because these are most needed for kids in their reading and spelling.
How do I know my child is ready for vowel sounds?
Answer: Just like there are reading readiness signs, there are also signs that a child is ready to learn more about vowels. Children are typically ready to start hearing vowel sounds after they can hear beginning and ending sounds in words consistently.
My favorite way to find out what sounds kids hear in words is to closely watch them spell {or misspell} simple CVC words. They will begin trying to include the vowel in words. Often times, they may use the wrong vowel, if left to spell independently {such as FEN for fan} and that’s okay.
This is a sign that they can hear that something comes in between the F and N and helps you know they are ready to learn more about them. I always celebrate this moment as a a teacher because this is a BIG step for many young learners.
Where do I start with teaching vowel sounds?
Answer: Short vowel sounds are much more consistent in their spellings makes them the perfect place to start. This is especially true if you explore the short vowels through word families.
Our Short Vowel Sounds Resource Pack includes wall charts, book marks, and a printable chart to help kids learn their short vowel sounds.
How do I teach short vowel sounds?
Answer 1: Start with word families…one at a time.
You can read more about word families and how effective they can be for beginning readers. Learning word family patterns helps kids to see that words’ spellings are connected; and because they can read or spell one word, they can read or spell other words. For example, if kids can read and spell cat, they can read and spell other words like rat, mat, hat, fat, or even that and flat. This is very powerful.
Word families are also very predictable in spelling as well as vowel sound. For example, the a sound in cat is different than the a sound in can {at least where I’m from}, but -at words all share the same a sound and the same -at spelling, making it easier for kids to learn.
The key is introducing word families one at a time, especially at first.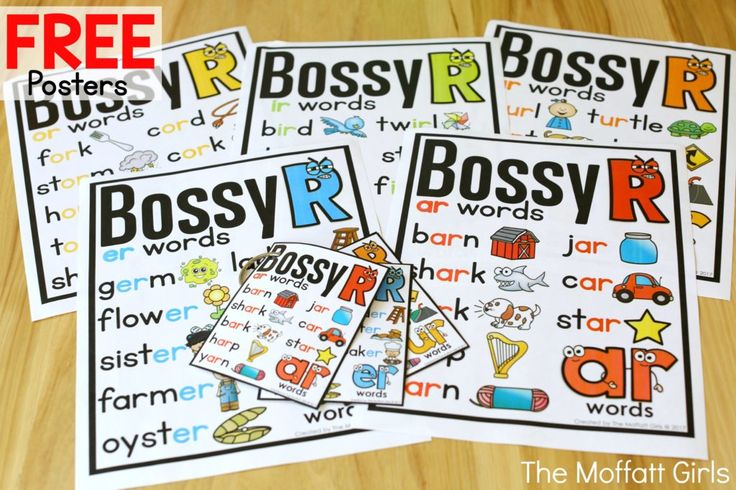 Once a child is comfortable with that family, move on to a new word family.
You can find some of the beginning word family work we do in Reading the Alphabet.
Once kids have a few word families under their belt, start mixing them up. I did this with the printables I made for the BOB Books, Set 1. The Measured Mom also has some fantastic Short Vowel Word Family Mats and Short Vowel Word Family Houses that work well for teaching kids short vowel word families.
Answer 2: Some kids don’t respond well to the chunking part of learning word families, such as f+at. Marie, of All About Learning, shares that drawing attention to the word families chunks can actually confuse some children, especially if they are showing signs of dyslexia.
So if word family chunks aren’t working, use word families without drawing attention to the chunk that they all share. For example, instead of reading fat like f + at {chunking the -at separate from f}, kids could sound it out f – a – t {as three separate sounds}.
For struggling spellers and readers, it helps once again to stick with one word family before moving on to other word families. Some of my favorite resources for kids learning to sound out those short vowel CVC words are our Sound it Out Strips and The Measured Mom’s Short Vowel Mats.
If your child continues to struggle with sounding out simple short vowel words, the ideas in my post, Helping Kids Sound Out Words, might be helpful for you.
When do kids start reading longer short vowel words?
Answer: As kids are becoming comfortable with short vowel CVC words and moving out of needing them in word families, they are typically ready to start spelling words with blends and digraphs in them. These include words such as clam, step, bath, or tent. {If these terms are new to you, be sure to visit my blends and digraphs post.
Have you seen these free resources that include blends and digraphs?
- Blends/Digraphs Chart
- Ending Blend Clip Cards
- digraph card games
- Blend BINGO
- MEGA pack Blends & Digraphs Game Boards.
- The Measured Mom also has a huge pack of Word Slider cards, which include short vowel words with blends and digraphs.
What do I teach after short vowel words?
Answer: Once kids are comfortable with short vowels with simple blends and digraphs, you may be tempted to move on to long vowels. But there are a couple more “stops” you can make before you arrive at long vowels. While it isn’t “wrong” to move to long vowels, some kids aren’t ready for that step just yet and that’s okay.
Two extra “stops” you can take are:
1. Teaching kids words that have blends and digraphs at the beginning AND end of words. Instead of a simple word like dump, work on reading and spelling words like stump or thump.
Our Short Vowel Spelling app does this with short vowels, starting with word families, moving to short vowel words with one blend or digraph and then challenging kids with longer short vowel words.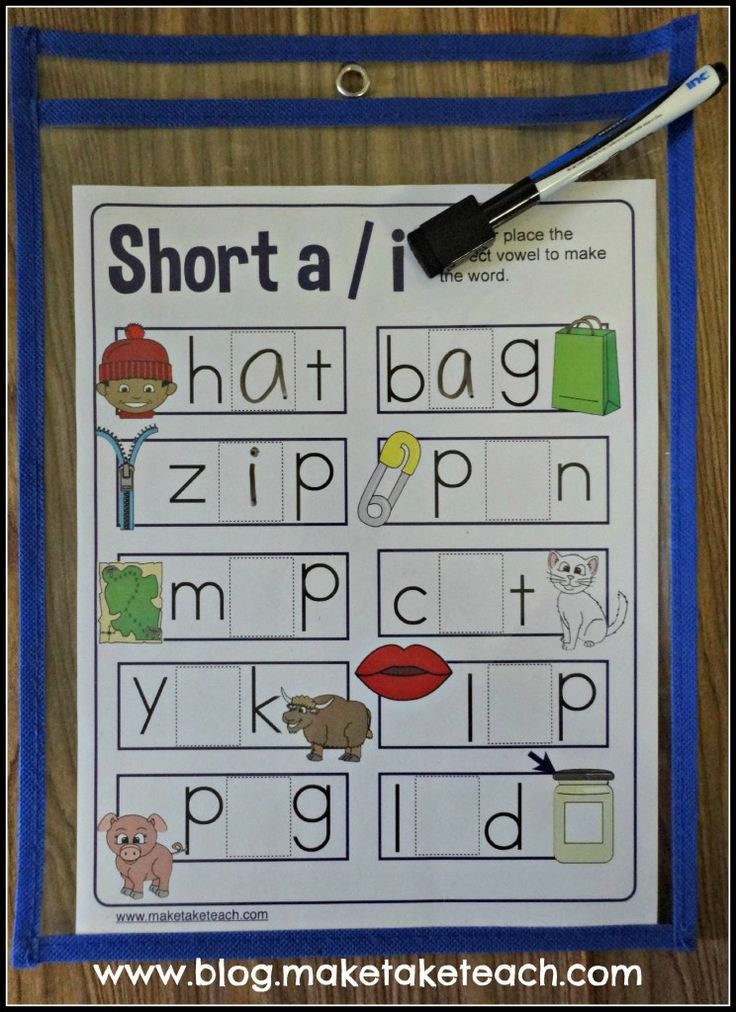
2. Teaching kids the bossy r patterns, which are ar, er, ir, or, and ur. Compare them to the short vowel words they already know, like the sorts at the end of Words Their Way’s Letter-Name Alphabet Spellers supplement book.
My child is not understanding the CVCe {long vowel} pattern. What do I do to help him get it?
Answer: Before you introduce words with long vowel patterns in them, sometimes it can be a great idea to just listen for sounds in long vowel words versus short vowel words.
Our Long Vowel Listening Game Pages are the perfect way to get kids listening for the long vowel sounds they hear in words.
It can help by teaching kids long vowel patterns by word families. The -ake family is one of my favorite word families to start with because you can spell so many words with it. I have an older post that shows a few ideas for introducing long vowel families specifically with the -ake family.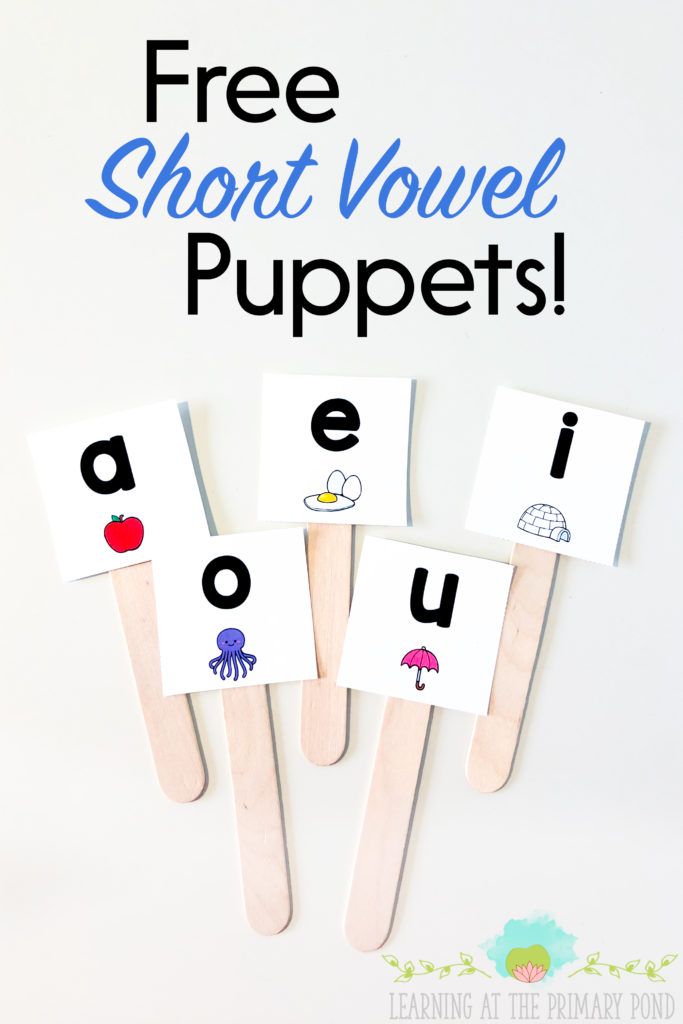 The Measured Mom also has a set of Long Vowel Word Family Mats, starting with CVCe words and moving to other long vowel patterns.
There are lots of long vowel patterns. Is there an order in which I need teach them?
Answer: Some long vowel sounds are not as common as others. For example, the ui pattern is not as common as the ew pattern for long u vowels. The best place to start is with the most common long vowel patterns because this is what kids see more in books and need more in their spelling.
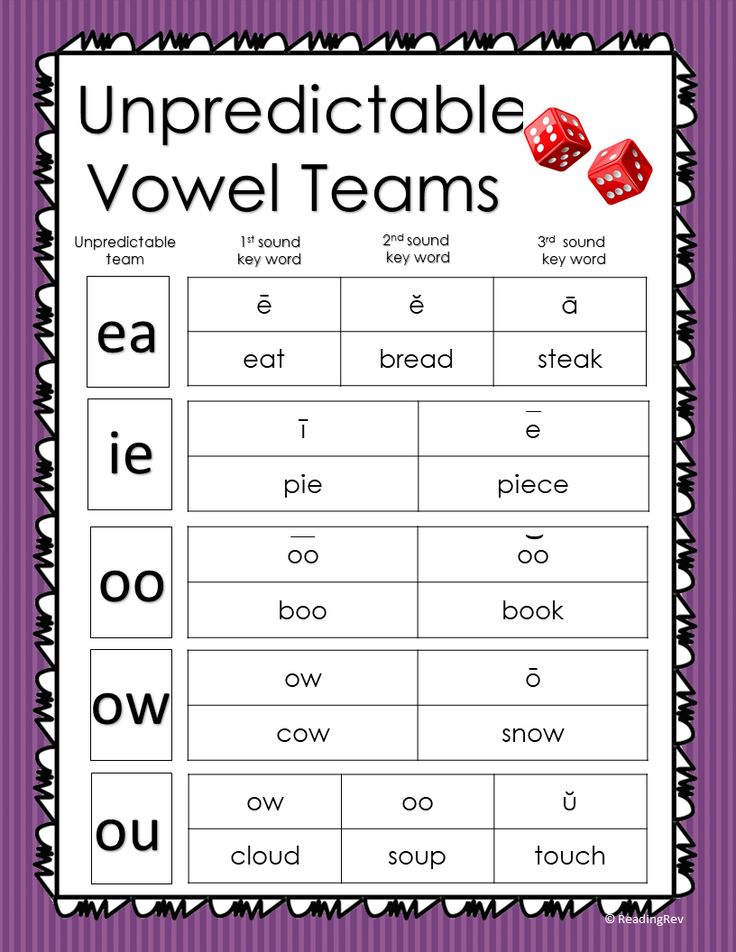
Typically, I start with the CVCe patterns, like the ones in our Long Vowel Spelling Game. If I had to break it down, this is how I introduce long vowel patterns {give or take}:
- CVCe patterns {a_e, i_e, o_e and u_e}
- Very Common Vowel Patterns {ee, ea, ai, oa, igh, etc.}
- Common Vowel Patterns {ay, ue, ie, ow, long oo, ew}
- Less Common Vowel Patterns {ui, ei, final y etc.
 }
}
Do I need to teach any other vowel patterns beyond short vowels and long vowels?
Answer: Yes. Like the bossy r patterns, there are other vowel patterns that are needed for reading and spelling. They include patterns like oo {in the word foot}, au, aw, ou, oi and oy. Besides the oo pattern, many of these are less common and could be taught alongside the less common vowel patterns.
More Resources for Teaching Vowel Sounds
- Phonics Book Series {from The Measured Mom}
- BOB Books {check out all our FREE Printables and Lesson Outlines/Lesson Plans}
- Words Their Way – love their supplement books
- All About Spelling
- Short Vowel Word Study
- Short Vowel Word Study App
- Long Vowel Word Study App
Want MORE Free Teaching Resources?
Join thousands of other subscribers to get hands-on activities and printables delivered right to your inbox!
How to learn vowels with a child: 10 letters in 5 lessons
Let's tell you how to learn 10 vowels quickly and easily in 5 lessons.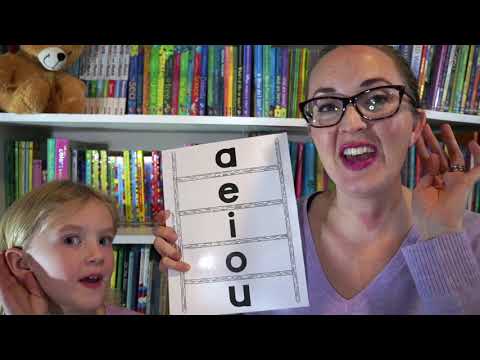 If you strictly follow the melodic recommendations from this article, your child will know all the vowels in a month, he will not have problems learning to read.
otvetprost.com
What you will need:
- Prepare 5 cards 12x10 cm. You can use cardboard or thick white paper. Write or print the letters 9 in red large bold type on them0003 A, O, U, S, E.
- Prepare 5 cards 9x10 cm. Write on them in blue font I, Yo, Yu, I, E .
- On the reverse side of the cards, write the letters by hand (for yourself, so as not to look at the front side when showing the letters to the child).
LESSON №1
At the first lesson you will need cards A, Z, O, Y .
1. Place the back of the cards facing you. Show the child the first card and say: “This is A ".
2. Then move the next card forward and say: "This is I am ".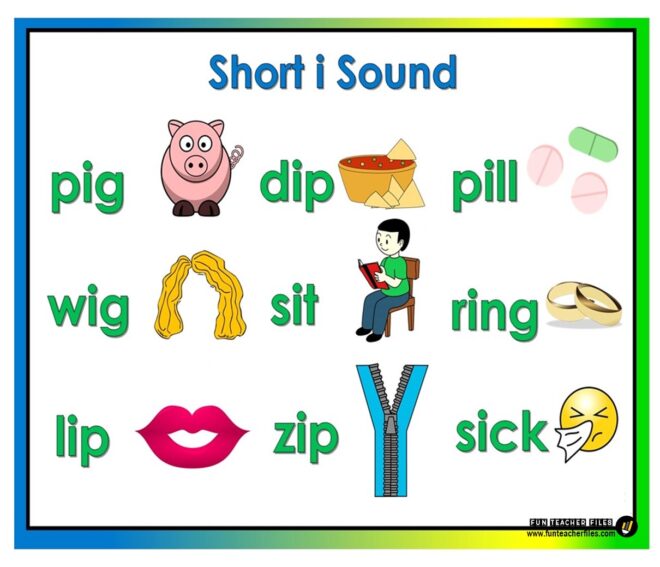
3. "This is O ."
4. "This is Y ".
- Show each card for no more than 1 second.
Look not at the cards, but into the eyes of the child. Come up with a fun game to get your baby's attention.
- Do not ask the child to repeat them.
Your task is to quickly show all four letters and say them like a rhyme.
- Every day until the next lesson, show the child cards with these letters, call them in the exact order as indicated above.
- IMPORTANT! Hold the cards so that the child does not see the next letter.
- Over time, take a long pause after the word "This is...". Pronounce it interrogatively.
- The child should simply say "Ah!", "Oh!", without the word "it".
Such a game with cards will take you no more than a minute, you can repeat it several times a day (minimum 5). The main thing is to do it regularly, do not miss classes.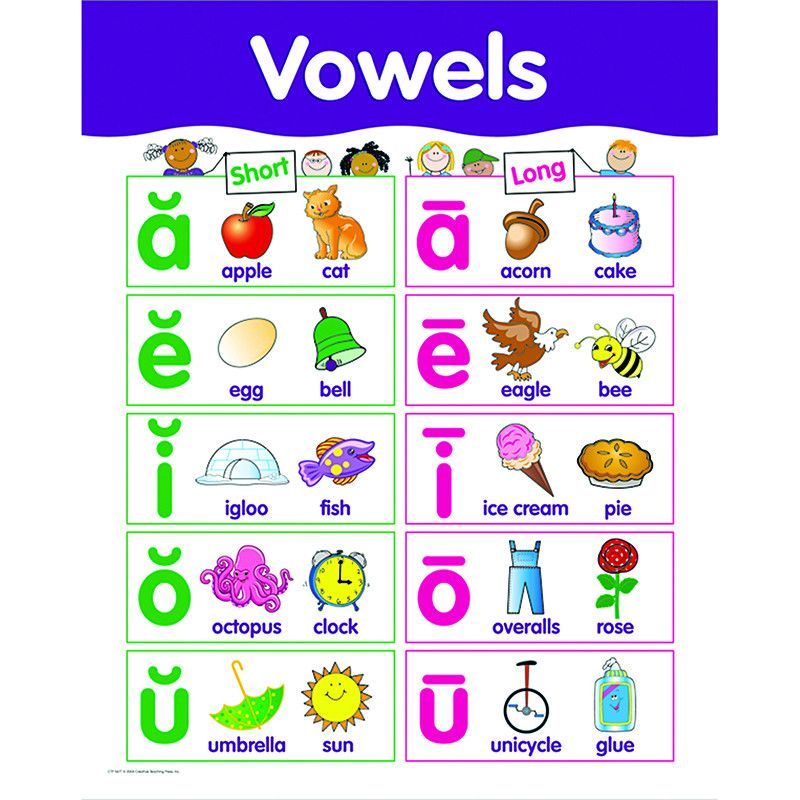
SESSION #2
- Repeat with the child A, Z, O, Y in that order.
- Spread the cards in front of the child in pairs: 1 row - A - Z ; 2 row - O - Yo .
Reinforcement games and activities
Play games with these letters to help children remember them as a rhyme and individually.
"Wind". Red letters are big brothers, blue letters are little brothers. A strong wind came up and mixed all the brothers. Shuffle the letters, but make sure they are not upside down. The task of the child: to put the cards in pairs, calling out loud: A - next to I , O - next to E . First help, and then let him do it himself.
Hide and Seek. Put the red letters on top and cover them with the blue ones. The little brothers hid under the big brothers and changed places so that (child's name) would not find them.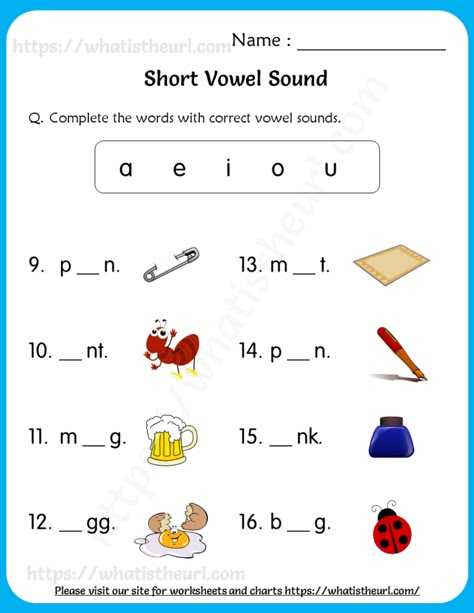 Guess which little brother hid under big brother O ? That's right, under O hid Yo ! And under A ? That's right, I'm !
"Hide and Seek". The same, but now the big brothers are hiding under the little ones.
Crow. Put the letters in pairs in the correct order. Move both palms (to make it harder for the child to guess) over the cards with the words: "The crow flew, flew, flew, flew and ... ate the letter." Quickly cover one of the letters with your palm: “Which letter did the crow eat?” If the child does not respond quickly, remove your hand for a few seconds and let him peek. If even then he doesn’t say, tell me, for example: “Next to O . That's right, Yo !" Over time, the child will remember the location of the letters and will be able to guess them easily.
"Cards". Shuffle the cards.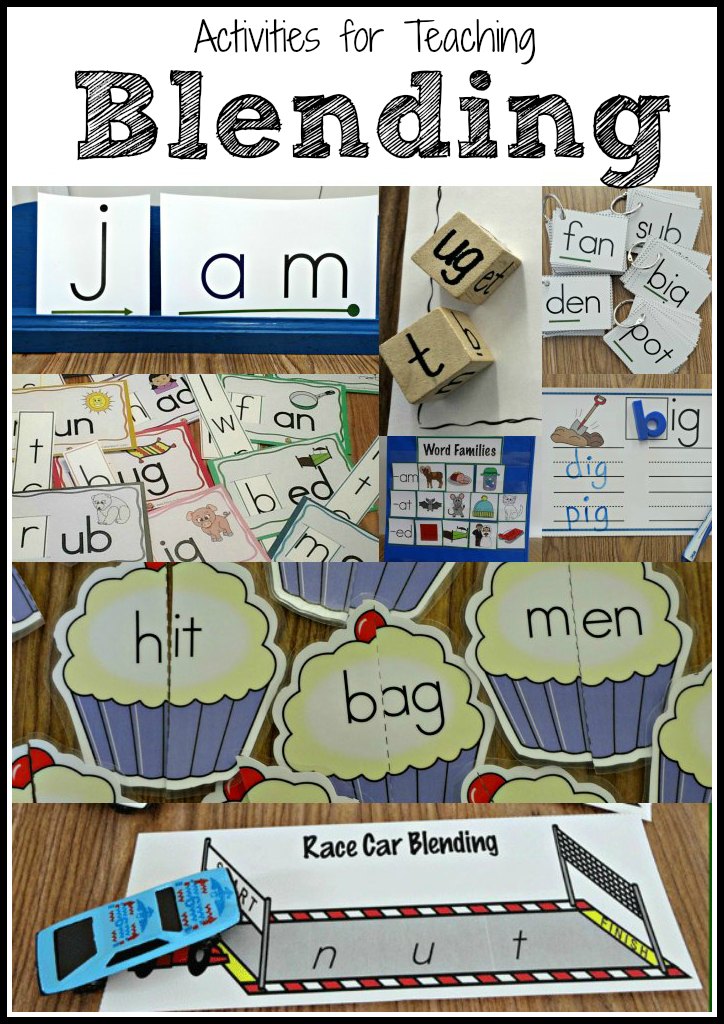 Take one and put it in front of the child: "What is this?" If he guessed right, he takes it, if not, the card remains with you. First, it is better to throw out cards in pairs: first O , then E , A - I , etc. If you see that the child does not experience any difficulties and calls everything correctly, show in reverse order and at random.
It is better to play these games once a day, unless the child asks for more. Stop the game while he still wants to play: “We’ll finish the game another time” so that the kid doesn’t get bored with your activities and looks forward to the next one.
Repeating the past and learning new: A - Z, O - E, U - Yu
After you have played five games with the first two pairs of letters, get the next pair of cards Y - Y.
In this lesson, show the child already three pairs of letters. Just like you showed him in the first lesson.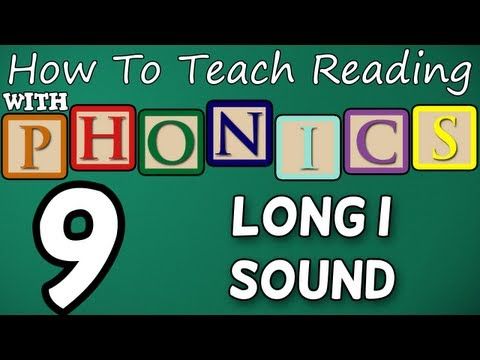 The child will name familiar pairs himself, and you quickly call the last two you, without giving the child the opportunity to make a mistake. In two or three days of the show, which will take place before the next lesson, the child will remember a new rhyme:
“This is I ”
“This is O ”
“This is ё ”
“This is U ”
“This is Yu ”
Train a few days , show the child several times a day already these three pairs of vowels. IMPORTANT! In reinforcing games, continue to use only the first two pairs for now: A - Z, O - E, and no more than once a day.
SESSION №3
Games and exercises for consolidation
Place six cards in pairs on the table in front of the child, calling them out loud, in the order in which you showed them to him. Play the same games as described in lesson #2.
We repeat the past and learn new things: O - E, U - Yu, Y - I
Do not use the first pair of cards ( A - Z) . Now the cards are in a pile like this: O - E, U - Yu, Y - I. In all subsequent lessons, do the same so that the total number of letters is 6. The technique is the same: the child calls the familiar letters himself, the new ones - you.
Classes will take you about six minutes a day, but it's important not to miss a single one.
Do not forget that it is not time to play reinforcing games with a new couple.
LESSON #4
Reinforcement games and exercises
The number of vowels with which we play reinforcing games increases with each lesson: now five games need to be played with 8 letters.
We repeat what we have learned and learn something new: U - Yu, S - I, E - E
Remove 9 from the pile0003 A - I and O - E and add pair E - E . IMPORTANT! The letters E and E , which children often confuse, never “meet” when shown: when the letter E “came” in the fourth lesson, the letter E had already “left”.
Do exactly the same as in the previous lessons, adding a new pair. Don't play reinforcing games with her yet.
SESSION #5
Reinforcement games and activities
In this activity, play games with all ten vowels. You can do this for as long as you want until the child loses interest. If you see that the child recognizes and names vowels quickly, does not make mistakes and does not think, move on to studying consonants and reading.
- Twice a week give new material, and repeat the rest of the day.
It is important that the classes are daily (regular). Less than 10 minutes a day is enough to see the result: the child will remember all 10 vowels, learn to pronounce them correctly and not be confused.
- Do not try to help your child remember a letter based on some external signs or associations.
"This is my mother's letter", " Yo with dots, and this is E without dots. By doing this, you only interfere and confuse! When reading, there will be problems recognizing letters: the baby will have to remember both mother O liu, and aunt Yu liu, and Yo zhika with dots ...
- The most important thing that children should learn when studying vowels is that that they can be sung.
videouroki.net
How to explain vowels to a child? Vowel sounds are formed only with the help of voice. The air, when it passes through the throat and mouth, does not encounter obstacles, as is usually the case with the pronunciation of consonants. We can draw a vowel sound for as long as we have enough breath.
doschkolonok.blogspot.com.by
Tell your child that big red letters are big brothers, blue letters are little brothers. Both of them love to sing songs.
Big brothers sing in scary deep voices. Demonstrate how exactly: A, O, U, S, E. You can use the key of the scale: sol-fa-mi-re-do.
Little brothers sing in so-o-o-o-o little voices. Sing in a high voice: I, Yo, Yu, I, E (same melody, but one or two octaves higher). Singing, show the letters on the cards.
These songs will help children memorize vowels by ear.
- A very IMPORTANT point to pay attention to when teaching letters. Show your child the vowels written in different fonts and colors.
The kid must learn to recognize the letter in any shape and size.
- Learn a poem about vowels with your child:
Vowels stretch in a ringing song,
Can cry and scream
Game method of learning ten vowels in five lessons
(full presentation including five videos)
So, you set out to teach your kid to read books. You will start, of course, by learning letters with it. In what order should they be taught? Of course, not in alphabetical order and not in complete disorder, when a child is given mixed vowels, then consonants.
An important factor at the initial stage of learning to read in warehouses is the child's solid knowledge of the ten letters denoting vowels (hereinafter, for simplicity, I will simply call them "vowels"). I have repeatedly drawn my attention to the fact that children who do not read well, even schoolchildren, hesitate to name vowels, and when reading they stumble, remembering whether it is E, or E, or Yu. In view of the paramount importance of knowing ten vowels for full reading (so that the child does not “stumble” in each warehouse) I developed this game technique for quickly learning them, which I have been successfully using for several years now.
The methodology is based on the principle of multiple display and synchronous voicing of a group of characters with their gradual partial replacement, proposed by the outstanding teacher Glenn Doman. In this case, the task is facilitated by the fact that in Russian the vowels form pairs that seem to rhyme: five reinforcing games I developed.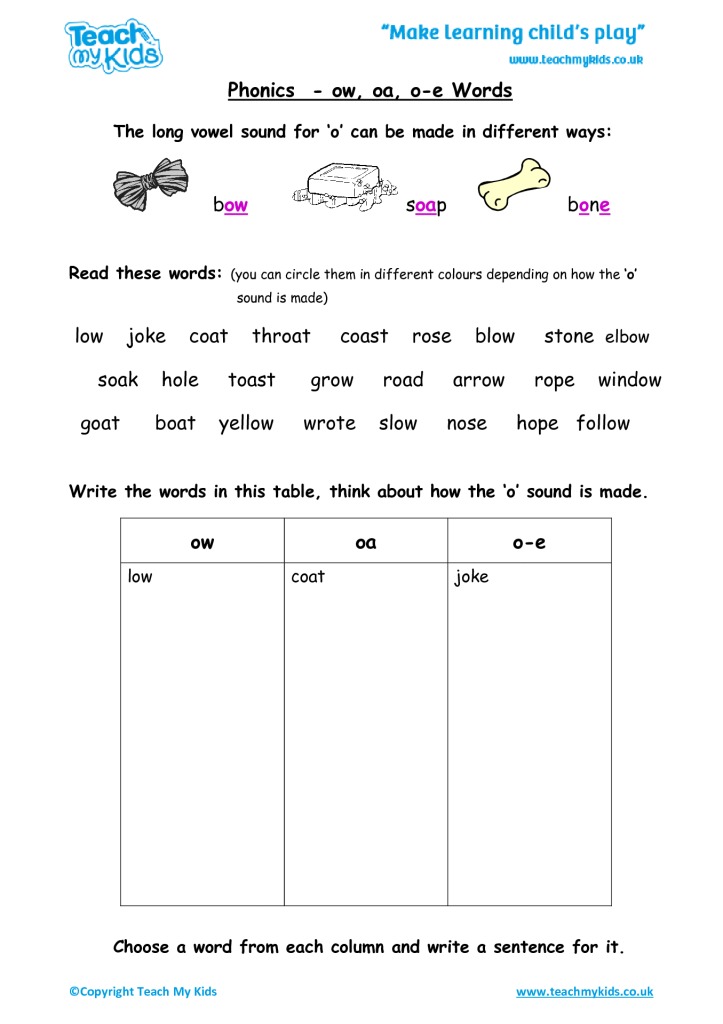
The purpose of the lessons according to this method is to give the child a solid knowledge of ten vowels in five lessons. Often, parents believe that their child does not need this: “He has known all the letters since the age of two.” When you start showing him the letters, it turns out that he does not know them well. Confuses E with Yo or Yu, does not know E, Y, sometimes thinks, remembering some letter. Before you start learning to read, the child's knowledge of all vowels must be brought to automatism.
From other ways of studying letters, which often only slow down their assimilation and make it difficult to use (A - watermelon, I - turkey or O - like a bagel, Yu - Yulia's letter, I - looks like a telegraph pole, etc.), this The technique is simple and efficient. I calculated that the entire teaching of a child to ten vowels using this technique takes a total of just over an hour.
This technique is also included in the lessons of the FIRST STAGE OF TRAINING.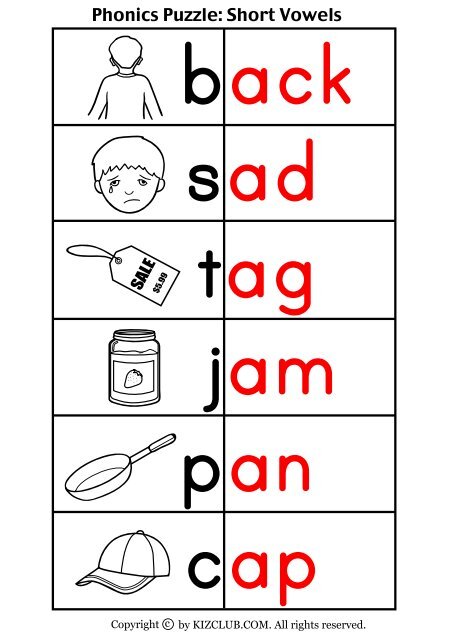 But in view of the fact that it has an independent value and can be used even before learning to read, I have separated it from these five lessons into a separate section of the e-book.
The duration of each of the five lessons of this technique is a few minutes. Lessons can be conducted by both the teacher and the parents of the child twice a week. On the remaining days of the week, parents repeat the contents of the previous lesson with the child. It takes them two to seven minutes a day to do this.
Lesson #1
Print the supplied vowel cards on white paper, preferably as heavy as your printer will allow (see Appendix), and cut out the first four letters. If you make cards yourself, write the letters A, O in large print with a red felt-tip pen on cards 12x10 cm in size, and I, E in a slightly smaller font with a blue felt-tip pen on cards of size 9x10cm.
On the back of each card, write this letter by hand for yourself so you don't have to look at the front side when showing the letters to a child.
Display of the first two pairs of vowels (A-Z, O-Yo).
Stack two pairs of cards as shown, with the back side facing you. (Video clip 1)
Move card A closest to you forward (as indicated by the arrow) and show it to the child. Say, "This is A." Then shift the next card forward and say: “This is me”; then - "This is O"; and then - "This is Yo." Show each card no longer than 1 second. Make it fun, in the form of a game. Look not at the cards, but into the eyes of the child to see where he is looking and to attract his attention. Most children already know the letters A and O. You can pause and give the child the opportunity to name them. And quickly call the letters I and E yourself, before the child, so as not to give him the opportunity to make a mistake. And do not require the child to repeat them. Your task is to quickly show these four letters and at the same time recite a small rhyme:
“This is A”
“This is I”
“This is O”
“This is Y”
Children can easily memorize even longer verses, especially since they will soon begin to repeat this easy rhyme on their own.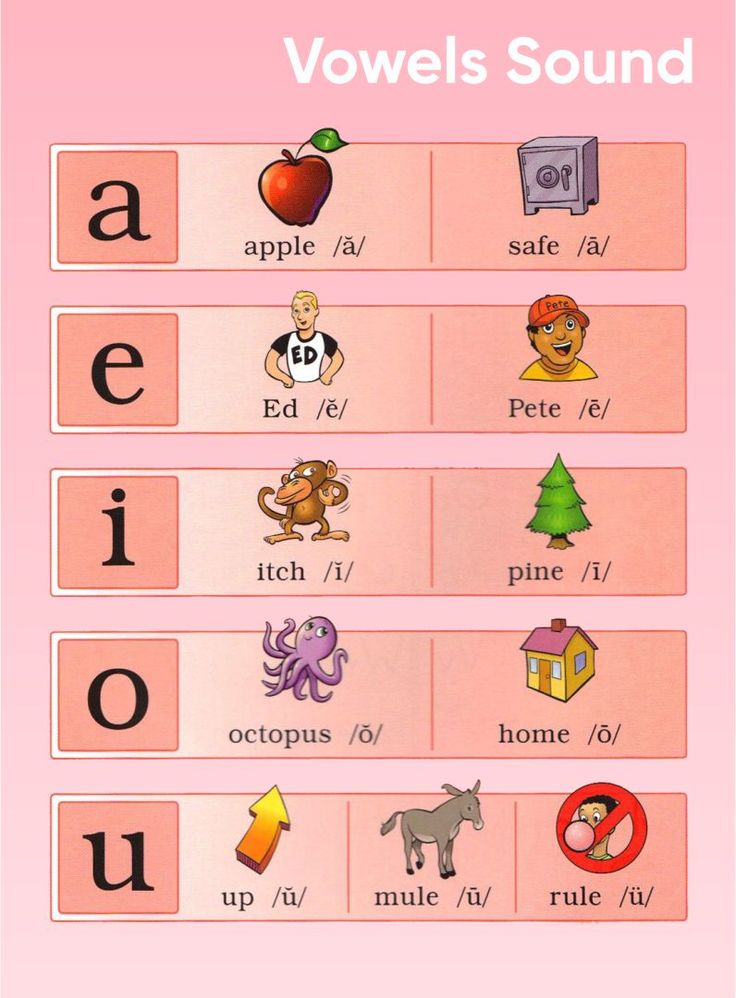
If you are a teacher, explain to the child's mother in class that she must show and say these four letters every day until the next class, at least five times a day. Have her do this the first time in your presence so you can correct her if she does something wrong. Feel free to explain everything to your parents in as much detail as you would to their children, and check how they understood you. Shuffle the cards. Ask your mom to arrange them in the correct order. Then she should sit or put the child in front of her and, while showing the letters, look into his eyes. She should pronounce letters unfamiliar to the child clearly and before him. A typical mistake is when mom takes out the next letter and holds it in her other hand without covering the next letter with it. In this case, the child sees two letters at the same time.
Tell your mother that all homework will take her half a minute a day, as one such display lasts five seconds. It's important not to skip them.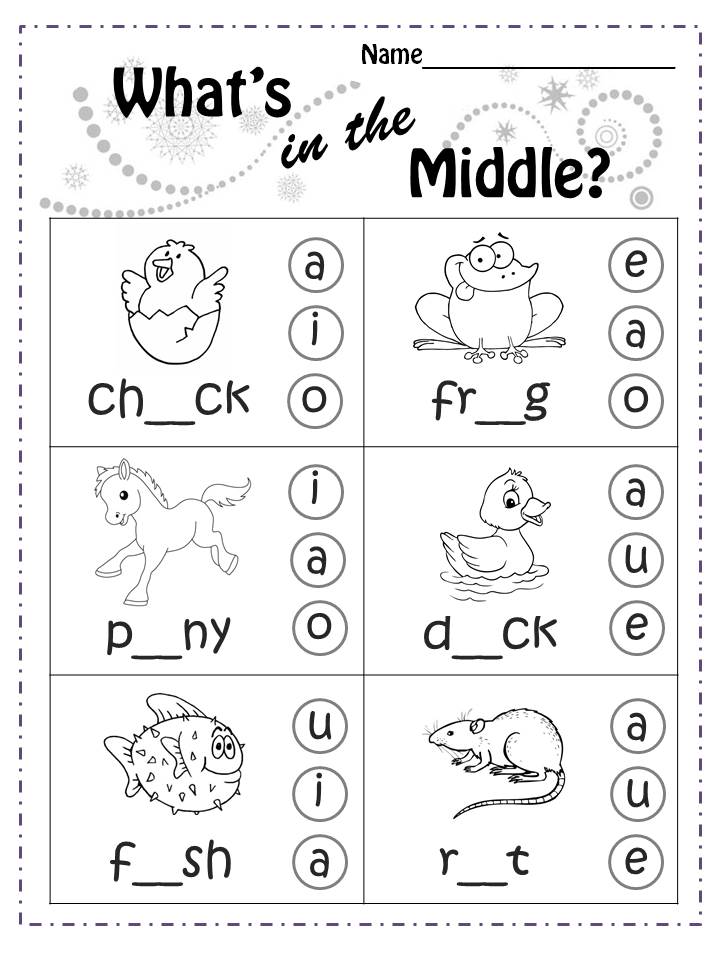 Gradually, the pause after the word "This is ..." should be increased, and the word itself should be pronounced with an interrogative intonation, as if encouraging the child to name the letters himself. The child must simply name the letter. He should not say "this is A" or "letter A". Give your mother the four letters you made, ask them to bring them with you to class.
Lesson #2
By the beginning of this lesson, the children have already repeated for two or three days after their mother A, Z, O, Yo and remember them well in this order.
Reinforcing games.
Now with these four letters you need to play five reinforcing games so that the children memorize them firmly both in the order of the learned rhyme and separately.
Place four cards on the table in front of the child in pairs, calling them out loud, in the order in which they were shown to him. After that, start playing.
1st game. "Wind".
Explain to your child that the red letters are big brothers and the blue letters are little brothers.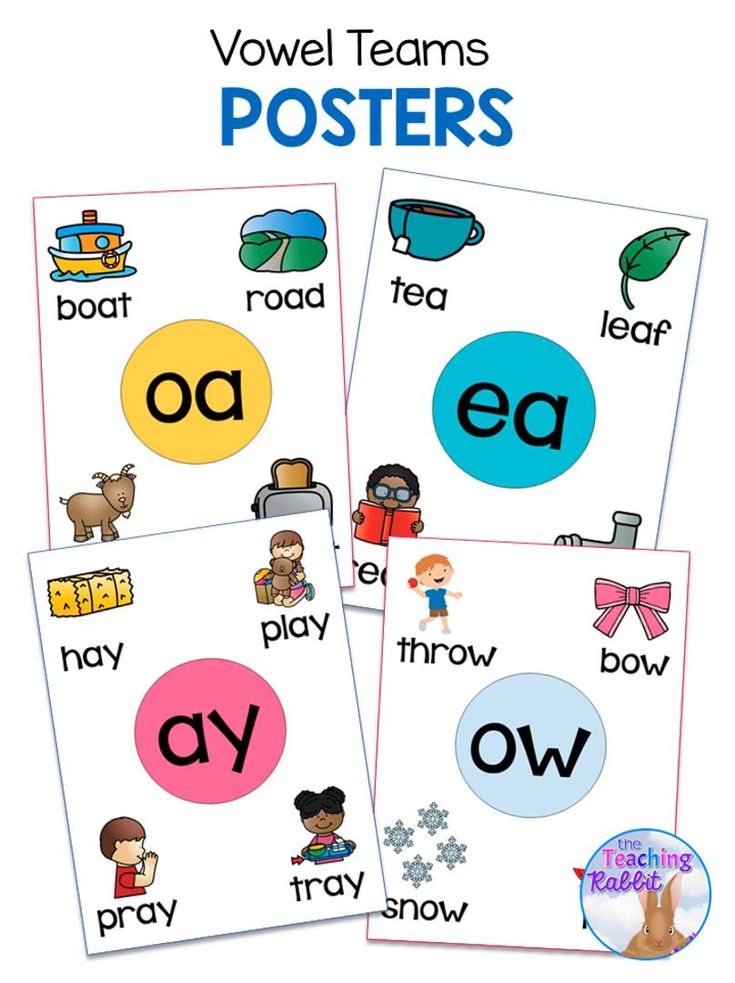 Then say: "The wind came up and mixed all the brothers." Shuffle the letters yourself so they don't turn upside down. Then let the child put them in order in pairs, calling out loud: A - next to me, O - next to Yo (at first with your help). ( Video fragment 3 )
2nd game. "Hide and Seek".
Cover the smaller cards with large ones (red letters on top) and change the order of these pairs: “The little brothers hid under the big ones and changed places so that Lenochka would not find them. Guess which little brother hid under big brother Oh? That's right, Yo hid under O! And under A? That's right, me!"
3rd game. "Retreats".
You play the same way, but this time it's the other way around - the big brothers hide under the little ones. ( Video fragment 4 )
4th game. "Crow".
Move your palms over the cards laid out in the correct order and say: "The crow flew, flew, flew, flew and .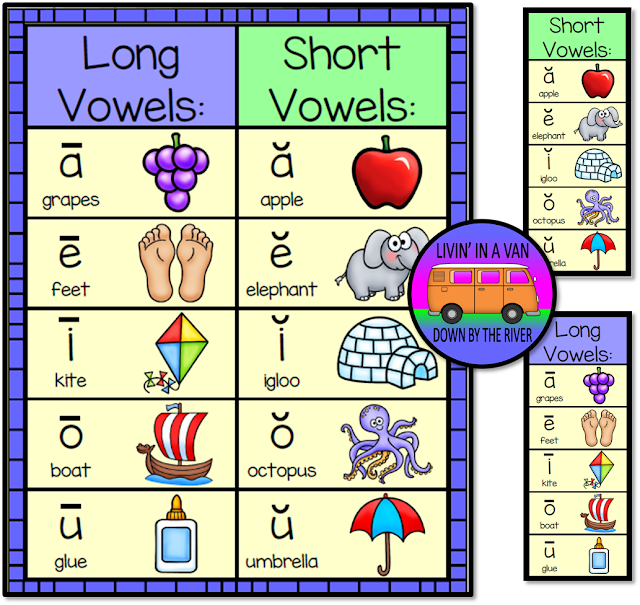 .. ate the letter." Quickly cover one of the letters with your palm: “What letter did the crow eat?” It is better to drive with both palms at the same time, so that it is more difficult for the child to guess which letter you are going to cover. If he couldn't answer quickly, tear your hand away for a moment and cover the letter again. If even then he doesn’t say, tell me, for example: “Next to O. That’s right, Yo!” Over time, the child will remember the location of the letters and will guess them easily.
5th game. "Cards".
Now play with your child with the same cards as adults play cards. You shuffle the cards, then toss a card on the table in front of him and ask, "What is this?" He called correctly - he won and took the card, he made a mistake - another student takes it, and at home - his mother. Do not rush to allow other students to prompt, let the child think a little. At first, try throwing cards in pairs: first O, then E, A - Z, etc. If the child wins confidently, throw in pairs, but in reverse order. Then start throwing around. ( Video fragment 5 )
The mother present at the lesson memorizes and writes down how to play these five games at home. You only need to play once a day, unless the child himself asks for more. But each time stop the game while he still wants to play: "We'll finish the game another time."
Display of three pairs of vowels (A-Z, O-Yo, U-Yu).
After you have played five games with the first two pairs of letters, cut out the next pair of U-Y cards you printed out, write them on the back for yourself and add them to the pile (after the lesson, give this pile, all six letters, mother).
Now show the child three pairs of letters as you showed him two pairs in Lesson 1. Only this time the first four letters are called by the child, and you quickly name the last two yourself, preventing him from making a mistake (remind your mother about this too). Give mom the same instructions as in lesson #1. By the next lesson, in two or three days of the show, the child will already remember a new rhyme:
“This is A”
“This is I”
“This is O”
“This is Y”
“This is U”
“This is - Yu"
(Video clip 2)
Give your mother the six letters you made and ask her to bring them with her to the next class.
Attention! After lesson number 2, the mother shows the child several times a day already these three pairs of vowels, but so far she plays reinforcing games with him only for the first two pairs (A - Z, O - E) once a day.
Lesson No. 3
By the beginning of this lesson, the children have already learned the rhyme:0305 “This is U”
“This is Yu”
and the letters A, Z, O, Yo, thanks to five reinforcing games, are known randomly. Now we need to reinforce the knowledge of the last vowels they have learned U and Yu.
Reinforcing games.
Place the next six cards in pairs on the table in front of the child, calling them out loud, in the order in which they were shown to him. After that, play the games detailed in lesson #2.
Display of three pairs of vowels (O-Yo, U-Yu, Y-I).
Put away the first pair of A-Z cards, cut out the next pair of S-I cards you printed, write the cards on the back for yourself and add them to the pile.
Starting from this lesson, each time we add a new pair of vowels, we remove the first pair so that the total number of letters shown does not exceed six. The cards are now stacked in the following order.
Show the child these three pairs of letters as you did in previous lessons. As before, the child calls the first four letters, and you quickly name the last two yourself, preventing him from making a mistake (remind your mother about this too).
Give your mom all the letters you made and ask her to bring them with you to the next class. Tell your mom that all homework will now take her no more than six minutes a day and remind her that it is important not to miss any of them.
Attention! Pay attention to the mother that after this lesson, the child needs to be shown these three pairs of vowels several times a day, putting aside the well-known A - Z. And in the evening it is necessary to play reinforcing games with him only for the first three pairs: A - I, O - E, U - Y (so far without Y, - I).
Lesson No. 4
By the beginning of the fourth lesson, children know the following vowels in pairs: A - Z, O - E, U - Y, Y - I, and the letters A, Z, O, Y, U, Y know thanks to reinforcing games and scattered. Now you need to consolidate the knowledge of the last vowels they have learned, Ы and И.
Reinforcing games.
You have already understood that the number of vowels with which we play reinforcing games increases with each lesson: in the second lesson we played with four letters, in the third - with six, and now these five games need to be played already with eight letters.
Place the next eight cards in pairs on the table in front of the child, calling them out loud, in the order in which they were shown to him. After that, play the games detailed in lesson #2.
Display of three pairs of vowels (U-Yu, Y-I, E-E).
This time you remove the first two pairs of cards A - Z and O - E, and cut out the last pair of E - E you printed out.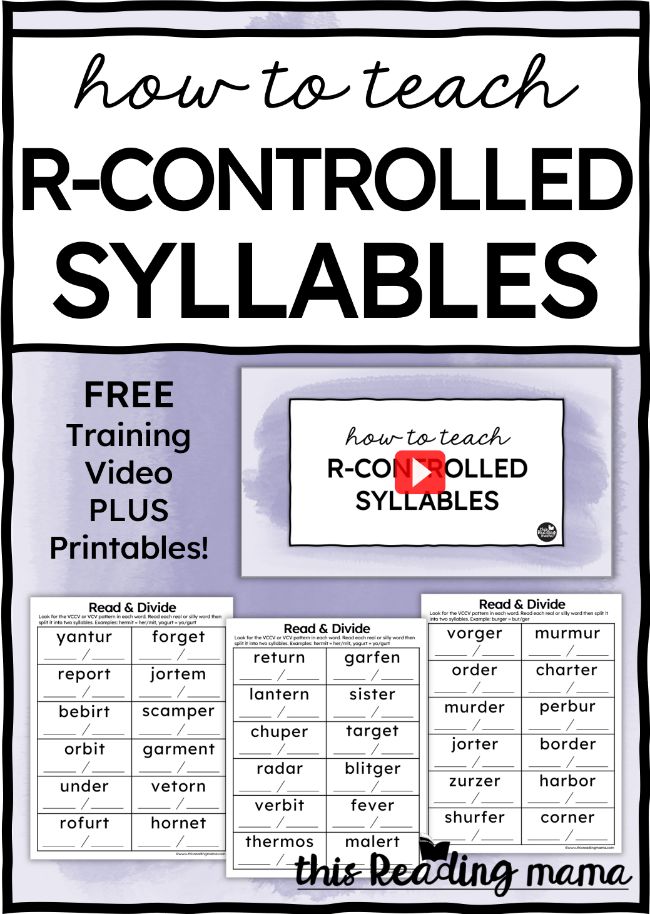 Write these cards on the back for yourself and add them to the stack. The total number of letters shown is still six and the rhyme is just as easy to remember. It is also important that the letters E and Yo, which children often confuse, never “meet” when shown: when the letter E “came” in the fourth lesson, the letter Yo already “left”. The cards are now stacked in the following order.
Show the child these three pairs of letters as you did in previous lessons. As before, the first four letters are called by the child, and you quickly name the new E and E for him yourself, preventing him from making a mistake (remind your mother about this once again). Give your mother all ten letters you made, ask them to bring them with you to class. Tell her that all homework will now take her no more than six to seven minutes a day and remind her that it is important not to miss a single one.
Attention! Pay attention to the mother that after this lesson, the child needs to be shown several times a day the last three pairs of vowels, putting aside the well-known A - Z and O - E.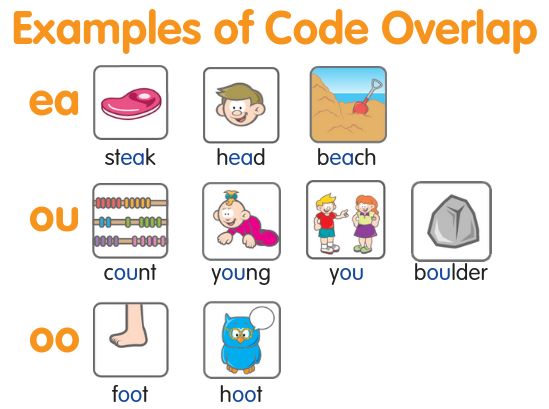 And in the evening, you need to play reinforcing games with him for the first four pairs once : A - I, O - E, U - Yu, S - I (so far without E, E).
Lesson №5
By the beginning of the fifth lesson, children know all ten vowels, it remains only to consolidate the knowledge of the last two vowels they have learned E and E.
Reinforcing games.
In this lesson, five games should be played with all ten vowels already.
Place ten cards on the table in front of the child in pairs, calling them out loud, in the order in which they were shown to him. After that, play the games detailed in lesson #2.
Now you can give your child's mother all ten letters you made so that she continues to play reinforcing games with him once a day until the child begins to cope with them easily and accurately. Then, of all the games, you need to leave only the last one - “Cards”. With this game, you need to ensure that the child recognizes each letter instantly. To do this, when showing letters, you need to cover them with your palm, opening them only for a moment. This game only lasts a few seconds, and in the process of learning to read, it is worth continuing to play until the child begins to read.
Conclusion.
If you strictly adhered to this lesson plan, then after lesson number 5 your child knows all ten vowels as you know them: he calls them without hesitation and without mistake. It happens, however, that the child stumbles before naming any letter, and sometimes he confuses any two with each other. I noticed that this happens in two cases. Firstly, if the child has already been taught haphazardly before, and the error "settled" in his head. Secondly, if parents are engaged in amateur performances, they “run ahead” and show the child at home those vowels that you have not yet given in the lesson. Remind parents that this should not be done, even if the child already knew some letters before.
If, nevertheless, for any of these reasons, the child makes mistakes or names some letter uncertainly, just continue playing Cards with him for some more time. At the same time, if the child does not remember any letter well, for example, Yo, throw this card together with O: first O, then Y. Then throw them in pairs, but in reverse order, and only over time start throwing randomly. But never try to help your child remember a letter by external signs or associations: “This is my mother’s letter, and this is Yulia’s letter, this is Yo with dots, and this is E without dots.” This will completely confuse him: he will remember that one of them has dots, but he will not know which one, and will try to guess. And to read something simple, like "beloved kitten", he will not be able to do it at all. After all, you will have to not only deal with “Yo with dots”, but also remember your girlfriend Yulia, aunt Ira and mother Olya. So resist the temptation to teach your child letters as soon as possible somehow, but with the help of this technique, lay in him a solid foundation of knowledge of vowels from the very beginning. Moreover, memorizing systematically shown letters in the form of three-line rhymes does not require any effort from the child, and both children and parents like reinforcing games.