Research based strategies for teaching letter sounds
Try These 10 Fun Phonics Activities to Teach Letter Sounds to Children
What is phonics?
Phonics is the relationship between letters and sounds as well as the understanding of how those sounds connect to form words.
For instance, the /c/ sound, the short /a/ sound, and the /t/ sound blend together to form the word cat.
What does the research say about teaching phonics?
Research indicates the importance of teaching children phonics as a preliminary step for learning to read.
Research also suggests that systematic instruction which incorporates wordplay (manipulating letters/sounds in words to change the word), writing words, and using manipulatives such as magnetic letters to create words are all effective strategies for teaching phonics.
Additionally, research demonstrates the benefits of applying a multi-sensory approach to phonics instruction.
A multi-sensory approach incorporates sight, sound, touch, and movement into instruction. This helps address a variety of learning modalities, enabling students to better absorb the information.
Ten Fun Research-Based Phonics Activities to Teacher Letter-Sounds
1. Play the game “I Spy.”
In the game “I spy” you pick something that you see and don’t tell the child what it is. The child has to guess what you see.
Here is how you can use “I Spy” to teach letter sounds (phonics):
Let’s say you see a book in the room: You can say: I spy something that starts with the letter B or I spy something that ends with the letter K.
After your child guesses what “you spy” have them tell you the sound the letter makes. If your child cannot guess what “you spy” or does not know the letter sound, provide them with assistance.
You can also do the same thing using letter sounds. For example, if you see a book, you can say “I spy something that starts with (make the sound for b)” or “I spy something that ends with (make the sound for k).
After your child finds the object, have them tell you what the first letter (or last letter) of the object is. Take turns with your child. First you spy, then they spy, or vice versa.
2. Put letters on flashcards for a fun activity.
Put one letter on each card as shown below (create upper case and lower case cards):
Here is a sample activity:
Pick three to four-letter words and scramble them up. For example, if the word is pig, put the letters out-of-order (e.g., ipg) on the table in front of your child.
Put the letters one to two feet in front of your child so she has room to work. Next, give them a sheet of paper with three (or four) spaces for letters on it, like so _ _ _.
Then tell them the word or show a picture of the word and give the instruction (e.g., “I want you to make the word pig on the lines below, using the letters above).
If you have Magnetic Letters, you can use these as well. You can also encourage your child to write the letters in with a pen or pencil.
You can do word families to help your child understand that many words are spelled the same way, with only the first letter different. So after pig, try big, wig, and rig.
Rhyming practice is another helpful strategy when teaching kids about letter sounds.
3. Play letter-sound Go Fish.
Make doubles of flash cards. Each player gets five cards and the rest of the cards go in a pile in the center of the table.
Player 1 calls out a letter-sound and asks if player 2 has a match.
If they don’t have a match, tell them to “go fish” which means to choose from the pile. See more detailed rules for how to play Go Fish here.
4. Make your own phonics Bingo game.
Draw a grid or make one on the computer like the one below. (You can also print out a large version of the one below here). You can find more blank grids here).
While the grid above has 25 boxes, you can play phonics Bingo with 9 or 16 boxes also.
Here are four options for getting pictures into the boxes:
Option 1 – Draw something simple in each box.
Examples of simple drawings for each letter of the alphabet include an apple, a banana, a comb, a door, an egg, a feather, a girl, a hat, an ice-cube, a jar, a kite, a light bulb, a mitten, a nose, an orange, a pan, a queen, a ring, a spoon, a table, an umbrella, a vase, a worm, a xylophone (that one might not be so easy to draw), and a zipper.
Use colors to make it look fun.
Option 2 – Get images from Google Images, print them, cut them out and glue them in the boxes.
Option 3 – Go to Google Images, copy each image by hitting “control c’ or by right-clicking on the image and selecting copy, then paste each picture into each grid box by right-clicking in the grid and clicking paste or by hitting “control v.”
Option 4 – Find and print out ready-made Bingo grids by doing a search for Kids Bingo Grids
You can play the Bingo game four ways:
1 – Call out a letter sound. If your child has a picture on her Bingo card that starts with that letter sound, have her put a coin, checker piece, or small piece of paper over the picture (you can cut index cards into small pieces.
This will work better than regular paper because the pieces will be heavier and stay on the Bingo card better).
2 – Call out a letter. If your child has a picture on her Bingo card that starts with that letter, have her cover the picture.
3 – Call out a letter sound. If your child has a picture that ends with that letter sound, have her cover the picture.
4 – Call out a letter. If your child has a picture that ends with that letter, have her cover the picture.
When your child fills up a row, up, down, or diagonally, she gets Bingo (she wins).
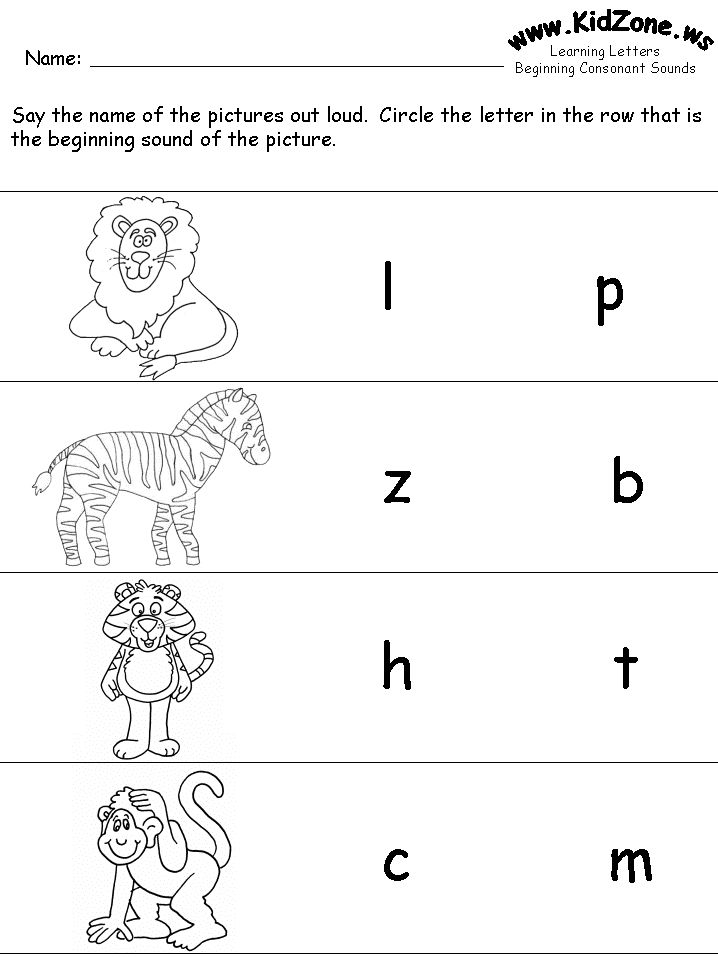
5. Make flashcards with a picture on one side and the letter the picture starts with (or ends with) on the other side
You can draw the pictures yourself or make flashcards using pictures from Google Images.
To make a flashcard from Google Images, go to the Image, copy it, “right-click” on it and click copy or hit “control c.” Then go to a word document and paste (right-click and click paste or “hit control v.”).
Then print out the pages, cut out the picture, and write the corresponding letter on the back.
If you know how to insert tables, you can put several pictures on the page in table boxes, print the page, cut out all the pictures, and put the letters on the back. Here is an example:
Show your child a picture and ask them to tell you the letter (or letter sound) it starts with (or ends with). If they are correct, let them know and show them the back of the card. If they are not correct, give them two more tries.
If they do not get the letter or sound, show them the back of the card and tell them the letter and sound (then enunciate the sound as you say the word), have them say the letter/sound back to you twice and shuffle the card back in the pile. Repeat.
6. For children who have a lot of energy, turn a phonics lesson into a movement activity.
Tape four letters onto the wall as shown in the image below:
Call out a letter sound and tell your child to run to the letter that makes that sound, touch it and run back. Spice it up. Here are some examples:
-Hop to the letter that makes the sound
-Skip to the letter that makes the sound
-Tip Toe to the letter that makes the sound
7. For another movement activity, put tape on the floor, with a letter on each piece of tape.
Tell your child to start with their feet on a certain letter (e.g., start on letter A), then tell them to jump to different letters, using the letter sounds.
For example, “Jump to the letter that makes the sound (insert letter sound).”
See an example below:
As your child becomes more independent with his letter sounds, you can make the letters spell actual words. For the word cat, have three pieces of tape, C, A, T.
Tell your child to start at the C, then jump to the next letter in Cat, and then the last letter.
To make it more challenging, have your child spell the word backwards, by starting with the last letter and jumping in order until they get to the first letter.
Mix up the game with upper and lower case letters. The example above has three letters, but you can use as many pieces of tape and letters as you want.
Start out with a few and add more if your child is making good progress.
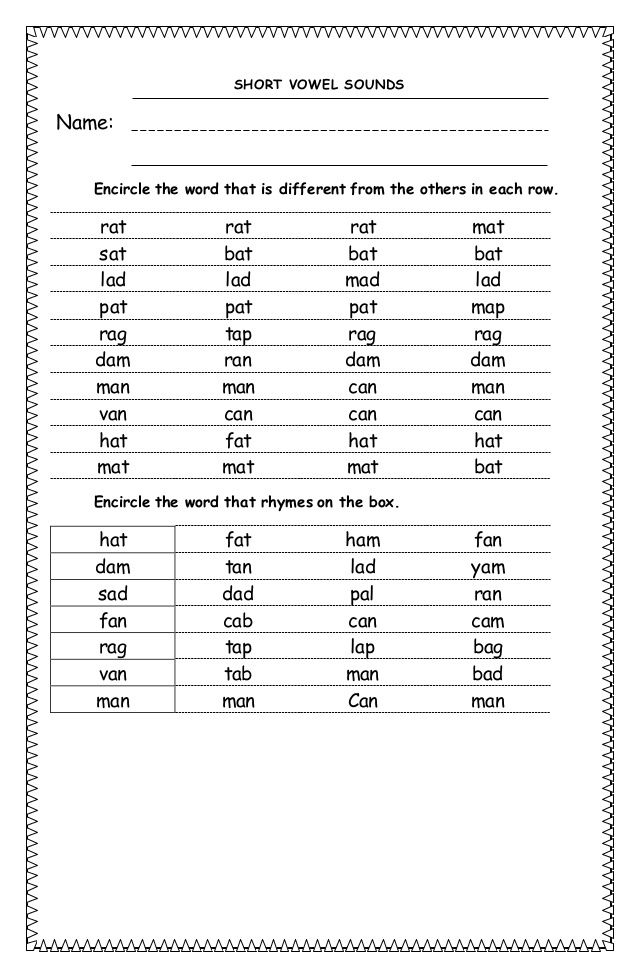
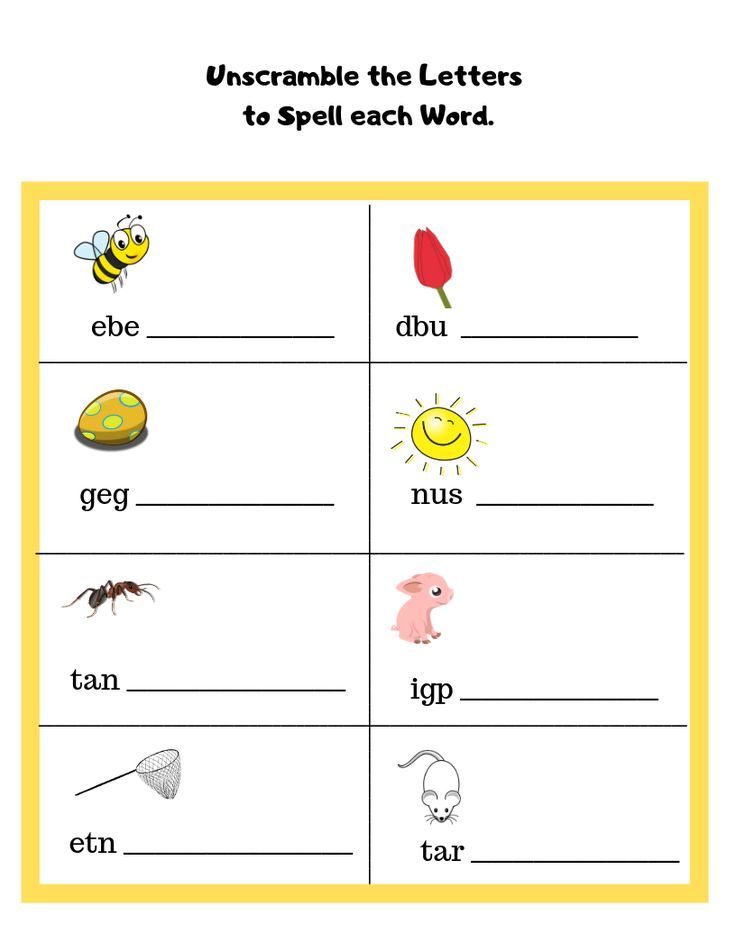
8. Make a worksheet, using words and pictures with your child’s favorite characters, foods, animals, etc.
You can draw the worksheets by hand or use tables in Microsoft Word. For a three-letter word, make a table with five columns and one row.
Put the picture of the word in the first box of the table (you can draw in the pictures or copy and paste them from Google Images). Put the letters in the other boxes, but leave one letter out. Have your child fill in the missing letter.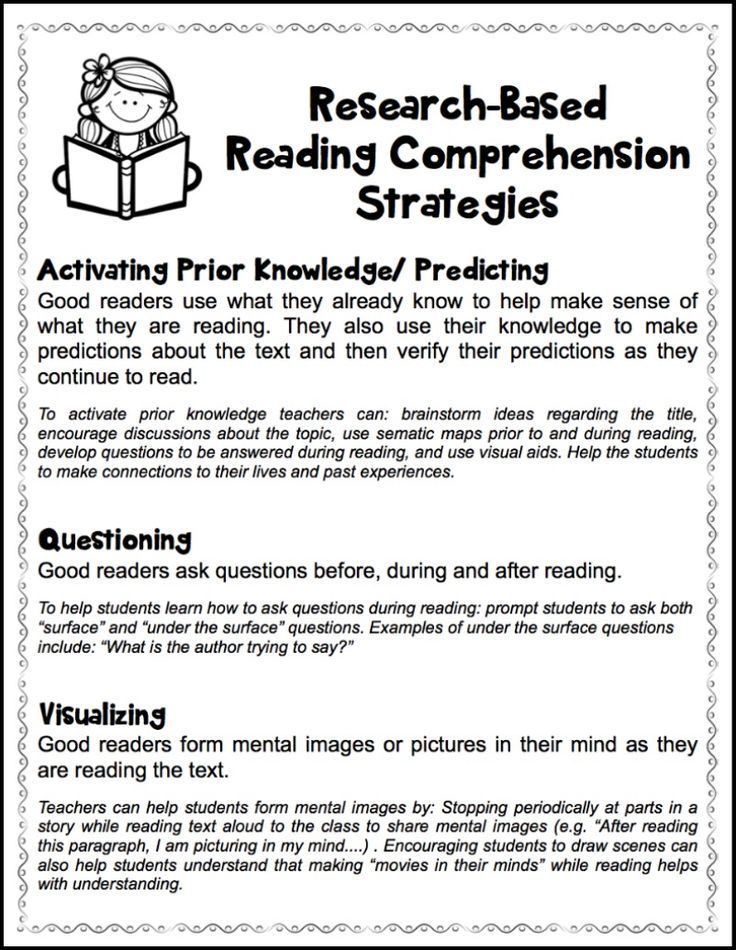
Here is an example of the worksheet:
Click here to print out your own version of this sheet.
For children who may have trouble solving this worksheet, try providing them with a letter bank to see if that helps.
See an example of a worksheet with a letter bank below.
Click here to print out your own version of a phonics worksheet with a letter bank.
9. Have your child paste letters on paper as you call out the sounds.
You can use the letter flashcards you made, like in number 2.
You can use this activity to teach your child how to spell words. Draw lines or boxes on the paper so your child knows where to paste the letters.
You can give your child the exact number of letters in the word, or throw in some extra letters to make it more challenging.
Call out the first sound in the word, have your child pick the correct letter, and paste it on the first line.
Then have them do the next sound, and so on, until the word is complete.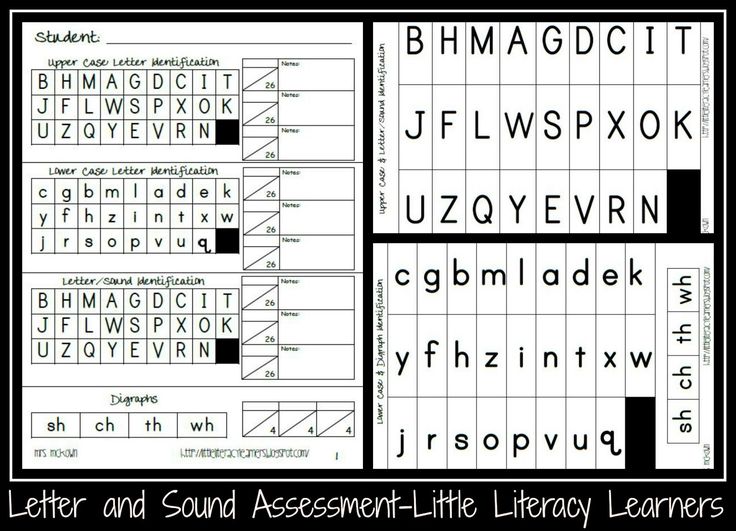
Supervise the activity, providing assistance as needed.
When your child is done, hang up their work to show them that you are proud of their effort.
You can also use this idea to teach a child how to spell their name, such as the sample in the image below.
10. Sing the alphabet sound song.
The tune is similar to the traditional alphabet song.
Here is a great example by Kidstv123. You can make up your own version as well.
What else can you do to help your child learn letter sounds?
If your child is significantly struggling with learning letter sounds or acquiring other academic skills, despite consistent practice and guidance, talk to your child’s school and/or doctor.
They can refer you to the appropriate professionals to determine what might interfere with your child’s progress and if additional strategies could help.
Additional Information About Teaching Phonics to Children
Keep in mind that the activities in this article are recommendations. Please do not try to pressure a child into participating in any of these activities.
This can lead to your child feeling frustrated, and possibly shying away from phonics (letter-sound) practice.
Remember to always stay calm when working with a child or student, even if you think they should be getting something that they are not getting.
If you get frustrated with them, they may start to feel anxious, angry, inferior, stupid, etc. which will lead to a less productive learning session.
Keep practice sessions short (2 to 10 minutes for younger children or children who get easily frustrated and 10 to 15 minutes for older children or children who can work for longer periods without frustration), unless the child is eager to keep going.
For suggestions on ways to encourage children to complete tasks or assignments they do not want to do, read the following articles:
- 3 Ways to Use Timers to Encourage Homework and Chore Completion
- How to Use Schedules to Improve Children’s Behavior
Video Presentation
Education and Behavior – Keeping Us on the Same Page for Children.
Teaching Letters and Sounds: 27 Strategies that Work
If we want to help our students learn their letters and sounds, we must have multiple Strategies for Teaching Letters and Sounds. Alphabet recognition and mastering the sounds are essential skills for our earliest readers. Without mastery of the earliest skills, students struggle with building and recognizing words and patterns. We have composed several blogs giving you some of the best Strategies for Teaching Letters and Sounds, but we have even more great ideas and resources now! Here are 27 Strategies that we are confident will help you as you teach your littles–#9 is sure to be a favorite!
Teaching Letters and Sounds
1– Use repetition when assigning teaching letters and sounds during independent and partner practice.
At some point during your day, your students should have a chance to practice their letters and sounds in a routine and repetitive way. This practice serves as a great instructional routine that does not take much time.
You want to give students repetitive practice because they know what to expect, they have a short time to practice what they’ve learned, and most students can complete the activity without much direction.
During this time, you can help your students who need the most intervention. We created these Alphabet Printables, so students have a variety of activities to practice when doing independent and partner practice.
Kiddos get to practice writing the letter, both upper and lowercase, distinguishing between the upper and lowercase letter (with daubers), identifying pictures that begin with that letter sound, and finding that letter on a keyboard. So many different ways to practice one letter, and it is all on one piece of paper!
2– Have multiple references and tools available in the classroom when teaching letters and sounds.
Students need the same resources we do when they need information. Kids will use these resources if we teach them to use them before asking you or another teacher for information.
These can be posters on the wall, an informational page in their desk folder, or resource cards. We have created these Alphabet Poster Cards for our students, so they have access to this information when they need reminders for letters and sounds.
Print these posters as full pages, half pages, or quarter pages. You use these as a sound wall, visual cues, posters, and flashcards!Each poster comes in both black and white and color. We have included the alphabet, blends, digraphs, diphthongs, long vowels, r-controlled vowels, trigraphs, short vowels, word families, and double consonants.
3–Be creative and provide novelty when practicing letters and sounds
It’s important to remember what kids want to create. They want to do things that are out of the ordinary. So be creative with the activities you choose when introducing and practicing each letter and sound.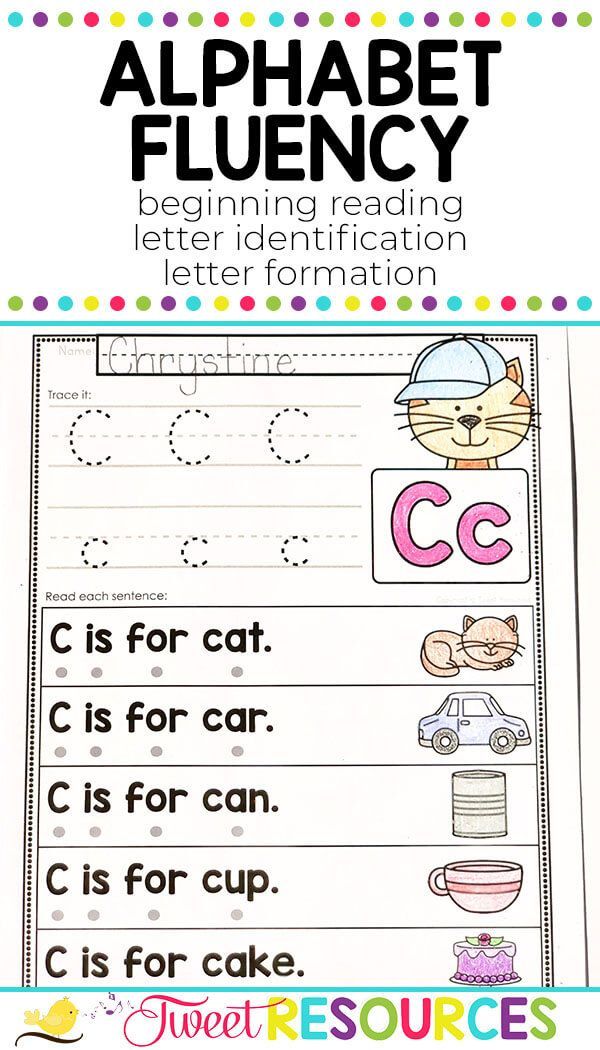
You will have great success with Alphabet Crowns. Kids love these crowns! However, there are so many other things you can try with your kids. Be creative! Use Pinterest, and find something to connect this content with your little ones.
Great Strategies that are Hands-On
4–Allow kids time to explore with hands-on and fine motor activities
Having students use their hands/bodies while learning is fundamental to their brain development. When kids use their muscles and brains simultaneously, they are less likely to forget what they learned. It is also great to incorporate fine motor practice into hands-on learning. We created these Alphabet Play Dough Mats to have a hands-on way to practice. Give your tactile students a chance to roll out play-dough and model the letters of the alphabet.
Plus, we have got a great recipe from instructables.com, so if you need a great Play-Dough recipe, I recommend this one! It is fabulous. I think the cream of tartar does the trick with consistency.
5–Incorporate art into learning letters and sounds.
Whenever I have an opportunity to allow my students to express their creativity while learning, I embrace it. I have found art activities like Alphabet Dot Art also keep behavior problems to a minimum when managed correctly.
Students get to work on fine motor, letter recognition (of different fonts), and letter/sound correlation with this activity. Students can use the dot-art piece to dab a Q-tip in paint and “dot” the image. They then cut out the pictures of objects that begin with that letter and glue them onto the different font representations of that letter. It is a fun activity for little learners! Or use Bingo Daubers from Amazon!
6–Kiddos Love Swat-a-Sound.
You can use the giant swatters from Dollar Tree (or the $1.25 Tree). Then, spread letters out on the carpet and give two kiddos (each) a swatter- then say, “Find the letter that makes the sound (insert here).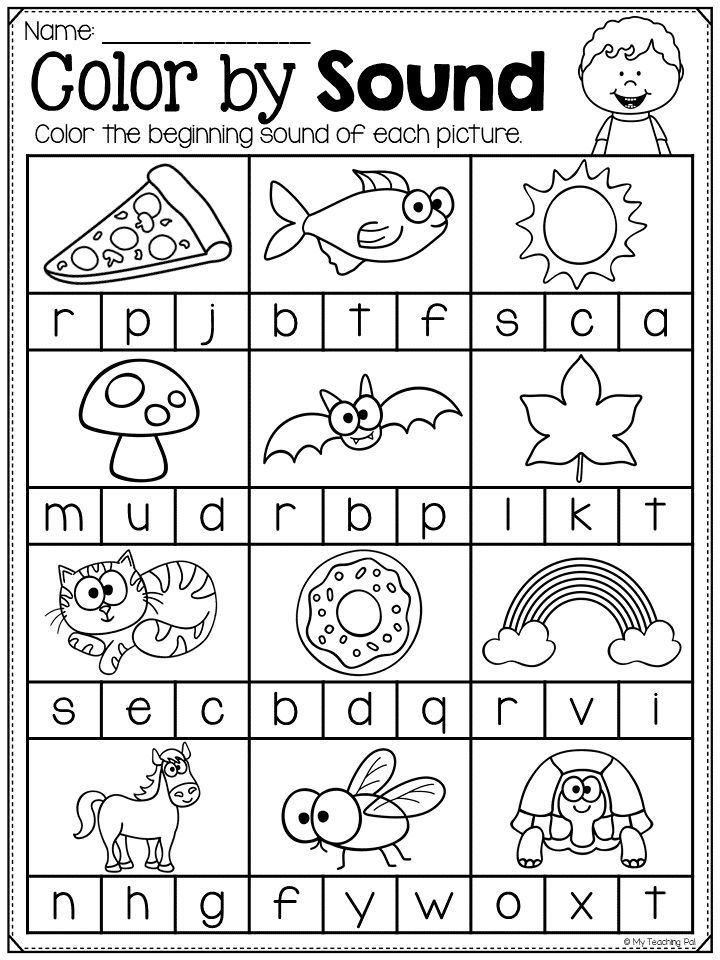 ” They hit it with the swatter and say its name and sound. Then two more friends go. We have played in whole and small group settings. They always ask to play!
-Jessica R.
More Letters and Sounds Strategies that Get Them Moving
7–We sing and dance to songs like this: Everybody dance now!A says /a/,/a/,/a/. And on and on
-Vera from The Tutu Teacher
8–Have Fun Teaching videos from YouTube! They are great. We listen to them every morning.
https://educationtothecore.com/2021/03/youtube-videos-that-teach-phonics/
Phonics videos are great to use in a variety of settings! I use phonics videos to get my students started in the morning, during indoor recesses, brain breaks, 5-minute time gaps, and of course, during the reading block. They are a great tool to get your students up and moving while learning phonics skills. Here are some of my favorite YouTube videos that teach Phonics skills our students have to learn.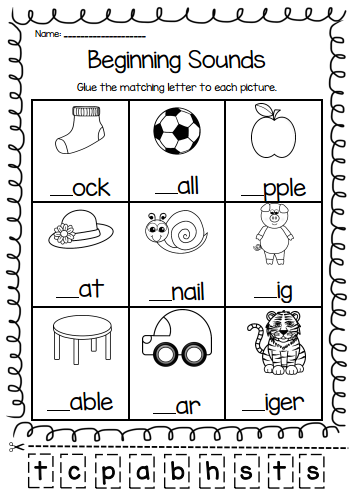
9–Why a Sound Wall?
Sound walls have grown increasingly popular in recent years. For good reasons too!
Sound walls stem from the Science of Reading where it focuses on the connection between print patterns and phonological information. Sound Walls allow for explicit instruction of phonemes or the sounds we hear. We use letters to represent those sounds or graphemes. A sound wall pairs the speech sounds (phonemes) to the letters (graphemes).
Using sound walls, your students will have everything they need to
- Properly produce sounds.
- Identify which sounds correspond to certain spelling patterns.
- Read and write words that have them.
Strategies for Letter and Sounds that Don’t Feel Like Work!
10–Alphabet Foldable Booklets
There are three different versions for each letter. And, you can use them with all of your students, regardless of their academic level. Start with learning just the letters and words that start with that letter. Move onto one sentence per page with the same images. Lastly, students can practice reading two sentences per page with the same pictures. Students can learn print concepts, identify letter names and sounds, and practice sight words and fluency with these foldable booklets.
Each booklet focuses on one letter of the alphabet. Every no prep booklet has these activities:
- Uppercase and lowercase letter identification
- Letter writing practice (uppercase and lowercase)
- Beginning sound identification (color pictures)
- Letter art decorating
- Writing words that begin with that letter
- Fill in the blank sentences with words starting with that letter
11–Letter Building STEM
Students can build letters using popsicle sticks. They can then count how many sticks were used to build that letter and record the number.
More Strategies Using Their Hands
12–Alphabet Sensory Tubs
Take a set of magnetic letters and bury them in some sensory substance (sand, rice, water beads, etc.). Students will then have to “search” for the letters and match them to a corresponding sentence strip. Sensory Bins with Letters (picture and several ideas from Still Playing School)– Sometimes, the best way to help kids learn is to let them explore. Or, spread shaving cream out on a tray and have your students write out the letters in the cream.
13–Write and Wipe Puzzles
I let my students each have a set of these. They could practice cutting out the puzzle pieces and writing each letter of the alphabet. They kept all of the pieces in an envelope, so it was a center they could repeatedly do while practicing the beginning sounds of words.
14–Alphabet Watches
Students can wear their letters and sounds with these watches. These watches are just a different version of the crowns for those of you who would rather have your students wear alphabet practice around their wrists instead of their heads. They can “check the time” as they practice identifying the letter name and then pictures/words that begin with that particular letter.
Additional Strategies for Letters and Sounds
15–Digital Alphabet Activities
For those of you who are teaching virtually or parents who prefer not to print out a lot of papers at home, we recommend using digital alphabet activities. This bundle includes alliterations, keyboarding practice, and beginning sound hunts. This digital practice will engage kids for hours with these alphabet practice activities.
16–Data is a part of teaching, but sometimes our kindergarteners are given assessments that are not suitable for their skills. We have created a Kindergarten Data Tracking Book that assesses the skills we teach.
In this databook, teachers can track letters, numbers, shape identification, sight words, CVC word reading, writing letters and numbers, and addition and subtraction.
Check out all of the pages we include in this Kindergarten Data Tracking Book. (As a fun bonus, they are all created around chocolate chip cookies. Yum, Yum).
17–Pancake Flip – Cut out 5-10 brown circles and write the letters students are currently working on in class (you may want to do 3-4 circles for each letter). Using a spatula, students “flip” over the circles and say the letter name.
18–Letter Game Board – Print out a couple of free game board templates. Fill in the blank spaces with letters that you are working on. Find a die and a couple of cubes or other math manipulative items, and students can play a letter identification game.
Easy Strategies for Letters and Sounds
19–Magazine/Newspaper Ad Scavenger Hunt – Students will go through old magazines and newspapers, searching for pictures that begin with a given letter sound.
20–CORE BINDER—The CORE Binder is the ULTIMATE resource covering daily activities from classroom routines, math, and ELA. These Classroom Organizers and Resources for Education also include social and emotional tools because we know teaching isn’t all 123s and ABCs. But, it does include letter sounds, word building, phoneme blending, and so forth!
21–Alphabet Flip Books—
These are Alphabet Cards designed to teach letters and sounds!
ABC Flip Books: Alphabet cards. Use these to teach words that begin with each letter of the alphabet. Each letter contains six cards and one letter writing practice. These cards can be laminated, cut, hole-punched, and secured with a ring.
22–Alphabet Flip and Reveal—
This activity is Alphabet Flip and Reveal. These are great for small group instruction, centers, intervention. Alphabet Flip and Reveal is also a great resource to have on hand in the classroom.
Flip and Reveal includes all letters/sounds of the alphabet and ten images for each letter/sound. All letters have an accountability sheet where your students can practice letter formations while matching the letter with the corresponding picture.
More Games for Letters and Sounds
23–I Have Who Has—This is an ABSOLUTE MUST-HAVE! Your students will beg to play these games, not only for their alphabet and ELA but for their MATH as well!
- Learning Through Play: Students can learn while doing something fun and effective!
- Flexible Use: This is the perfect warm-up for your lesson, lesson practice for a new concept or skill, review, small group, and more!
24–Play the game “I Spy.”
In the game “I spy,” you pick something you see and don’t tell the child what it is. The child has to guess what you see. Or, grab our I Spy Phonics–ETTC developed an entire resource dedicated to phonics-based I SPY Activities – updated to include 84 activity pages!
25–Bingo
We have so many fantastic resources that you can use in your classroom to expose your students to the letters of the alphabet and their sounds! But, we also don’t mind sharing from other sources!
This gorgeous Initial Letter Bingo Cards set is perfect for a small group or whole class activity.
Need daubers? Grab some here: Bingo Daubers from Amazon!
26–MemoryChoose five to ten pictures and matching letters. Place each card face down. In pairs, students take turns to flip over two cards. Once they turn over a matching picture and letter, they get to keep these cards. The student with the most cards wins!
Or how about this great idea for letter memory using paper plates from FrugalFun4Boys!
27–The Name Game
Give your children a notecard with their name spelled clearly on it. Say, “Whose name has a __ in it?” and all children with that letter in their name have to do something silly, like stand on one foot or touch their tongue to their nose, etc.
And Here is a Great Bonus: If you aren’t quite sure about our Sound Wall resource yet, please read Making the Most of Your Sound Wall! This resource is manageable and user-friendly and naturally lends itself to student differentiation. If you are a paid premium member, you can also find this resource BUNDLED within the premium website! Because this is a bundled resource within premium means it is not available to our free members. So be sure to become a premium member to gain access!
WRITTEN BY – SUZANNE KELLEY
At Education to the Core, we exist to help our teachers build a stronger classroom as they connect with our community to find trusted, state-of-the-art resources designed by teachers for teachers. And, we aspire to be the world’s leading & most trusted community for educational resources for teachers. Plus, we improve the lives of every teacher and learner with the most comprehensive, reliable, and inclusive educational resources.
If you enjoyed what we have to offer at ETTC, be sure to join our email list so that you won’t miss a beat. Plus, we are here to help with all your resource needs. Become a Premium Member of Education to the Core and receive immediate access to thousands of printable activities..png) So, for one small monthly or annual fee, everything ETTC can be at your fingertips all of the time.
So, for one small monthly or annual fee, everything ETTC can be at your fingertips all of the time.
Comments
comments
NM Startseva — Letter-subjunctive, syllabic and sound analytical methods of teaching reading and writing in Russian alphabets and primers of the 19th century
Among the issues of primary education methodology, one of the most important was and remains the question of optimal and effective methods of teaching reading and writing. Of course, throughout the history of alphabet writing, the methods of presenting the material, the sequence of stages of teaching reading and writing were different, it was far from immediately that teachers came to the conclusion that the systems of sound writing, which include the Russian graphic system, should be studied precisely from sound to letter, and not vice versa. The variety of approaches and the difficult search for the right way to teach literacy are evidenced by manuals - alphabets and primers, which became available to many in the 19th century, as teaching reading and writing becomes widespread.
The letter-subjunctive method (alphabetic synthetic method) appeared earlier than others in Russian practice and for a long time (more than three hundred years) was the leading method in the domestic method of teaching reading.
The training took place in several stages. At the first stage, the children memorized the names of the letters (“az”, “beeches”, “lead”, “verb”, “good”), repeating their long names after the teacher. It was necessary to be fluent in the alphabet in order to subsequently easily operate with letters when composing syllables. It was a separate exercise, it required quite a lot of time. In the textbooks, the letters were placed in direct order (from the letter "az" to "izhitsa"), and then in the reverse order (in Russian textbooks this was called the "five word"). It was believed that a student can move on to the next level of learning to read if he can name all the letters in the forward order, in the reverse order, and also correctly identify any letter that the teacher shows him.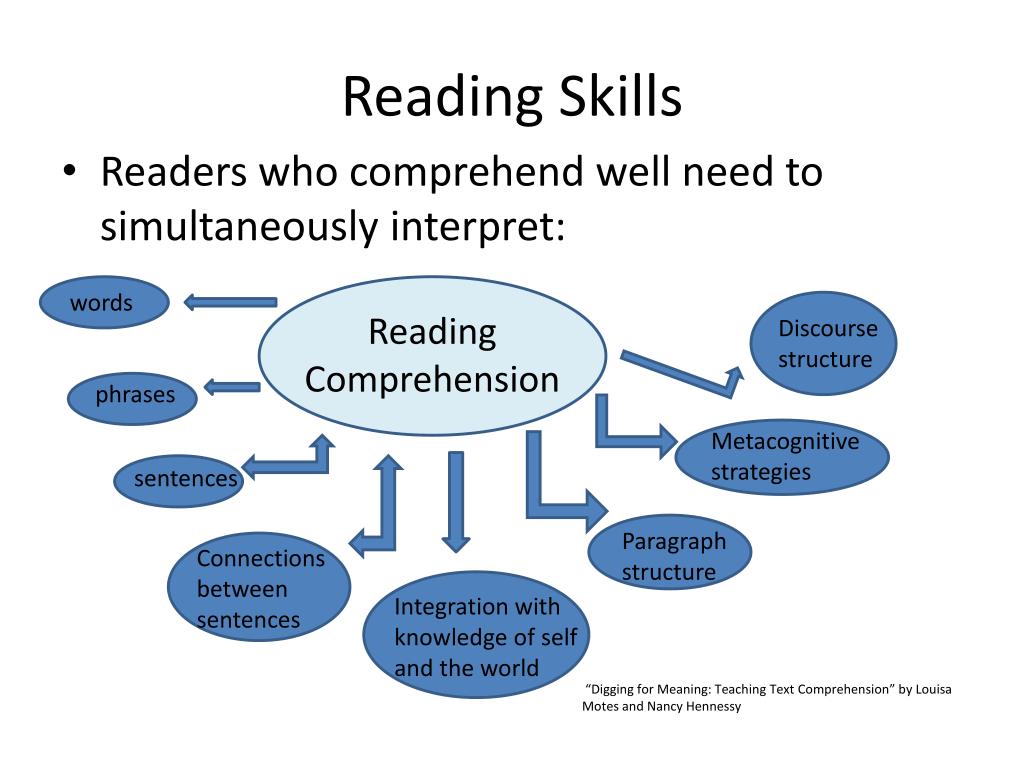
Then they began to collect syllables from the letters, which were pronounced in accordance with the names of the letters: “beeches” yes “az” turns out to be “ba”, “beeches” yes “is” - “be”, “beeches” yes “like” - “ bi" and so on. After memorizing a large number of two-letter syllables of the type consonant plus vowel, as well as vowel plus consonant, it was possible to move on to three-letter and four-letter syllables, rare for the Russian language. The very pronunciation of such a word was a long and tedious process. For example, the syllable “stra-” was read like this: “word” yes “firmly” yes “ri”, yes “az”. According to modern methodologists, more than four hundred syllables were used, and they included not only frequent Russian syllables, or at least real ones, but also those that were a mechanical combination of letters and were not found in any Russian word.
The third stage consisted in reading whole words, but also in "warehouses" (as syllables were called in textbooks).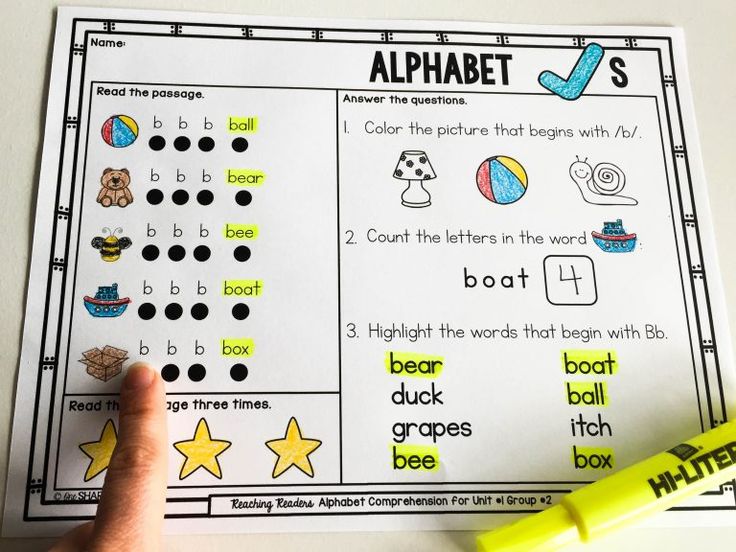 The student named each letter, then the syllable, and after reading all the syllables in this way, the whole word. This made it very difficult to understand the text, and the mechanical memorization of letters and syllables did not clarify the mechanism of reading.
At the last stage of learning to read, it was already possible to read "over the top", that is, to read whole words without dividing them into syllables and letters. Children approached this stage of education only a year and a half after the start of their studies.
They began to think about writing in the third year of study, but this was done only with the best students. Even at the end of the 19th century, the famous Russian methodologist Nikolai Alexandrovich Korf noted: “In most schools where literacy is taught according to the subjunctive method, the ability to write is considered some kind of higher science, in the secret of which only a few best students are initiated ... Out of ten reading boys, only one writes.
After Peter's reforms in the field of graphics, the Russian Academy of Sciences decided to take the path of some simplification and adapt the so-called civil alphabet for teaching reading. At first glance, this was supposed to make the initial steps to mastering the skill of reading easier and less time consuming.
However, the poor knowledge of the phonetic composition of the Russian language at that time did not allow us to solve the problem successfully. However, gradually, instead of the names of the letters of the Church Slavonic alphabet, they began to use simpler names borrowed from the Latin language (“de” and “i” - “di”, “be” and “er” - “bo”, etc.) .
As an example of a textbook compiled for teaching reading using the subjunctive method, one can cite P. N. Sharapov’s book “A Precious Gift for Children, or the Newest Russian Alphabet with XXXII skillfully engraved and colored pictures depicting various wonderful things taken from natural history for children, subjects by which they can learn to read in a very easy and pleasant way. With the introduction of prayers, sacred history, fables and stories, as well as the concept of grammar, arithmetic and the description of figures by P. Sharapov.
The textbook was published in 1816, then reprinted in 1838. Colored (hand-colored) engravings were placed separately, and the textbook itself was an unillustrated manual, where visual effects were limited to highlighting topics, red lines, gaps between topics and subtopics. The last section is "Description of the figures in the alphabet." The texts sequentially, in alphabetical order, tell about "various wonderful objects for children" out of "natural history" : plants (watermelon, forget-me-not, rose bush), animals (butterfly, wolf, goose), mythical creatures (unicorn, Jupiter), geographical objects (Etna volcano), etc. Note that this section is located at the very end of the manual , and, therefore, - despite the declaration of the author - did not really help children "in an easy and pleasant way" to learn to read: either when learning the alphabet "by figures" these texts were read aloud by an adult, and they served not so much to master the mechanism of reading how much science education; or the child read these descriptions himself, but after the basic reading skill had been sufficiently formed. Thus, although the manual was illustrated, the visual materials were not functionally linked to the texts.
On the first pages of The Newest Russian Alphabet... there are several variants of the alphabet: "upper straight letters", "lowercase straight letters" , then "oblique uppercase letters" and "oblique lowercase" (apparently, they should prepare students for writing). All letter names are given in accordance with the civil Russian alphabet of that period. Naturally, the letter “e”, as well as “y”, are not included in the alphabet, although among the three-letter syllables there are syllables like “by”, “buy”, “boy”, etc. The letter “fita” is also included in the alphabetical list, still used at the beginning of the 19th century in borrowed personal names. The alphabet includes two letters "i" (historically "and octal" and "and decimal"), the coexistence of which in the Russian language lasted until 1918 years old, as well as the letter "yat", denoting the sound [e] in a position after soft consonants in words where there was no transition [e] to [o] (village - village) or alternation with zero (stump - stump).
The basis of learning to read according to this manual is the learning of various types of "warehouses" (but this is not the actual syllabic method of teaching literacy, which will be discussed below, since the first stage of work here is learning the letters of the alphabet, and the syllabic method involves completely ignoring letters on elementary level of learning to read). At first, the student gets acquainted with two-letter covered syllables (“ba”, “bo”, “be”, “bu”), successively changing the consonant letter in them (“ba”, “va”, “ga”, etc.) , then a vowel (on each new line). Here, P. N. Sharapov takes into account the possibilities of compatibility of letters (it would be more accurate to say sounds, but the analysis of this textbook does not allow us to say that the compiler pays attention to the Russian phonetic system), which becomes obvious when considering two-letter “warehouses”. So, in combination with the letters "a" or "y" all consonants are used, while with "u" or "s" a much smaller number, which corresponds to the real language situation.
Three-letter syllables are composed with much less logic. There are two types of syllables:
1) consonant + consonant + vowel (“bra”, “vra”, “glo”, “elo”, etc.), where the second consonant letter is only “l” or “r” ;
2) consonant + vowel + “y” (“bay”, “bark”, “sing”, “swarm”, etc.).
These types do not exhaust the diversity of Russian three-letter syllables, on the one hand, but on the other hand, the author also cites such syllables that are very problematic, if not impossible, to meet in existing Russian words (“vuy”, “shay”, “tsla” , "lle", "rro", etc.). There are no other examples in the textbook, four-letter or five-letter syllables are not studied at all, although they exist in the language (“stra-” or “wind-”, for example).
In the transition to the third stage of learning - reading words in "warehouses", the principle from simple to complex is clearly not observed. P. N. Sharapov suggests reading monosyllabic words first, but these are multi-letter words like “power”, “cane”, “wool”, “sew”, “pour”, “weave”, which is much more difficult than reading two-syllable or polysyllabic words , consisting of covered-open two-letter syllables: "porridge", "hay", "milk", "dog".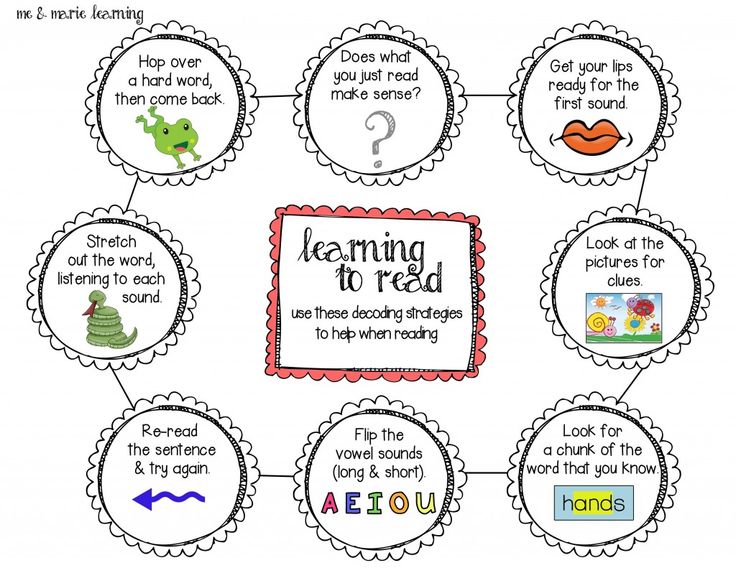 And given that it is also necessary to name the letters that make up the syllables, then the process of reading such examples seems very difficult for beginners.
The author of the textbook also does not take into account any grammatical rules and patterns, collecting together words of different parts of speech, different forms (verbal first of all) of words for reading. Apparently, the content aspect is of little interest to P. N. Sharapov at this stage of learning, and therefore all language units are just material for practicing the skill of reading whole words by syllables.
The rest of the materials collected in the textbook are traditional for ABCs and primers of that time. Here are the texts of prayers, moralizing texts, fables. Then comes the arithmetic section. But the presence of a grammar section is not quite usual and allows us to attribute this “alphabet” to textbooks of an “advanced type”.
By the middle of the 19th century, the literal subjunctive method had lost its position among the leading Russian methodologists and advanced teachers, who considered it to be excessively time-consuming and irrational.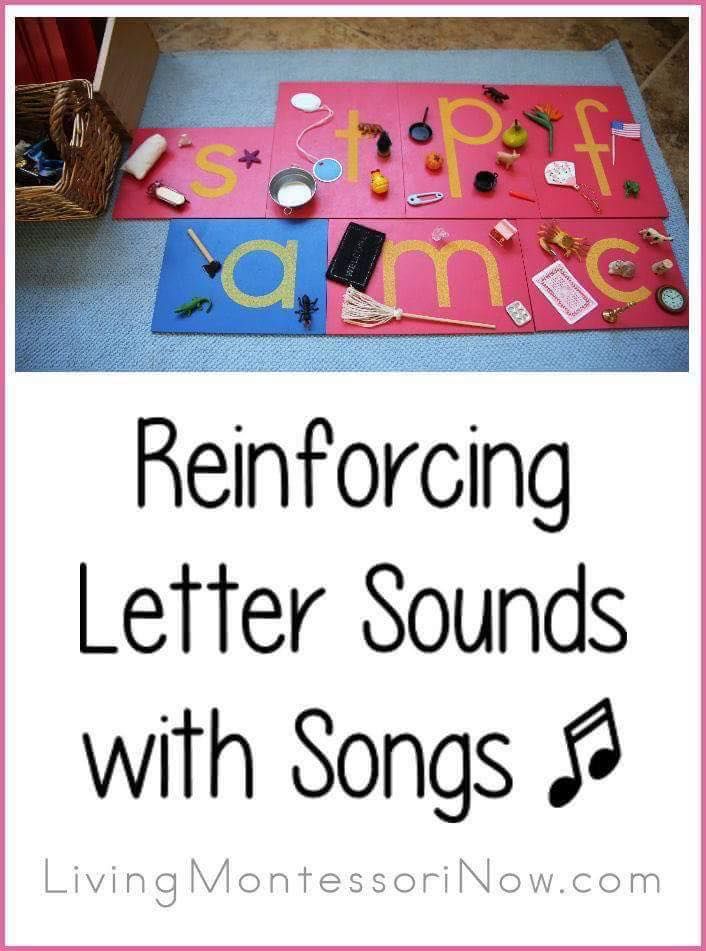 The students got tired of the monotony of the exercises, the process of mastering was slow, the transition to meaningful reading was extremely difficult.
The literal method has ceased to be the leading one, but it has not completely disappeared. In teaching writing, which became an integral part of literacy in the 19th century, it was believed that the detailed development of reading skills through the pronunciation of syllables and letters contributed to literacy and memory development. This can be seen from the analysis of textbooks for small rural schools and parochial educational institutions. In the latter, the Church Slavonic alphabet was also studied.
One can cite as an example the "ABC compiled for the Muravishche school in the Chukhloma district". There are only 23 pages in the manual, there is not a single illustration, the pages with educational material are uniformly designed. At the beginning of the book, all letters are placed in alphabetical order, and without division into vowels and consonants. And then given the material for practicing reading "warehouses". There are much fewer types and examples of "warehouses" here than in the alphabet of P. N. Sharapov. For example, the syllables "consonant + consonant + vowel" are given only with the second letter "l". But the reading of words begins with two-syllable words more convenient for children with covered-open syllables. Although the content side of linguistic units is not taken into account here, as evidenced by words like “water description”, “curvature”, “pulling”, “linguistics”, which are hardly included in the lexicon of rural residents.
Also, throughout the 19th century, the letter-subjunctive method of teaching reading was used at home in the families of provincial merchants and petty nobility living in small towns. This is told, for example, by M. Gorky in the autobiographical story "Childhood". The grandfather taught the boy to read, forcing him to repeat the letters of the Church Slavonic alphabet:
“- Earth! People!
The words were familiar, but the Slavic signs did not answer them: "earth" looked like a worm, "verb" looked like stooped Grigory, "I" looked like my grandmother and me, and grandfather had something in common with all the letters alphabet.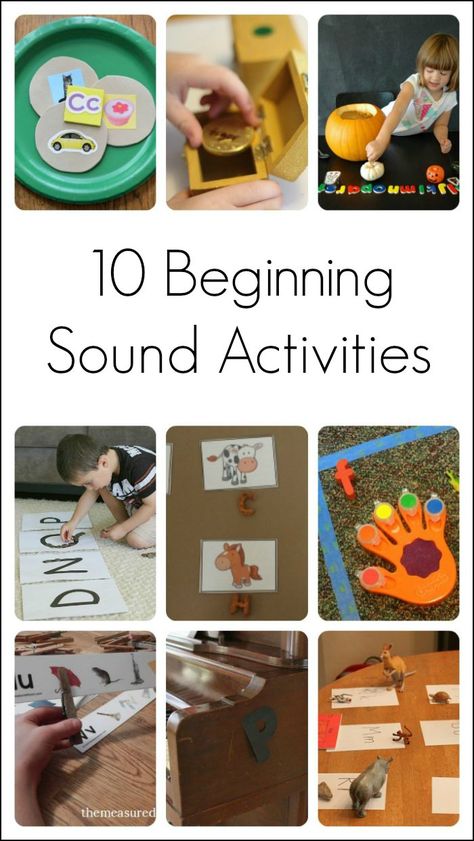 For a long time he drove me through the alphabet, asking both in a row and randomly; he infected me with his hot rage, I sweated and screamed at the top of my throat.
M. Gorky's text clearly demonstrates that an inquisitive child's mind could not put up with the unmotivated memorization of incomprehensible signs, transforming them into images that make it possible to include associative memorization methods.
The large time costs and the monotony of the methodology of teaching primary reading by the subjunctive method led to the fact that since the 18th century they tried to simplify it. Learning to read began to begin immediately with syllables. The child memorized individual syllables (“ba”, “bo”, “be”, “bi”, “boo”), while not paying attention to the names of the letters (they might not have been studied at all). The method was called syllabic by the Methodists. The idea of learning by heart was again central here, but the first stage was removed - the study of the letters of the alphabet, and this gave time advantages.
The syllabic method was a variant of the literal subjunctive and had the same main drawback: the mechanism for encoding sounding speech into graphic signs remained incomprehensible to children. In addition, these methods did not develop children, they were divorced from life practice, therefore they gave rather low results and did not meet the objectives of mass education of the population. Textbooks compiled on the basis of the syllabic method resemble earlier textbooks, are not accompanied by methodological comments, and therefore do not represent any separate subject for conversation.
The desire to reduce the time for learning to read and to diversify the work of students, to make it more interesting led to the search for new ways. In the middle of the 19th century, sound methods of teaching literacy came to the Russian school. They were much more productive than alphabetic ones, since they not only reduced the learning time, but also relied on the life experience of students, were based on understanding, and not on memorization and endless repetition.
The sound method of teaching literacy had several varieties. First, it is the sound analytical method developed and introduced by the French Methodist Jacoteau (1770–1840). In Russia, methodist Vasily Andreevich Zolotov (1804–1884) ardently propagated it, for which he received the name “Zolotov method”. The training was built analytically, according to the model: sentence - word - syllable. Jacoteau did not reach the sound and its image with the help of the letter, he recommended memorizing individual syllables.
It was proposed to start teaching reading from the analysis of the whole sentence, which was placed in the primer several times using different fonts. The sentence was slowly read by the teacher, the students repeated the phrases after him according to the acoustic image, but at the same time they looked at the page of the textbook. Then separate words were singled out from the whole sentence, they were pronounced, the words were divided into syllables. Jakoto further recommended memorizing syllables, and in the Russian method, individual sounds were isolated from syllables, and then they were taught which sound which letter should correspond to.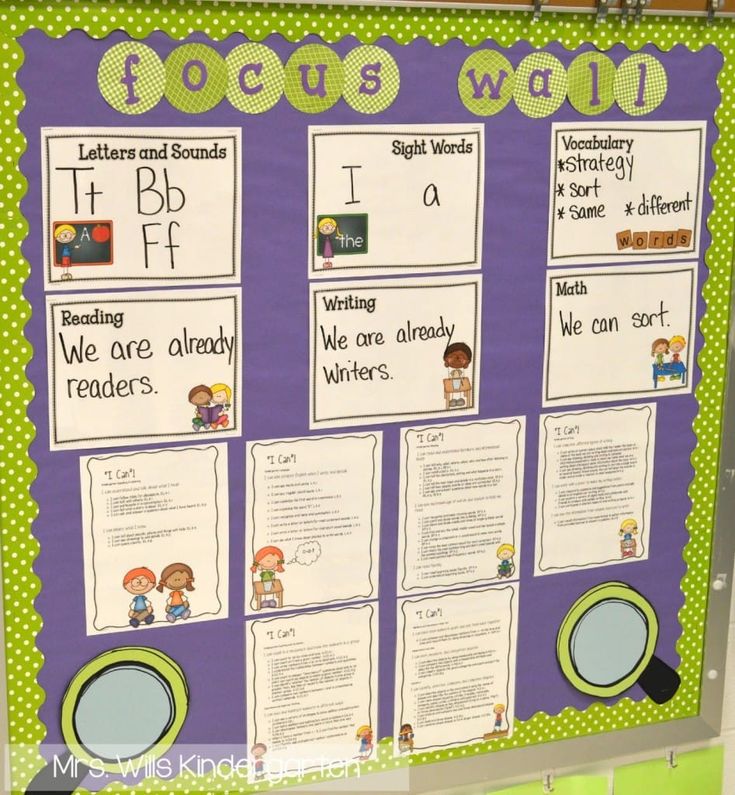 The child had to learn to perform many analytical operations: isolate words in sentences, single out syllables and sounds, compare them with each other, determine how letters denote similar sounds in different syllables, etc.
This approach to the study of literacy did not imply a given order of learning letters. It was not always possible to go from simple to more complex, since students were presented with a whole group of letters at once as part of a word or sentence. With this approach, the time and volume of purely mechanical work was noticeably reduced, the child learned various analytical operations, and when reading, he underwent an analysis of living speech, which was not at all the case with literal subjunctive methods.
An example of an alphabet built according to the sound analytical method (although not entirely consistent) is the “Russian alphabet with instructions on how to teach”, compiled by V. A. Zolotov. It began to be published in the 60s of the XIX century, and the last reprints of the textbook date back to the very end of the 70s - the beginning of the 80s (Zolotov's Russian alphabet went through more than 25 reprints). Simultaneously with the book, tables for learning to read, and mobile letters for exercises, were published.
The creators of the analytical sound method planned to go from sentence to word, syllable and sound, but Zolotov begins his studies with the child from words. From mobile letters, words are typed, consisting of direct (in modern terminology, covered and open syllables such as "ma", "do", "tu") and reverse (respectively, uncovered and closed: "or", "hell", "mustache") syllables.
The words are composed without dividing them into syllables, and the teacher reads them syllable by syllable, highlighting them only intonation. Children repeat after him in chorus. Work with the first word, then add the second to it. Further, the students read these words already without the help of the teacher, but collectively. Gradually include in the work all the words that are read both in order and out of order.
After a sufficient number of group oral exercises, according to the teacher, the class proceeds to individual work. One student goes to the blackboard, he reads the words syllable by syllable; at the direction of the teacher, reads the words in a free order; shows the words that the teacher says and reads them himself.
The meanings of words in children are clarified already at the next stage, when students learn to read these words and find them among others. To do this, the teacher asks students questions about the subject, which calls a particular word. Naturally, at the first stage of teaching literacy, children are offered words that name objects familiar to them from everyday life. Moreover, the same words are supposed to be analyzed and memorized by their graphic and acoustic appearance in several lessons. The transition to the next group of words and exercises will depend on the abilities of the students and the skills of the teacher.
At the second stage, students move on to the analysis of syllables. The teacher explains what a syllable is, shows how words are divided into syllables, pronouncing the words and pushing the corresponding moving letters on the board. A syllable is considered a unit that does not carry meaning, but is necessary to build a whole word. The concept of sound is immediately introduced (although sound and letter differ inconsistently) as a unit of syllables. Children read syllables in already familiar words. Then they alternately go to the blackboard, where they read individual syllables as directed by the teacher. When the teacher sees that the children read the syllables quite smartly and correctly, he invites the students to start writing down syllables from dictation and compose separate words from them.
When moving from syllables to letters and sounds, the following technique is used: they take reverse syllables, close the consonant letter and ask to pronounce the first sound. They immediately offer both letters of a one-to-one correspondence (“a”, “o”, “u”), and vowels, denoting two sounds in Russian in the position of the beginning of a word - the consonant “y” and the vowel following it (this is “e”, "yo", "yu", "i"). Accordingly, the child will pronounce and hear one sound, then two, and this, of course, could not but cause some confusion in the minds of the students. Apparently, it was only important for the author of the manual to teach children to read, so he was not too interested in the accuracy of the definition of sound and graphic units, the laws of their interaction, which, apparently, made it difficult to understand some patterns, leading, among other things, to the indistinguishability of letters and sounds. However, realizing that in the transition to sound in children unfamiliar with the peculiarities of Russian phonetics, difficulties will arise, Zolotov remarked: "Not all of a sudden, not at once, but little by little the students themselves will come to the solution of the problem."
Once the class has worked out the possible vowel sounds, the exercises are similar to those described above. According to the same methodological scheme, Zolotov's textbook assumed work first with hard and then with soft consonants, which were found in the studied words. It was according to the principle "these consonant letters are found in the proposed words" that groups of consonants were built and the order of their introduction into student life was given.
When studying individual letters, samples of handwritten letter styles were placed in the manual so that children could immediately learn to write words by depicting letters according to the model in the book. This is convenient, visual, introduced more logically than in other alphabets, where the handwritten font was given before or after studying the entire alphabet in a whole list. Further in the textbook were given exercises for reading handwritten texts.
It is impossible not to note in Zolotov's manual such a stage of work in teaching reading as the study of words "with a middle syllable" . This refers to syllables that, according to the tradition that was in force in schooling in the 19th century, ended in a consonant sound, that is, they were covered and closed and consisted of three sounds. The method of working with them was no different from working with two-letter syllables, but apparently it went faster, because by that time individual sounds and letters had already been studied.
The analysis of this alphabet shows that the author did not consistently adhere to only one method in teaching literacy, while selecting material, he did not always take into account the phonetic features of language units. Declaring in his methodological works that the process of teaching reading should serve as a means to mental development, and mental development should have visualization as its basis, in this manual, in our opinion, he did not fulfill both of his own requirements. Work on this alphabet was largely based on endless repetition and monotonous exercises, and all clarity was taken out of the textbook (nothing fundamentally changed during reprints). All visual and illustrative material here consisted of graphic highlights (different fonts were used), the arrangement of examples either in time or in a column, and the distance between different exercises.
Zolotov owns a methodological guide for a teacher "Exemplary lessons in a rural elementary school", where he actually departed from the analytical principle of presenting material. He advised teachers to conduct various preparatory exercises during the week, including those to prepare for reading and writing (when reading texts for children, conversations are held about words and their meanings; elements of future letters are written, which Zolotov called lines). Then the teacher explained to the children that there are sounds in the language to convey words and letters - special signs for recording words by sounds.
Learning to read begins with the word "I", in which, according to Zolotov, "only one pure sound" (an amazing interpretation of iotated vowels from the point of view of modern methodology). Then other "words" are taken, consisting of one vowel sound: "y", "a", "e", "o". The author notes that these are emotional words (special exclamations) or responses to a shout (that is, formally, learning comes from the word, although these words are very specific, and literally after two lessons separate syllables that are not words appear).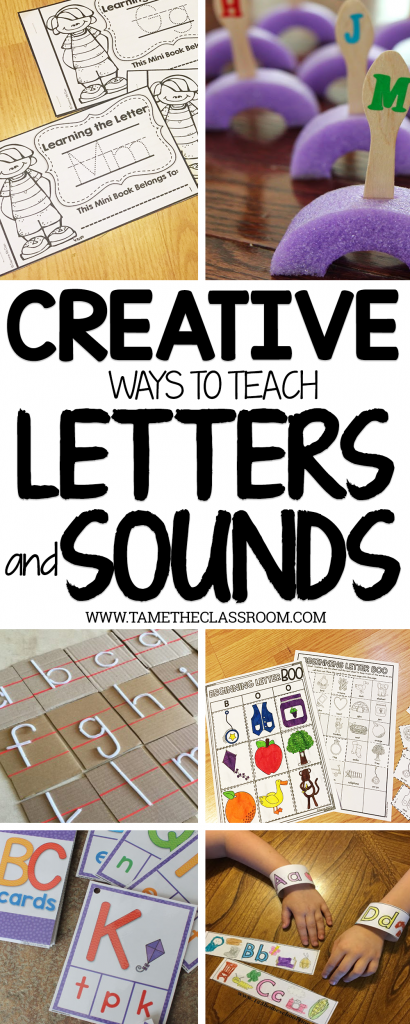 This stage of learning was accompanied by pictures: some letters of the alphabet are depicted as human figures in folk costumes, frozen in poses resembling the outline of letters. It is surprising that these pictures are placed in the manual for the teacher. Apparently, he should, if possible, draw them for children. Then reverse syllables are introduced with the help of monosyllabic words (“hell”, “mustache”, “yar”, “he”) or simply as separate syllables if the corresponding word is not in the language.
Such a difference in approaches to teaching reading and writing by one methodologist is apparently explained by the fact that Russian methodological science during this period was going through a stage of renewal and formation, when everywhere in schools that appeared massively in the second half of the 19th century, after the abolition of serfdom, teachers looked for the most simple, intelligible and at the same time developing methods of teaching children to read and write.
Source
10/11/2016 All-Russian seminar with international participation "Sound-letter analysis in literacy lessons"
- Details
- Zaporozhets Irina Viktorovna
For teachers of preschool education, primary education, additional education, other specialties
All-Russian seminar with international participation
Date: 10/11/2016
Time: 16:00 - 17:30
Presenter: Zaporozhets Irina Viktorovna, primary school teacher, teacher of the highest qualification category, teacher of ANEO "Center for further vocational education "ANEKS"
Description:
The purpose of the seminar: to give teachers methodological recommendations on the formation of language analysis and synthesis skills in literacy classes.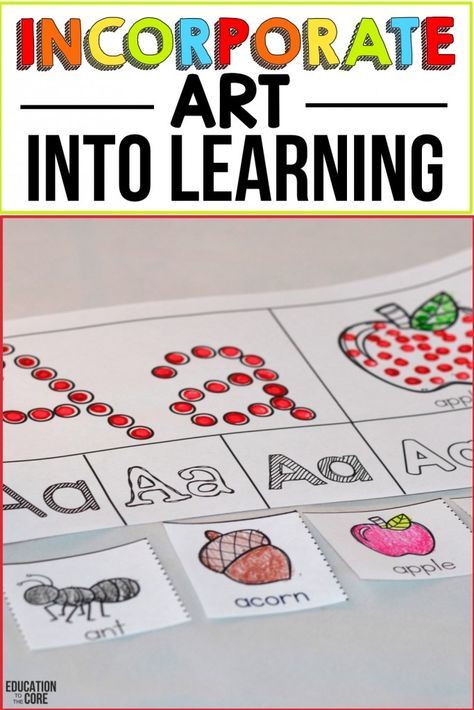
Source: http://logoportal.ru/seminar-education-gramote/.html
Questions for discussion:
- Development of phonetic abilities of children, increasing the level of development of spelling skills.
- Classification of the sounds of the Russian language, the order of studying the sounds and letters of the Russian alphabet, work on the tape of letters.
- Teaching the sound analysis of the word as the main task of the stage of preparation for teaching literacy.
To receive a certificate, you need to leave a speech abstract from your work experience for one of the sections of the seminar.
Please register with MAAM. Only registered MAAM users can copy. Publication address: http://www.maam.ru/detskijsad/seminar-praktikum-dlja-roditelei-tema-zvuko-bukvenyi-analiz-slova.html
Please register with MAAM. Only registered MAAM users can copy. Publication address: http://www.maam.ru/detskijsad/seminar-praktikum-dlja-roditelei-tema-zvuko-bukvenyi-analiz-slova. html
html
Please register with MAAM. Only registered MAAM users can copy. Publication address: http://www.maam.ru/detskijsad/seminar-praktikum-dlja-roditelei-tema-zvuko-bukvenyi-analiz-slova.html
Section list:
Section 1. "Development of phonemic hearing in schoolchildren"
Section 2. "The role and place of didactic play in literacy classes"
Section 3. "Working with parents in the pre-letter period of literacy"
Sign up for the event and leave your abstract
- Back
- Forward
You may also be interested in:
- 11/09/2022 All-Russian seminar "Plots of fairy tales in the works of Trash" Milevskaya Natalia Ivanovna 2022-11-09 19:00
- 11/24/2022 City seminar "Formula of success".
Learn more