The dot story
The Dot by Peter H. Reynolds: book review and activities
I highly recommend this book to anyone who works with children or is a parent. I have to fight back the tears every time I read this story. I too was a reluctant learner and lacked self-confidence as a child. For this very reason, I decided to enter the world of education so that I might be able to motivate and encourage children to believe in their abilities.
The Dot is a beautiful story about a girl named Vashti who is encouraged by her teacher to take a risk. Vashti does not believe she can draw. She is filled with self-doubt until her teacher gently persuades her to, “just make a mark and see where it takes you.” This inspirational story shows how one reluctant learner gains self-esteem with just one dot. Once Vashti sees her artwork signed and framed, she is inspired to experiment more with dots. The simple support of her teacher gives Vashti the confidence to take risks and to grow. Vashti then passes on her teacher’s words of wisdom to another student who does not believe he can draw a straight line.
She hands him a paper and pencil and asks him to draw. She then insists he sign his artwork. The author reminds us of the powerful influence of teachers. We all share the responsibility to challenge a child’s preconceived notions and to encourage children to dream.
This book is an excellent tool to use with adults as well. Consider reading this book to your colleagues at your next teacher in-service. Adults in the helping profession should be reminded of the power they have to inspire children. All it takes is one adult to change a child’s life. I have a pretty good feeling that if you are reading this review you are in fact one those adults. I would also highly recommend using this book in your parenting workshops.
Discussion Dots
International Dot Day
Did you know that September 15th is International Dot Day? Peter H. Reynolds offers some great resources to use with your students! Visit the following sites for some great ideas and extension activities to use with this book.
Dot Day printables
Book Video
Connect the Dot Worksheet Maker
The Dot Activities created by Shanna
I hope you enjoy the following activities I’ve created to use with students after sharing this excellent story. Feel free to click on the links under both activity 1 &2 to print out. You must be a member to access the handouts for activities 4, 5, and 6.
The Dot Activity #1: Connect the Dots
Connect the Dots
Pass out a dot to each student. You may take their picture and glue it on one side of the dot. Another option is to have the student decorate one side of the dot and write their name. On the opposite side of the dot have the students write something they want to accomplish. Once all of the students are finished creating their dots then connect the dots using a piece of yarn. As a class, pick the perfect spot in the classroom to hang the dot garland.
Connect the Dots Handout
The Dot Activity #2: Complete My Dot
Complete My Dot
This is a great activity to use with a group of four students. You can adapt this activity for a larger group by breaking the students up into groups of four. Each student will get a dot with four sections. On the backside of the dot the student will write their name. Each student in the group will write something unique, special or great about the person on one section of the dot. When the dot is returned to the student he or she should have a complete dot with lots of positive words and messages from his or her classmates.
Complete My Dot
The Dot Activity #3: Dot Word Art
Dot Word Art
Each student will get a sheet of dots and an index card or piece of paper. The student will use his or her dots to create an inspirational word or a word that describes him or her.
The Dot Activity #4: Musical Dots
Musical Dots
This game is played much like the original musical chairs. Each chair will have a dot attached to it with a question or challenge written on the back. The students will walk around the chairs until the music stops. Once the music stops the students must find a chair to sit in. The student who is without a chair will select a chair to pull from the circle. The same student will then read what is written on the backside of the dot from the selected chair. He or she will answer the question or perform the challenge. The remaining students will continue walking around the chairs until the music stops. The student left standing without a chair will select a chair and read the dot. He or she will then answer the question or perform the challenge. The game continues until there is only one student left. He or she will be crowned the dot king or queen. You may reward this student with a jar of dots (m&ms, skittles, etc.)
The Musical Dot handout is available on the lesson page for members only.
The Dot Activity #5: Dare Dots
Dare Dots
Each student will select a dot at random. Each dot has a dare written on it. The student will then be challenged to perform their dare dot. There are also blank dots for students to create their own challenges.
The Dare Dots are available on the lesson page for members only.
The Dot Activity #6: Dot Detective
The Dot Detective
Each student will be given a dot. The student can either put his or picture on one side or write his or her name. On the other side the student will write three unique facts about him or herself. Make sure the students do not show their dot to anyone else. You will then collect all of the dots and place each of them under a different number (1 through 16). Each student will then receive a Do You Know the Dot handout. Either you can read the clues out loud to the students or the students can examine each dot on their own. The student will then write the name of the person they think the dot belongs to on their handout. You will then reveal the picture or name of each dot and the students will mark their handout with either a check or an x depending on if they guessed correctly. The students will add up their total of correct dot guesses. The student who has the most correct answers is the Dot Detective winner!
The Dot Detective handouts are located on the lesson page for members only.
The Dot - Teaching Children Philosophy
by Peter H. Reynolds
FILTERS: art-or-beauty, grade-1-2, grade-2-4, grade-3-5
Book Module Navigation
Summary »
Guidelines for Philosophical Discussion »
Questions for Philosophical Discussion »
Summary
The Dot is about aesthetics and asks two central questions: “What is art?” and “What makes art good?”In art class, Vashti convinces herself that she can’t draw. Her teacher encourages her to “make a mark and see where it takes you.” Vashti makes a frustrated mark on the page, and her teacher asks her to sign it and displays it for everyone to see. Realizing she can draw a better dot, Vashti begins creating many more dots. Vashti meets a little boy in awe of her work. The boy is convinced that he can’t draw. Vashti encourages the boy to “make a mark and see where it takes you,” which sets in motion a whole new story.
Read aloud video by Peter Reynolds
Guidelines for Philosophical Discussion
The Dot raises philosophical questions about the definition and evaluation of art. The questions can be accompanied by the following activity.
One way to begin the lesson is with a hands-on activity before reading. For this activity, each student has a blank piece of paper and a marker in front of them. Each student is asked to make a single mark on their paper. The activity is a fun way to engage and learn kinesthetically, and is also a good jumping off point for later discussion. Once the children have completed the activity, have them put their papers aside to listen to the story. While you will refer back to this activity in this module, it isn’t needed to have a philosophical discussion.
Vashti simply marks her paper with a dot. She doesn’t think of this ‘painting’ as art until her teacher asks her to sign it, and then proceeds to hang it up. The question arises: Is Vashti’s dot painting art? Discussion can begin with this question. If children say “yes”, you can ask: What about the dot makes it art? If children say “no”, you can ask: Why not? If a child offers a definition of art, ask the other children if they can think of a counterexample. If they cannot, bring one up yourself, and ask if they think it’s art. For example, if a child thinks the dot is not art because it is not representative of anything, give an example of an abstract work of art.
One option at this point in the conversation is to bring in different candidate pieces of art which kids might disagree about. For example, you could show abstract art, sculptures, or photographs. For each candidate piece of art, ask the kids whether they think it is art or not, and why they think so.
One definition of art that some philosophers have suggested is an institutional definition of art. The basic idea is this: Something is art (a) if it is meant to be a contribution to the art institution, or (b) if the art institution has deemed it art. For example, the fact that some artifact is in an art museum could be the reason why it is art. Alternatively, an artist might want something to be considered art by art-appreciators and other artists, so since it was created with this intent, it is automatically art. Something like this is going on in The Dot. Did the dot painting become art once it was framed and hung up on the wall (i.e. put into an institutional context)? Or did the dot painting become art when Vashti signed it (i.e. submitted it to others as something that is art)? Attention can be brought back to the dots that the children drew. Ask: Are the marks that you made art? Would they be art if you hung them around the room or put them in a museum? What if they signed them?
The Dot also raises question about the evaluation of art. Maybe Vashti’s dots are art, but are they good art? You can start this discussion by asking the kids: What’s your favorite type of art? Follow this with: Why do you like it? Use their descriptor words to ask a generalizing question about all art. For example, if a child describes their favorite piece of art as beautiful, ask the other children if they think all good pieces of art need to be beautiful. This may also lead to a conversation about immoral art. If someone depicts something unpleasant, such as a cat on fire, is it a bad piece of art?
When giving these examples, ask children whether they like or dislike a couple of the pieces. If there is a disagreement, this gives the opportunity to ask the question: If someone likes a piece of art, and you don’t like the same piece of art, how do we know if it is good art or not? Does one of us have to be right and the other wrong?
Questions for Philosophical Discussion
What is Art
- Is Vashti’s first picture art? Why or why not? What makes it art?
- Did signing it make it art? If so, what if she never signed it?
- Does hanging it up make it art? What about in a museum? If so, what if she never hung up the dot; would it no longer be art?
- Would it have been art if she signed the blank paper (without a dot)?
- Does someone have to decide that something is art for it to be art? If so, who decides whether something is or is not art?
- Does all art have something in common? If so, what might this be?
- Does art have to represent something?
- Does art have to express something?
- Does art have to be human-made?
- If I think something is art and you think it isn’t art, is one of us right and one of us wrong?
Evaluating Art
- What makes something good art?
- Does art need to be hard to draw or make?
- Does art need to be creative or unique?
- Does art need to be beautiful? What makes art beautiful?
- Does art need to make you feel a certain way when you look at it?
- Can art be wrong or immoral? What if someone draws a picture of a cat that’s on fire–is there something bad about that?
Original questions and guidelines for philosophical discussion by Sarah Magid and Daniel Gorter.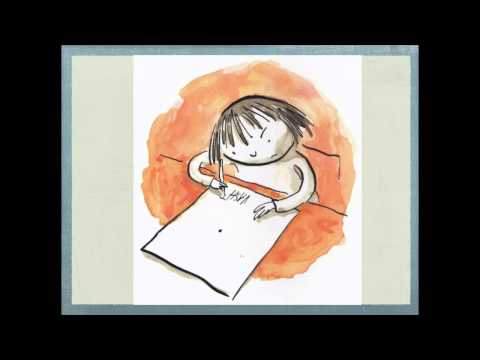 Edited June 2020 by The Janet Prindle Institute for Ethics.
Find tips for leading a philosophical discussion on our Resources page.
Download & PrintEmail Book Module Back to All Books
The history of the appearance of dot painting in arts and crafts and its modernity
- Authors
- Executives
- Job files
- Award documents
Chupina S.S. 1
1MBOU "OOSH No. 2", Khanymei settlement
Folded D.A. 1
1MBOU "OOSH No. 2"
The author of the work was awarded a diploma of the winner of the II degree
Diploma of a student Certificate of the head0013
The text of the work is placed without images and formulas.
The full version of the work is available in the "Files of the work" tab in PDF format
Introduction
The relevance of lies in the study of the emergence of dot painting in arts and crafts, the expansion of handicraft to an entire industry based on dot drawing on a product, on a body, on glass, on skin, etc. A simple artistic technique, but how much it novelty, discovery and beauty. The dot is used in many artistic directions. In a drawing, a point works as a reception of light and shade and volume. In painting, the Impressionists used dot technique as a new genre of writing. In arts and crafts, we observe the emergence of a dot, and we are convinced that many folk crafts have been transformed in a special way from its use.
Great interest has been shown in spot painting these days, due to the availability of acrylic paints in work in convenient packaging, so that the artist can start performing decorative work immediately, picking up a similar tube and preparing the surface of any material for decoration.
Formulating the research problem
The technique of dot painting (“point-to-point” from the English “point to point”) makes it possible to create works of art in a variety of variations: to compose an applied composition on glass, on cardboard, on paper, on leather, and so on. You can decorate clothes, shoes with dot painting, paint fabric using the Batik technique, decorate interior and household items. This is how we know it today, but how and where it appeared, and when it entered the practice of decorating modern decorative objects, I would like to know.
Point has received another interesting direction in the educational format these days as Growth Point .
If you look at a dot through the eyes of an artist, then you can say about it that the dot can develop in different ways, transform into a line, into a spot, into a curl, into a drop, and so on. Anything can appear from a point, as the artist wishes. Perhaps, Point of Growth is that dotted seed from which something good, beautiful and useful sprouts.
Let's return to the point as a certain technique of writing in arts and crafts. A dot can be small or large, making up an ornament of repeated repetition and its convergence in a border strip, for example. A stylized flower may appear from several points. For some reason, there is a feeling that we have seen it somewhere, it is familiar to us. We were interested in the idea of finding the appearance of a dot in the painting. We took the path of searching through what we saw, what we know and what else can be learned.
The novelty of the topic of research work is in a different narrative of the appearance of dot painting as a decorative design for icons, and only then, the use of this painting in decorative and applied art. At the present stage, there is a huge demand for dot painting, and this is now considered a very fashionable trend in the decorative design of designer products.
Research purpose:
- to confirm the historical connection of dot painting from the period of writing icons, and which has survived to this day as an unusual writing technique in modern arts and crafts.
Study objectives:
- learn the history of the emergence and development of dot painting, using various information sources and documents;
- to explore modern design material intended for this technique of writing on various decorative items and objects;
- to prove the modernity of dot painting in art.
Research object: dot painting in arts and crafts.
Subject of research: confirmation of the appearance of dot painting in the period, which is indicated by the painting of icons from the Nativity of Christ.
Research hypothesis: if we assume that dot painting was used by the first icon painters from the period from the Nativity of Christ in the decorative design of icons, then later it could appear in the arts and crafts of Russian folk craft, brought by Palekh masters with extensive experience in painting icons and they could use their knowledge in creating Palekh lacquer miniatures.
The following methods of work are possible : searching for information on the Internet, contacting a library, a museum, a temple. Along with the search for information on dot painting, there was a need to find out the type of material that best leaves a dot on the surface of any objects. A dot can be a comma, a spot of various sizes and bead-dots, depending on the artist's intention. Conducting research, there was a desire to independently make this painting on a variety of surfaces of household items.
The practical significance of this work: historical data can be used in fine arts lessons, in additional classes and in aesthetic cycle circles. Those who are fond of embroidering icons can decorate the frames for these icons using the dot painting technique. Many people, being isolated from others (for the period of a pandemic, a long illness, leading a sedentary lifestyle for a number of reasons), can independently master the technique of point writing, studying our project as a new type of decorative work, creating author's original products. You can make gift, exhibition, collection exhibits or decorate a corner, or even the entire interior of the house, with decorated products. Working in the technique of dot painting, subjects can be taken from the folk crafts we have proposed and create something of your own based on them.
Chapter 1 Theory
Primary information on the history of spot painting
Using various resources, documents, we learned about the appearance of dot painting in coinage as a dot method of working on tin, which later turned into the so-called drip technique. In the old days, paint was collected in a straw, after which it was applied in drops to the surface and created a unique pattern on household items, sacred religious objects, clothing items, and so on. This method of painting was very popular in Asian countries: India and Persia. The plots drawn in this technique are very diverse: images of gods and people in clothes lavishly decorated with dotted ornaments, flowers and animals. Moreover, this trend can be traced both in planar painting and in three-dimensional bas-reliefs and sculptures. It is also known that the point as a pictorial unit was actively used by the indigenous people of Australia. With its help, they displayed the history of their people with all the details: from the outcome of battles to astronomical data.
Is it really so? We decided to explore the origin of dot painting, to go, as they say, from the other side.
Agree or disagree with primary information.
There was a problem in finding the birth of a point as the main or additional decorative detail in certain types of fine art. For some reason, it is generally accepted that such a type of artistic creativity as dot painting appeared thanks to a special pattern made by dots by African, Indonesian or Australian aborigines. We admit that there could be such an influence on contemporary art in spot painting, but we abandoned this existing idea as the only one.
If there is any doubt, then it is necessary to look for other evidence by changing the accepted concept and move on to something extraordinary.
Spot painting in icon painting or the search for its appearance in a new way of research.
We wanted to conduct our research and prove that the dot as an artistic element appeared much earlier and went through a different path of development than the one to which many informational texts incline us. Once we paid attention to the iconography, in which the dotted design of the faces of the saints, the details of their clothes and the objects around them on the icons can be traced. If you look at one of the icons painted by the Apostle Luke himself (one of the disciples of Jesus Christ), and there were three of them about the “Mother of God”, we will see that the clothes in which the Mother of God is dressed are decorated with such a dotted pattern resembling pearls. The writing of these icons dates back to the beginning of our era, the reckoning from the Nativity of Christ, which means that the dot was already used as a decorative element at that time. Below is the icon of the Evangelist Luke and is known to us as the Filerim (Fig. 1).
This icon clearly shows the dotted edging of the face of the Theotokos. The halo on the icon is depicted in the form of outgoing rays in the head area. It is he who has dotted rows depicting the outgoing light and holiness from the face of the Virgin.
There are many other icons with a similar method of decoration using a group of dots on clothes and on the binding of books depicted on the icons. Below we see the icon of the Mother of God - the Queen of Heaven. Early 8th century. Rome. Basilica of Santa Maria in Trastavere (Fig. 2).
On this icon, the robe of the Mother of God is decorated with dots. Their location forms a close proximity in the ornamental rows, which corresponds to the rules of dot painting.
Before us is the icon of St. Nicholas. On his clothes and on the Bible, which he holds in his hand, we see ornamental rows made of dots of different colors, with different alternations (Fig. 3).
3).
In our church, some icons show a similar dot painting, which indicates that such dot decoration of certain details in icon painting is canonically allowed (Fig. 4, 5).
The Russian icon has constantly attracted and still attracts the closest attention of art critics, artists and just lovers of painting with its unusualness and mystery. This is due to the fact that ancient Russian icon painting is a peculiar, unique phenomenon. It has great aesthetic and spiritual value. And, although a lot of special literature is currently being published, it is very difficult for an unprepared viewer to decipher the encoded meaning of the icon. To do this, some preparation is required.
The conclusion suggests itself that the surviving icons from the Apostle Luke, a doctor and artist who was a disciple of Jesus Christ, contain dot painting. We wanted to make sure of this, and we received a positive answer. Canonically, such design of icons in the technique of dotted writing is allowed, so the direction of our research is correct. Yu.P. Sergeev introduces us to the basics of the technique of making icons in the book "Secrets of icon painting" [7].
. The history of the appearance of dot painting from the icon painting of the Dpalekh lacquer miniature and its revival in arts and crafts today.
In the lacquer Palekh miniature, we found similarities with icon painting.
The first mention of the art of Palekh painters dates back to the 17th century. The word Palekh itself refers to the Finno-Ugric group, the carriers of which completely disappeared among the Slavic people. It is believed that the village of Palekh was formed by people fleeing from the Tatar-Mongol on the site of a scorched area of \u200b\u200bthe forest, which is called singed in the common people. And so the name of the settlement was born, from which the names “Palekh icon painting”, “Palekh painting” and “Palekh miniature” originated.
Since the artists of the Palekh miniature were former icon painters, this fact could not but affect the style of writing artistic compositions. In Soviet times, there was a ban on painting icons, and the artists created their Artel in 1918 and began painting on wood. By the middle of the 17th century, folk rumor had spread the news about the magnificent works of the Palekh painters and reached the major cities of Russia, including Moscow.
The founders of the Palekh style are outstanding artists Ivan Ivanovich Golikov and Alexander Alexandrovich Glazunov, in whose Moscow workshop Ivan Golikov wrote the first work in the so-called Palekh style. Pre-revolutionary Palekh was famous for its miniature icons, or, as they were called, petty, work. Palekh icons were admired by Nikolai Nekrasov, Nikolai Leskov, Anton Chekhov. In 1814, Johann Goethe showed particular interest in the works of Russian icon painters.
If these artists were icon painters in the past, then dot painting should be preserved in Palekh lacquer miniatures. Indeed, we find confirmation of this, and, referring to the creative works of Palekh masters, we are convinced of the correctness of our research.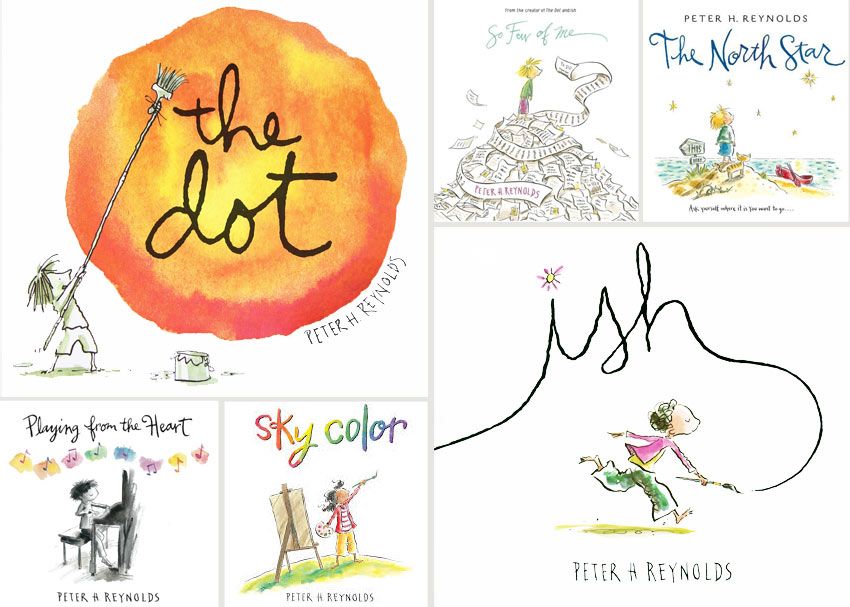 On the tray (Fig. 6) and on the lid of the box (Fig. 7) decorative techniques from dotted writing are depicted both as ornamental border stripes and as decorative elements forming snow whirlwinds from dots, decorating horse harnesses, symmetrical patterns and stylized bushes and trees . Grass and leaves (Fig.6,7).
Dot decoration in compositions gives fullness and volume to traced images. Such painting completes the compositions, filling the space or limiting the plot image of the artistic miniature with dotted paths.
In many ways, the traditional art of Palekh is based on the traditions of ancient Russian icon painting. These traditions were perceived by Palekh not mechanically, but with strict selection and significant processing according to the new requirements, new tasks of that time. Palekh miniature is decorative. About her techniques and rules of writing can be found in the book "The Art of Palekh" by N.M. Zinoviev [2].
This is not the only dot painting practice in Palekh. There are other folk crafts where spot painting lives to this day: Dymkovo painting, Gorodets, Khokhloma, Gzhel and many others. others
Conclusions: we learned a lot of new things, for example, that the first Palekh masters were icon painters, which is why there are many similarities in these Palekh miniatures with the technique of painting icons. We learned that the icons had not only the canonical stylization of images, but were also unusually decorated. Dot painting was necessary in icon painting for the characteristic brightness and importance of the written images and faces, which are different from portraits in painting. We were convinced that in many ways the traditional art of Palekh is based on the traditions of ancient Russian icon painting.
Chapter 2. Practical part
2.1. Explanation of artists' interest in dot painting
The experience of the first icon painters most likely had an aesthetic meaning rather than a symbolic one. The decoration on the icons of the divine or holy face was implied as an obligatory matter. This is a fact of the artist’s love, who believe in general, for those images that people believed and tried to combine holiness and lordship on the icon, filled with a wide variety of decorative decorations, including dot painting, most often droplets-dots were white. Among the disciples of Christ there were also fishermen, so the appearance of white pearls on the icons is quite real. Of course, pearls were a very expensive stone, and due to the lack of pearls, icon painters decorated the clothes of the holy fathers on icons with a white dotted path, thus highlighting one or another holy face on the icon, giving it preference or special respect. So dot decoration from icon painting smoothly migrated to Palekh lacquer miniatures. The best examples of Palekh painting have long been included in the number of works of art that are world heritage [5].
Many folk craftsmen considered a special beauty in a dotted letter. The dot resembles many images from nature: peas, millet, the core of a camomile, an asterisk in the sky, a drop of water, a grain of sand, etc. Styling elements of nature, decorative craft artists used dot painting already at the dawn of its appearance - these are berries-beads in the form of dots were depicted in the Khokhloma letter, and in Gzhel, and in Gorodets.
I tried to make several works in the dot painting technique, using the main compositions of Gorodets writing (Fig. 8, Fig. 9). Spectators and jury members became interested in my works when my creative products were shown at exhibitions and participated in competitions. So, for example, I made one work for the Easter exhibition, and the second for the environmental competition. I was presented with two earthenware jugs, which I painted dotted according to the relief forms that were originally extruded during their manufacture. As a result, I realized that, indeed, dot painting fits beautifully on any material, and the monotonous color of the product is transformed into an interesting decorative object (Fig. 10, Fig. 11).
You can also use glass as a material for dot painting. The same acrylic contour paints look good on the surface of various materials. I will introduce you to two more of my works, where there is a spot painting, but on glass (Fig. 12, Fig. 13). From Cheryl Owen, you can learn some of these techniques in this technique of the work "Painting on glass" [9].
2.2. Dot painting point to point in arts and crafts yesterday and today
In the course of the research work, we got acquainted with many works in which dot painting was and is being used. Yesterday this art had one meaning, and today - another. If on the first icons we see this painting as an element of decoration, then in real works this same painting acts as a full-fledged work of art. This art can only be compared with a mosaic, with a stained-glass window, where the same material is laid out, lined up in an independent panel. Elya Bakieva teaches many people in her book “Glass Painting for Beginners: Sketches, Acrylic and Dot Techniques with Contours” how and with what decorative colorful products can be made. [6].
In Moscow in the Museum. A.S. Pushkin, in the halls of the Hermitage in St. Petersburg there are expositions of paintings by impressionist artists, written in the technique of pointillism. One of the brightest representatives of such a point performance of his paintings is Seurat Georges. In Henri Perruchot's book "The Life of Seurat", he describes in detail the life and work of Georges Seurat (1859-1891), a neo-impressionist artist who led the movement that received the name divisionism or pointillism in painting [1]. This point drawing used in painting has a mixed opinion. It takes a long time to write, has a number of inconveniences in terms of drying time, which is probably why dot painting in painting did not receive much development, but in arts and crafts it turned out to be both in place and on time.
Currently, applied arts artists have invented their own technique of dot painting, which is called point-to-point (from the English “point to point”) and, using it to paint various decorative objects, paintings, interiors, have created their new world of design in many directions. Looking at such products, one gets the impression that they are all decorated with small beads or beads. Now, point-to-point painting is understood precisely as painting with acrylic contours, if only because it is the best and most common material for such creativity. All these types of painting once inspired Dutch designers to a new reincarnation - dot painting became acrylic, and we can assume that dot acrylic painting appeared along with the first tubes of acrylic contours. A description of the work in the “Point” technique with a rich visual range can be found in the book “Dot Painting” by Natalia Vorobyova [4]
2.3. Required materials and topics for modern point-to-point technology
In Rus', the point technique was called "droplet" due to the fact that the dye dripped onto the surface with a straw. The accuracy of such works was not always at the proper level, and only with the development of modern industry, the quality of paints, convenient packaging (tubes with spouts) made it possible to look at dot painting as an easy and relaxing art form. You can watch a very good master class on painting with contours using the “Point-to-Point” technique [3].
The contours that artists and amateurs of such art are currently working on come from different brands and with different nozzles on their spouts. Firm "Gamma" produces the most liquid contours, but it is "Gamma" that has the largest range of colors. The Decola firm has thick contours, with thin noses. The contours of the company "Tair" are very successful, they do not flow, the dots remain even and neat on the material. The contours of the IDEA firm with good spouts do not flow, the dots are thin, the PEBEO firm also has good colors, but very thin spouts, and it is difficult to clean them.
For beginners, one company is enough, then you will figure out what you like and need more. All spouts have a very slight bevel, thus you can adjust the size of the points. When working with contours, you need to have a piece of fabric made from natural fibers or soft napkins. This is necessary when you work with tubes, the edge of the spout seems to be "blurred", numb and the dots turn out to be uneven and blurry, so you need to wipe the spout thoroughly. Be sure to wipe the tip of the tube before screwing it back on to keep the cap clean and the tip clean, again preventing the paint from drying out. A paper clip and a thin fabric pin will also come in handy. They need to periodically clean the spouts so that a dried lump does not form on it. True, if you regularly close the tubes with a cap, even if you are only distracted for a minute, then this will not happen.
To degrease glossy or leather items, you will need liquid alcohol or nail polish remover, cotton pads. The best assistant for beginner artists will be Yulia Fisyuk's book "Dot Painting" [8].
We recommend doing the first work on colored cardboard with contrasting contours. The effect will be good, and so you will soon master the dot painting (Fig. 14.15).
Conclusions: Due to industrial progress, we have gone far from the historically inconvenient technical side of drawing dots on objects. The abundance of fast-drying paints in the most convenient packaging allowed artists, amateurs, children of any age to resolutely take up dot painting and get good results in decorative and applied art. A new direction in decorating objects with this technique opened up a special layer of decorative art for people of different ages. Those who have never been engaged in such creativity can try their hand and talents in dot painting.
Conclusion
Existing folk crafts have introduced dot painting into their decorative component since ancient times. Many people in Rus' were engaged in various folk crafts, and such people were called craftsmen, and mostly they were believers.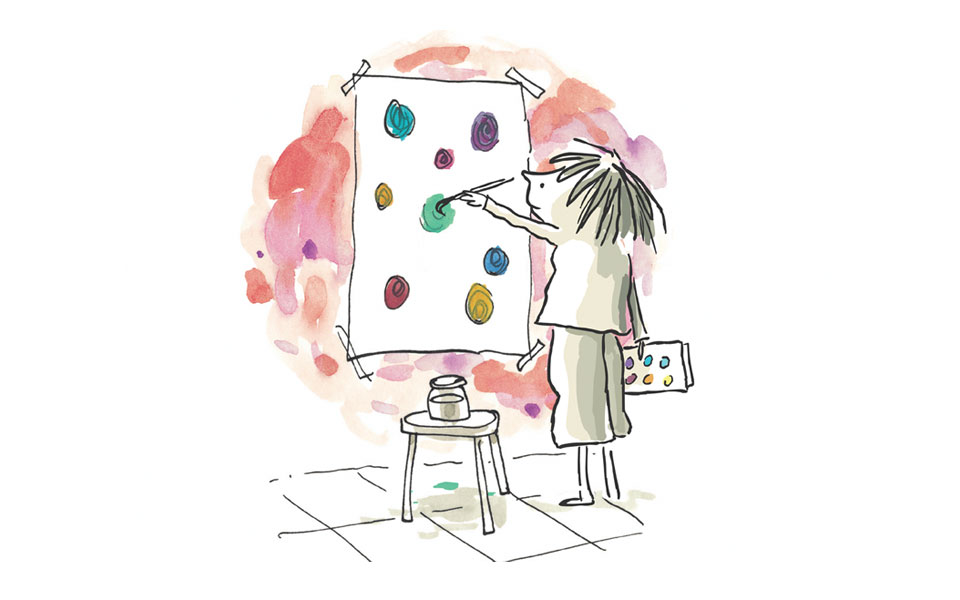 In Rus', there was a good tradition - to pass home icons from generation to generation. The more they prayed, the more valuable and expensive these icons were for believers. Praying before the icons, peering into the elements of their decorative design, folk craftsmen memorized them, and then used them in the design of household items, in folk costumes and in many other ways.
Our research helped to confirm the hypothesis in which we assumed that if dot painting was used by the first icon painters from the period after the Nativity of Christ in writing and designing icons, then later it could appear in the decorative and applied art of Russian folk craft. Palekh masters had extensive experience in painting icons, which means that they used their knowledge and design skills in creating Palekh lacquer miniatures.
Our research turned out to be correct, and we were not mistaken when we saw the similarity of the writing of the Palekh masters with icon painting.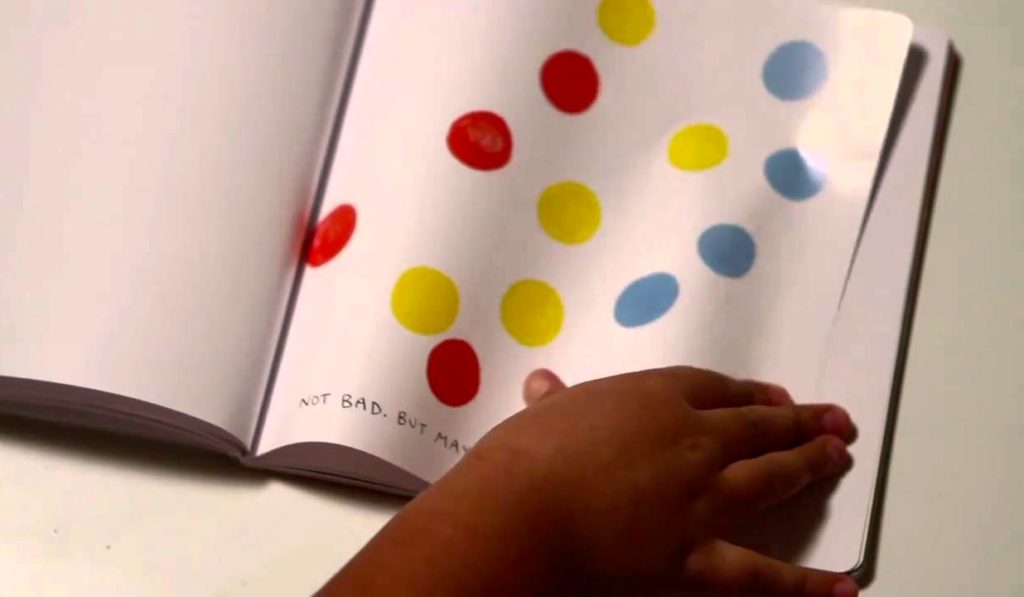 We found the relationship between these two artistic directions, diverse in direction, and received information about the relationship of dot painting in temporary space, which lives to this day. After all, people say that everything new is a well-forgotten old. Such an expression can be corrected in our case and say that the dot painting was never forgotten by the masters of icon painting or folk craft, and everything old was refined, reformatted, modified and transformed so much that many thought about the appearance of this letter from other sources. Looking at these masterpieces of decorative dot painting (Fig. 14, Fig. 15), you will understand that floral and geometric motifs have always been in our folk craft, and they also constituted the main plot composition in dot painting.
Many folk crafts in Rus' actively use the point method of writing in their decorative works: Dymkovo, Filimonov, Kargopol toys and many others.
Now the spot painting technique is again at the peak of popularity and demand.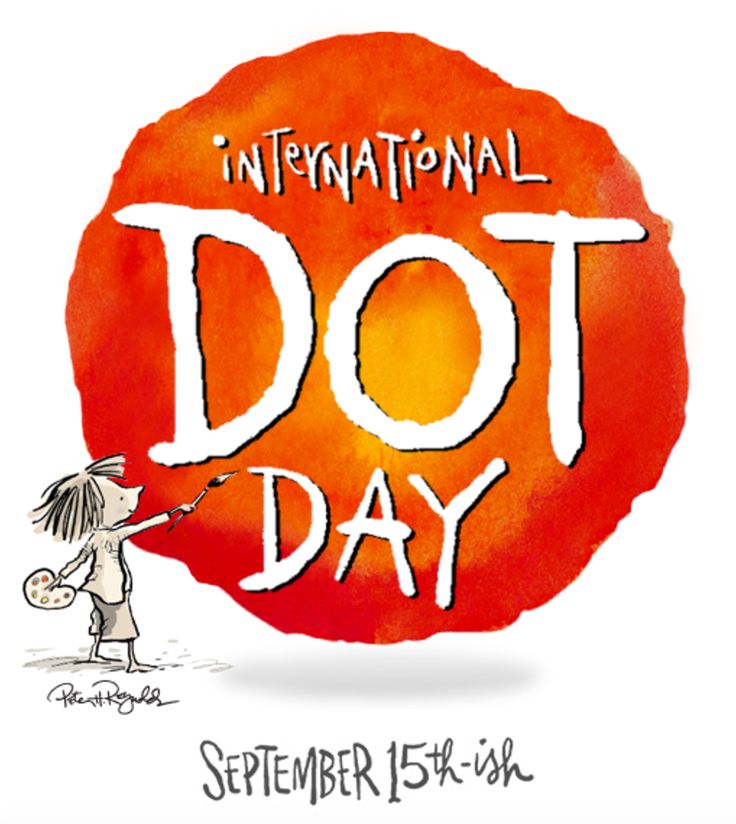 This technique allows you to decorate any dishes, clothes, shoes, interior items, and even decorate and paint icons. Such a painting looks stylish, modern and expensive, because any thing processed using the dot painting technique is always individual and original.
After studying the literature, using the Internet resource, it turned out that the art of such decoration has developed over the years. This art has the prospect of development, and it will delight people with its beauty and usefulness for a long time to come. This study will be useful to those who prepare abstracts or reports on this topic. You can make a message during the dot painting master class, or use the material for an open event, to prepare and conduct classes in arts and crafts.
List of used literature and Internet resource
Henri Perruchot "The Life of Seurat". Translation from French. G. Gennis; Moscow. Publishing house "Rainbow" 1992 - p. 192.
192.
Zinoviev N.M. Art of Palekh. Second edition. Publishing house "Artist of the RSFSR" Leningrad. 1975 - P. 146.
Master class No. 1 on painting with contours using the “Point-to-Point” technique: [website]. URL: https://www.liveinternet.ru/users/5078362/post257164909/.
Natalia Vorobyova. Dot painting. Publisher: Hobbiteka, 2018 Series: Golden Library of Hobbies. – S. 208.
Palekh painting: [website]. URL: https://www.ritsu.ru/sn49-palehskaya-rospis.html)/
Glass painting for beginners. URL: https: https://art-fashn.ru/biser/rospis-po-steklu-dlya-nachinayushhih-eskizy-akrilovaya-i-tochechnaya-tehnika-konturami.html).
Sergeev Yu.P. Secrets of icon painting. Library of a young artist. Moscow. Young artist. 2000 - S. 20.
Dot painting for beginners. Color. RU. Creation. Needlework. Hobby https://www. liveinternet.ru/users/5078362/post257164909/ https://zvetnoe.ru/club/poleznye-stati/tochechnaya-rospis-dlya-nachinayushchikh/
Cheryl Owen. Painting on glass. Modern design. 15 stylish projects. Manufacturer: ed. Art Spring. 2009. - S. 80.
Julia Fisyuk. Dot painting. Educational literature. The most understandable tutorial. Publisher - AST. 2016 - S. 66.
Applications
Icon of the Evangelist Luke and is known to us as Filerimskaya
Fig.1
Icon of the Mother of God. Early 8th century. Rome. Basilica of Santa Maria in Trastavere
Fig.2
Fig.3
Icon of St. Nicholas.
Icons in the Church of the Nativity of Christ in the village of Khanymei. Ornamental rows made of dots of different colors, with different alternations on these icons of saints.![]()
Fig.4 Fig.5
On the tray (Fig. 6) and on the lid of the casket (Fig. 7) there are decorative devices made of dotted writing.
Fig.6 Fig. 7
I tried to make some works in the dot painting technique, using the main compositions of Gorodets writing. Both panels participated in competitions of the village.
Fig.8 Fig.9
My works. Spot painting on ceramics.
Fig.10 Fig.10 11
Two more of my works, where there is a dot painting, but already on glass.
Fig. 12 Fig.13
I recommend doing the first work on colored cardboard, for example: a passe-partout for icons.
Fig.14
Dot painting was never forgotten by masters of icon painting or folk craft, and everything old was refined, reformatted, modified.
Fig.15
Job views: 78
Spot painting - what materials, tools, paint and stencils are needed?
One of the unusual and ancient artistic techniques is dot painting. With its help, even novice needlewomen can create masterpieces on a variety of surfaces from glass and ceramics to wood and metal. To work, you will need special paints and tools, imagination and a well-lit workplace.
What is dot painting?
In English, the technology is called point-to-point, which literally translates as “point to point”. A feature of this direction is that the artists do not use strokes and strokes. The image is applied using flat or volumetric colored dots located close to each other and forming lines and geometric shapes. A very unusual visual effect is created, similar to beadwork, the use of rhinestones and embroidery.
Dot painting can be applied to any smooth, flat and grease-free surface. Beginning craftsmen are trained to create monochrome outlines, while with experience, more complex multi-color patterns can be created. More often, the technique is used to decorate everyday and festive dishes, interior items, mirrors, and even create paintings.
Dot painting - history
People began to draw with dots several millennia ago, and now dot painting of plates is a popular artistic technique:
- Scientists have found the oldest dot images in several countries: China, India, Indonesia, Thailand, ancient Persia.
- However, the oldest drawings are those found by archaeologists on the Australian mainland. Dot ornaments of local natives, according to various estimates, are 38-40 thousand years old.
- From ancient people, technology passed into traditional crafts for many regions of the world, many of these products have survived to this day.
- In Rus', the technique was called "droplet" due to the fact that the dye dripped onto the surface with a straw.
- Some European artists began to create point-to-point paintings. Thus was born a new direction in painting - pointillism.
 The most famous works belong to Georges-Pierre Seurat, Paul Signac and Lucien Pizarro. In this technique, in a certain period, the famous Camille Pizarro painted his paintings.
Dot painting rules
In order for any dot painting with contours to look spectacular on the surface, as in the works of eminent masters, it is important to follow a few rules:
- The surface chosen for application must be smooth, clean and even.
- The product must be degreased to prevent the dye from spreading.
- Dot painting of bottles, as well as other objects, can be applied with a variety of dyes and tools. Some are suitable for most materials, while others are highly specialized.
- You can use stencils to create beautiful patterns or draw your own sketches.
- It is customary to start work from the middle of the pattern.
- Some techniques use only the primary colors red, yellow and blue. The human eye optically mixes nearby points, so visually the picture has many shades.

What do you need for spot painting?
Both adults and children can draw with dots. Spot painting for beginners involves the preparation of the necessary materials and tools:
- a well-lit and comfortable workplace;
- the surface itself for applying the pattern;
- primers;
- varnishes;
- specialized paints or their substitutes;
- paint tools;
- solvents, eg white spirit;
- blotting wipes;
- stencils or self-drawn sketches.
Spot Painting Materials
With proper preparation, spot painting can be applied to any flat surface:
- wood;
- ceramics;
- glass;
- fabric.
The difference will be in the preparation of the surface before work:
- Smooth materials such as glass, tiles and glazed ceramics must first be degreased and then coated with a special primer for smooth surfaces. It improves the adhesion of the paint and does not allow it to chip off at the slightest damage.

- Metal products are coated with special colored primers with an anti-corrosion component.
- On porous surfaces such as wood, cardboard, unglazed ceramics, MDF and fiberboard sheets, special primers based on acrylic dispersion are applied, which level the surface and reduce paint consumption during work.
- Dot painting on fabric also requires preliminary preparation. The material needs to be washed and ironed. It can be primed with special industrial compositions for fabric or with a weak solution of gelatin.
Spot painting tools
The main tools that the master should always have at hand are:
- A thin pencil or a special disappearing marker for marking the space and drawing the main contour elements.
- Dots for dot painting are special metal or plastic sticks, the tips of which are metal balls of different diameters. It is dipped in paint and put a flat point on the surface. Dot painting masters try to do without such a tool, applying a pattern with a special tube of paint - a contour.
- Wet wipes and sponges for blotting tools, removing an unsuccessful element.
Paints for spot painting
Professional spot painting of a vase or other objects is applied with special paints - contours. This is an acrylic composition of a certain density, which is in a tube with a long pointed spout. Masters draw directly to them. Most formulations are divided into:
- Acrylic Contours for glass and ceramics. However, craftsmen use them to paint on any hard surface.
- Enamel paints for metal objects.
- Fabric acrylic . It is more liquid and less resistant to abrasion.
Quality outlines from well-known imported manufacturers are relatively expensive, so beginners can replace them with:
- Ordinary acrylic paints that are brought to the desired consistency. Some craftsmen place them in old tubes from contours or plastic cones with a hole of the desired diameter.
- To learn the basics of dot painting in art schools, children are first given ordinary markers or felt-tip pens.
 With their help, you can learn the pressure force and the method of constructing a bitmap.
 - Pearl paints in tubes or so-called 3D-gels, which make it possible to set three-dimensional dots.
Stencils for dot painting
Not every master is able to improvise in the process of work, creating a pattern, starting from the shape of the product. If it is difficult to determine the pattern on your own, then you can use special stencils:
- For opaque products, they are made independently from stationery plastic, cutting out the desired contour. In art stores, you can buy such a stencil for a very modest price.
- Dot painting on glass can be carried out on any ornament fixed on the back of the product.
How to learn spot painting?
If at first painting with dots looks like a difficult task, then in the process of the first work all the nuances become clear:
- You should always start with degreasing and priming the surface, preparing all the necessary materials.

Learn more