Yarn game with hands
Kid's guide to easy string figures, games, and tricks with video clips
Kid's Guide to Easy String Figures
Games and Tricks with Video Clips!
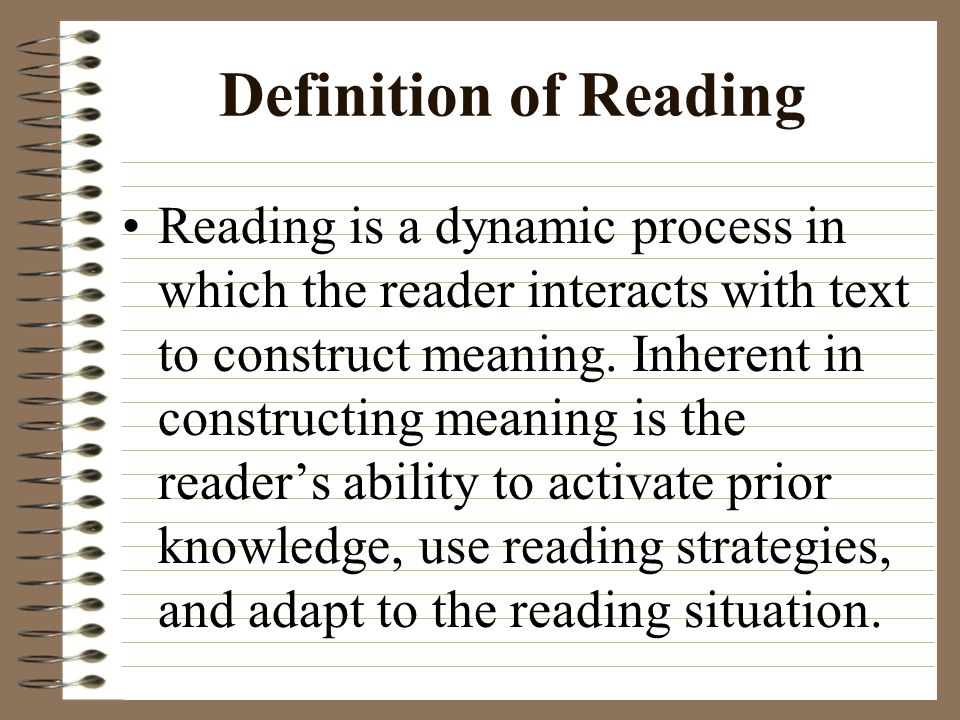
Maybe you already know how to do Cat's Cradle and a few other string figures? If not, then you can learn to make some string figures now. If you can already do some, then why not learn a few more and teach your friends how to do them?
Did you know that in some parts of the world kids know how to make dozens and dozens of amazing string figures? Making string figures is a pastime that kids and adults throughout the world have enjoyed for thousands of years.
String figures are really fun to make! Long before TV, or even books, people were using string figures to illustrate the stories they told around the campfire.
Video clips have been added for most figures. If you have difficulty following a description of how to make a string figure, look at the end of the description and click on Slow dial-up, Dial-up, or Broadband. To view the clips you will need Window's Media Player. For best viewing enlarge the view. If you want to view better quality clips, Right Click on the Dial-up or Broadband link (even if you don't have DSL or other high speed connection) and select "Save as" to download the clip to your computer for fast, high quality viewing anytime you want. Be sure to go to the main menu and look on other pages for more video clips.
The following figures give some idea of the great variety of string figures you can learn to do. First, you will need to learn Position 1 and Opening A, as these are commonly used to begin figures.
Position 1
Pick up one short section of the string loop on both thumbs without twisting it. Extend hands apart. The string now goes from one thumb to the next without any twists in it. The string closest to you is called the near thumb string, and the farthest one is called the far thumb string.
Now, using your little fingers, pick up the far thumb string on the fingernail side of the little fingers.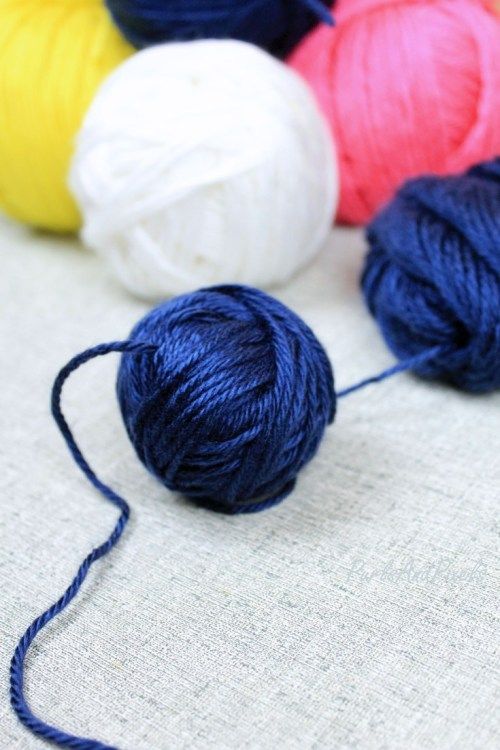 (If told to grab a string, you would curl your finger around it and either hold it with the fingerprint side or, if instructed to, twist it 180 degrees towards or away from you as directed to take the string up on the finger or thumb.) Now just
spread your hands and fingers apart to tighten the string and you have Position 1. View video: Slow dial-up, Dial-up, Broadband
(If told to grab a string, you would curl your finger around it and either hold it with the fingerprint side or, if instructed to, twist it 180 degrees towards or away from you as directed to take the string up on the finger or thumb.) Now just
spread your hands and fingers apart to tighten the string and you have Position 1. View video: Slow dial-up, Dial-up, Broadband
Opening A
Do Position 1. Use your right forefinger to move left and pick up the left palm string on the back of the forefinger.
Tighten the strings. The left forefinger then moves right, goes through the right forefinger noose, and picks up the right palm string. Unless told otherwise, tighten the strings after each step with palms facing each other, and fingers pointing up and spread apart.
View video: Slow dial-up, Dial-up, Broadband
(Opening B is the same except you start with the left forefinger picking up the right palm string.)
Here's what the strings in Opening A are called.
A Hand Catch
Do Opening A. Hold your hands out towards someone. Have them put one hand through the center of the figure. Now release the strings on both little fingers and forefingers, but keep the strings on the thumbs. You have now caught the other kid's hand.
Do Opening A again with the far string still around the other kid's wrist. Tell them to put their hand back up, from below, into the center of the figure. Let go of the strings on your little fingers and forefingers again, and pull your thumbs apart. The string will go right through their arm!
View video: Slow dial-up, Dial-up, Broadband
Cup & Saucer
Europe
Do Opening A. Move both your thumbs over the near forefinger strings and pick up both far forefinger strings (pulling the hands apart to make the strings tight is something you should do after each step unless told not to).
Now remove the lower of the two strings, the original thumb nooses,
from both thumbs.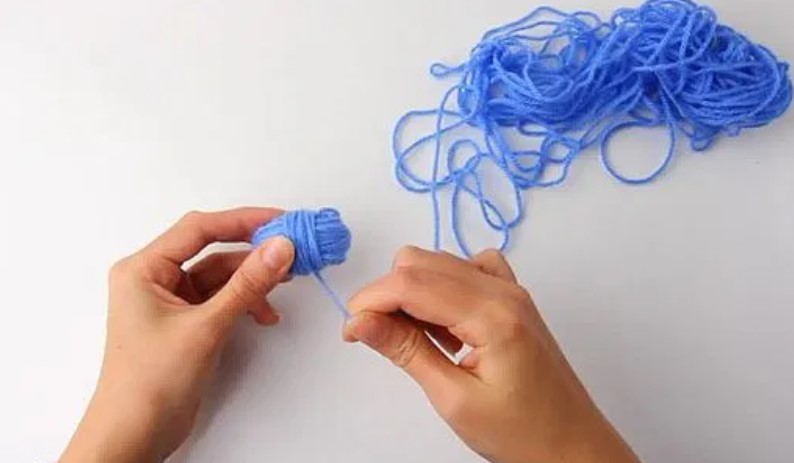 You can remove each bottom string with the opposite hand, or you can use your middle fingers to remove the bottom near thumb string up and over the thumbs (at the same time) while leaving the upper string nooses in place (or use your mouth to remove the bottom near thumb string from the thumbs). Release both little fingers and extend thumbs up.
View 27 second video: Slow dial-up, Dial-up, Broadband
View 2:36 minute video with audio: Slow dial-up, Dial-up, Broadband
Several other very simple figures can be made from Cup and Saucer. Stretched out by bringing thumbs and forefingers closer together, the Cup can pass for A Boat on water. The Witch's Hat is made by taking the middle of the near thumb string (the top of the cup) in your mouth and pulling it out, without releasing the thumbs, until a large triangle is formed. The small forefinger nooses are the brims of the hat. The Eiffel Tower is made in the same way, but thumbs are removed so the forefinger nooses are larger and resemble the base of the Eiffel Tower.
View video: Slow dial-up, Dial-up, Broadband
From the Cup, thumbs can also be rotated away from you, down, and in front of the forefinger nooses so the thumbs are pointing down with palms out to create The Outrigger Canoe.
Laurel Sharp likes to do two more variations: Start with The Eiffel Tower and work your hands back and forth to collapse the figure into an upside down Y. Now put the nooses held in each hand on your ears and release the noose in your mouth so it hangs down in front of you. This is the The Stethoscope. Put your thumb in the hanging noose, tighten it, and put it against someone's chest (or your own), then rhythmically stroke the two strings. If one is a little tighter than the other, a very good "lub-dub, lub-dub" of a heart can be heard. Take the center of the "Y" and put it on your nose leaving the two nooses on your ears so that the remaining noose hangs from your nose. You have now made The Elephant's Nose.
The Star
Alaska
Do Cup and Saucer using a short string loop or a regular size loop that has been doubled.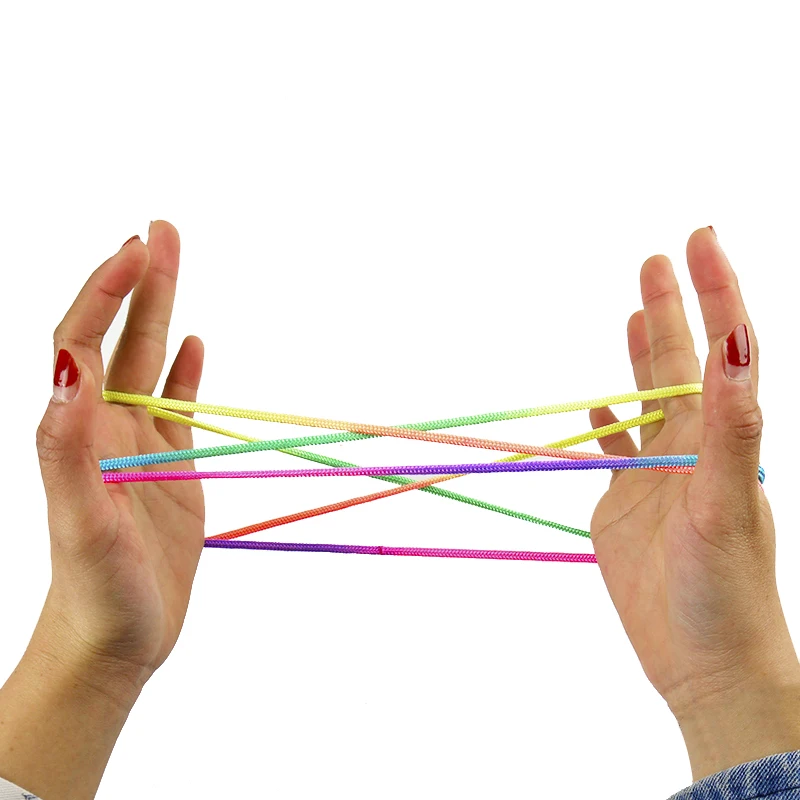 (2) Hold your hands with fingers pointing up. Look at the center of the figure where the bottom of the cup sits on the saucer. This part is made up of three strings. Two are crossed and go to the near side of the forefingers; the other is on top and loops around the far forefinger/far thumb strings. Use your little fingers to pick up this top straight string as shown. Now release the strings on your thumbs. (3) With your thumbs move over the forefinger nooses and pick up the near little finger strings. Now release just the string noose on your right little finger. If the star doesn't look right, try using a shorter string.
This figure was collected by David Titus (March, 2001) while visiting with Yupik children from the village of Akiuk, Alaska. This figure appears to be a new invention. Most of the children in the village knew it (and many others). Even some of the Kindergarten kids could make much harder figures than The Star. View video: Slow dial-up, Dial-up, Broadband
Fishing Spear
South Pacific
Do Position 1, then use the right forefinger to pick up the left palm string, but do not pull on this string yet.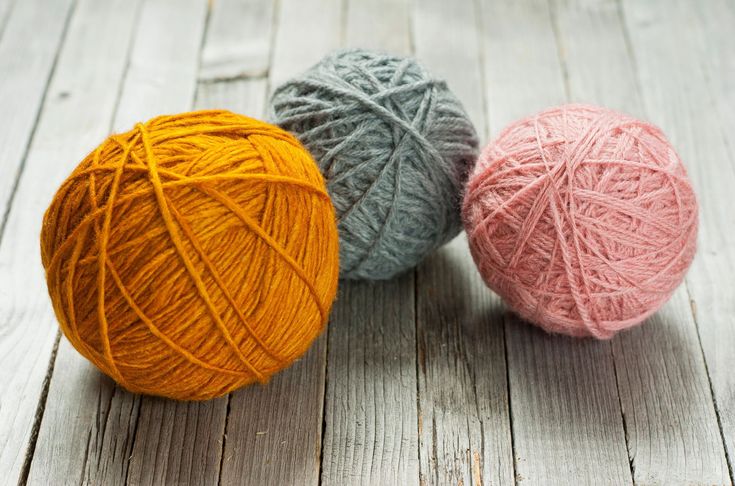 As your right hand returns to it starting position, the forefinger moves away from your body twisting the right forefinger noose 360 degrees. (2) The left forefinger then moves right, through the right forefinger noose, and picks up the right palm string just like in Opening A. (3) Release the right thumb and right little finger nooses at the same time. This figure is also called The Witch's Broom, or Turkey's Foot.
View video: Slow dial-up, Dial-up, Broadband
Dressing a Pelt
American Indian
Do Opening A. Use your thumbs to hold the near forefinger strings tight against the forefingers. Release the little fingers, but keep the hanging string loose—do not extend. Flip the hanging string out away from you so that it goes up and over all the strings, comes back towards you, and hangs over the near thumb string. Now move the thumbs down and away from you so that they go through the thumb nooses and grab the far forefinger strings that are hanging over the thumb nooses. The original thumb strings will slip off. Extend the figure quickly.
The pulling through of the string reminded American Indians of pulling off the skin of a hanging animal and reversing it as it was being dressed or skinned. The figure is difficult to do quickly in one smooth motion, so competing to see who can do it the fastest is a fun game to play. Note that this figure is an upside down Cup and Saucer and can be made the same way by reversing references to thumb and little finger in the instructions for making Cup and Saucer.
View video: Slow dial-up, Dial-up, Broadband
A Moth
Zulu
Do Opening A using a short #5 or #6 string. Release thumb strings. (2) Thumbs then move over the forefinger strings and pick up the near little finger strings. Release the strings on the little fingers. (3) Thumbs next pick up the near forefinger strings. Now remove (navaho) the lower thumb strings (which is easiest to do using the middle fingers to lift them off and over the thumbs while leaving the upper thumb strings in place).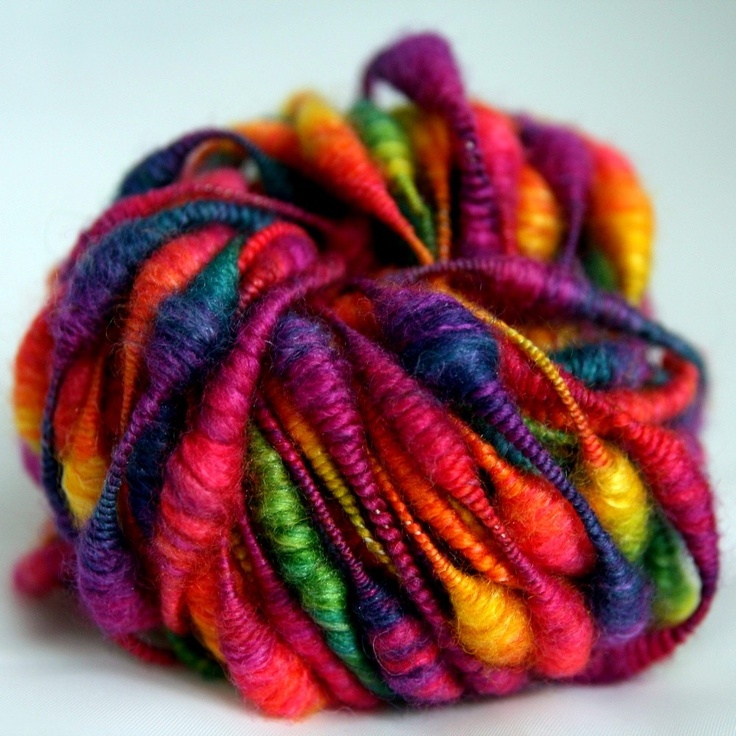 (4) Forefingers move down and grab the top string that goes around the middle of the thumb/forefinger noose, then, moving away from you, extend the forefingers up and palms out.
View video: Slow dial-up, Dial-up, Broadband
The Mouth
Pacific
Double up a normal #8 string or use a short #4 or #5 string, and do Position 1. (2) Forefingers pick up the far little finger string. (3) Thumbs then move over the near forefinger strings and pick up the far little finger strings (which could also be called the far forefinger strings) and remove the lower thumb strings (or simply let the original thumb string slip off as you pull the far little finger string through). (4) Open and close your thumbs and forefingers to make the mouth talk. Cover your mouth with your forearm and give the mouth a voice.
This figure is also called Crab's Mouth, but the Hawaiians think it looks more like the twitching posterior of a pig. View video: Slow dial-up, Dial-up, Broadband
You can also release your little fingers and turn thumbs and forefingers pointing away from you to create The Bone.
Man Climbing a Tree
Australia
Do Opening A. Little fingers then move over all strings and pick up the near thumb strings on the tips of the little fingers to keep it separate from the original string. (2) Grab and hold tight the palm strings with the forefingers, then remove the bottom little fingers noose (holding the top string with your middle fingers while letting the lower string slip off). (3) Release the thumb nooses while letting the bottom forefinger noose slip over the forefinger. (4) Depress the far little finger string using your foot, a book, etc. (5) Extend hands upward while letting the forefingers alternately slip to see the man climbing a tree.
View video: Slow dial-up, Dial-up, Broadband
Sawing Wood
U.K.
Use all four fingers to pick up the string noose—the near hand string goes between the thumb and forefinger. Grab the near hand string close to the thumb with the opposite hand and twist it around the hand, then do the same for the other hand.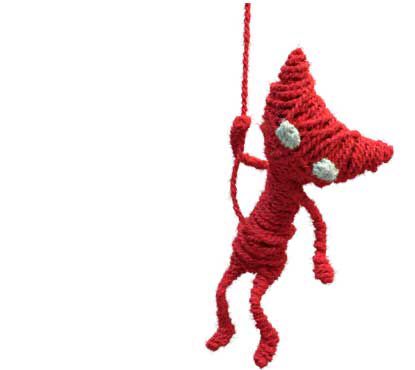 (You could also grab the near hand string with all fingers and twist the string up onto the hands in one motion.) There is now a palm string and two dorsal strings across the back of your hands. (2) Use the forefingers to pick up the palm strings as you would in doing Opening A. Use your mouth or teeth to hold on to the center of the near hand string that goes straight across from hand to hand. (3) Have a second person grab the straight string on the far side of your hand. (4) Turn your forefingers away from you, bend them down and grab the noose that goes around the forefingers while letting the strings going around your hand slip off. Pull both hands apart, then let the other person pull their string, then you pull your strings, and so on, to saw wood.
View video: Slow dial-up, Dial-up, Broadband
Variation 1: You, as person A, makes Opening A. Person B then picks up your near thumb string on their right thumb and little fingers as in Position 1, and likewise they take up your far little finger string with their left thumb and little finger.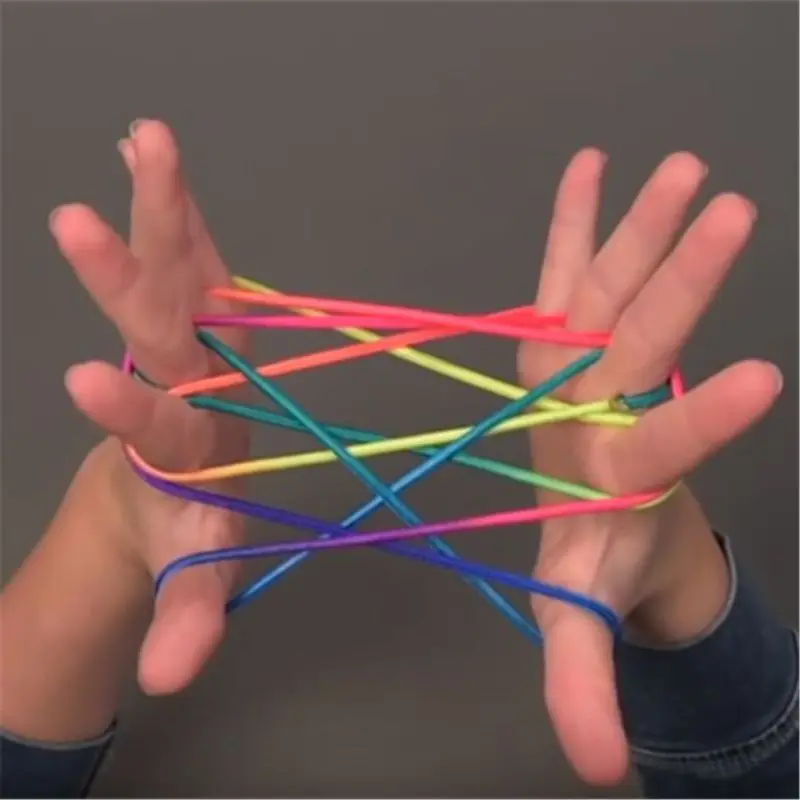 Person B then does Opening A over your strings. Both of you then release your thumb and little finger strings while holding on to your forefinger strings. Now you can saw wood vigorously without pulling any teeth out.
Variation 2: Two people take up the string loop as in Position 1 with your palms facing theirs. You will share far little finger strings in common. Now each of you, using only your right hands, do Opening A. Next use your left hands to do Opening A over top of your right hand strings. Both of you then release your thumb and little fingers and saw wood by alternately pulling right then left hands.
Framework for a Hut
Africa
Take up Position 1 on the left hand only. With the right hand, move left and through the hanging string noose, then reach around to the back of the left hand. With your right thumb and forefinger grasp the string going across the back of the left thumb. (2) Now pull this string down and through the hanging string noose just far enough to transfer it to the left forefinger without twisting it. (3) With your right thumb and forefinger hold tight to the left palm string near the left little finger and transfer it to the left thumb. (4) Again, using your right thumb and forefinger, move over top of the left hand, reach around to the back of the left hand and grab the string going around the back of the left hand. Pull this string out and over the left hand to remove it, and then slowly extend your right hand up while letting the strings on the left hand slip to raise the framework for a hut (or teepee?)
View video: Slow dial-up, Dial-up, Broadband
You can turn this figure upside down so that the left hand becomes The Parachute with its cords holding up the parachutist.
The Mouse
World Wide
With the left hand held with the palm down, hang the string noose over the left thumb and fingers.
(2) With your right forefinger, move away from you and pick up the left near hanging thumb string, then move left, going between the thumb and forefinger, and grab the string going across the back of the left thumb and forefinger.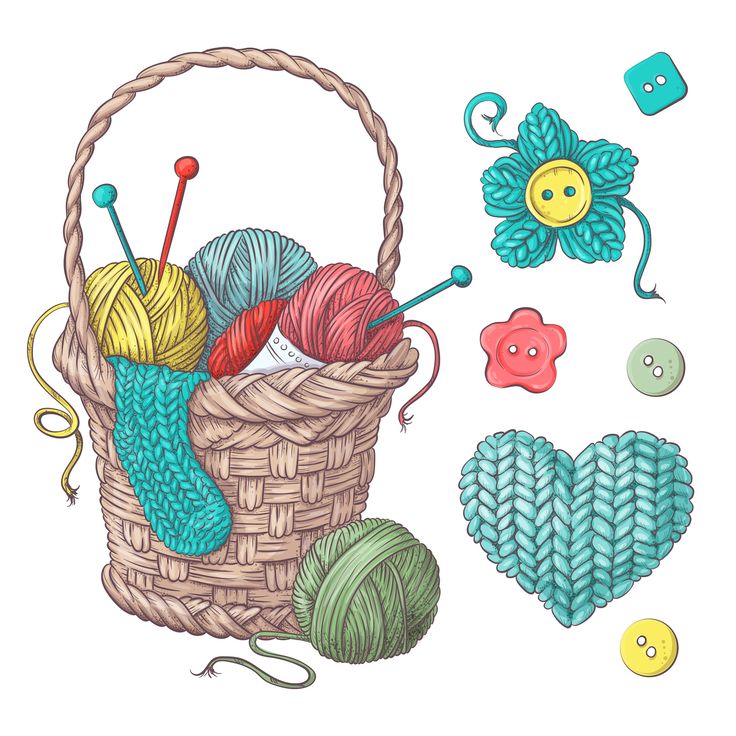
Pull this string a short distance out, then twist your right forefinger towards you to bring it to the normal upright position, but do not extend hands apart.
Instead touch your right forefinger to the left forefinger and transfer the noose from the right forefinger to the left forefinger.
(3) Now take your right forefinger and, moving away from you, pick up the left hanging palm string. As before, move left, going between the forefinger and middle finger, and grab the string going across the back of the left hand.
Pull this string a short distance out, then twist your right forefinger towards you to bring it to the normal upright position without extending hands apart. Transfer this noose to the left middle finger by touching the tip of it with your right forefinger and letting the noose slip onto it. Repeat this pattern for the left ring and little fingers.
4) Release the left thumb. This noose is the mouse. Attack the mouse with your left thumb while pretending it is a snake. With your right thumb and forefinger grab the left near little finger string that hangs down just below the left little finger and pull the string so the mouse can make its escape by running away through the trees.
View video: Slow dial-up, Dial-up, Broadband
This figure is also known as The Yam Thief and many stories can be told about what is going on. One story is about a row of birds sitting on a fence and suddenly taking flight. Another is about a cat and a mouse. Another is about a strong but stupid man trying to pull up a root by pulling before the thumb is released. The clever village weakling then releases the thumb and easily pulls up the root to the amazement of all. So make up your own story.
Thumb Catch
Pacific
Start with Position 1 using the left hand only. The right little finger then moves left, through the hanging string noose, and picks up the left near thumb string.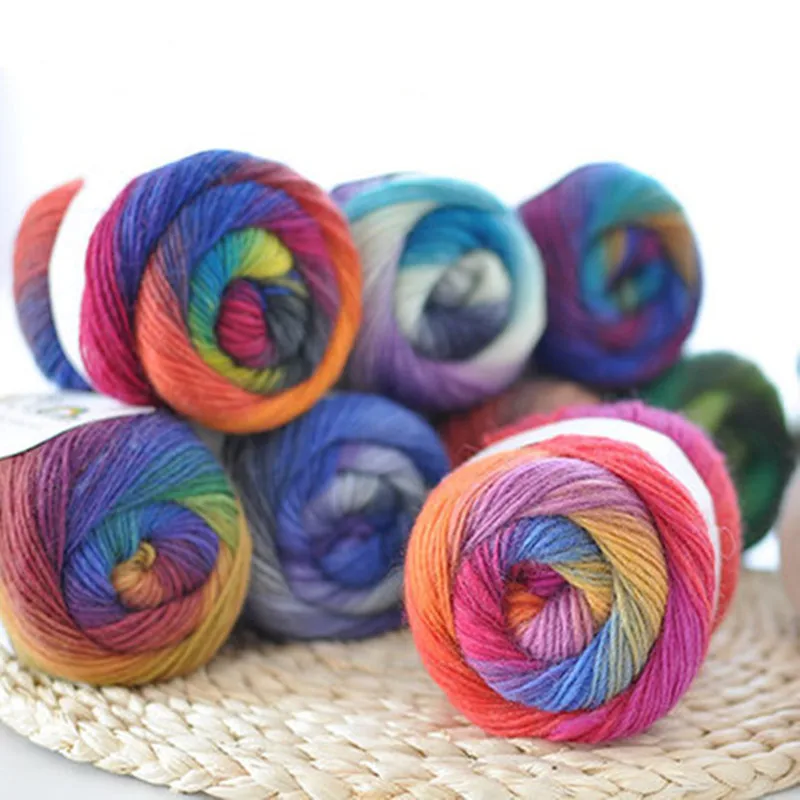 Extend hands apart. (2) The right thumb then picks up the right near little finger string. This is a twisted Position 1. Now do Opening A. The thumbs then move over, through the forefinger noose, down, toward you, then up. (3) Release the forefinger nooses, then release the little fingers and extend to catch the thumbs in a snare.
View video: Slow dial-up, Dial-up, Broadband
If, before you release your little fingers, you put all fingers from below into the thumb nooses and transfer them to the wrists, then release your little fingers, you will have made The Handcuffs. Alternatively, transfer only one thumb noose to your wrist and hold the other open with your fingers, then ask an innocent bystander to put their hand through it. Release little fingers to cuff and arrest them.
Batoka Gorge
Africa on Zambesi River
Drape the string loop over your right wrist keeping the two strings separated without any twists. (2) The left hand then moves to the right and through the two hanging string nooses. Extend hands apart. There should be two crossed strings, and a near and far wrist string. (3) The little fingers pick up first the far then the near crossed strings. (4) Now flip the near wrist string that goes straight across up and over the hands. The near little finger strings run diagonally down to the far wrist string. (5) Pick up these near little finger strings on the thumbs, and then remove the wrist nooses.
View video: Slow dial-up, Dial-up, Broadband
This is a nice African figure, but for most of us who have never been to Batoka Gorge on the Zambesi River below Victoria Falls, it doesn't quite look like a gorge. The figure is said to look like the river as it zigzags back and forth through Batoka Gorge below the falls. If you want to invent new names for figures, that's okay.
Casting a Spear
Africa, Pacific
Do Opening A. (2) Left forefinger picks up the right forefinger noose from above on the tip of the finger removing it from the right forefinger, then the right forefinger moves over the back of the left forefinger and picks up the original, bottom left forefinger string removing it from the left forefinger. The left forefinger noose now goes through and around the right forefinger noose. (3) Release the right forefinger to cast the spear while holding the right far thumb string and right near little finger string close together to form the shaft of the spear which has three points on the other side (making it a fishing spear). (4) Now with your right forefinger go from below up into the left forefinger noose and pick up the original right forefinger string. (5) Release the left forefinger this time to cast the spear the other way. Again pick up the released noose and cast again and again.
View video: Slow dial-up, Dial-up, Broadband
The Wink
Pacific
Pick up the string loop with your right forefinger and middle finger only, with palms down and the string hanging down. (2) With your left thumb and forfinger take hold of the right far middle finger string just below the middle finger and twist it around the middle of the right forefinger/middle finger one time, then transfer it to the right thumb.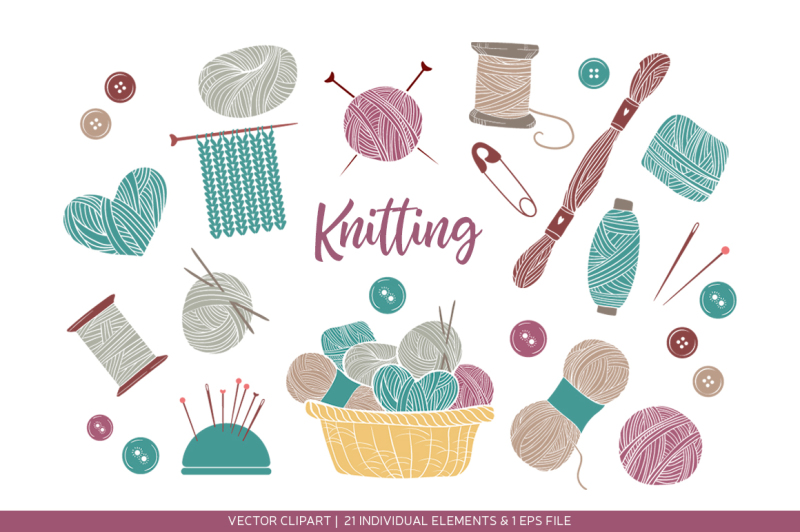 (3) Now pick up the top forefinger/middle finger string with your right thumb, and remove the original string that was on the right thumb. (4) With your left thumb and forefinger grab from below the string that hangs down from the right forefinger over the right palm and transfer it to the right thumb. Now grasp the two hanging strings with your left hand and pull to make the eye wink.
View video: Slow dial-up, Dial-up, Broadband
And a special thanks to Jim Brennan for the animation to the right.
Checkout his collection of tricks at Diabolo Tricks
- Visit our Zazzle store:
- Fine Poster Art
Fine poetry and art go together. Support this site: Visit our Zazzle store featuring ultra hi-res images of artworks, Hubble/ESA/NASA space images, Mandelbrot fractals, maps and more. Images up to 525 megapixels allow for fine printing at the largest sizes. Give a fine print as a gift that could hang around for a hundred years or more.
5 String Games for Kids
- View Larger Image
Share This Story, Choose Your Platform!
If the sight of your children staring zombie-like at a screen sends shivers down your spine, why not try introducing them to an old-fashioned hands-on activity like string games.
Remember string games like cat’s whiskers? Jacob’s Ladder? Witch’s broom? If it’s ringing a vague bell but you can’t remember how it’s done, Kidspot has devised a string figure refresher course on your behalf.
In this article you’ll find five fool-proof how-to videos that will get you started on some basic string games.
Spending ‘quality time’ with our kids is something we angst about in Western culture and we do all sorts of crazy, elaborate things to try to be a good parent. But a core essence of parenting is simply the passing down of stories and ideas to the following generation.
If you spend some time learning a few string figure, then sit down to teach them to your children, you’ll be engaging in some solid quality time with your kids. You’ll also be keeping the ancient art of string tricks alive through the digital age.
String games: a history
The origin of string games dates right back to the Greeks in the 4th century AD. Since then, many cultures have taken up the practice of string figures, largely to illustrate stories. The cultural presence of string figures is far-reaching: from our very own indigenous Australians to the Inuit in the Arctic to the Zulu in southern Africa.
It’s no accident that string figures are so prevalent in so many cultures across the world.
- They’re a great development tool for a few key cognitive areas that are crucial for your child’s intelligence quotient: patterns and relations, geometry, spatial awareness and problem solving.
- They’re a classic parent-to-child cultural hand-me-down.
If you’re still thinking it’s too old-fashioned and hokey, think about this: string figures are just an ancient form of Tweet; a little idea passed on from one person to the next, eventually connecting a whole lot of us across the planet with common knowledge.
So get to it and learn some string tricks to pass on to your kids.
Check out our easy string game videos
We’ve collated five simple figures in this article, but there are so many more, and a lot of them lead to others. For example, once you know the Cup and saucer you can also do the Eiffel Tower, Stethoscope, and Star string figure, while Jacob’s Ladder leads to the Witch’s hat.
Cat’s whiskers
Cat’s whiskers is probably the string figure you will remember from the schoolyard. It’s handy because once you can do cat’s whiskers, you’re halfway to Jacob’s Ladder.
- How to make the Cat’s whiskers string figure
Jacob’s Ladder
Jacob’s Ladder: We used to call it the Harbour Bridge down here. It looks complex, but once you get the hang of the “Navaho” move it’s easy as.
- How to make the Jacob’s Ladder string figure
Butterfly (or moth)
The Butterfly string figure is an old tribal classic that originates from Native American and Zulu cultures. They call it “the moth”. But we thought “the butterfly”’ was a more enticing name.
- How to make the Butterfly string figure
Cup and saucer
Like cat’s whiskers, cup and saucer leads to a number of further figures.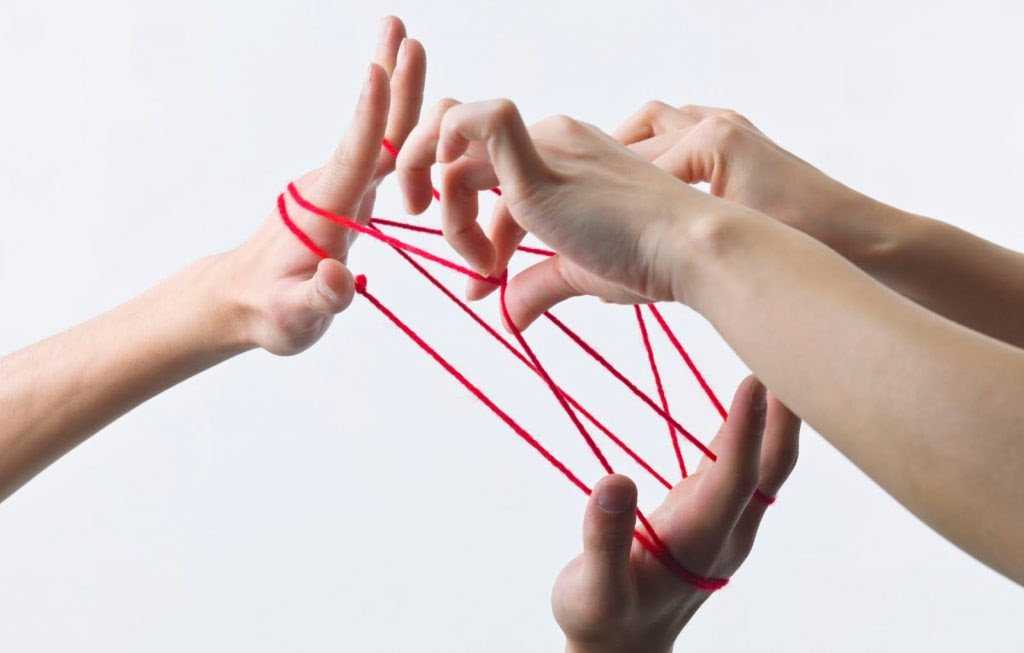 Keep watching the video to see the Eiffel Tower as well.
- How to make the Cup and saucer string figure
Witch’s broom
Witch’s broom is a simple but effective one, also known in tribal cultures as “the spear”. Watch closely for the double twisted loop at the beginning of the figure.
- How to make the Witch’s broom string game
Your string game glossary
If you’re going to go searching for more figures, here’s some terms you may come across. We’ve referred to fingers as thumb, pointer finger (or forefinger), middle, ring and pinkie. Some instructions refer to the: thumb, index, middle finger, ring finger and little finger.
- Position 1 – the most common starting position with the string running across the palms and behind the thumb and pinkie on each hand.
- Palm or palmar string – the string that runs across the palm in position 1.
- Transverse or frame strings – the strings that run straight across from one hand to the other.
- Opening A – (see videos) the beginning to most string figures – hooking the forefinger through each palmar string and pulling the hands apart so that there is a loop on each thumb, forefinger and pinkie.
- To Navaho, or pass over – to lift the lower loop on a finger (or thumb) up and off.
Thanks to Kidspot Australia for creating the instructional videos.
17 fun games and crafts with thread and rope for kids | Being a parent
Threads and ropes are amazing materials with which you can create many interesting games. They will help develop the child and will truly captivate him. Has your little one played with a ball of woolen thread yet? What about ropes?
Offer it to him - you will be surprised how much children are carried away by such games!
Thread and Rope Games - Electrician
Look how cunning
this little fitter is.
he still conducts light
only where there is no light
Remember this rhyme from childhood?
To play, you need a ball of woolen threads (preferably not very valuable) and a child's imagination.
Have your child run the wires around the room. Let him conduct electricity from one house (chair) to the sofa house. At the same time, tell the baby about electricity. You will see how this game will captivate him. The only drawback is twisting the threads after the game. We usually manage to collect all the threads in the same ball, but a couple of times we had to cut the threads, because we could not unravel the knots. Attach the child to twisting the ball of thread, this will contribute to the development of fine motor skills.
[tip] >>Advice from Being a parent is easy! [/tip]
Thread and Rope Games - Laser Maze
The game is designed for preschool children, but schoolchildren also enjoy it.
Take a ball of woolen threads, preferably bright ones, and stretch the threads in the room between all the elements: chairs, table, sofa, wardrobe. You will get a kind of laser alarm in the apartment or a laser labyrinth. The essence of the game: the child must go through the maze without touching the "laser beams". The game can be constantly complicated so that the child jumps, crawls, and bends. The game promotes the development of coordination and dexterity.
Thread can also be used to make fun toys.
Thread and Rope Games - Thread Tamer
This game can be offered to children from 3 to 6 years old.
However, it takes a little time to make.
Take a plastic ball that is usually used for filling dry pools. Make a small hole in it; as a rule, there is a hole in the balls, it can only be enlarged a little. And you will also need a clothesline with a diameter of 2 mm or more. and 2-3 meters long. The ends of the cord must be melted so that the rope does not unravel. Pass one end of the cord through the hole made in the ball. If the rope falls out, a through hole should be made and secured with a knot.
The toy is ready, you can start playing. Give the child a ball with unwound thread. The task of the baby is to wind the string around the ball so that it does not come off. For one child, this is a puzzle toy. And if you make 2 toys, you can arrange competitions between children. This game helps to develop fine motor skills of fingers and develops coordination.
Thread and rope games - Roads
The game is interesting for almost any age. Suggest an idea and the kids will pick it up.
We take any colored thread - so that it is clearly visible on the floor. And… we are laying roads! For very young children, the road will be flat and not long, and for older children, the road can run through mountains and gorges (tables and chairs). Having laid out the rope-road, we begin to “ride”.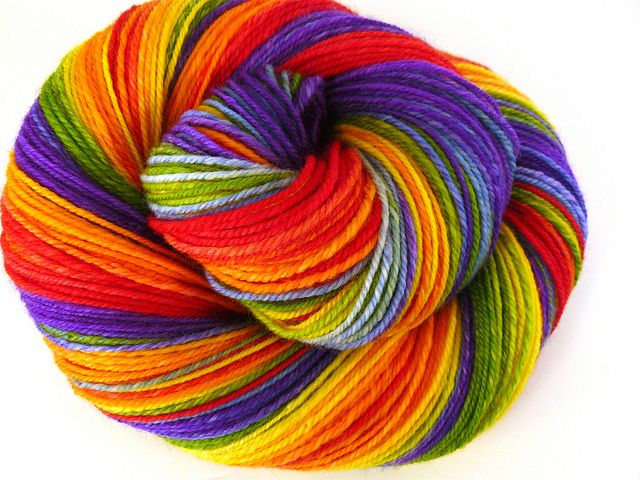 There are many options - to drive with a toy car, to walk on a rope yourself, without standing on the floor without a "road", or a more complicated option - to lay and ride at the same time. In general - give the threads and drop the idea - and the children themselves will come up with a bunch more variations with the “road”.
Games with threads and ropes - Cobwebs
Invite your child to wrap thread around a chair or table legs - just be prepared for the fact that literally EVERYTHING will be braided! around 🙂 Sports complexes and bunk beds are especially in demand. And then another task on the web to get out somewhere higher. True, the game at this moment becomes unsafe for kids, but children over seven will completely determine the strength of the structure themselves. Although falls are still not excluded.
The game is incredibly captivating for kids! By the way, you can take the hank with you to the waiting area. But it’s better to grab scissors too - what if you have to “save someone’s furniture?
Crafts with threads and ropes - Emotional little men
You will need threads, sand, a ball.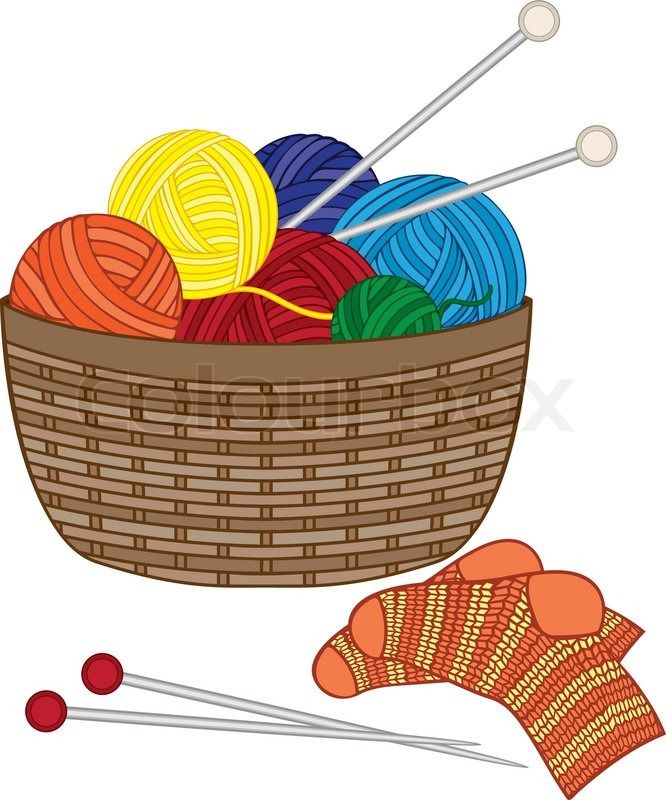
Pour sand into the ball with a small spatula - you can entrust this responsible task to the kid. There is a little sand - as soon as you get a “head” - tie it with a thread. Make the ball a hairstyle of threads. Glue the eyes and nose cut out of paper or just draw them. Make several little people with different hairstyles and facial expressions - the child will play with pleasure or, depicting emotions.
[tip] >>Advice from Being a parent is easy! [/tip]
Thread and rope games - Rope walls and traps
Learn how to make knots with your children - and then offer the task of weaving a net onto a wall. Or create a rope trap - it's very interesting!
Crafts with threads and ropes - A bowl of threads
Together with your child, you can make a wonderful interior bowl!
Cut colorful strings with the children and get to work!
[spoiler show="How to make a bowl of thread with your own hands"]
For crafts you will need the following:
- base (any bowl of any material)
- thin film
- PVA glue
- thread
Cover the bowl with cling film. We spread glue on the film and wrap it with threads in random order. We are waiting for it to dry.
Carefully remove from the bowl-base together with the film, separate the film.
[/spoiler]
Crafts with threads and ropes - Drawing threads
Crafts with threads and ropes - Rope troops
The game helps to learn letters, while captivates children. Develops fine motor skills. Age: from 3 years old.
What you will need: k strings of various kinds of ropes (braid, thick threads for knitting)
How to play?
Tell your child that you will make unusual letters with him. Ask what letter he would like to make, or suggest a letter yourself - a new one, and possibly one that the child has not yet learned well.
Lay different letters on the floor or on the table with bright threads. When the child already knows the letters, write the words with threads.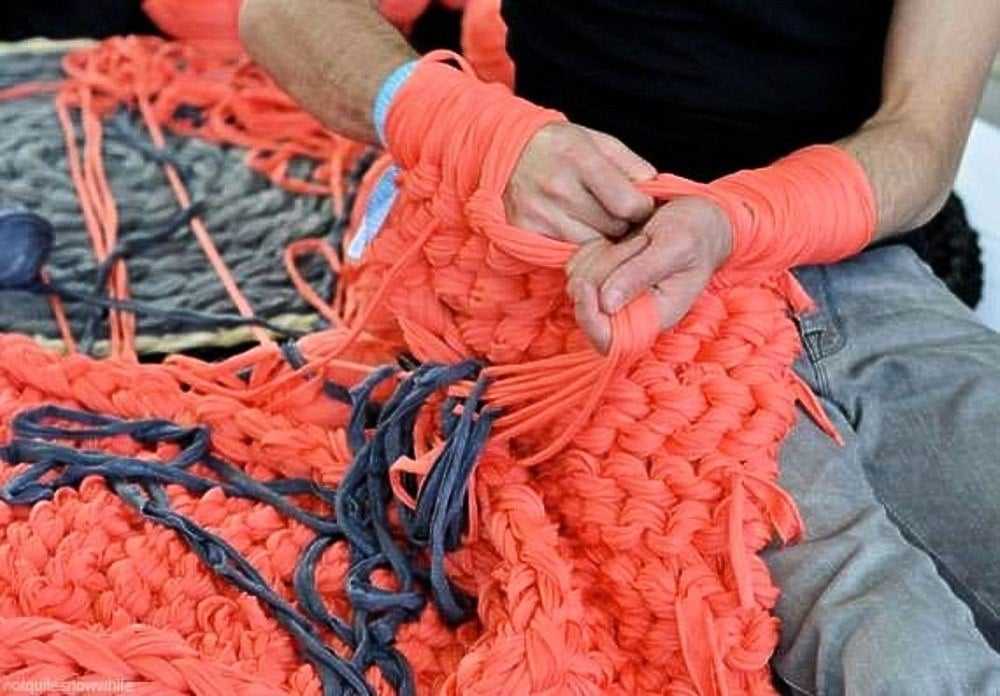
Thread and Rope Crafts - Thread Appliques
Thread and Rope Crafts - Pattern with threads
From the same series as appliqués, but more complex and interesting. Accordingly, for older children.
It is possible with babies of three years old, but then the mother will have to do most of the actions.
[spoiler show="Open step-by-step photos and how to make such a picture"]
First cut the threads to the desired length and form the main elements.
Wood - fancy pieces of thick brown threads, to form the trunk and branches:
“Leaves” — thread rings twisted 7-8 times on 2 fingers, slightly twisted when removed from the fingers, as we twist the thread, tying a knot on it before sewing. This gives an interesting shape.
About the grass, for example, everything is clear:)
The sun.
Flowers. Small according to the principle of leaves on a tree, large - I will tell below.
Dragonfly.
[tip] >>Counseling from Being a parent is easy! [/tip]
How to make a sun, flowers and a dragonfly:
The point is that ordinary stationery pins are stuck into a cork stand, strong foam plastic or several layers of packing cardboard, according to the “clock” principle - something like this:
The central pin is removed, and threads begin to be wound on opposite pins, so that petals and a crosshair in the center are subsequently obtained. We go in a circle, the different colors of the pin pairs help a lot with this. 3-4 layers are enough, you can experiment with threads of different colors, come up with combinations, etc.
When everything is wound and fastened, we begin to form the middle: for this we thread the needle and begin to wrap it around the crosshairs for the petals, making sure that the thread enters and exits between the same pairs of pins (i.e., again we follow the symmetry ). We complete, fix, pull out the pins, straighten the flower.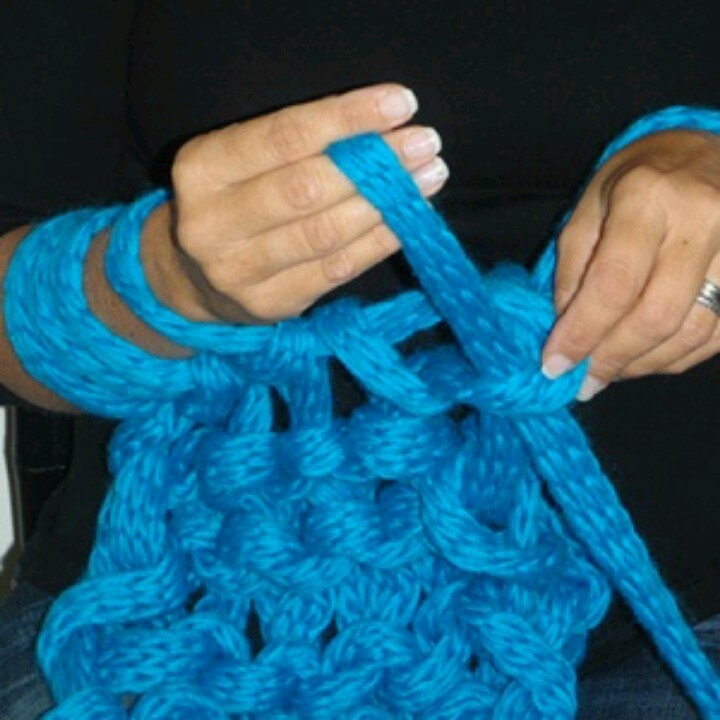 Voila!
The sun is made according to the same principle, just add a couple of passes around the middle, passing the thread alternately under and over the future "ray". Petals, of course, are cut, forming rays.
Dragonfly - one pair of pins (measuring the size, make a margin for the "splendor" of the wings and petals, they will be a little shorter as a result), winding the middle, then formed two rings of "eyes" (pierced the middle with a needle to fix) and a body with a tail (turn the ink around the axis to use the natural property of wool to curl and form a beautiful body).
So, everything is ready for work! Lay out the blanks on the sheet to make sure everything fits and looks nice, as well as to mark the places for gluing.
Grease the sheet with PVA glue and arrange all the figures in their places. After light drying on top, cover tightly with glass or plywood for better gluing of parts. And framed! 🙂
[/spoiler]
Games with threads and ropes - Christmas tree made of threads
Dad's participation will be required! You can make different blanks. But believe me, children will “hang out” near such a game for a long time 🙂
Crafts with threads and ropes - Fluffy toy
Children are very fond of working with yarn, younger children begin to get acquainted with this material by creating various applications from cut yarn, middle-aged children make tassels, panels of ropes, ribbons, and older children learn to make voluminous toys from yarn — and they do it with great interest and diligence. The finishing touches and the finished toy delight them - after all, they created this miracle with their own hands.
In addition, the work on making pom-poms perfectly develops hand motor skills, develops patience, develops imagination when finishing the toy.
[spoiler show="Watch the description of how to make the simplest toy out of thread"]
To make a pom-pom, you need to cut two identical circles from cardboard. We put them together and wind the threads, the turns are dense and even - the children do it very well and they like this process.
Then we cut the threads along the “edge” of the wound circles - this is still difficult for preschool children to do and their mother helps them in this.
We bind the workpiece by pulling the thread between the cardboard circles, cut off the excess threads and decorate the pompoms with various details to complete the image. If the toy consists of several pompoms, we pull the thread through all the pompoms with a long needle. Ready-made toys can be hung on the Christmas tree, used in the interior and just played!
[/spoiler]
Crafts with thread and rope - Panel or mandala
Type in the search box - weaving a simple mandala - and look at the description - there are a lot of types.
Thread and rope games - Button on string
The game of button on string has been played since time immemorial. This is a simple but very interesting game that cheers you up.
Play with your children. The game develops attentiveness, dexterity and sensitivity. For children from five years old.
To make a button on a string game, prepare:
- a button, it is desirable that it be more massive
- thread, use strong thread
[spoiler show="See game making description and step by step photos"]
Take a thread about 60 cm long and pass it through a button that has two holes.
Tie a knot at the end of the thread to form a circle.
Position the button in the middle of the thread. Now put the thread on your index fingers and spread your hands so that the thread is taut.
Now comes the most interesting part. You need to get the hang of rotating and spreading your arms at the same time. Feel how the button is wound in one direction and unwound in the other direction.
It may take some time to learn to get into the rhythm, but soon you will see the button spin, it's like playing an accordion.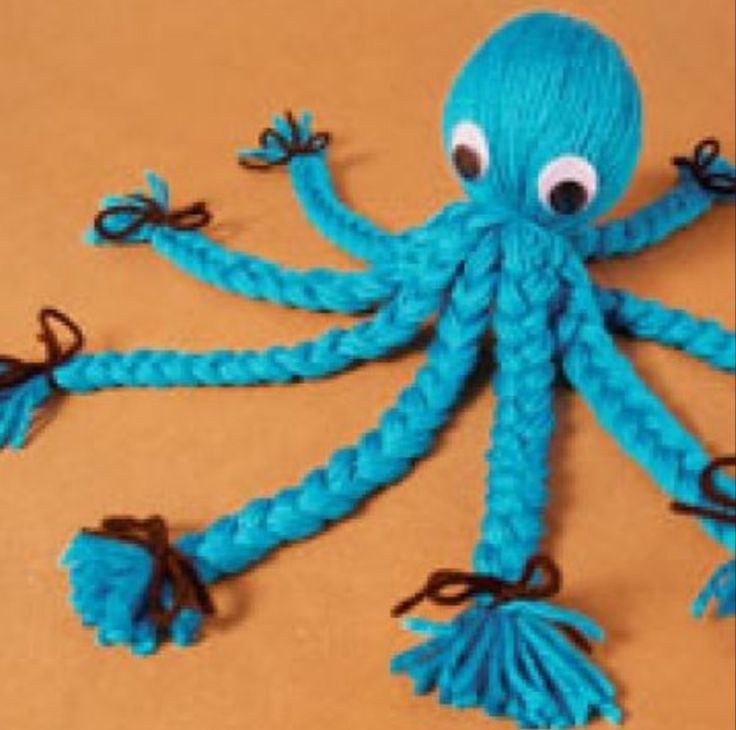 You may even hear a buzz.
Tips
- You can also make this game out of discs cut out of cardboard or thick paper. This allows you to decorate the disc with colored patterns, lettering, or glued-on pieces of foil, etc. Get creative with disc sizes, color patterns, and see how it works!
- If you decide to use two large buttons, they will knock against each other as they rotate, as if they were clapping their hands. This will add more fun to the game.
- Big, colorful buttons work better.
- Use two plastic tubes to avoid cutting your fingers, so the game lasts longer.
Warnings
- Do not pull too hard or the thread will break.
- Keep the rotating button away from your hair. Otherwise, the hair will wind around the toy, it will hurt and you will have to fix your hair.
- Because scissors are sharp, be careful if there are small children around!
[/spoiler]
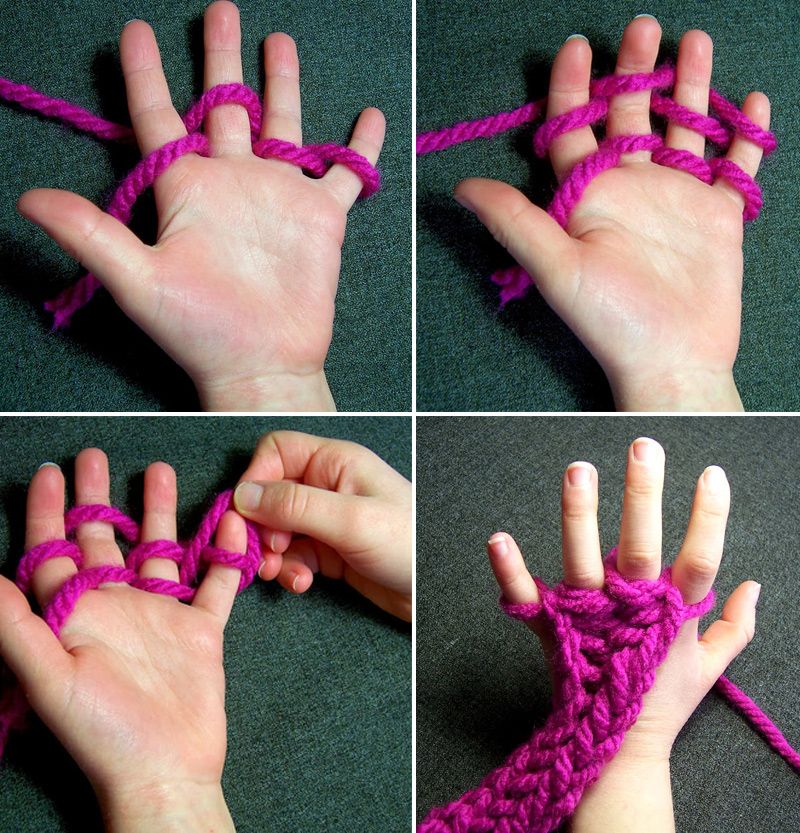
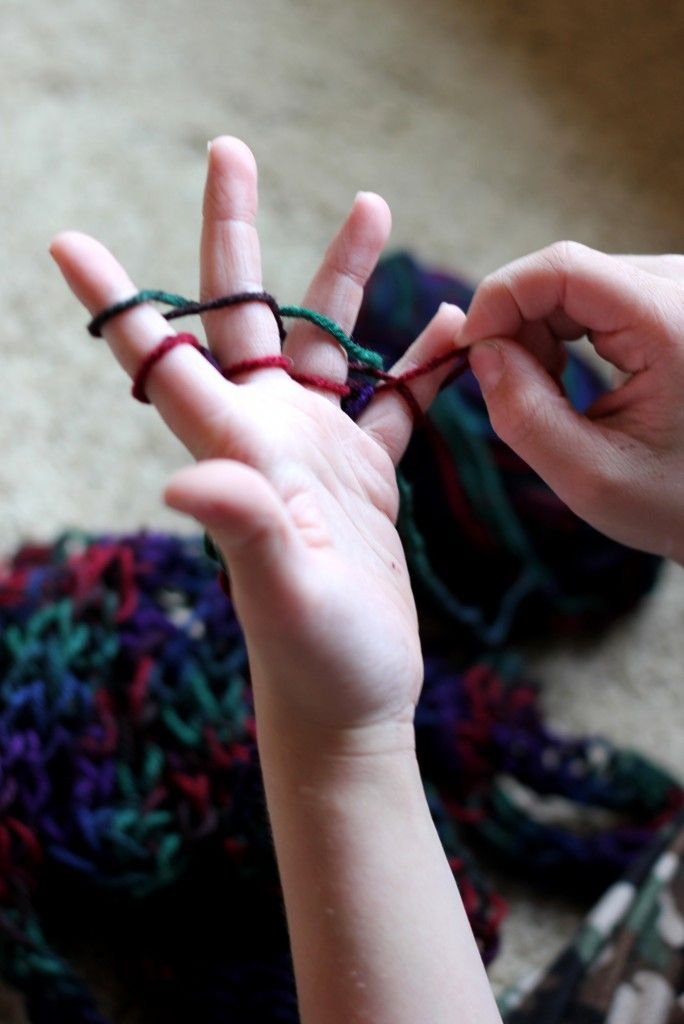
Thread and Rope Games - Single Finger Braid
Game for children aged 5-6 and up. The smaller the child, the more you will have to explain and show. But after this game, there will definitely be no problems with laces! 🙂
An older child can be puzzled by a completely independent performance - show him the pictures and ask an interesting task - believe me, he will like it!
So, to learn how to make a braid of threads on your fingers — take a thin rope or woolen thread 1.3 m long. Tie the ends together with a knot.
[spoiler show="See the description of the braiding and step-by-step photos"]
*Red arrows in the figure indicate the sequence of actions in the first place, green - in the second.
Insert the little fingers and thumbs of both hands into the loop. With the index fingers of both hands, hook the rope at the middle of the opposite palm.
Release the loops from the thumbs and spread the arms out to the sides.
Use your thumbs to pull the rope behind the little fingers from below.
Passing your thumbs over the part of the rope closest to them, pry the next section with them. Then drop the loops from the little fingers.
Pass your little fingers over the part of the rope closest to them and pry the next section with them. Then drop the loops from your thumbs.
Slide your thumbs over the two nearest sections of the rope from above and pry the third section from below with them.
With the index finger of the right hand, hook the loop on the index finger of the left hand and put this loop on the thumb of the left hand. Do the same with the other hand.
With the index finger of the right hand, remove the lower loop from the thumb of the left hand. Do the same with the other hand.
Insert the index fingers into the rope triangles formed between the thumb and index fingers of each hand. Drop the loops from the little fingers and quickly spread your arms to the sides, while turning them with your palms away from you and spreading your fingers.
[/spoiler]
The braid is ready.
Thread play safety.
However, it is worth remembering that you need to worry about the safety of the child. Small children can play games with threads only under the supervision of adults, who must ensure that the kids do not get tangled in them.
Sources: moipodelki.ru, adalin.mospsy.ru, domestically-speaking.com, m.diary.ru, luntiki.ru, www.rukodelie.by, janemouse.livejournal.com, vdohnovenieelena.blogspot.com
[important]>>Go to the games section
>>Watch the game idea video[/important]
50 cool DIY Christmas decorations
November 27, 2021 Likbez Do it yourself
Unique Christmas decorations made from paper, felt, plastic bottles, wine corks and other materials.
Christmas decorations from bushings
Frame: Handimania / YouTubeWhat you need
- Bushing;
- scissors;
- yarn.
How to
Bend the sleeve and cut across into several equal wide pieces.
Separate many identical pieces from the yarn.
Frame: Handimania / YouTubeUnfold the bushings. Insert a piece of yarn folded in half into one of them.
Frame: Handimania / YouTubePass the ends of the thread through the resulting loop and tighten.
Frame: Handimania / YouTubeTie a few more pieces of yarn in this way. Move the threads that are on the sleeve so that the cardboard is not visible.
Frame: Handimania / YouTubeTie the piece from the sleeve completely with thread.
Frame: Handimania / YouTubeDivide the ends of the yarn into two parts. Twist each of them lightly and pull through the ring. The detailed process is shown in the video below. Straighten the threads.
Frame: Handimania / YouTubeOver the ring, tie the yarn with another piece of thread, forming a hat.
Frame: Handimania / YouTubeTrim the ends of the threads so that you get a fluffy pompom.
Frame: Handimania / YouTube In the same way, make hats from the remaining parts of the sleeve. For hanging, tie yarn loops on top.
What other options are
from the bushings. You will get beautiful snowflakes:
Another design:
You can make a New Year's ball:
Santa Claus:
and even a mini -glass with a casa
Ice Cream Sticks Christmas Decorations
Frame: createwithjenn / YouTubeWhat you need
- Ice cream sticks;
- ruler;
- pencil;
- scissors;
- wood glue;
- toothpick;
- brush;
- brown;
- paint red;
- twine or other thread;
- white paint.
How to make
Cut off the ends of four sticks so that you have two pieces 6.3 cm long and two pieces 7.6 cm long. cm. Prepare two more whole sticks about 11 cm long. If you have other sticks, adjust the size by eye yourself.
Frame: createwithjenn / YouTubeOn two solid parts, make three marks 1.9 cm apart. First measure from the place where the rounding of the stick ends. Apply glue with a toothpick to the marks on one piece.
Frame: createwithjenn / YouTubePlace it on the edge and glue three short identical parts to it, as shown in the photo.
Frame: createwithjenn / YouTubeGlue the marks on the second whole stick and attach it to the short pieces.
Frame: createwithjenn / YouTubeWhen the blank is dry, cover it with brown paint. The rest of the sticks are red. Let the coating dry completely.
Place the four pieces with rounded tops on the short sticks, two long ones in the middle and the other two on the edges. Leave small gaps between them. Trim their straight edges with a whole stick. On the other side, put the last piece.
Gently glue the red pieces onto the brown blank. Remove the whole stick, you won't need it anymore. Tie a piece of twine to the short red part on both sides so that you get a loop.
Frame: createwithjenn / YouTubePaint the edges of the red pieces white.
The second part of the video shows how to make an incredibly cool ski set using the same sticks:
What other options are there
Here the sled is made differently:
In this workshop you will learn how to make wooden snowman, Santa Claus and a Christmas tree:
In this video there is also an angel, a star, a car and a fence:
And here are very simple wooden snowflakes:
Christmas tree decorations made of paper
Frame: ABC TV / YouTubeWhat you need
- Light paper;
- ruler;
- pencil;
- scissors;
- awl;
- golden rope;
- fine wire;
- glue;
- large light bead;
- bright paper.
How to
Cut out a 15 cm square and a 15 x 8 cm rectangle from paper.
Fold the edge of the square in about 1 cm. Then turn it over and fold it in the opposite direction again. Repeat until you have folded the entire piece like an accordion.
Frame: ABC TV / YouTubeGather the rectangle into an accordion too, starting from the narrow edge.
Frame: ABC TV / YouTube Fold the large square accordion in half. Make a hole in the middle of the fold with an awl.
Fold the second accordion in half and pierce in the same place.
Frame: ABC TV / YouTubeCut as much string as needed to make a hanging loop. Fold the ends together, form a loop and tie a knot. Remove excess.
Frame: ABC TV / YouTubeWrap the wire around the loop. Fold the ends together. Pass the wire through the opening of the large harmonica.
Frame: ABC TV / YouTubePull out almost the entire rope. Then, in the same way, thread the wire with the rope into the hole of the small accordion.
Frame: ABC TV / YouTubeTighten the rope so that the parts touch each other. Glue the two halves of a large harmonica.
Frame: ABC TV / YouTubeApply glue to the bottom of the small harmonica and attach it to the large one.
Frame: ABC TV / YouTube Put a bead on the wire and lower it to the paper blank. Remove the wire. Tie the rope in a knot over the bead so that it does not fall out.
Spread the wings of the angel by lifting the paper towards the bead. Straighten the bottom.
Frame: ABC TV / YouTubeGlue a heart made of bright paper under the bead.
This video tutorial shows how to make this toy have a collar instead of a heart. And there are three other ways to create an angel out of paper.
What other options are
This is how to make a voluminous paper ball:
This small Christmas tree is made using the origami technique:
Here they explain how to make a volumetric paper star:
in similar equipment in similar equipment in similar technology create a cute deer:
And a unicorn:
Felt Christmas decorations
Frame: SoCraftastic / YouTubeWhat you need
- Cardboard;
- pencil;
- scissors;
- green felt;
- chalk;
- invisible or staples;
- needle;
- thread green;
- light ribbon;
- synthetic winterizer or wadding;
- ready-made red bow or red ribbon;
- glue gun;
- bulk paint or beads.
How to
Draw a small circle on the cardboard. Draw a smaller circle inside. For convenience, you can circle the covers or something else. Cut out the shape along all lines.
Place the template on the felt and trace around with chalk. You will need two of these parts.
Frame: SoCraftastic / YouTubeCut out the pieces of felt.
Frame: SoCraftastic / YouTubeFold one of them in half. With scissors, make a zigzag edge on a small semi-circle.
Frame: SoCraftastic / YouTubeOverlay this part on another. Inside should be the sides with chalk marks. Make the same patterned edge at the second part, cutting along the contour of the first. Then make the edge openwork and on the outside of both pieces of felt.
Frame: SoCraftastic / YouTubeFor reliability, connect the parts for a while with stealth or paper clips. Sew around the outer edge. Leave a small hole in one place. Put the ribbon there so that you get a loop, and sew it up.
Shot: SoCraftastic / YouTube Stuff the toy with padding polyester or cotton and sew up the inside edge.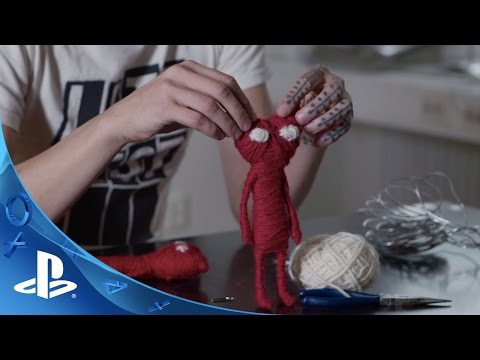 Glue a ready-made or homemade ribbon bow from below.
Make small toys on the wreath out of bulk paint or beads.
What other options are there
Any felt toys are very cool. Here, for example, is the cutest New Year's boot:
Elegant holiday bells:
And this video shows how to make several toys: a gingerbread man, a house, a deer, a bullfinch, a Christmas pudding, a heart and an angel.
Foamiran Christmas decorations
Frame: Craftastic / YouTubeWhat you need
- Glitter foamiran of two different colors;
- pencil - optional;
- scissors;
- glue gun;
- ribbon;
- beads.
How to make
Cut out eight small circles from foamiran of each color. To make them even, take some kind of cover and press it on the material from the back or circle it with a pencil.
Fold each circle in half and cut along the fold.
Frame: Craftastic / YouTubeThen fold each piece in half with the glitter side inward. Glue from the inside on the straight side.
Frame: Craftastic / YouTubeNow connect two triangles of the same color. You need to glue them in the places where the folds are. In total, you will get eight blanks of each color.
Frame: Craftastic / YouTubeApply glue to the straight side of one piece and attach another color element to it. Attach six more shapes, alternating colors. The extremes must be different.
Frame: Craftastic / YouTubeMake another one like this. Lightly spread both on the glitter side.
Frame: Craftastic / YouTube Glue the blanks together by connecting the colored pieces in the same way as in the previous step.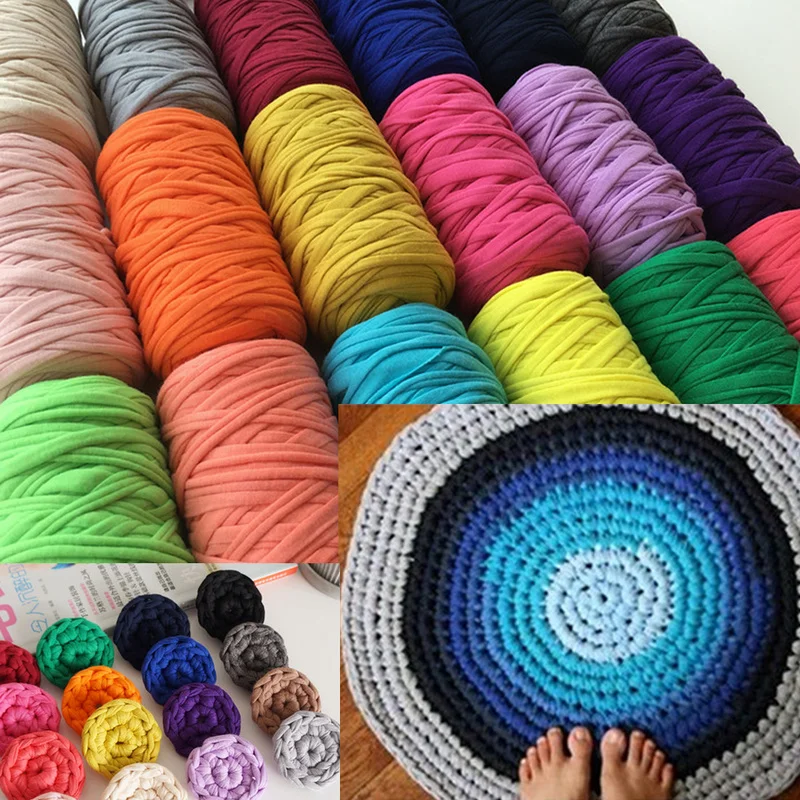 From above and below, glue those places where the reverse side of the foamiran is visible. The detailed process is in the video below.
Cut out two small strips of foamiran of each color. Glue each one in half lengthwise.
Frame: Craftastic / YouTubeTwist one strip, lubricating it with glue for reliability. Attach a loop of tape to the edge of the second strip and also form a glued “snail”.
Frame: Craftastic / YouTubeSpread glue from the inside of the hole on the ball. Insert the prepared parts there. They should stick out about half way.
Frame: Craftastic / YouTubeGlue beads into the holes between the bottom and top of the balloon.
What other options are there
Another foamiran ball - spiral:
Beautiful hearts:
Icels:
and elegant wreath:
Plastic bottles
: Little Crafties / Youtube 9000How to do
Tape the bottle around the bottle in two places above and below where the constriction begins. Between the inner edges of the tape, the bottle should be straight. Cut along these lines.
Frame: Little Crafties / YouTube You will no longer need the bottom and top of the bottle. Divide the middle cut piece into four identical rings.
Gently burn the edges of each with a hot iron. Apply a little hot glue to the part in one place and attach the tip of the ribbon at an angle.
Frame: Little Crafties / YouTubeWrap the ring all the way, always keeping the tape at the same angle. Cut off the excess tip and fix the decor with glue.
Frame: Little Crafties / YouTubeUse fabric glue to attach the sequins to the ribbon. You can use hot glue, but you have to apply it very carefully so that it is not visible.
Wrap another ring with ribbon of the same color and decorate with sequins. Wrap the other two details with a ribbon of a different shade; you do not need to decorate them additionally.
Frame: Little Crafties / YouTubeLubricate one ring on the outside with hot glue in two opposite places. Place the part inside another identical ring. Glue them so that they are perpendicular to each other.
Shot: Little Crafties / YouTube Put the third ring on the workpiece and fasten it at the intersections of the previous two - evenly between them.