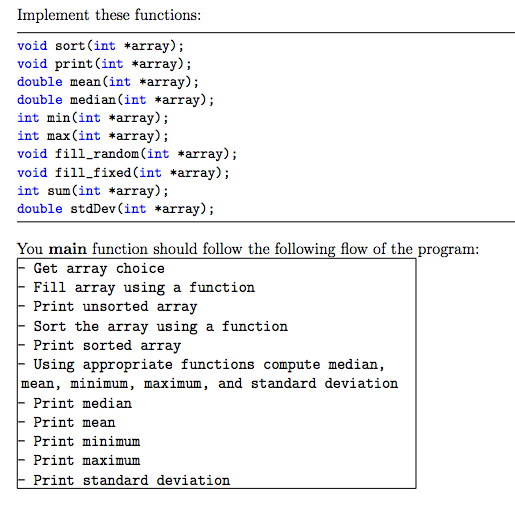
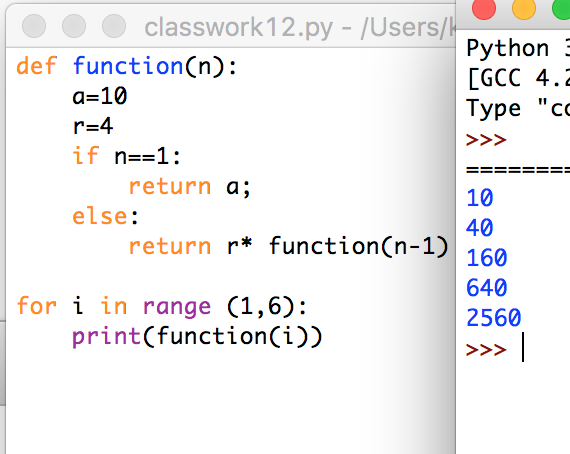
Function of print
Python print() Function
❮ Built-in Functions
Example
Print a message onto the screen:
print("Hello World")
Try it Yourself »
Definition and Usage
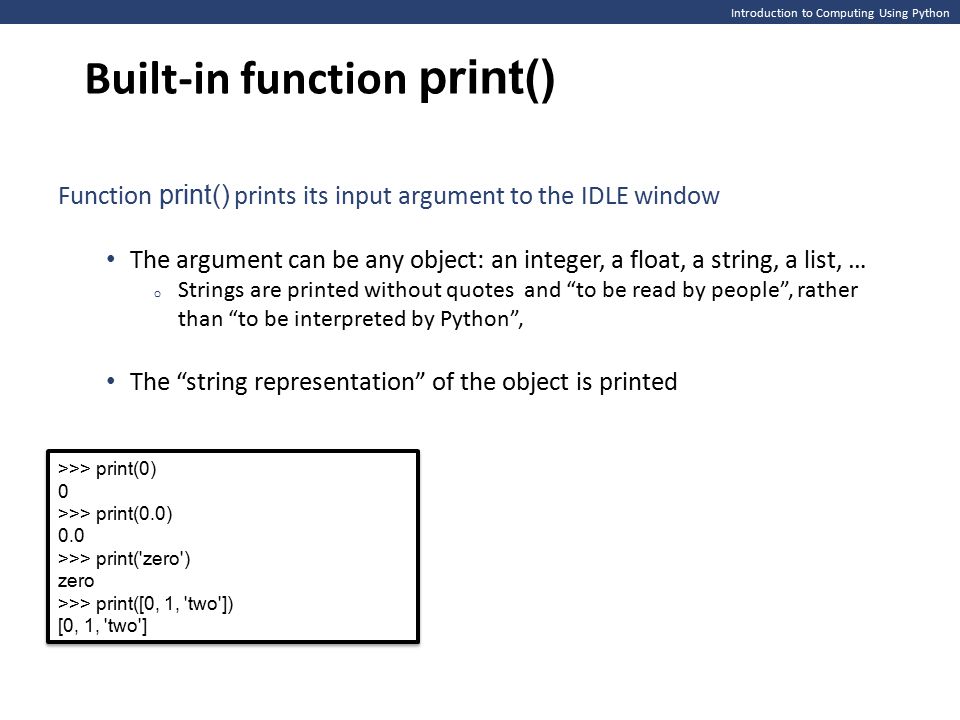
The print() function prints the specified message to the screen, or other standard output device.
The message can be a string, or any other object, the object will be converted into a string before written to the screen.
Syntax
print(object(s), sep=separator, end=end, file=file, flush=flush)
Parameter Values
| Parameter | Description |
|---|---|
| object(s) | Any object, and as many as you like. Will be converted to string before printed |
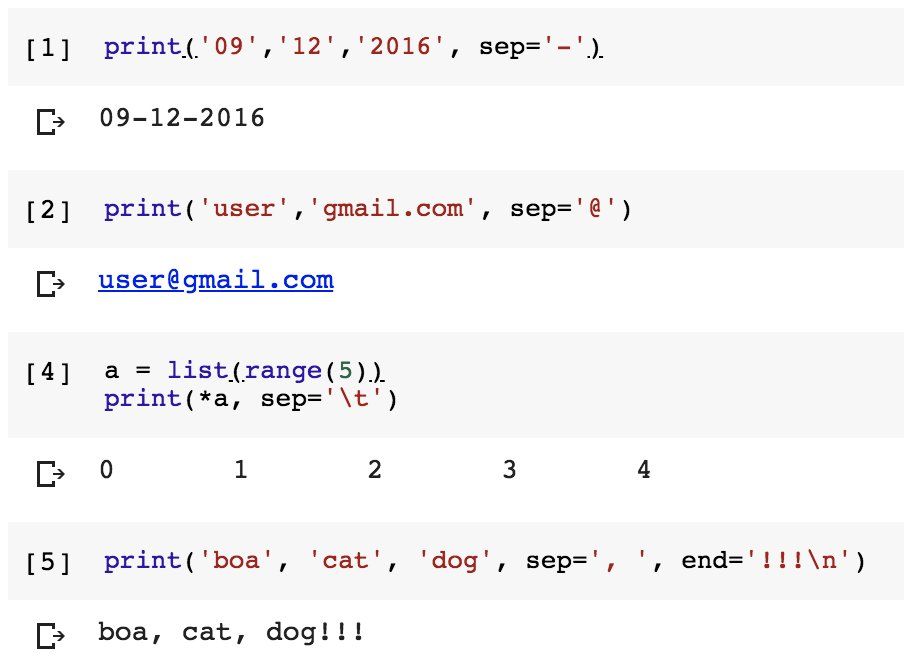
| sep='separator' | Optional. Specify how to separate the objects, if there is more than one. Default is ' ' |
| end='end' | Optional. |
| file | Optional. An object with a write method. Default is sys.stdout |
| flush | Optional. A Boolean, specifying if the output is flushed (True) or buffered (False). Default is False |
More Examples
Example
Print more than one object:
print("Hello", "how are you?")
Try it Yourself »
Example
Print a tuple:
x = ("apple", "banana", "cherry")
print(x)
Try it Yourself »
Example
Print two messages, and specify the separator:
print("Hello", "how are you?", sep="---")
Try it Yourself »
❮ Built-in Functions
COLOR PICKER
Top Tutorials
HTML TutorialCSS Tutorial
JavaScript Tutorial
How To Tutorial
SQL Tutorial
Python Tutorial
W3.
 CSS Tutorial
Bootstrap Tutorial
PHP Tutorial
Java Tutorial
C++ Tutorial
jQuery Tutorial
Top References
HTML ReferenceCSS Reference
JavaScript Reference
SQL Reference
Python Reference
W3.CSS Reference
Bootstrap Reference
PHP Reference
HTML Colors
Java Reference
Angular Reference
jQuery Reference
Top Examples
HTML ExamplesCSS Examples
JavaScript Examples
How To Examples
SQL Examples
Python Examples
W3.CSS Examples
Bootstrap Examples
PHP Examples
Java Examples
XML Examples
jQuery Examples
FORUM | ABOUT
W3Schools is optimized for learning and training. Examples might be simplified to improve reading and learning. Tutorials, references, and examples are constantly reviewed to avoid errors, but we cannot warrant full correctness of all content. While using W3Schools, you agree to have read and accepted our terms of use, cookie and privacy policy.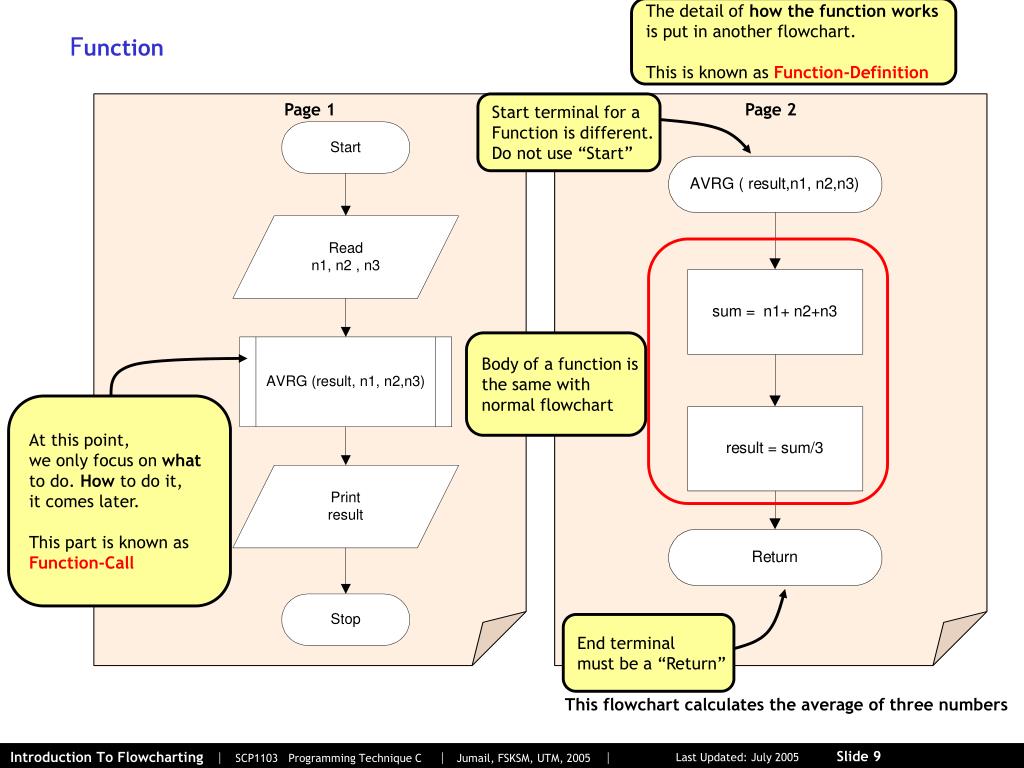
Copyright 1999-2022 by Refsnes Data. All Rights Reserved.
W3Schools is Powered by W3.CSS.
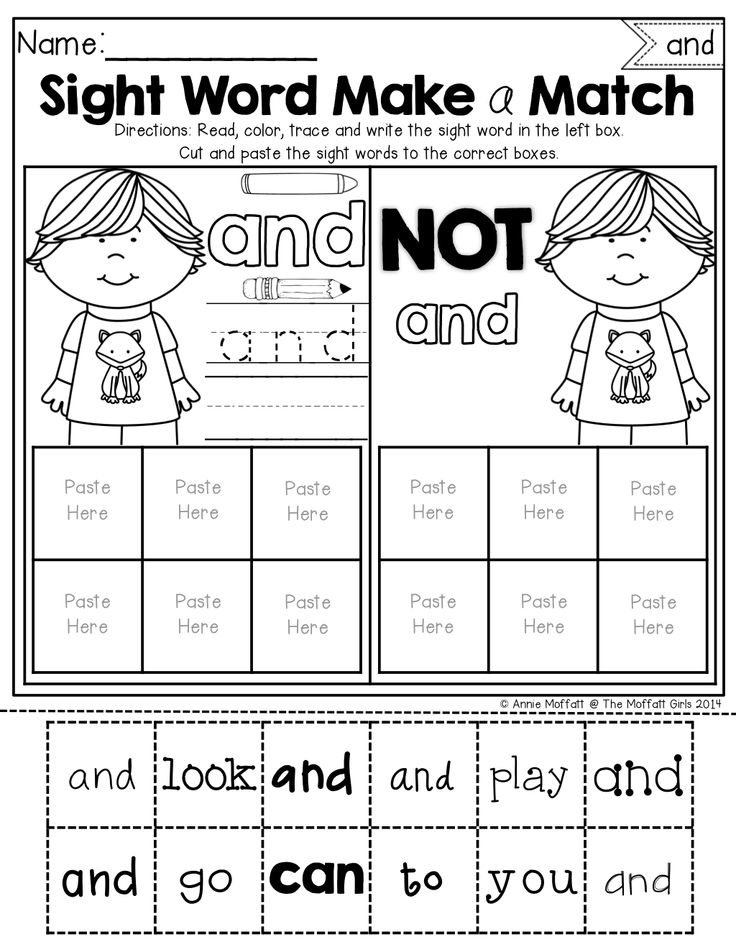
Print Awareness During Read Alouds
By: Reading Rockets
How can you help kids develop print awareness? Here are some sample questions and prompts you can use before, during, and after a read aloud activity to help children activate basic knowledge about print and books.
Prior to reading any story aloud
- Introduce the story by stating the title, then the author's name and asking students, "What does an author do?" (Students should respond, "Writes the story.").
- State the illustrator's name and ask, "What does an illustrator do?" (Students should respond, "Draws the pictures.").
- Hold up the book and say, "This is the front of the book, (turn it sideways and state) and this is the spine." Turn the book to the back cover and state, "This is the back of the book." Then ask, "Do we begin reading from the front or the back of the book?" (Students should respond, "From the front.
 ").
"). - "Let's look at the picture on the front."
- Hold up the book with the front cover facing the students. Ask: "What do you think will happen in this story? Remember, I want you to answer using complete sentences."
Before the reading
- Select vocabulary words from the story that you need to discuss prior to reading the story. Write them on sentence strips or on the board. Discuss the words with students.
- Please note the use of open-ended questions that will require the students to give responses that extend beyond Yes/No answers. Remember to use open-ended questions as you read the story and in your discussion after the reading.
- Encourage students to draw upon what they know about the words from their personal lives. For example, if the word is the verb fish, perhaps some of the children have gone on fishing trips with their parents. Encourage a brief telling of personal stories. Their personal stories allow students to make connections with the text.
During the reading
- Briefly discuss the pictures on each page after reading that page.
- Encourage students to guess/predict what will happen next.
After the reading
- Ask students to tell you if they liked the story and why. Encourage responses in complete sentences. "I liked it when the little girl rescued her friends because it showed that girls can be heroes."
Reading Rockets (2004)
Reprints
You are welcome to print copies or republish materials for non-commercial use as long as credit is given to Reading Rockets and the author(s). For commercial use, please contact [email protected]
Related Topics
Early Literacy Development
Parent Engagement
Print Awareness
Reading Aloud
New and Popular
100 Children’s Authors and Illustrators Everyone Should Know
A New Model for Teaching High-Frequency Words
7 Great Ways to Encourage Your Child's Writing
All Kinds of Readers: A Guide to Creating Inclusive Literacy Celebrations for Kids with Learning and Attention Issues
Screening, Diagnosing, and Progress Monitoring for Fluency: The Details
Phonemic Activities for the Preschool or Elementary Classroom
Our Literacy Blogs
Shared Reading in the Structured Literacy Era
Kids and educational media
Meet Ali Kamanda and Jorge Redmond, authors of Black Boy, Black Boy: Celebrating the Power of You
Get Widget |
Subscribe
| Multiple pages per side | Multiple pages can be printed on one sheet of paper. |
| Poster | This feature allows you to print one document on 4 (Poster 2x2), 9 (Poster 3x3), or 16 (Poster 4x4) sheets of paper. The sheets can then be glued together to form a poster-size document. Select Overlap Poster Parts. Specify the Poster Parts Overlap in millimeters using the radio button in the upper right corner of the Basic tab to make it easier to glue the sheets. |
| Brochure | This feature allows you to print documents on both sides of paper and arrange the pages so that the paper can be folded in half to create a booklet. |
| Manual Duplex Printing | You can print on both sides of a sheet of paper. Set the document orientation before printing.
|
| Paper Options | Change the size of the printed document in both directions, specifying the new size as a percentage of the original. |
| Watermark | Watermarks are printed as text over the body text of the document. For example, you can print the text DRAFT or CONFIDENTIAL in large gray diagonal letters on the first or all pages of a document. |
| Watermark ( Creating a watermark ) |
|
| Watermark ( Watermark change ) |
|
| Watermark ( Watermark Removal ) |
|
| overlay | This feature is only available when using the PCL/SPL printer driver. This option is not available when using the XPS driver. An overlay is text or an image that is stored on a computer's hard drive as a special file format. Overlays can be printed on any document. Overlays are often used in place of pre-made forms and letterheads. Instead of preprinted forms, you can create an overlay that contains exactly the same information as letterhead. To print a letter on company letterhead, you do not need to load letterhead into the device. To use an overlay containing a logo or image, you must create one. |
| overlay ( Create an overlay ) |
|
| overlay ( Using overlay ) |
|
| overlay ( Overlay removal ) |
|
 In this case, the pages are reduced and arranged in the specified order. Up to 16 pages can be printed on one side of a sheet.
 The Edit Watermarks dialog box opens.
 Just print the overlay document.
  If necessary, specify the path to the file (the default path is C:\Formover).
Print functions
Print functions
Feature Sets: Set 1
| • | Media Type The following types of media can be used with the machine. For optimal print quality, select the type of media you want to use.
| |||||||||
| • | Job Spooling Only those who know the password can print secure documents. Since these documents are protected in the machine, you must enter a password using the machine's control panel. For a protected document, you must set a Password and a Job Name. | |||||||||
| • | Password Select the password for the secure document being sent to the machine from the drop-down box. | |||||||||
| • | Job Name Select the job name for the secure document to be sent to the machine from the drop-down box. | |||||||||
| • | Resolution Resolution can be set to one of the following:
| • • • 9000 • 9000 • 9000 • 9000 • 9000 • 9000 • (Toner Save)
 thick
thick  If the Toner Save Mode check box is selected, the print becomes fainter. Default setting: Off
 | We do not recommend using the Toner Save mode for printing photos or grayscale images. |
Feature Sets: Set 2
| * | The default is "On". |
| • | High Quality Image Printing You can increase the print quality of images. If the High Quality Image Printing check box is selected, the print speed may be slower. |
| • | Reduce Paper Curl Checking this box can reduce paper curl. If only a few pages are printed, you do not need to select this setting. In the printer driver, change the MediaType setting to thin media. |
| • | Improve Toner Fixing Checking this box can improve toner fixing on paper. 
|