Lesson on shapes for kindergarten
Fun and Engaging 2D Shape Activities
One of the very first math lessons we teach in kindergarten is two-dimensional shapes! There are so many ways you can introduce shapes while also engaging your students in fun, hands-on activities. I think one of my favorite things about teaching shapes is that the students don’t even realize they are learning! They get to build, sort, and manipulate shapes in many ways, which leads to high engagement. Read on for my favorite kindergarten-approved 2D shape activities that your students will love!
Activities for Teaching 2D Shapes
Since shapes are all around us, chances are that many of our students will enter kindergarten with a basic knowledge of shape names. It also doesn’t take too long to fill in the missing shape names that our students haven’t quite mastered. After that, the goal is for our students to describe, build, and even manipulate two-dimensional shapes. This is where some additional shape practice activities can come in handy!
Introducing Shape Names and Attributes
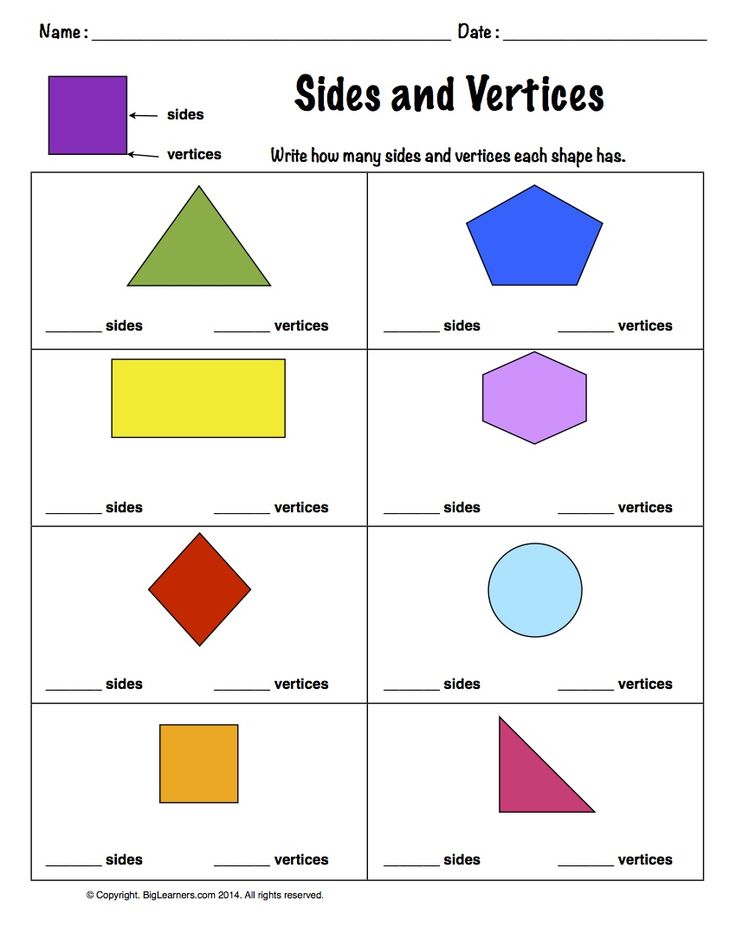
The first step in teaching students shapes is to make sure they know all of the 2D shape names and their unique attributes. I have found that all students benefit from an introduction (or reintroduction) to the shape names and attributes before we move on to other 2D shape activities.
I love introducing and reviewing shapes with these 2D Shapes Poems! These poems are catchy and help students learn about each shape’s attributes as well as relate them to real-world objects that they already know. Before you know it, your students will look at a stop sign and say, “Hey, that’s an octagon!” 🙂 #proudteachermoment
I introduce the shapes one at a time which prevents overwhelm and allows the students to focus on that shape and its unique attributes. We practice one shape each day until all of them have been added to our shape wall!
Identifying and Describing Shapes
After plenty of time has been spent pronouncing the shape names and discussing the shape attributes, it is time for students to put that knowledge into practice. They are now ready to identify shapes in different contexts and describe them in their own words! As with any new concept, it’s important to keep young learners engaged by using a variety of activities when practicing the same skill multiple times, such as identifying and describing shapes.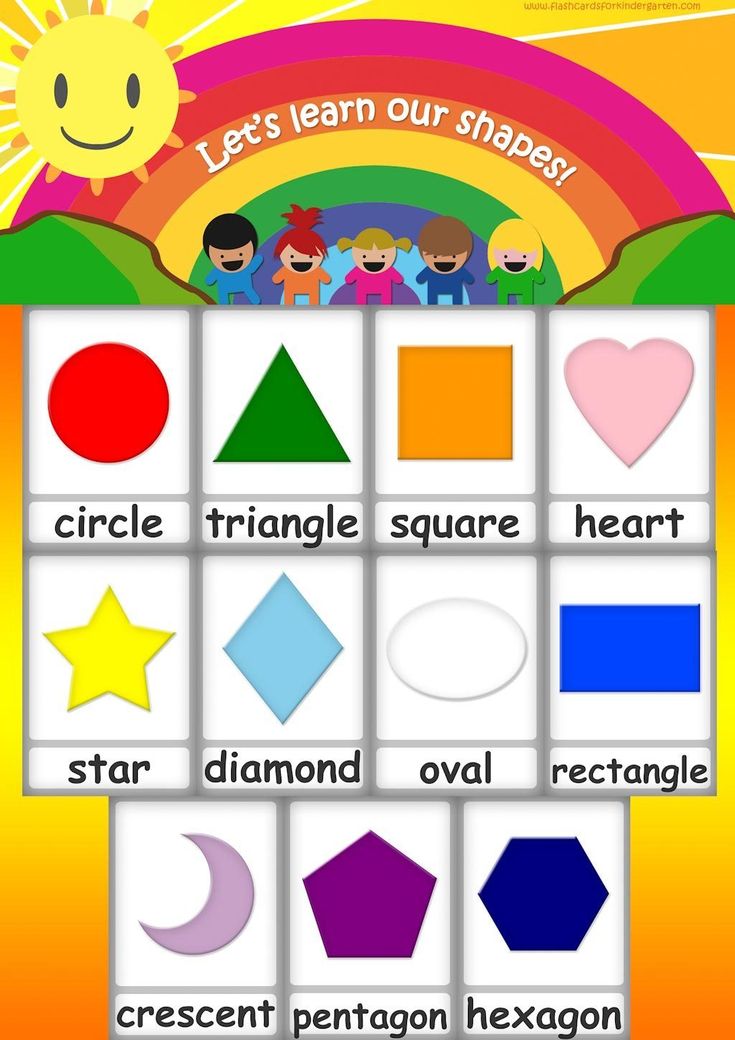
Shape Bingo is a fun way to add repetition to your 2D shape practice because students will want to play this game over and over again! I love to play this game in small groups, so we can quickly review the shape names and attributes as we draw each card. For an added challenge, you could pull a card and keep it hidden from the students. Then, give them clues about the shape by describing its unique attributes so that the students can guess the correct shape before placing their bingo markers.
I also love to encourage students to identify shapes in the world around them. One way to practice this skill is with a shape sort, where students can identify and sort a variety of real-world objects based on shape. This 2D shape sort is a very fun center activity that gets students excited to look for shapes all around them. It’s so fun to hear students point out the shapes they see as they walk down the hall!
Here are several more 2D shape activity ideas that will keep your students engaged as they practice identifying and describing shapes in multiple ways:
- Play a shape game where students draw a shape out of a bucket and say its name and whether it has curved or straight lines
- Play “I Spy” where students must find real-world objects that match a specific shape
- Go outside on a nature hunt and see what you can find in each shape
- Do a shape show-and-tell
Making Shapes
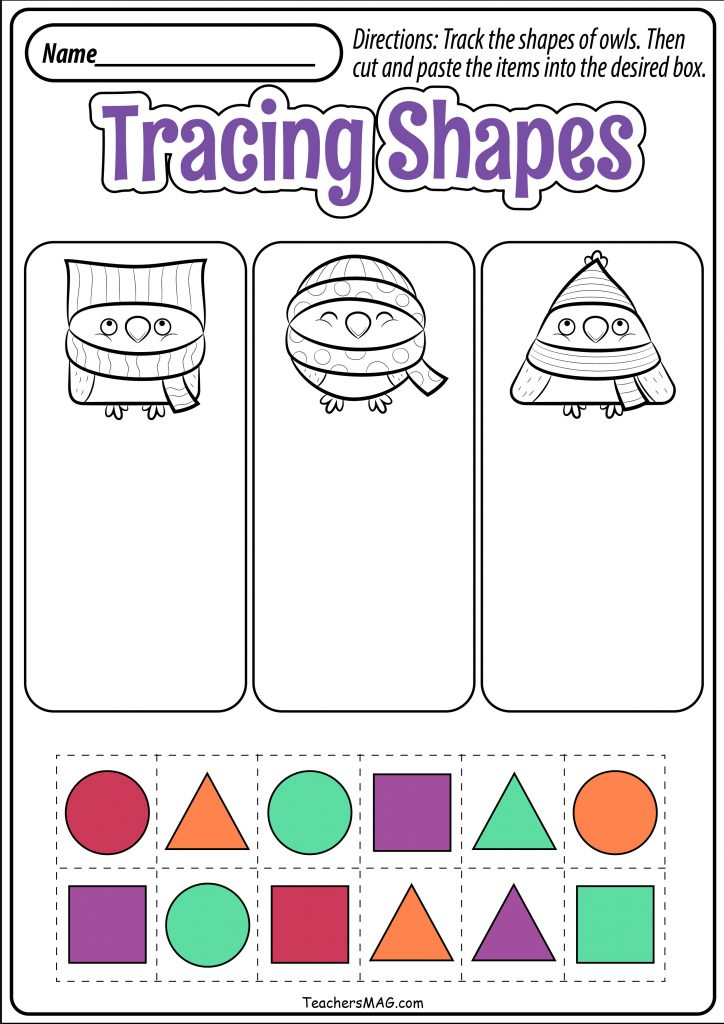
After students have a good understanding of shape names and their attributes, they are ready to start building shapes on their own! There are many ways to provide individualized opportunities for shape building, based on the fine motor skills of your students. Some students might form shapes using craft sticks while other students might be ready to trace shapes with a highlighter.
In the kindergarten classroom, it’s important to include fine motor practice anywhere we can. Two-dimensional shape building practice is the perfect time to strengthen hand-eye coordination and writing skills! Here are some additional ways to practice forming and writing shapes:
- Practice drawing shapes in the air
- Highlight shapes
- Trace shapes with a writing utensil
- Practice making shapes with sensory materials, such as in sensory trays filled with beads, cereal, rice, etc.
- Trace over shapes with little cars or something similar
- Form shapes with playdough (Check out this playdough mat freebie)
- Form shapes with craft supplies, such as pom-poms, craft sticks, pipe cleaners, etc.
Working With Shapes
Once students have had plenty of time to form shapes using their knowledge of shape names and attributes, they’re ready for the next step: Working with shapes.
When students are given plenty of opportunities to manipulate and work with shapes in various ways, it deepens their understanding of two-dimensional shapes and prepares them for future math concepts.
One of my favorite 2D shape activities is this shape-building activity, where students can see the relationship between shapes as they use pattern blocks to create a larger shape. I love how this activity encourages students to see how shapes are related to each other.
Here are some of my other favorite ways to help students build on their budding knowledge of 2D shapes:
- Sort shapes by attributes, size, color, etc.
- Build with shapes
- See what they can build using only one shape
- Do art projects using a variety of shapes
- Build their name with shapes
- Make a shape book
Using 2D Shape Activities for Centers
Many of the activities I mentioned above would be perfect for math centers in your kindergarten classroom. In fact, I have compiled my ten favorites into a collection of 2D Shapes Centers and Activities! These activities include practice opportunities for 12 different two-dimensional shapes. These shape centers are perfect for kindergarten, Pre-K, and preschool!
2D Shapes Centers and Activities
$5.00
These 2D shapes centers and activities are full of learning and fun for your preschool and kindergarten students. You can use these activities as you introduce the 2D shapes to your class, or spread them out throughout the year in your math centers. Some centers are also in black and white to be printed on colored paper.
Shop Now
Save These 2D Shape Activities
Be sure to save this post to your favorite classroom board on Pinterest so that you can refer back to these ideas later!
Exploring Shapes
Introduction
The ability to accurately identify shapes is a foundational mathematical skill, and it is quite rewarding for children because their world is full of shapes. Understanding shapes will enable students to be more in tune to the world around them and see the connections between objects, as well as being better able to appreciate artistic works.
Guiding Questions
- What are some basic shapes?
- Where are these shapes found?
- How can a child incorporate a knowledge of shapes into his/her life?
Learning Objectives
After completing the lessons in this unit, students will be able to:
- Identify specific shapes.
- Recognize shapes in the environment.
- Create original works of art using the shapes.
Preparation
- Read through each of the mini-lessons.
- Find the suggested materials you want to use.
- Make any copies needed and gather any materials you want to use.
- Choose appropriate extension activities.
Lesson 1: Introducing shapes
Select a couple of books about shapes to introduce the idea. Some recommended choices are:
- Shapes, Shapes, Shapes, by Tana Hoban
- The Greedy Triangle by Marilyn Burns
- Round is a Mooncake by Roseanne Thong
- Food for Thought by Joost Elffers
- Museum Shapes from the New York Metropolitan Museum of Art
Read them to the student and encourage thinking about the concept of all objects having shapes.
Lesson 2: Identifying shapes
Materials
- Standard set of eight crayons
- Sand, sugar or flour
- Two small cups
- Container with fairly short sides (like a plastic food storage container or a small box)
Use the table below to give the child an overview of basic shapes. Go over them twice, then go on to the activities.
Identification Activity
After you have gone over the list twice, give the student the Shape Sheet at the end of this lesson and have him/her use the crayons to mark the shapes as you direct, reading through the directions on the next page.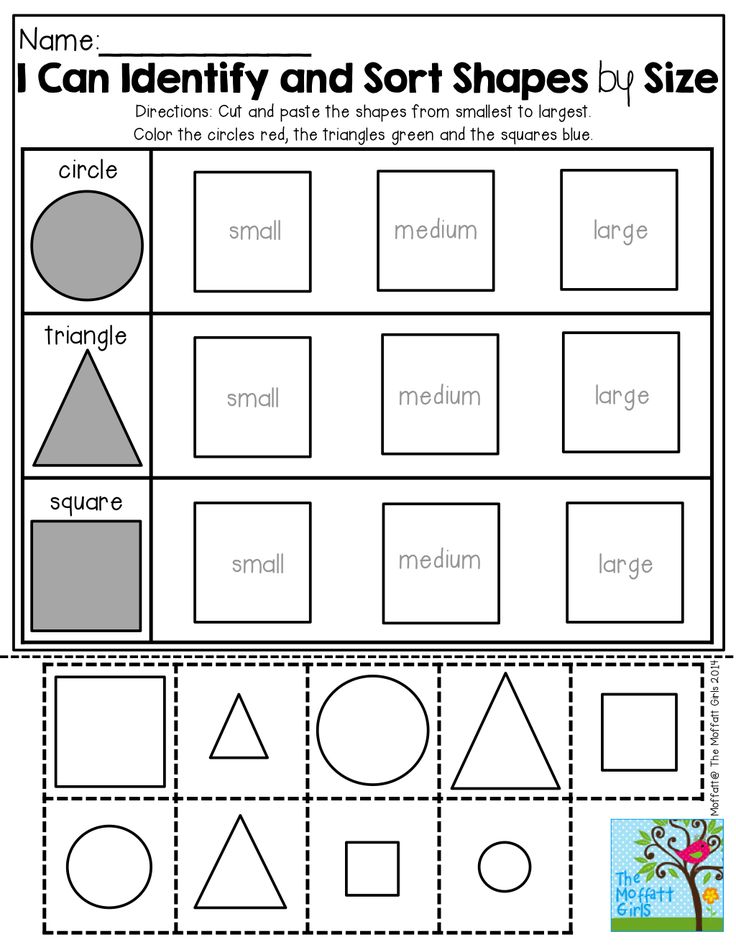 Feel free to give hints using the “Need to Know” section in the chart above.
Drawing Activity
Next, the student will draw the shapes with a finger in sand, sugar, or flour. To do this, put the two cups of sand, sugar, or flour in the container. The child should be able to reach into the container with ease.
Allowing the child to reference the Shape Sheet, have the child draw the shapes with his or her finger. If there is more than one child, allow them to share the exercise, with one child drawing a shape and the other identifying it, then exchanging roles.
Identification Directions
- How many circles can you find? Color them red.
- How many squares can you find? Color them green.
- Can you find the oval? Draw a circle inside of it.
- How many triangles do you see? Color them blue.
- Find the rectangle and draw an oval around it.
- Color the rhombus black.
- Can you find three pentagons? Color them purple.
- Are there more parallelograms or pentagons? Put an “X” on the parallelograms.
- Find the hexagons and color them yellow.
- Do you see the trapezoid? Color it brown.
- Find all the octagons and color them orange.
Lesson 3: Playing with shapes
Sing and dance along with the Hokey Pokey Shape Song!
Cut out the shapes at the end of this lesson, one six-page set per child. You can print the sheets on colored paper or allow the child to color the shapes for easier identification. (Note: You will also be using these shapes in later lessons.) Either with an adult or with other children, have child stand with shapes spread out near his/her feet.
Sing and dance the “Hokey Pokey” with the shapes, having the child pick up the shape and then dance with it. Call the shape out before each verse.
Example
- Adult says: “Triangle!”
- Child(ren) pick(s) up triangle
- All sing: “You put your triangle in, you put your triangle out.
 You put your triangle in and you shake it all about. You do the Hokey Pokey, and you turn yourself around. That’s what it’s all about!”
 - Adult says: “Pentagon!”
- Child(ren) pick(s) up pentagon
- All sing: “You put your pentagon in, you put your pentagon out. You put your pentagon in and you shake it all about. You do the Hokey Pokey, and you turn yourself around. That’s what it’s all about!”
You may also allow the children to take turns calling the shapes.
Lesson 4: Drawing and coloring with shapes
Materials
- Examples of Kandinsky paintings
- Crayons, markers, or watercolors
- Shapes used for the Hokey Pokey
- Large sheet of drawing paper
Show the student images of Kandinsky paintings on the Internet. Here are a few examples
If possible, print them in color or check out a book of Kandinsky’s paintings from the library. Have the student identify as many shapes as he/she can find in the paintings, creating a tally chart of how many times each shape was used by writing tally marks on the shapes used for the Hokey Pokey.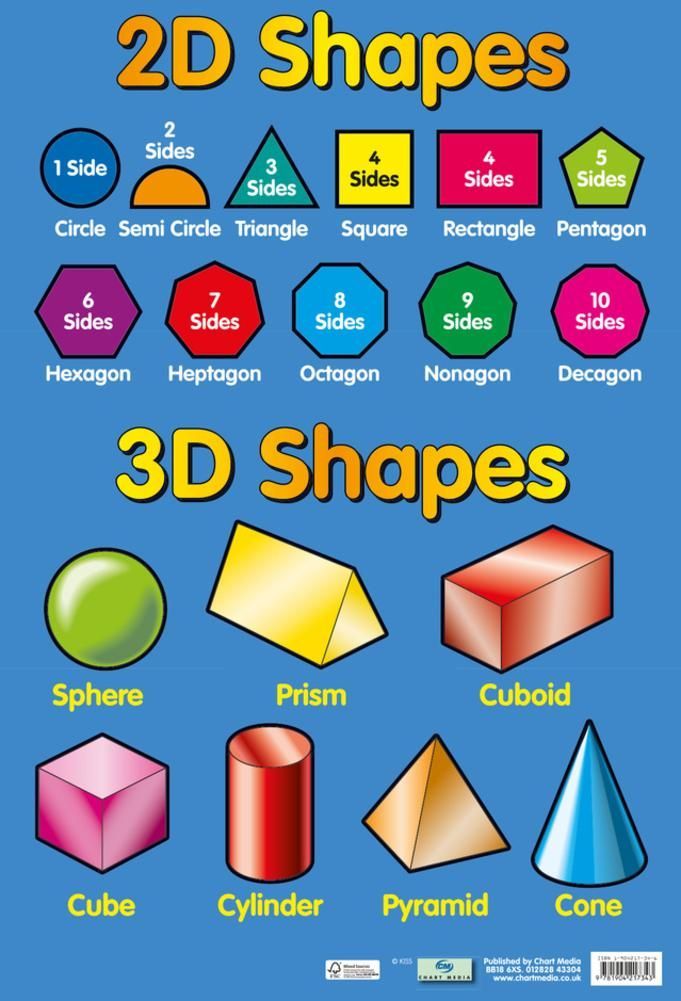
Have the student lay the shapes out on the floor or a table in order of most used. Using crayon, marker or watercolor, have the student create his/her own “Kandinsky” imitation, using at least one of each shape learned.
Lesson 5: Shape walk
Take the student on a “shape walk” to find shapes in and around the house/classroom/school.
After the shape walk, reflect on the shapes that were easiest to find and those that were hardest to find, using questions such as:
- Are there more circles inside or outside?
- Are there more squares or circles? Why is that?
- How did what was found outside match the tallies from the Kandinsky paintings?
If desired, have the student create a new drawing that reflects the shapes as found on the walk. If lots of circles were found, have lots of circles in the drawing. No trapezoids? Leave those out. Now you both have a visual representation of the shape walk results.
You may want to introduce the Shape Hunt Chant developed by the International Reading Association/National Council of Teachers of English. Here's a printable copy of this copyrighted material here (it’s OK to reproduce it for educational purposes).
Extension
Picture Yourself with Shapes
- Take pictures of the student with shapes he/she finds, then put the pictures in an inexpensive photo album.
- To make this more interesting, make it a scavenger hunt in which students try to get pictures of themselves with the most interesting shapes. They should not create the shapes, but rather discover them.
- To extend this activity, have the student invite family or friends take pictures of themselves with shapes to send to the student.
More Fun Online
- Sammy Shapes website
- Patterns to make three-dimensional shapes
- Additional practice on shapes
Assessment
Since this is a Kindergarten-level activity, this assessment is skills-based, rather than grade-based.
This series of lessons was designed to meet the needs of gifted children for extension beyond the standard curriculum with the greatest ease of use for the educator. The lessons may be given to the students for individual self-guided work, or they may be taught in a classroom or a home-school setting. Assessment strategies and rubrics are included at the end of each section. The rubrics often include a column for "scholar points," which are invitations for students to extend their efforts beyond that which is required, incorporating creativity or higher level technical skills.
Abstract of the lesson in mathematics "Geometric figures" (reinforcement) | Plan-summary of a lesson in mathematics (middle group):
Abstract of a lesson in mathematics.
Subject: Journey in the camp: Geometrical figures. (reinforcement.)
Age group: Middle group.
Form of joint activity: integrated occupation.
Form of organization: group.
Teaching kit: mathematics in kindergarten 4-5 years old
Purpose: Learn to distinguish and name the following geometric shapes: square, circle, triangle, rectangle, exercise in counting; be able to navigate in space.
Tasks:
Educational:
To expand children's knowledge of figures. Learn to group them by color, size.
Developing:
Develop observation, mindfulness.
Develop the memory of thinking and speech.
Educational:
Promote the development of teamwork and mutual assistance when working in a team.
Stimulate interest in mathematics.
To develop the skills of cultural behavior in society.
Materials:
For children - a card with four stripes, circles (large and small) in four colors: green, blue, yellow, red; geometric figures.
For the teacher: Four baskets with stickers of figures (for example, the first basket is a triangle, the second is a square ...) Geometric shapes according to the number of children of different colors. Four bags of different colors: green, blue, yellow, red. Three keys. Soft toy.
Class progress.
The educator invites the children to the mat all the guys come up and stand in a circle in the center of the circle there is a tutor and invites them to go to a country not simple, but magical, geometric, and in this country everything consists of figures. The entrance to this country is bewitched in order to disenchant the entrance to the magical land, you need to get three magic keys.
In: I invite all children
Set off on a journey soon
Tests are waiting for you
Difficult tasks.
Our path will be long with obstacles. Are you guys ready for this journey?
D: Yes, ready.
Q: In that case, you can hit the road. The teacher and the children come to the first table. There are geometric figures on the table.
Q: Our first task: There are different pieces on the table. You need to take one piece at a time and name them.
D: Everyone in turn takes a piece from the table and clearly names the piece he took.
V: Well done guys, you all answered correctly. We passed the first task correctly, the path to our country is getting shorter, we have received our first key. (the key was under the last figure.) Let's move on to the second task:
There are four baskets on the chairs in the group, figures are glued on each (circle, square, triangle, rectangle). To do this, whoever has squares, stand up to the basket with the square. Who has circles, stand up to the basket with the circle. Whoever has rectangles, stand up to the basket with the rectangle. And whoever has triangles, stand up to the basket with triangles.
D: Find their baskets and stand up.
Q: Guys, if you're ready, put your pieces up. Well done, now put the pieces in your baskets. And in one of the baskets, the children find the second key. Now we can move on.
They approach the rug and there the whole rug is strewn with different figures of different colors. (While the children were doing the tasks, the junior teacher poured the figures onto the mat.)
There are four bags of different colors on the mat.
Q: Guys, this is our last assignment. In order to get the third key, you need to collect and group the pieces by color, then put them in bags.
Y: They complete tasks and find the third key in one of the bags.
V: Well done guys, you did the job. Magical land is disenchanted!!!
Guys, while the country was bewitched in the “dishes” store, all the cups mixed up the shelves, you need to help put things in order in the store. To do this, sit at the tables for each child a card with four stripes and 14 circles.
The teacher explains. “This (points to the circles) Large and small cups.
They should be placed on the shelves as you wish.”
Variants can be as follows:
- mugs lie in disarray on each shelf;
- mugs lie on two shelves (large and small)
- mugs are arranged by color on four shelves.
The teacher asks everyone how he arranged the cups and which shelf has more of them and which one has less.
You can invite the children to arrange them so that each shelf has “cups” of the same color. Ask which “cups” are more: red or blue; yellow or green.
Q: Well done guys have put things in order in the store, now residents of the magical land will be able to come to the store and easily choose cups.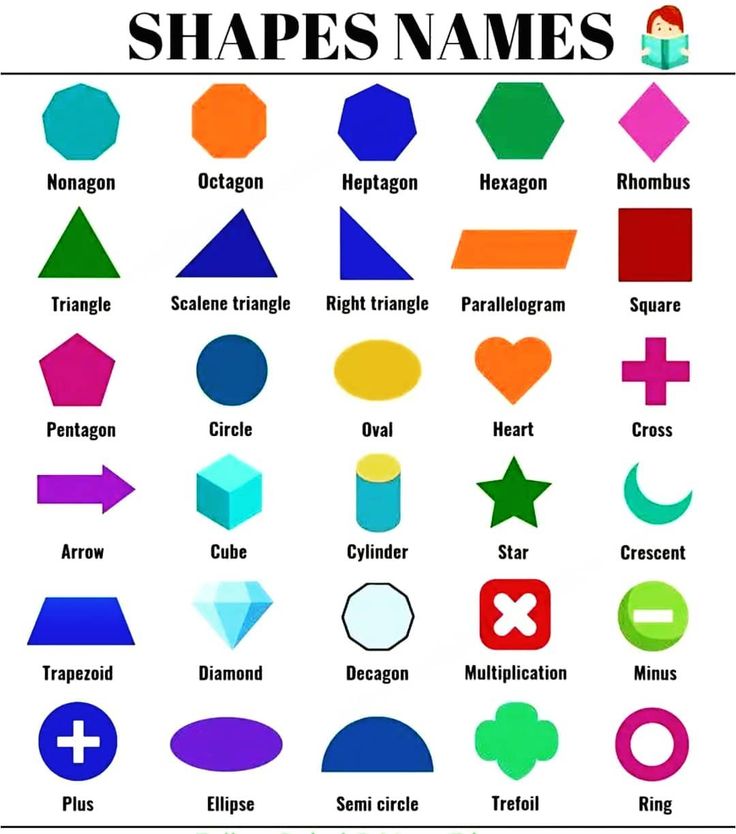 I suggest you clean up the toys and go for a walk there will be many more interesting things.
On the street you can play the game: "Find the hidden toy."
With the help of a rhyme, a leader is selected:
Seagulls lived at the pier,
Their river pumped water.
One, two, three, four, five -
Help me count them.
The host goes out the door. The children hide the toy. To find it, the driver is given directions: “Go from the swing to the sandbox, turn right from the sandbox, take three steps and look there”
Game options: The teacher indicates the direction of the asphalt with arrows of different colors.: The child indicates the direction: “From the beginning go there, where the blue arrow points, then go three steps and look there.”
When turning, the child must say where he turned: to the right or to the left.
The game is played several times at the request of the children.
Abstract of the lesson on FEMP for children of senior preschool age "In the Geometry Region"
Purpose: to consolidate knowledge of known geometric shapes, their properties, to develop memory and observation skills.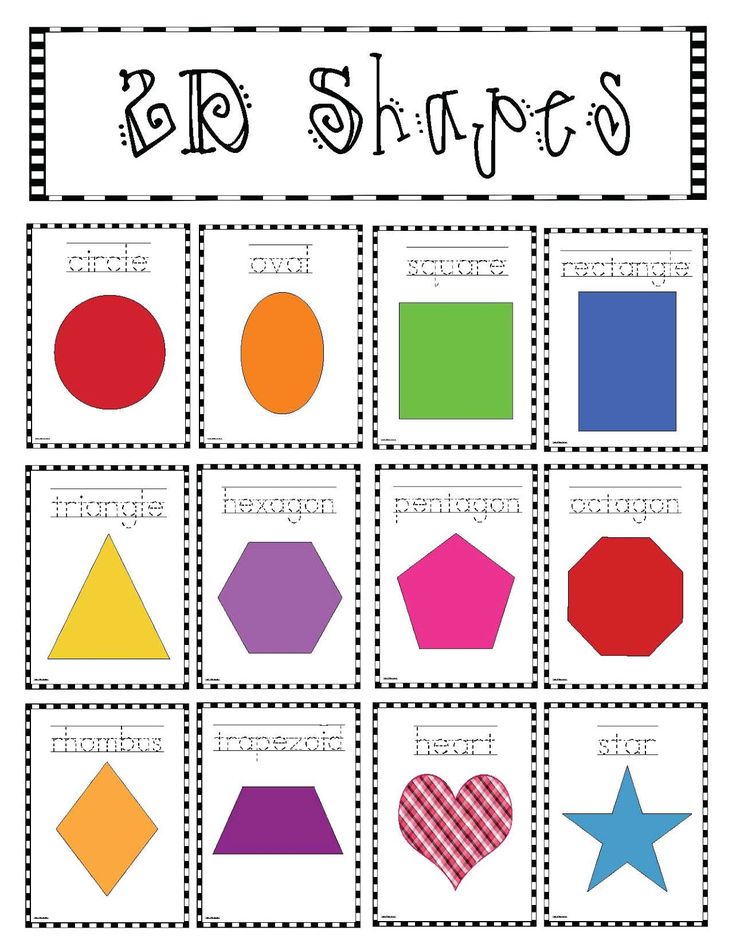
Tasks: to consolidate the ability to model from geometric shapes. Teach children to navigate in a limited area (sheet of paper). Improve your dialogue. Form the need for physical activity.
Materials and equipment: presentation on electronic media, multimedia, 2 magnetic boards with magnets, laptop, projector, audio recording, 2 posters with an image consisting of geometric shapes, mathematical set "geometric shapes" - 2 pcs, chest, letter, posters with the tasks “What is superfluous?”, colored pencils for each child, sheets of white paper according to the number of children, “pebbles” of round and oval shape.
Lesson progress
Educator: Guys, I want to invite you on an unusual journey. Unusual because the country we are going to is not on the map. What is this country? This country is Mathematics. And today we will visit a very interesting region - Geometry. What kind of land it is, who lives there, what the inhabitants do - you will find out all this by answering questions and completing all the tasks that the inhabitants of this unusual land have prepared for you. Ready to start your journey?
Children: Yes!
Educator: Excellent! Then we close our eyes and say the magic words:
We stomp our feet, clap our hands,
Let's close our eyes, say: "Ah!"
And we will be visiting!
On the slide of the projector is a picture of a fairy forest. Children open their eyes.
Educator: So, here we are already in this unusual land. Look carefully around. There must be a task left for us somewhere.
Children look around and find a chest.
Educator: What a beautiful chest! Yes, there will probably be a task in it. (open the chest) Guys, here is a letter: “Dear guys! We are very glad that you came to visit us.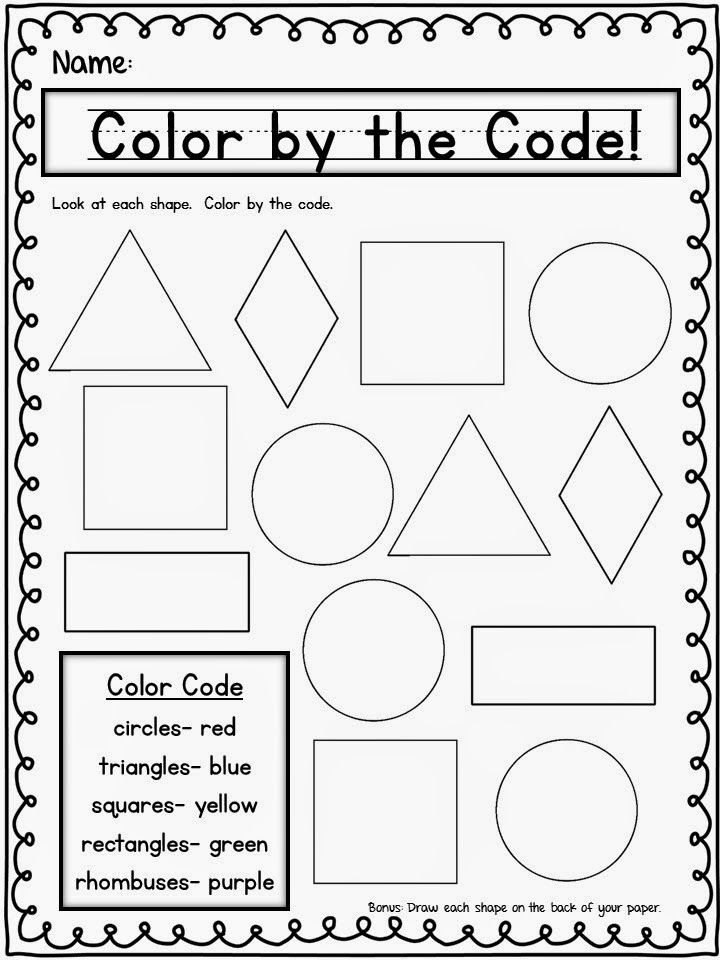 To find out who we are, you need to solve riddles and complete our tasks. And here is the first riddle:
The plane flies through the sky
Delta wing,
On my bike
Triangular seat,
There is such an object, a square,
And all this - ....
Children: Triangle.
Educator: Of course, well done!
(On the screen, in the picture of the forest, a fabulous inhabitant of the country appears: the little man Triangle)
Look, here is the first inhabitant of this region - a triangle. And we read on. Listen.
He's been my friend for a long time
Every angle in it is right.
All four sides are the same length.
I'm glad to introduce myself to you. And my name is...
Children: Square.
The next character appears on the slide - man Quadrangle
Educator: Wonderful! We continue.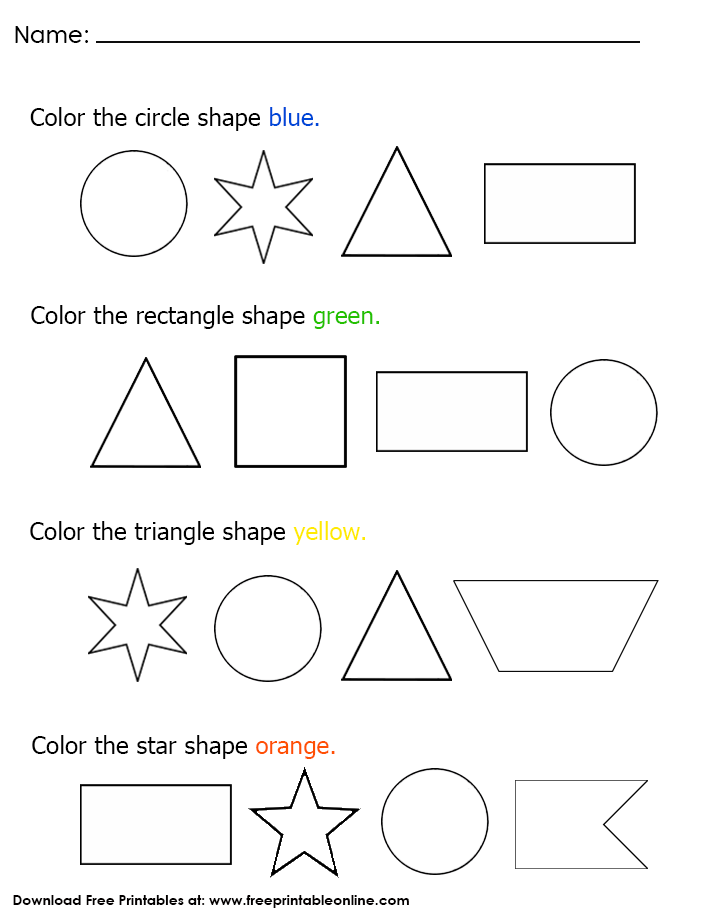
We stretched the square
And presented at a glance,
What did he look like?
Or with something very similar?
Not a brick, not a triangle,
Became a square - ...
Children: Rectangle.
A Rectangle man appears on the slide.
Educator: Great! We listen further.
The wheel rolled
After all, it looks like
Like a visual nature,
Only for round figures.
Guess dear friend
What is this...
Children: Circle.
The little man Krug appears on the screen.
Educator: Excellent. Go ahead.
If I took a circle
Slightly compressed on both sides
Guess, children, together,
I would have..
Children: Oval.
Another inhabitant, the Oval Man, appears on the screen.
Educator: Good! And the last riddle.
triangle filed
And got the figure.
Two obtuse corners inside,
And two sharp - look
Not a square, not a triangle,
It looks like a polygon.
Children: Trapeze.
The last figure appears on the screen - little man Trapeze.
Educator: Well done, guys! You have solved all the riddles. What are the inhabitants of this region?
Children: are figures. Geometric figures.
Educator: Right. Various figures live in the edge of Geometry. Look at the screen and name all these shapes again.
Children answer (triangle, square, rectangle, circle, oval, trapezoid)
Educator: What figures do you still know?
Children's answers. (Rhombus, hexagon, cylinder, cone…)
Educator: Well done! Guys, the inhabitants of this country offer us to continue the journey. Close your eyes and count to three.
At this time, the picture changes on the screen - river bank
Teacher: Where were we transferred?
Children's answers: (River bank, lawn)
Educator: Great! We are on the banks of a beautiful river. The inhabitants of this country have prepared tasks for us. Before proceeding with their implementation, we need to split into two teams and each team to stand in a column one after the other. Look, guys, I attach a poster with a symbolic image consisting of geometric shapes to the board for each team. Nearby is a set with geometric shapes. Listen to what task you have to complete: you need to jump one by one to the board, look at the image, choose any suitable geometric figure, put it on the mat and run back to your column. The next participant also jumps to the board and chooses the next matching piece and constructs the image as in the sample. The team that completes the task first wins. And yet, guys, please note that in addition to the shapes, additional elements are used in the image. Don't forget about them too. Ready? 1, 2, 3 run!
Children perform the task - the relay race. After that, the correctness of the task is discussed.
Educator: Great, guys! The inhabitants of this region give us another task. That's what it is: we need to get to the other side of the river. But how to get over if there is no bridge, Guys, look carefully, there are pebbles in the river. Some are round in shape, others oval. The task of the first team is to get over to the other side, stepping only on the stones-circles, the other - on the stones-ovals. Who will move to the other side, sit down at the table. Well, let's get down to the task.
To the cheerful music, the children take turns overcoming the obstacle and sit down at the tables. Where one more task is prepared for them.
Educator: Excellent! Everyone returned, no one got their feet wet. And here is the next task from the inhabitants of the edge of Geometry. In front of you are pieces of paper with pencils. You must follow my instructions. Listen carefully and draw.
- Draw a blue square in the upper left corner.
- Green triangle - in the center.
- Red oval - in the upper right corner.
- Orange rectangle - in the lower right corner.
- Yellow circle - in the lower left corner.
Children complete the task, then check everything together.
Educator: Very good. Our journey is coming to an end. It's time for us to go back to kindergarten. Geometric figures give us the last task for today. Look at the board, which piece is superfluous and why?
On the board, posters are hung in turn with tasks for finding an extra figure in a line.