Shapes in order
Different Shape Names (with Useful List, Types) • 7ESL
Pin
Are you looking for different shape names in English? Here you will find a list of shapes with different types and useful example sentences. If you work in a business that requires the use of mathematics, for example then it would be very important that you are aware of the English names for shapes.
However, this may not be the only reason that you need to learn this information. When taking part in day-to-day conversations, you will need to learn the shape names in order to describe something or be able to understand what someone is talking about, for example, if a person tells you about ‘the square plate.’ Here, you can learn shape names and further expand your vocabulary.
Table of Contents
Shapes
What Are Shapes?
Shapes are geometric figures, or the pattern an outline falls into. Shapes are often drawn (whether by ink, pencil, or digitally), but they occur in life, also. Frequently, people picture 2D (two-dimensional, or flat) images when they hear the word “shapes,” so most of the objects listed in this lesson will be 2D shapes, but some will be 3D as well.
Different Types of Shapes
There are many, many different types of shapes, and there are names for basically all of them. The following list focuses on more common shapes that you’re more likely to encounter or to need or want to know the name of.
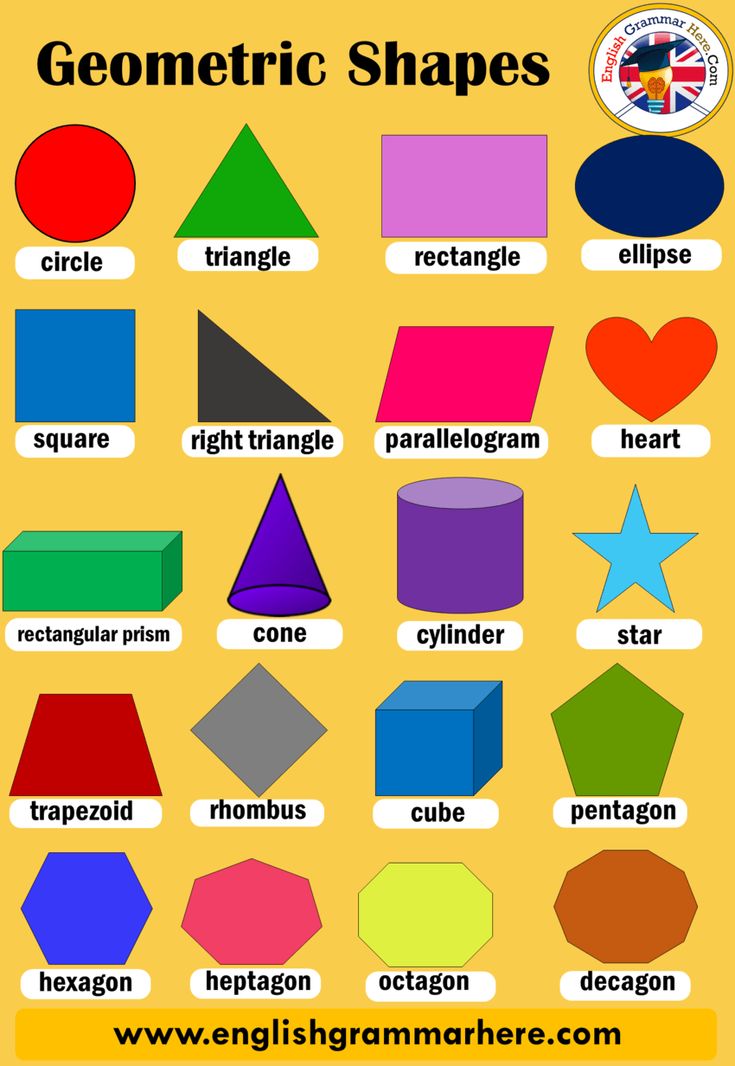
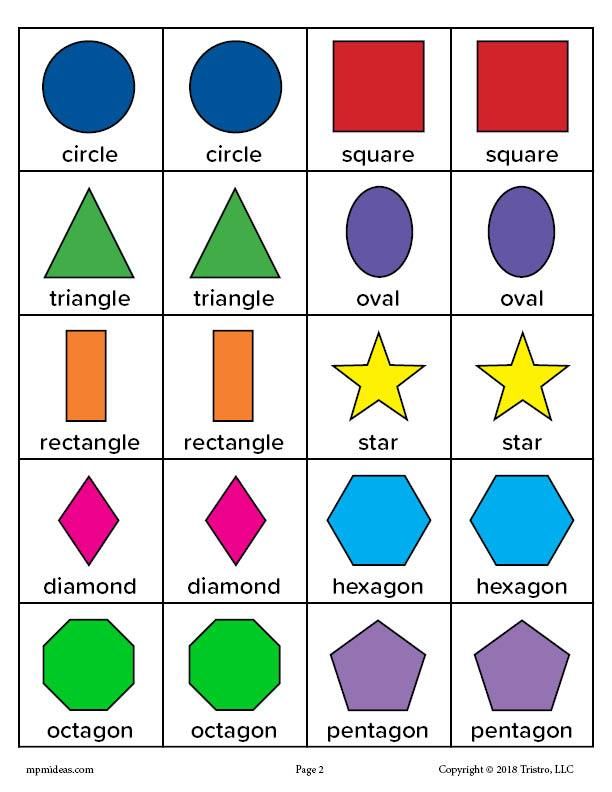
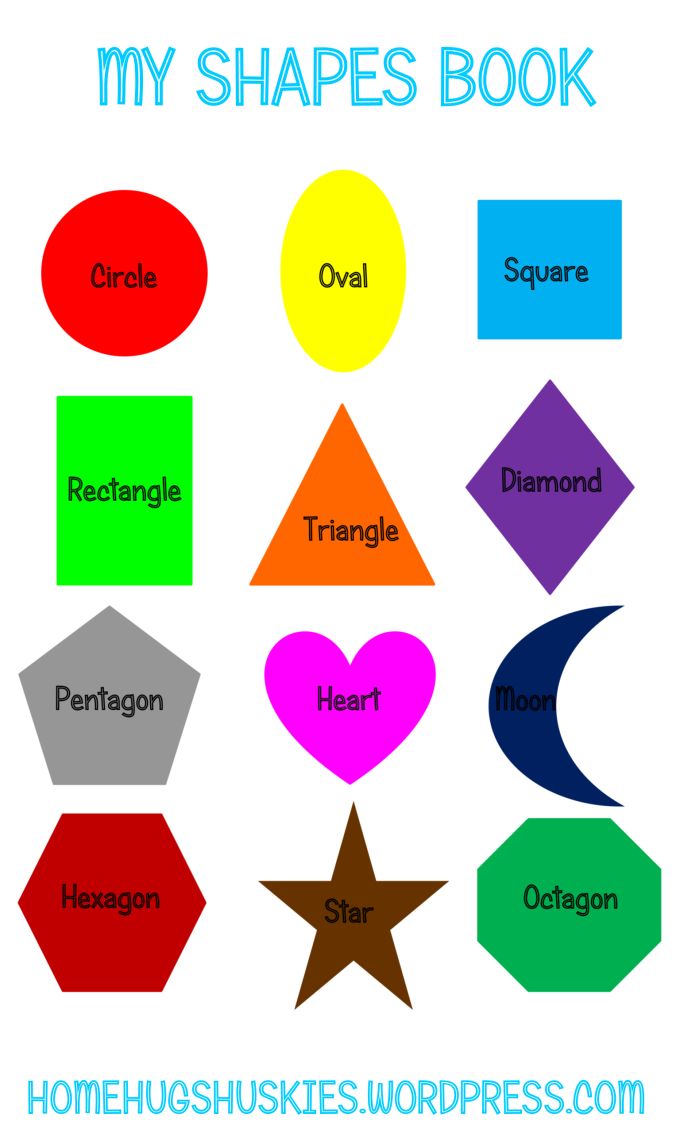
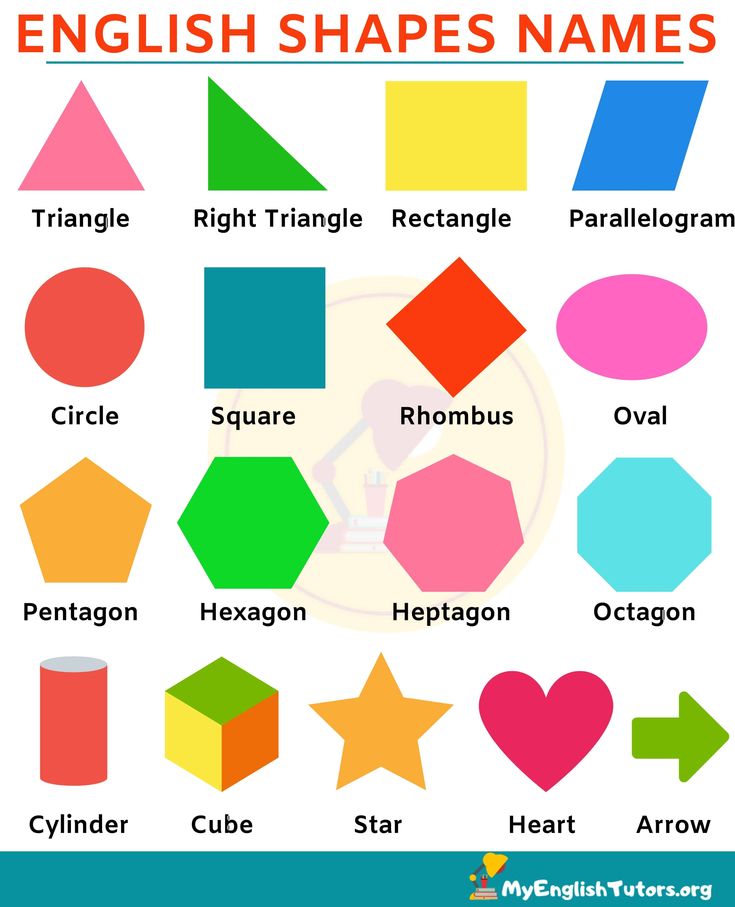
Shape names with pictures
Pin
Two-Dimensional (Flat) Shapes
- Circle: A circle is an equally round shape. Picture the lid of a jar, flat, from above. That is a circle. The wheels on a car are circular, as well. So are the holes in most lined paper and notebooks.
- Oval: An oval is basically a circle that’s been a little squished. The cups of over-the-ear headphones are generally referred to as oval. So is the profile of an egg.
 Some make a distinction between circles that have been squished in the middle versus circles that have been squished at the top, the former being called an ellipse, but common usage treats both as ovals.
 - Rectangle: A rectangle is a shape with four sides, made up of two sets of parallel lines, with four right angles (90 degree angles; picture a capital L). It doesn’t matter whether the sets of sides are the same length. Picture a plain piece of printing paper. This is a rectangle, with one set of sides (generally the top and bottom) shorter than the other set of sides (generally the left and right).
- Square: A square is a very specific type of rectangle, one with four equal sides. Some boxes have a square footprint. Origami paper is square.
- Triangle: A triangle is a shape with three straight sides. These sides can be any length, with any degree of angle, as long as the three sides are joined at their ends. Many warning signs are triangular.
 A slice of a round pizza is mostly triangular (the crust is a little too rounded to be perfect).
 - Pentagon: A pentagon is a shape with five sides. A basic drawing of a house, with two lines for the roof, a line for each side, and a line for the bottom is generally a pentagon.
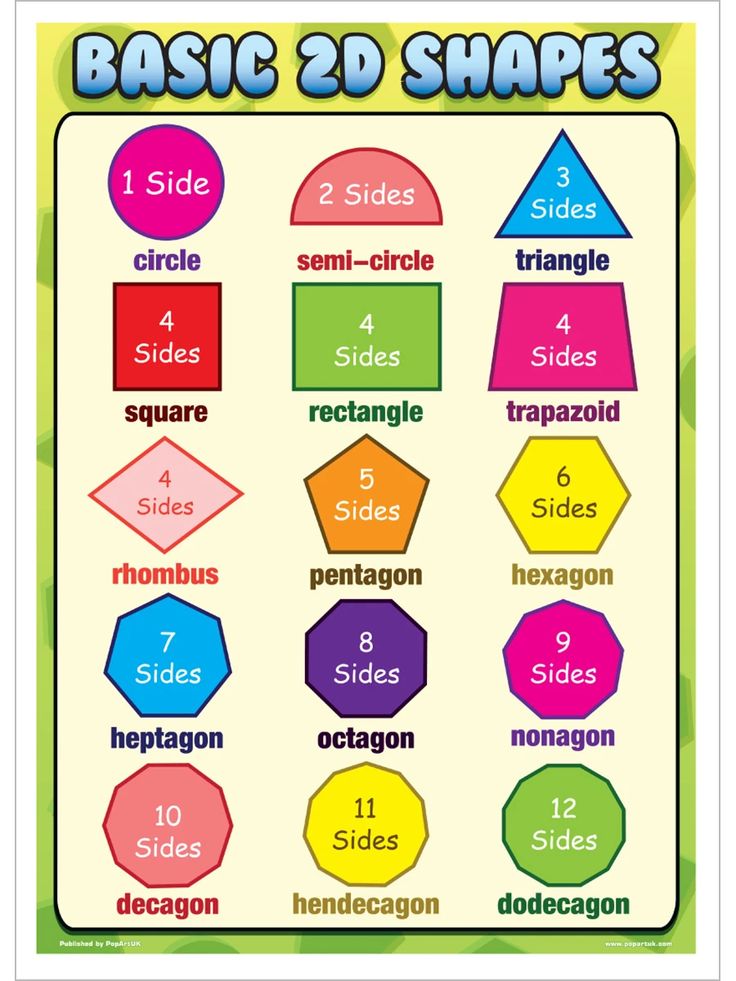
Shapes with more sides are generally named based on how many sides they have. A hexagon has six sides, heptagon has seven, and an octagon has eight.
Three-Dimensional Shapes
Three-dimensional shapes are ones that aren’t just flat on paper, but also take up room vertically. Only a few are really commonly named.
- Sphere: A sphere is a 3D circle, like a ball.
- Cube: A cube is a 3D square, like a box.
- Pyramid: A pyramid is a 3D triangle. The giant structures in Egypt are pyramids, as is the Luxor in Las Vegas.
Shape Names
It’s important to build a good vocabulary, in any language. The more words you know and understand, the better you can communicate. Even if you don’t use the words often, understanding them allows you to follow along with a conversation, even if it ventures a little outside of your comfort zone. This lesson is specifically focused on different types of shapes.
- Nonagon
- Octagon
- Heptagon
- Hexagon
- Triangle
- Scalene triangle
- Right triangle
- Parallelogram
- Rhombus
- Square
- Pentagon
- Circle
- Oval
- Heart
- Cross
- Arrow
- Cube
- Cylinder
- Star
- Crescent
The math student measured each side of the nonagon until he had measurements for all nine edges.
Pin
OctagonThe sectional shape is a quarter of an octagon.
Pin
HeptagonThe pagoda has a base of heptagon.
Pin
HexagonA hexagon is a six – sided figure.
Pin
TriangleThe sum of all the angles of a triangle is 180 degrees.
Pin
Scalene triangleA scalene triangle is a triangle that has three unequal sides.
Pin
Right triangleThe hypotenuse is the longest side of a right triangle.
Pin
ParallelogramThese are the opposite sides of the parallelogram.
Pin
RhombusA rhombus is a simple quadrilateral whose four sides all have the same length.
Pin
SquareThe interior angles of a square are right angles or angles of 90 degrees.
Pin
PentagonDraw a pentagon, a regular five-sided figure.
Pin
CircleThe students sit in a circle on the floor.
Pin
OvalThe shape of the earth is an oval.
Pin
HeartThe pool was in the shape of a heart.
Pin
CrossThe cross is the symbol of Christianity.
Pin
ArrowIt flew straight as an arrow.
Pin
CubeThe box was cube-shaped.
Pin
CylinderThe cylinder is rotated 180 degrees.
Pin
StarShe cuts these paper into star-shaped.
Pin
CrescentHe has a crescent–shaped knife.
Pin
Shapes | PictureLearn different shapes with images to improve and expand your vocabulary, especially shapes and colors vocabulary words in English.
PinShapes: Different Shape Names (with Useful List, Types)Shapes Names VideoThere are shapes everywhere, and so references to them happen frequently. Hopefully, after this lesson, you’re feeling prepared to deal with shapes!
Three-Dimensional Shapes | SkillsYouNeed
This page examines the properties of three-dimensional or ‘solid’ shapes.
A two-dimensional shape has length and width. A three-dimensional solid shape also has depth. Three-dimensional shapes, by their nature, have an inside and an outside, separated by a surface. All physical items, things you can touch, are three-dimensional.
This page covers both straight-sided solids called polyhedrons, which are based on polygons, and solids with curves, such as globes, cylinders and cones.
Polyhedrons
Polyhedrons (or polyhedra) are straight-sided solid shapes. Polyhedrons are based on polygons, two dimensional plane shapes with straight lines.
See our page Properties of Polygons for more about working with polygons.
Polyhedrons are defined as having:
- Straight edges.
- Flat sides called faces.
- Corners, called vertices.
Polyhedrons are also often defined by the number of edges, faces and vertices they have, as well as whether their faces are all the same shape and size. Like polygons, polyhedrons can be regular (based on regular polygons) or irregular (based on irregular polygons). Polyhedrons can also be concave or convex.
One of the most basic and familiar polyhedrons is the cube. A cube is a regular polyhedron, having six square faces, 12 edges, and eight vertices.
Regular Polyhedrons (Platonic Solids)
The five regular solids are a special class of polyhedrons, all of whose faces are identical, with each face being a regular polygon. The platonic solids are:
- Tetrahedron with four equilateral triangle faces.
- Cube with six square faces.
- Octahedron with eight equilateral triangle faces.
- Dodecahedron with twelve pentagon faces.
- Icosahedron with twenty equilateral triangle faces.
See the diagram above for an illustration of each of these regular polyhedrons.
What is a Prism?
A prism is any polyhedron that has two matching ends and flat sides. If you cut a prism anywhere along its length, parallel to an end, its cross-section is the same - you would end up with two prisms. The sides of a prism are parallelograms - four-sided shapes with two pairs of sides of equal length.
Antiprisms are similar to regular prisms in that, their ends match. However the sides of anti-prisms are made up of triangles and not parallelograms. Antiprisms can become very complex.
What is a Pyramid?
A pyramid is a polyhedron with a polygon base that connects to an apex (top point) with straight sides.
Although we tend to think of pyramids with a square base, like the ones that the ancient Egyptians built, they can in fact have any polygon base, regular or irregular. Furthermore, a pyramid can have an apex in the direct centre of its base, a Right Pyramid, or can have the apex off centre when it's an Oblique Pyramid.
More Complex Polyhedrons
There are many more types of polyhedra: symmetrical and asymmetrical, concave and convex.
Archimedean solids, for example, are made up of at least two different regular polygons.
The truncated cube (as illustrated) is an Archimedean solid with 14 faces. Six of the faces are regular octagons and the other eight are regular (equilateral) triangles. The shape has 36 edges and 24 vertices (corners).
Three-Dimensional Shapes with Curves
Solid shapes which include a curved or round edge are not polyhedrons. Polyhedrons can only have straight sides. Also see our page on two-dimensional Curved Shapes.
Many of the objects around you will include at least some curves. In geometry the most common curved solids are cylinders, cones, spheres and tori (the plural for torus).
| Common Three-Dimensional Shapes with Curves: | |
|---|---|
| Cylinder | Cone |
| A cylinder has the same cross-section from one end to the other. Cylinders have two identical ends of either a circle or an oval. Although similar, cylinders are not prisms as a prism has (by definition) parallelogram, flat sides. | A cone has a circular or oval base and an apex (or vertex). The side of the cone tapers smoothly to the apex. A cone is similar to a pyramid but distinct as a cone has a single curved side and a circular base. |
| Sphere | Torus |
| Shaped like a ball or a globe a sphere is a completely round object. Every point on the surface of a sphere is an equal distance to the centre of the sphere. | Shaped like a ring, a tyre or a doughnut, a regular ring torus is formed by revolving a smaller circle around a larger circle. There are also more complex forms of tori. |
Surface Area
Our page on Calculating Area explains how to work out the area of two-dimensional shapes and you need to understand these basics in order to calculate the surface area of three-dimensional shapes.
For three-dimensional shapes, we talk about surface area, to avoid confusion.
You can use your knowledge about the area of two-dimensional shapes to calculate the surface area of a three-dimensional shape, since each face or side is effectively a two-dimensional shape.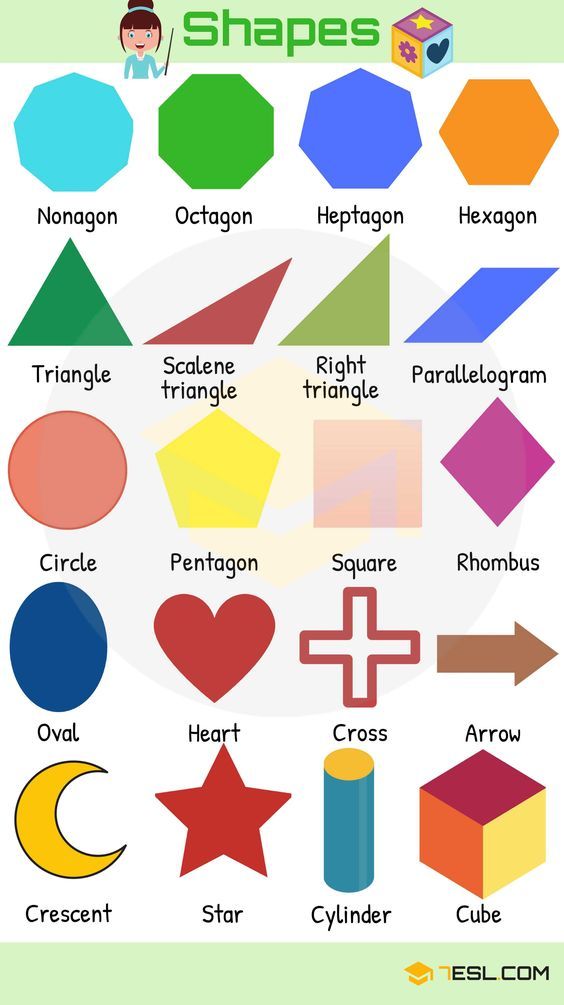
You therefore work out the area of each face, and then add them together.
As with flat shapes, the surface area of a solid is expressed in square units: cm2, inches2, m2 and so on. You can find more detail about units of measurement on our page Systems of Measurement.
Examples of Surface Area Calculations
Cube
The surface area of a cube is the area of one face (length x width) multiplied by 6, because all six faces are the same.
As the face of a cube is a square you only need to take one measurement - the length and width of a square are, by definition, the same.
One face of this cube is therefore 10 × 10 cm = 100cm2. Multiply by 6, the number of faces on a cube, and we find that the surface area of this cube is 600cm2.
Other Regular Polyhedrons
Similarly, the surface area of the other regular polyhedrons (platonic solids) can be worked out by finding the area of one side and then multiplying the answer by the total number of sides - see the Basic Polyhedrons diagram above.
If the area of one pentagon making up a dodecahedron is 22cm2 then multiply this by the total number of sides (12) to give the answer 264cm2.
Pyramid
To calculate the surface area of a standard pyramid with four equal triangular sides and a square base:
First work out the area of the base (square) length × width.
Next work out the area of one side (triangle). Measure the width along the base and then the height of the triangle (also known as slant length) from the central point on the base to the apex.
There are then two ways to calculate the surface area of the four triangles:
Divide your answer by 2 to give you the surface area of one triangle and then multiply by 4 to give the surface area of all four sides, or
Multiply your answer by 2.
Finally add the area of the base and sides together to find the total surface area of the pyramid.
To calculate the surface area of other types of pyramid, add together the area of the base (known as base area) and the area of the sides (lateral area). You may need to measure the sides individually.
Net Diagrams
A geometric net is a two-dimensional 'pattern' for a three dimensional object. Nets can be helpful when working out the surface area of a three-dimensional object. In the diagram below you can see how basic pyramids are constructed, if the pyramid is 'unfolded' you are left with the net.
For more on net diagrams see our page 3D Shapes and Nets.
Prism
To calculate the surface area of a prism:
Prisms have two ends the same and flat parallelogram sides.
Calculate the area of one end and multiply by 2.
For a regular prism (where all the sides are the same) calculate the area of one of the sides and multiply by the total number of sides.
For irregular prisms (with different sides) calculate the area of each side.
Add your two answers together (ends + sides) to find the total surface area of the prism.
Cylinder
Example:
Radius = 5cm
Height = 10cm
To calculate the surface area of a cylinder it is useful to think about the component parts of the shape. Imagine a tin of sweetcorn - it has a top and a bottom, both of which are circles. If you cut the side along its length and flattened it you would have a rectangle. You therefore need to find the area of two circles and a rectangle.
First work out the area of one of the circles.
The area of a circle is π (pi) × radius2.
Assuming a radius of 5cm, the area of one of the circles is 3.14 × 52 = 78.5cm2.
Multiply the answer by 2, as there are two circles 157cm2
The area of the side of the cylinder is the perimeter of the circle × the height of the cylinder.
Perimeter is equal to π x 2 × radius. In our example, 3.14 × 2 × 5 = 31.4
Measure the height of the cylinder - for this example the height is 10cm. The surface area of the side is 31.4 × 10 = 314cm2.
The total surface area can be found by adding the area of the circles and the side together:
157 + 314 = 471cm2
Example:
Radius = 5cm
Length of Slant = 10cm
Cone
When calculating the surface area of a cone you need to use the length of the ‘slant’ as well as the radius of the base.
However, it is relatively straightforward to calculate:
The area of the circle at the base of the cone is, π (pi) × radius2.
In this example the calculation is 3.14 × 52 = 3.14 × 25 = 78.5cm2
The area of the side, the sloping section, can be found using this formula:
π (pi) × radius × length of slant.
In our example the calculation is 3.14 × 5 × 10 = 157cm2.
Finally add the base area to the side area to get the total surface area of the cone.
78.5 + 157 = 235.5cm2
Tennis Ball:
Diameter = 2.6 inches
Sphere
The surface area of a sphere is a relatively simple expansion of the formula for the area of a circle.
4 × π × radius2.
For a sphere it is often easier to measure the diameter - the distance across the sphere. You can then find the radius which is half of the diameter.
The diameter of a standard tennis ball is 2. 6 inches. The radius is therefore 1.3 inches. For the formula we need the radius squared. 1.3 × 1.3 = 1.69
The surface area of a tennis ball is therefore:
4 × 3.14 × 1.69 = 21.2264 inches2.
Example:
R (Large Radius) = 20 cm
r (Small Radius) = 4 cm
Torus
In order to calculate the surface area of a torus you need to find two radius values.
The large or major radius (R) is measured from the middle of the hole to the middle of the ring.
The small or minor radius (r) is measured from the middle of the ring to the outside edge.
The diagram shows two views of an example torus and how to measure its radiuses (or radii).
The calculation to find the surface area is in two parts (one for each radius). The calculation is the same for each part.
The formula is: surface area = (2πR)(2πr)
To work out the surface area of the example torus.
(2 × π × R) = (2 × 3.14 × 20) = 125.6
(2 × π × r) = (2 × 3. 14 × 4) = 25.12
Multiply the two answers together to find the total surface area of the example torus.
125.6 × 25.12 = 3155.072cm2.
Further Reading from Skills You Need
Understanding Geometry
Part of The Skills You Need Guide to Numeracy
This eBook covers the basics of geometry and looks at the properties of shapes, lines and solids. These concepts are built up through the book, with worked examples and opportunities for you to practise your new skills.
Whether you want to brush up on your basics, or help your children with their learning, this is the book for you.
Filling up a Solid: Volume
With three-dimensional shapes, you may also need to know how much volume they have.
In other words, if you filled them up with water or air, how much filling would you need?
This is covered on our page Calculating Volume.
Forms and procedure for citizens' appeals
In dealing with citizens' appeals, the administration of the Krasnogvardeisky district of St.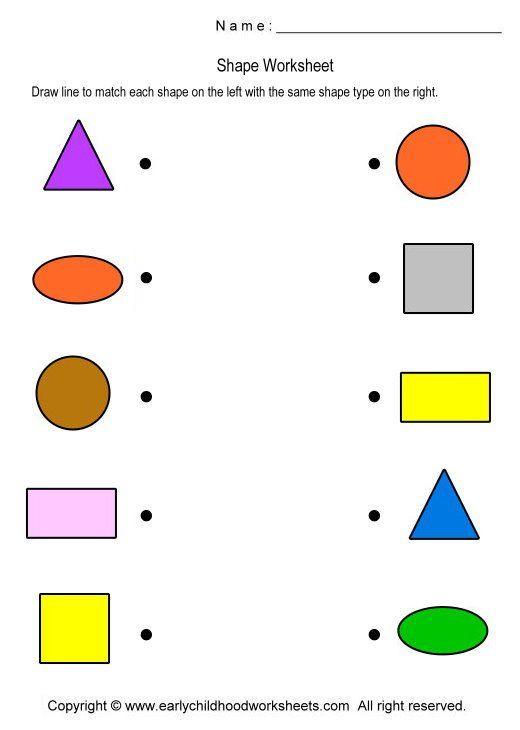 Petersburg is guided by the Federal Law of May 2, 2006 No. administration of the Krasnogvardeisky district of St. Petersburg.
Appeals can be individual and collective, including appeals of associations of citizens, including legal entities. Be presented in writing or in the form of an electronic document, as well as orally. The appeal contains proposals, statements, complaints.
Proposal - recommendation of a citizen to improve laws and other regulatory legal acts, the activities of state bodies and local governments, the development of public relations, the improvement of socio-economic and other spheres of activity of the state and society.
Application - a citizen's request for assistance in exercising his constitutional rights and freedoms or the constitutional rights and freedoms of other persons, or a message about a violation of laws and other regulatory legal acts, shortcomings in the work of state bodies, local governments and officials, or criticism of the activities of these bodies and officials.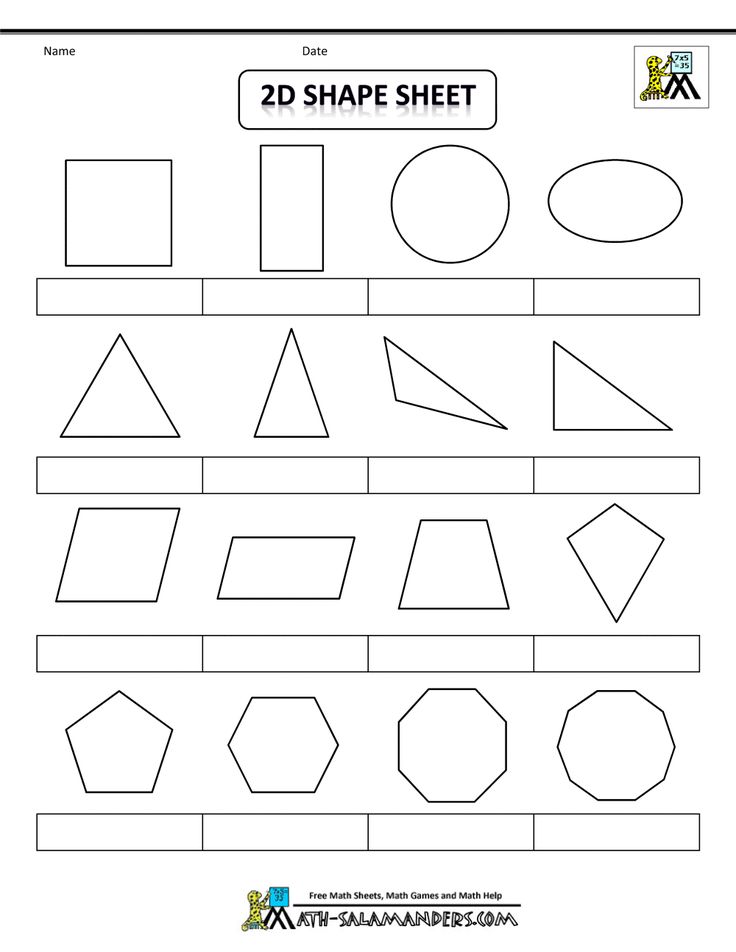
Complaint - a citizen's request for the restoration or protection of his violated rights, freedoms or legitimate interests or the rights, freedoms or legitimate interests of other persons.
Methods of contacting the district administration.
1. Send electronic circulation through the Electronic Reception Service https://letters.gov.spb.ru/
2. Send a letter by mail at 195027, St. Petersburg, Sredneokhtinsky prospekt, 50.
3. Bring the letter in person to the address: 195027, St. Petersburg, Sredneokhtinsky prospekt, 50, until
00, Friday until 17-00Break from 13-00 to 14-00
Saturday, Sunday - days off.
Received by the administration of the Krasnogvardeisky district
Petersburg, appeals of citizens (individuals), including organizations (legal entities), public associations, state bodies, local governments are considered in accordance with:
The Constitution of the Russian Federation;
Declaration of the Rights and Freedoms of Man and Citizen (Adopted by the Supreme Soviet of the RSFSR on November 22, 1991);
Federal Law No.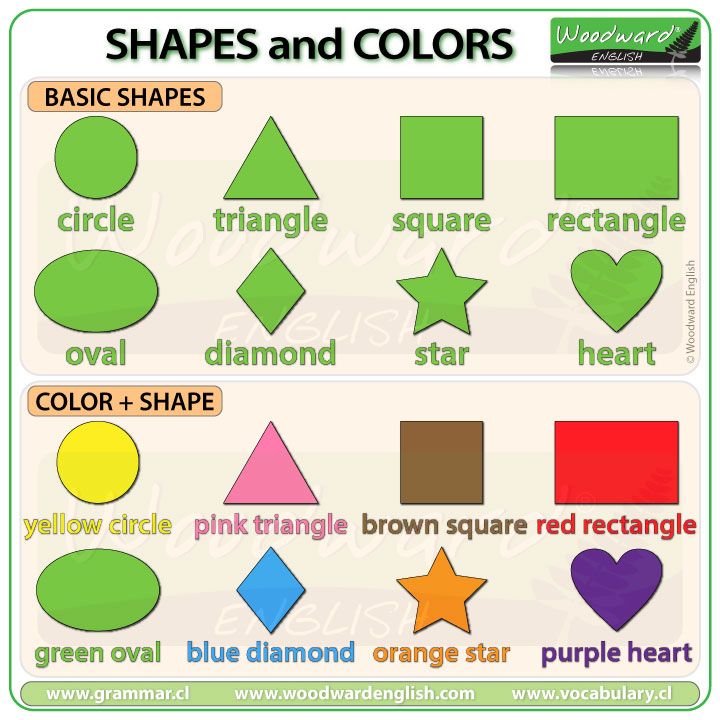 59-FZ dated May 2, 2006 “On the procedure for considering applications from citizens of the Russian Federation”;
Federal Law No. 152-FZ of July 27, 2006 “On Personal Data”;
Federal Law No. 8-FZ dated 09.02.2009 “On Providing Access to Information on the Activities of State Bodies and Local Self-Government Bodies”;
Regulations of the administration of the Krasnogvardeisky district of St. Petersburg, approved by order of the administration of the Krasnogvardeisky district
St. Petersburg dated September 29, 2004 No. 119-p;
Instructions for office work in the administration of the Krasnogvardeisky district of St. Petersburg, approved by order of the administration of the Krasnogvardeisky district of St. Petersburg dated November 29, 2004 No. 153-p
Law of St. Petersburg dated March 28, 2018 No. of the Russian Federation to apply to the state authorities of St. Petersburg and local self-government bodies of intra-city municipalities of St.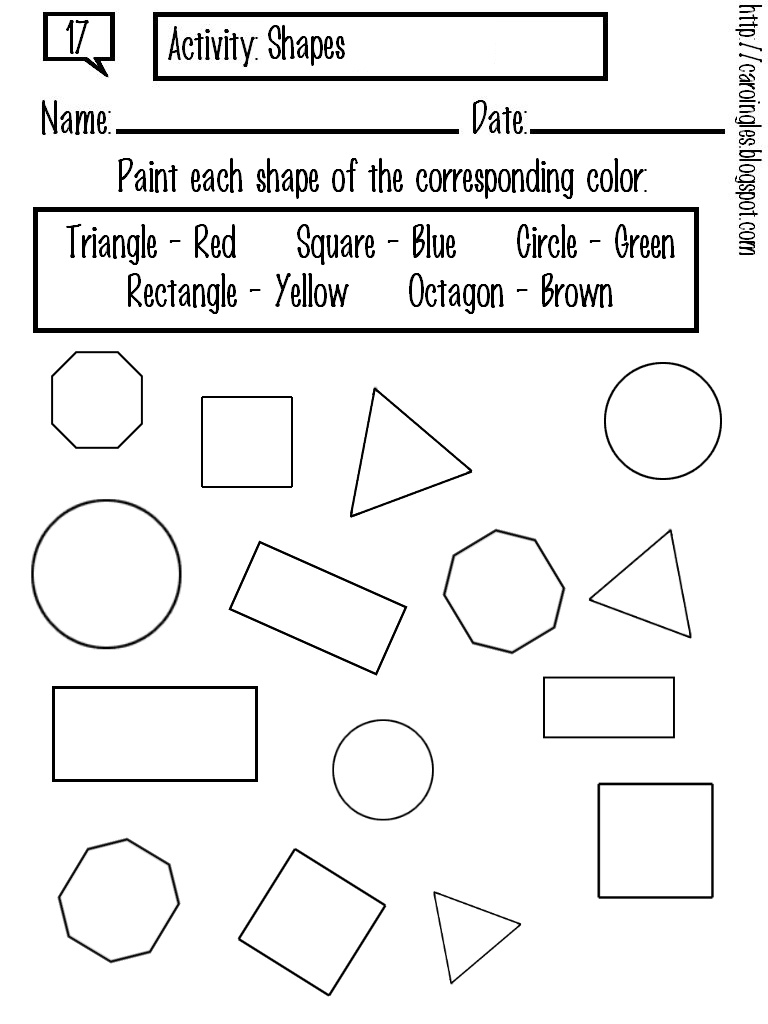 Petersburg"
Decree of the Government of St. Petersburg dated July 18, 2018 No. 575 “ On approval of the procedure for holding a regional day for the reception of citizens of the Russian Federation by the executive bodies of state power of St. Petersburg” “The procedure for holding a regional day for receiving citizens of the Russian Federation by the executive bodies of state power of St. Petersburg" (Source: ISS "KODEKS")
Managing access to forms of model-driven applications in Power Apps - Power Apps
- Article
- Reading takes 5 minutes
Power Apps Forms Settings is a set of capabilities that enable model-driven app developers to customize how users access forms in a solution or application.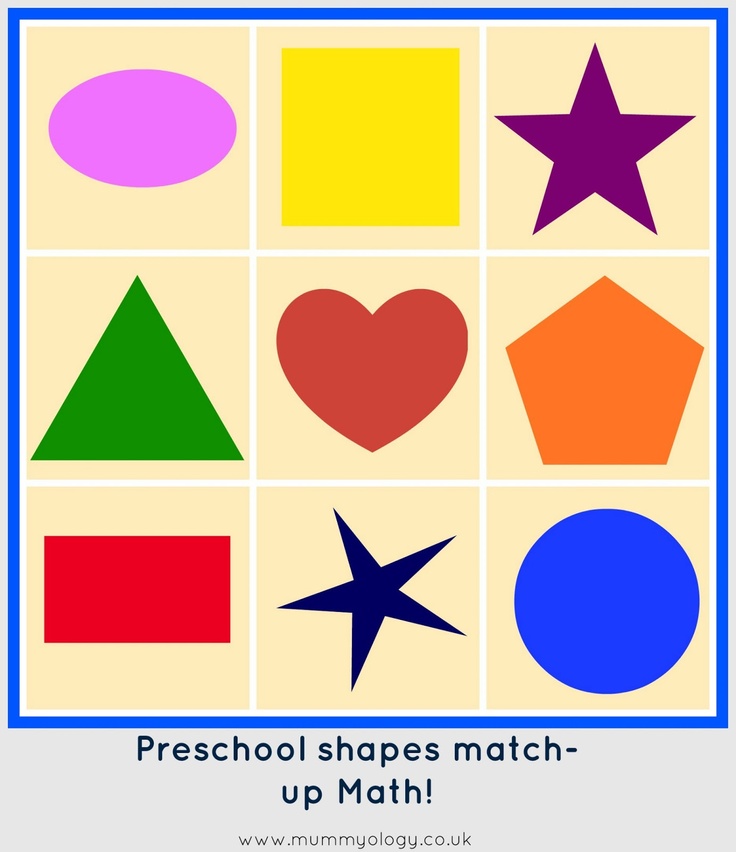 From Form Settings There are three different scopes that the manufacturer can choose from:
- Set the security roles for the form.
- Sets the order of forms.
- Set the fallback form for the table.
You can access the form settings from the area of Form in Power Apps or from the command bar in the form designer.
Setting security roles for a form
Different users in an organization can interact with the same data in different ways. Managers may want to be able to quickly view information on a line, or workers may want a form that allows them to quickly enter data. To meet different needs, you can assign security roles to forms that belong to different user groups.
If a table has multiple master forms or other types of forms defined, you can specify which forms users can use based on their security roles. Because each table must have a form that can be displayed to any user, at least one form must be defined as a "fallback" form, that is, that form will be available to users whose security roles are not explicitly assigned forms.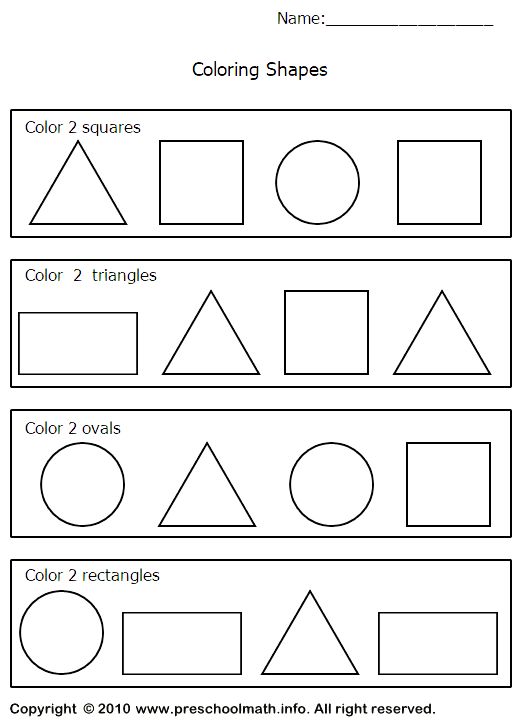
Note
- Cannot assign quick create and view forms or card forms to security roles.
- Another option that producers can use to control form access is to make the main form inactive. Main forms can be set to active or inactive. This feature was included primarily to manage newly added forms when upgrading Microsoft Dataverse environments, but it can be used to block users from using any of the core forms.
Security role assignment form
-
Sign in to Power Apps, select Solutions , open the desired solution, select the table, and then select the Form area.
-
Next to the main form for which you want to configure security roles for the form, select ... , then select Form Settings .
-
In the left navigation on page Form settings, select Security role .
-
Select one of the following options:
- To set security roles for each user, select All .
- To configure form access for one or more specific security roles, select Specific security roles . Then select the security roles you want to grant access to from the list of security roles that have been configured for your environment.
- To set security roles for each user, select All .
-
Select Save and publish .
Specifying a form order
If you have multiple basic forms, Quick Create Forms, Quick Forms, or Card Forms, you can assign a form order to a table. The form order determines which of the available forms will be displayed by default. The available master forms can be further controlled by assigning security roles to the form.
Note that the order of the forms does not determine who can see the form, which is determined by the security roles. More information: Set security roles for Form
- Sign in to Power Apps, select Solutions , open the required solution, select the table, and then select the Forms area.
- Next to the main form for which you want to set up a fallback form, select ... , then select Form Settings .
- In the left navigation on page Form Settings, select Form order .
- Select the form set you want, for example Basic Form , Quick Create Form , Express Form or Card Form .
- Reorder by dragging the form up and down the list in the order you want them to appear to your users. You can also use the following keyboard shortcuts: Tab/Tab + Shift to move the focus, Spacebar to select or release the form, and Down/Up Arrow keys to move the form. Select Save and publish . To set the form order using Solution Explorer, see Assign the form order of a model-driven application.
Setting a fallback form for a table
Setting a fallback form for a table is important to ensure that if the user is not assigned any security roles or no security roles are assigned to the main form type, there is always a "default" form that will be displayed for this table. Fallback forms are only available with main forms and do not apply to Quick Create, Quick View, and Card forms.
There are several different strategies to consider when managing the fallback form for a table.
Display the same form for all users
If you do not need to use multiple forms for a table, you do not need to create a fallback form.
Create an emergency form
If you use role-based forms because you want to limit the information that users can view or change, create a form that displays as little information as possible. Then select specific security roles, but don't select any other than system administrator. As a result, this form will be displayed only to the "System Administrator" role and to all users whose security roles are not associated with a particular form. You can add an HTML web resource to the form with information about why so little information is displayed on the form and a link to information about how to request to be added to the security role associated with the form or enable a new security role for the form.
Create a generic form
If you use role-based forms to provide a custom user experience based on the user's role, you can set the least specialized form as a fallback form and configure it to be displayed to all users. Then create custom forms for specific security roles and specify that these forms only appear for specific security roles. Do not set these forms as fallbacks. Finally, in section Form settings set Form order to specify which forms will be displayed from the most restricted form to the most versatile form. Your fallback form will appear at the bottom of the list. This will cause users to see the form customized for their role as their default form, but they will still be able to use the form picker to select the most common form if needed. Whatever shape they choose will be the default shape until another shape is chosen.
Install a fallback form for table
- Sign in to Power Apps, select Solutions , open the required solution, select the table, and then select the area of Forms .
- Next to the main form for which you want to set up a fallback form, select ... , then select Form Settings .
- In the left navigation on page Form Settings, select Reserve Forms .
- To disable the form from the fallback order, clear the checkbox. In this example, form Information will be removed from the reserve order.
To enable the form for the reservation, check the box next to the form to enable it.
- Select Save and publish .
Using form scripts
The client API form context (formContext) contains a reference to a form or to an element in a form, such as a quick view control or a row in an editable grid, for which the current code is being executed. More information: Client API 9 form context0003
Important!
The Xrm.Page object is deprecated and you must use the getFormContext method of the object passed in the execution context to return a reference to the corresponding form or form element.