Sugar cookie recipe valentines
Valentine's Day Cookies - Sally's Baking Addiction
These decorated Valentine’s Day cookies resemble conversation heart candies—so fun for the holiday! My recipe for sugar cookies promises flavorful cookies with soft and thick centers, slightly crisp edges, and flat tops for decorating with royal icing. The dough comes together with 7–8 simple ingredients, and the cookies hold their cookie cutter shape in the oven.
Not to toot my own horn, but… I have absolutely *zero talent* when it comes to piping writing on cookies and cakes. Zero zip zilch. LOL. Pen and paper, great! Piping frosting on cupcakes and flooding icing on cookies, totally manageable! But combine writing + piping, and I completely lose control of my hand.
Recently, my talented assistant Stephanie came to my rescue, and helped me write on these conversation heart-inspired cookies. Because we just can’t make Valentine’s Day cookies without the fun little sayings on top!
Conversation Heart Candies
If you aren’t familiar with conversation heart candies, they are a Valentine’s Day staple here in the U. S. They’re like little edible love notes! Pastel-colored, a little chalky-tasting, and totally iconic, conversation hearts have been around for over a century. Did you know the company that produces them comes up with a new theme each year, and creates new sayings to go along with that theme? The sayings are usually sweet or funny, but can even be sassy or sarcastic!
But you don’t need to buy a bag of conversation hearts to make today’s recipe. You just need a rolling pin, a heart-shaped cookie cutter, and a little inspiration for what to write on top (I provide some suggestions below).
So Much to Love About These Valentine’s Day Cookies
These lookalike (but tasteabetter) heart-shaped treats start with my trusty recipe for sugar cookies. The cookies are soft and buttery with crisp edges. The dough holds its shape wonderfully in the oven. Sharp and precise; no misshapen hearts!
- Soft, thick centers with slightly crisp edges
- Irresistible buttery vanilla flavor
- Made from simple ingredients
- Leave plain or flavor with extracts
- Hold shape while baking
- Freeze beautifully
- Easy-to-follow recipe used by beginner and expert bakers alike
Reader Sharon commented: “I have made this recipe probably 50 times and I absolutely love it! It’s not too sweet so when you add royal icing it makes it just perfect.
★★★★★”
We’re using royal icing for today’s Valentine’s Day sugar cookie decoration, but you can absolutely skip the writing and top them with buttercream like we do for these shamrock cookies, or use this easy glaze cookie icing instead.
Overview: How to Make Valentine’s Day Cookies
- Make cookie dough. You only need 7–8 ingredients. With so few ingredients, it’s important that you follow the recipe closely. Creamed butter and sugar provide the base of the cookie dough. Egg is the cookie’s structure and vanilla extract adds flavor. I almost always add a touch of almond extract for additional flavor and highly recommend that you try it too! Flour is an obvious addition, baking powder adds lift, and salt balances the sweet. By the way, you can create these Valentine’s Day cookies using my chocolate sugar cookies too!
- Divide in 2 pieces. Smaller sections of dough are easier to roll out.
- Roll out cookie dough.
 Roll it out to 1/4 inch thickness. If you have difficulty evenly rolling out dough, try this adjustable rolling pin. Such a brilliant invention!
 - Chill rolled-out cookie dough. Without chilling, these cookie cutter sugar cookies won’t hold their shape. Chill the rolled-out cookie dough for at least 2 hours and up to 2 days.
- Cut into shapes. If you need suggestions for cookie cutters, I love Ann Clark brand. (Not sponsored, just a genuine fan!) For the cookies pictured here, I used the 3.5-inch size from this set. You just need to make sure your heart cookie cutter is big enough to give you plenty of space to pipe the writing on—I think about 3 inches is good. You can use the same cookie cutter for these raspberry sugar cookies, too.
- Bake & cool. Depending on size, the cookies take about 12 minutes.
- Decorate. More on the icing below.
The Trick Is the Order of Steps
Notice how I roll out the dough BEFORE chilling it in the refrigerator? That’s my signature sugar cookie trick!
Let me explain why I do this. Just like when you’re making chocolate chip cookies, to prevent the cookies from over-spreading, the cookie dough must chill in the refrigerator. Roll out the dough right after you prepare it, then chill the rolled-out dough. (At this point the dough is too soft to cut into shapes.) Don’t chill the cookie dough and then try to roll it out because it will be too cold and difficult to work with. I divide the dough in half before rolling it out and highly recommend you do the same. Smaller sections of dough are simply more manageable.
Here’s another trick! Roll out the cookie dough directly on silicone baking mats or parchment paper sheets so you can easily transfer it to the refrigerator. Pick the whole thing up, set it on a baking sheet, and place it in the refrigerator. If you don’t have enough room for 2 baking sheets in your refrigerator, you can stack the pieces of rolled-out dough on top of each other (with parchment or baking mat in between).
Royal Icing Is Best for Writing on Cookies
This royal icing is my preferred sugar cookie icing because it’s easy to use, dries in a couple hours, and doesn’t have a texture comparable to hardened cement.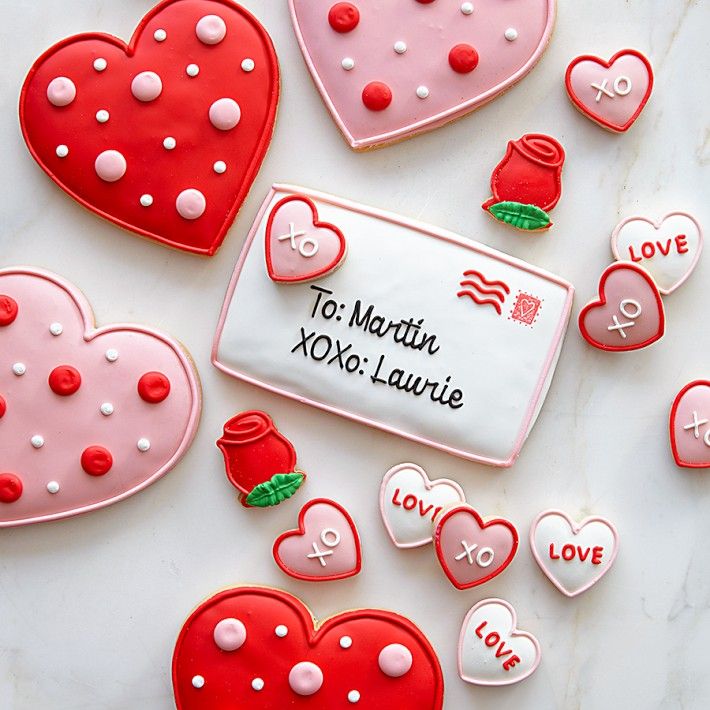 (It’s actually on the softer side!)
I make the royal icing with meringue powder. Meringue powder takes the place of liquid raw egg whites, which is found in traditional royal icing recipes. It eliminates the need for fresh eggs, but still provides the same consistency. You can find meringue powder in some baking aisles, most craft stores with a baking section, or shop for meringue powder online.
The trickiest part is landing on the perfect royal icing consistency. My royal icing video is included in the written recipe below, so use that to help guide you.
Tools You Need for Decorating These Heart Sugar Cookies
- Americolor Soft Gel Paste Color Kit: In my experience, this is the BEST coloring for royal icing. The color is rich and vivid. You only need a teeny drip for the pastel colors in today’s cookies. And for darker colors, 1 small drop. So these colors will last you a very long time! I used the yellow, deep pink, violet, green, and orange; and red for the writing.

- Disposable or reusable piping bags.
- Coupler(s): If you only have 1 piping tip and want to decorate with multiple colors of icing, keep the tip on the outside of the bag by using a coupler so you can easily transfer the piping tip to other bags of colored icing.
- Round Icing Tip #4: For piping the royal icing on top of each cookie (outlining and flooding).
- Round Icing Tip #2: For piping the writing on top of the iced cookies.
I stuck with the shortest possible sayings and words because, well… you know my struggle. Some *short* conversation heart text inspiration:
- BFF
- Love
- Kiss
- Hug
- XOXO
- Sweet
- Wink
- Kind
- Me & U
- Cute
Have fun with it, and don’t worry about making them look perfect. You can even skip the writing for plain pastel Valentine’s Day cookies. Your Valentine will appreciate your efforts no matter what.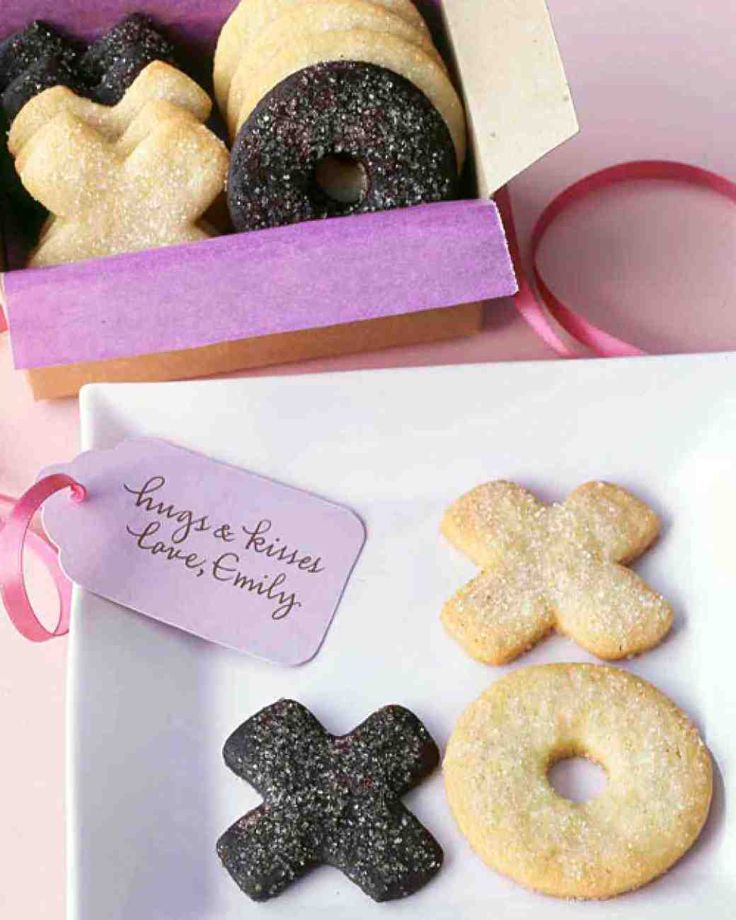 😉
😉
More Valentine’s Day Desserts
- Valentine’s Day Cupcakes
- Sparkle Sweetheart Cookies
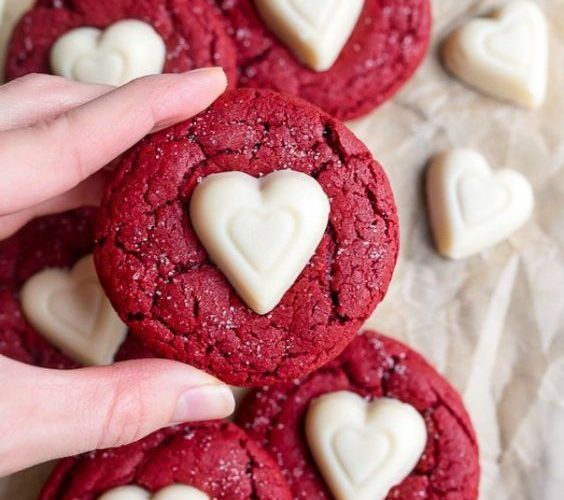
- Red Velvet Cake
- Lava Cakes
- Homemade Chocolate Truffles
See even more Valentine’s Day dessert recipes.
Valentine’s Day Cookies
★★★★★ 4.8 from 17 reviews
- Author: Sally
- Prep Time: 2 hours
- Cook Time: 12 minutes
- Total Time: 6 hours (includes icing setting)
- Yield: 20 3.5-inch cookies
- Category: Cookies
- Method: Baking
- Cuisine: American
Description
These decorated Valentine’s Day heart sugar cookies resemble conversation heart candies—so fun for the holiday! I include the full set of special tools and equipment I use in the Notes below.
- 2 and 1/4 cups (281g) all-purpose flour (spoon & leveled), plus more as needed for rolling and work surface
- 1/2 teaspoon baking powder
- 1/4 teaspoon salt
- 3/4 cup (1.5 sticks or 170g) unsalted butter, softened to room temperature
- 3/4 cup (150g) granulated sugar
- 1 large egg, at room temperature
- 2 teaspoons pure vanilla extract
- optional for added flavor: 1/4–1/2 teaspoon almond extract
Royal Icing
- 4 cups (480g) confectioners’ sugar, sifted (I use and recommend Domino brand)
- 3 Tablespoons meringue powder (not plain egg white powder)
- 9–10 Tablespoons room-temperature water
- gel food coloring kit for tinting (or any gel food coloring)
- Whisk the flour, baking powder, and salt together in a medium bowl. Set aside.
- In a large bowl using a hand mixer or a stand mixer fitted with a paddle attachment, beat the butter and sugar together on high speed until completely smooth and creamy, about 2 minutes. Add the egg, vanilla, and almond extract (if using) and beat on high speed until combined, about 1 minute. Scrape down the sides and up the bottom of the bowl and beat again as needed to combine.
- Add the dry ingredients to the wet ingredients and mix on low until combined. Dough will be relatively soft. If the dough seems too soft and sticky for rolling, add 1 more Tablespoon of flour.
- Divide the dough into 2 equal parts. Place each portion onto a piece of lightly floured parchment paper or a lightly floured silicone baking mat. With a lightly floured rolling pin, roll the dough out to about 1/4-inch thickness. Use more flour if the dough seems too sticky.
 The rolled-out dough can be any shape, as long as it is evenly 1/4-inch thick.
 - Lightly dust one of the rolled-out doughs with flour. Place a piece of parchment on top. (This prevents sticking.) Place the 2nd rolled-out dough on top. Cover with plastic wrap or aluminum foil, then refrigerate for at least 2 hours and up to 2 days.
- Once chilled, preheat oven to 350°F (177°C). Line 2–3 large baking sheets with silicone baking mats or parchment paper. Carefully remove the top dough piece from the refrigerator. If it’s sticking to the bottom, run your hand under it to help remove it. Using a heart cookie cutter (pictured cookies use the 3.5-inch size), cut the dough into hearts. Re-roll the remaining dough and continue cutting until all is used. Repeat with 2nd piece of dough. (Note: It may not seem like a lot of dough, but you get a lot of cookies from the dough scraps you re-roll.)
- Arrange cookies on baking sheets 3 inches apart. Bake for 11–12 minutes or until lightly browned around the edges.
 If your oven has hot spots, rotate the baking sheets halfway through bake time. Allow cookies to cool on the baking sheets for 5 minutes, then transfer to a wire rack to cool completely before decorating.
 - Make the icing: I have a video for how to make royal icing below. Use that as your guide for this step. Combine sifted confectioners’ sugar, meringue powder, and 9 Tablespoons of water in a large bowl. Using a hand mixer or a stand mixer fitted with a whisk attachment, beat icing ingredients together on high speed for 1.5–2 minutes. When lifting the whisk up off the icing, the icing should drizzle down and smooth out within 5–10 seconds. If it’s too thick, beat in more water 1 Tablespoon at a time. I usually need 10 Tablespoons, but on particularly dry days, I may use up to 12–14 Tablespoons. Keep in mind that the longer you beat the royal icing, the thicker it becomes. If your royal icing is too thin, just keep beating it to introduce more air OR you can add more sifted confectioners’ sugar.
 Yields about 3 cups of icing.
 - Separate icing into 6 different bowls. (Or fewer bowls, depending how many colors you want.) Stir in 1 tiny drop of the following colors into each bowl, 1 color per bowl: pink, violet, green, yellow, and orange. The 6th bowl is for the writing. For that, stir in 2–3 drops of red. You won’t use the red icing for a couple hours after the base icing sets, so place a damp paper towel directly on the surface of it. This prevents it from hardening.
- Spoon or pour the pastel icings into piping bags (disposable or reusable) fitted with round icing tip #4. If you only have 1 tip and want to decorate with multiple colors of icing, keep the tip on the outside of the bag by using a coupler so you can easily transfer the piping tip to other bags of colored icing. Decorate cookies with colored icing by piping a border around the edges and then filling it. Let the icing-covered cookies mostly set, uncovered, for at least 2 hours before adding writing.
- Spoon or pour the red icing into a piping bag (disposable or reusable) fitted with round icing tip #2.
 Write desired words/messages on the cookies (ideas/suggestions listed in the post above!). Writing icing will set within 2–3 hours.
 - Decorated or plain cookies stay fresh covered at room temperature for 5 days or in the refrigerator for up to 10 days.
Notes
- Freezing Instructions: Plain or decorated sugar cookies freeze well up to 3 months. Wait for the icing to set completely before layering between sheets of parchment paper in a freezer-friendly container. To thaw, thaw in the refrigerator or at room temperature. You can also freeze the cookie dough for up to 3 months before rolling it out.
 Prepare the dough through step 3, divide in half, flatten both halves into a disk as we do with pie crust, wrap each in plastic wrap, then freeze. To thaw, thaw the disks in the refrigerator, then bring to room temperature for about 1 hour. Roll out the dough as directed in step 4, then chill rolled-out dough in the refrigerator for 45–60 minutes before cutting into shapes and baking.
 - Special Tools (affiliate links): Electric Mixer (Handheld or Stand Mixer) | Baking Sheets | Silicone Baking Mat or Parchment Paper | Rolling Pin or this Adjustable Rolling Pin | Heart-Shaped Cookie Cutter | Americolor Soft Gel Paste Color Kit | Disposable or Reusable Piping Bags | Couplers | Meringue Powder | Wilton Tip #4 | Wilton Tip #2
- Easy Glaze Icing: Instead of this royal icing, you can use my easy cookie icing if that’s easier for you. However, I find it nearly impossible to write with that icing because it isn’t stable like royal icing.
- Be sure to check out my top 5 cookie baking tips, my 10 must-have cookie baking tools, and here’s the best way to ship cookies!
Keywords: valentine’s day cookies, heart sugar cookies
Valentine's Frosted Sugar Cookies - Two Sisters
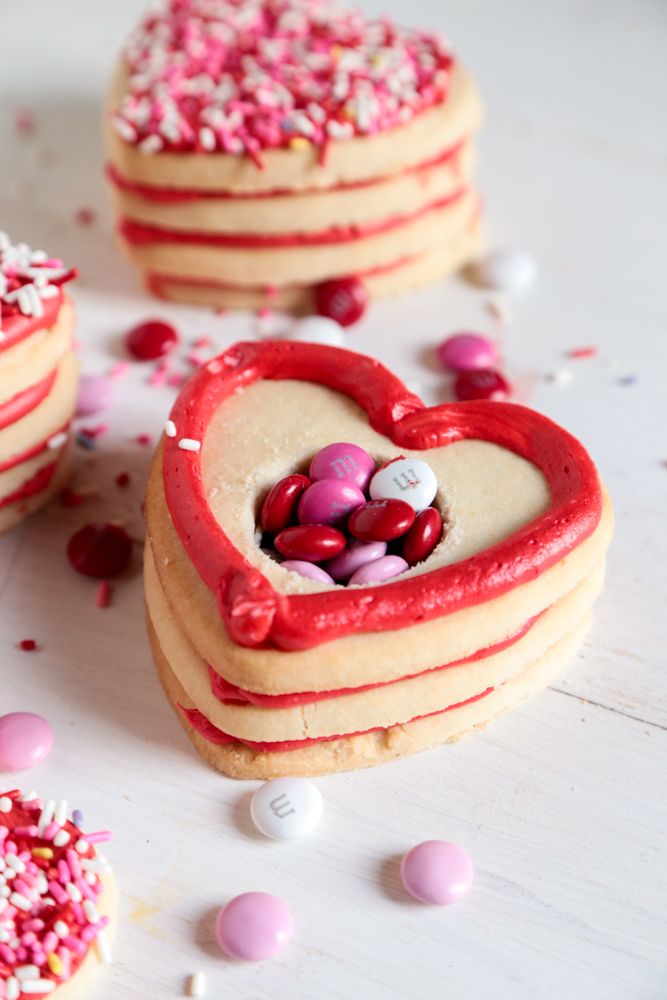
Our Valentine’s Frosted Sugar Cookies are a bite-sized version of the classic sugar cookies with homemade buttercream frosting. So yummy and so easy to make!
Frosted Sugar Cookies are one of our most favorite kinds of cookies. And these “mini” Valentine’s Frosted Sugar Cookies are a perfect Valentine’s Day treat. They are so easy to decorate that even the youngest family member can join in on the fun. And most importantly, they are a super delicious bite-sized treat of yummy sugar cookies and creamy buttercream frosting. You’ll definitely want to make these for your loved ones for Valentine’s Day.
How to Make the Sugar Cookie Dough
Our Valentine’s Heart Sugar Cookies Bites start with our Best Sugar Cookie Recipe. This sugar cookie dough is easy to work with, tastes great, and really holds it’s shaping during the baking process. You can find the recipe and detailed instructions on how to make the dough here. We made a half-batch (exact measurements are included in the recipe box at the bottom of the post) of our Best Sugar Cookie Recipe and ended up with 90 Mini Heart Sugar Cookie Bites that were approximately 1 inch tall.
Step 1: To make the Sugar Cookie dough, cream the softened butter and sugar until light and fluffy. Add the egg and vanilla and beat until thoroughly combined. Add the baking powder and mix. Finally the flour, one cup at a time and mix just until combined.
Baking Instructions
Step 2: Roll out the cookie dough about 5/8″ and use a small Heart Cookie Cutter to cut out the heart-shaped Sugar Cookie Bites.
Step 3: Bake in an oven preheated to 350 degrees for 5-6 minutes (depending on how thick or thin you rolled the dough). Check on the cookies at the 4-minute mark, because you don’t want to over bake them. The edges will be slightly golden when they are ready to come out of the oven.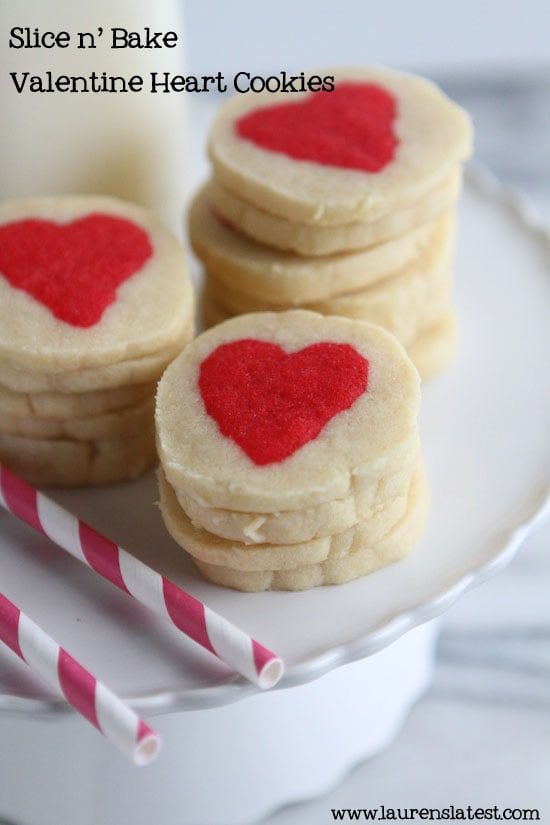 Allow the cookies to cool completely before you frost them.
Frosting and Decorating the Cookies
Step 4: Next, whip up a batch of our easy and delicious Best Buttercream Frosting Recipe. You can find our recipe for buttercream frosting here.
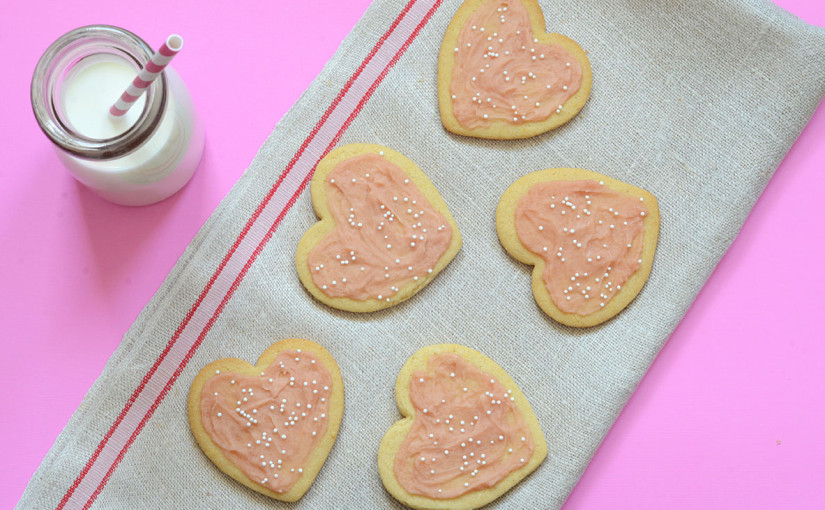
Step 5: We split this batch into three bowls to make our pink, red and white frosting. For the red frosting, we added 4 drops of Crimson Wilton Color Right Food coloring and 1 drop of Pink food coloring. To get this pretty color of light pink frosting we added 1 drop of Wilton Color Right Pink frosting to our Best Buttercream Frosting Recipe.
Step 6: Once you have your frosting ready to there are no fancy decorating skills required. Use a knife to spread the yummy buttercream frosting onto the cookies and then decorate them with a pretty Valentine’s Day NonPareils Sprinkles.
Expert Tips and FAQS
Allow the Best Buttercream Frosting to set before you store the cookies away. (But you don’t have to wait to eat them!)
Other Valentine’s Day Cookies You will love
- Chocolate Cookies with Raspberry Frosting
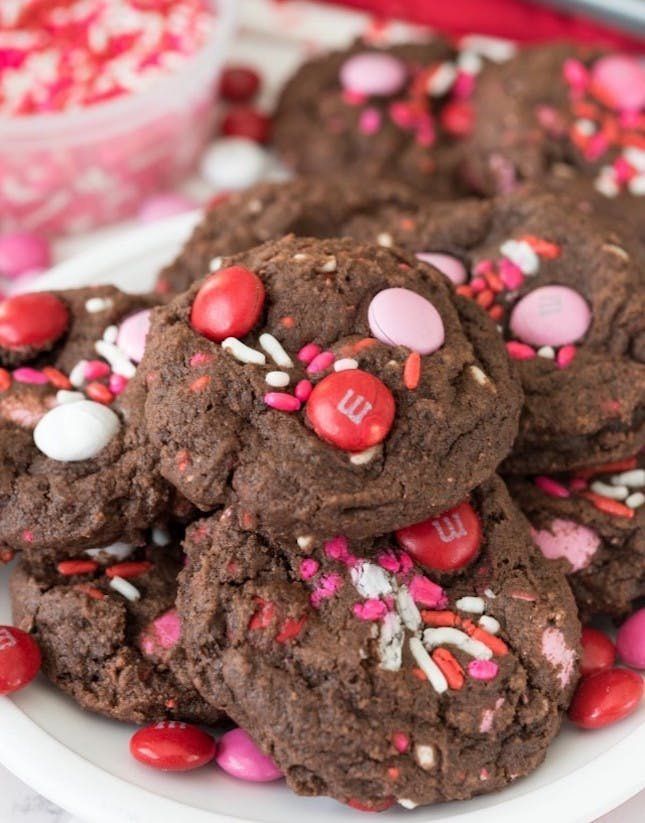
- Valentines M&M Cookies
- Chocolate Thumbprint Cookies
- Valentine’s Day Frosted Sugar Cookie Bars
Did you Make This Recipe? Leave a review below, then snap a picture and tag @twosisterscrafting on Instagram so we can see it!
And don’t forget to follow us on Pinterest, Facebook, and Instagram!
Ingredients
The Best Sugar Cookie Dough
- 1 cup Butter (Salted Sweet Cream, softened to room temperature)
- 1 cup Granulated Sugar
- 1 Large Egg
- 1 tablespoon Vanilla Extract
- 2 teaspoon Baking Powder
- 3 cups All-Purpose Flour
Other ingredients
- The Best Buttercream Frosting
- Valentine's Day NonPareils Sprinkles
- Heart Cookie Cutter Set
- Wilton Color Right Food Coloring - Pink
- Wilton Color Right Food Coloring - Crimson
Instructions
- To make the Sugar Cookie dough, cream the softened butter and sugar until light and fluffy.
 Add the egg and vanilla and beat until thoroughly combined. Add the baking powder and mix. Finally the flour, one cup at a time and mix just until combined.
 - Roll out the cookie dough about 5/8" and use a small Heart Cookie Cutter to cut out the heart-shaped Sugar Cookie Bites.
- Bake in an oven preheated to 350 degrees for 5-6 minutes (depending on how thick or thin you rolled the dough). Check on the cookies at the 4-minute mark, because you don't want to over bake them. The edges will be slightly golden when they are ready to come out of the oven.
- Allow the cookies to cool completely before you frost them.
- Make a batch of our Best Buttercream Frosting Recipe and split it into three portions. Leave one portion white and color the other two pink and red.
- Frost the cookie bite hearts.
- Sprinkle the top of the frosting with Valentine's Day NonPareils Sprinkles.
Notes
Frosting Colors:
For the red frosting, we mixed the frosting with 4 drops of Crimson Wilton Color Right Food coloring and 1 drop of Pink food coloring.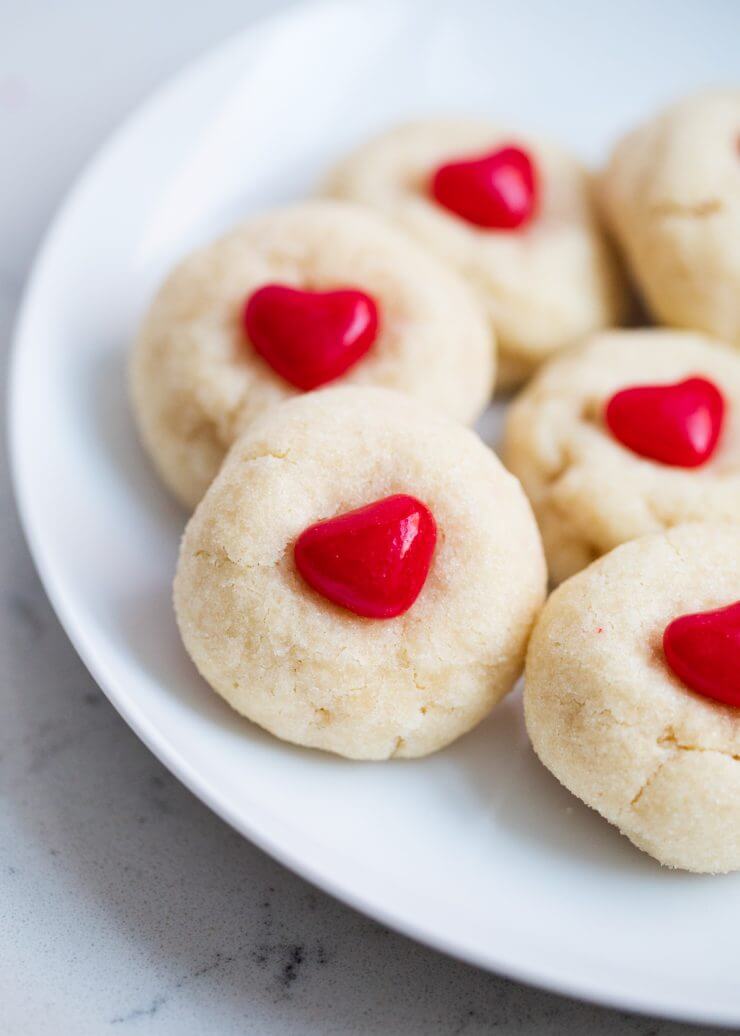 To get this pretty color of light pink frosting we added 1 drop of Wilton Color Right Pink food coloring to the frosting.
Did you Make this Recipe? Leave a review below, then snap a picture and tag @twosisterscrafting on Instagram so we can see it!
cookies "Valentine", a step -by -step recipe for 6358 kcal, photo, ingredients
Add recipe
Recipe
Advertising
Viderait on the topic
Recipe from Julia Vysotsky
Crumbing Pies with meat with meat with meat 9000,0004 Sprinkle pies taught me. the main thing in her technique is to fit as much stuffing as possible, the shape can be triangular or round, as you like. Do not add too much mustard
Julia Vysotskaya
Recipe from Yulia Vysotskaya
Pie with corn, cheese and sweet peppers
Instead of wheat flour, you can take oatmeal, rye or whole grain flour, and add almost any ingredients - perfect, for example, finely chopped broccoli or sweet green
Julia Vysotskaya
Advertising
Related video recipes
Recipe from Yulia Vysotskaya
Fruit baskets
I love when homemade products are not too even, not very regular - not like from a store, but you can put anything you like in such baskets!
Yulia Vysotskaya
Recipe from Yulia Vysotskaya
Puff tubes with green peas and almonds
The stuffing for the tubes needs to be quite thick and nutty to get more cheese! Almonds are better to dry slightly in the oven.
Julia Vysotskaya
Advertising
Oksankan
Preparation
2 hours
Recipe for:
1 person 1 Person 9000 9000 9000 can be an original and tasty gift!
To the cookbook
With pictures No pictures
To favorites
With pictures No pictures
Login or register and we will be able to withdraw your daily rate of consumption of proteins, fats and carbohydrates
Enter/Register
Ingredients for
Portion 9000

| powdered sugar | 1 cup0003 | 300 g |
| Lemon juice | 3 drops |
Select all
Step-by-step recipe with photo
Beat butter at room temperature with sugar, powdered sugar. Add eggs, beat until smooth. Add flour, salt, baking powder, vanilla and almond extract., knead the dough, the dough should not stick to your hands. Wrap in foil, put in a cool place for 1-2 hours.
Roll out the dough to 0.5 cm thick, cut out cookies with a cookie cutter.
Place on a baking sheet.
Bake for 7-10 minutes at 180-190 degrees until light golden brown. Refrigerate the finished cookies.
Prepare icing for decoration. Add powder to the protein, mix, add a couple of drops of lemon juice. The icing for the contour should be moderately dense. Draw an outline on the cookies.
Dilute a little water to fill the icing biscuits. By adding 1-2 teaspoons of water. Pour icing over cookies. Leave overnight for the icing to dry.
Decorate with designs that can be applied by hand, with a pastry bag or with a stencil.
Bon appetit.)!
share photo
agree?
Votes for the recipe of the day (5)
Recipe Tags
Baking
Advertising
Advertising
RECROURCE RECRECTION
tell friends
003
Recipes of the month
Quick recipes
Proper nutrition (pp-recipes)
Oatmeal cookies
Meat menu
Fragrant Warming tea
Ingredients
Add to a search
and or
Exclude the ingredient
Users
Show
90,000 Valentine's cookies - a simple and tasty recipe with step -by -step photos- Valentine cookies
- Dough:
- 300 g flour
- 150 g cold butter
- 2 egg yolks
- 0.
 5 tbsp. powdered sugar
 - 1 sachet vanilla sugar
- red food coloring
- Icing:
- 1 egg white
- 3-4 tbsp. l. powdered sugar
- Show as large photos with description
- 0346
Bright and tasty cookies "Valentines" for the holiday of February 14th will surely please your soulmate! And it is not necessary to give expensive gifts. The symbol of the holiday is “valentines”, and they can be very different. For example, if your significant other has a sweet tooth, bake heart-shaped cookies. There are many options for sweet "valentines", you can paint them with cream or just bake Chocolate and coffee valentines
Recipe step by step
Step 1
1
1. Sift the flour.
Step 2
2
2. Add butter cubes and cut with a knife.
Step 3
3
3. Add egg yolks, powdered sugar and vanilla sugar.
Step 4
4
4. Cut the dough again with a knife.
Step 5
5
5. Dilute the food coloring according to package instructions.
Step 6
6
6. Add food coloring to the dough and knead quickly.
Step 7
7
7. Shape into a ball, wrap in cling film and refrigerate for 1 hour.
Step 8
8
8. Roll out the cooled dough to a thickness of about 5 mm (if the dough is sticky, you can add a little flour). Cut out heart shapes.
Step 9
9
9. Place on baking parchment paper .