4 year old letter recognition
At What Age Should a Child Know the Alphabet?
As children grow, they naturally hit learning milestones. One of the most critical educational milestones a child must reach is learning the alphabet, which prepares them for reading and writing.
But at what age should a child know the alphabet?
In this article, you will learn at what age a child should know how to recite the alphabet, recognize and write individual letters, learn letter sounds, and eventually learn how to read. Read on to make sure your little one is on the right track!
At What Age Should a Child Know the Alphabet?
Recitation
Typically, by the age of three, children should be able to recite the alphabet. However, every child is different. Some toddlers may learn in their twos, and others might not pick it up until the late threes.
Children generally learn how to recite the alphabet through repetition. If you sing the ABC song to your kids often, they are more likely to pick it up quicker, just as they would any song.
Recognition
Most children can recognize letters between the ages of three and four. Most kids will recognize the letters in their name first.
For example, a boy named Jace will probably be able to remember what the letter “J” looks like as well as recognize most other letters in his name. Similar to alphabet recitation, use repetition to teach your children about recognizing individual letters. You may ask them, “What letter is that?” whenever you see an isolated letter.
Writing
By ages four to five, children will start writing letters. Children will learn to write the alphabet in preschool and kindergarten, but it may be beneficial to have your child practice writing his/her letters at home. Most children at this age know that written symbols represent messages and may be interested in writing on their own. One of the easiest ways children learn how to write letters is to begin tracing them.
Additionally, teaching your child how to write his/her name is an important step that will ultimately help them become familiar with writing the rest of the alphabet.
Sounds
By five years old, children will start to associate letters with their accompanying sounds, otherwise known as phonics. In other words, around the age of five, children should be able to reason that the word “book” starts with the letter B.
Children begin learning phonics in kindergarten, which is a vital step to decoding written text and begin reading.
Reading
By six years old, first graders should be able to read words aloud with ease. For the most part, children can recognize sight words and their names. Moreover, children can decode some words by sounding out their letter combinations.
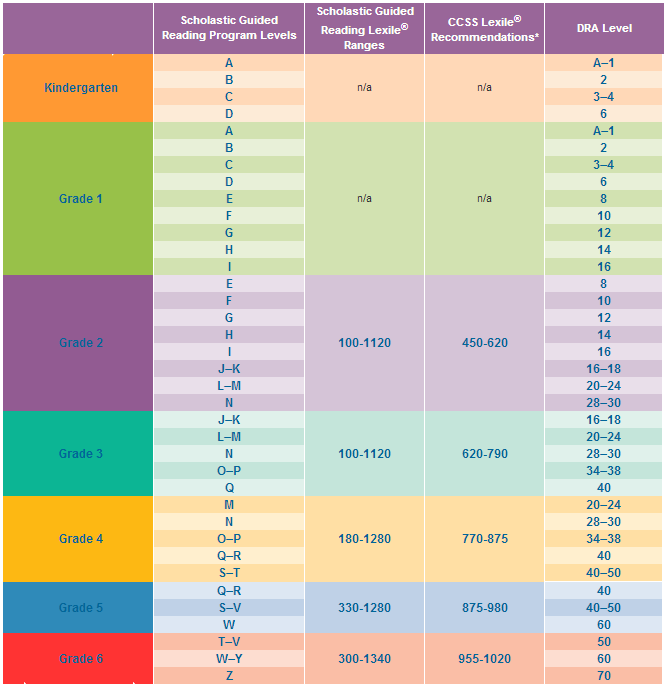
By second grade, a child should be able to sound-out a simple book. By the third grade, your child should be able to read independently and fluently. By this point, your child should be a master of the alphabet and is ready to master the art of reading!
What If Your Child Isn’t Learning at the Rate S/He Should?
It’s important to remember that every child is different and may learn at a different rate.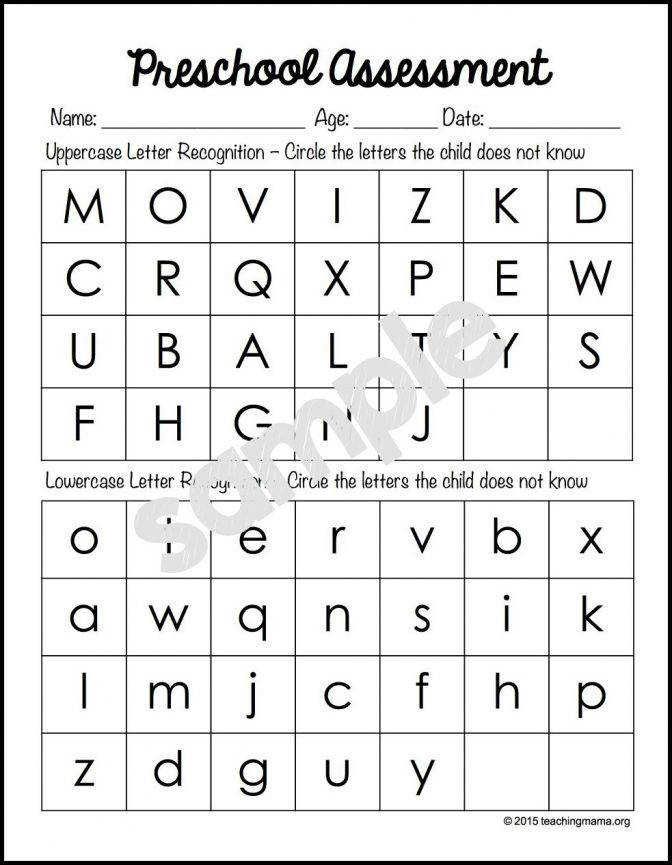 If your child isn’t learning the alphabet at the pace s/he should, one reason may be because s/he isn’t interested or is simply undergoing a minor setback.
However, if your child is falling severely behind, it’s important to find out if your child truly has a problem learning or if it is nothing to worry about. Therefore, work one-on-one with your child to determine if there is a problem. For example, practice reading and writing with your child. If s/he is having a hard time comprehending the instruction or if it’s taking him/her an abnormally long time to do the task, consider talking with your child’s teacher about it.
In the end, if you suspect your child might have a reading or learning disability, discuss it with a doctor. If your child is truly suffering from a reading disability, it can cause him/her to fall behind in his/her education. The sooner you seek help, the sooner you will be able to find a solution that works for your precious little one!
Learn the Alphabet at a Top-Tier School!
So at what age should a child know the alphabet? Learning the alphabet is an ongoing process.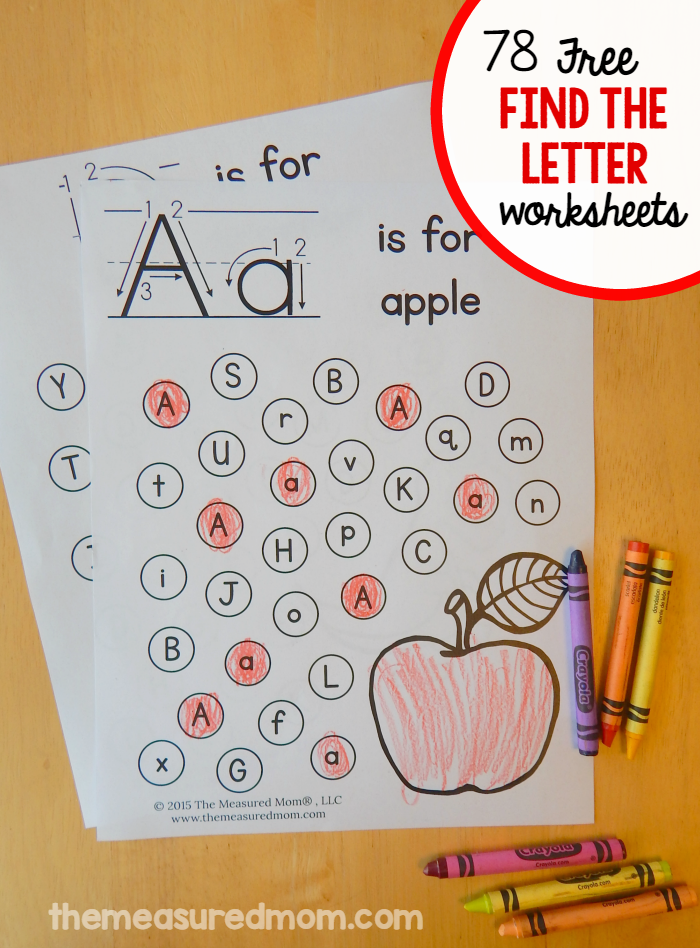 That being said, it’s crucial to enroll your little one in a school that will not only teach him/her but also helps develop in him/her a love of learning.
Smaller Scholars Montessori Academy helps children become more confident, creative, and independent through the acclaimed Montessori experience. You can enroll your child in the toddler program, which is for kids between the ages of eighteen months and three years, or in the primary program, for children between three and six years. In both programs, children have a rich classroom environment in which they are encouraged to explore, learn, and thrive. Then, as children grow older, they can explore the elementary program for kids up to twelve years old.
What are you waiting for? Ensure your child learns the alphabet and how to read by enrolling your child in Smaller Scholars Montessori Academy! Contact them to learn more.
How to Teach Your Preschooler Letter Recognition Through Play
- Share
Helping your preschooler to gain letter recognition skills does not need to feel like “work!”
Learning through play in a fun, stress-free, and positive manner is always the best way.
What Letter Recognition Means
Learning letter recognition skills involves several different hands-on components.
Children need to distinguish the shapes of letters from each other (visually recognize them) and be able to point to and state the letter names, as well as the sounds made by each letter.
In addition, they must learn to form letters and write them.
These skills do not all need to be accomplished during the preschool years and in fact, preschoolers are not yet developmentally ready to learn to read and write.
By simply exposing your child in a fun way, you will begin the process of laying down foundational pre-reading and writing skills.
When Should a Child Recognize Letters of the Alphabet?
Although you can read about average ages when kids gain alphabet skills, those often vary widely.
Just as children learn to walk and talk at different ages, the same is true for recognizing letters of the alphabet.
They each learn at their own pace, depending on many factors.
How to Build Skills to Prepare Your Child for Letter Recognition
Through fun play activities, parents can help their children gain various developmental skills that prepare preschoolers for letter recognition.
Those types of skills include visual perception, memory, and auditory perception.
What this means is that learning the letters does not in fact start with exposure to the actual letters, but rather to play activities that develop these skills.
Visual Perception
Visual perception refers to your child’s brain making sense of what their eyes are seeing, such as details and shapes (shape recognition).
These skills also include visual-motor and eye-hand coordination.
Helpful kinds of activities include:
- those that exercise the large muscles (such as throwing/catching)
- small motor activities (like lacing)
- visual perception (such as building puzzles)
- and limiting screen time, which has limitations related to visual perception skills.
Memory
Memory development relates to storing and using information in the brain.
Stress-free activities to enhance these skills include:
- simple card games
- Memory card games (get your own by downloading the FREE set of printables at the end of the post)
- talking about fun memories
- story visualization
- reading and talking about books
- Visual memory games, like picture bingo
- Auditory memory games
Auditory Perception
Auditory perception includes the brain’s ability to distinguish sounds and words, which is important for learning the sounds of letters.
These are the kind of activities that can support this skill:
- listening to music
- distinguishing animal sounds
- clapping out copied rhythm patterns
[source]
How do I Teach My Child Letter Recognition?
Even before your child shows an interest in print,
- reading to them
- sharing poems and nursery rhymes
- talking to them
- telling stories
- and singing songs to or with them
are all meaningful and fun activities that set the stage for letter recognition.
Keep it fresh, keep it new, and be willing to return to their favourite activities when asked.
As your child shows a growing interest in print, make it available to them whenever possible.
Instead of keeping that book to yourself as you read to them, show children the words, running your fingers over them as you read. Let kids turn the pages of books.
Have books available in the home to which kids have constant access.
So many things around the house contain words, like packages, lists, letters, emails, screens, magazines, and greeting cards.
Point and touch as you read, showing children that you are using words daily, expressing how much can be learned through their use.
Write in front of your kids for all different purposes, at least sometimes spelling aloud.
Make drawing and writing tools and surfaces available to your child at all times, indoors and out.
Don’t just offer the traditional papers and crayons – include:
- Drawing with sticks in the sand
- Writing on clay or playdough
- Drawing on shower and bath walls with soap
Should I Teach the Letters in a Specific Order?
Instead of teaching letters in any special, prescribed order, focus on those that are used most often and in order of importance for your child.
They typically want to know about the letters:
- in their names
- in “MOM” and “DAD”
- in a pet’s name
- environmental print (like on STOP or WALK signs)
- and even outstanding words from a favourite storybook
Think about and pay attention to those letters and words that appear to be interesting to your kids, using them as the foundation to build upon.
[source]
Is it Better to Teach Upper or Lowercase Letters First?
For preschoolers, the field of occupational therapy makes a good case for beginning with capitals in handwriting letter formation.
They are formed from larger lines and curves that avoid retracing and changing directions, while still teaching top to bottom strokes.
If children try to form letters for which their visual-motor skills are not prepared, they sometimes build poor habits that can be difficult to break later on.
Of course, your child may be familiar with lowercase letters, seeing them in many print formats, and gradually learning to identify them.
When their motor skills are ready, they typically make an easy switch to including them along with uppercase when they write.
[source]
Letter Recognition Activities and Games for Preschoolers
Here are some fun ways to teach your preschooler recognition through play.
1. Point Out Environmental Print
Print is all around us.
Point out, talk about and stress the sounds of words on signs (such as favourite restaurants and traffic/street signs), cereal or other product boxes/labels, and familiar logos.
2. Share Rhyming Books
Read favourite rhyming books to your child, accentuating the rhyme and rhythm.
Afterwards, play an oral game of stating some rhyming words from the story and adding a new rhyming word of your own.
Challenge your child to come up with more words that rhyme. Either real or pretend “words” are okay, as it is the rhyming factor that counts.
3. Letter Hunt
Point out and talk about the letters in your child’s name, making them clearly visible in print.
Show them how you find one of those same letters in a magazine or newspaper and cut out as a rather square piece (not necessarily trying to cut out close to the letter’s edges).
Challenge them to find other letters from their name in print and cut those out, as well.
After all the letters have been found, they can arrange them in the correct order for their name.
These may be kept in a small bag for future use or glued onto a coloured sheet of paper to post on the fridge or in your child’s room.
Instead of cutting, another option is to use different colours of highlighters to mark various letters found in print.
4. Play with Plastic/Wooden Letters
Letters may be sorted and put into piles in different ways:
- those with curves
- letters with straight lines
- those from your child’s name or other important words
- letters they can name
- and those for which they can say the sounds
Letters with magnets may be used on the fridge or on a magnet board for sorting purposes.
5. Bake Letters
Use bread or pretzel dough to form letters with your child, then bake them to be eaten later.
While you work, talk about the letter names, sounds, and easy words (like their names) that may be formed.
Special baking tins and cookie cutters may be purchased to bake letters. You can also bake oblong cakes and cut into large letter shapes, as well.
6. Form Letters with Familiar Materials
Offer kids various types and colours of pasta to form letters on flat backgrounds, either to glue into place or to leave loose and rearrange into different letters.
Other materials to explore might include:
- dry breakfast cereals
- buttons or pennies
- cotton balls
- dried beans
- mini-marshmallows
- toothpicks
- rice
- Yarn
7. Form Letters with Unusual Materials
Using a tabletop or oblong baking pan with low sides, spread shaving cream or pudding for your child to trace letters into with their fingers.
The same may be done with sand (or moved outside), to trace in with fingers or safe “sticks,” like pencils, dowels, or rulers.
8. Go on a Scavenger Hunt
Have children choose a letter card or cutout. Talk about how the letter looks and sounds.
Depending on your child’s level of development, challenge them to find things around the house that have that letter printed on them OR objects that begin with that letter’s sound.
9. Fish for Letters
Magnetic letter fishing games may be purchased or made with paper, magnets, paperclips, dowels, and string.
Name or pick a letter, focusing on how it looks and/or sounds. Kids then “fish” for the matching letters from the “pond.”
They can also just fish for a random letter and then name it once it is “caught.”
You can also use a version of this game later on, when children are learning to match upper and lowercase letters.
10. Play Musical Chairs with Letters
Add paper plates with letters or letters cut from cardboard right onto the chairs or onto the floor beneath.
Children walk around the circle and find a place to sit when the music stops. They each then name the letter on their chair or floor directly beneath.
11. Find Letters on a Keyboard
Make use of an old computer keyboard or typewriter. Your child names the letters as they touch the keys.
They can also find them to press as you say the names, sounds, or hold up cards, one letter at a time.
12. Spray or Write Letters Outdoors
Offer spray bottles with water for children to spray letters on driveways, sidewalks, or even the side of your house.
Another option is to use sidewalk chalk to write letters on the driveway, patio, or basketball court.
13. Form Letters with Bendable Materials
Get your child to bend pipe cleaners, chenille stems, or products like Wikki Stix (string covered in wax) to form letters.
Children often like to make multiple letters and form words, as well.
14. Find the Hidden Letters
“Bury” plastic or wooden letters in a sand table or sand box. Ask your child to name the letters as they are discovered.
Other materials may be used as alternates in sand tables or large trays, such as coloured rice, pasta, dried beans, or bird seed.
All of these ideas can help to strengthen your child’s early literacy skills.
Pay attention to where they stand in their development and keep raising the bar just a bit higher, while still returning to those games and activities in which they feel a high measure of success!
This is the key to learning.
Get FREE access to Printable Puzzles, Stories, Activity Packs and more!
Join Empowered Parents + and you’ll receive a downloadable set of printable puzzles, games and short stories, as well as the Learning Through Play Activity Pack which includes an entire year of activities for 3 to 6-year-olds.
Access is free forever.
Signing up for a free Grow account is fast and easy and will allow you to bookmark articles to read later, on this website as well as many websites worldwide that use Grow.
- Share
Recognition of goods on shelves using neural networks based on Keras and Tensorflow Object Detection API technologies / Sudo Null IT News
In the article we will talk about the use of convolutional neural networks to solve a practical business problem of restoring a realogram from a photo of shelves with goods.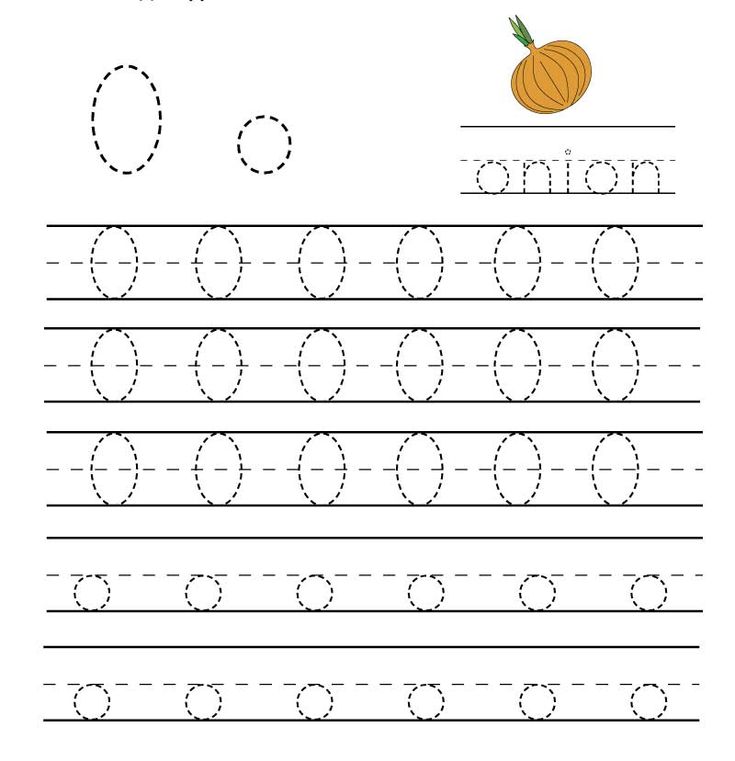 Using the Tensorflow Object Detection API, we will train the search/localization model. Let's improve the quality of searching for small items in high-resolution photos using a floating window and a non-maximum suppression algorithm. On Keras, we implement a product classifier by brand. In parallel, we will compare the approaches and results with the decisions made 4 years ago. All the data used in the article is available for download, and the fully working code is on GitHub and is formatted as a tutorial.
Introduction
What is a planogram? A plan-scheme for displaying goods on a specific store equipment.
What is a realogram? A scheme for displaying goods on specific commercial equipment that exists in the store here and now.
Planogram - as it should be, realogram - what do we have.
Until now, in many stores, managing the balance of goods on racks, shelves, counters, racks is exclusively manual labor. Thousands of employees manually check the availability of products, calculate the balance, check the location with the requirements. It's expensive and mistakes are very likely. Incorrect display or lack of goods leads to a decrease in sales.
Many manufacturers also enter into agreements with retailers to display their products. And since there are many manufacturers, there is a struggle between them for the best place on the shelf. Everyone wants their product to lie in the center opposite the eyes of the buyer and take up as much space as possible. There is a need for constant auditing.
Thousands of merchandisers move from store to store to make sure their company's product is on the shelf and presented as promised. Sometimes they are lazy: it is much more pleasant to make a report without leaving home than to go to a retail outlet. There is a need for constant audit of auditors.
Naturally, the task of automating and simplifying this process has been solved for a long time.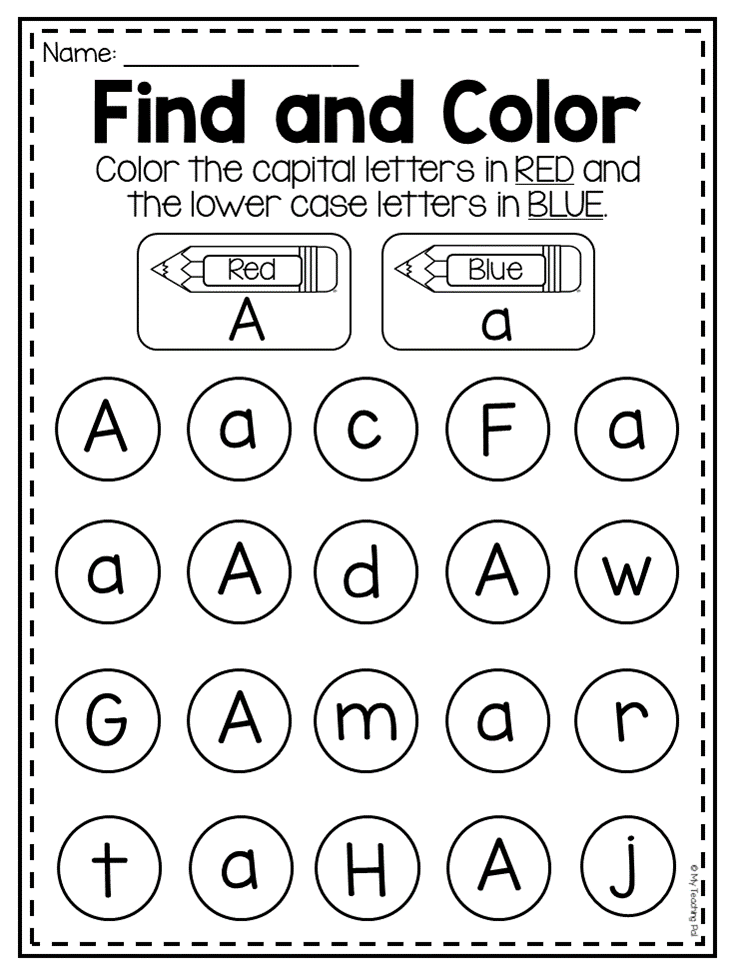 One of the most difficult parts was image processing: finding and recognizing products. And only relatively recently this problem has been simplified so much that for a special case in a simplified form, its complete solution can be described in one article. This is what we will do.
The article contains a minimum of code (only for cases where the code is clearer than the text). The complete solution is available as an illustrated tutorial in jupyter notebooks. The article does not contain a description of the architectures of neural networks, the principles of operation of neurons, mathematical formulas. In the article, we use them as an engineering tool, without going into much detail about its design.
Data and approach
As with any data driven approach, neural network solutions require data. You can also collect them manually: shoot several hundred counters and mark them up using, for example, LabelImg. You can order markup, for example, on Yandex. Toloka.
We cannot disclose the details of a real project, so we will explain the technology on open data. I was too lazy to go shopping and take photos (and they wouldn’t understand us there), and the desire to independently mark up the photos found on the Internet ended after the hundredth classified object. Fortunately, we stumbled upon the Grocery Dataset archive quite by accident.
In 2014, Idea Teknoloji, Istanbul, Turkey shared 354 photos from 40 stores with 4 cameras. In each of these photographs, they marked with rectangles a total of several thousand objects, some of which were classified into 10 categories.
These are photographs of cigarette packs. We do not promote or advertise smoking. There was simply nothing more neutral. We promise that everywhere in the article, where the situation allows, we will use photos of cats.
In addition to labeled photos of counters, they wrote an article Toward Retail Product Recognition on Grocery Shelves with a solution to the problem of localization and classification. This set a kind of benchmark: our solution using new approaches should turn out to be simpler and more accurate, otherwise it is not interesting. Their approach consists of a combination of algorithms:
Recently, convolutional neural networks (CNNs) have revolutionized the field of computer vision and completely changed the approach to solving this kind of problem. Over the past few years, these technologies have become available to a wide range of developers, and high-level APIs such as Keras have significantly lowered the barrier to entry. Now almost any developer can use the full power of convolutional neural networks after a few days of acquaintance. The article describes the use of these technologies with an example, showing how a whole cascade of algorithms can be easily replaced with just two neural networks without losing accuracy.
We will solve the problem step by step:
- Data preparation. We will download the archives and convert them into a form convenient for work.
- Classification by brand. Let's solve the classification problem using a neural network.
- Search for products in the photo. Let's train the neural network to search for goods.
- Search implementation. Let's improve the quality of detection using a floating window and a non-maximum suppression algorithm.
- Conclusion. Let's briefly explain why real life is much more complicated than this example.
Technology
The main technologies we will be using are: Tensorflow, Keras, Tensorflow Object Detection API, OpenCV. Even though both Windows and Mac OS are suitable for working with Tensorflow, we still recommend using Ubuntu. Even if you have never worked with this operating system before, using it will save you a lot of time. Installing Tensorflow to work with the GPU is a topic that deserves a separate article. Fortunately, such articles already exist. For example, Installing TensorFlow on Ubuntu 16. 04 with an Nvidia GPU. Some of the instructions in it may be outdated.
Step 1. Data preparation (github link)
This step usually takes much longer than the simulation itself. Fortunately, we use ready-made data, which we transform into the form we need.
You can download and unpack like this:
wget https://github.com/gulvarol/grocerydataset/releases/download/1.0/GroceryDataset_part1.tar.gz wget https://github.com/gulvarol/grocerydataset/releases/download/1.0/GroceryDataset_part2.tar.gz tar -xvzf GroceryDataset_part1.tar.gz tar -xvzf GroceryDataset_part2.tar.gz
We get the following folder structure:
We will use information from the ShelfImages and ProductImagesFromShelves directories.
ShelfImages contains pictures of the shelving itself. The title encodes the rack ID with the ID of the image. There can be several pictures of one rack. For example, one whole photo and 5 photos in parts with intersections.
File C1_P01_N1_S2_2.JPG (rack C1_P01, photo N1_S2_2):
We run through all the files and collect information in pandas data frame photos_df:
ProductImagesFromShelves contains cut out photos of products from the shelves in 11 subdirectories: 0 - not classified, 1 - Marlboro, 2 - Kent, etc. In order not to advertise them, we will use only category numbers without indicating names. File names contain information about the rack, the position and size of the pack on it.
File C1_P01_N1_S3_1.JPG_1276_1828_276_448.png from directory 1 (category 1, shelving C1_P01, snapshot N1_S3_1, upper left corner coordinates (1276, 1828), width 276, height 448):
We do not need the photos of individual packs themselves (we will cut them out from the pictures of the racks), but we collect information about their category and position in pandas data frame products_df:
In the same step, we split all our information into two sections: train for training and validation for training monitoring. In real projects, this is, of course, not worth doing. Also, do not trust those who do this. It is necessary to allocate at least one more test for the final check. But even with this not very honest approach, it is important for us not to deceive ourselves too much.
As we have already noted, there can be several photos of one rack. Accordingly, the same pack may appear in several shots. Therefore, we advise you to break it down not by pictures, and even more so not by packs, but by racks. This is necessary so that the same object, taken from different angles, does not end up in both train and validation.
We make a 70/30 split (30% of the racks go for validation, the rest for training):
# get distinct shelves shelves = list(set(photos_df['shelf_id'].values)) # use train_test_split from sklearn shelves_train, shelves_validation, _, _ = train_test_split( shelves, shelves, test_size=0.3, random_state=6) # mark all records in data frames with is_train flag def is_train(shelf_id): return shelf_id in shelves_train photos_df['is_train'] = photos_df.shelf_id.apply(is_train) products_df['is_train'] = products_df.shelf_id.apply(is_train)
Let's make sure that in our split there are enough representatives of each class for both training and validation:
The blue color shows the number of category products for validation, and the orange one for training. Category 3 is not doing very well for validation, but its representatives are, in principle, few.
It is important not to make mistakes at the data preparation stage, since all further work is based on its results. We did make one mistake and spent many happy hours trying to figure out why the quality of the models is so mediocre. We already felt like losers to "old school" technologies, until we accidentally noticed that some of the original photos were rotated by 90 degrees, and the part is done upside down.
In this case, the markup is made as if the photos were oriented correctly. After a quick fix, things got much more fun.
Let's save our data to pkl files for use in the next steps. Total, we have:
- Photo directory of racks and their parts with bundles,
- Data frame with a description of each rack with a note if it is for training,
- Data frame with information on all the goods on the racks, indicating their position, size, category and whether they are intended for training.
For verification, we will display one rack according to our data:
# function to display shelf photo with rectangled products def draw_shelf_photo(file): file_products_df = products_df[products_df.file == file] coordinates = file_products_df[['xmin', 'ymin', 'xmax', 'ymax']].values im = cv2.imread(f'{shelf_images}{file}') im = cv2.cvtColor(im, cv2.COLOR_BGR2RGB) for xmin, ymin, xmax, ymax in coordinates: cv2.rectangle(im, (xmin, ymin), (xmax, ymax), (0, 255, 0), 5) plt.imshow(im) # draw one photo to check our data fig = plt. gcf() fig set_size_inches(18.5, 10.5) draw_shelf_photo('C3_P07_N1_S6_1.JPG')
Step 2. Classification by brand (link to github)
Image classification is a major task in the field of computer vision. The problem lies in the "semantic gap": a photograph is just a large matrix of numbers [0, 255]. For example, 800x600x3 (3 RGB channels).
Why this task is difficult:
As we said, the authors of the data we use have identified 10 brands. This is an extremely simplified task, since there are many more brands of cigarettes on the shelves. But everything that did not fall into these 10 categories was sent to 0 - not classified:
"
Their article proposes such a classification algorithm with a final accuracy of 92%:
What will we do:
- Prepare data for training,
- Let's train a convolutional neural network with ResNet v1 architecture,
- Let's check on the photos for validation.
It sounds "voluminous", but we just used the Keras example "Trains a ResNet on the CIFAR10 dataset" taking from it the function of creating ResNet v1.
To start the training process, two arrays must be prepared: x - photos of packs with dimension (number_of_packs, height, width, 3) and y - their categories with dimension (number_of_packs, 10). The y array contains the so-called 1-hot vectors. If the category of the training pack is number 2 (from 0 to 9), then the vector [0, 0, 1, 0, 0, 0, 0, 0, 0, 0] corresponds to this.
An important question is what to do with the width and height, because all the photos were taken with different resolutions from different distances. We need to choose some fixed size to which we can bring all our pack pictures. This fixed size is a meta-parameter that determines how our neural network will train and work.
On the one hand, I want to make this size as large as possible so that not a single detail of the picture goes unnoticed. On the other hand, with our meager amount of training data, this can lead to rapid overfitting: the model will work perfectly on the training data, but poorly on the validation data. We chose the size 120x80, maybe we would get a better result on another size. Zoom function:
# resize pack to fixed size SHAPE_WIDTH x SHAPE_HEIGHT def resize_pack(pack): fx_ratio = SHAPE_WIDTH / pack.shape[1] fy_ratio = SHAPE_HEIGHT / pack.shape[0] pack = cv2.resize(pack, (0, 0), fx=fx_ratio, fy=fy_ratio) return pack[0:SHAPE_HEIGHT, 0:SHAPE_WIDTH]
Let's scale and display one pack for verification. The name of the brand is difficult for a person to read, let's see how the neural network copes with the task of classification:
After preparing for the flag obtained in the previous step, we split the x and y arrays into x_train / x_validation and y_train / y_validation, we get:
x_train shape: (1969, 120, 80, 3) y_train shape: (1969, 10) 1969 train samples 775 validation samples
The data is prepared, we copy the ResNet v1 architecture neural network constructor function from the Keras example:
def resnet_v1(input_shape, depth, num_classes=10): …
Build the model:
model = resnet_v1(input_shape=x_train.shape[1:], depth=depth, num_classes=num_classes) model.compile(loss='categorical_crossentropy', optimizer=Adam(lr=lr_schedule(0)), metrics=['accuracy'])
We have a rather limited dataset. Therefore, in order for the model not to see the same photo every epoch during training, we use augmentation: we randomly shift the image and rotate it a little. Keras provides the following set of options for this:
# This will do preprocessing and realtime data augmentation: datagen = ImageDataGenerator( featurewise_center=False, # set input mean to 0 over the dataset samplewise_center=False, # set each sample mean to 0 featurewise_std_normalization=False, # divide inputs by std of the dataset samplewise_std_normalization=False, # divide each input by its std zca_whitening=False, # apply ZCA whitening rotation_range=5, # randomly rotate images in the range (degrees, 0 to 180) width_shift_range=0.1, # randomly shift images horizontally (fraction of total width) height_shift_range=0.1, # randomly shift images vertically (fraction of total height) horizontal_flip=False, # randomly flip images vertical_flip=False) # randomly flip images datagen.fit(x_train)
We start the training process.
# let's run training process, 20 epochs is enough batch_size = 50 epochs = 15 model.fit_generator(datagen.flow(x_train, y_train, batch_size=batch_size), validation_data=(x_validation, y_validation), epochs=epochs, verbose=1, workers=4, callbacks=[LearningRateScheduler(lr_schedule)])
After training and evaluation, we get an accuracy of around 92%. You may end up with a different accuracy: there is very little data, so the accuracy depends very much on the success of the partition. On this partition, we did not get much higher accuracy than what was indicated in the article, but we did practically nothing ourselves and wrote little code. Moreover, we can easily add a new category, and the accuracy should (in theory) increase significantly if we prepare more data.
For interest, we compare confusion matrices:
Our neural network determines almost all categories better, except for categories 4 and 7. It can also be useful to look at the brightest representatives of each confusion matrix cell:
You can also understand why Parliament was mistaken for Camel, but why Winston was mistaken for Lucky Strike is completely incomprehensible, they have nothing in common. This is the main problem of neural networks - the complete opacity of what is happening inside. You can, of course, render some layers, but for us this visualization looks like this:0003
An obvious opportunity to improve the quality of recognition in our conditions is to add more photos.
So, the classifier is ready. Let's move on to the detector.
Step 3. Search for products in the photo (github link)
The following important tasks in the field of computer vision are: semantic segmentation, localization, object search and instance segmentation.
For our task, we need object detection. A 2014 paper proposes a Viola-Jones and HOG approach with visual fidelity:
Thanks to the use of additional statistical constraints, their accuracy is very good:
Now the problem of object recognition is successfully solved with the help of neural networks. We will use the Tensorflow Object Detection API system and train a neural network with the Mobilenet V1 SSD architecture. Training such a model from scratch requires a lot of data and can take days, so we use a transfer learning model pretrained on COCO data.
The key concept of this approach is this. Why does a child not need to be shown millions of objects so that he learns to find and distinguish a ball from a cube? Because a child has 500 million years of visual cortex development. Evolution has made vision the largest sensory system. Almost 50% (but this is inaccurate) of the neurons in the human brain are responsible for image processing. Parents can only show the ball and the cube, and then correct the child several times so that he perfectly finds and distinguishes one from the other.
From a philosophical point of view (from a technical point of view, there are more differences than common), transfer learning in neural networks works in a similar way. Convolutional neural networks consist of levels, each of which defines increasingly complex forms: highlights key points, combines them into lines, which in turn combine into shapes. And only at the last level of the totality of the found features determines the object.
Real world objects have a lot in common. In transfer learning, we use the already trained levels of defining basic features and train only the layers responsible for defining objects. For this, a couple of hundred photos and a couple of hours of work of an ordinary GPU are enough for us. The network was originally trained on the COCO (Microsoft Common Objects in Context) dataset, which is 91 category and 2,500,000 images! Many, though not 500 million years of evolution.
Jumping ahead a bit, this gif animation (a bit slow, don't scroll right away) from tensorboard visualizes the learning process. As you can see, the model starts to produce quite high-quality results almost immediately, then polishing goes on:
The "trainer" of the Tensorflow Object Detection API system can independently perform augmentation, cut out random parts of images for training, select "negative" examples (sections of a photo, containing no objects). In theory, no pre-processing of photos is needed. However, on a home computer with an HDD and a small amount of RAM, it refused to work with high-resolution images: at first it hung for a long time, rustled the disk, then flew out.
As a result, we compressed the photos to a size of 1000x1000 pixels while maintaining the aspect ratio. But since many features are lost when compressing a large photo, first several squares of random size were cut out from each photo of the rack and compressed into 1000x1000. As a result, both bursts in high resolution (but not enough) and in small (but a lot) got into the training data. We repeat: this step is forced and, most likely, completely unnecessary, and possibly harmful.
Prepared and compressed photos are saved in separate directories (eval and train), and their description (with the packs contained on them) is formed in the form of two pandas data frames (train_df and eval_df):
The Tensorflow Object Detection API system requires input data to be in the form of tfrecord files. You can generate them using the utility, but we will do it with the code:
def class_text_to_int(row_label): if row_label == 'pack': return 1 else: None def split(df, group): data = namedtuple('data', ['filename', 'object']) gb = df.groupby(group) return [data(filename, gb.get_group(x)) for filename, x in zip(gb.groups.keys(), gb.groups)] def create_tf_example(group, path): with tf.gfile.GFile(os.path.join(path, '{}'. format(group.filename)), 'rb') as fid: encoded_jpg = fid.read() encoded_jpg_io = io.BytesIO(encoded_jpg) image = Image.open(encoded_jpg_io) width, height = image.size filename = group.filename.encode('utf8') image_format=b'jpg' xmins = [] xmax = [] ymins = [] ymax = [] classes_text = [] classes = [] for index, row in group.object.iterrows(): xmins.append(row['xmin'] / width) xmaxs.append(row['xmax'] / width) ymins.append(row['ymin'] / height) ymaxs.append(row['ymax'] / height) classes_text.append(row['class'].encode('utf8')) classes.append(class_text_to_int(row['class'])) tf_example = tf.train.Example(features=tf.train.Features(feature={ 'image/height': dataset_util.int64_feature(height), 'image/width': dataset_util.int64_feature(width), 'image/filename': dataset_util.bytes_feature(filename), 'image/source_id': dataset_util.bytes_feature(filename), 'image/encoded': dataset_util.bytes_feature(encoded_jpg), 'image/format': dataset_util.bytes_feature(image_format), 'image/object/bbox/xmin': dataset_util.
 float_list_feature(xmins), 'image/object/bbox/xmax': dataset_util.float_list_feature(xmaxs), 'image/object/bbox/ymin': dataset_util.float_list_feature(ymins), 'image/object/bbox/ymax': dataset_util.float_list_feature(ymaxs), 'image/object/class/text': dataset_util.bytes_list_feature(classes_text), 'image/object/class/label': dataset_util.int64_list_feature(classes), })) return tf_example def convert_to_tf_records(images_path, examples, dst_file): writer = tf.python_io.TFRecordWriter(dst_file) grouped = split(examples, 'filename') for group in grouped: tf_example = create_tf_example(group, images_path) writer.write(tf_example.SerializeToString()) writer.close() convert_to_tf_records(f'{cropped_path}train/', train_df, f'{detector_data_path}train.record') convert_to_tf_records(f'{cropped_path}eval/', eval_df, f'{detector_data_path}eval.record')
 It remains for us to prepare a special directory and run the processes:
The structure may be different, but we find it very convenient.
The data directory contains the files we created with tfrecords (train.record and eval.record), as well as pack.pbtxt with the types of objects we will train the neural network to search for. We only have one type of object being defined, so the file is very short:
The models directory (there can be many models for solving one task) in the ssd_mobilenet_v1 child directory contains the settings for training in the .config file, as well as two empty directories: train and eval. In train, the “trainer” will save the model checkpoints, the “estimator” will pick them up, run them on the data for evaluation and add them to the eval directory. Tensorboard will monitor these two directories and display information about the process.
Detailed description of the structure of configuration files, etc. can be found here and here. Instructions for installing the Tensorflow Object Detection API can be found here.
Go to the models/research/object_detection directory and download the pre-trained model: tar -xvzf ssd_mobilenet_v1_coco_2017_11_17. tar.gz
Copy the pack_detector directory prepared by us there.
First start the training process:
python3 train.py --logtostderr \ --train_dir=pack_detector/models/ssd_mobilenet_v1/train/ \ --pipeline_config_path=pack_detector/models/ssd_mobilenet_v1/ssd_mobilenet_v1_pack.config
We start the evaluation process. We do not have a second video card, so we run it on the processor (using the CUDA_VISIBLE_DEVICES="") instruction. Because of this, he will be very late regarding the training process, but this is not so scary:
CUDA_VISIBLE_DEVICES="" python3 eval.py \ --logtostderr \ --checkpoint_dir=pack_detector/models/ssd_mobilenet_v1/train \ --pipeline_config_path=pack_detector/models/ssd_mobilenet_v1/ssd_mobilenet_v1_pack.config \ --eval_dir=pack_detector/models/ssd_mobilenet_v1/eval
Starting the tensorboard process:
tensorboard --logdir=pack_detector/models/ssd_mobilenet_v1
After that, we can see beautiful graphs, as well as the real work of the model on the estimated data (gif at the beginning):
The training process can be stopped and resumed at any time. When we think the model is good enough, save the checkpoint as an inference graph:
python3 export_inference_graph.py \ --input_type image_tensor \ --pipeline_config_path pack_detector/models/ssd_mobilenet_v1/ssd_mobilenet_v1_pack.config \ --trained_checkpoint_prefix pack_detector/models/ssd_mobilenet_v1/train/model.ckpt-13756 \ --output_directory pack_detector/models/ssd_mobilenet_v1/pack_detector_2018_06_03
So, at this step, we got an inference graph that we can use to search for bundle objects. Let's move on to using it.
Step 4: Implementing search (github link)
The inference graph loading and initialization code is at the link above. Key search functions:
# let's write function that executes detection def run_inference_for_single_image(image, image_tensor, sess, tensor_dict): # run input expanded_dims = np.expand_dims(image, 0) output_dict = sess.run(tensor_dict, feed_dict={image_tensor: expanded_dims}) # all outputs are float32 numpy arrays, so convert types as appropriate output_dict['num_detections'] = int(output_dict['num_detections'][0]) output_dict['detection_classes'] = output_dict['detection_classes'][0]. astype(np.uint8) output_dict['detection_boxes'] = output_dict['detection_boxes'][0] output_dict['detection_scores'] = output_dict['detection_scores'][0] return output_dict # it is useful to be able to run inference not only on the whole image, #but also on its parts # cutoff - minimum detection score needed to take box def run_inference_for_image_part(image_tensor, sess, tensor_dict, image, cutoff, ax0, ay0, ax1, ay1): boxes = [] im = image[ay0:ay1, ax0:ax1] h, w, c = im.shape output_dict = run_inference_for_single_image(im, image_tensor, sess, tensor_dict) for i in range(100): if output_dict['detection_scores'][i] < cutoff: break y0, x0, y1, x1, score = *output_dict['detection_boxes'][i], \ output_dict['detection_scores'][i] x0, y0, x1, y1, score = int(x0*w), int(y0*h), \ int(x1*w), int(y1*h), \ int(score * 100) boxes.append((x0+ax0, y0+ay0, x1+ax0, y1+ay0, score)) return boxes
 The function finds bounding boxes (bounded boxes) for packs not on the whole photo, but on its part. The function also filters out found rectangles with a low detection score, specified in the cutoff parameter.
This is a dilemma. On the one hand, with a high cutoff, we lose many objects, on the other hand, with a low cutoff, we begin to find many objects that are not packs. At the same time, we still find not everything and not ideal:
However, note that if we run the function for a small piece of the photo, then the recognition is almost perfect at cutoff = 0.9:
This is because the MobileNet V1 SSD model accepts 300x300 photos as input. Naturally, with such compression, a lot of features are lost.
But these features persist if we cut out a small square containing several packs. This suggests the idea of using a floating window: we run over the photo with a small rectangle and remember everything found.
A problem arises: we find the same packs several times, sometimes in a very truncated version. This problem can be solved using the non-maximum suppression algorithm. The idea is extremely simple: in one step we find the rectangle with the maximum recognition score (detection score), remember it, delete all other rectangles that have an intersection area with it greater than overlapTresh (the implementation was found on the Internet with minor changes):0003
# function for non-maximum suppression def non_max_suppression(boxes, overlapThresh): if len(boxes) == 0: return np.array([]).astype("int") if boxes.dtype.kind == "i": boxes = boxes.astype("float") pick = [] x1 = boxes[:,0] y1 = boxes[:,1] x2 = boxes[:,2] y2 = boxes[:,3] sc = boxes[:,4] area = (x2 - x1 + 1) * (y2 - y1 + 1) idxs = np.argsort(sc) while len(idxs) > 0: last = len(idxs) - 1 i = idxs[last] pick append(i) xx1 = np.maximum(x1[i], x1[idxs[:last]]) yy1 = np.maximum(y1[i], y1[idxs[:last]]) xx2 = np.minimum(x2[i], x2[idxs[:last]]) yy2 = np.minimum(y2[i], y2[idxs[:last]]) w = np.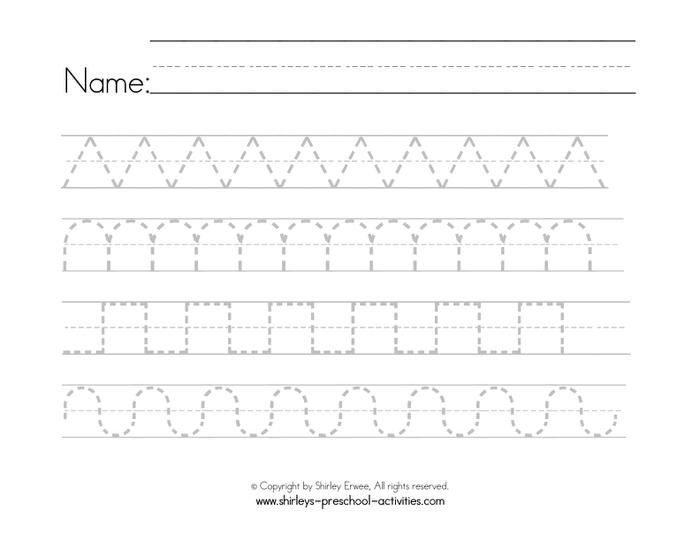 maximum(0, xx2 - xx1 + 1) h = np.maximum(0, yy2 - yy1 + 1) #todo fix overlap-contains... overlap = (w * h) / area[idxs[:last]] idxs = np.delete(idxs, np.concatenate(([last], np.where(overlap > overlapThresh)[0]))) return boxes[pick].astype("int")
 The result is visually almost perfect:
The result of work on a poor quality photo with a large number of packs:
As we can see, the number of objects and the quality of the photographs did not prevent us from correctly recognizing all the packages, which is what we wanted.
Conclusion
This example in our article is rather “toyish”: the authors of the data have already collected them in the expectation that they will have to use them for recognition. Accordingly, we chose only good pictures taken in normal lighting, not at an angle, etc. Real life is much richer.
We cannot reveal the details of the actual project, but here are some of the challenges we had to overcome:
- Approximately 150 product categories to be found and classified and marked up,
- Almost each of these categories has 3-7 styles,
- Often more than 100 items in one picture,
- Sometimes it is not possible to make a photo of a rack in one photo,
- Poor lighting and the play of sellers with backlight (neon),
- Goods behind glass (glare, photographer's reflection),
- High angle photographs when there is not enough space for the photographer to take a front-facing photo,
- Overlapping goods, as well as situations where the goods are back to back (SSD can not cope),
- Products on the lower shelves are heavily distorted, poorly illuminated,
- Non-standard shelving.
All this radically changes and complicates the process of data preparation, training and the architecture of the applied neural networks, but it will not stop us.
From pixels to letters: how OCR works
What is OCR?
OCR (eng. optical character recognition , optical character recognition) is a technology for automatically analyzing text and turning it into data that a computer can process.
When a person reads a text, he recognizes the characters with the help of his eyes and brain. For a computer, the scanner camera acts as an eye, which creates a graphic image of a text page (for example, in JPG format). For a computer, there is no difference between a photo of text and a photo of a house: both are a collection of pixels.
It is OCR that turns an image of text into text. And you can do anything with the text.
How does it work?
Imagine there is only one "A" in the alphabet.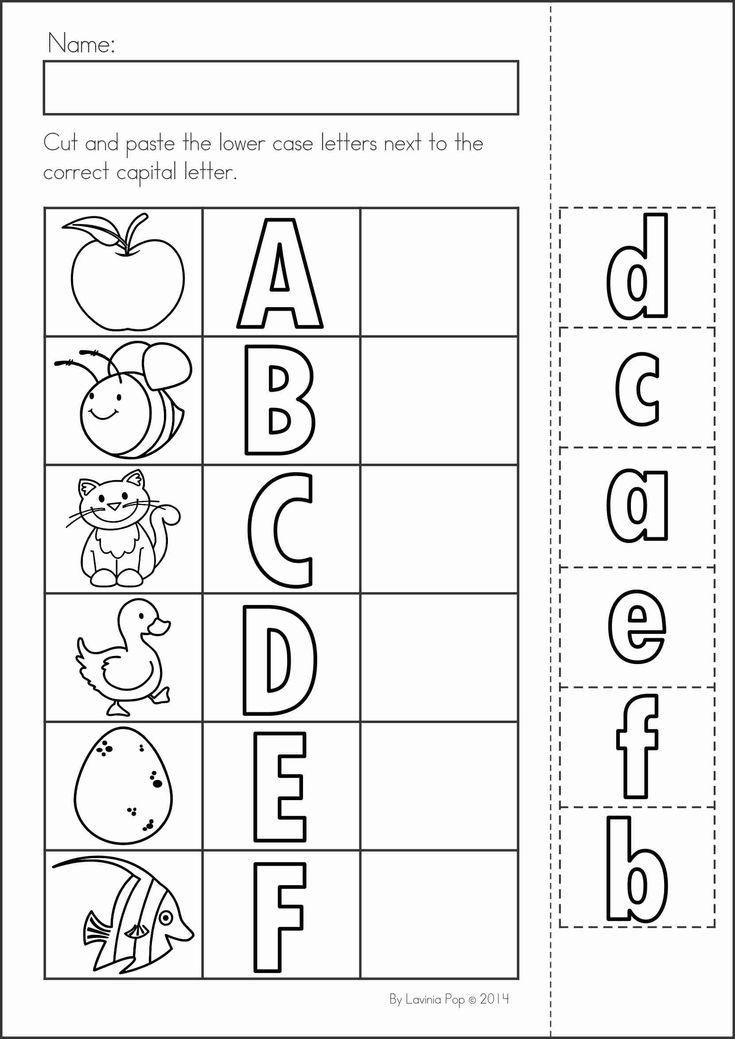 Will this make the task of converting an image to text easier? No. The fact is that each letter (and any other grapheme) has allographs - different styles.
A person will easily understand that all this is the letter "A". For a computer, on the other hand, there are two ways to solve the problem: to recognize characters as a whole (pattern recognition) or to highlight the individual features that make up a character (feature detection).
Pattern recognition
In the 1960s, a special OCR-A font was created for use in documents such as bank checks. Each letter in it was the same width (the so-called fixed-width font or monospace font).
Sample font OCR-A Receipt printers worked with this font and software was developed to recognize it. Since the font has been standardized, recognizing it has become a relatively easy task. The next step was to train OCR programs to recognize characters in several more common fonts ( Times, Helvetica, Courier , etc. ).
).
Sign detection
This method is also called intelligent character recognition (eng. intelligent character recognition, ICR ). Imagine that you are an OCR program that has been given many different letters written in different fonts. How do you select all the letters "A" from this set, if each of them is slightly different from the other?
You can use this rule: if you see two lines converging at the top in the center at an angle, and in the middle between them a horizontal line, then this is the letter "A". This rule will help recognize all the letters "A" regardless of the font. Instead of pattern recognition, the characteristic individual features that make up the symbol are highlighted. Most modern omnifont (able to recognize any font) OCR programs work on this principle. Most often, they use classifiers based on machine learning (since, in fact, we are faced with the task of classifying images by letter classes), recently some OCR engines have switched to neural networks.
What to do with handwriting?
A person is able to guess the meaning of a sentence, even if it is written in the most illegible handwriting (unless it is a prescription for drugs, of course).
The task for the computer is sometimes simplified. For example, people are asked to write the zip code in a special place on the envelope in a special font. Forms created for further processing by a computer usually have separate fields that require you to fill in capital letters.
Tablets and smartphones that support handwriting often use the principle of feature detection. When writing the letter "A", the screen "feels" that the user first wrote one line at an angle, then another, and finally drew a horizontal line between them. The computer is helped by the fact that all signs appear sequentially, one after another, in contrast to the option when all the text is already written by hand on paper.
OCR by steps
Pretreatment
The better the quality of the original text on paper, the better the recognition quality will be. But the old font, coffee or ink stains, paper creases reduce the chances.
Most modern OCR programs scan a page, recognize the text, and then scan the next page. The first stage of recognition is to create a copy in black and white or in shades of gray. If the original scanned image is perfect, then all black is the characters and all white is the background.
Recognition
Good OCR programs automatically mark difficult page structure elements such as columns, tables, and pictures. All OCR programs recognize text sequentially, character by character, word by word, and line by line.
First, the OCR program combines pixels into possible letters and letters into possible words. The system then matches word variants with the dictionary. If a word is found, it is marked as recognized. If the word is not found, the program provides the most likely option and, accordingly, the recognition quality will not be as high.
Postprocessing
Some programs allow you to view and correct errors on each page. To do this, they use the built-in spell checker and highlight misspelled words, which may indicate incorrect recognition. Advanced OCR programs use a so-called neighbor search method to find words that often occur side by side. This method allows you to correct the misrecognized phrase "melting dog" to "barking dog".
In addition, some projects that are engaged in digitization and recognition of texts resort to the help of volunteers: recognized texts are laid out in the public domain for proofreading and checking recognition errors.
Special cases
For high accuracy of recognition of historical text with unusual graphic characters that differ from modern fonts, it is necessary to extract the corresponding images from documents. For languages with a small character set, this can be done manually, but for languages with complex writing systems (such as hieroglyphics), manual collection of this data is not practical.
To recognize historical Chinese texts, you need to enter at least 3000 characters in the OCR program, which have different frequencies. If manual marking of several tens of pages is sufficient for recognition of historical English texts, then a similar process for Chinese will require the analysis of tens of thousands of pages.
At the same time, many historical Chinese scripts have a high degree of similarity with modern writing, so character recognition models trained on modern data can often give acceptable results on historical data, albeit with reduced accuracy. This fact, together with the use of corpora, makes it possible to create a system for recognizing historical Chinese texts. For this, researcher D. Stegen ( Donald Sturgeon ) from Harvard processed two corpus: a corpus of transcribed historical documents and a corpus of scanned documents of the desired style.
After image preprocessing and character segmentation steps, the training data extraction procedure consisted of:
1) applying a character recognition model trained exclusively on modern documents to historical documents to obtain an intermediate OCR result with low accuracy;
2) using this intermediate result to match the image with its probable transcription;
3) extraction of marked-up character images based on this mapping;
4) selection of appropriate training examples from marked symbols.